Using The Staple Gun
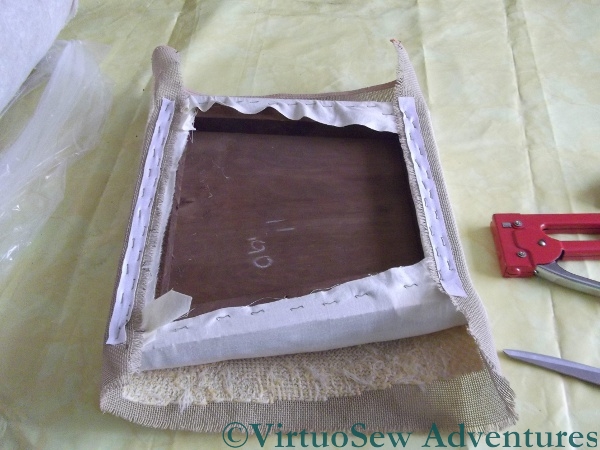
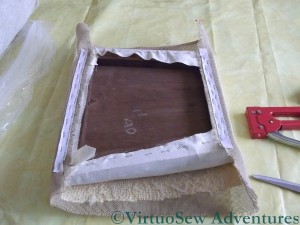
You may recall that I decided to finish off the canvaswork seat covers for the dining room. That entailed, removing the existing corded velvet covers, so I decided to increase the padding on the seats while I was at it. So I added a couple of thick layers of cotton linterfelt, and covered it with calico.
I’ve had some real upholstery done recently, and the upholsterer told me that staple guns cause less damage to the wood than nails (obvious, when you think about it), so that’s what I used.
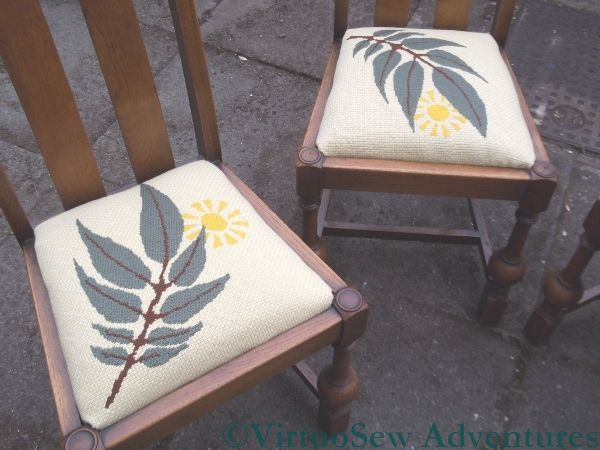
First Pair
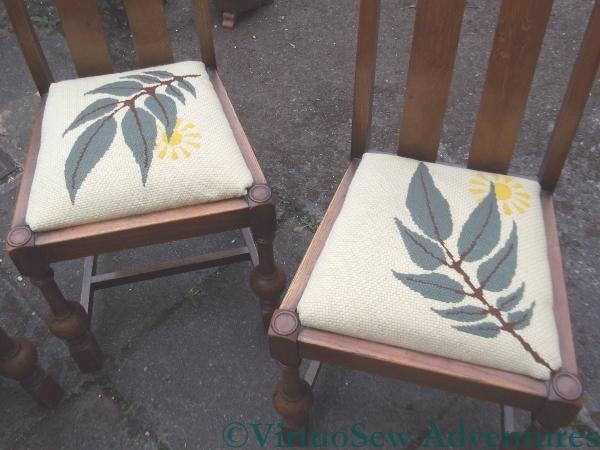
Second Pair
The staplegun has a kick like a mule, so the job had to be spread out over a couple of days. Getting the tacks out of the last set of covers took a day all by itself, so I have stapled it through some cotton tape, to prevent whatever I may use in the future catching on the threads of the canvas.
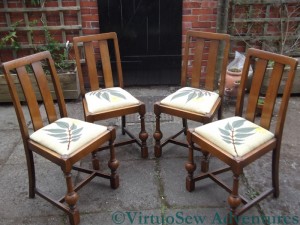
Finished Chairs
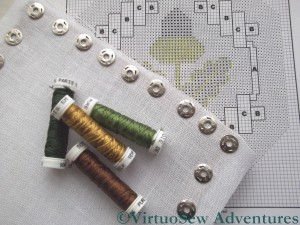
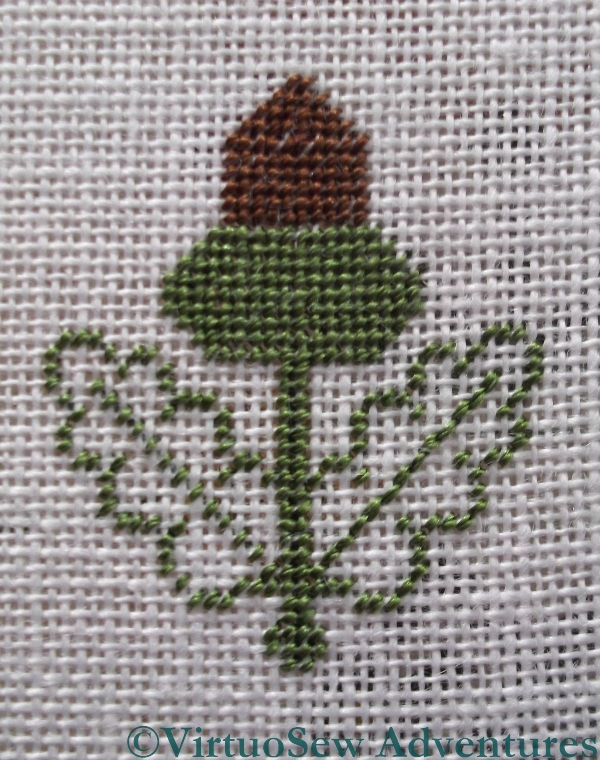
The Acorn Begins
The Golden Accessories is a set of bonus instructions for three needlework accessories which was supplied with the Tudor and Stuart Masterclass, and now that the Petite Pincushion is finished, I’m starting on the first of them.
The silk work seems to be entirely in tent stitch, so, although the fabric is very fine, it will be simple enough to work. The cold snap at the beginning of the year has roughened my hands, so the silk sometimes catches a little – but in fact, surprisingly little, and at least the wristwarmers make stitching possible at all!

Acorn - First Stitches
I’ve been fortunate, since the weather has been kind, giving me good light to stitch by. So good, in fact, that the first two colours seemed to be stitched in no time at all, leaving me positively flabberghasted by my progress. Strange to say, although tent stitch has never been a favourite of mine, I’ve thoroughly enjoyed starting work on the Acorn – I think it is something to do with the silk thread, which is just gorgeous to work with!
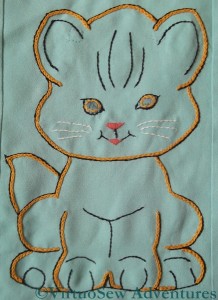
Pyjama Case
Grandmama must have worked embroideries galore for her assorted grandchildren. This pyjama case with a chubby kitten on the front was worked for me – I think as a birthday present – when I was about nine, and I’ve rediscovered it among a host of other reminiscences of childhood.
You can see the lingering “Make Do And Mend” ethos of the wartime years when she was bringing up her own family in looking at the whole thing, which is actually pieced together to create the final, full size of the pyjama case. It’s worked on a synthetic crepe, too, which many embroiderers today would tend to despise.
However, if you zoom in on the picture, you will be able to see the legacy of her teacher Miss Hunter in the beautifully even stitches of the embroidery (nothing complex – chain stitch, stem stitch, and satin stitch). That legacy is also apparent in the care that Grandmama took in lining it just as beautifully. She’s even sewn tapes to the inside of the case so that the strain on the press studs is reduced.
I’d almost forgotten about this piece and I was thrilled to find it again!
As from today I am going down to just one post per week. I’m planning a lot of work on the house, and I don’t want to be resenting lost embroidery time. Not least, the ultimate goal is to have a studio, or at least a studio corner, so eventually the work should result in a better life for my embroidery. I will still be embroidering, and still writing posts (I’ve found more of Grandmama’s bits and pieces, too!), but I hope at a slightly more relaxed pace.
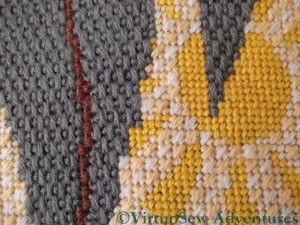
Close Up of the Sunburst
I believe I have mentioned before that our house is rather Arts & Crafts flavoured. I’ve been working on our dining room almost since we moved in. It’s north-facing, and our predecessors had painted it pale blue and papered the ceiling turquoise with gold stars. We felt we were dining inside an iceberg!
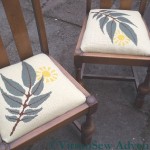
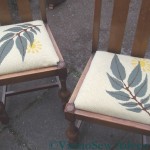
That may explain why when I repainted it, the ceiling turned white and the walls sunshine yellow. Above the picture rail, I stencilled a eucalyptus leaf frieze (in deference to my husband The Australian). When in due course I inherited my Grandmama’s dining room table and chairs, I decided to work needlepoint covers for the seats.
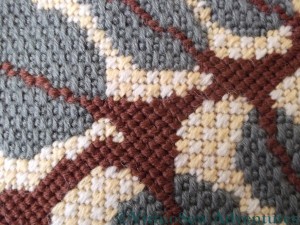
Close Up of the Leaf
Fortunately there are only four of them, but even so, I had to ask my mother to work on them as well, or they’d never have been finished. She helped with the stencilling as well – also an exciting challenge!
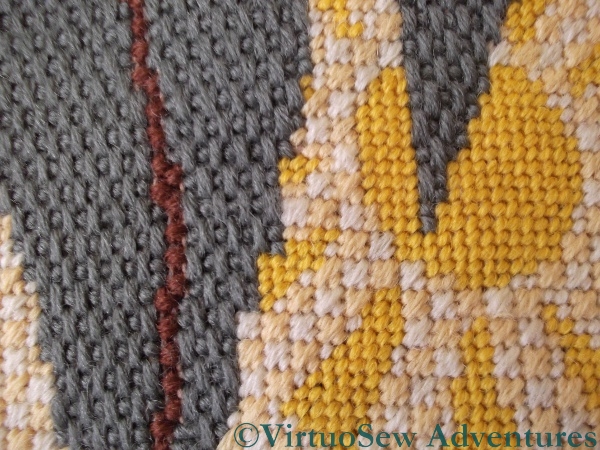
Unfortunately when they were finished I discovered some marks on some of the background. I was so dispirited that I couldn’t face unpicking them and so I stowed them away for several years. Now, however, I have fished them out, and I am tackling the replacement of some of the rows of stitching, one row at a time.
I would be nice to think I could get the chairs recovered for Easter…
Something Else In The Archive
My mother and I have been trying to make sense of the various boxes and bags that travelled from my grandparents’ attic to my parents’, and we’ve found all sorts of things.
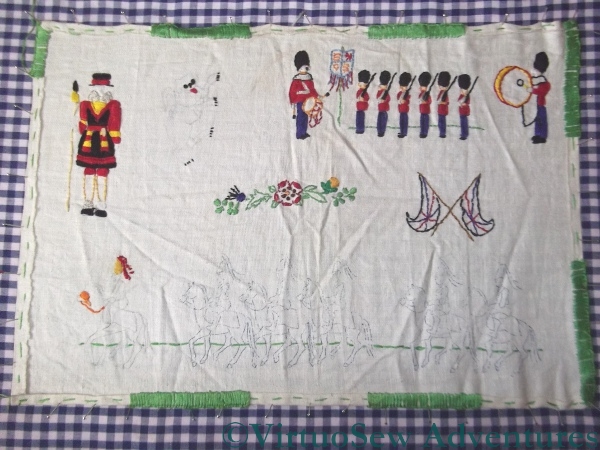
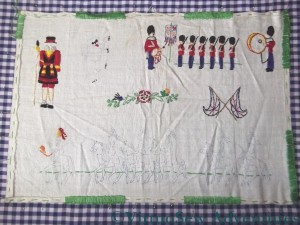
This traycloth must be something that Grandmama began to work quite late in life, when her eyesight was no longer what it had been, because it’s worked in four strands, and the back would not pass Miss Hunter‘s scrutiny. Judging by the subject matter – maybe she began it in 1977 for the Queen’s Silver Jubilee?
I suspect she intended to alternate the colours of the blanket stitch edging to create the same effect as the coloured blocks of fringing on a ceremonial trumpet’s banner.
I rather like the idea of tackling the parade of guardsmen at the bottom, so I’m planning to add this to my list of projects at some point. It would be the only project of which I would be able to say I had finished what Grandmama started!
I daren’t wash the piece or iron it, because the tracing has already begun to break up in some places. The unstitched motif in the top row is a heraldic lion, and most of his outline has rubbed off. It’s really just as well that I was keen on heraldry as a teenager and still have my books on the subject. I should be able to recreate him without too much trouble.
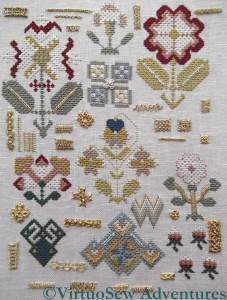
Spot Sampler - the Whole Thing Finished
Well, at last!
My first post on the Tudor and Stuart Goldwork Masterclass was dated 7 May 2010, so the course has taken me about 22 months, rather than the eighteen that Tricia planned it for. That’s not too bad – I thought it would have been much longer.
I’ve finished the spots and stitches as designed and laid down in the course, with a few small additions. I’ve done several sections of Plaited Braid using different metal threads, as well as having another go at Diagonal Half Guilloche stitch, down at the bottom. The picture is quite high resolution, if you want to zoom in and have a closer look..
I don’t usually practice stitches very much, but some of these stitches look and feel so different in the various different threads that it’s become clear to me that on future projects, I will have to test all my metal stitches with the thread and fabric I intend to use.
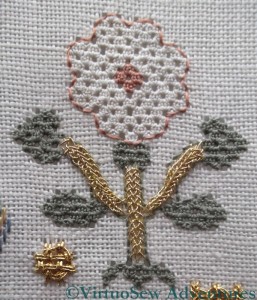
Curving Plaited Braid Stitch
I also realised – at the last moment – that I hadn’t done possibly the hardest bit in the whole thing, that is, the curved stems of Plaited Braid Stitch for this flower. That was difficult for several reasons, but partly because I spent a lot of time trying to get the frame in the right position to allow me to work the stitch as I had practised it. I chose the very finest of the metal threads in the kit, and in the end I discovered that I could work the stitch quite effectively not only as I’ve practised (horizontally), but also at an angle, working away from me. It’s worked quite well, and I enjoyed wrestling it into some sort of sense, but I don’t yet feel that I can work Plaited Braid stitch with ease or grace. Maybe that will come in time. In truth, I think being able to work it at all is a considerable achievement!
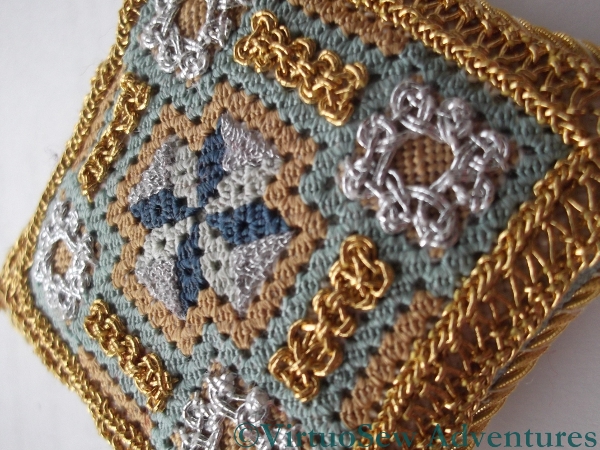
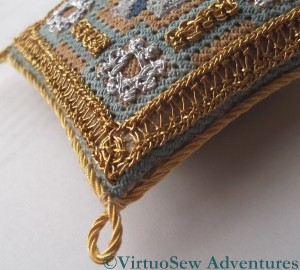
Petite Pincushion - Embroidery Finished
I said the Petite Pincushion had accelerated – it’s finished!
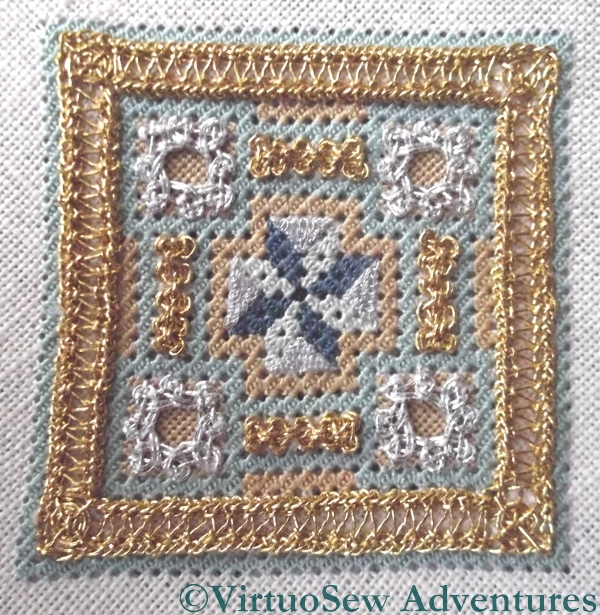
First here is a view of the finished embroidery, still stretched on the frame. You can see the zig zags of the the Hem Stitch on Ladder Stitch, the spirals of the Spider’s Webs, the intricate patterns of the Eight Sided Interlacing and the Figure Eight Interlacing, and the regular background texture of the Queen Stitches. Looks good, doesn’t it!
Making up the pincushion was relatively easy, especially after the Tulip Slip Pincushion and the Tudor Pincushion. The kit included a lovely piece of jacquard woven silk for the back, and Fine Grecian Twist to trim the pincushion. I backed the embroidered section with calico to keep the stuffing in – I couldn’t find silk in the right sort of colour (stash not big enough!) and the calico is unobtrusive. All the sewing was done by hand – I find it easier to do that than to get the sewing machine out!
Petite Pincushion Finished
Petite Pincushion Again
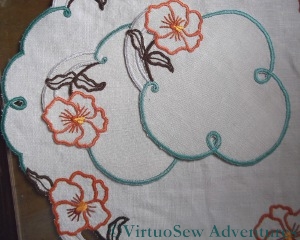
Dressing Table Set in Cutwork
When I first discovered eBay, I bought a lot of transfers and some threads, and this dressing table set in cutwork arrived in one of the parcels, already stamped and half-heartedly started.
You’ve probably already gathered that I’m not very enthusiastic about working a one-stitch project, so I eyed it askance for a little while, but then it occurred to me that my grandmother’s dressing table would be the better for a little embellishment, and that this might make a good travelling project.
(Translation: Travelling Project – a small, simple project that can be easily taken on visits. Sometimes I use a large project as a travelling project, if it is simple enough – for example, the initial stages of the Map of Amarna, when I had only one thread colour to use and no decisions to make)
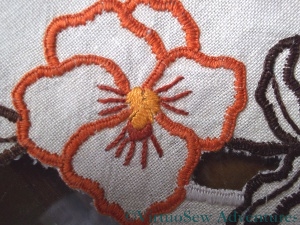
Flower On Dressing Table Set
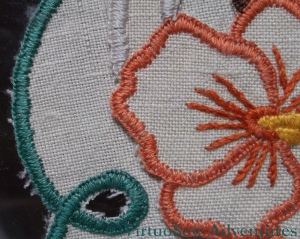
More Edges on the Cutwork
I had to buy a special pair of supersharp, super narrow scissors to deal with the cutwork. Truly scary – have I made the edge strong enough or haven’t I? The close-ups show that there were a few threads that weren’t quite properly trimmed, but they don’t show as much in real life.
And, as it turned out, I rather enjoyed keeping the buttonhole stitch close and neat, and didn’t find the project half as tedious as I feared!

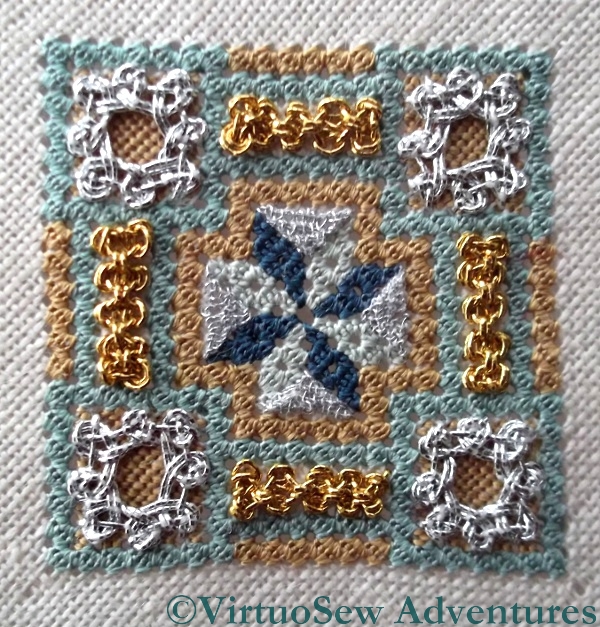
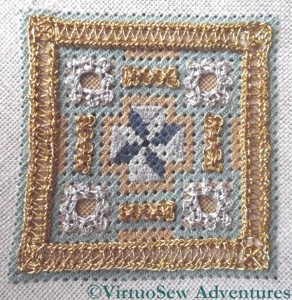
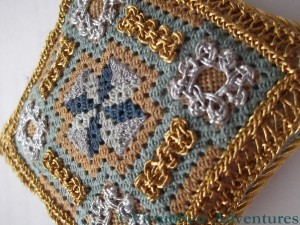
Petite Pincushion Eight Sided Interlacing
Somehow, progress on the Petite Pincushion accelerated hugely once the silkwork was finished. Each separate metal element (except the border!) proved to be fairly quick to do, and as I’ve already said, I enjoyed them immensely.
The next elements of the Petite Pincushion were the four spots of Eight Sided Interlacing in silver – so, yet another different metal thread to sample. Putting in the foundation stitches was made much easier because the foundation of tent stitches was square, and neatly segmented along each side by the Queen Stitches. Working these fairly zipped along, and I really enjoyed them.

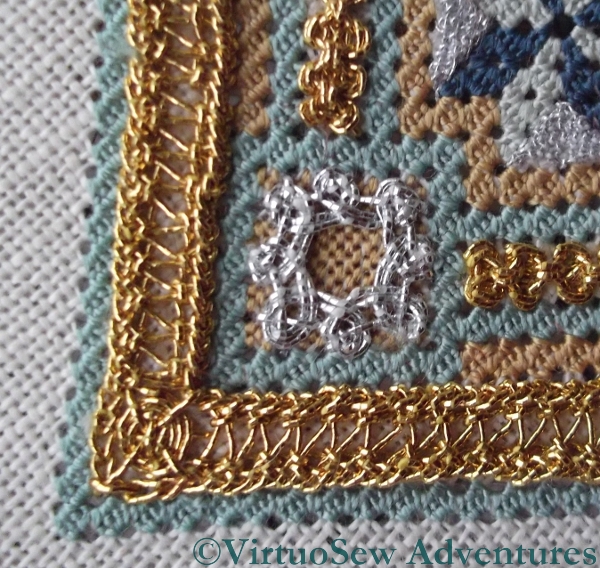
Petite Pincushion - CloseUp
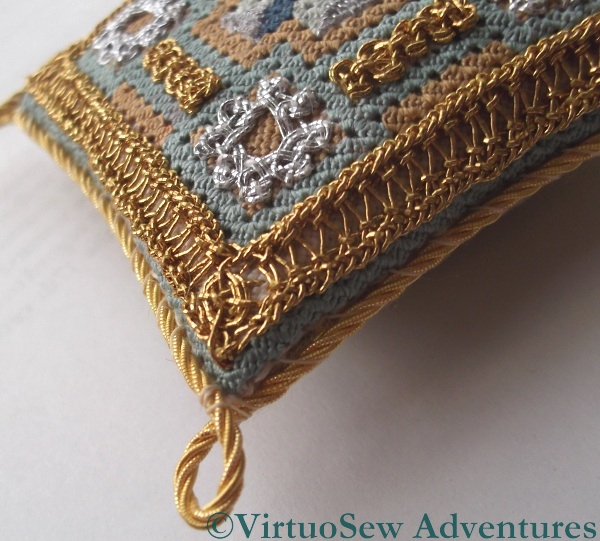
The final section was a border of hemstitch on Ladder Stitch, with Eight legged Spider’s Web stitch in each corner.
The Eight Legged Spiders Web stitches were easy and fun, filling in the otherwise blank corners beautifully. They’re more stable than the Four Legged variation, so if I were to be mad enough to use this as a pincushion when it’s finished, the spider’s webs would continue to look good under the strain!
I’ve been struggling with ladder stitch throughout the course – if you recall, when I first started working it on the Spot Sampler, I had serious problems with tension and with the thread breaking up. Practice makes perfect, I’m glad to say. By the time I’d worked Ladder Stitch all around the edge of the Petite Pincushion, it was going swimmingly – much to my relief.
The Hemstitches on either side of the Ladder Stitches increase the thickness of the edges, and create a zig zag effect with the horizontals, subtly altering the overall effect.

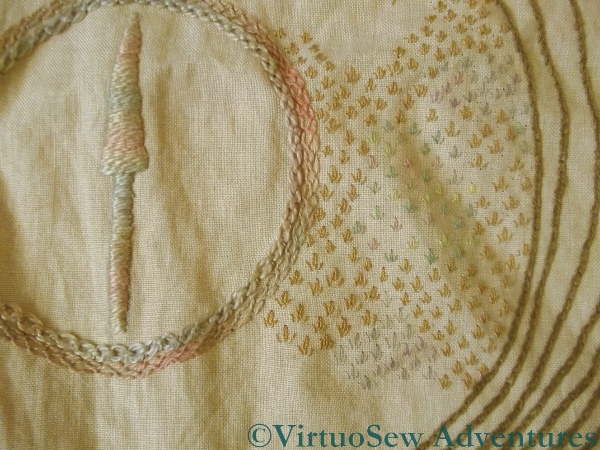
Fields Of Amarna
The cultivation on the Map of Amarna will take quite a while to do, but since I’m really quite happy with the progress it is making, I thought I would post a quick update on it.
The scatter of tête de boeuf stitches is as much as I have managed to do since I finally decided that that was the solution I was going to use. Granted, I’ve been working on a lot of other pieces at the same time, and sometimes I am simply not in the mood for single-stitch work, but it’s also more time consuming than you might expect. I’m trying very hard not to use a regular pattern of stitches – the scatter is as random as I can make it, given the human proclivity for pattern-making.
Since what remains to be done is about four times as much as I have done, I expect it will be quite some time before you see it again, but rest assured, I haven’t forgotten…