
Tag: interior decoration
Experiments for the Chorus of Angels Tablecloth
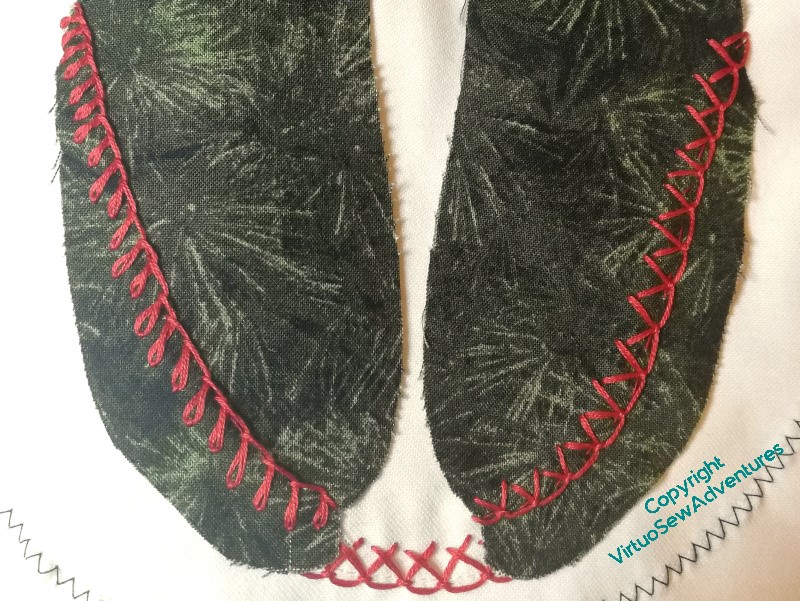
With sixteen angels to do, it seemed like a good idea to work out a plan of action. My first idea was to have green capes with red stitching and red capes with green stitching, so that was the first thing I tried. Red on green is certainly working, and looking at the comparison between petal stitch or an upward pointing stitch for the trim on the cape, it seemed to me that petal stitch was the clear winner, so I put that in place.
Yes, definitely, that works.
And I like closed feather for the trim around the shoulders, too.
The red neckline and hem – not so much. It looks like a failed attempt to link the trim on the cape, rather than a harmonious trim on a dress. Ugh!
Part of the problem, I think, is that the border is too narrow, but I was afraid of the red pulling itself forward too much.
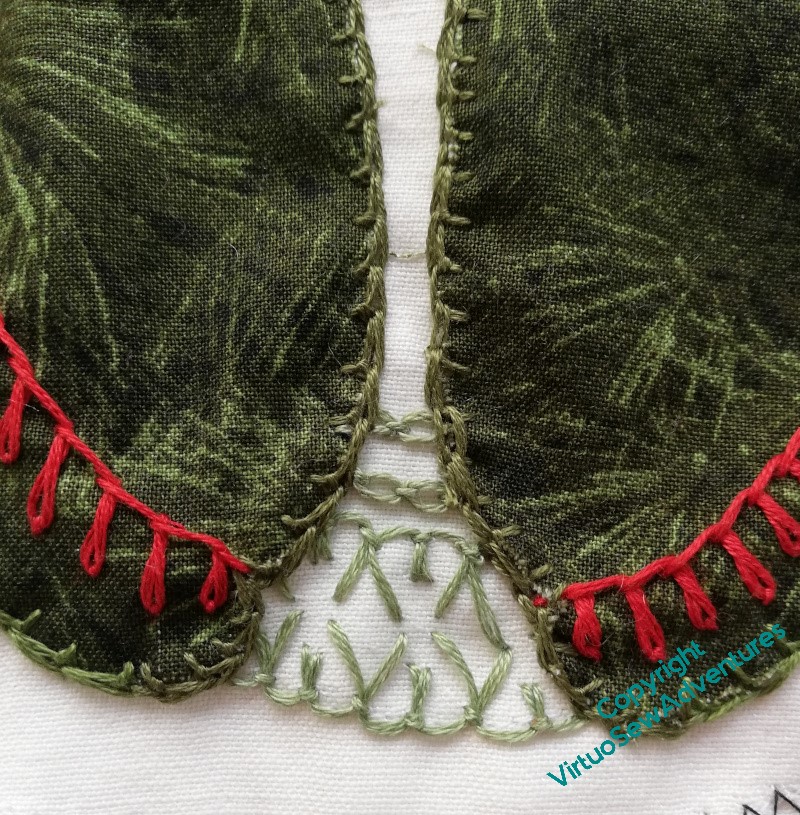
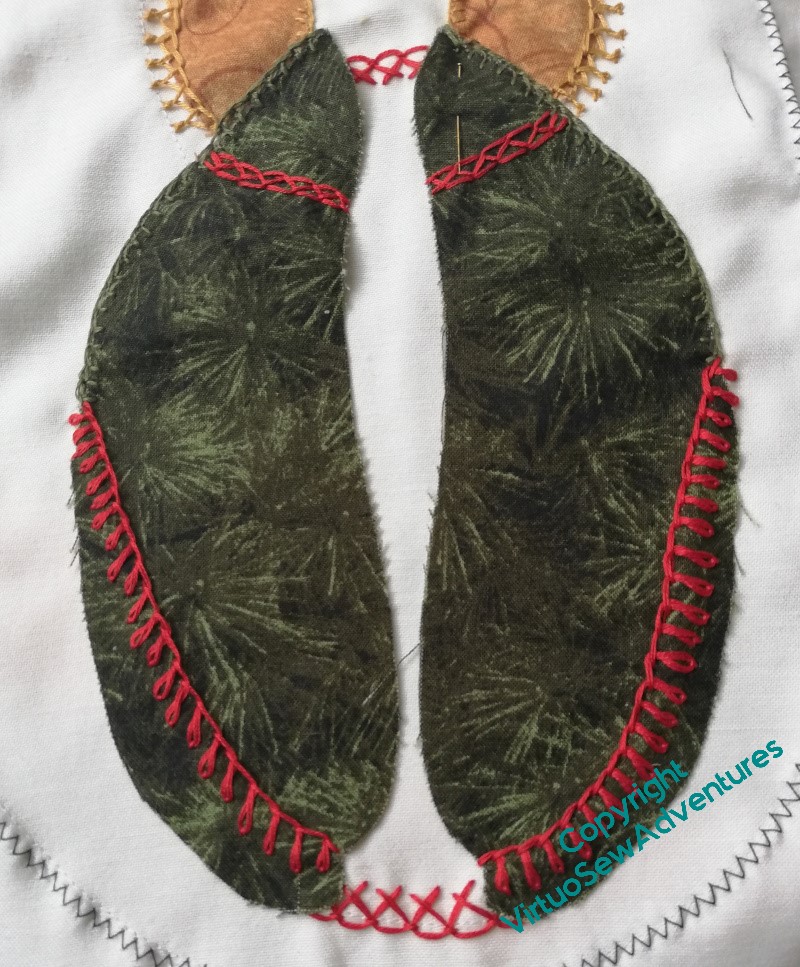
So, here’s what I’ve settled on.
The cape is edged with Mountmellick stitch, which makes a rather charming edging stitch. I think of it as a cross between blanket stitch and chain stitch, even though it’s not really, and wasn’t used as such originally. The dress edging is much broader than the first one, two rows of up-&-down blanket stitch face to face, and you will note that I’ve patterned them, with a V-shape alternating with a short pair of stitches. Then I’ve added two rows of cable chain stitch to broaden the edging further.
Chorus of Angels Tablecloth
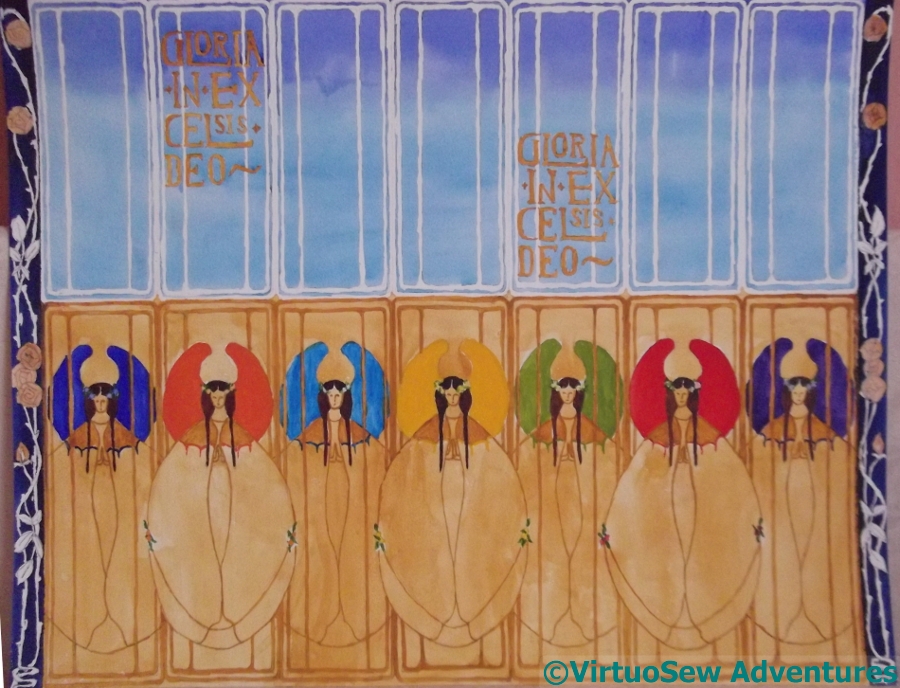
Some of you may recall this design, which Mam and I were thinking of developing into the background for the crib figures I inherited from one of my great aunts. I’ve not managed to think of a way to make it work in embroidery yet, so I keep on looking at it and thinking “No”, and moving on.
Sigh.
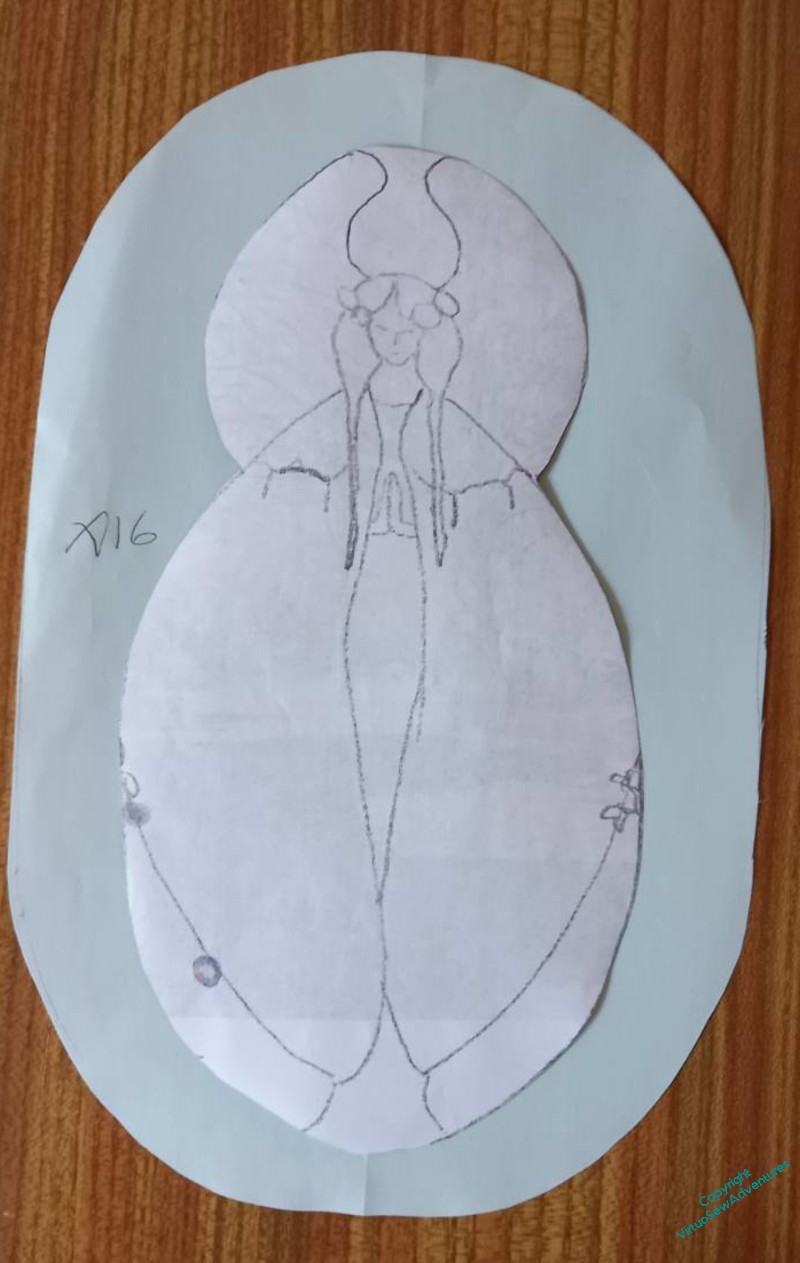
However, it has occurred to us that using the same angels as the basis for a design for the Christmas tablecloth might work quite nicely, and will give us another chance to play with the shapes and design.
So, sized for the purpose, planned out and tweaked. And we’ve decided, rather than embroidering directly on the tablecloth (if you’ve ever embroidered a tablecloth, you will have a fair guess why we aren’t!), we are going to prepare the applique separately and attach those to the tablecloth.

We’re using quilting cottons in red, yellow, and green, and we’ve got everything cut out and pinned approximately in place, and now we’re not sure what to do next!
So there are some experiments ahead. I’m thinking of restricting the colours to stranded cotton in the same red, green and yellow (as far as possible), and using a variety of interesting edging stitches. And we both have samplers of those in our embroidered Coat of Many Flowers and the Little Jacket!
Parterre – where had I got to again?

There was a lot of path to stitch, but that gave me plenty of thinking and experimenting time. I started playing with the Milanese Pinwheels when I wanted a break from the endless limestone pavement, and began by using them in the interlocking form shown in the book.
But I didn’t like the look of it, too congested, too solid in the wrong sort of way.

So then I tried a square.
It looked better with somue actual pinwheels, rather than the skeleton pinwheels I used to determine the placement, but again, I thought this was too congested, pulling away from the border a bit too anxiously.
Nope.
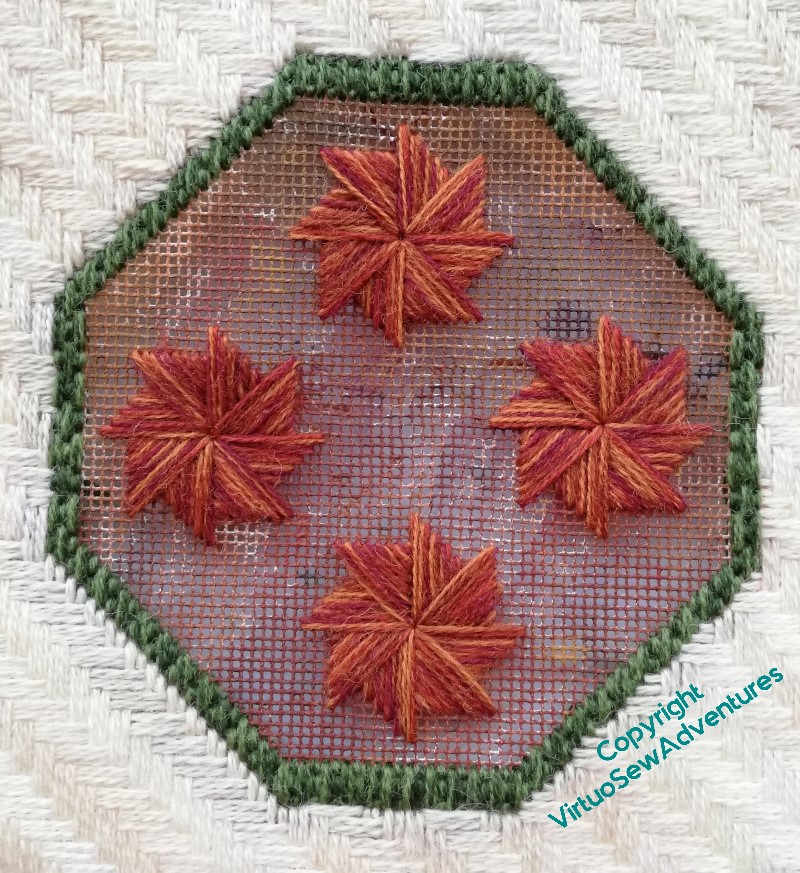
So I asked for comments, and my cousin said, have you tried the diagonal placement without the central one – four pinwheels, rather than five, more space for them to breathe.
I think this is going to work, in fact. There’s plenty of space for the heroic pinwheels to make themselves felt, and if I can find a stitch pattern for the background that runs all the way across, I think they will be nicely set off by it.
It’s good to have progress to report!
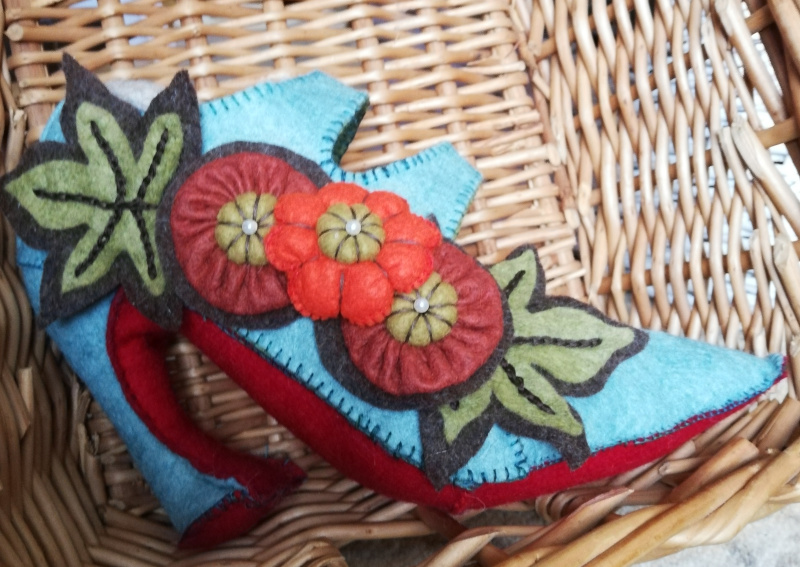
Fabulous Felt Shoes Finished
Yet another Twixmas project that lasted longer than I anticipated…!
I enjoyed making these – the instructions were clear, and in fact, you make a basic court shoe shape, and then add variations and additions. Some of the felt I had was a little flimsy, so the two decorative additions to the first two shoes are both made of two layers of felt stitched together, using patterned blanket stitches, before I attached them to the shoes.
I varied the stitches I used, not quite following the instructions.
Of Course I Did.
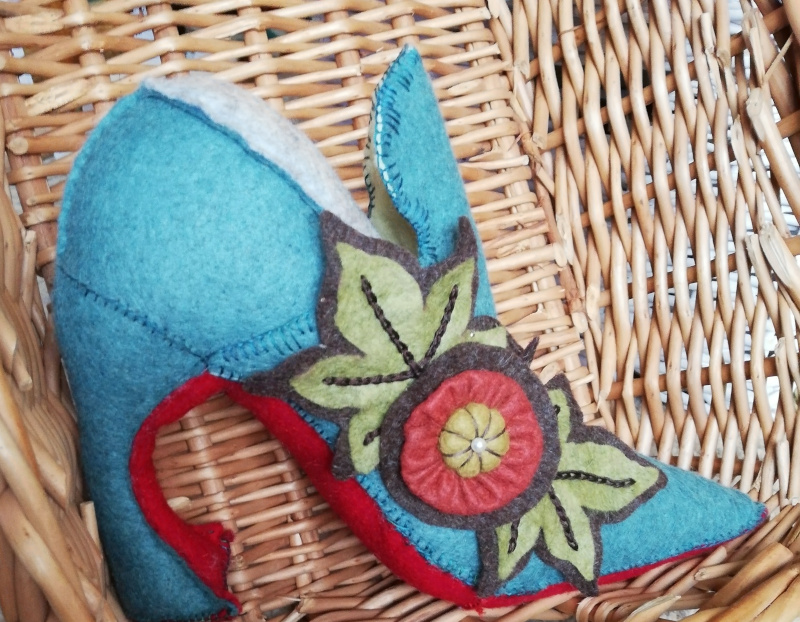
The basic shoe shapes are put together using stab stitch, which I use when I’m making felt cradle toys. It’s secure, simple, and leaves a nice raised seam, which I think adds to, rather than detracts from, the finished effect.
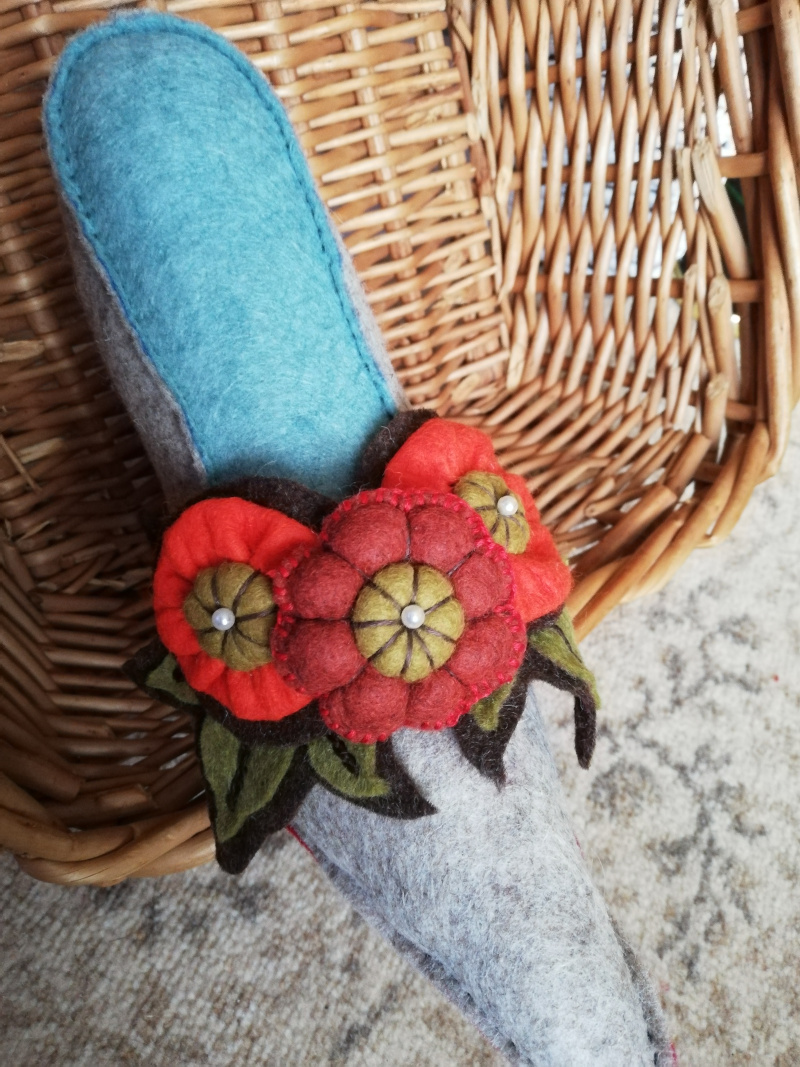
I think the instructions suggest back stitch for the leaves, but I’ve chosen reverse chain stitch. I like the solidity of the line, and it somehow enhances the slight dimensionality of attaching the two leaves together.
The instructions also suggest ready made felt balls for the flower centres – I didn’t have any, so I just made small stuffed balls of the same felt as the leaves. And there are two sorts of flower – one is made of two discs stitched together and stuffed, the other is, effectively, a Suffolk Puff.
I think they are both charming!
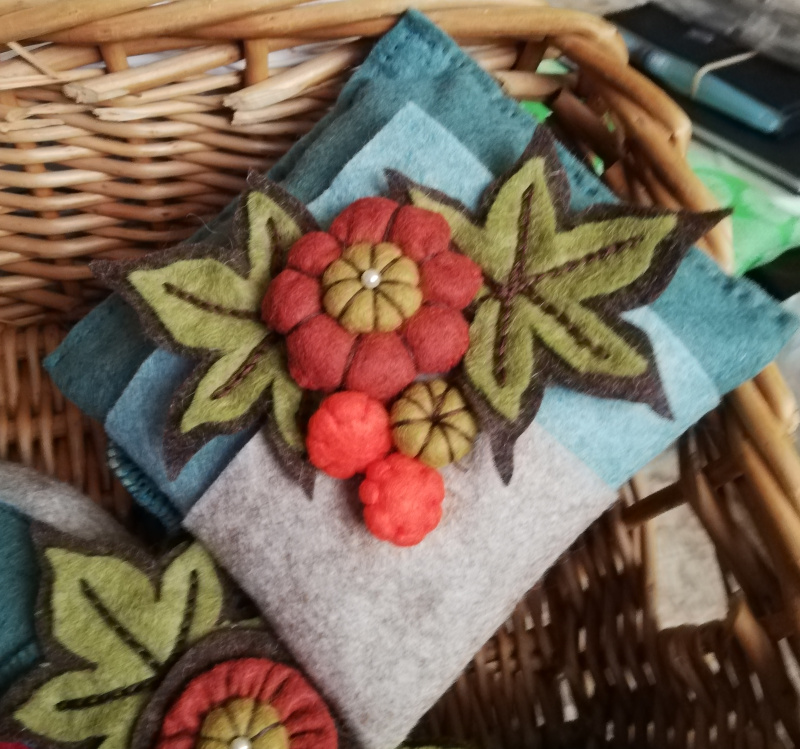
Once I’d done the shoes I gave some attention to hanging them. I had some felt left over, so I made a small felt cushion using the shoe colours, and then made some more flowers and leaves.
The finished mobile is delightful, but it goes very badly with my studio, which is still decorated in the taste of the previous people to live here – yellow (no quarrel with that) with a border panel in pink, blue, and green.
I’m going to have to redecorate the studio, aren’t I!
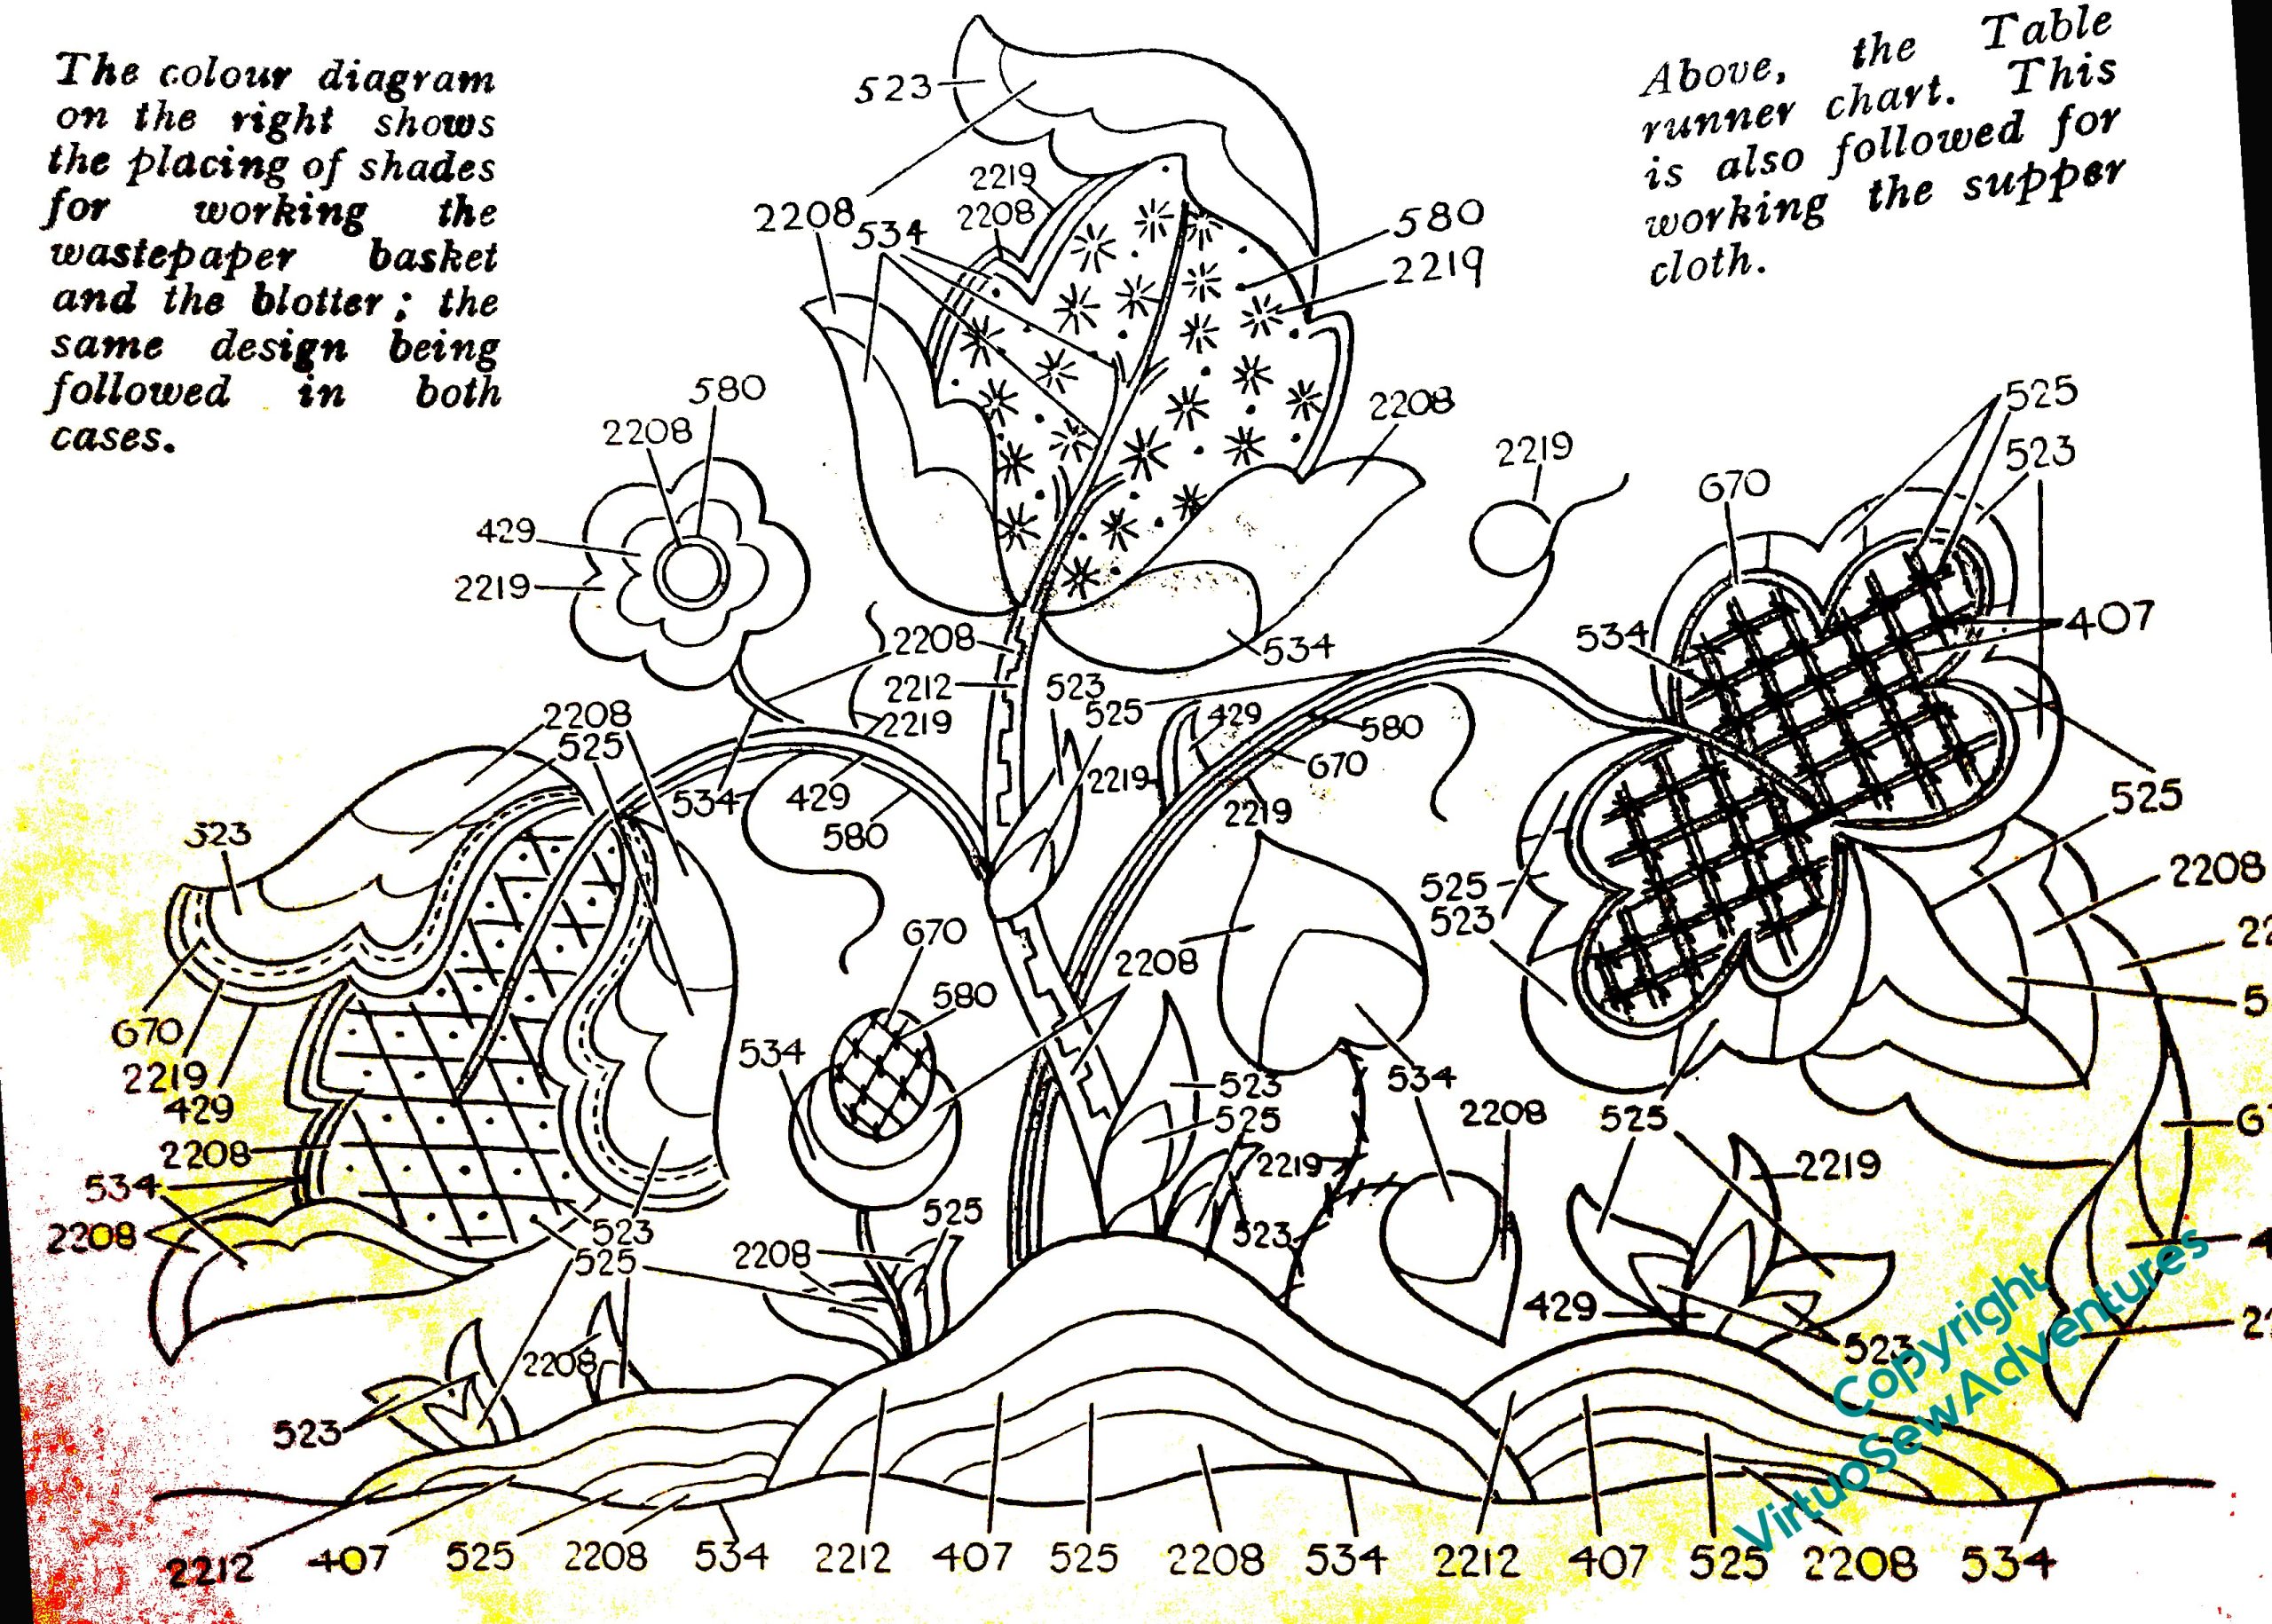
Playing with Flox 4 – finish

I worked both ends of the table runner at the same time, because I thought that would enable me to see the whole thing as a single piece, rather than two pieces the same. As I’ve said many times, I have a real problem with repeating motifs, and this is one way I try to trick myself into not seeing the repeats, as it were.
The other thing I did was to put the stems in quite early on in the process. Partly because it was an easy choice to make, and partly because one of my other discoveries over the years is just how much different it makes to the sense of making progress if the design is visually joined up. “Spotty” designs are very discouraging, but if the design elements are linked, somehow progress is easier to see.
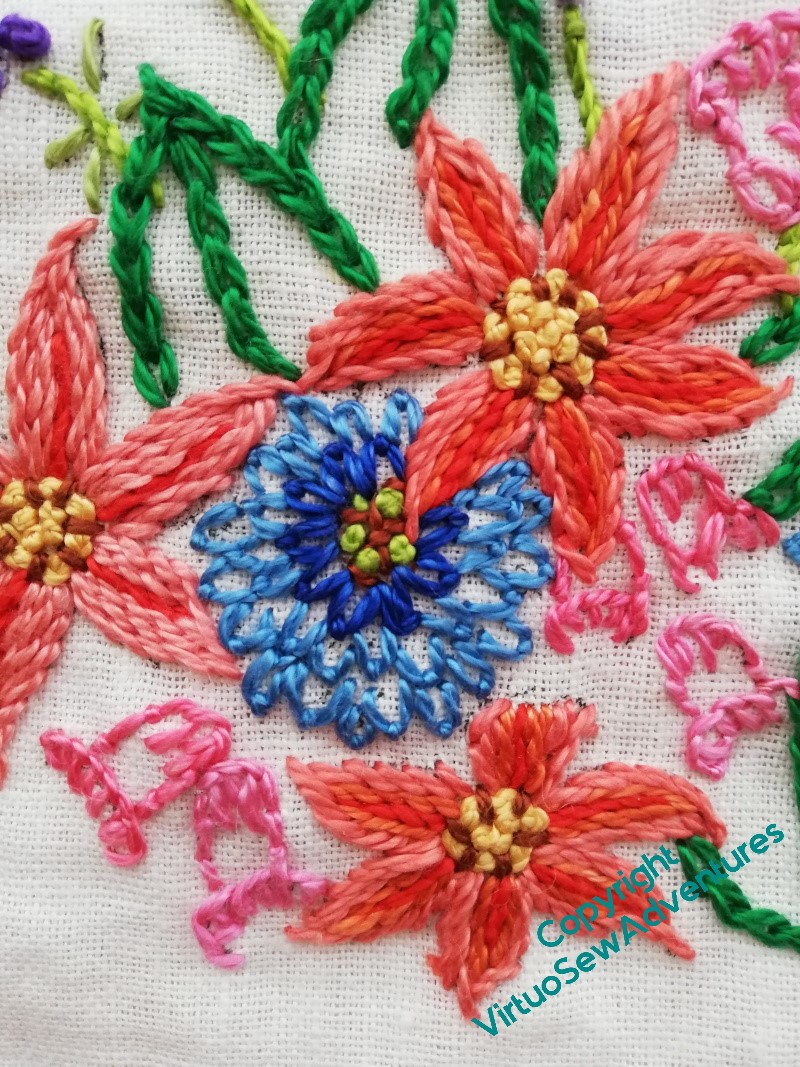
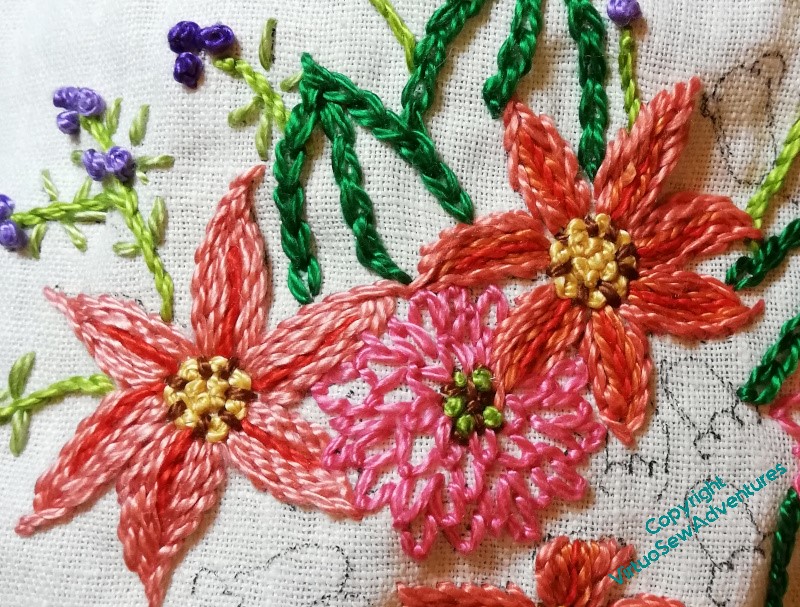
In the picture here, you see most of the decisions I made for the main section. Each of the orange petalled flowers uses a different combination of the several orange threads I had in my bundle, which turned out to be just as well, as it makes it look deliberate while reducing the terrors of playing Thread Chicken.
I also learnt from the first frilly flowers and when I reinstated them in blue, I used two shades, which makes for a much lighter and less blocky look.
The two shades of pink in the bell flowers also help to make the whole thing a bit less monolithic. It’s just as well, because the weight of the thread does make the stitching very emphatic.
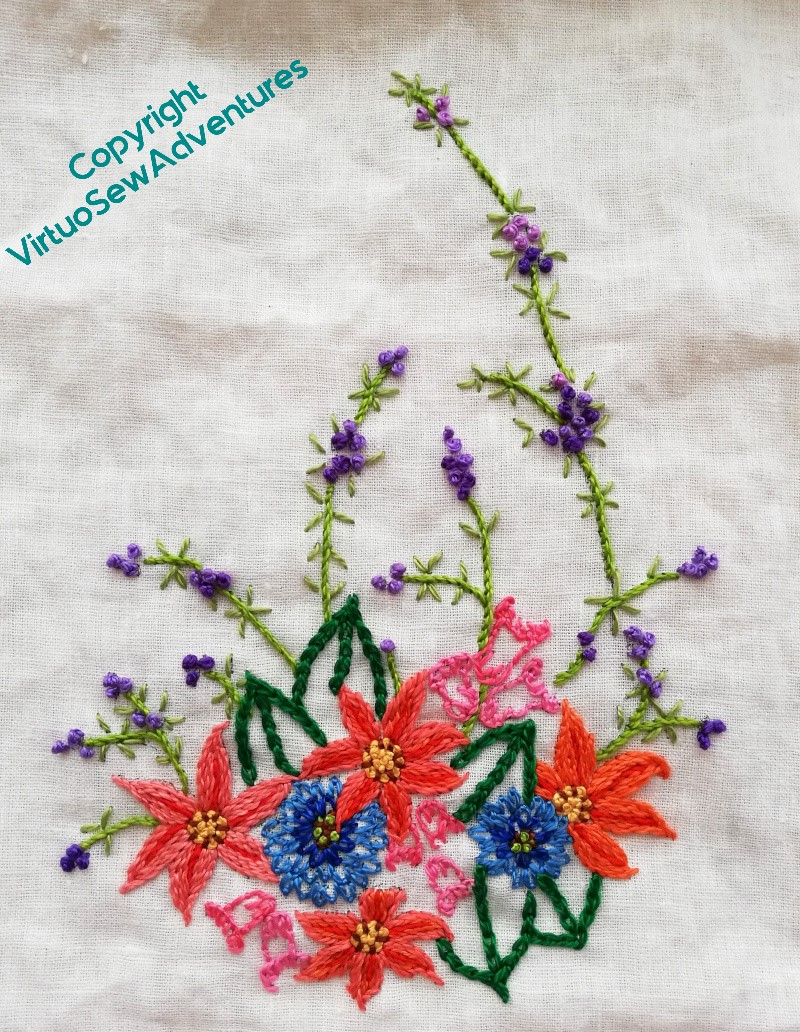
So, it’s finished, although yet to be pressed owing to the fact that the ironing board bites and I’m rather fighting shy of it at present.
My suspicion, based on my experience with Kai-Lung, is that had I been able to use the original transfer, the design would have been larger, making it maybe possible only to do one end of the table runner, but also changing the relative scale of design to thread. The design is a little small for the thread, so when I come to use up the leftovers on something else, I must remember to enlarge whatever I use. I will just have to be ingenious with my colour distribution!
Playing with Flox 3 – a couple of missteps
Flox is quite an odd thread to use. It’s tough and almost wiry. I love the shine and brilliance of the colours, but even the fairly loosely woven fabric I chose was a little bit too closely woven for the thread. I had rather a battle with it, and it was a bit tricky to find stitches I liked the look of. I’ve ended up using a very small selection of stitches – chain stitch, stem stitch, French Knots, and fly stitches.
The pink fly stitches on the frilly flower, I decided, were a bad choice. I’ve no quarrel with the stitch, but pink beside the apricot/ orange of the six-petalled stitches looked wrong, too congested and overheated and all in all, Just Wrong. Amid much muttering, and no little anxiety (dear heaven, I’m not used to playing thread chicken to this extent any more!!), out they came.
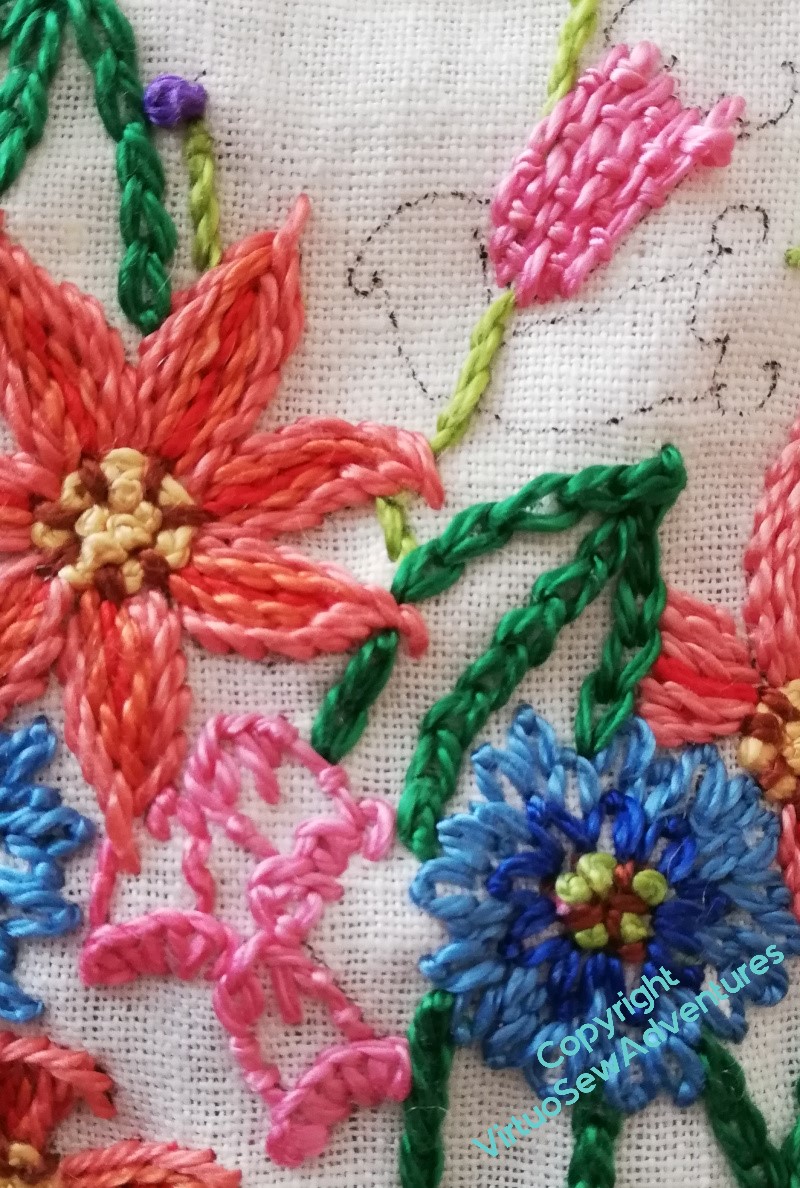
I replaced them with two shades of blue – much better!
The final flowers were the bell shaped flowers. I did wonder about working them with a full-coverage stitch, such as Romanian Couching or something like it. You can see in the picture at the right that I tried a fully stitched bell. That came out two. But then I discovered that my two pinks were slightly different shades, like the oranges. So I’ve deployed the two shades to eke out my thread a little.
I did the same with the six petalled flowers – each of the four is a different combination of thread shades.
Playing With Flox 2
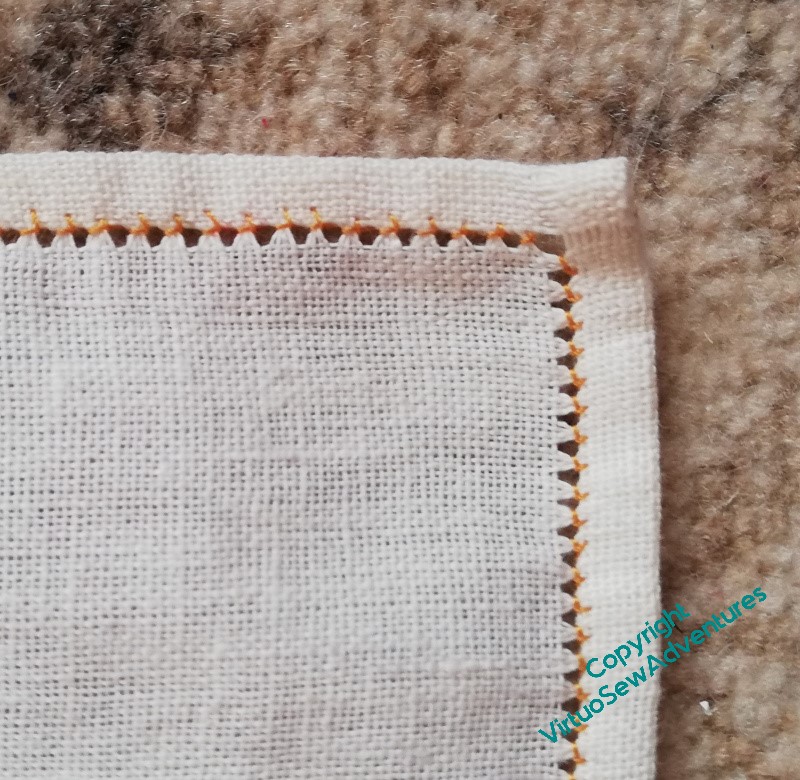
I found a suitable – fairly loosely woven – fabric, and evened up the edges (a lot of unravelling happened!), then hemstitched around the whole thing. In the past, I’ve done the hemstitching last, but as I had a few occasions coming up on which I had time to myself, in public, in which stitching might enable me to be usefully occupied and not loom at people, I thought this was a good use of my time. One reel of cotton, my knitter’s captive blade, and a needle – no other equipment needed, and no risk of losing any of the precious Flox!
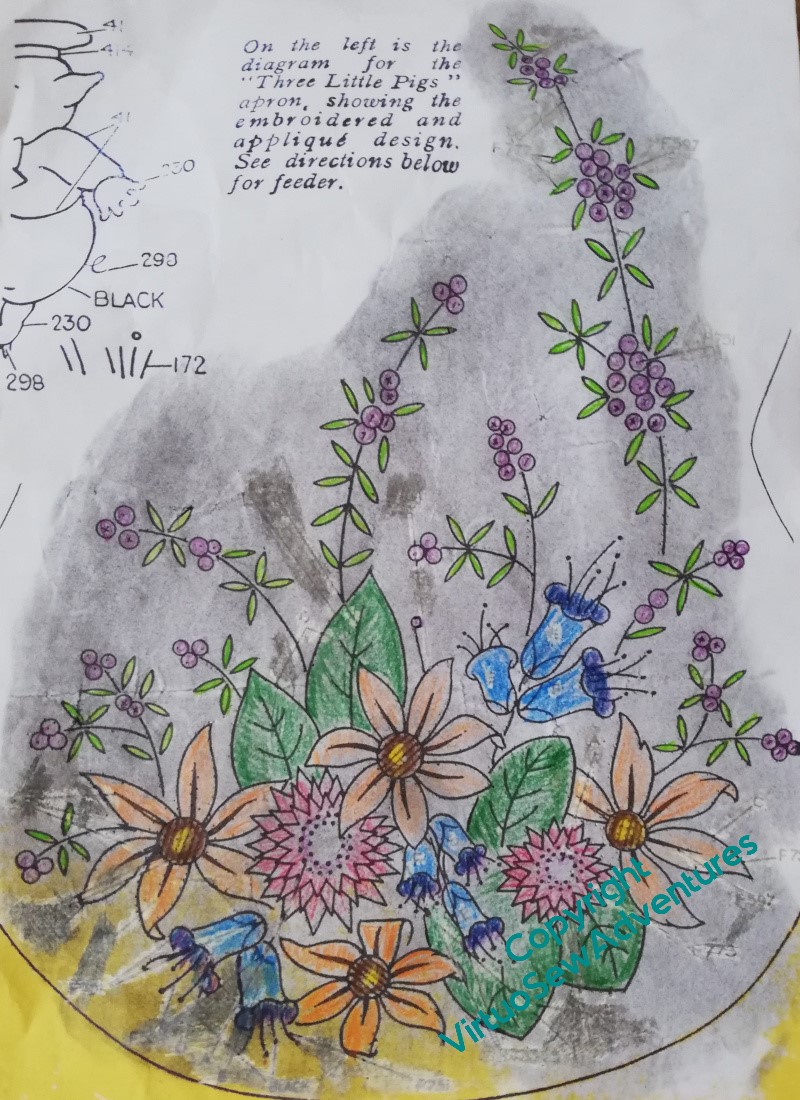
Then I did a colour plan for the chosen design. I don’t usually plan pieces like this so much in advance, but since I have limited thread to work with, I picked out a crayon for each colour I had, and had a go. The background is blackened because I first tried to used prick and pounce to transfer the design. It didn’t at all – possibly because the fabric is too loose and all my pounce ended up in gaps rather than on threads. The next attempt was a transfer pencil. That didn’t work either, not at all, no sign of transfer of anything. I wonder whether transfer pencils degrade with time?
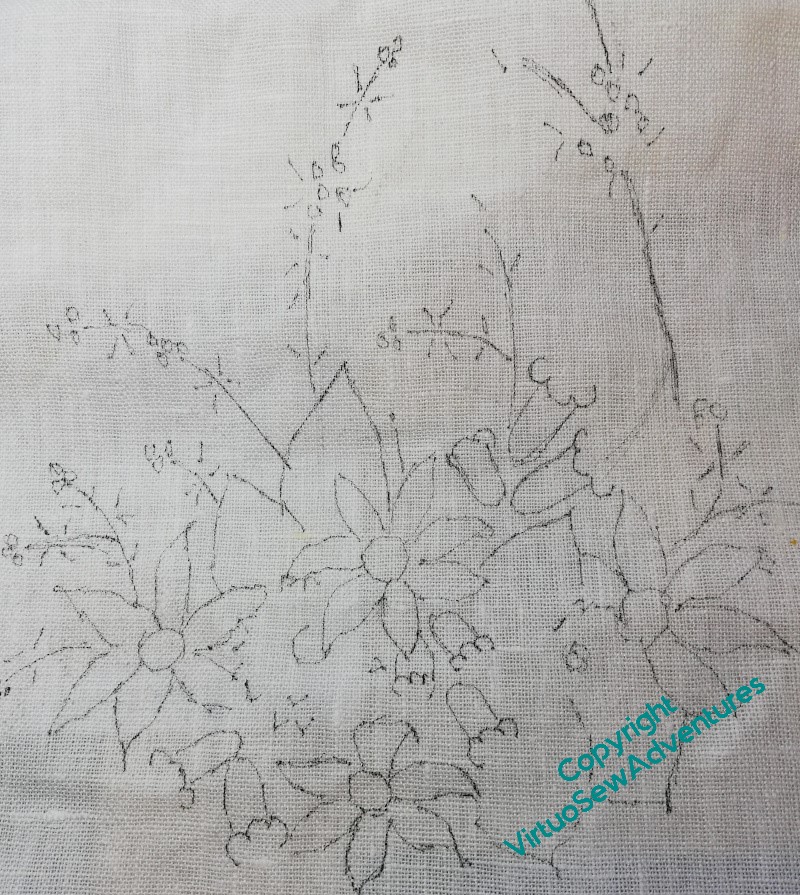
So then, which much muttering, I moved on to my cheap and nasty LED lightbox substitute. If I ever find an old-fashioned one I shall leap upon it, LEAP, I tell you.
You can see that I didn’t transfer all lines in all detail. This is a legacy of the Stitch Off, and a result, also, of the efforts I’ve been putting into painting and sketching over the years. This sort of design doesn’t rely on precision, all of the charm of it comes from the sense of life and profusion, and the fabric and thread are both too chunky to allow for much delicacy. So I’m trying to minimise my reliance on guidelines, and indeed, gradually make the guidance still more minimal. A work in progress, again.
Playing With Flox
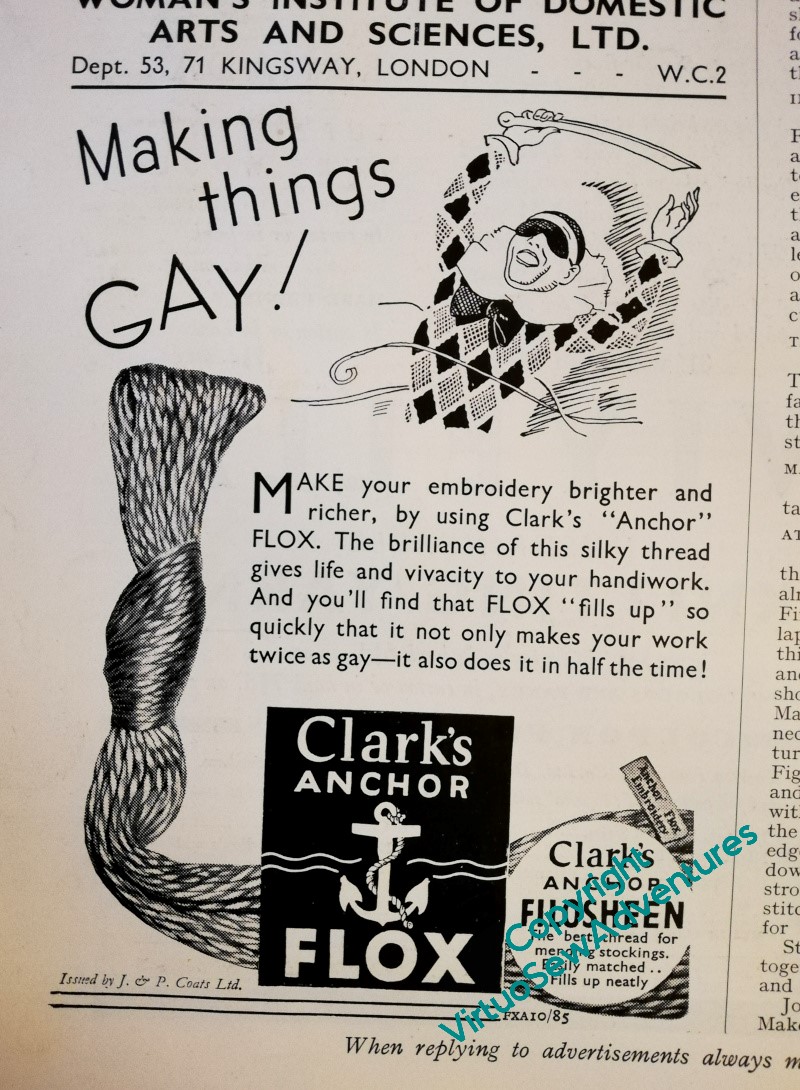
Well, if I had paid attention, forty years ago, to the adverts in those nineteen thirties The Needlewoman magazines, I would at least have known that Anchor “Flox” was a twisted, fairly heavy thread. I might also deduce that it was fairly new, because the tone of the adverts suggests that the reader needed to have the idea of it explained. So it is a fairly heavy thread, glossy and lustrous, and brightly coloured, creating bright, impactful pieces for interiors, rather than tiny delicate pieces for baby’s layettes.
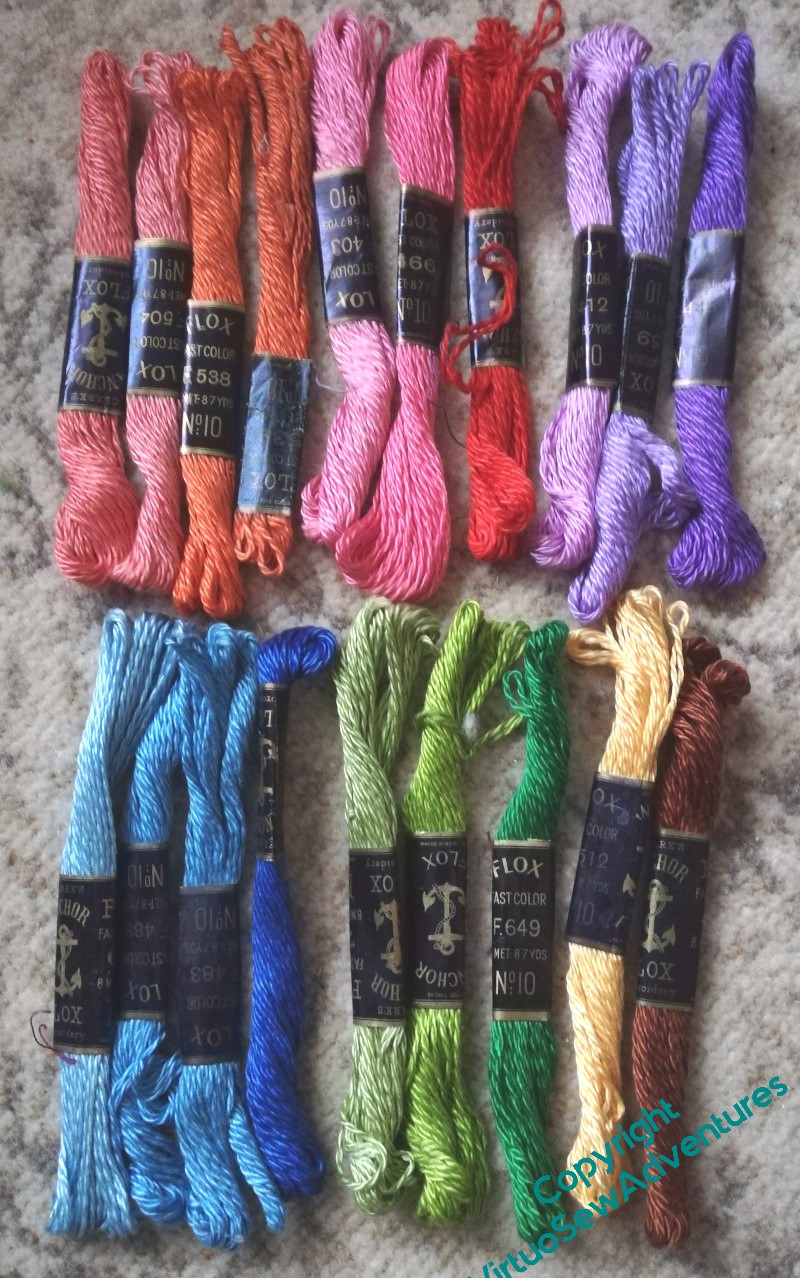
I laid out all my colours from the bunches I bought on the Embroiderers’ Guild stall at the Harrogate Knitting and Stitching Show in colour families to see what I had to work with. Bright, colourful, lustrous, yes – yes, all of that. The thread is a bit heavier than the heavy pearl cottons, but the twist is not so tight. I wonder how it will make up? (Apart from “in half the time”!)
Now I look at it in better light, the red is more of an orange, so it’s misplaced, but there’s a fair range of colour here, as long as I’m not going for subtlety..
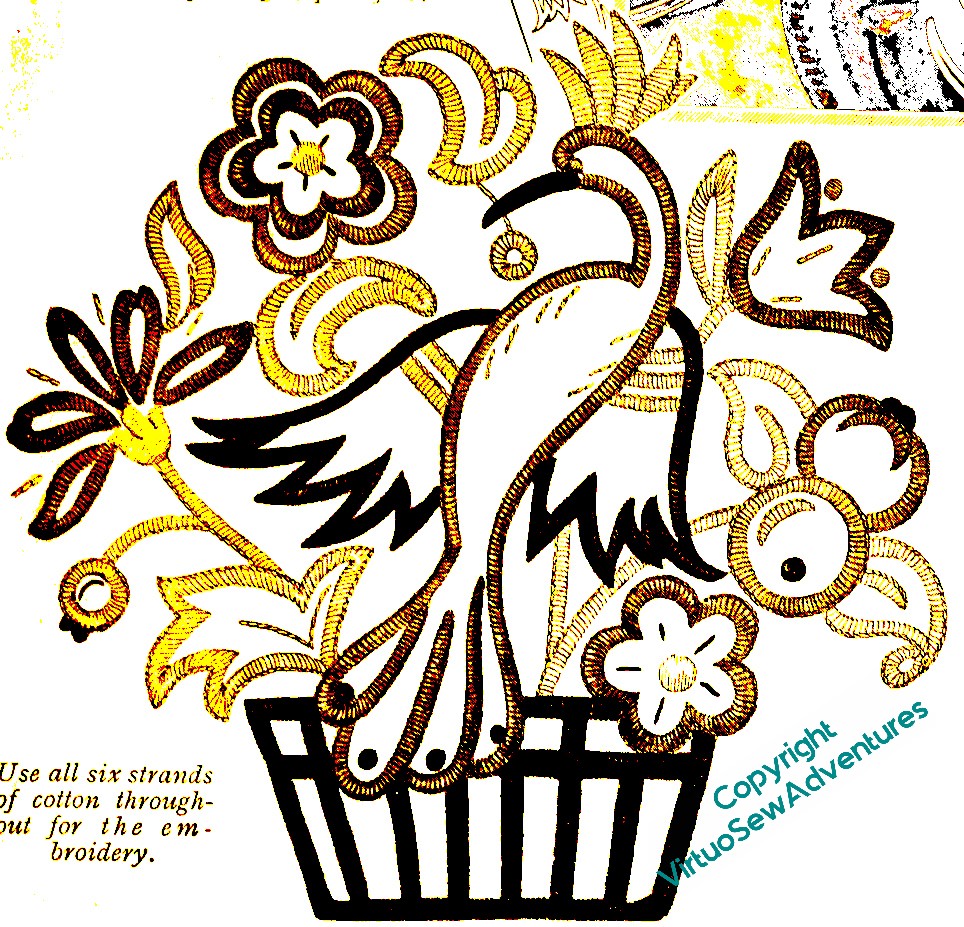
I went through my magazines, to find a selection of designs that were specifically intended for Anchor Flox, but not so huge (the Persian Fantasy Screen was intended for Anchor Flox, and that ends up as five feet by six!) as to demand more thread of each colour than I have.
I’ve decided to do one of the floral table runner designs, the middle of the top row here, because I think it will talk nicely to the Queen Anne style teacloth which is presently gracing a side table in the the living room. After that, if I seem to have enough, I am very tempted by that parrot…
Mending, Upcycling, and other adventures
As a family, we have always made and remade, mended and upcycled, garments, furnishing and furniture. There is a tale of five year old me, accompanying my mother to buy fabric for a dress in the now long-gone and much-lamented fabric shop in town, and piping up, as she was paying, to ask “What will it be _next_?”, so you can tell this is deeply ingrained!
Usually this is something I let pass without comment, but two episodes lately seemed worth mentioning, in case they give someone else an idea..
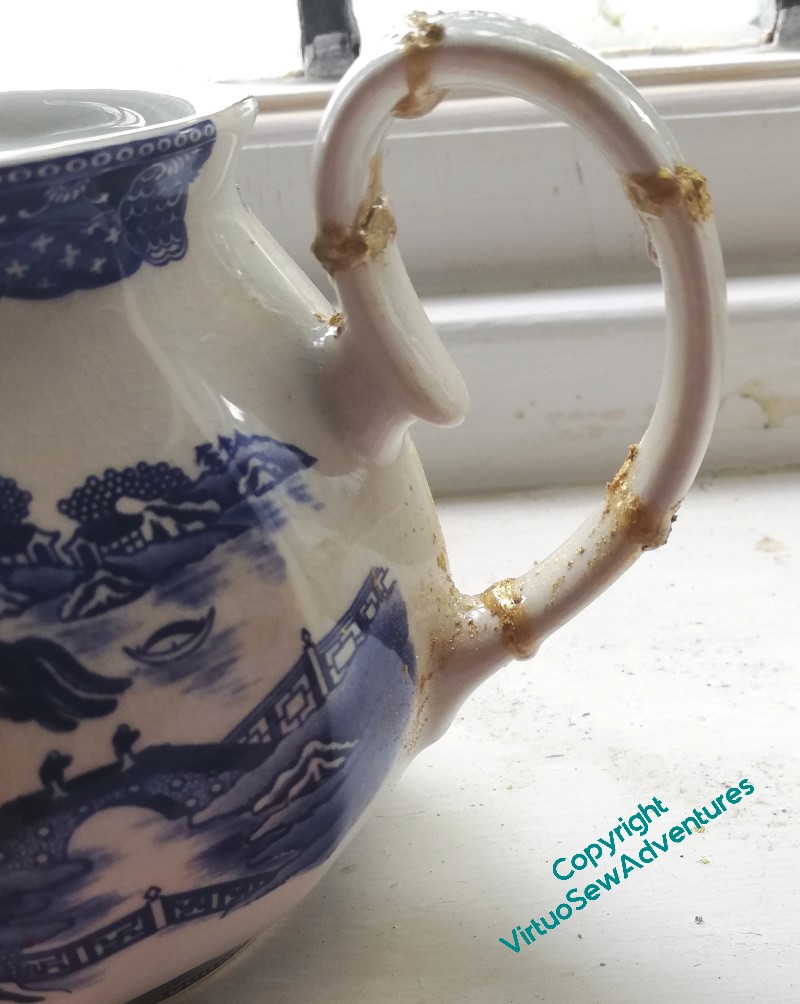
The Japanese mending technique for pottery, “kintsugi”, involves highlighting the mends with gold, so as not to obliterate the history of a piece. I can’t say I’m very good at it, but I had an entertaining afternoon with a kit that enabled me to play with the idea, at least.

And then my cousin mentioned a footstool she had with an entirely unsuitable cover for the surroundings, and a few oddments of furnishing fabric from earlier work on the room. Cue a Kintsugi-inspired crazy patchwork footstool cover, with all the seams emphasized with gold piping! This took some work and collaboration, as my sewing machine isn’t up to the task, but Mam’s was.
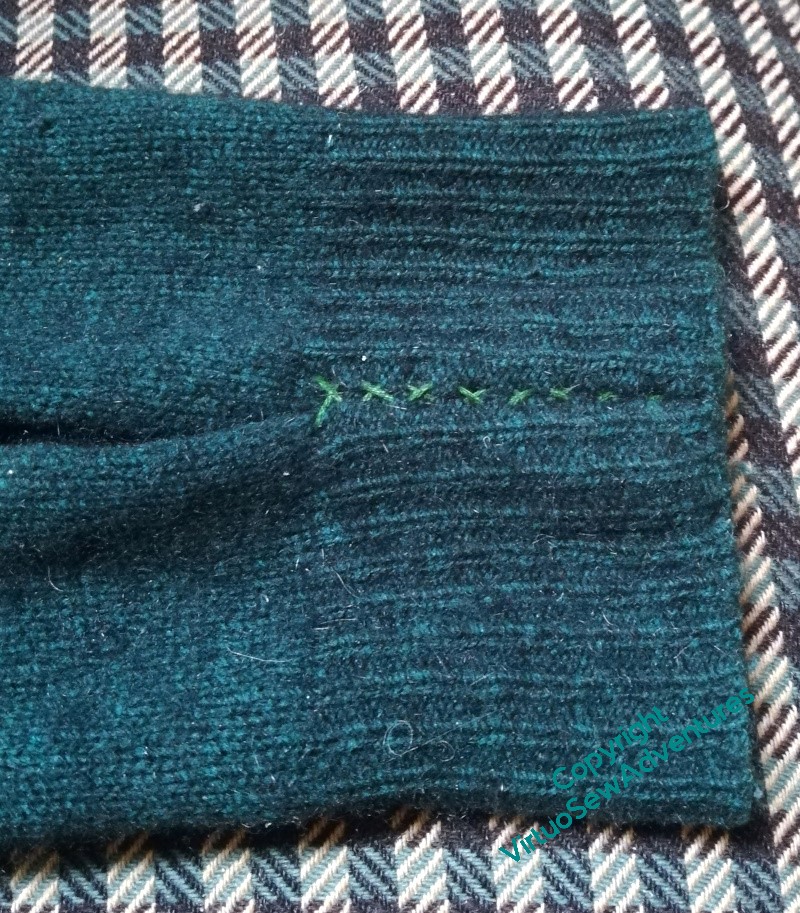
And on an entirely different scale – one of the problems with older knitwear is the way the ribbed cuffs seem to lose all their elasticity, and what was once a trim and neat shape, will often become shapeless and saggy with age. I’ve tried in the past adding elastic, but I couldn’t make that work (if anyone has – what’s your trick?), so it rather nags at me.
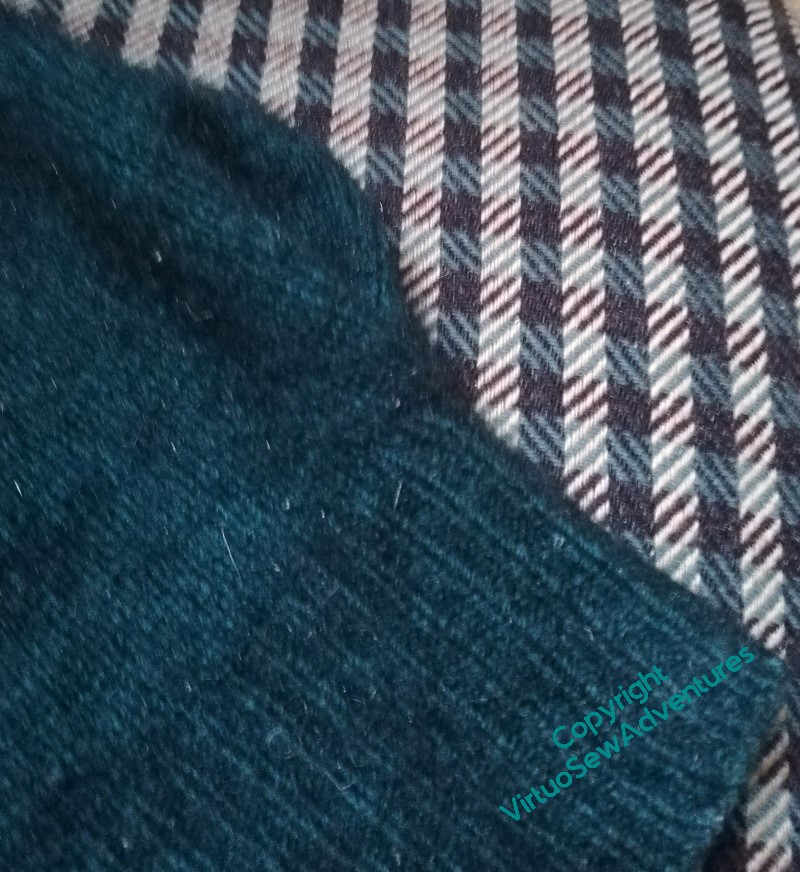
Then this winter we made a dress with rather extravagantly tucked sleeves, and I thought I had an idea that might work. I’ve created an inverted box pleat in the cuff here – it’s just held with stranded cotton at present, something that will show up so I can play with it until it works, and then do it properly (or not!) – and held it together, starting at the sleeve end, with crossing stitches. Then I caught down the side of the box pleat.
You can see in this picture how the cuff is now neat and close, and the sleeve has a bit more shape, and rather less “flop”. I’m very pleased with that, and I may extend this to other, similar garments.
Finally Displaying Tudor Trinkets!
As I forecast, I had a rather entertainingly messy time with plaster bandage and acrylic paint to create my Trinket Tree.
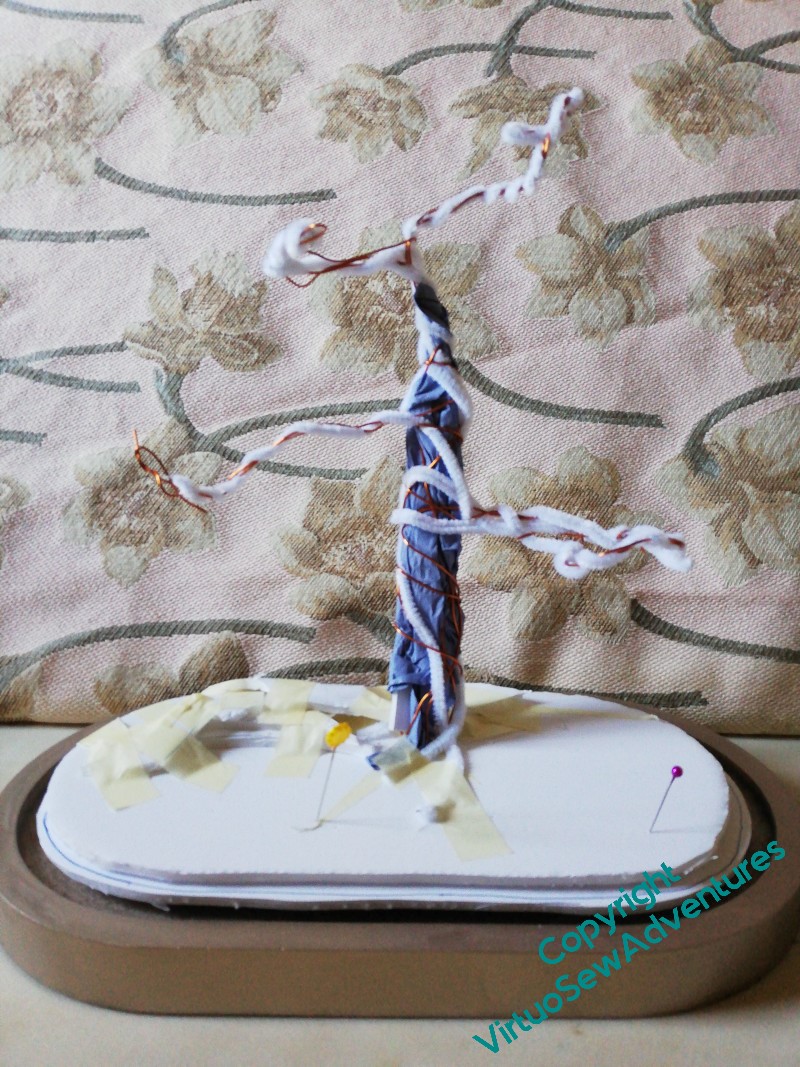
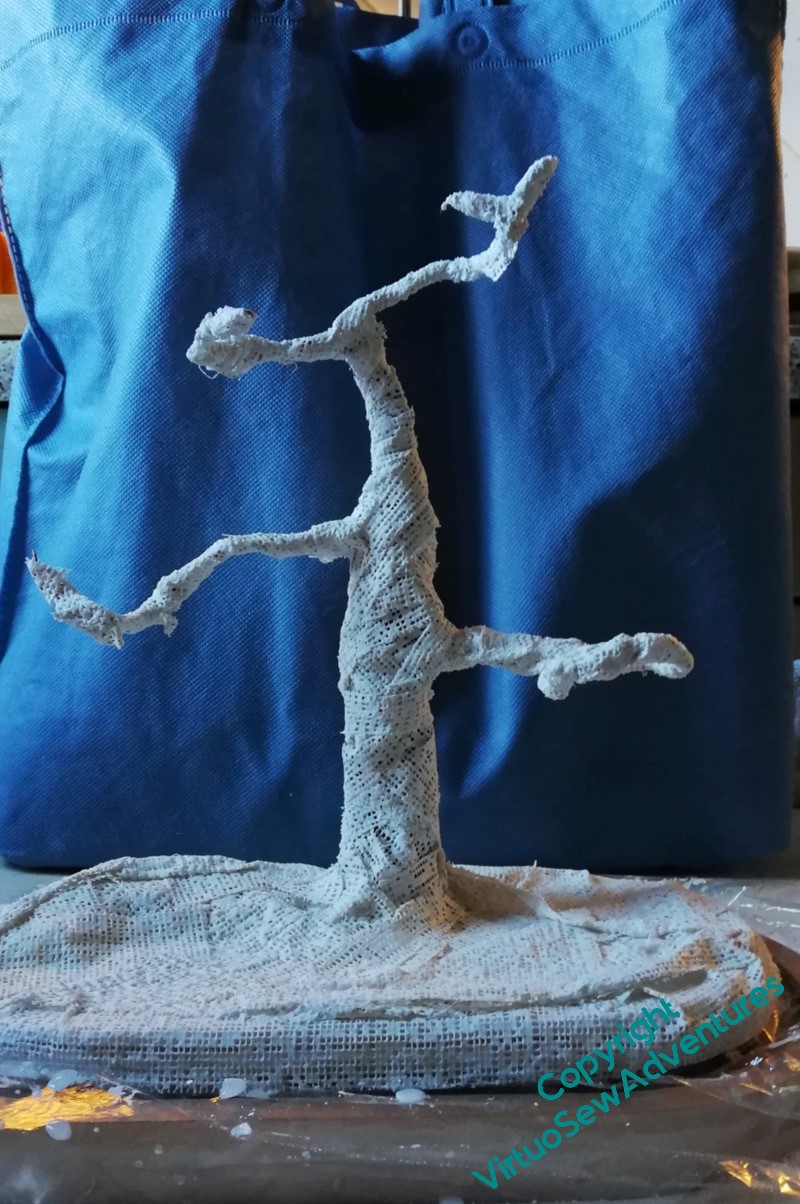
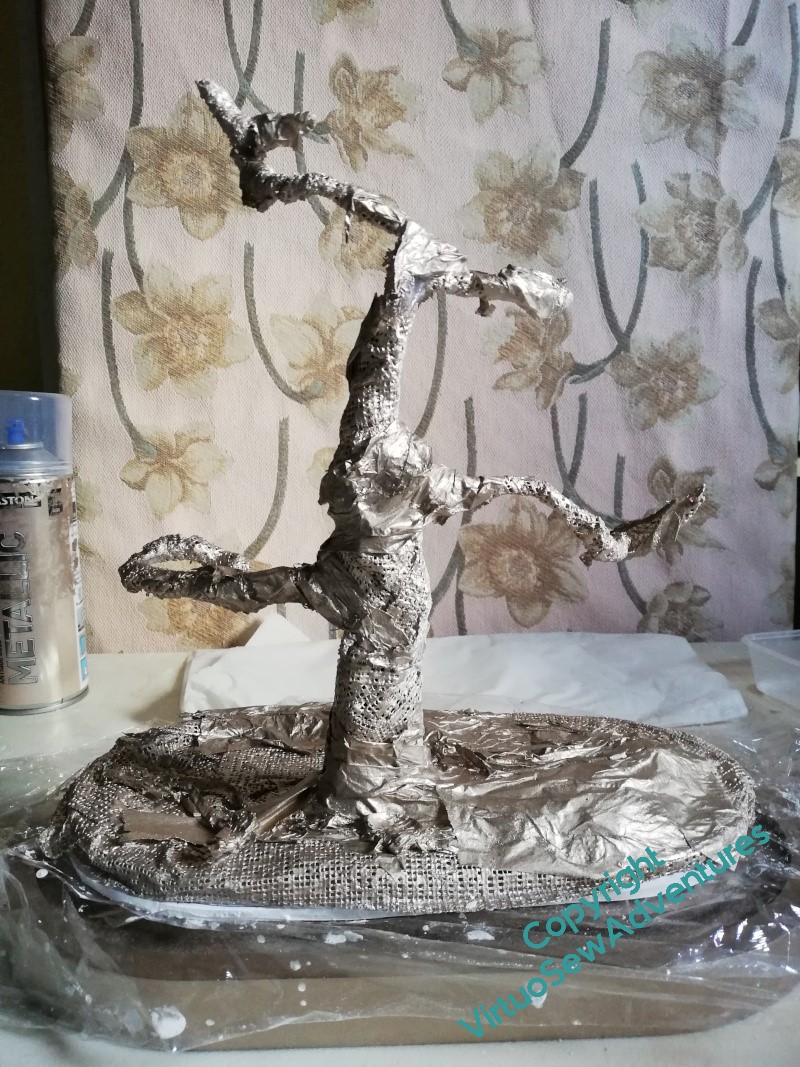
As you can see, foamcore, wire, crumpled paper and lots of tape were involved, as well as some tissue paper to vary the texture a little. Although I needn’t have worried – now the Trinket Tree is loaded, you can barely see it!
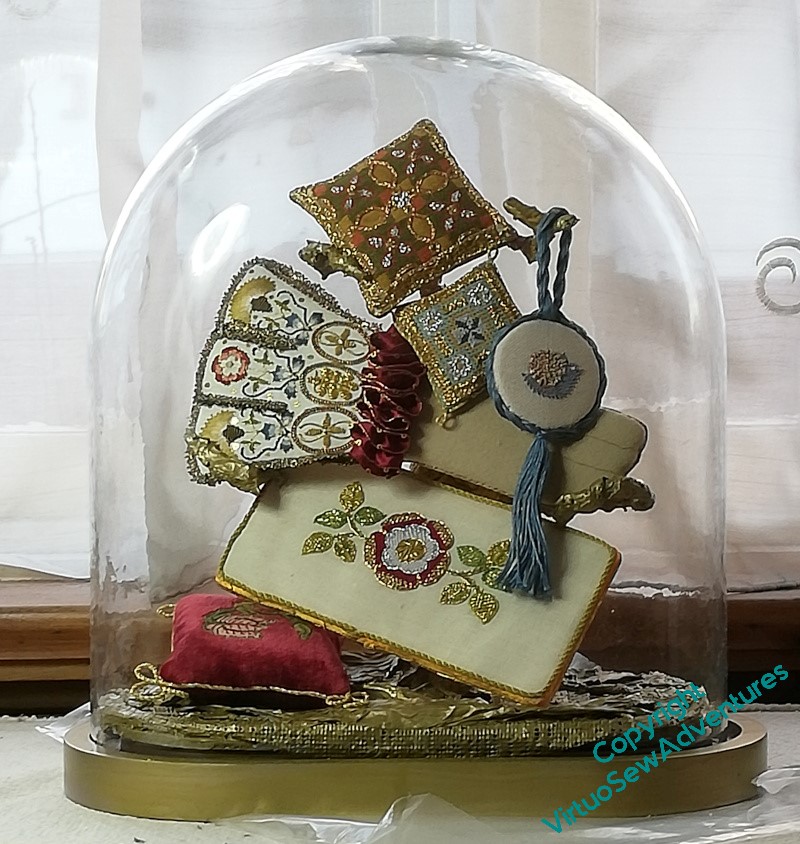
At present it sits on the hall table – the table it is on for this photograph is where I stitch and usually covered with bits and pieces relating to the current task. Not a good place for a glass dome, although it fits so neatly over the trinket tree’s base, that it’s quite hard to knock adrift!