
Tag: bargello
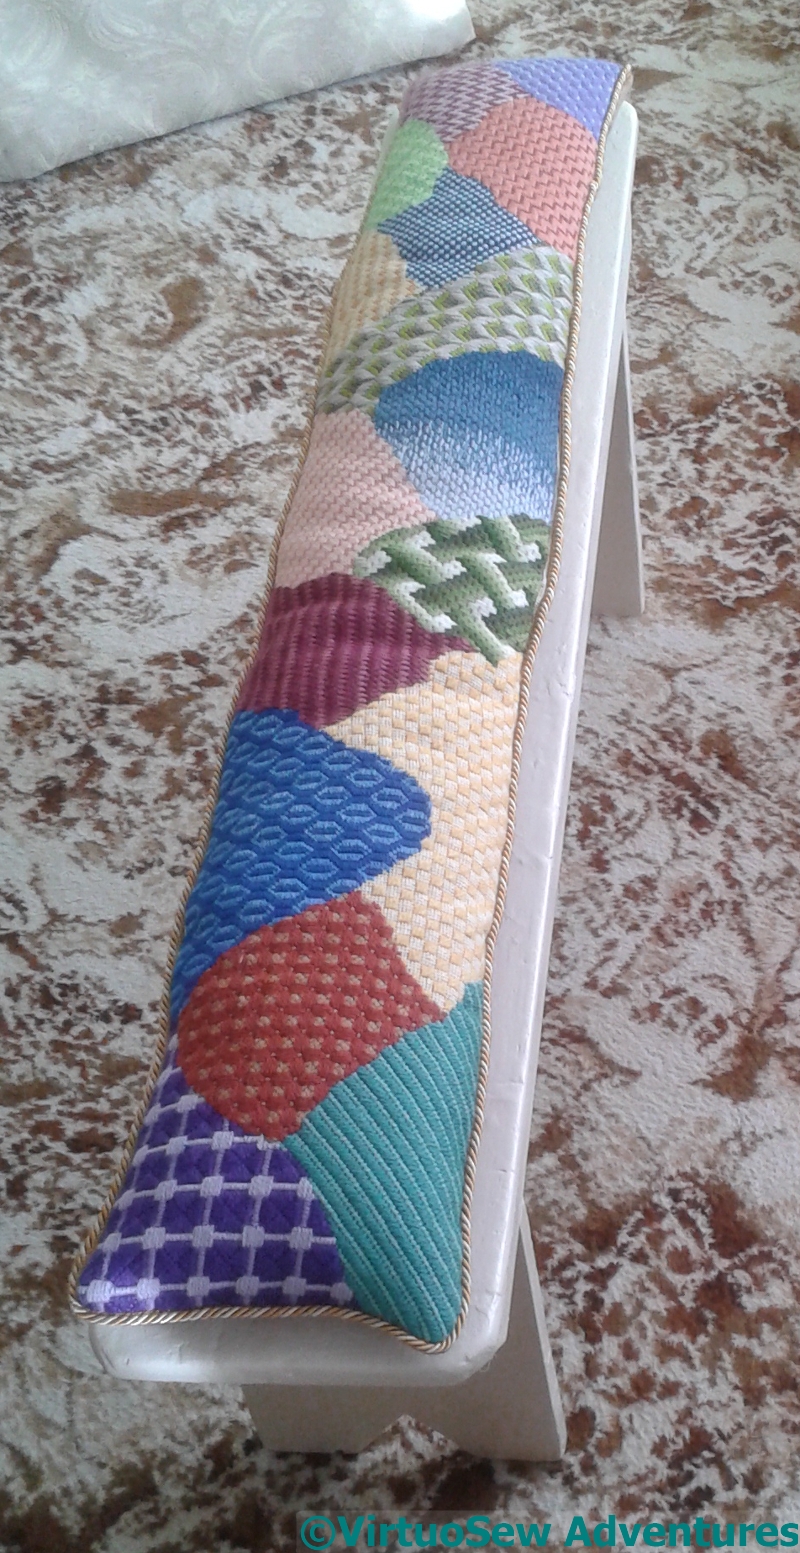
Finally! Crazy Paving Canvaswork finished!
In fact, it was finished a long time ago, and somehow I didn’t get around to writing it up…
Not that there is much to say. All of the interest (almost!) was documented in the stitching.
The old form has been scraped, holes filled, sanded, and repainted, and the cushion is a simple shape, tidied up with piping cord.
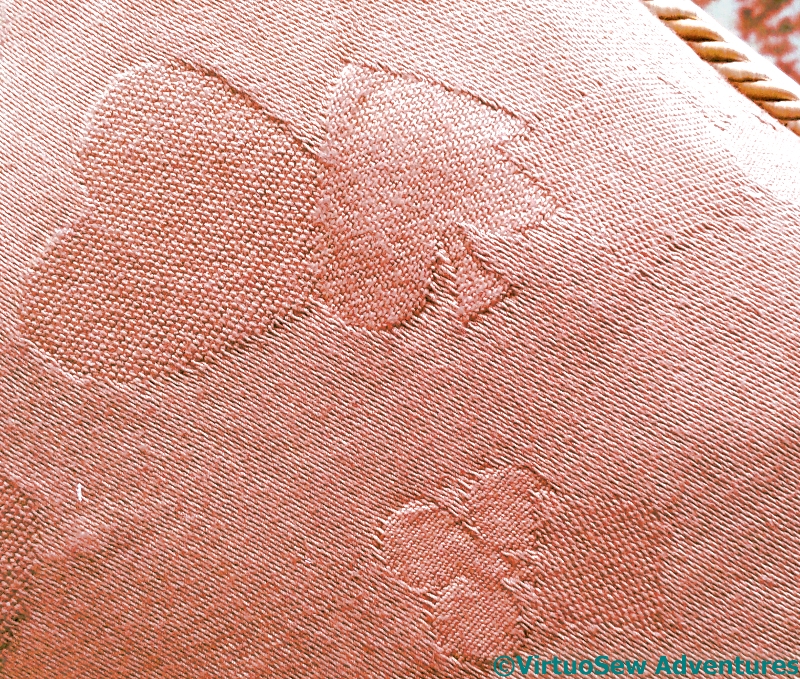
Some of the interest, in fact, is in the backing fabric. It’s an unremarkable jacquard woven pattern in cotton on a synthetic warp, but the design – rather ironically, since I’m card-blind for all practical purposes! – is a design of suits I created during my MSc in Textile Design Technology. It’s clunky, and not well-differentiated, but it was the first time I designed a jacquard pattern. The only time, too, but it was fun while it lasted, and I’m glad I asked the technician to weave a half-metre for me instead of the 10 cm that was all that was needed for the module.
Report for 17 UFOs in 2017
Progress on the Christmas Angel
You may recall that a very long time ago I listed some projects I wanted to work on this year, prompted by Meredithe at Pomegranate and Chintz and Anne at Frayed At The Edge. Mereditithe’s most recent post for the challenge is here.
Then the Head of Nefertiti swept into my head and my hands and took almost all my brain power and stitching time, and Nothing Happened.
Well, something has now happened. I’ve had the Christmas Angel sitting in the corner of the living room waiting to be noticed, and a little while ago, I got to a natural Stop and Think point with my other projects.
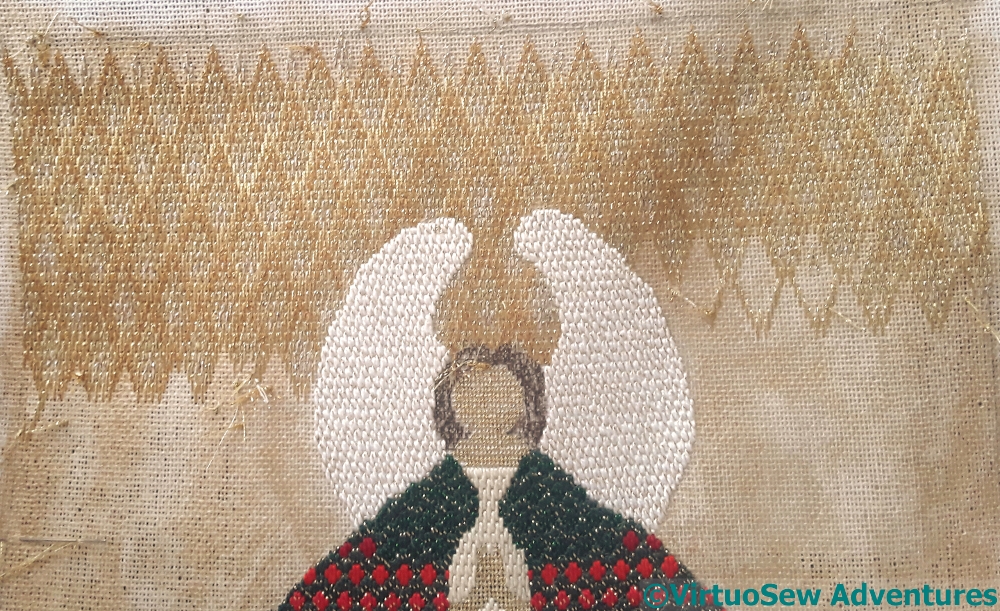
So I have made a start on the background. I’m using metallic machine thread, two strands for the rough, textured threads in the centre of each cell, and three strands, one of each of three shades for the framework. It’s beyond fiddly and flyaway, and I’ve even bought some Thread Heaven to see whether it helps (a bit, maybe not quite as much as I hoped).
All that said, I think it is going to look rather splendid when it is finished. The idea is that it should be somewhat reminiscent of an icon painted on gold leaf. Some of them have a sort of engraved “diaper pattern” effect, and I hope that the diamond flame bargello pattern will do the job.
The Second Worktop Bin
Stage Four
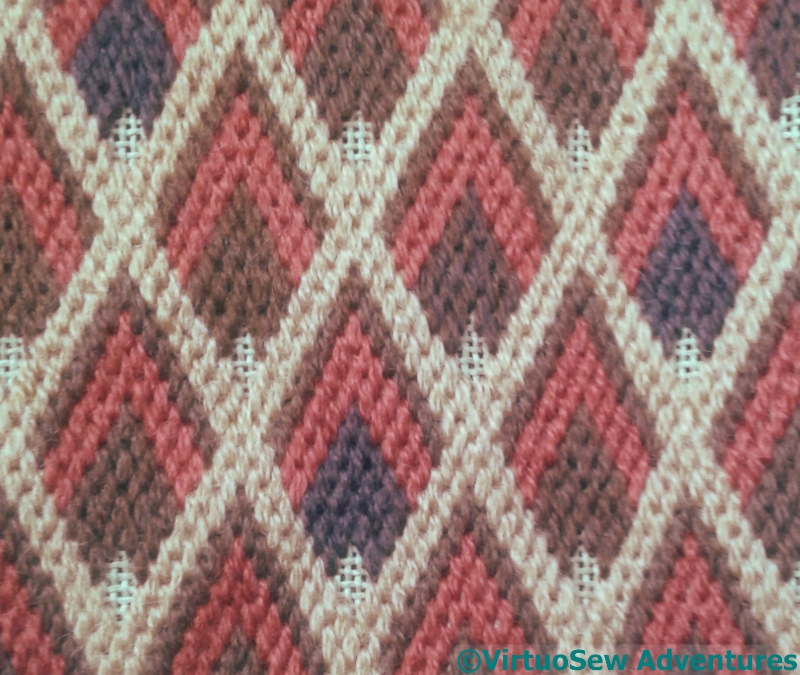
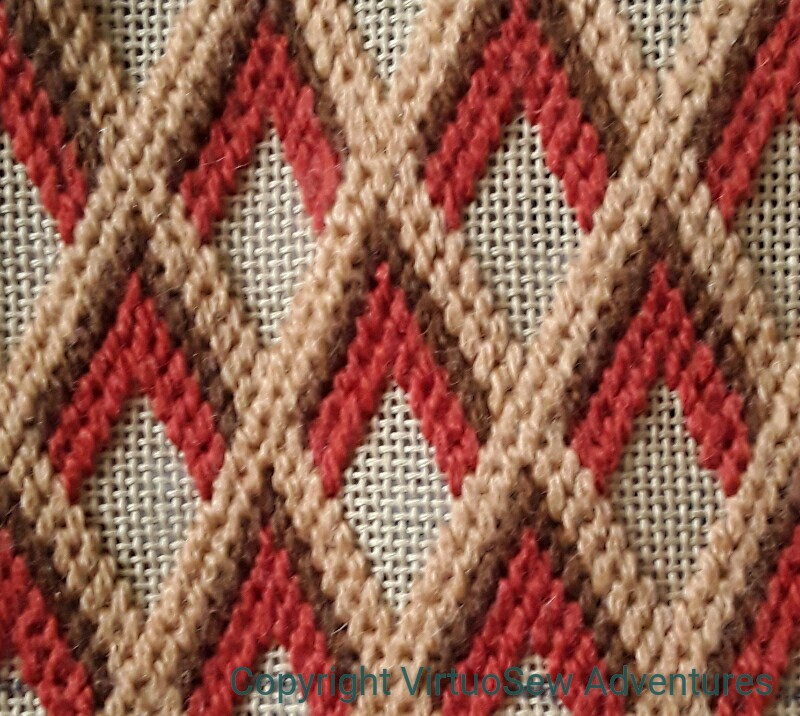
I did indeed find myself mixing and blending a lot of different browns to fill in all those brown sections.
Remember what I said about stash busting being “an inexact science”? Well, the trick about dealing with that (in this context) is to make the various infills and changes look deliberate. I scattered the different shades in a random looking pattern across all the different diamonds. There are four or five different blends, and outside the central section there are only two of each shade in any one row.
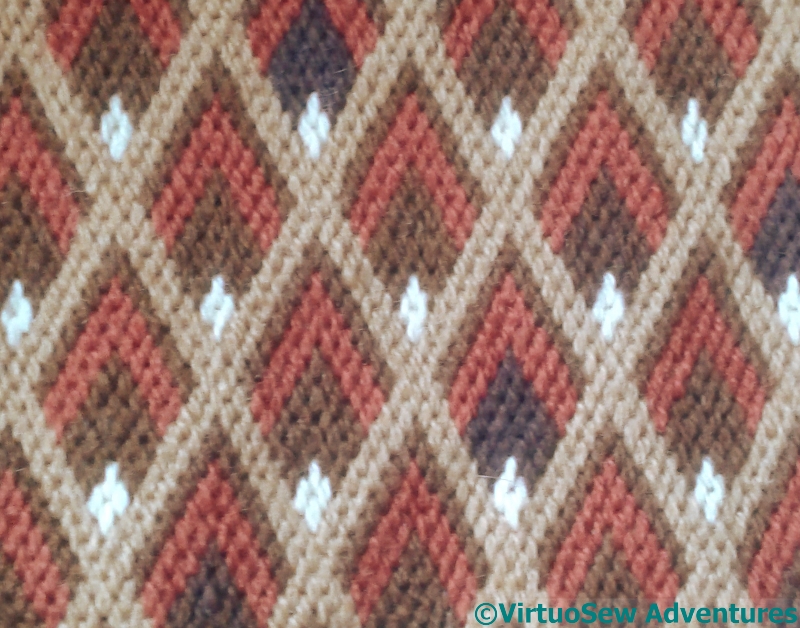
Stage Five
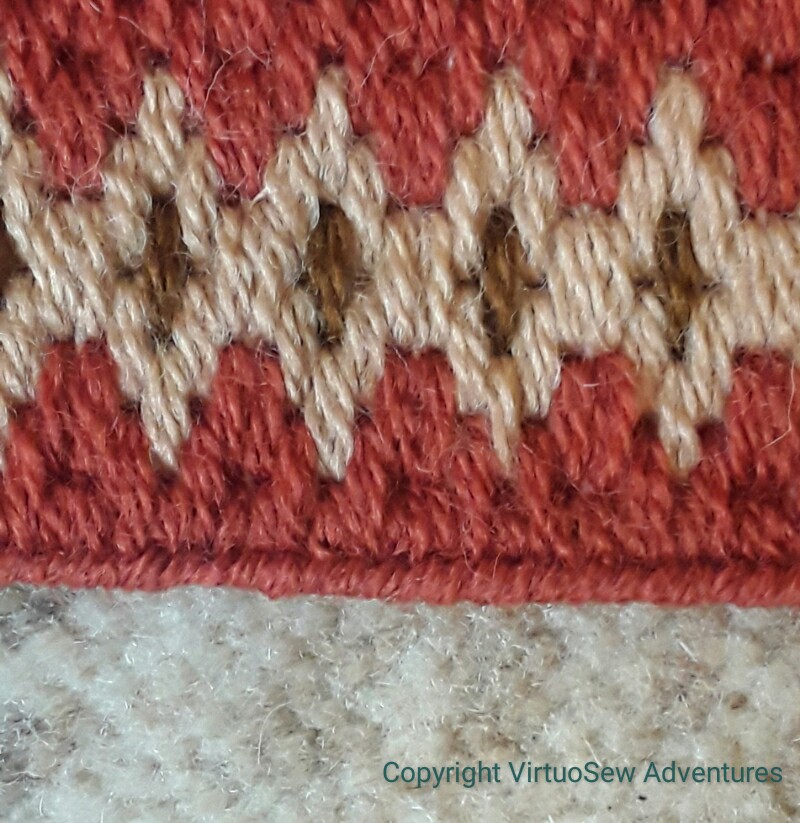
The central section has brown diamonds all the same colour because I was using the central section to help me lay out the trellis pattern, and I simply kept going. In fact as I look at the canvaswork while I write this post, the central section blends beautifully into the outer sections. It really does look deliberate.
The tiny diamonds that lift the whole effect are in a very light cream. Fortunately I didn’t need much of this one, and I had enough!
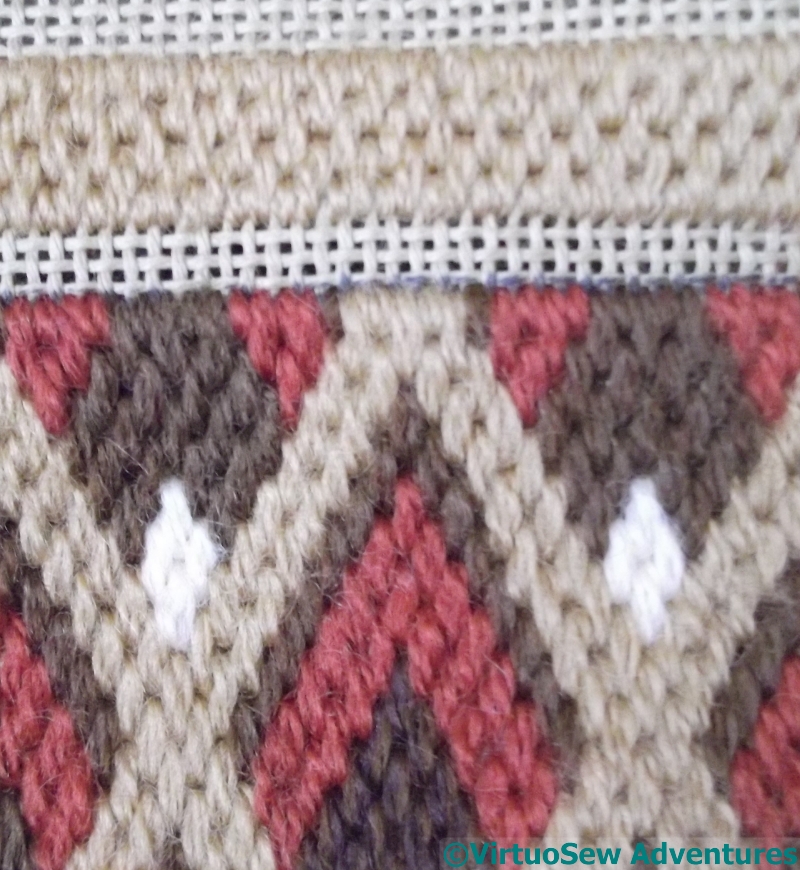
Inside Top In Place
I profited from the experience of making the first little worktop bin, and instead of stitching the inside section after I’d folded back the top and stitched the rim, I worked it while the canvas was still flat, which was altogether easier to do!
Although I confess, I was wondering whether I would have enough of this beige to complete it, or whether I would have to take it out and use a different colour entirely…
Another Worktop Bin
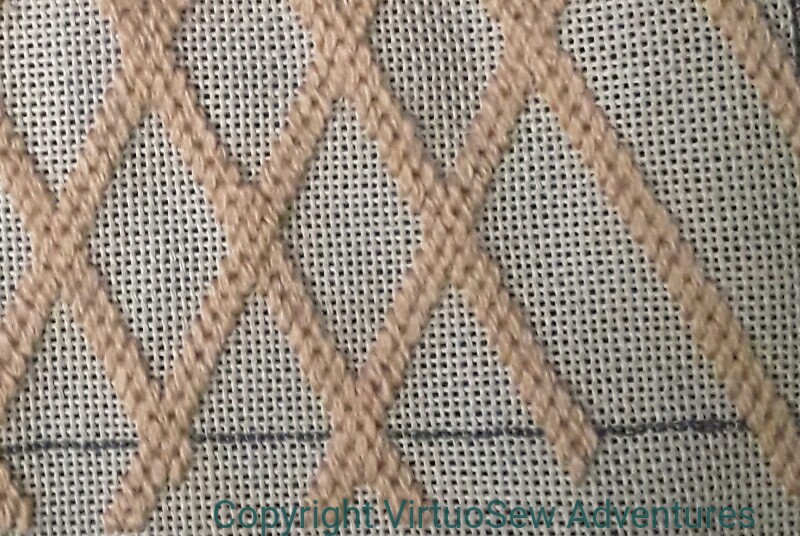
Diamond Framework
The first worktop bin was such a success that I decided to do another one.
This time the bin itself is a cardboard drum that used to contain chocolates. It’s rather bigger than my sawn-off milk bottle, and furthermore, the canvas is finer (I’m only using two strands of Paterna in the needle, not three), so the canvas is going to take a little longer to do.
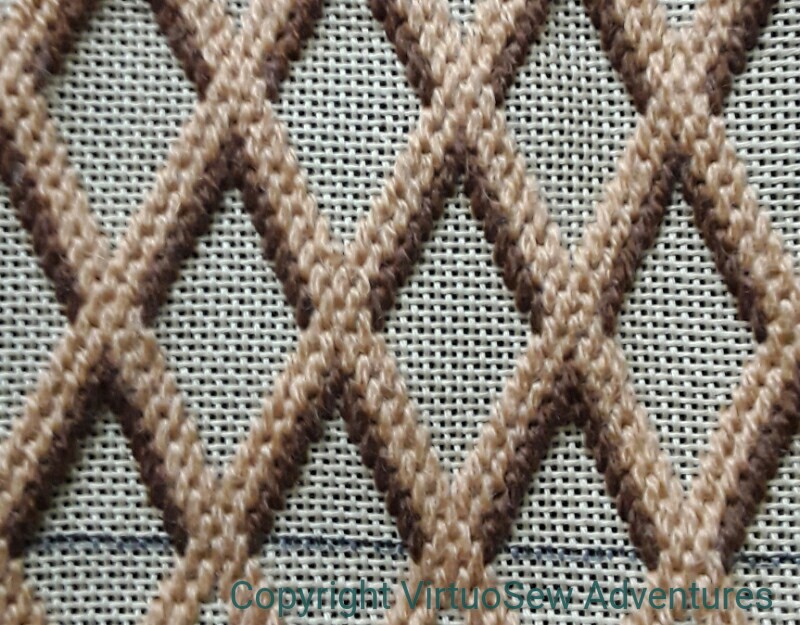
Stage Two
I’m staying with browns, and with diamond patterns, and starting with this diamond lattice pattern. I’ve had enough of the creamy beige wool to work the framework, and since it is only two strands, I should have enough of it to work the edging and seam as well.
But there is a lot more dark brown to come and I may very well find myself combining threads to stretch my varieties of dark brown to fit the pattern. Never mind, I will then have made some Stashbusting Progress!
Stage Three
Has anyone else noticed what a very inexact science stashbusting is? You embark on a project, full of hope that it will consume vast stores, only to find that the Stash in question has shrunk not at all…
Right up until the project when you rely on that happening….
Finishing the Form Cushion – Stage One

Corner of the Form
When I’d finished the stitching of the canvaswork for the Form Cushion, it was a little puffy and warped, and badly in need of blocking, but being long and thin I had nothing suitable for blocking it on. Until I had an inspiration – use the form itself!
We covered the form with an old towel, and then worked on alternate sides of the form. I’ve put an old length of cotton curtain header over the canvas, so that when I come to remove the staples, it will be fairly easy to do.
In theory…
It took quite a lot of heaving and tweaking, and the combined efforts of my mother and myself (for a client, she’s having to put a lot of effort in here, isn’t she! – she’s started on renovating the form too.), but in due course we managed to get the canvas firmly attached, and stood back to look at it.
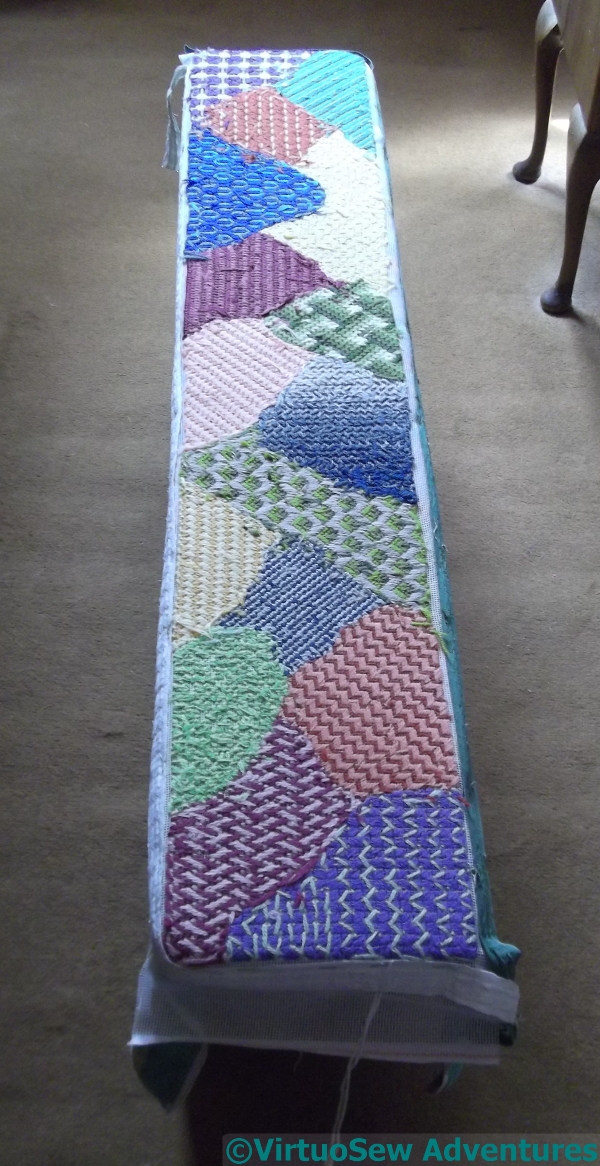
Taking The Long View
It didn’t look nice and smooth as it does here. It was bumpy and lumpy, and not very happy at all.
So I steamed it gently, using a steam iron but not letting it touch the wool. Very, very carefully, and slowly..
It started looking a great deal better (even upside-down), but then we set it aside, still stapled in place, for a few weeks. We wanted to be sure that it was very thoroughly dry before we moved on to actually making the cushion.
And besides, I’m not entirely clear on the type of cushion it will be!
The Worktop bin – finished
Edges turned in
There is always more “engineering” involved in these projects than you expect. Once I’d turned in the edges and done the herringbone stitch “piping”, I realised that the top of the bin was probably going to be on show on the inside. I found some felt to line it with, but since it was a spare offcut, I decided to run a line of straight stitches on the inside, just in case there wasn’t enough of it!
Felt lining attached
I attached the felt with small stitches, not too tightly, but just enough to make sure that it doesn’t move unless I want it too. It’s almost a pre-felt, not too dense, so it showed some adventurous tendencies. Some firm treatment, a tug or two, and it settled down nicely.
Vertical Seam
Which allowed me to consider tackling the seam turning it from a flat piece to a tube. After some of my usual thoughtful staring, it finally occurred to me that I already had the answer: Herringbone stitch, just like the edge finish at the top.
Obvious, really, isn’t it! It makes a sturdy seam which won’t permit much lateral movement, and since I’ve used it on the top edge, it doesn’t introduce yet another texture.
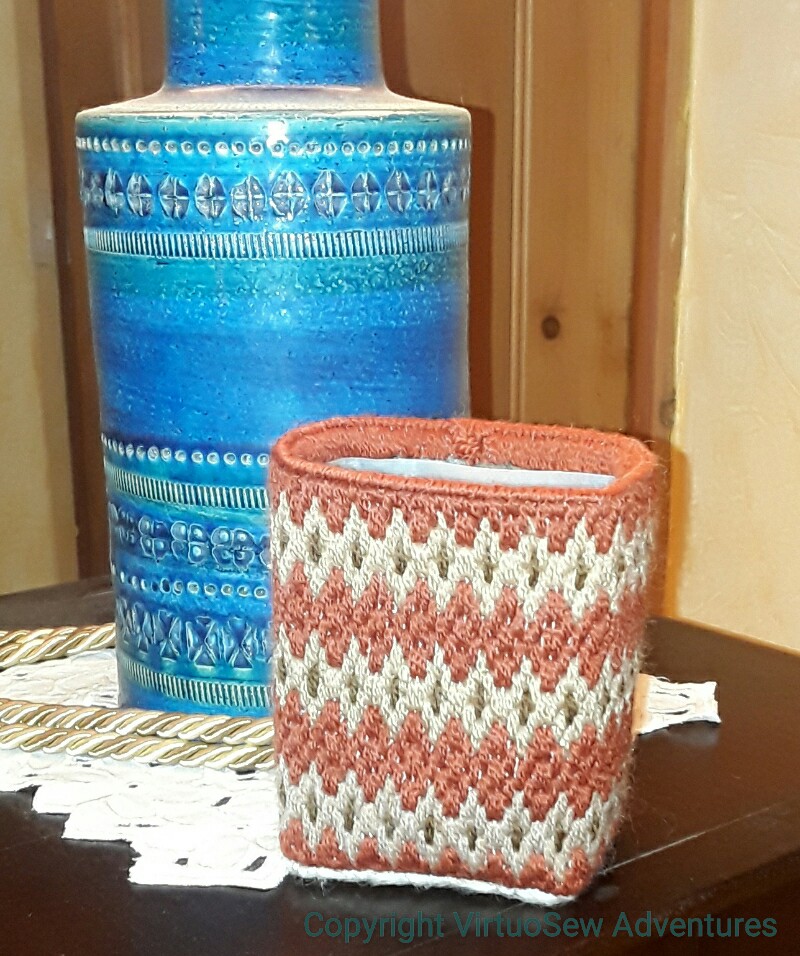
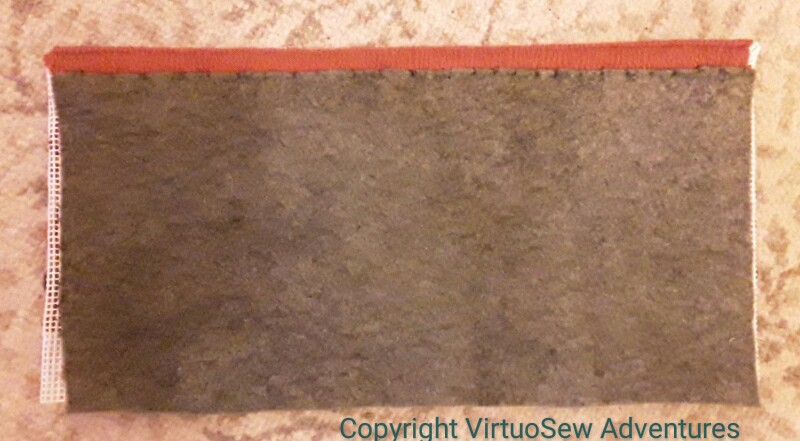
Finished and in service
When it came to sorting out the base, I put the sawn-off milk bottle inside to make sure I made everything fit, and folded in the canvas, holding it with a few rough stitches.
Finally I attached a piece of very dense felt to the bottom to hide all the canvas edges and make sure they don’t scratch any of the furniture. It is already in use, and you have to admit it’s very much better than an unclad sawn-off milk bottle would be!
Continuing The Worktop Bin Cover
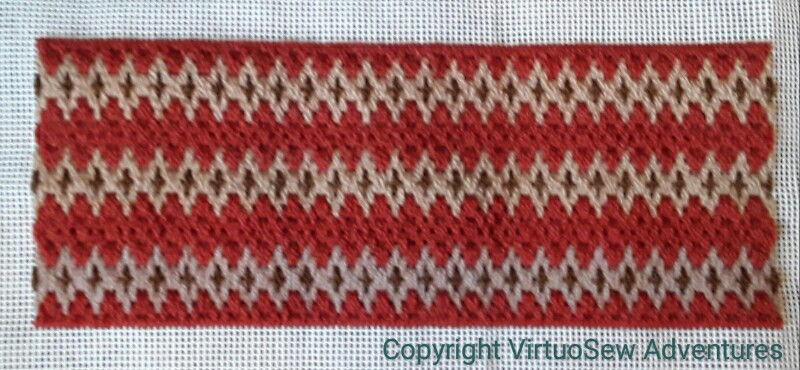
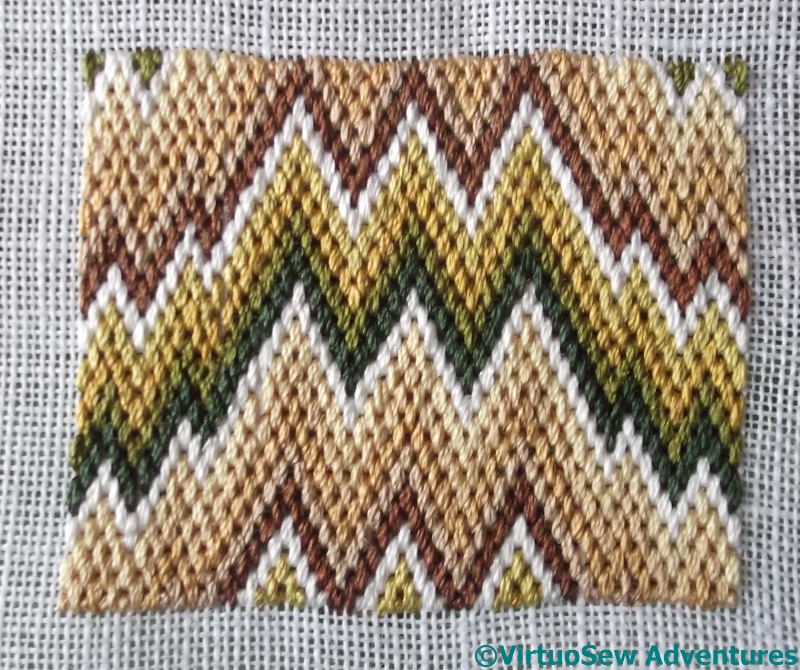
Bargello Panel
Once I’d settled on a pattern, it fairly romped along. Ten count canvas is such a lovely rest after the forty count linen of Eve In The Garden Of Eden!
As with the Crazy Canvaswork Cushion, I’m not buying extra wool for this, hence the row of light stitches which aren’t the same shade as the other two. Most of the thread is Paterna Persian Yarn, but the odd one out is Appletons. The texture and level of shine are different, but then, anything will be better than a sawn-off milk bottle!
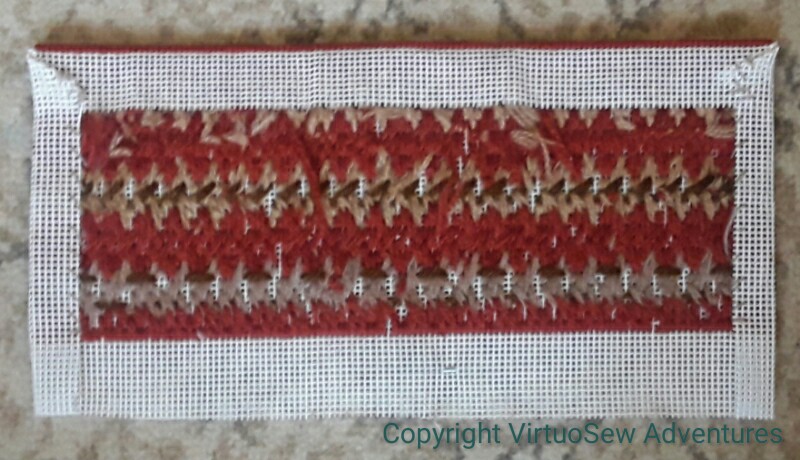
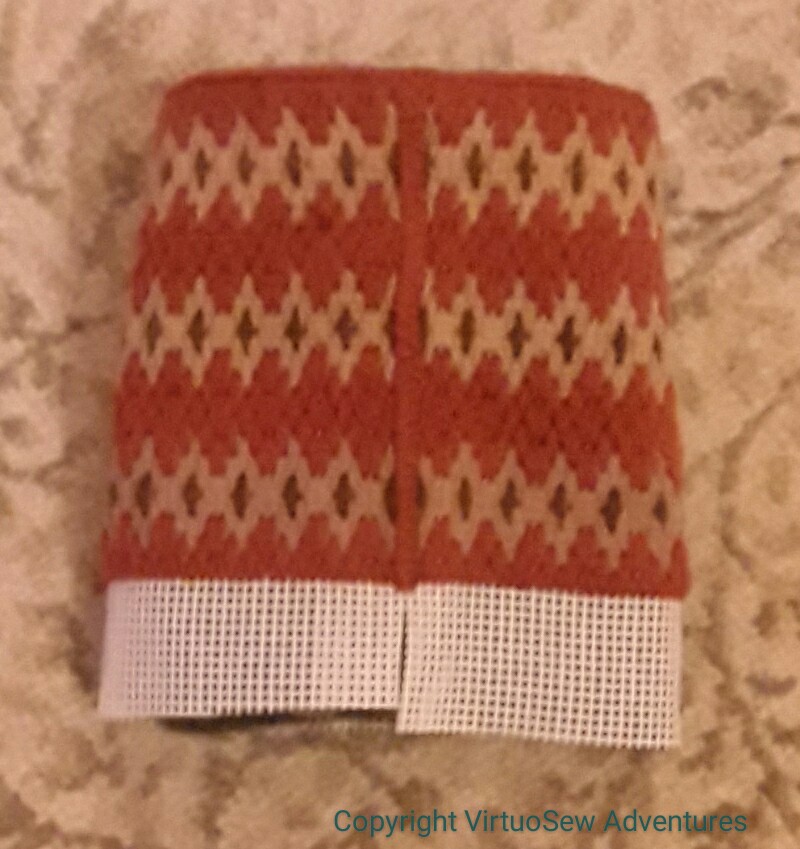
Edges Turned In
The next stage is to turn in three of the edges. I’m going to use the canvas at the bottom to help create the bottom of the bin, so I’ve left that, but the short edges will be seamed together – somehow (I’ve not solved that puzzle yet!).
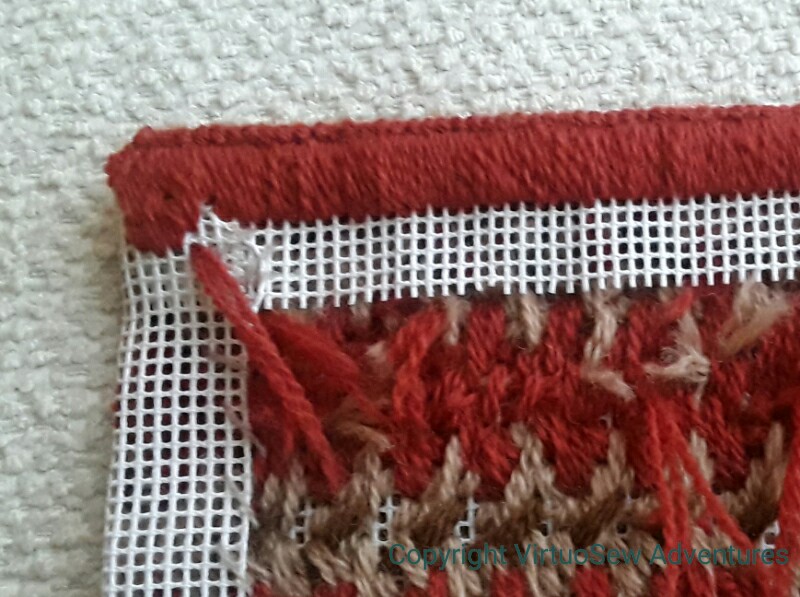
Herringbone Edge
I’ve learnt, over the years, that it is better to finish the folded edge of a piece of canvaswork than it is to try to fold the edge to be completely invisible.
So what will be the top edge of the bin has now been finished with herringbone stitch. It creates a lovely piped effect, much denser and firmer than a simple overcast stitch, and that will be very useful to help the bin stand up!
Small canvaswork worktop bin
First Trial
I have a small plastic bin – cut down from a milk carton – on the worktable beside my chair. It’s very useful for odds and ends, but it scarcely adds to the ambience.
Since all my embroidery at the moment – “Eve in the Garden of Eden”, and something I’m planning for “Dreams of Amarna, but haven’t quite got ready for stitching yet – is fine and detailed, I’ve decided to work a cover for it in bargello work.
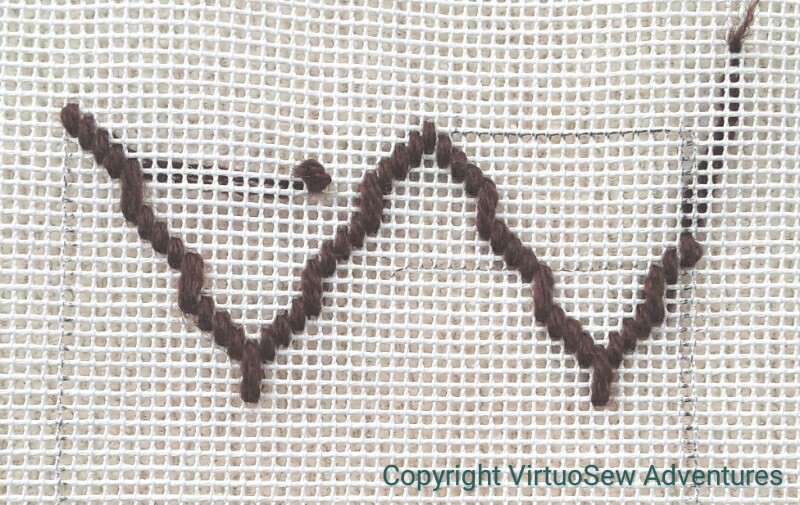
One stitched and one drawn
I’m using another of those offcuts of 10-count canvas. Ideally I would use something finer, but since I want a rest for my eyes, and in particular to use up some more of that persian yarn, I’ve been playing with various patterns in an old book. In this case, one pattern drawn on, and the other stitched, partly in wool, and partly in a fine silk, just to help me with stitch placement.

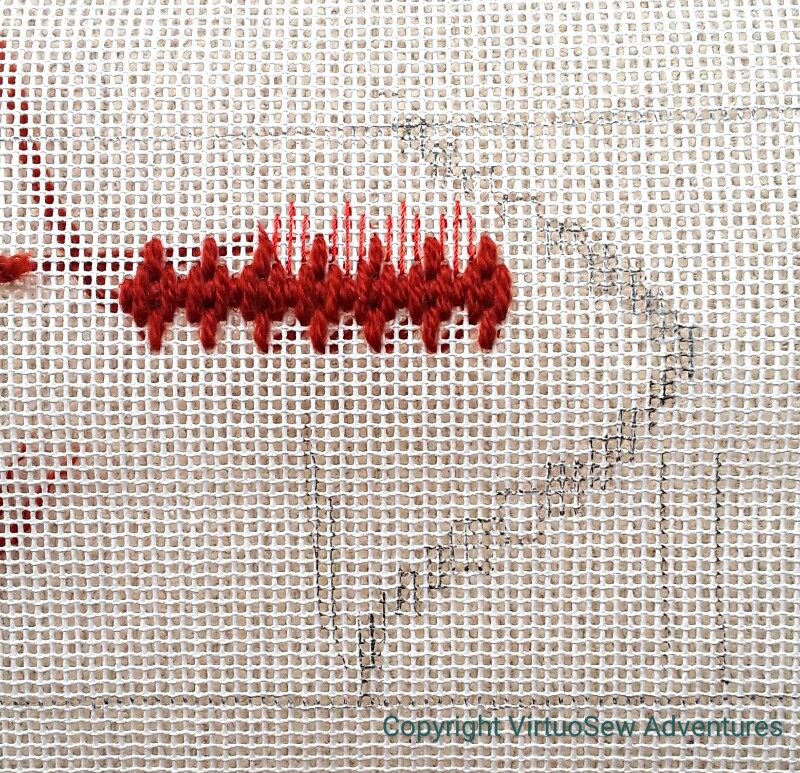
Another trial
I’ve decided to use the rusty colour, which I have rather a lot of, as the main colour, and I’m trying to find a small pattern that won’t dominate the room. I don’t think the “pomegranate” pattern qualifies…, but this one might…
Finished – Tiny – Flame Stitch Pincushion
Flame Stitch Finished
There are in fact several errors in the stitching here. However, since I kept losing them and finding them and losing them again, I decided to let them stand. If even I can’t keep them in sight, no-one else will find them…
I enjoyed using the silk thread for the stitching – but then I keep saying that, don’t I? Silk seems alive somehow, in a way that cotton, linen, and even wool, don’t.
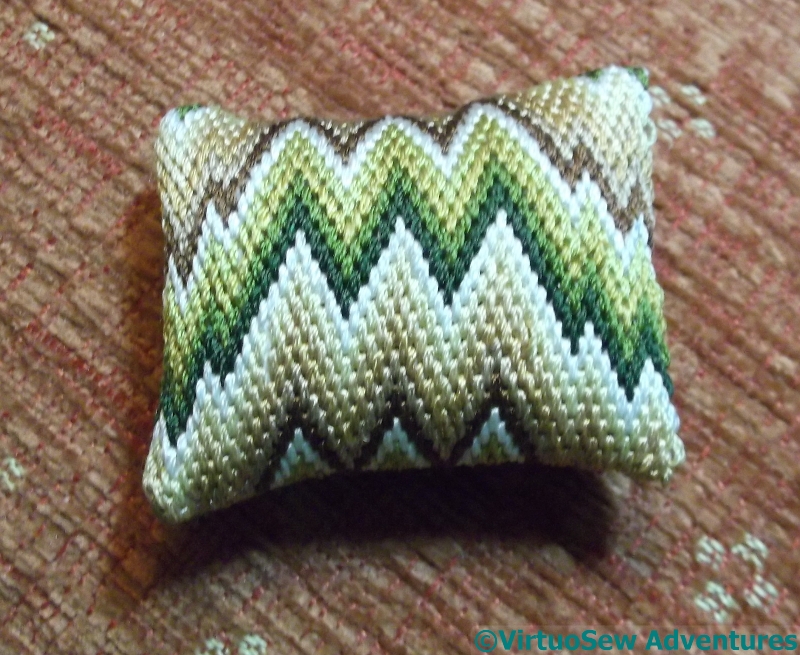
Finished Flame Stitch Pincushion
What really surprised me was just how small the pincushion was when I finished it, using a spare fragment of silk fabric for the back. It was really quite astonishingly fiddly when it came to turning it inside out and especially when it came to the corners.
Still, here it is, done, and stuffed, and the final side closed up neatly..

Isn’t It Tiny!
And then I put it in the palm of my hand and finally realised just how small it really is…
Another one for that eventual Winter Decoration Corner, I think – in my chaotic workspace, a pincushion this size would sink without trace!
Flame Stitch Pin Cushion
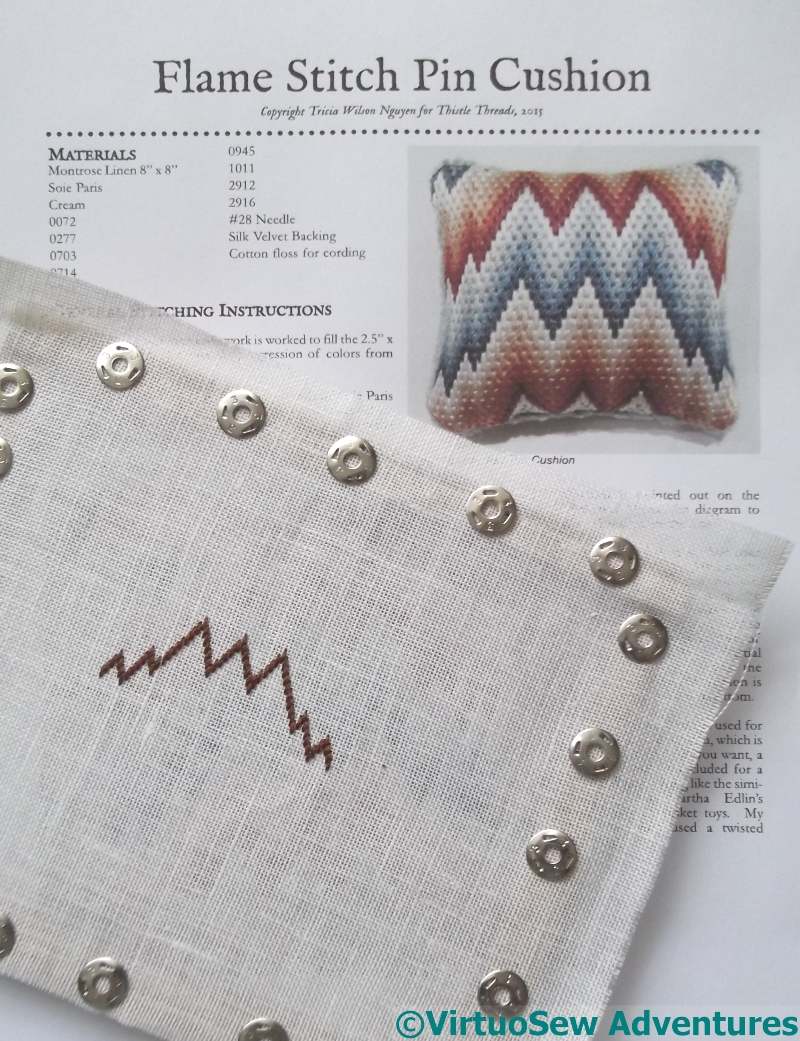
Pincushion Instructions
I hadn’t intended to do any of the Frostings Box designs, because I was intending to keep all the threads for my own purposes, but I’ve not been able to settle to anything this summer. I lost my “Dreams of Amarna” notebook (and found it again!), and although I have several pieces I want to do for it, I have no idea how I want to do them!
So I’ve been starting lots of little things to do in the intervals of the next major project.

Test Stitching
I’m determined not to buy anything for these projects, so I fished out a random piece of linen, and then the next thing was to discover how many threads to use. The instructions said four strands of Soie de Paris, but since I have no idea where the linen came from or what count it was, I thought the choice was worth testing. The left section is in two strands and the right is four.
Four it is, then!
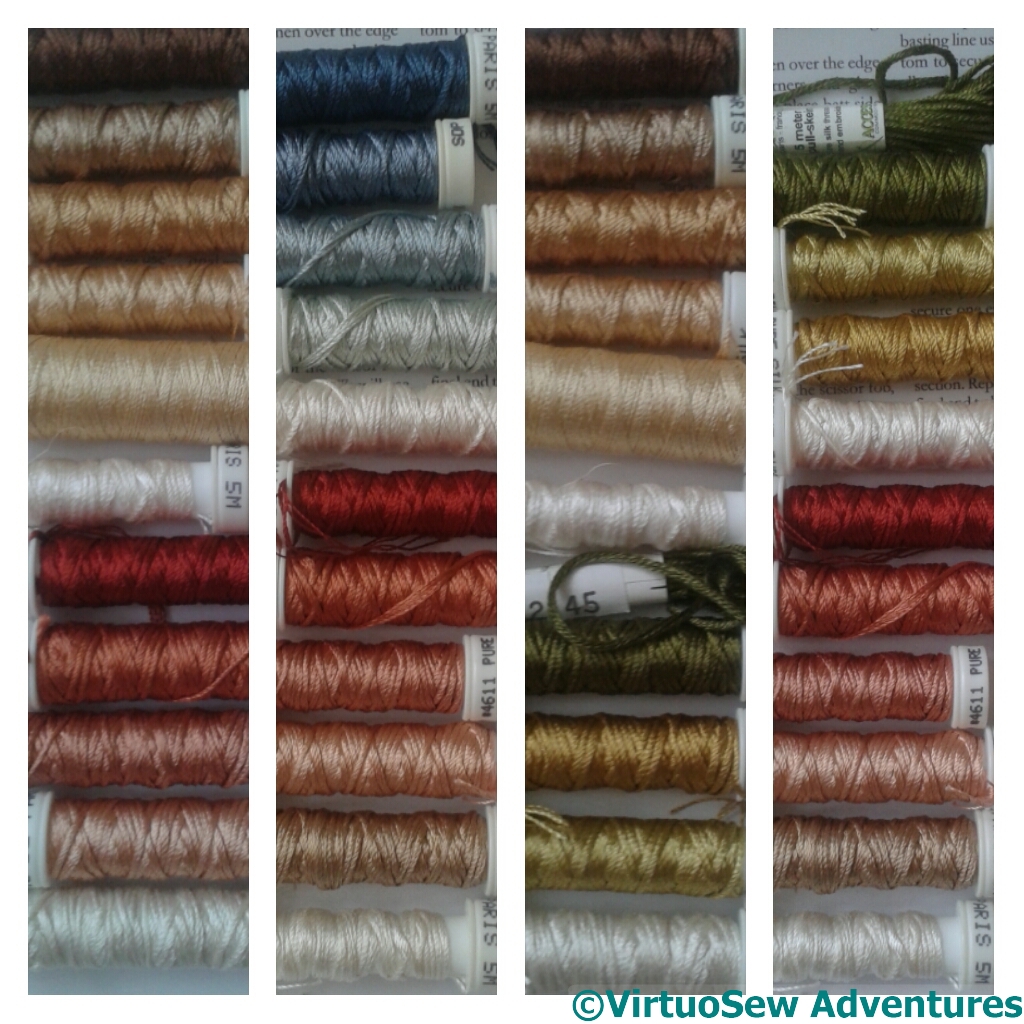
Colour Schemes
The next decision was colour scheme. As it happens, I don’t have the colours specified, so I decided to play around until I had something that looked interesting.
I’ve decided to go for green and brown.