
Tag: William Marshall
Return to William, just because!
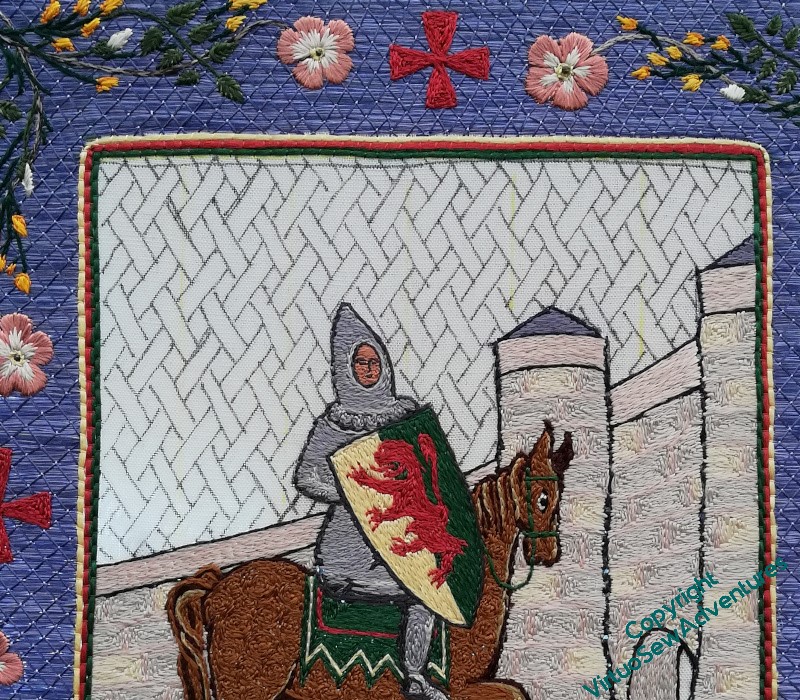
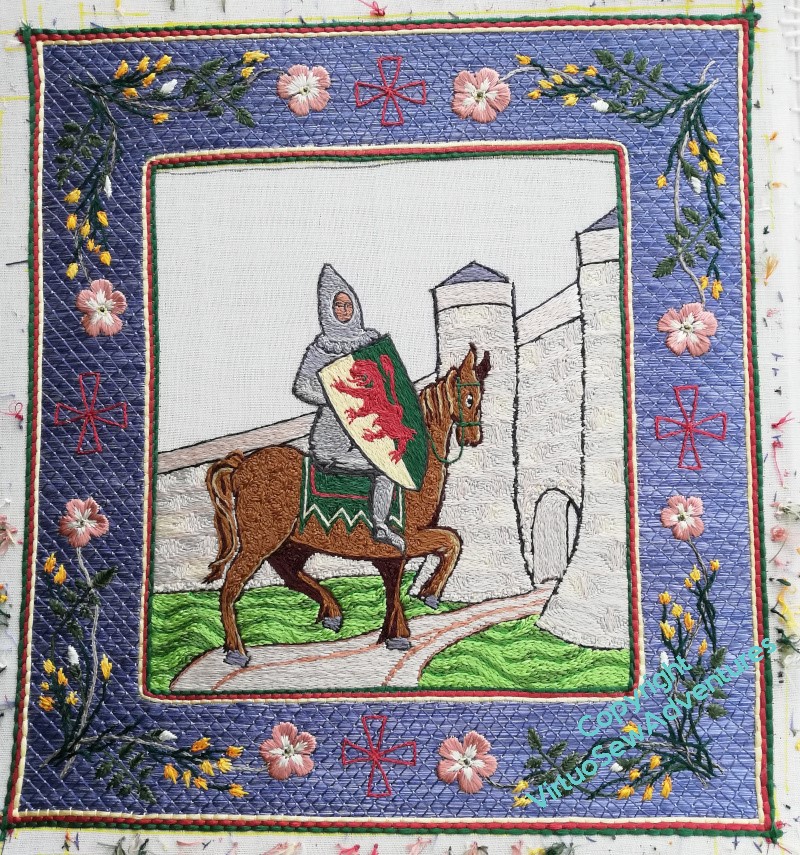
I thought people might enjoy some shots of William from different angles and in different lighting, both of which affect the gold and silk very strongly.
I don’t have much to say for myself, just – Enjoy (with a little editorial, as it were)!
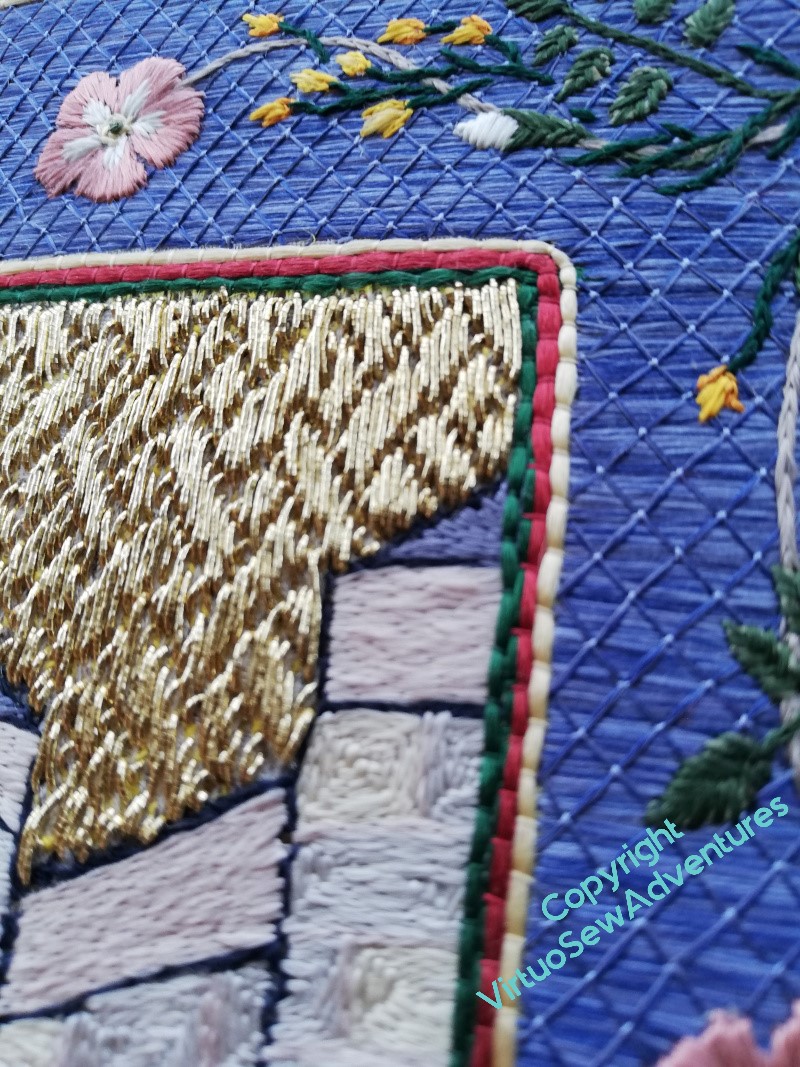
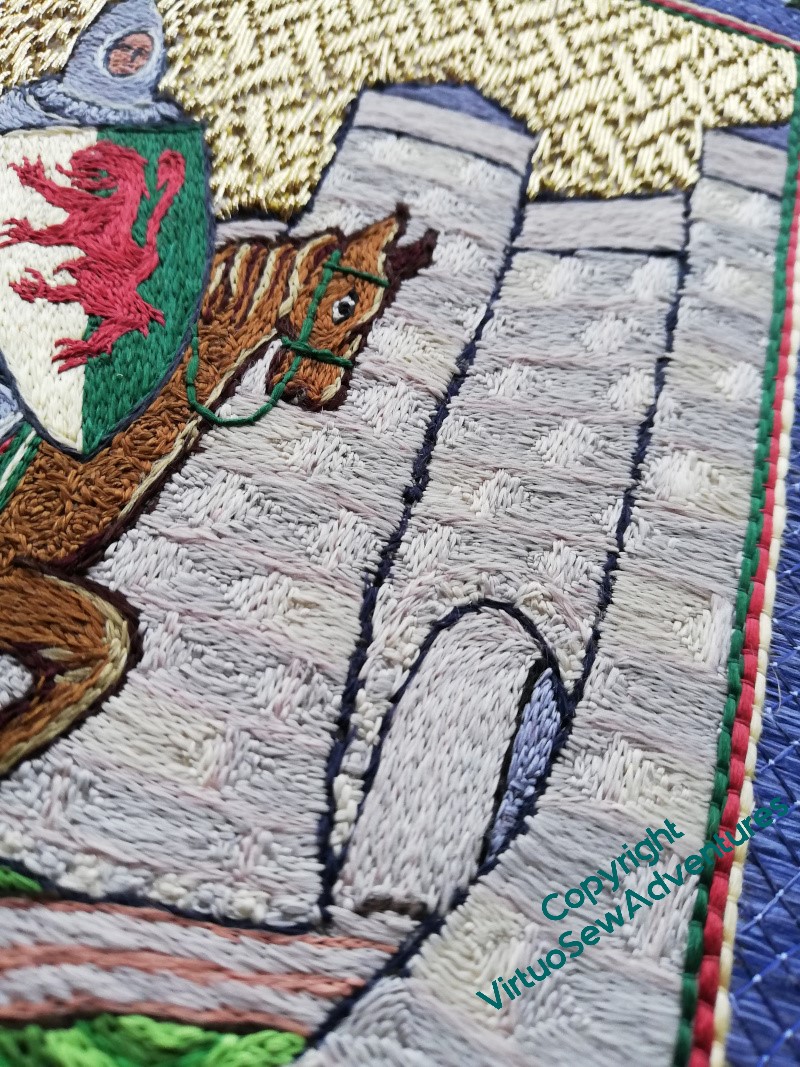
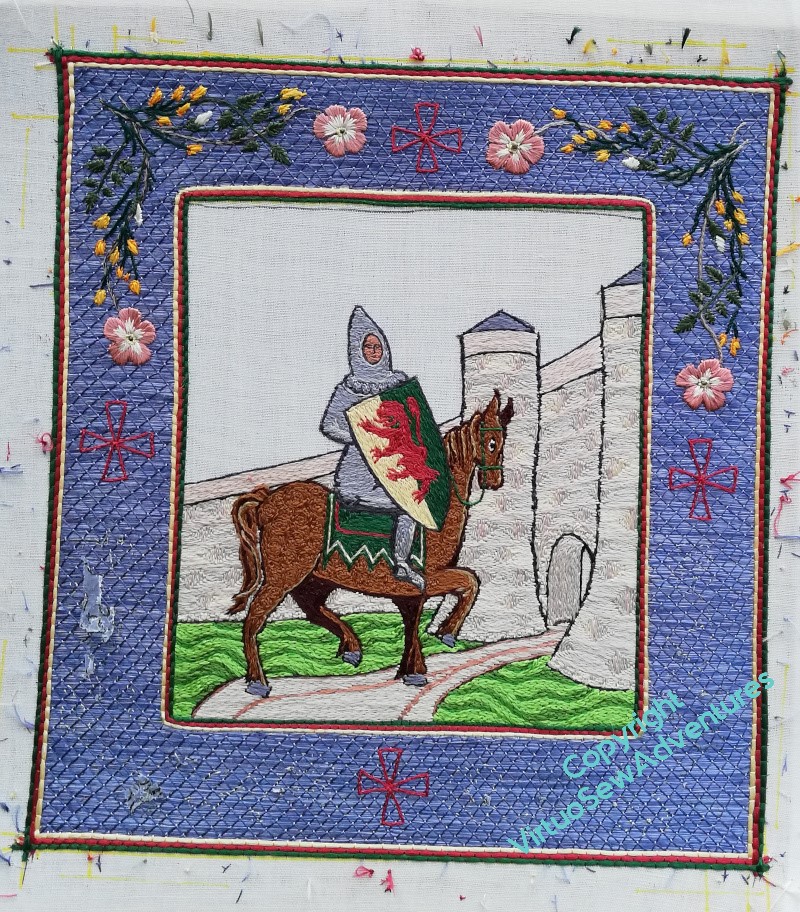
I had intended to fill in the end of the gatehouse tunnel with underside couching, but decided in the end it would make a lot less sense of the picture.
I was greatly relieved that the various oddities around the edges seem not to be drawling attention to themselves!
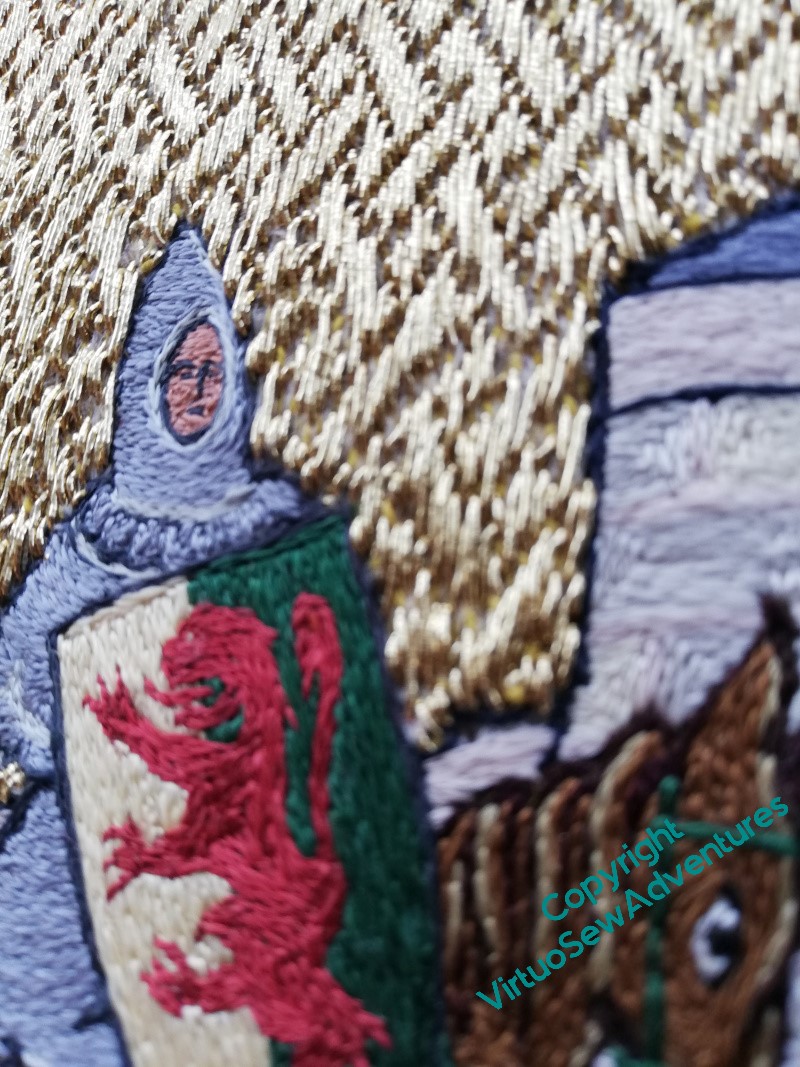
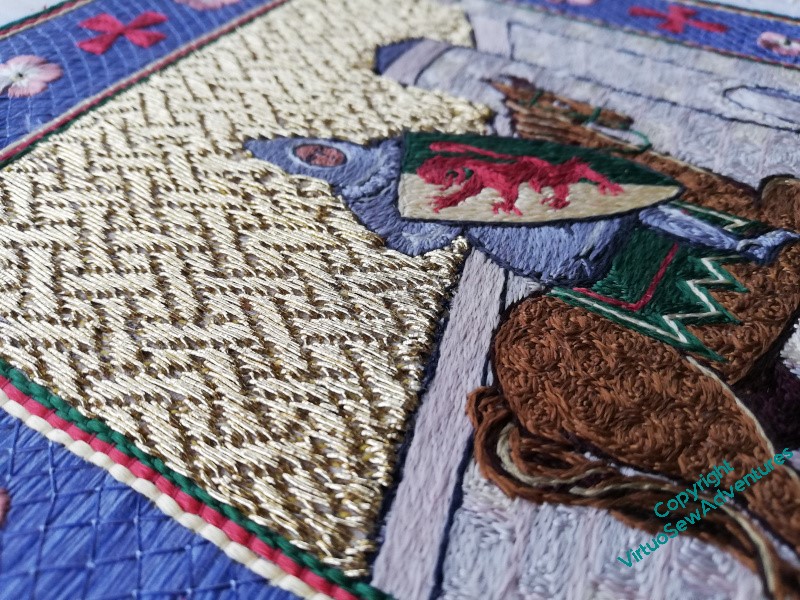
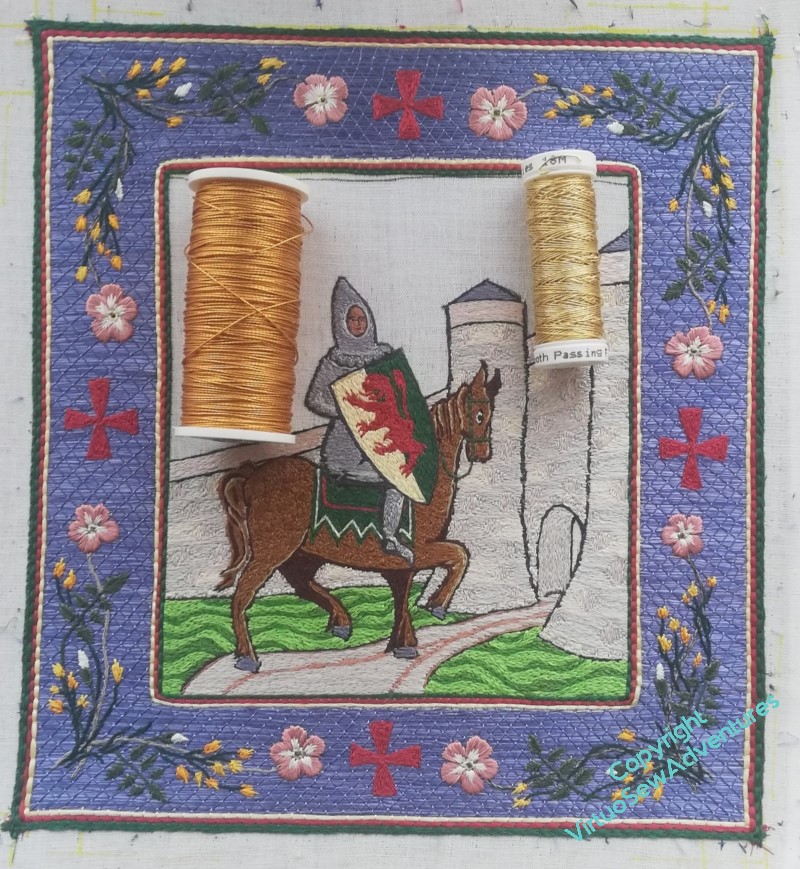
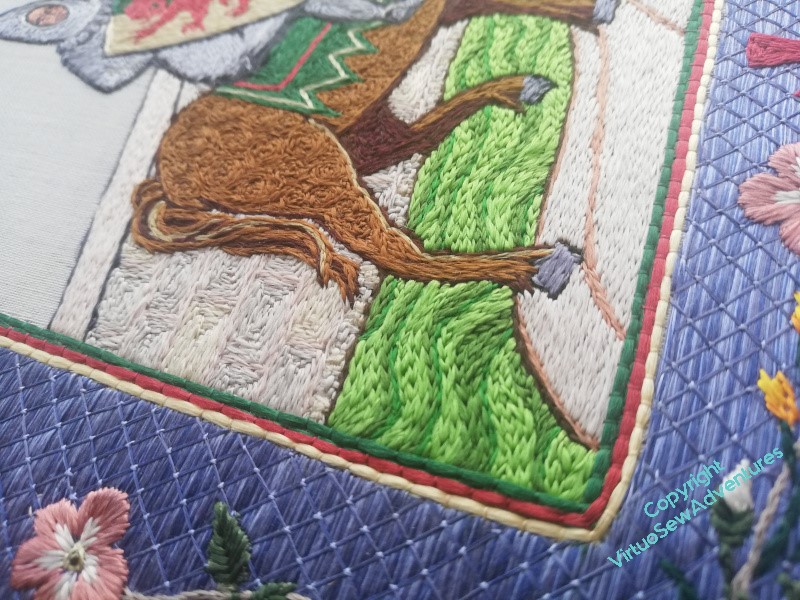
The lion rampant isn’t completely successful in terms of the details of stitch direction, I think, but I couldn’t see a better way to do it, and since when I put a picture on social media, someone was able to type their guess of the blazon (heraldic description) into a search engine and have “William Marshall, first Earl of Pembroke” pop up immediately, I think I’m just going to let well alone!
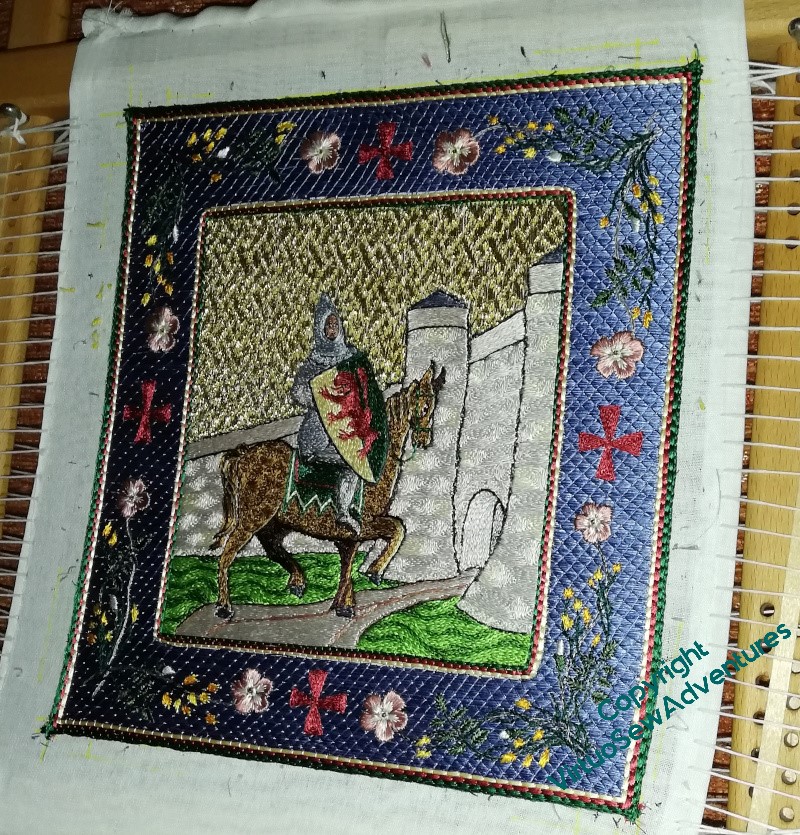
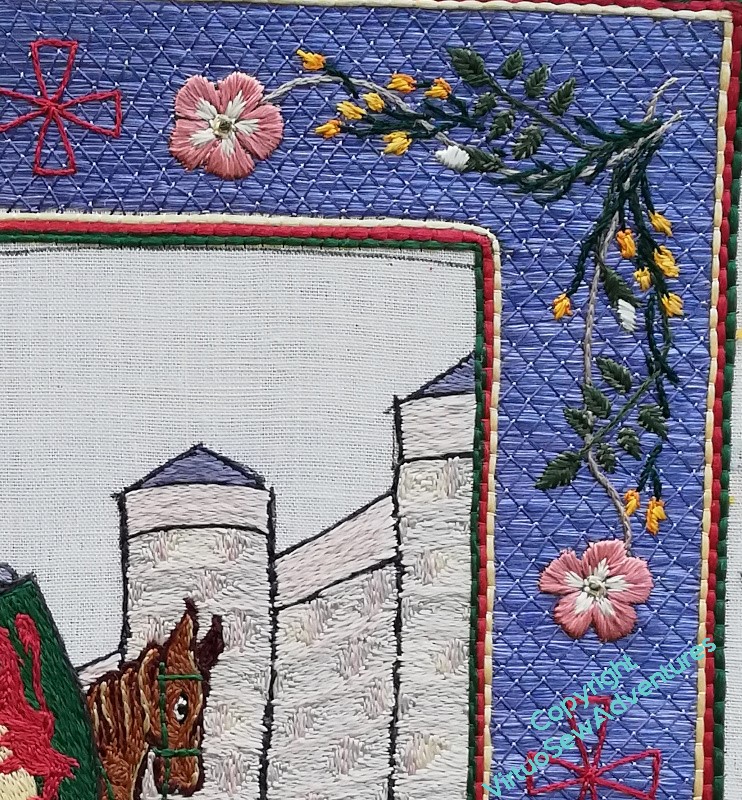
The points of light are couching stitches on the trellis couching. The flash doesn’t show up the stems in the border as well, but it does wonderful things for the stitch direction on the stonework and the dapples on the horse (Mars, we called him in the end, didn’t we?).
Finishing William The Marshall
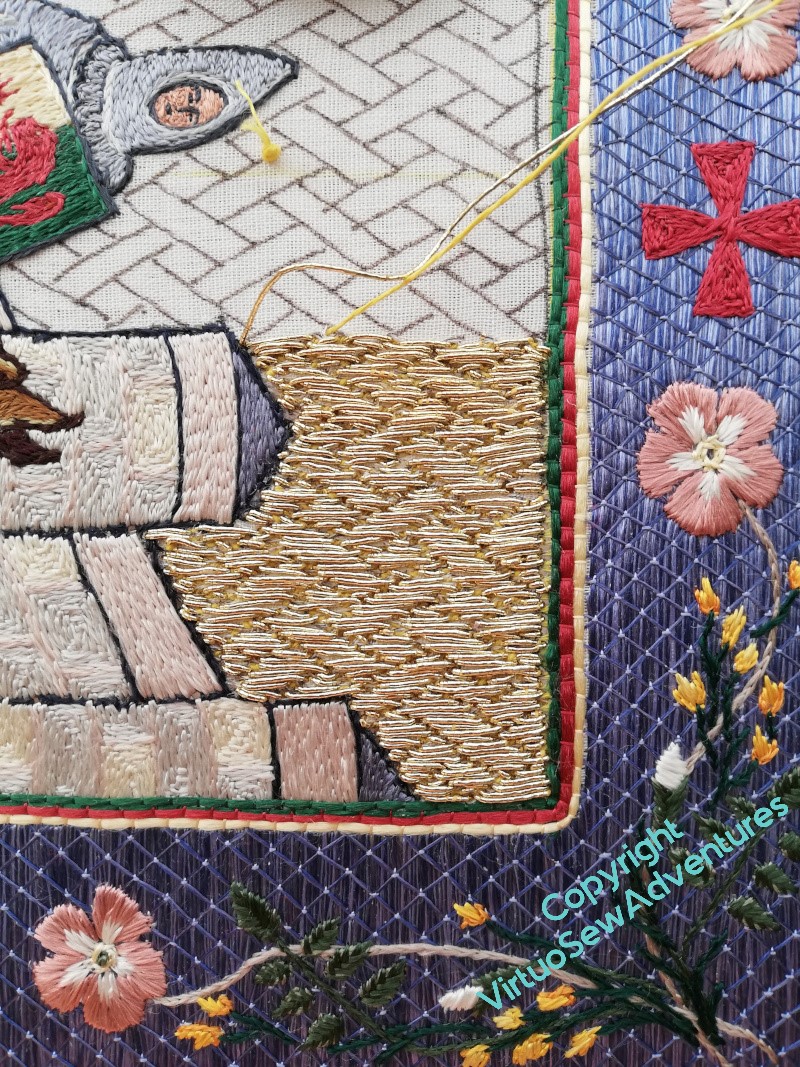
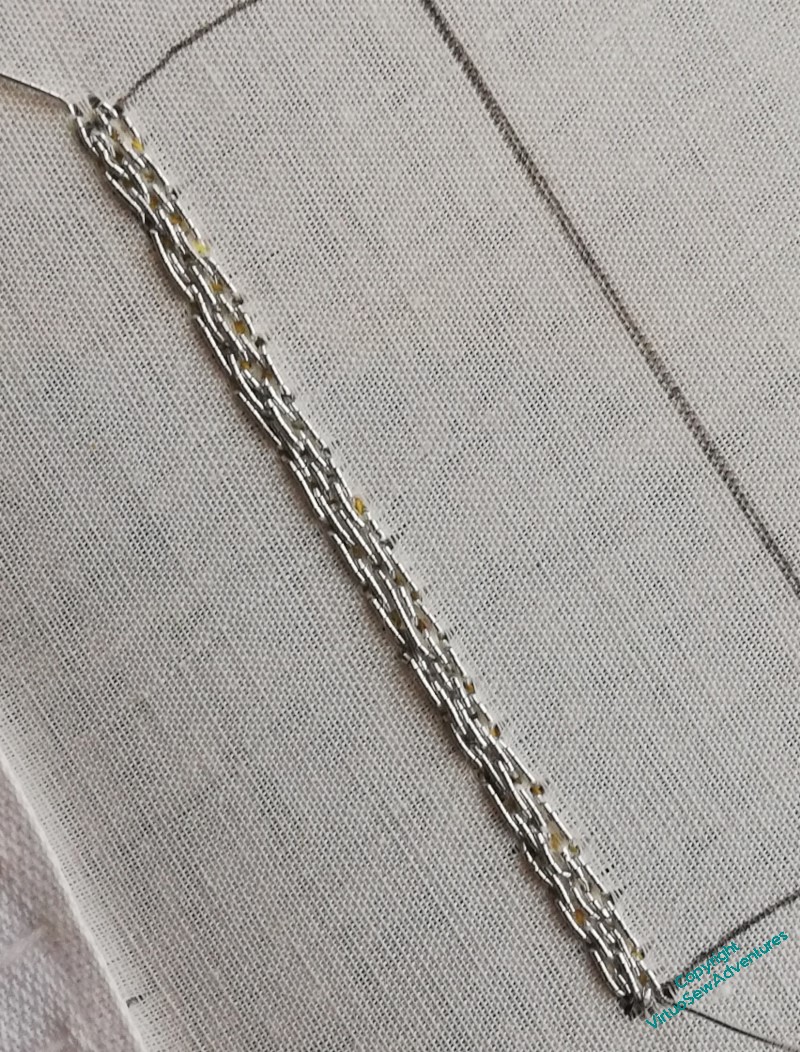
When we left William, I had just embarked on the underside couching, not without some trepidation, I have to say!
I stuck closely – one might say, religiously – to the advice about working underside couching that Tanya Bentham gives in her book about Opus Anglicanum. That is to say, no more than about half an hour at a time, no more than three sessions a day. In fact I think Tanya says 45 minutes, but I rapidly learnt that I lost focus and precision about the 33 minute mark, and two sessions were very much better for me than three.
If you click on any of these pictures to expand them, (they should open in a separate window) you will certainly see some of the infelicities in my workings here – scraggly bits of fabric showing, unevennesses in the pattern, all sorts of misadventures. There were even a couple of points where the fabric, doubled though it was, gave way at points, necessitating all manner of ingenuity. I suspect that my tension was adrift, as I have a definite tendency to pull too tight on my stitches, especially if I’m concentrating on the unfamiliar.
However, judge for yourselves whether I shouldn’t be pretty pleased with myself…
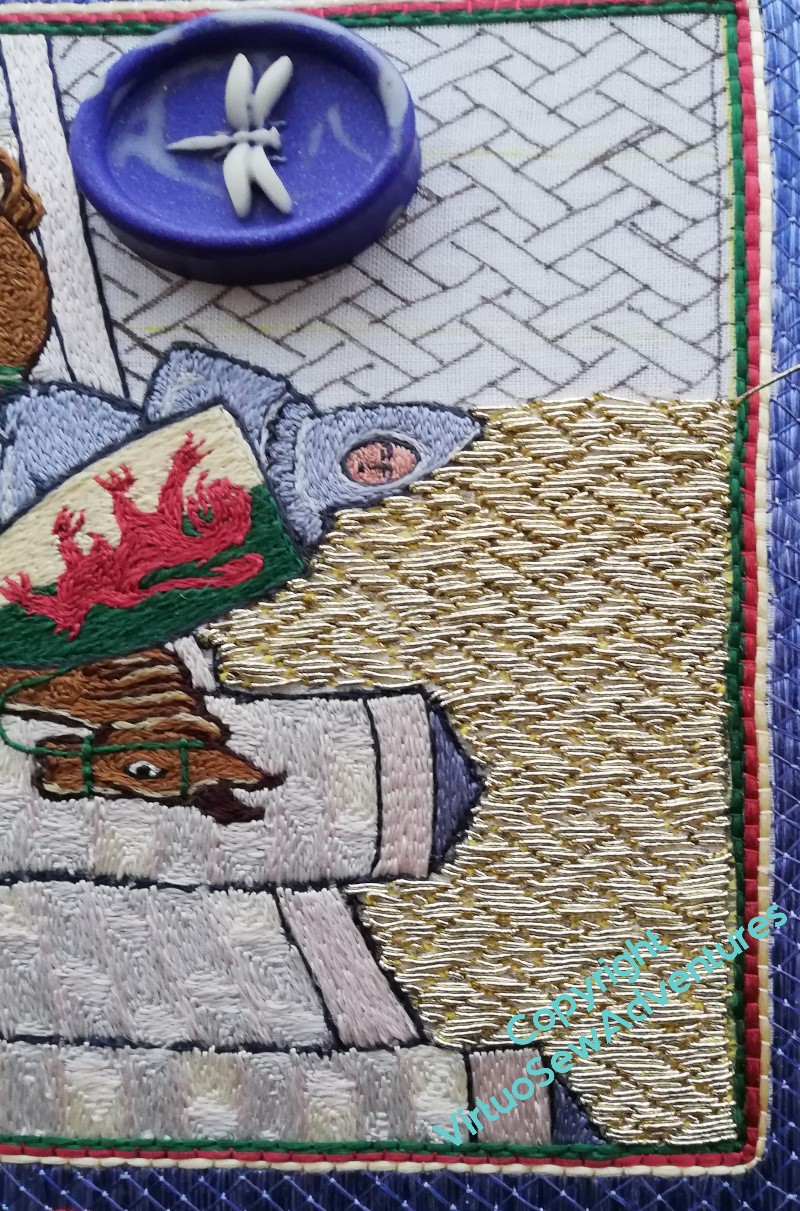
I do, of course, have to work out how I’m going to mount him, and on what, and it may be that in the end the lines of red, yellow, and green framing the border will need to be redone in some fashion. I like them as an idea, but as I move on to Aethelflaed, Rahere, and the Lady Julian, how much of a unity do I want to retain, and how on earth would I embody it?
Getting Back To William Marshall
You probably recall that before Christmas I had started to practice my basketweave underside couching and had even got as far as drawing in the guidelines.
And there, I got stuck. Partly because my stitching frame was in the way of the Christmas tree and had to be folded down, and partly because I rather lost my nerve – the interval, you understand!
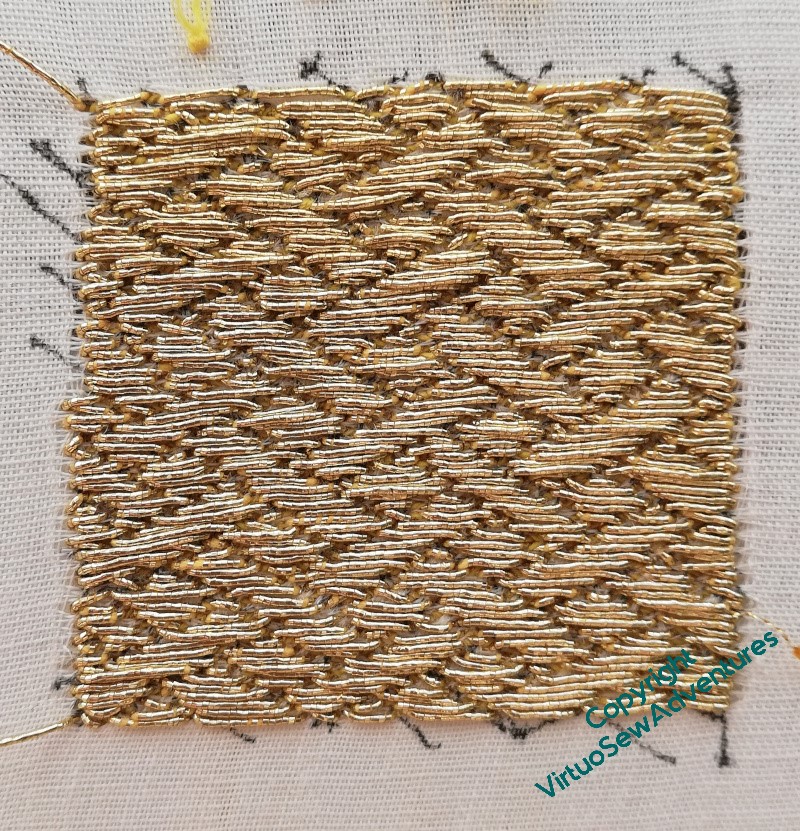
I decided to finish the test patch with the actual thread I’d decided to use, and then I would have No Excuse.
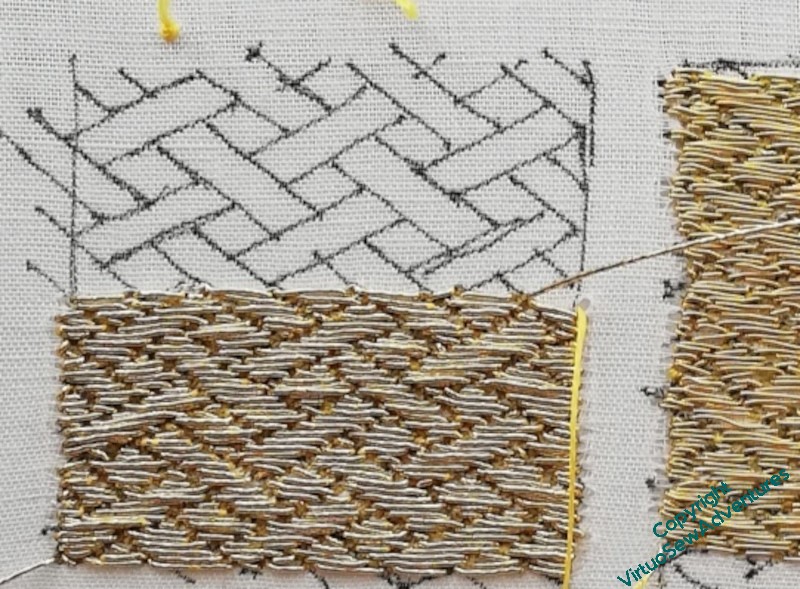
And in fact, this doesn’t look too bad, does it?
There are bits I’m less than chuffed with, but on balance, the pattern is fairly clear, clearer than on the previous piece, and I think I have to decide that any further improvement had better take place in situ, as it were.
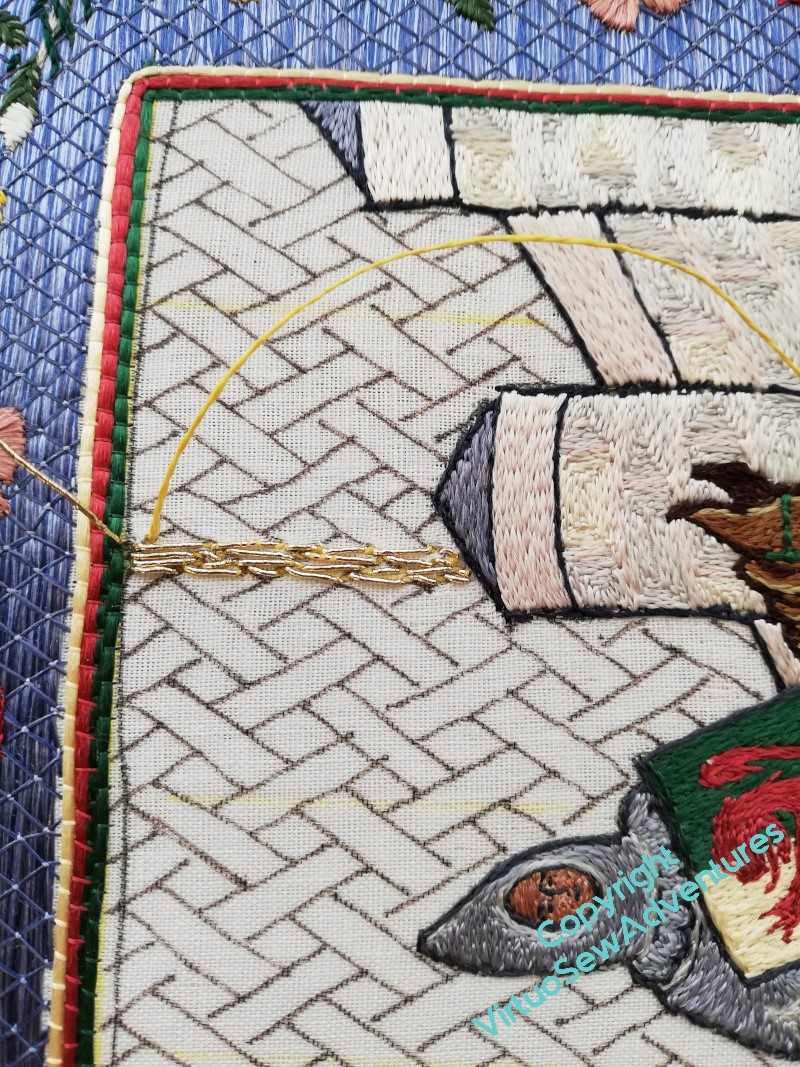
So here I go!
I decided to start on one of the straight lines I drew at intervals to help make sure I stay on track, and slightly off-centre, so that any particularly egregious infelicities in the changeover aren’t bang in the middle. You may recall that one of the discoveries from the practice piece is that I am more comfortable working horizontally and away from me. So I will work from this point to the far edge, and then turn the frame around, and work to the far edge in the other direction.
Wish me luck!
Still Practicing Beforehand
As my regulars know, all too well, I’m not much given to practicing beforehand. Therefore, the sight of me practicing should give everyone a slight sense of discomfort – the world is out of joint!
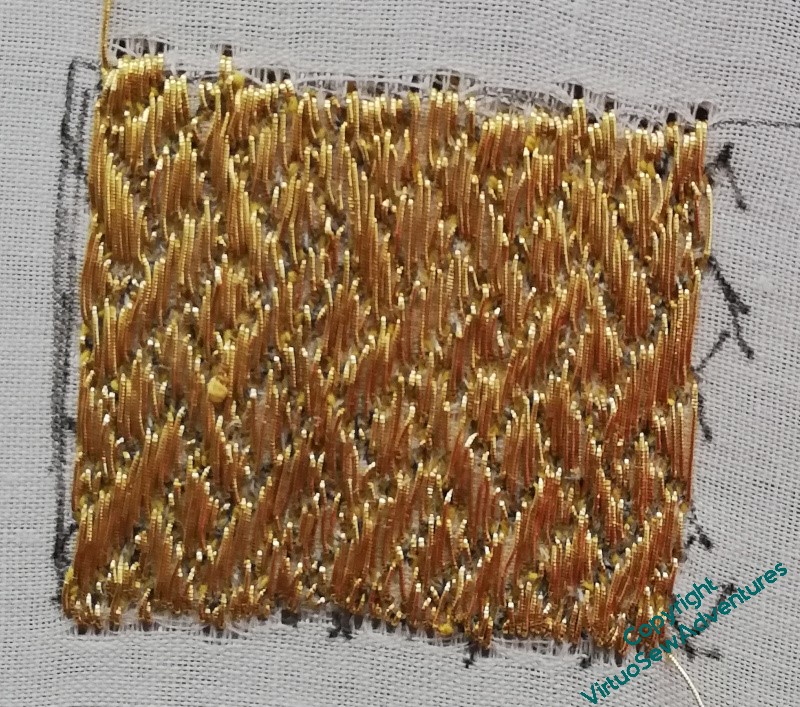
For this first practice, I used a gold metallic thread that is a bit finer than the recommended one, but it was at least the right structure and type. I did improve as I went through it, sufficiently to then move on to the real thread for the next practice panel.
This seems to be going better. The thread is slightly stiffer and thicker, and having taken the suggestion that Tanya made, I tried every combination of working away, working towards, working left to right, and working right to left, until I found the version that worked for me.
Horizontally, and away from me, since you ask!
Anyway, I intend to finish the second practice panel before I start on the real thing, but in the meantime I have now sufficient belief in myself on this one to have put in the guidelines on William for the real thing.
Even that wasn’t entirely straightforward, as my lightbox substitute is a little too big to fit comfortably under the frame, and has a slightly fragile usb connector, but it is now done.
Another decision to make!
Underside couching, I’ve decided, is rather like satin stitch. In concept it is simple, not to say obvious. The execution, accurately and aesthetically, is very much less so!
I had intended to use the gold thread left over from the Amarna Family Group as my thread for William’s background, in the interests of economy, if nothing else, but then I had advice from Tanya Bentham and others, to at least try the Smooth Passing, which might for a multitude of reasons behave rather better.
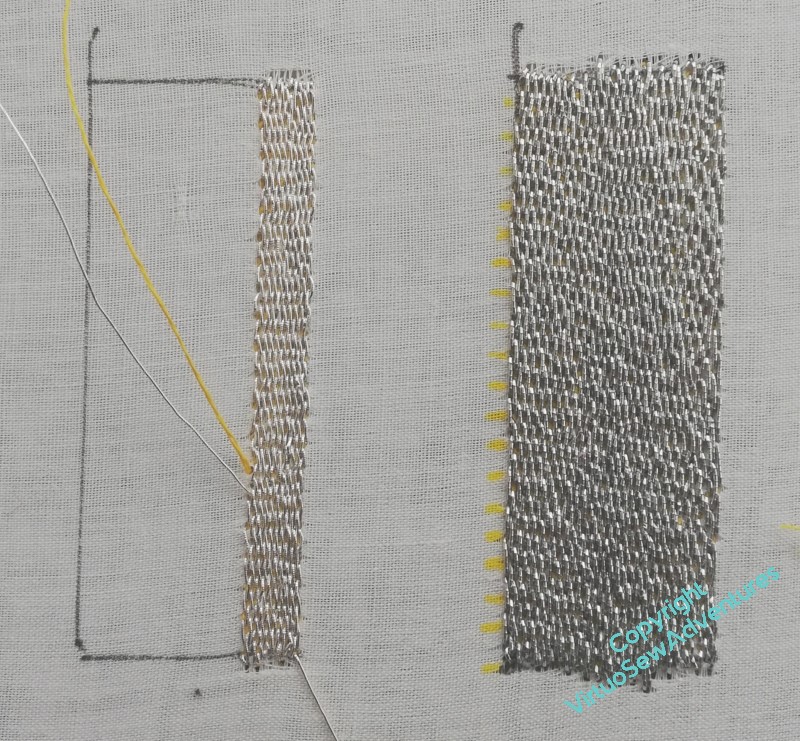
So here you see the second practice block started, again using silver, but this time smooth passing thread.
The passing thread is, as suggested, much pleasanter to use, and creates a smoother and less shadowed surface, which in turn, I think, should help the pattern I intend to use. Which, you may note, I’ve not yet got around to practicing!
However, that brings me to my decision. I do not think that I can be certain that the spool of Gold Smooth Passing I have left over from a Thistle Threads project will finish the job, so I shall have to buy some smooth passing. And it turns out that Gold comes in more than one shade!
The decisions are never at an end, are they…
And since I’m working on pulling the Amarna pieces together properly at present, I can’t claim to be giving my whole mind to the decision-making!
Practice Beforehand

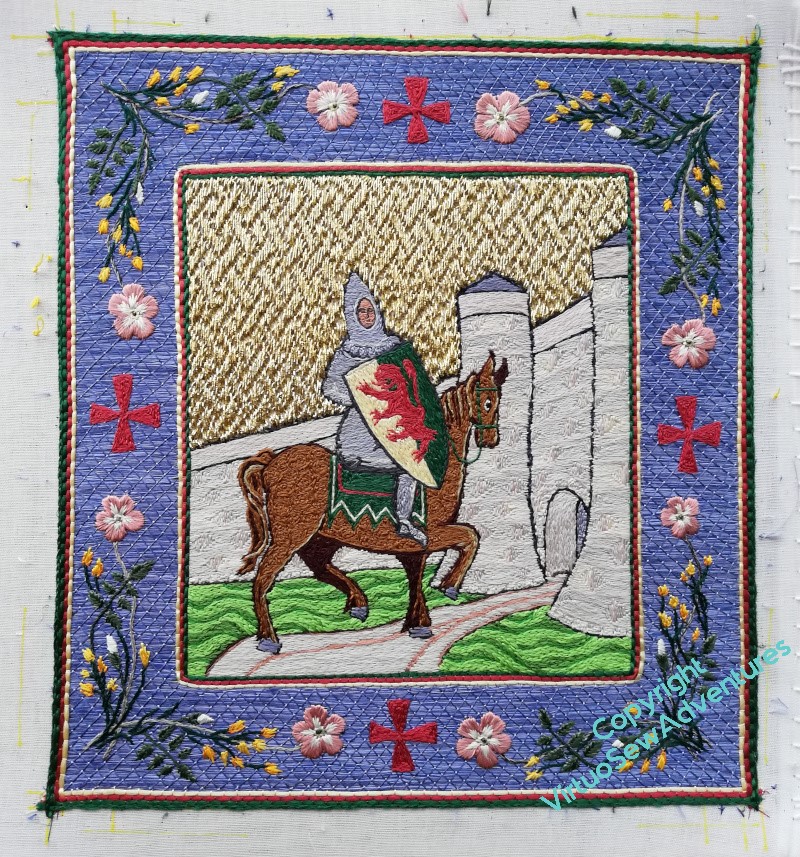
The crosses in place, and the whole border looking very much like a Book of Hours, or at least, a rather tame Book of Hours, I sat back and drew breath.
Having got William and his border done, and being really very pleased with how he’s turned out, I now need to tackle the sky. And from the first, I have intended the sky to be in basketweave pattern underside couching, which is an entirely new technique to me.
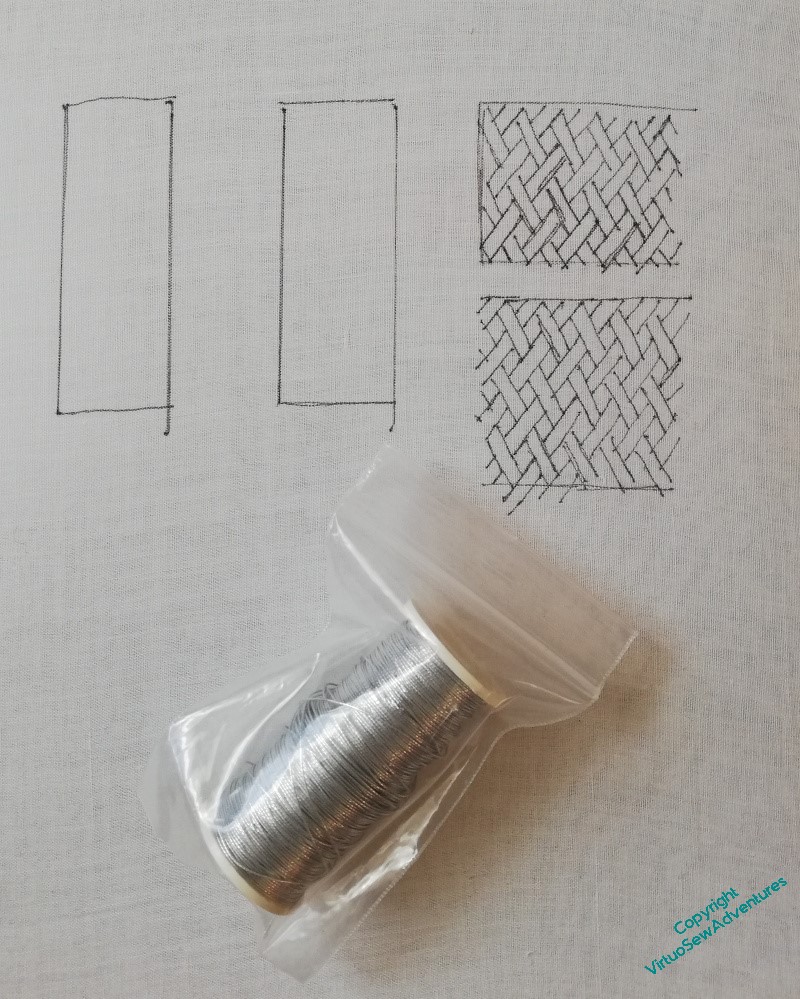
Regular readers may have spotted that I only rarely practice beforehand, regardless of the technique, preferring to throw myself headlong into the novelty, mind concentrated by terror. The exception tends to be in goldwork, when an exception occurs, and indeed, I had some of the fabric stretched in a frame, ready to practice, well before I had got William to that stage of finishing. Mindful of the advice from Tanya Bentham’s Opus Anglicanum book, however, I decided not to try practicing while I was still working the silk. In winter it is hard enough to keep the hands from catching on silk without making it worse by using metal threads!
I’m using silver for my practice pieces. One could practice with silk, or pearl cotton, but they would both spread and cover any failure to keep the lines close. I think this silver is the same size as the gold I intend to use, so it will make a better practice material.
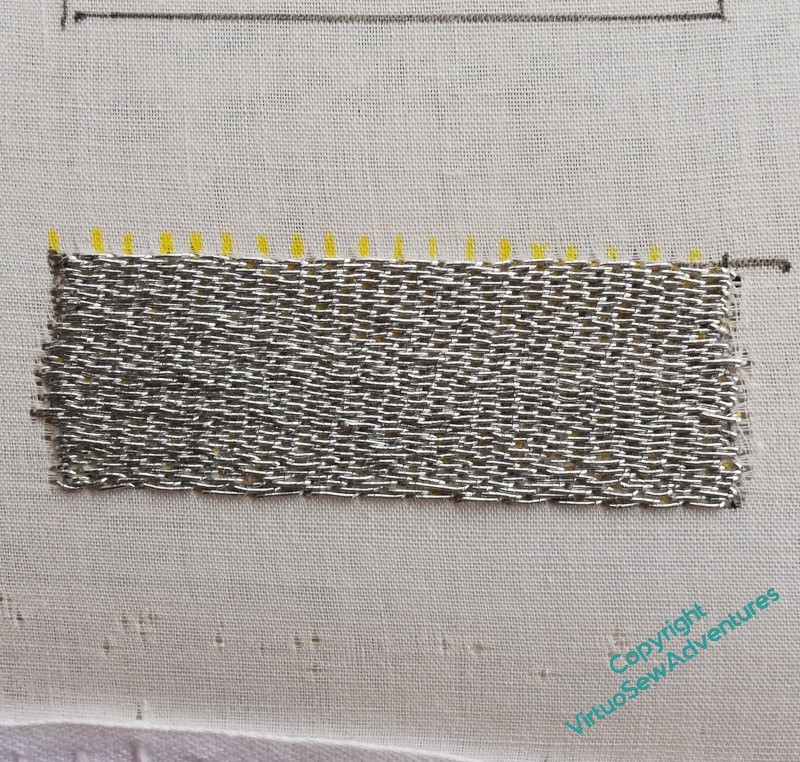
It’s easy enough to understand the principle underlying underside couching, but there are all sorts of hazards, As always, I suspect that once the management of the thread becomes second nature, all the difficulties will fall away, but packing the thread closely without cramming, making sure the stitches lie happily on the surface, and stopping the couching thread (a sturdy linen, beeswaxed before use) from showing, are all proving challenging at present.
I am determined to practice this properly, so I’m going to do this inch-wide strip before even considering practicing the basketweave pattern.
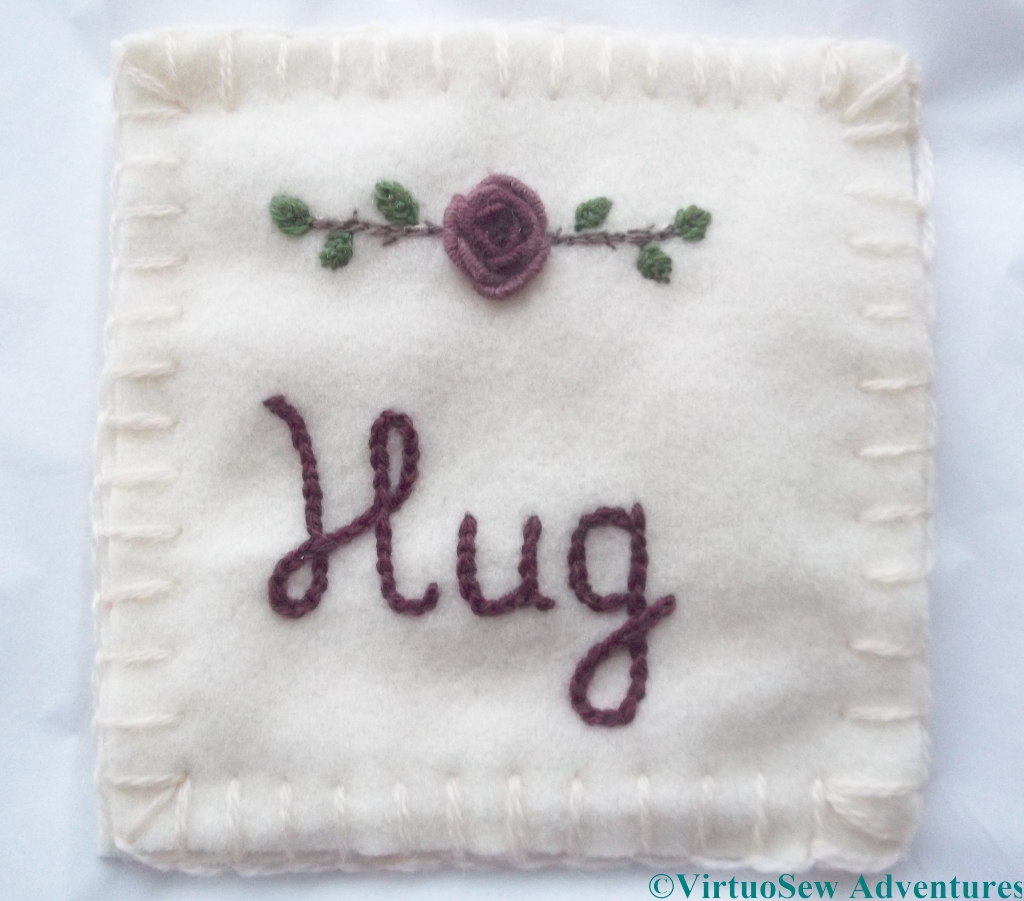
I have been looking further at Ko-fi, and how it might be used as a shop front, at least for digital items, and as an experiment, I’ve uploaded the Hug For A Handbag instructions to my Ko-fi Shop as a free/pay what you feel download. If anyone would like to go through the process and tell me what it’s like, and give me the opportunity to see what happens from this side, I’d be very grateful!
William, as far as he’s gone
I realised when I came to write about beginning to practice underside couching, that you’ve not seen William for a while, so here is a a quick update on progress.
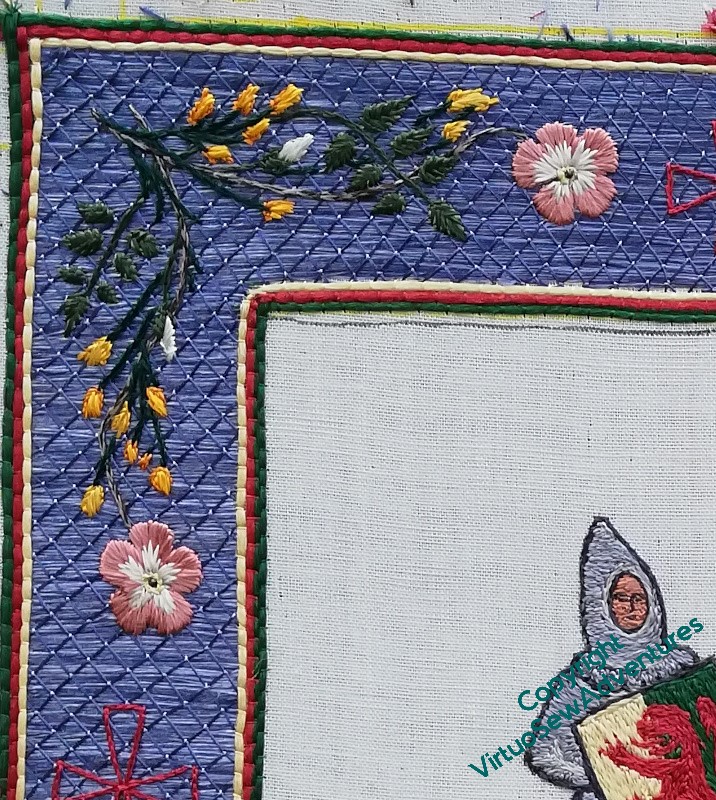
I got all the broom and dog roses done on the border, and then sat back to look at it. You may recall that I said last time that I thought that I would be filling the crosses, but I wanted to sit back and stare again, just to be sure.
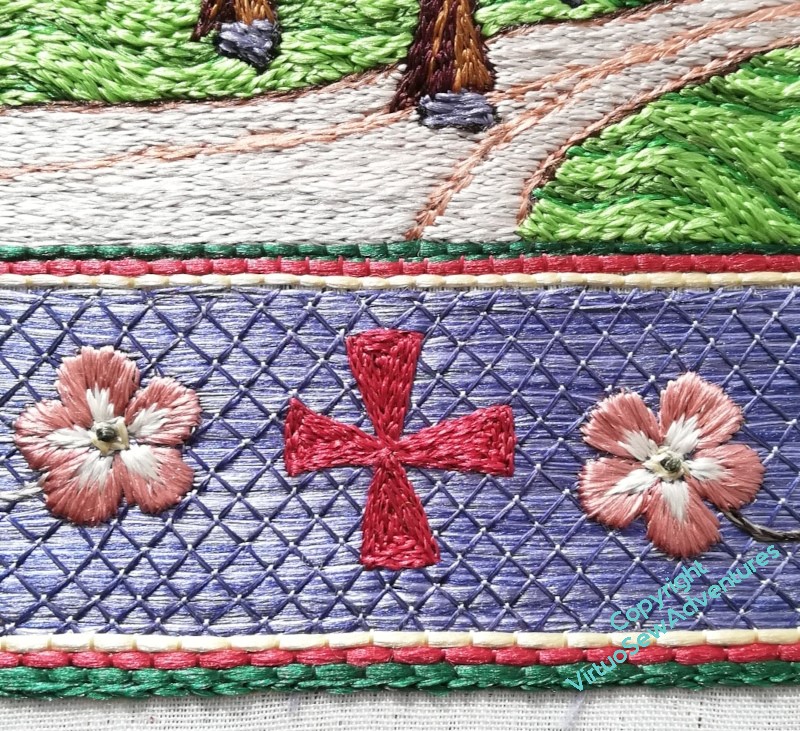
That staring didn’t take long. The crosses, as outlines, don’t really have the authority they need, so it soon became clear I needed to fill them all in. I doubled the outline, as a single line, and then filled in each triangle separately in split stitch. I did consider using satin stitch, or some sort of couching stitch, but I felt that with the dog roses bracketing the crosses, a different texture was required, and I am content with the result, I think.
One of the delights of working with floss silk is to see how it responds to the light, so here are some more pictures to enjoy.
Another Decision To Make
I can’t imagine how people can have a design planned down to the smallest detail before they begin. Even when I’m more organised than usual – William is a prime example – there are always details that either escape me, or that I hadn’t even considered at the start.
I should say, this isn’t a complaint. I don’t think I would find it remotely interesting to have planned everything out and have nothing to discover. These days, when I follow someone else’s design, it is to learn what they can teach me, so even though the design is planned, there is nothing sterile about the experience.
However, the fact remains that I am, yet again, wondering what to choose.
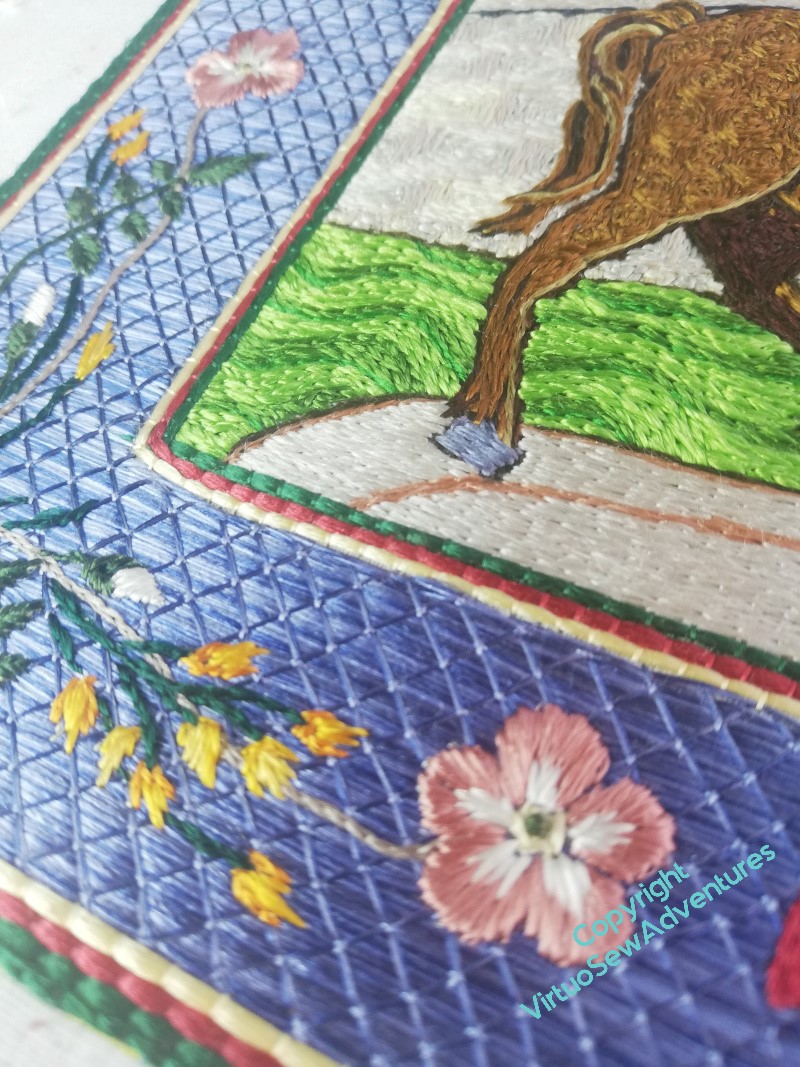
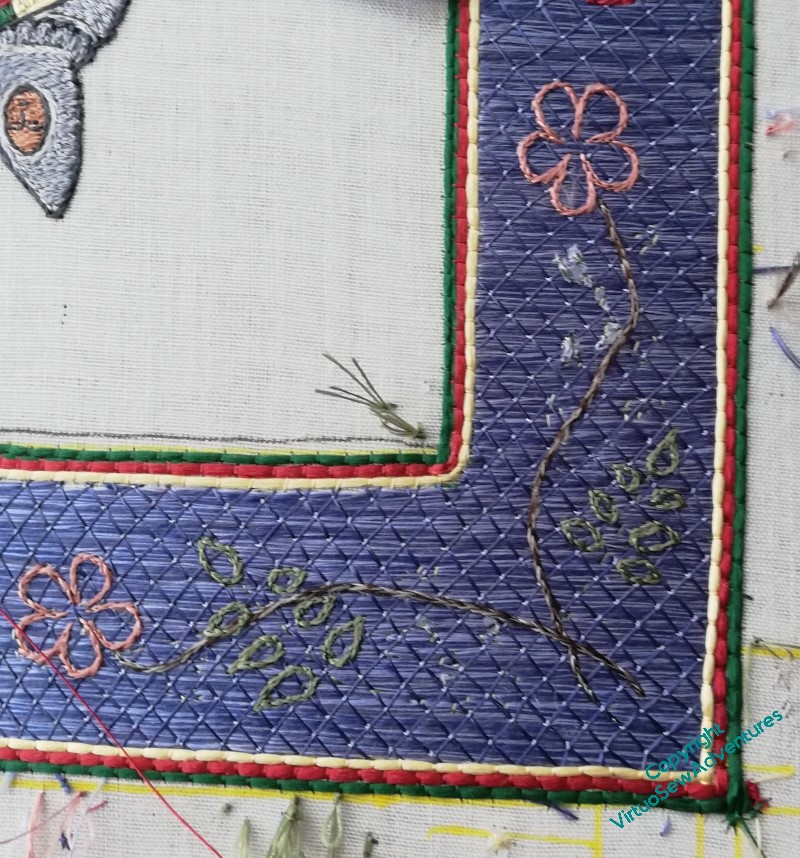
When I twisted together the fawn and the brown silk to stitch the stem of the dog rose, it was partly because I wasn’t happy with the colour and wanted to modify it slightly. When it was done, however, I felt that maybe I hadn’t, in fact, modified it enough. It seemed too close in tone to the background, so I worked the stem in the top right in just the light fawn.
And all the time I was working it, I felt twitchy. It seemed too bright, too bald, too obvious.
Now I have the top two corners done, and I have a decision to make – two colour stem, or single colour stem?
It doesn’t seem quite as glaring from a respectable distance. Note to self: for goodness sake, never decide anything from ten inches away, that’s not how anyone else is likely to see it, and if they do, you’ve already won them over anyway!
There is, of course, a middle ground. I could do the two colour stem on one diagonal and the fawn the another, echoing the angle of the castle walls and the trajectory of William’s career.
However, one decision has already been made – remember I wasn’t sure whether to fill in the crosses or not? I am now, and they will be filled.
Beginning The Border
Once I took the tissue paper away, I discovered that in fact my running stitch transfer wasn’t very clear. So I’m going to start by split stitch outlining each element before I fill it in.
You can see in this photo that I still hadn’t quite got all the tissue paper that had the design on it out from under the stitches, and I’m only part of the way through outlining this corner.
I did think I might try to outline everything first, and then I thought about what happens when I have something like that to do, and decided that each corner would be worked to a finish separately!

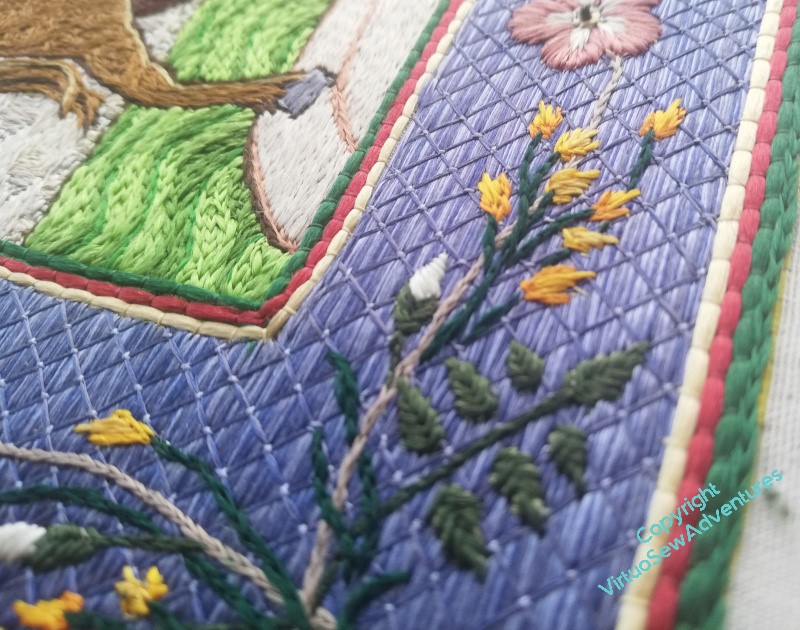
It is probably at this point that I start to wander from the path of classical Opus Anglicanum. I’m using fishbone stitch for the rose leaves and satin stitch for the broom. But after all, this is a modern work, by a modern embroiderer, not a reconstruction of an existing, or imagined, medieval work.
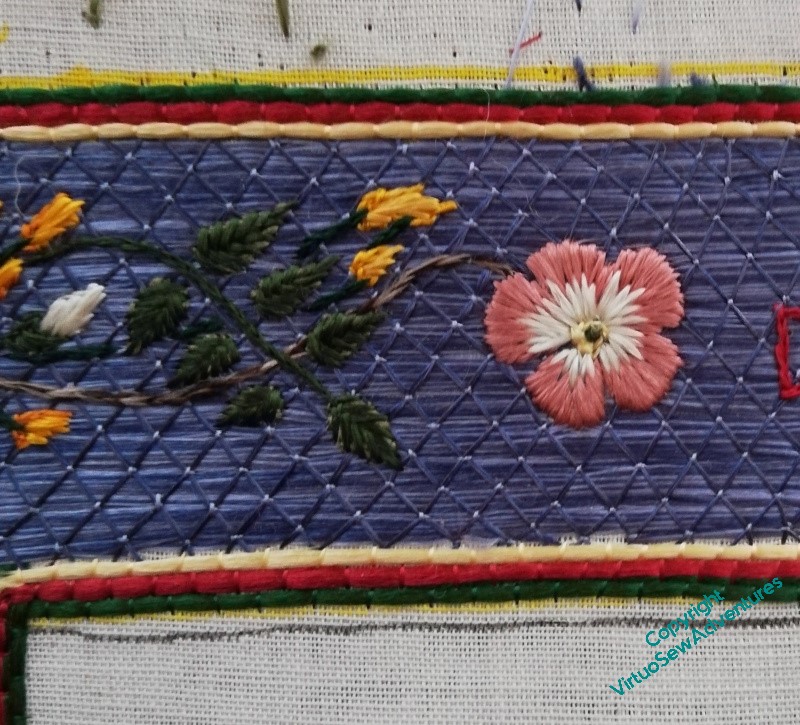
The wanderings continue with the dog roses – long and short stitch in the petals, over two rows of split stitch outline to help define the edges, and a tiny French knot for the dark centre.
I’m using two differnt dark greens for the rose leaves and the broom, to help the design make sense, and I worked the rose stem in split stitch using two shades of brown. I am not entirely sure about that, so I think the next corner around I will use one, maybe the darker one, and see whether that is an improvement. If it is, bringing this one into line might be a bit hair raising, considering how small all of this is!
Border Transfer
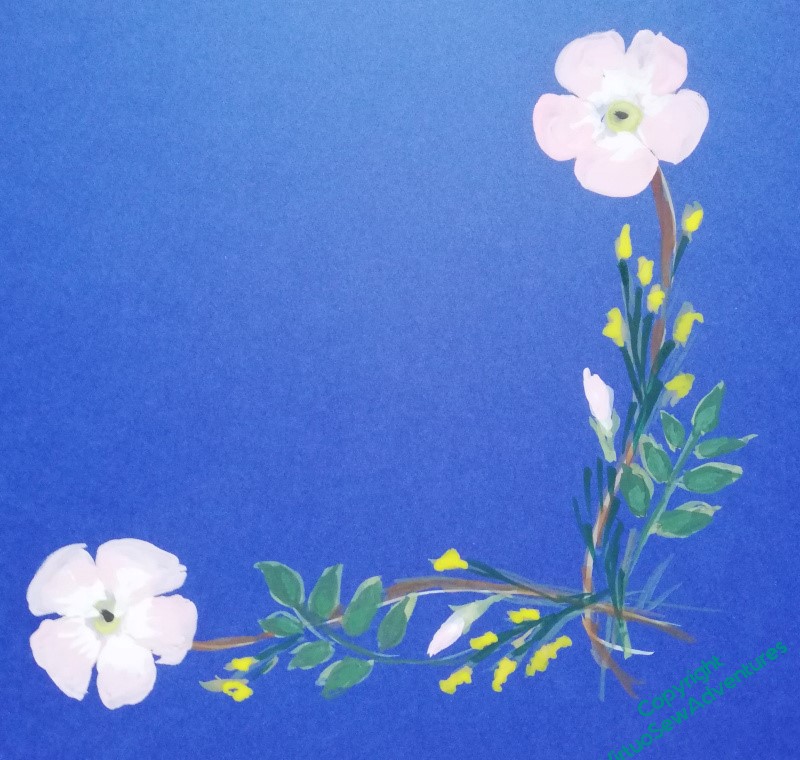
It may not be very obvious in the line drawing, but although the two sides of the corner sprig are very similar, they aren’t quite identical. I wanted to keep a sense of movement and flow, without the chaos of having every little bit different, so in the end I chose to create my corner sprigs based on two slightly different straight sprigs. In this photo you can see that the rose leaves are pointing in different directions, and the broom flowers are arranged differently.
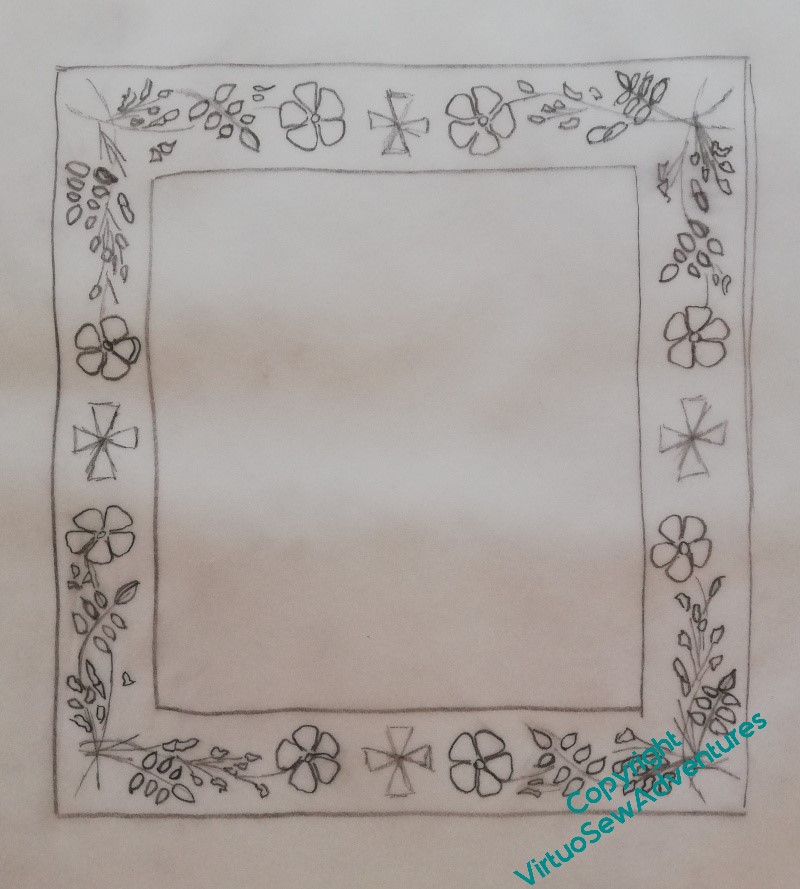
When I did the line drawing, I took my guiding sprig and turned it through ninety degrees for each corner. By doing that, there’s a sense of continuity, whereas I think if I had reflected the design in a mirror line through either the vertical or horizontal crosses, it would have created a rather stop-start effect. I was much impressed, years ago, by a programme about the carver and sculptor Grinling Gibbons, which said that he always aimed for balance rather than symmetry. I like that, it feels more human somehow, so that’s what I try to do too.
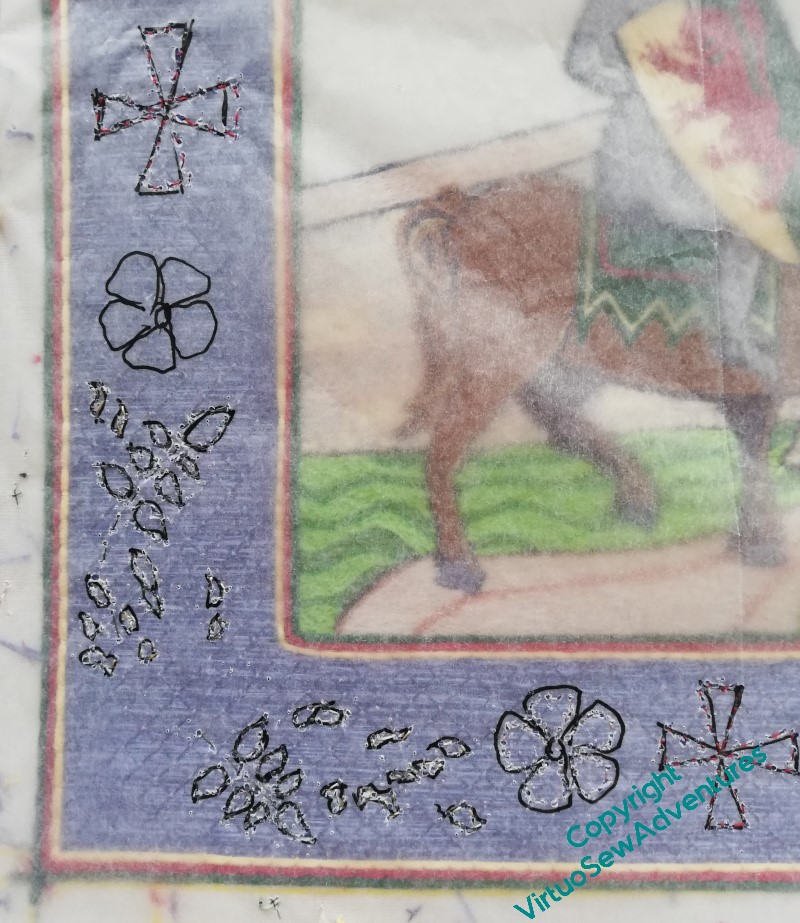
Now, however, I have to transfer the design to the border. Clearly that’s not going to be possible using prick and pounce or a drawing method, so I have chosen to create a drawing on tissue paper of the main elements, and running stitch along the design lines. I am hoping that this will be sufficient!
In any case, it allows time for the extra thread I had to order from Devere Yarns to arrive..
Finally, two Announcements:
- The eagle eyed among you may have noticed that the Ko-fi link went away and is now back (plug-ins not playing nicely!). I’m still hoping to put together an exhibition and a book about Dreams of Amarna, and any support, whether financial, moral, or material (suggesting venues, publishers, copy-editors) would be gratefully received!
- You may also noticed the lack of a link to Twitter. I’m mostly on Mastodon now, as @virtuosew@mathstodon.xyz, for reasons that anyone else who’s been on Twitter lately will probably understand very well!