
Tag: stumpwork
More thoughts on display
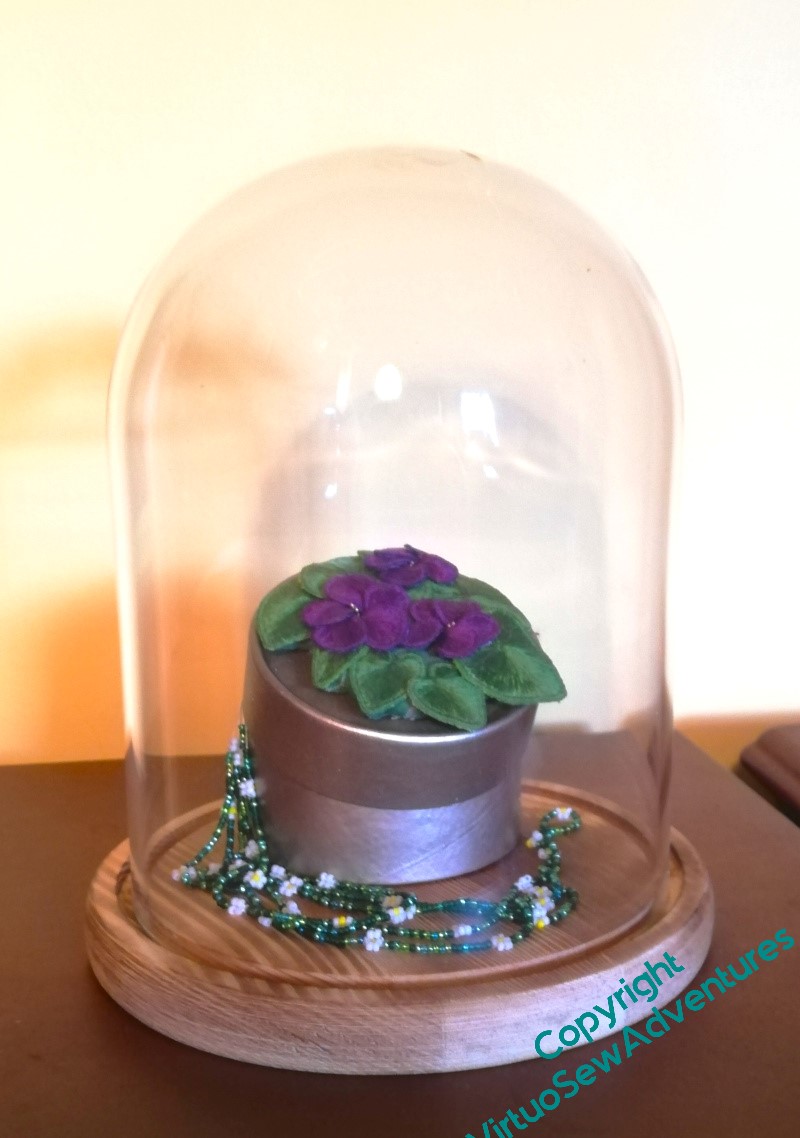
Two elements that sprang into mind very early in my work on the Amarna panels were the Clump of Violets and the bead necklace. The violets are to call to mind Mary’s exasperating experience, familiar to any language learner, of having useful vocabulary and structure retained only with the greatest of efforts, while the entirely useless just sticks – in her case, the Arabic for “violets” stuck in her head with no difficulty, whereas the words for “bread”, “bath”, or “dig” proved recalcitrant. The bead necklace is my reinterpretation of one of hers, owned in childhood and subsequently lost, like the necklaces she helped to excavate.
These two pieces link directly to Mary, and not to Egypt itself, and because of that, and because of their colour, they don’t sit well with the main panels, and I was left somewhat perplexed about them. Until something brought parlour domes to my mind, and the lights went on!
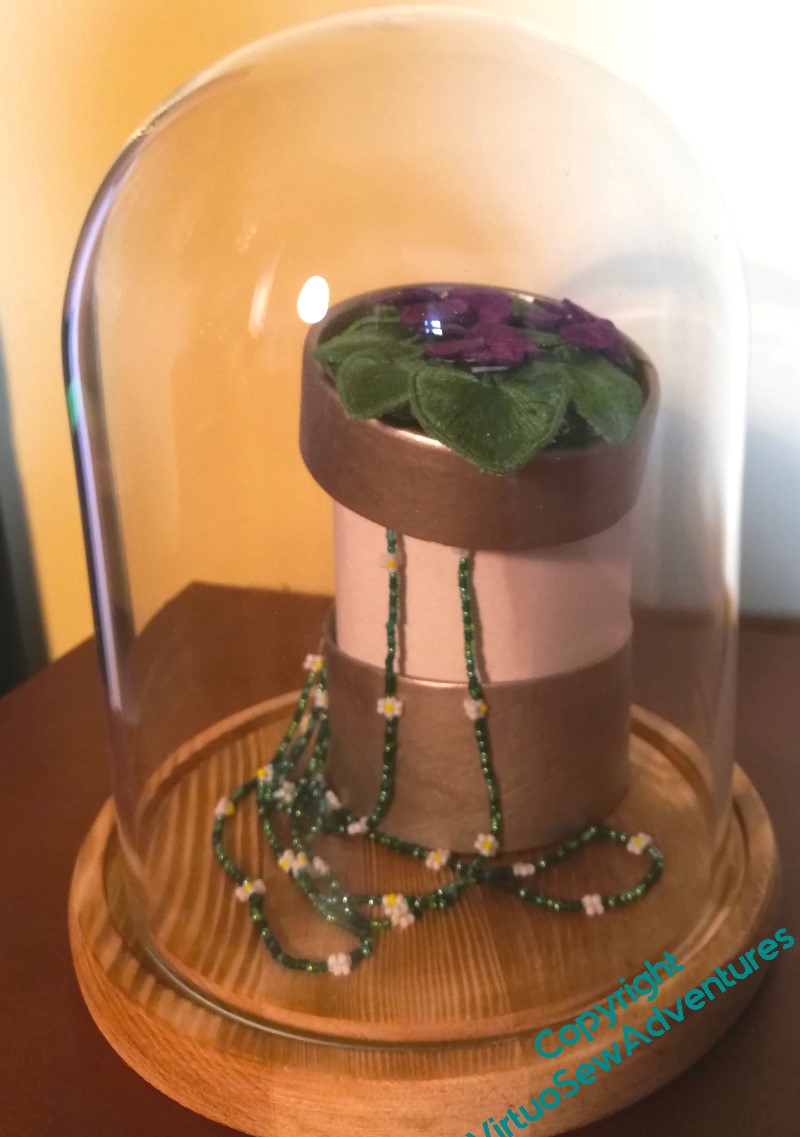
I thought that maybe if I used the clump of violets to top a golden trinket box, and allowed the necklace to spill out, the two pieces might live together happily as my representation of Mary herself. I found a small round cardboard trinket box and sprayed it gold (a very pale, insipid gold, it turned out, too, not at all what I wanted!), and began to experiment.
I think the whole thing needs to sit on a cushion within the dome, and the trinket box should be between the tall experiment and the short one in height, and a little narrower to allow the leaves to droop over the edge.
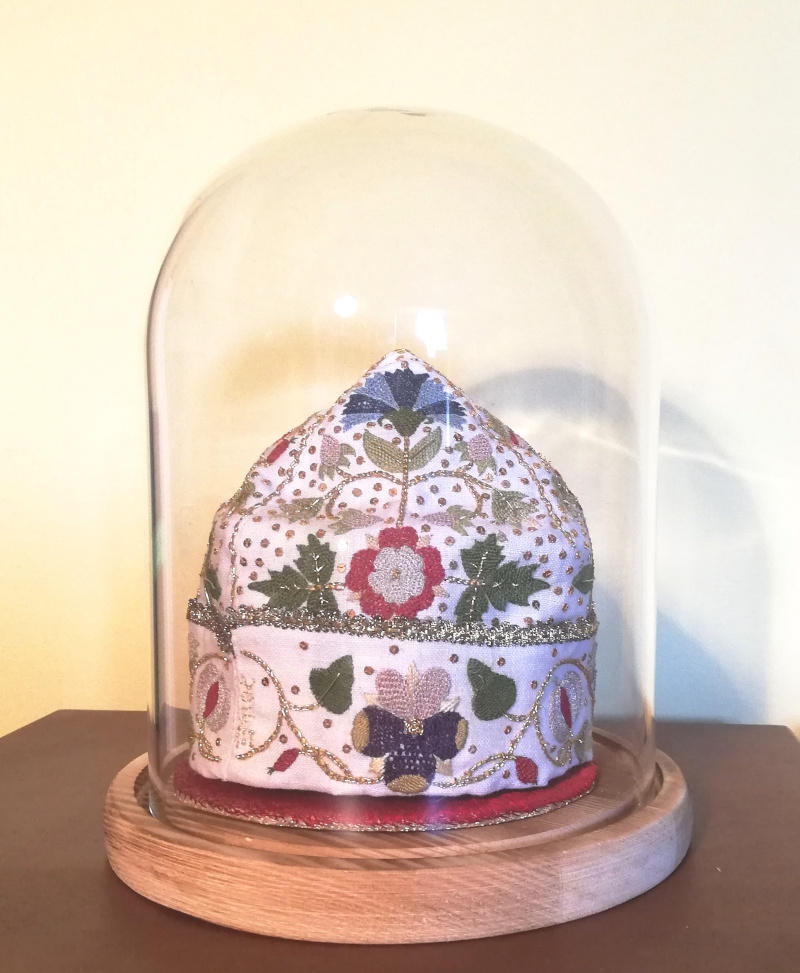
So while I work on achieving that, I have put away both violets and beads, and replaced them in the dome with the Glittering Nightcap.
Which is so happy that it is refusing to give it back, and I will have to buy another parlour dome for Mary’s trinket box!
Finishing Tynemouth Priory

I’m a little behind with posting this, but there were a few details to finish off-video…
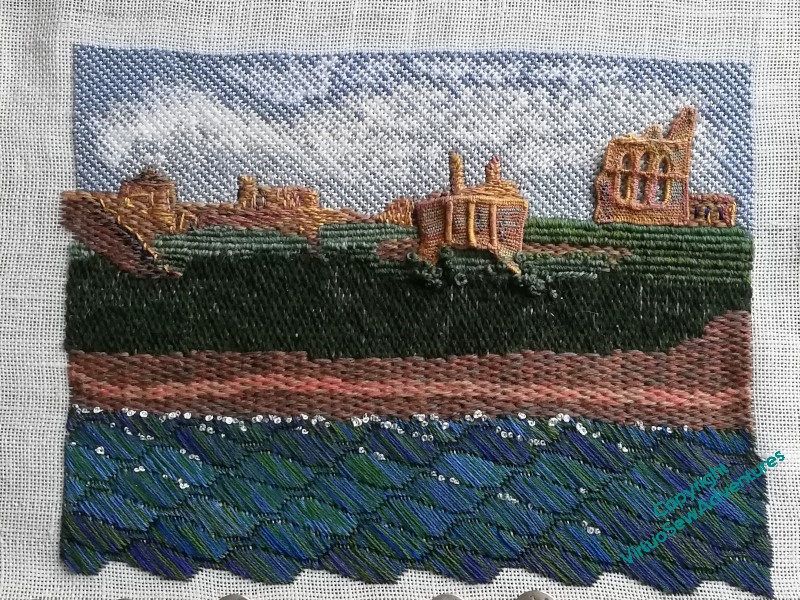
I didn’t want to overdo the water, but I wanted to break up the pattern a little, to create the sense of foam on the surface. I’ve used French Knots, in white silk and very very pale blue single strands of cotton. There were more, but having put them in, I took them straight out again!
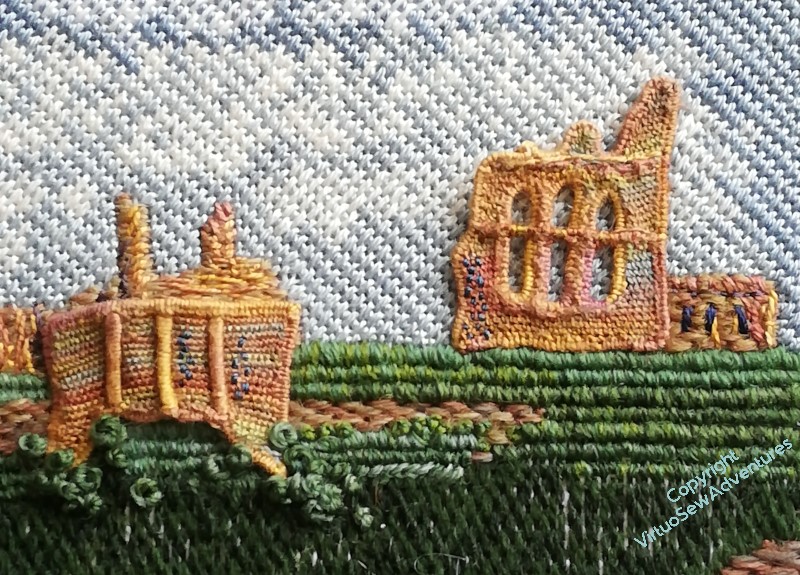
Finally, I got to add in the two needlelace slips. I hope you can see that I’ve added a few green French knots to help one section to bed in nicely.
The other one, I’ve twisted and pulled a little, and I’ve tried not to stitch it down too firmly or in too many places. I want the shadow of the slip to help create the sense of distance and disintegration, and I think it’s turned out rather well. I did jam it up hard against the rows of raised satin stitch, and again, I had to be a bit careful, to make sure I didn’t pull those stitches through to the back.
Finally, the first attempt at Tynemouth Priory for “Leaving the Tyme 1915”, finished in its own right. I suspect that when I frame it, I will crop at least some of the water out, but for sure, as I said in the video, adding it in if you didn’t do enough the first time becomes really, really trying.
As you know, I don’t feel comfortable planning to the last detail before I stitch. I like to have space to explore and experiment. That in turn means I have to be comfortable tweaking how I work and how I display what I’ve done, and it is often the case that embroidery responds to close mounting in a way that watercolours, for instance, do not. I would far rather do more stitching than I really needed to – even with an exasperating stitch like this! – than have to go back to it when I thought I was finished and my mind has moved on to something else!
A few last details
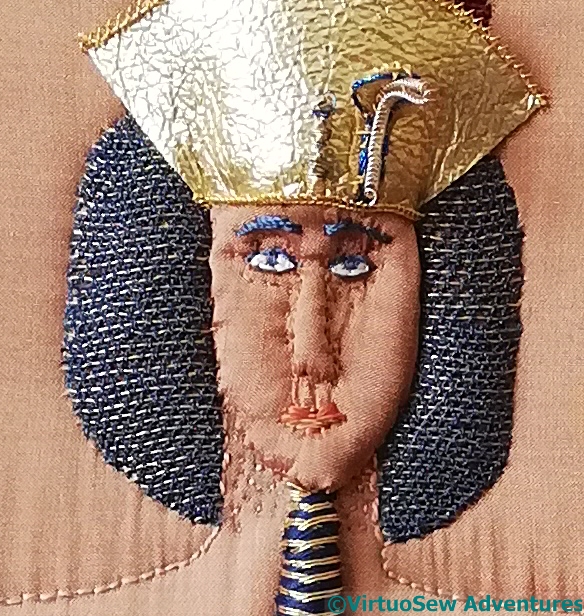
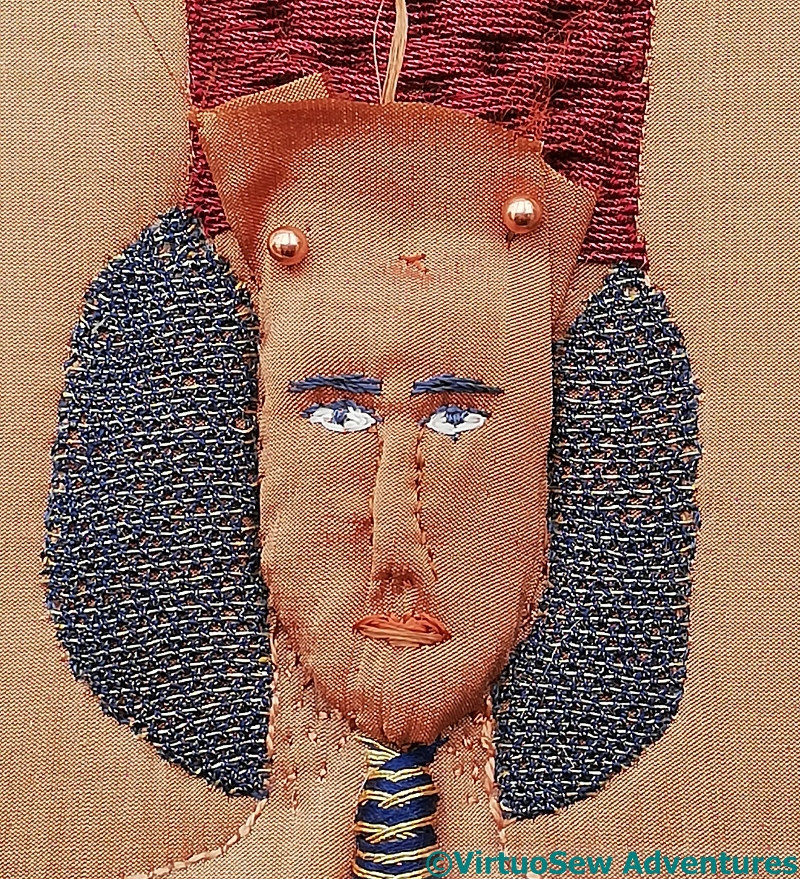
I added a few extra details, to sculpt the face a bit more – tiny stitches in silk, broadening and deepening the eye sockets, altering the shape around the nose, adding more stitches attaching the face.
In fact, to make sure the silk was fine enough, I twisted it myself from a spool of Japanese silk bought for the purpose. I think I ended up with three twisted threads from one length.
The gold kid of the headdress now has an upper edge trim as well. That would have been much easier to do if I could have done it before attaching the kid to the head!
As I was looking over the whole thing, it occurred to me that Akhenaten’s hands weren’t convincingly grasping his crook and flail. Fixing that wasn’t hard in theory – new hands cut from the edge of the silk, padded with padding from the edge of the piece, and attached with more hand-twisted silk thread.
In practice, it took several attempts before I was at all happy with the result, and I could be seen contemplating my own closed fist thoughtfully at various points in the process. Which doesn’t always help as much as you might think, when the aim is something slightly different to a realistic representation….!
However, I now think he’s probably as finished as I can make him. As I wrote to a friend: I may have doubts about detail, but I think Akhenaten is now as good as my current level of skill will allow. I hope someone will take him off my hands before I get good enough to shudder every time I look at him!
More of Akhenaten’s Accessories
I feel as though I’ve spent as much time on Akhenaten’s accessories as I did on the silver purl loincloth, and tied myself in as many knots as I did when I was doing his wig!
I do hope he starts to approve of my efforts again soon…
When last seen, I was content with the crook, done in alternating blue and gold wire rope, strung on a former made of fuse wire, but I was expressing doubt about the flail.
The gold purl and silk wrapped purl was too frail, and this version, using gold wire rope, was visually too heavy, and much too springy. So I knew that something else would have to be devised, and racked my brains repeatedly for ideas.
The ideas finally came late one night, and – too drowsy to wake up properly and write notes – I fell asleep hoping I wouldn’t have forgotten in the morning.
Fortunately, I hadn’t!
I’m assured that the word for the parts of a flail that flail is “swipple”, which sounds too outrageously appropriate not to make use of.
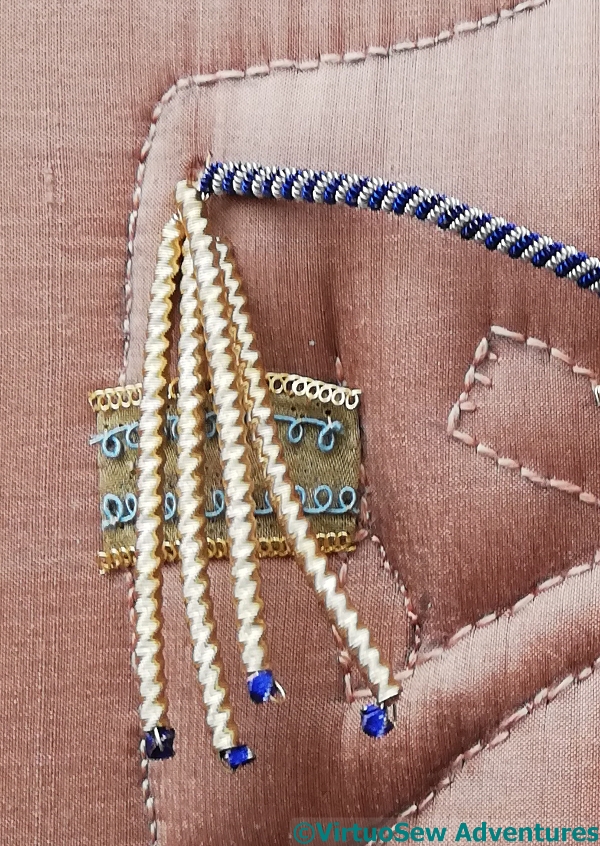
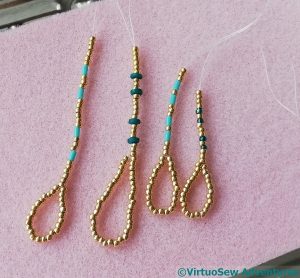
The various turquoise beads came from a friend on Instagram, who saw my wrestlings with the armlets and offered some treasures from her stash to assist. After several trials, I settled on a combination of gold and coloured beads, and a particular length of loop.
The finished flail has a handle of gold wire rope, a head of gold pearl purl, and four strung bead swipples. In fact, the inner two swipples have different coloured beads to the outer two. This is part of the layering of detail I’m trying to develop with Akhenaten, to help with the impression of rich gorgeousness I want to convey. It might be barely noticeable (although more so in real life), but it will break up what might otherwise look a bit monolithic.
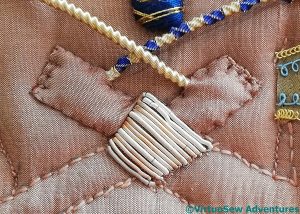
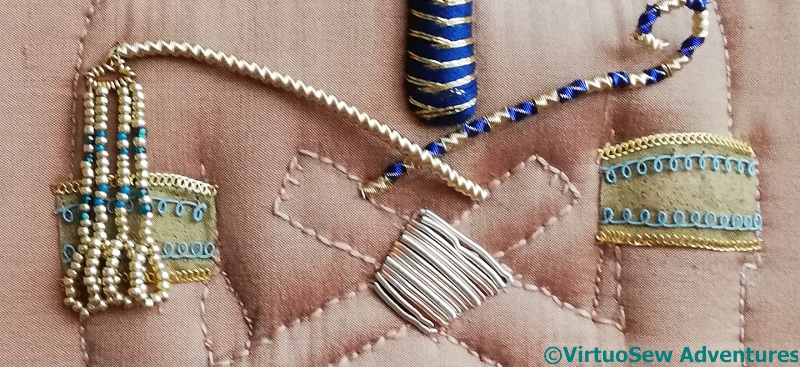
I’ve taken the same approach with the wristlet, which uses silver rough purl (leftover from the loincloth) in combination with a pale pinkish rough purl. Anything single-coloured was too obvious and argumentative, especially as it’s placed right in the centre of his chest, but when I left it out entirely, that looked worse!
Akhenaten’s Armlets
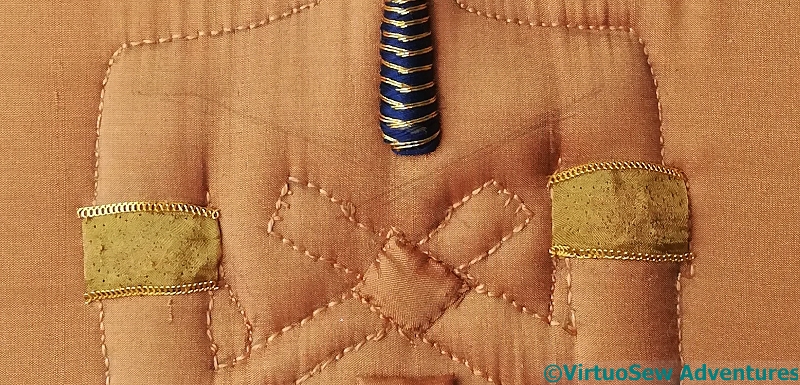
You may recall that I had some trouble with the armlets the first time I was working on them. Now, as I’ve come back to Akhenaten again, I’ve decided that the gold kid I’d settled on isn’t at all right. Off it came, and after some puzzling, I attached the brass mesh instead.
Only to decide that no, that looks dull, doesn’t capture the effect I’m after, and even edged with a flattened gold spiral, doesn’t stand out enough against the silk.

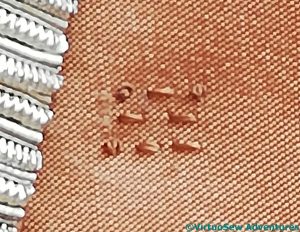
My next thought was to do some patterned chipwork. I chose a rather gorgeous, very ancient-Egyptian-looking blue, and a sort of diagonal basketweave pattern which is not a million miles removed from some of the patterns I have seen on ancient pieces.
The blue did at least help the silk to show something like true colour, but when I looked at the whole piece, I found the blue too bright, and the pattern altogether too much of a good thing.
I thought that was strange. The alternating directions should have echoed the beard and helped the two sit nicely together, and there is so much personality in the silver purl loincloth that you would have thought nothing could have been too much!
Then I had a thought – the kit for the Stuart Silk Purl Flower contained some bonus silk-wrapped wires and purls, and fortuitously, when slightly overstretched, there was just enough of one of the turquoise ones to do top and bottom on each armlet.
At this point I decided, somewhat tentatively, that maybe I’d got this bit right, or at least right enough to move on.
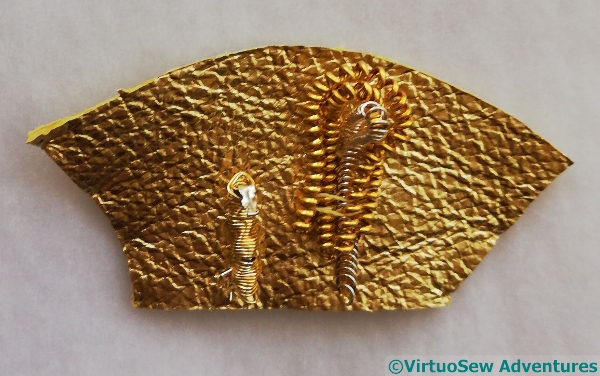
Akhenaten’s Headress Rethought – stage two
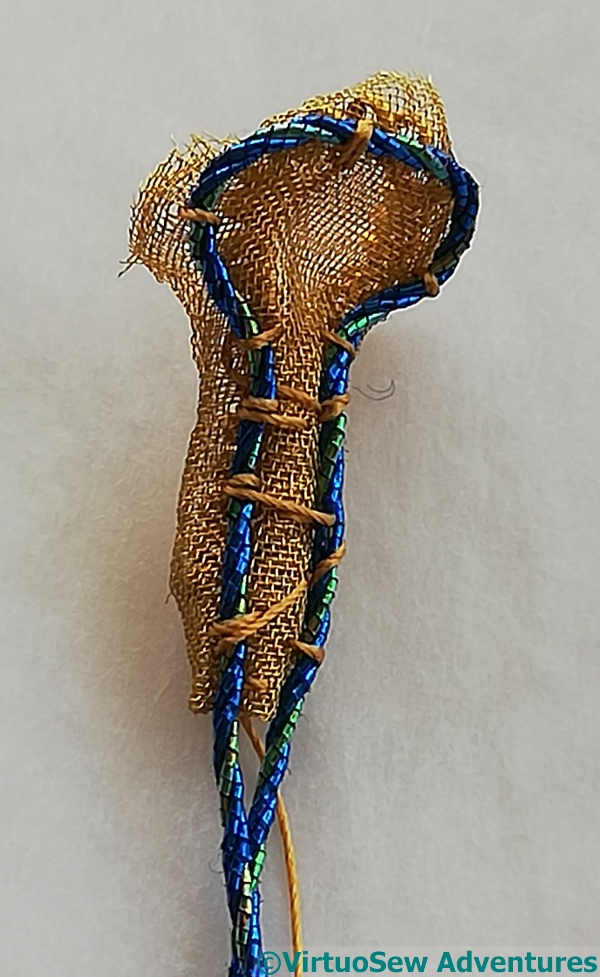
Having decided that all those delicious manipulations of brass mesh weren’t going to help in this case, I cut out the shape of the cobra’s hood from the brass mesh, (not getting too close, in case I cut the thread attaching it!).
At this point I realised it wasn’t quite strong enough, and attached the bent piece of pearl purl from the first attempt to the back in order to provide more support.
Bending back the brass mesh helped to conceal the supporting pearl purl – although whether anyone will be able to notice it is a moot point!
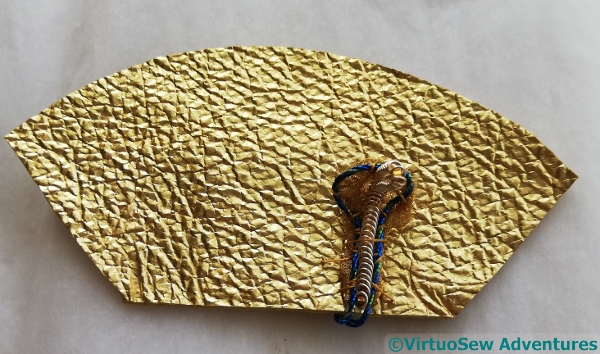
The final stage of the cobra was to attach the same piece of silver spiral with gold band to take the place of the snake himself, in front of the hood and to a new piece of gold kid. This time I looked again at some pictures of cobras, and made sure the hood was set back a little from where the mouth would be.
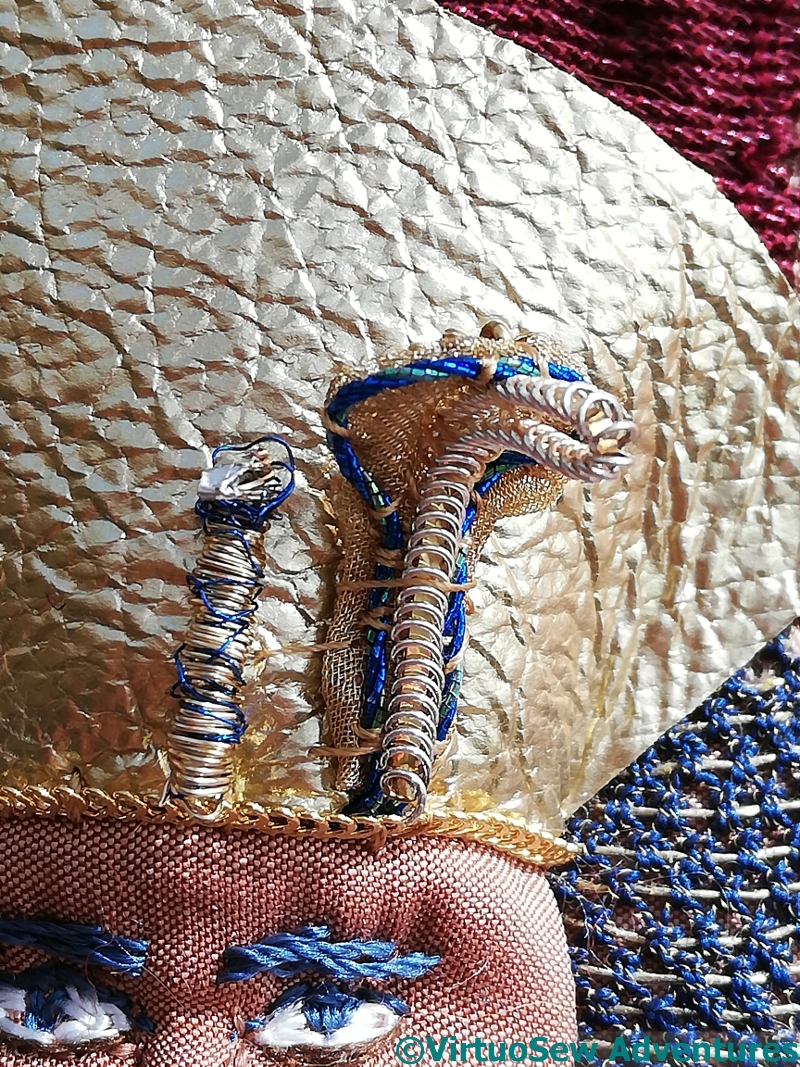
I used the same “vulture’s head” as last time, but helped it to stand out slightly by winding some blue wire from a tiny bit of blue purl around the large gold rope I used for the vulture’s neck. You can see how small it is, but it’s surprising how much difference it makes to the final effect!
Once I’d attached the gold kid, I could cover the bottom edge with gold spiral, and then trim the upper edge to create the shape I wanted. This is the stage you see here. However, I then decided that the upper edge needed a trim, so at some point I must tie myself in knots to attach some sort of trimming to a curved shape stretched over a padded base.
Wish me luck!
Akhenaten’s Headdress, Rethought
Of course, I had to take off the gold headdress when I decided to make another attempt (and another, and another!) at the face. Then, when I looked at it again, with my new version of the face in place, and still more new ideas swirling around in my head, I decided that it wasn’t quite right, either in shape or in conception, and needed a little more help…
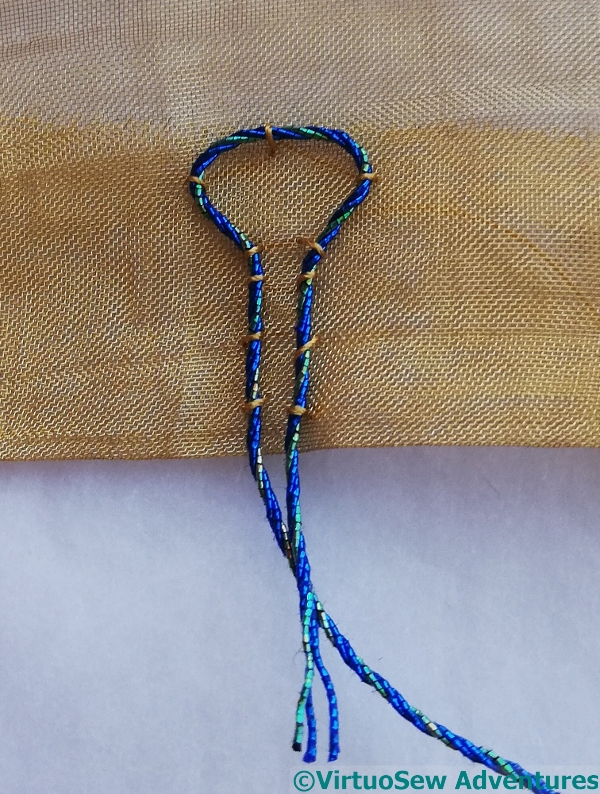
First of all, I think the first piece of gold kid I cut was the wrong shape, but secondly, and more interestingly, the cobra doesn’t really stand out against the gold kid, so I decided to try again.
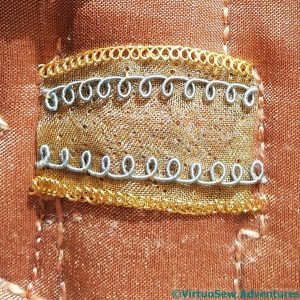
So I began by folding a piece of brass mesh and attaching to it a loop of the same blue twist I used to emphasize the edging of the belt. I had thought that this might be rather tricky, but the brass mesh is fine enough to take stitching without too much trouble.
At this point I should probably say that from the base to the top of the loop here is no more than a centimetre. This is all very small and very fiddly indeed!
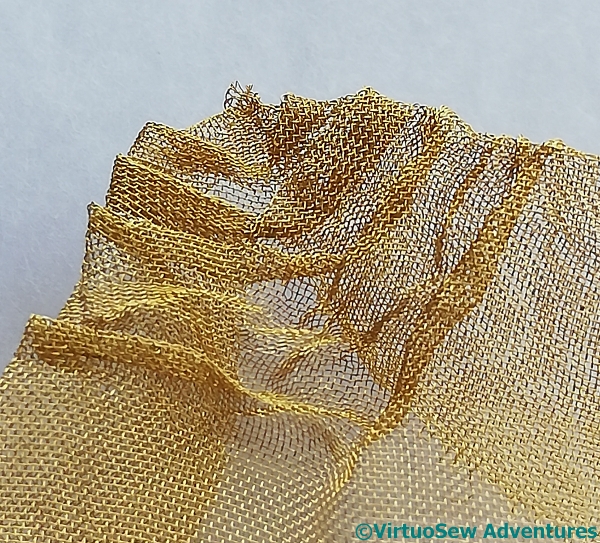
Manipulating Brass Mesh 1 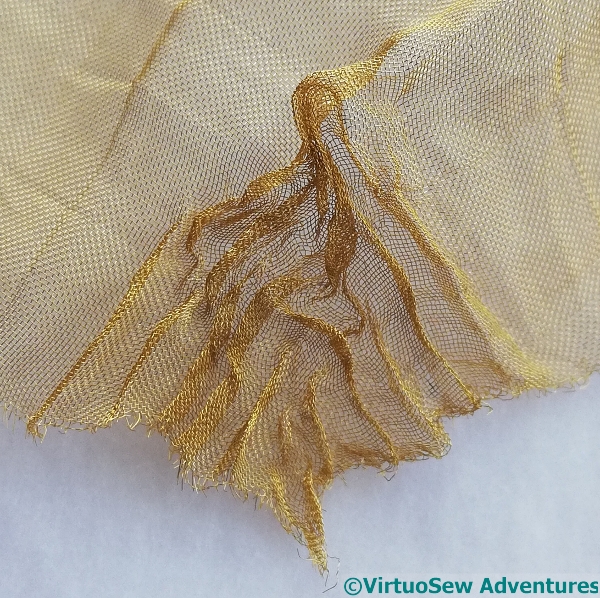
Manipulating Brass Mesh 2
I also experimented with some pleating and crinkling of the brass mesh. I like the various effects, and I’d love to fit them in somewhere, but unfortunately I couldn’t quite work out how to make them work in this context.
The whole piece is so striking that I am finding it particularly difficult with the last little details, because they need to have enough personality not to be overwhelmed, but I don’t want the final piece to feel “spotty”. The eye needs somewhere to rest occasionally, rather than zooming frantically in all directions!
Akhenaten’s Face – Yet Again

Having found the last attempt didn’t result in quite what I was aiming for, I tried a new approach.
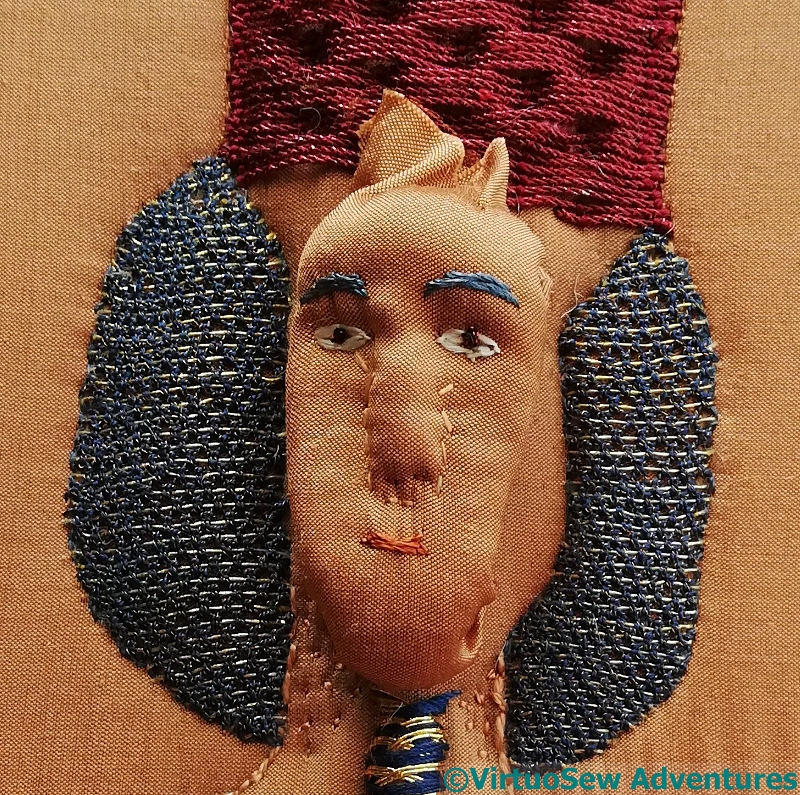
This time I took the outline of the face from the main piece, and needlefelted around it to get the shape to fit. Then I tried to get the features in place again, but having learnt from last time, I tried to leave the felt padding a little softer so as to be a bit easier to embroider. When I was trying the wet-felted versions to be further needlefelted, I used several different wools to see whether it made a difference, but with my level of inexperience, it didn’t, so this time I just used the first that came to hand.

Then I stretched silk over the top and began to stitch again.
When I tweeted this picture in a frustrated I’ve-had-enough-of-him pause, one of my friends replied “It’s Cassandra O’Brien!”. Which gave me a much-needed giggle – although I have a lowering feeling that Akhenaten and Cassandra might have got along quite well. Not necessarily the most admirable of people, either of them.
And don’t my lovely copper/rose-gold headed pins disappear beautifully against the fabric!
This looks rather better, I think.
I would have been happier if I could have made the brow heavier, and the nose more forward, but by now I feel I’m entering a world of diminishing returns, and may even start to make negative progress, which would be disheartening to say the least.
Now to see how this face copes with all the fuss of headdress and accessories…
Akhenaten’s Face – Again
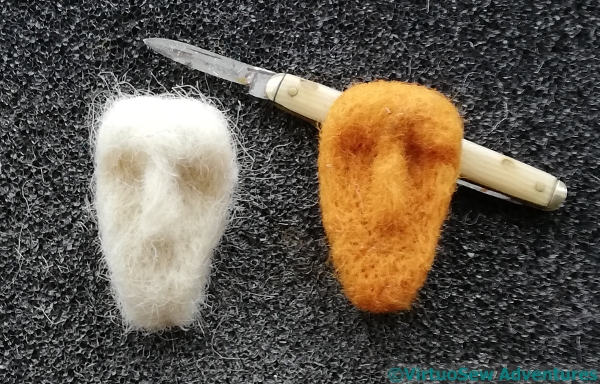
As you may recall, my last attempt at a face for Akhenaten wasn’t entirely successful, so I started again… This time I needlefelted the shapes very fiercely (which I enjoyed more than I expected to!) until they were quite solid and strongly shaped, only to discover that they were far too deep and I had to saw off the back half with a penknife!
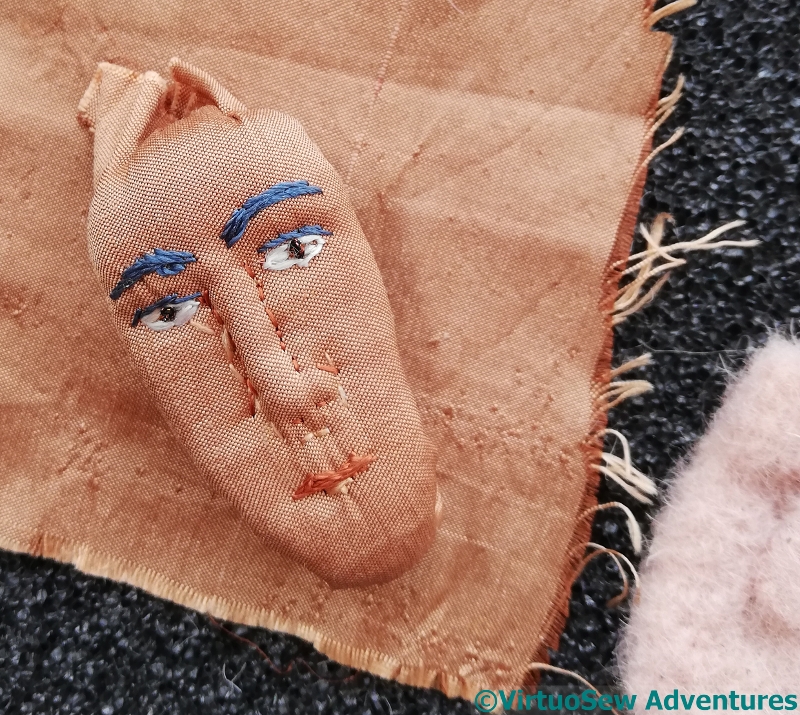
Then I stretched another fragment of silk over the top and worked the features.
When you consider how deep the eyesockets are in the felt, I’m a bit surprised that the eyes on this version don’t appear more deep-set, but he does have nice heavy brows, and the rest of the features aren’t too bad..
The face is also as narrow as it appears in that purple watercolour from a couple of weeks ago, so I felt quite optimistic when I turned back to the frame he sits on.
However, you can’t say that this face is much better than the apoplectic trumpeter – it has turned out by far too narrow for the space left for it, and I suspect that the detached buttonhole stitch with return used for the wig has done too much damage to the fabric to take it out.
So this is not the one to use, and I have to try again.
Again!
The Little Robin finished!
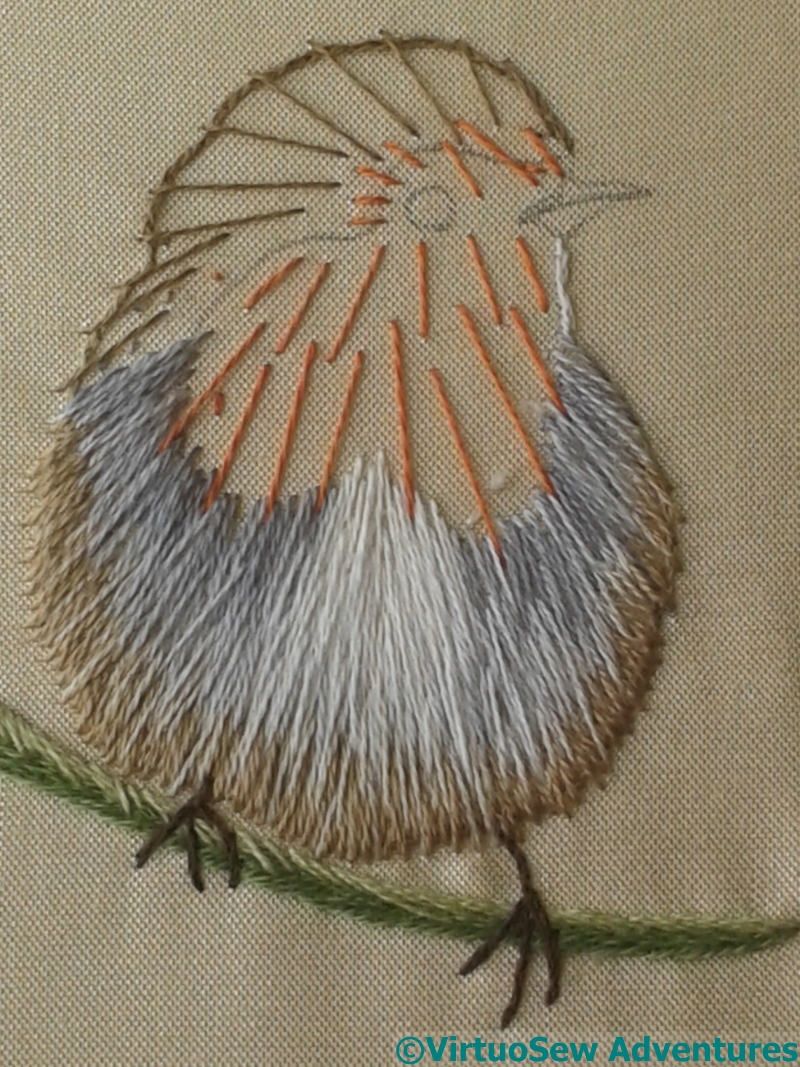
Working On The Robin
I have to admit that I have enjoyed the little Robin. Here is a halfway point, showing that while many suggest drawing direction lines for their stitches, I chose to draw with my needle instead. I found that the more helpful because it gave me a chance to gauge the overlap of each section with the next.
I’ve gathered that some tutors suggest working small sections to completion, and others in colour layers. I took the latter approach with the (I’m sure not original) refinement that sometimes I went back and did another layer in a colour I’d already done.
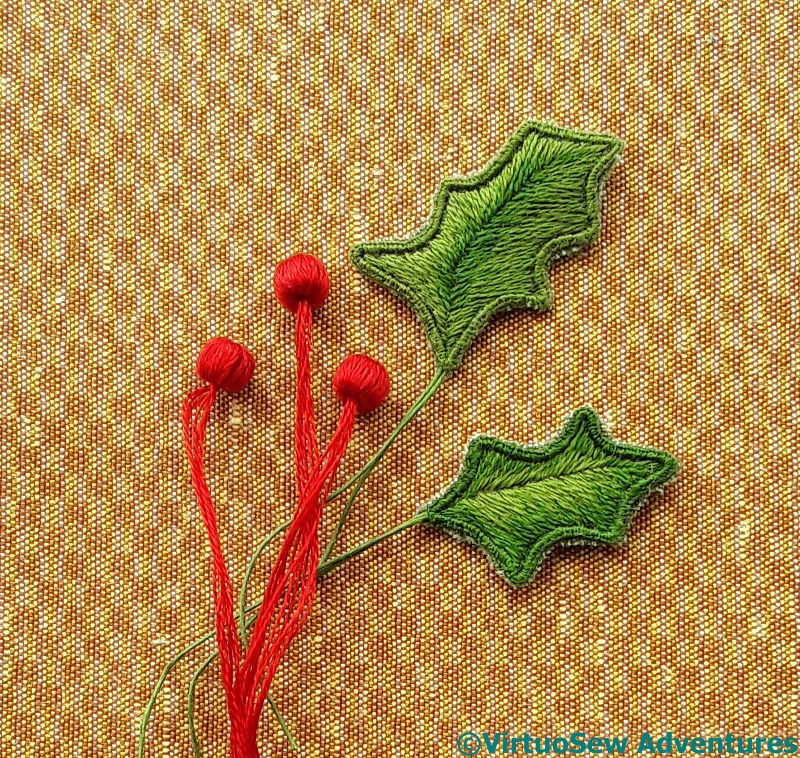
Stumpwork Bits
I also had fun with the stumpwork elements: two simple wired leaves (nothing terrifying about that, after working on the Stumpwork Violets for Dreams of Amarna!) and three berries made of beads wrapped with thread. I’ve not wrapped beads before, but as it turned out, this, too, turned out to be fairly straightforward.
And fortunately, my wandering applique scissors returned to the fold in time to be of use…
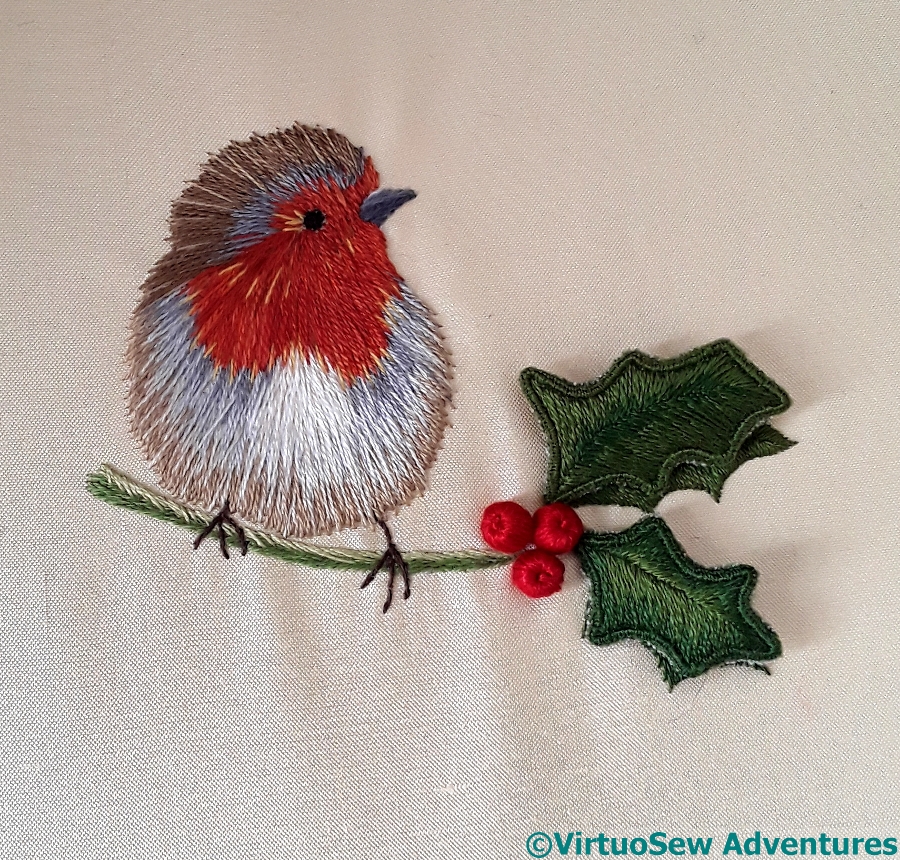
The Robin Completed
So here he is.
As you can see, even though I worked him in a hoop, and regularly made sure the fabric tension was maintained, there is a little bit of puckering. That may reflect, as much as anything else, a certain anxiety on my part. I think I will mount him on a round card and add him to the winter decoration corner when I set it up, and I should be able to ease some of the puckering then.
And – for those enquiring minds that wish to know – while I can’t say I’ve fallen in love with silk shading, we are definitely on better terms than we were!