
Tag: Thistle Threads
Finishing the Golden Accessories
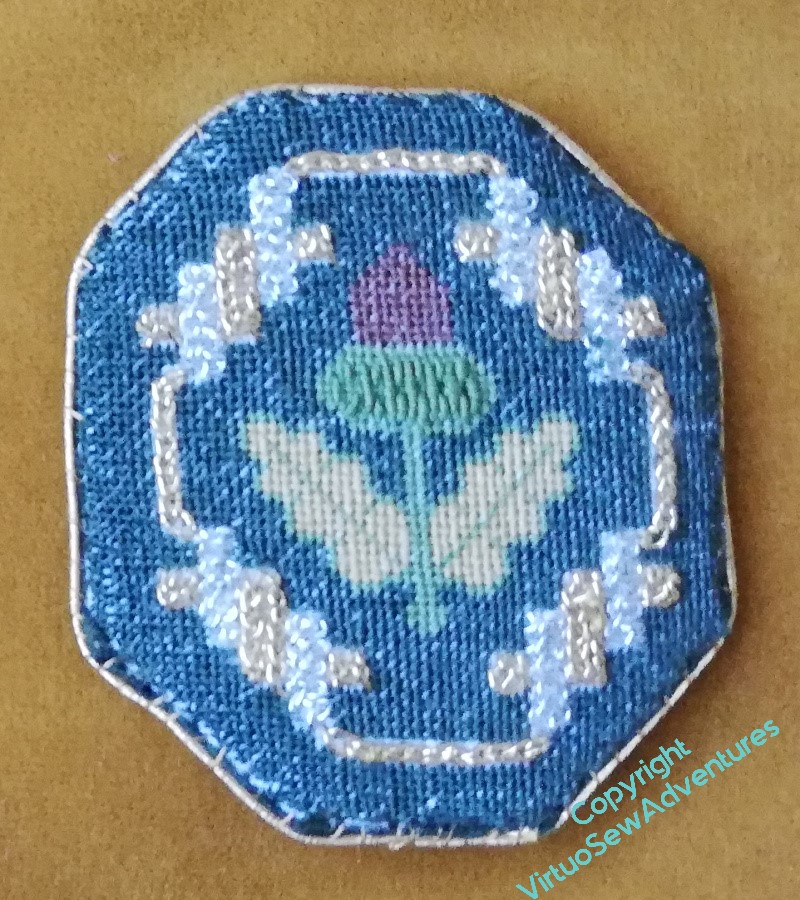

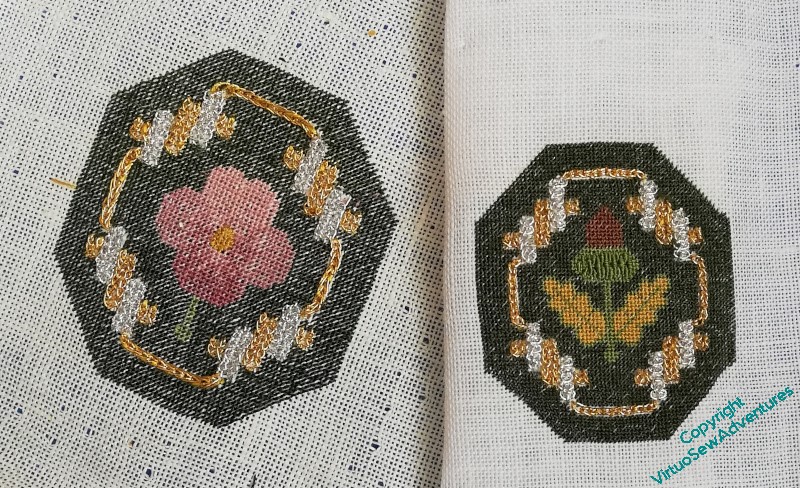
Since I made the mistake of losing the fabric and then picking a fabric of the wrong count, and what’s more, when I looked at the finished pieces they were none of them even the same proportion, I decided to abandon all thought of turning them into accessories for a workbox I don’t have, and just made little pads, backed with silk and edged with pretty braids from Thistle Threads. The two outer ones are Russian Braid, and the inner one – the last and largest – is in Silk Serpentine Gimp.
The pads are made using two heavy pieces of pelmet vilene, or something similar. I tacked the silk on as if it were English paper piecing, but the linen I sewed in place on the inside. Then caught back and front together with overstitching, and then went round again, attaching the braids. Someone on better terms with glue might have risked using it, but I am not that person!
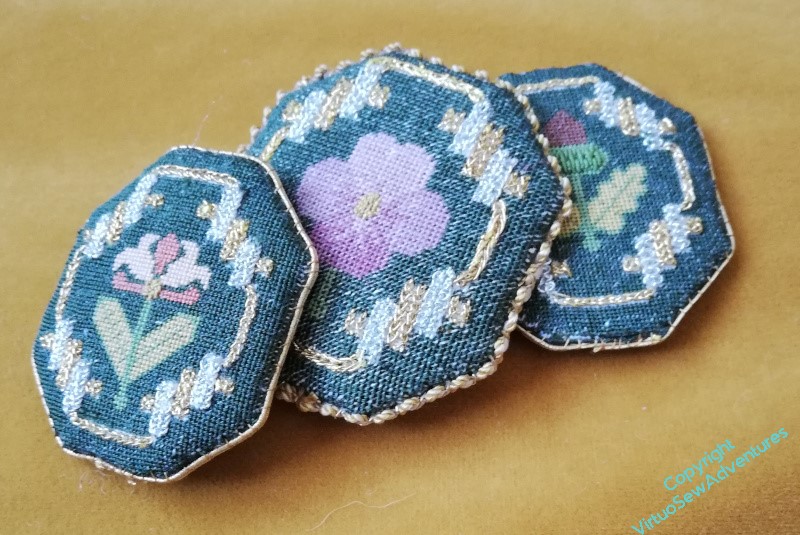
They are now propped up inside the parlour dome with the other Online University pieces, and sit on a coffee table in the living room. I am slightly astonished that no one who’s visited us since I set it up has ever commented on the dazzling intricacies on display, but then, maybe they’re enjoying the conversation too much?
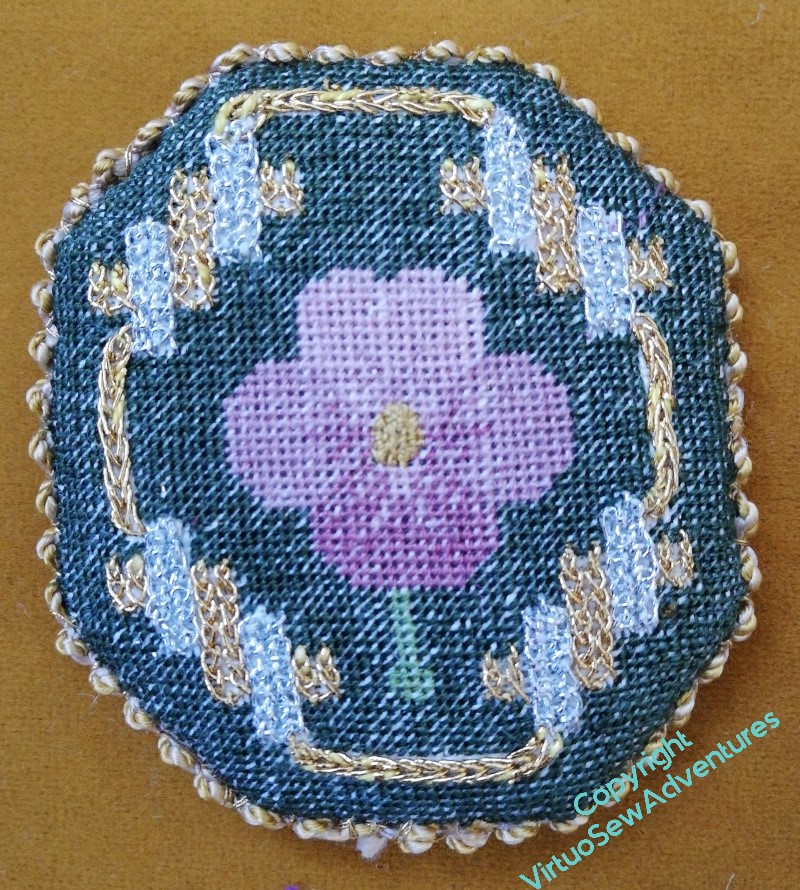
Golden Accessories – Pansy
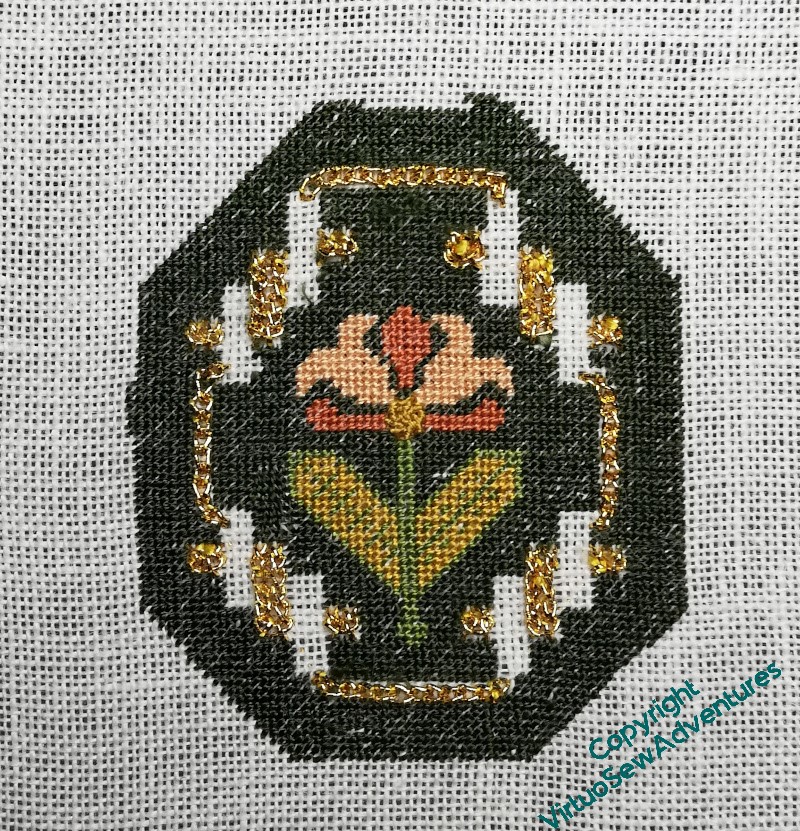
The Pansy continued apace, with only one alarming period when I thought the small amount on the card was all I had left to finish the dark green.
Then I found an entire full reel, gleaming at me from the bottom of the project box.
I was greatly relieved, to say the least!
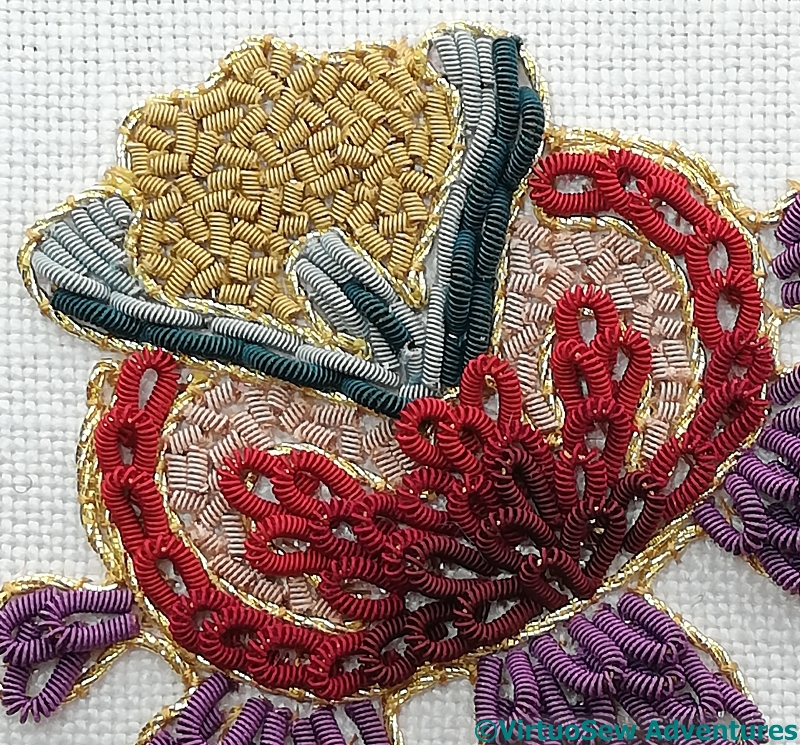
Next, however, on to the gold and silver.
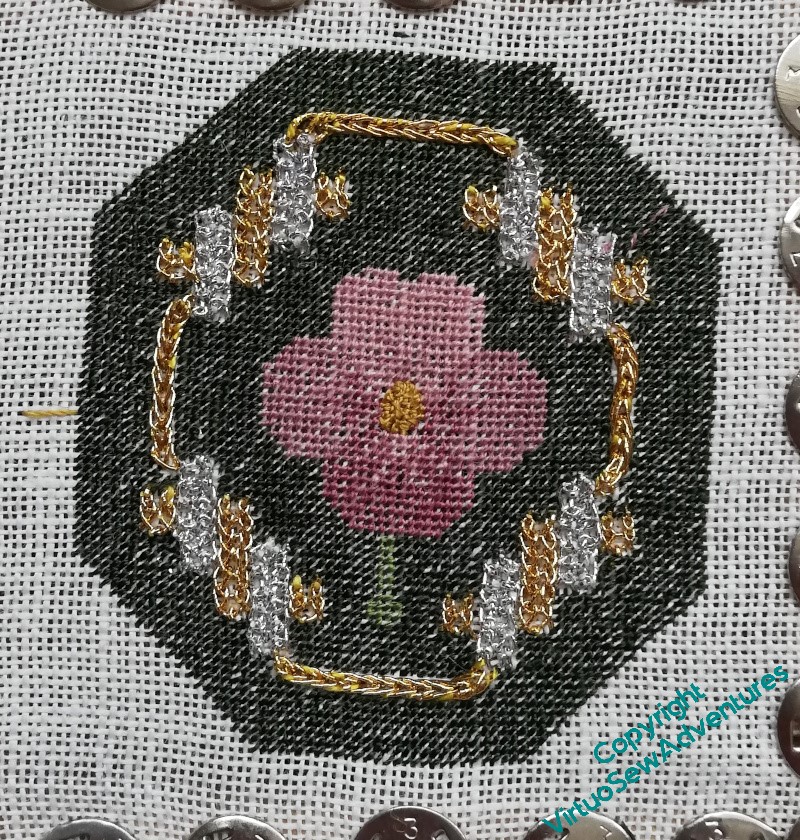
Some of this echoes the other two, and was fairly easy to put in place – reverse chain stitch in the narrow sections. I learnt from last time, however, and this time I put the silver strapwork panels in before the gold, which was again Ceylon Stitch.
The silver was reverse chain stitch with buttonhole edging – so it’s the stitch I used for the titles on the Map of Amarna and the View of the Excavation. Nicely familiar, and very satisfying – but also very much easier without the Ceylon Stitch in place. Next time I will try to think through the order of my stitching!
However….
It turns out that when I fished out a piece of linen to do the last of these pieces, I didn’t check it very well. The stitches are markedly bigger, and more spread out.
Next time, Rachel, take the time to count the threads!
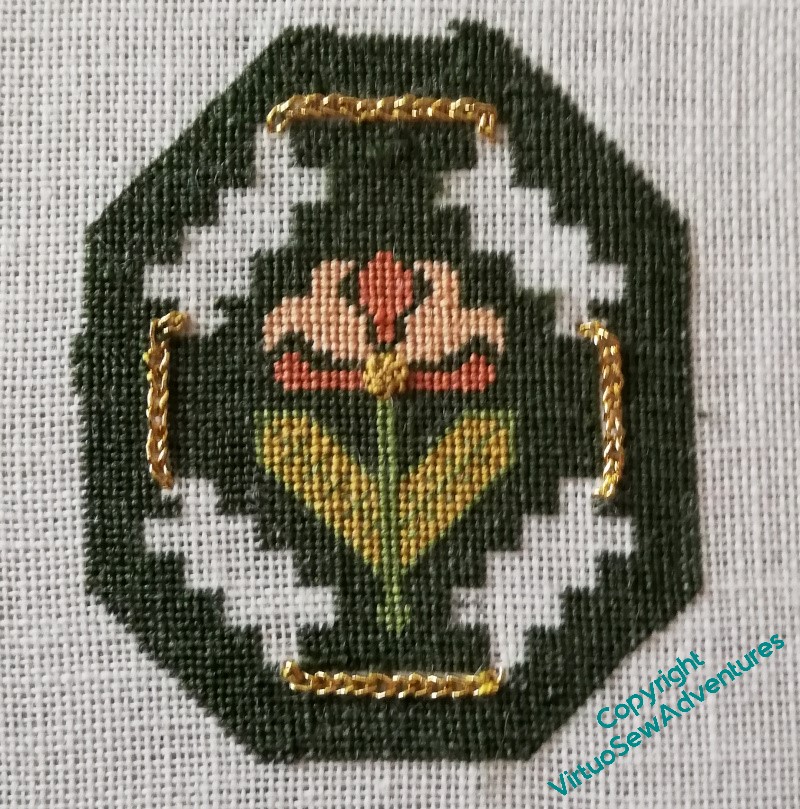
Starting the Pansy (Golden Accessories)
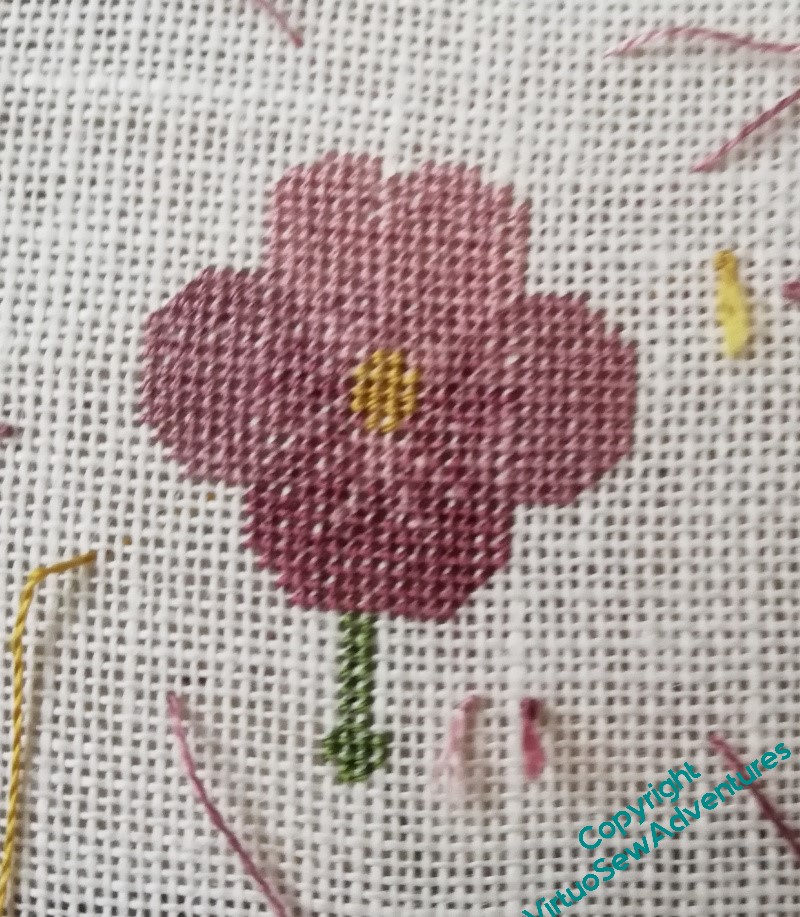
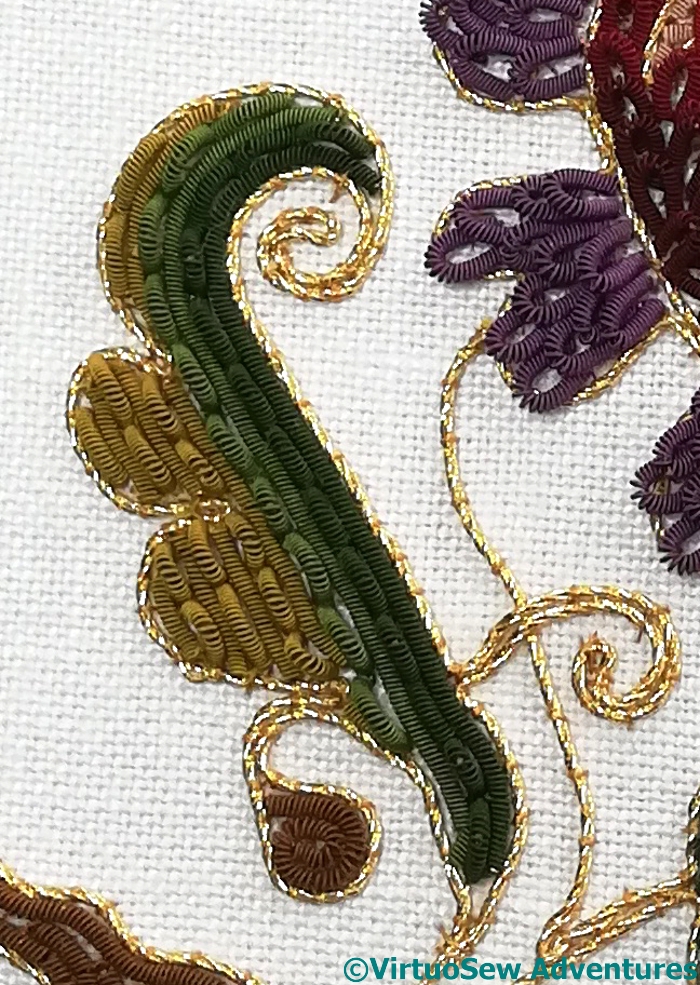
To begin with, the Pansy design of the Golden Accessories went much better than I feared.
In some lights the colours of the pansy are much closter than in others, making progress quite slow until I worked out which combination of lighting to use. But the petal shapes are simple enough, and although the weave is fine enough that I keep mistrusting my counting, I am also reminding myself that it doesn’t actually matter too much if the patterning on the petals aren’t exactly as charted. I shan’t be showing people the chart when I show them the pieces, and besides, if they go in the parlour dome, it’s fair to assume any onlookers will be too dazzled to pick up any oddities!
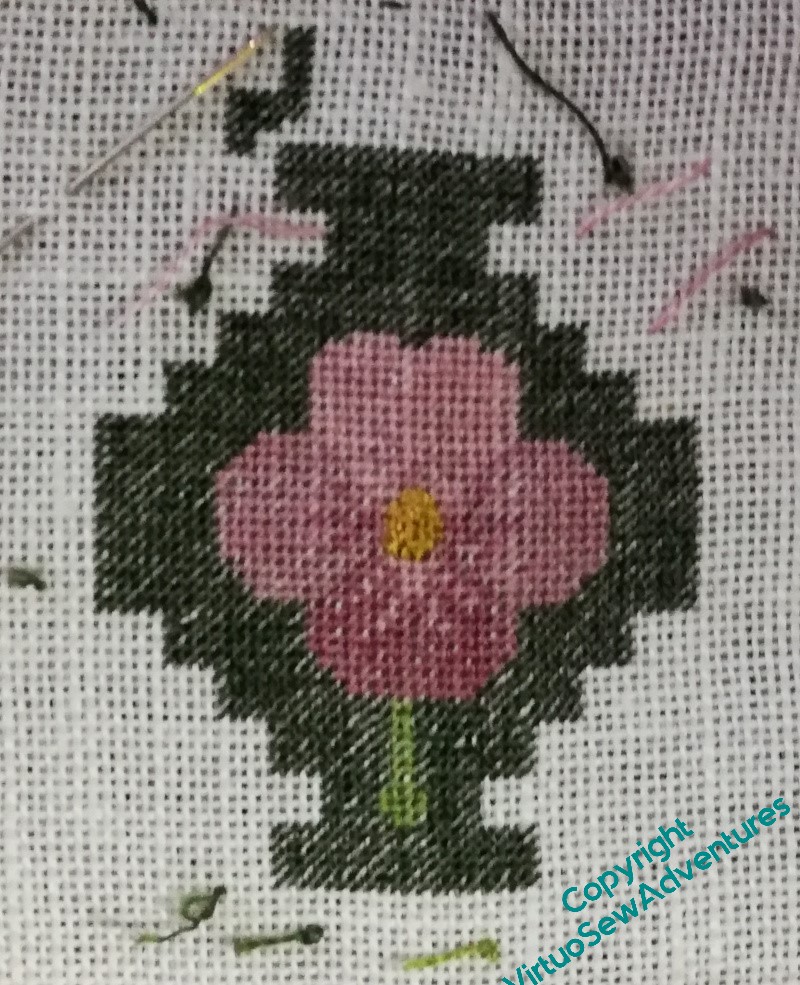
I’ve also learnt from last time.
Last time, I tried to outline the strapwork sections with tacking stitches, so that I could stitch without counting. That didn’t work – I actually misplaced the tacking stitches and had to count anyway. Grrr.
So, this time, I counted out from one point, and then followed the chart to outline, in one row of tent stitch, all the internal edges of the strapwork, and then went back to fill in the gap.
Well, that worked pretty well so it seemed reasonable to assume I could do something similar for the outside.
Which I could – except, do you see the card with the silk wrapped around it?
When I got to the point I pictured, I had got down to just that bit left, and was contemplating switching to half cross stitch, which has neither coverage nor any real cohesion, in a forlorn attempt not to run out.
Then I looked in the project box and discovered I have an entire reel as yet unstarted!
Phew.
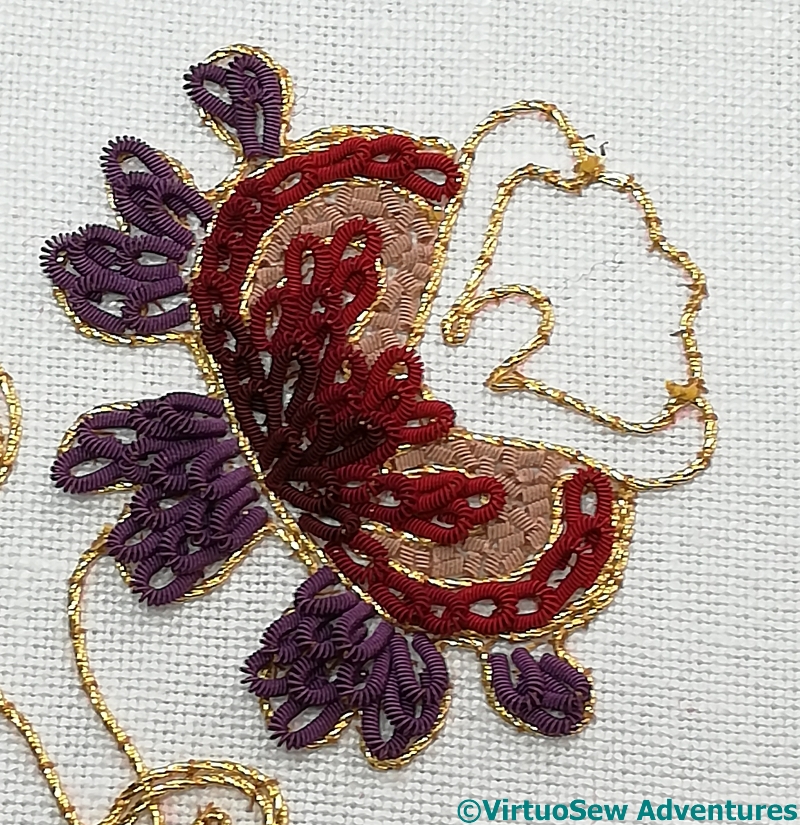
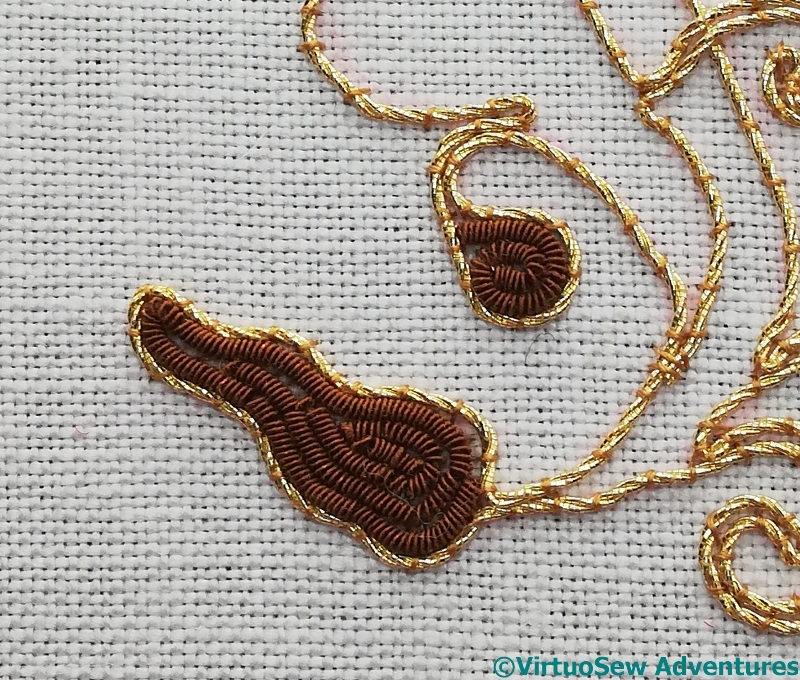
More on the Golden Accessories (honeysuckle)
So, where had we got to…?
Ah, yes. Spiral trellis stitch in silk for the centre of the honeysuckle flower, and then the outermost narrow band of the strapwork in gold reverse chain stitch. Straightforward enough, you’d say.
Well, yes, but I’m out of practice with gold threads and these sort of stitches, and the whole thing involved more contortions than I thought possible. There are also , I think, a few places where I had to undo and re-do the green background, where I haven’t tidied up the back or held fast the stitches quite as well as I should have done. We’ll see how the whole thing survives…!
The next was gold thread again, and Ceylon Stitch. There’s only space for two columns of the “chain stitch” effect in each strap, so everything is quite tight and compressed.
I’m struggling quite a bit with the Japanese needle and the fragile gold thread here. I’m sure I became more at ease with it when I was doing more of the Tudor and Stuart style, so I’m going to just continue. From any reasonable viewing distance, the breaks shouldn’t be obvious, and in truth, at this point, I just want these finished and added to the heap in the parlour dome!
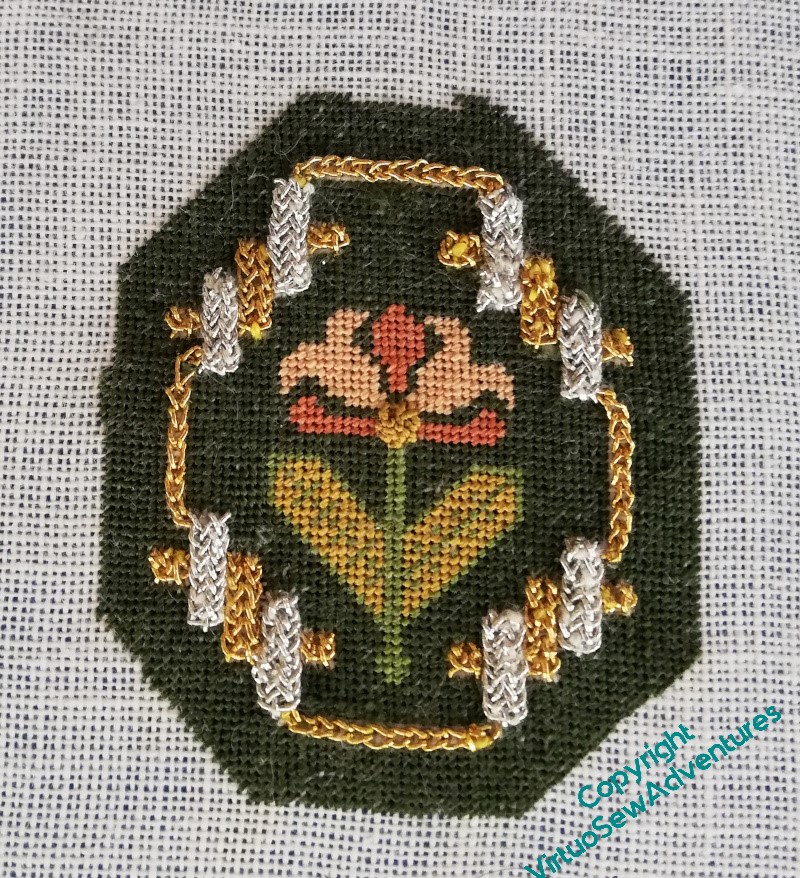
Finally, the strapwork is completed with plaited braid stitch in silver. And if I’ve said the gold was fragile, the silver was even more so – as in fact I commented, a decade or so. As I said, my suspicion is that this relates to atmospheric conditions while the thread was being made. It’s not helped by the fact that, even after a few inches of revision stitching, Plaited Braid Stitch has left my muscle memory and every twist and turn was hard-won.
I still like the look of it, though!
Found and to be finished
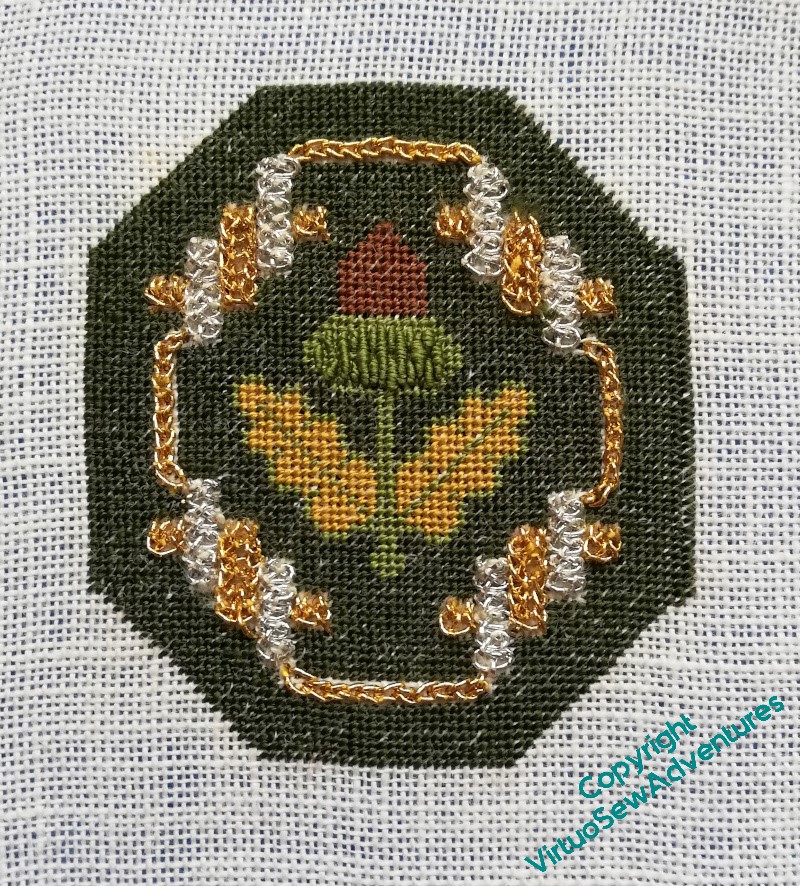
Very long term readers may recall that over a decade ago, I was working on some additional designs from the Tudor and Stuart Goldwork course, became thoroughly fed up with them, and shoved them in a dark corner until my good temper returned.
It’s taken a while…
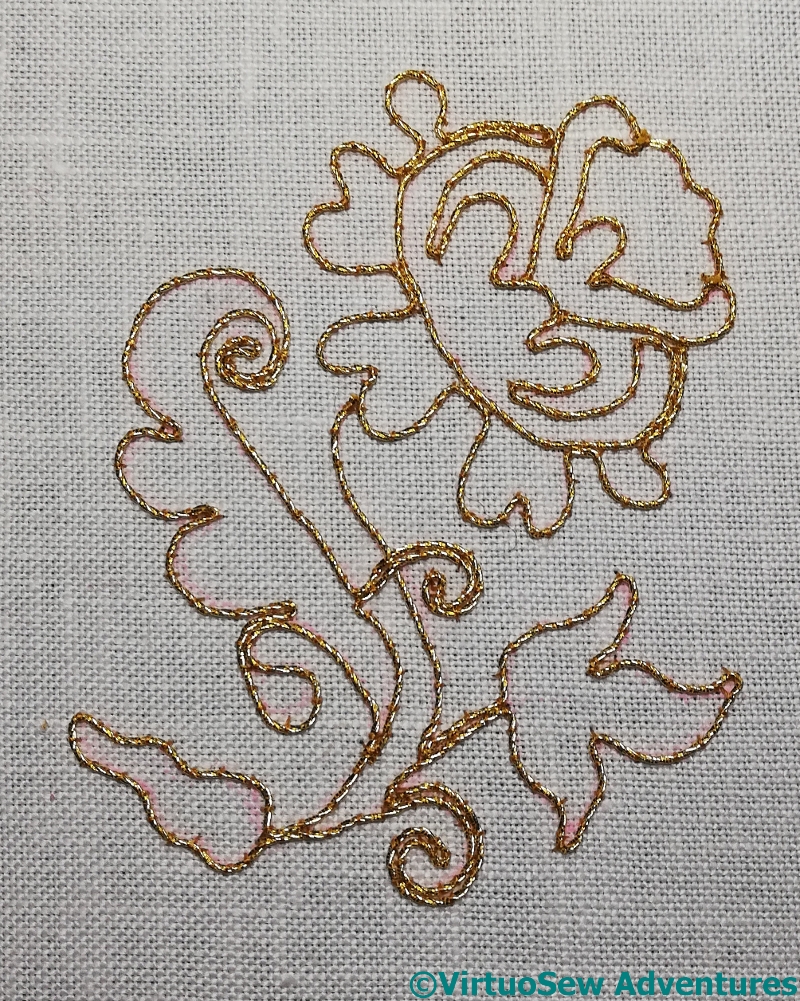
Anyway, I’ve found them again, and while the Parterre Knotwork is being difficult, the Amarna finish-work is being difficult, and Aethelflaed is being difficult, I thought I would see whether my good temper had returned, and I could get them finished.

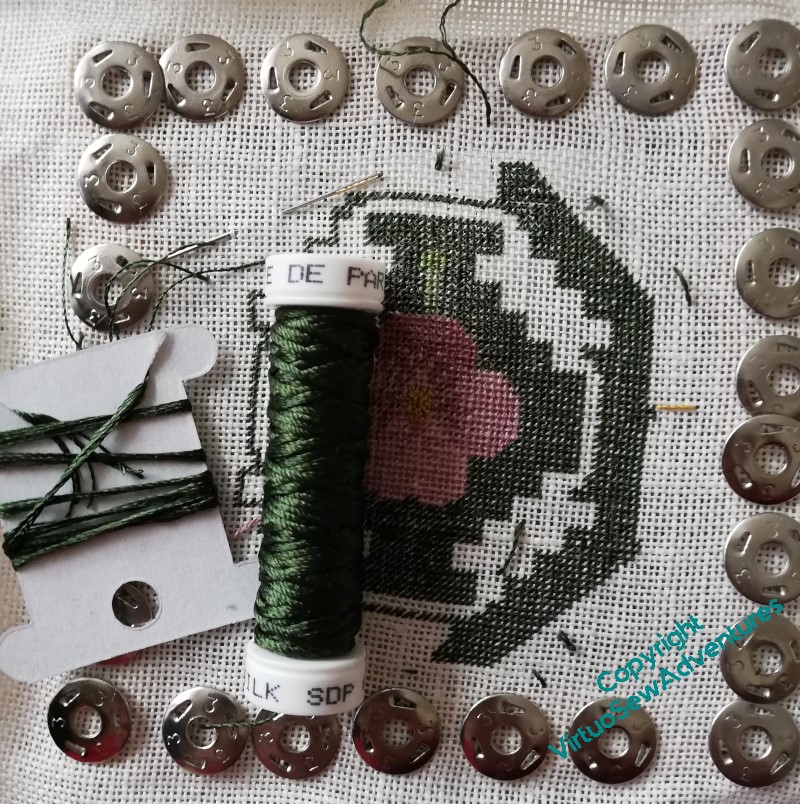
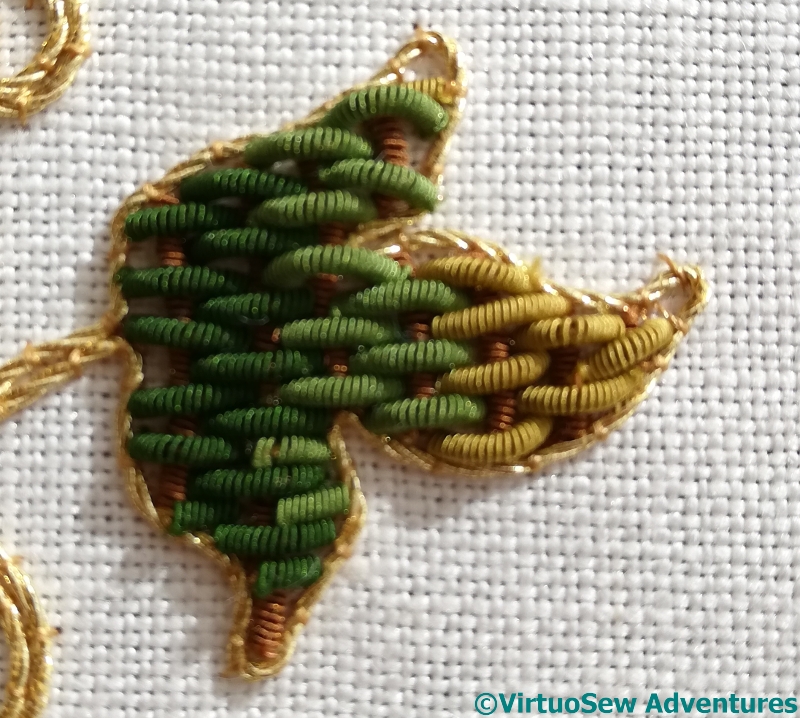
The Acorn was completed – some time in 2012, apparently, and I’d started on the tent stitch for the Honeysuckle, and found myself with some miscounting and unpicking, which I think may have contributed to the loss of temper.
So the first thing to do was to finish all that tiny dark green tent stitch. In fact what you see here was some considerable way into the process – almost all the right side outside the strapwork gaps is new – but with my new-since-I-started working light with magnifier, and my working spectacles, it actually went rather better than a decade ago.
The first addition was silk Spiral Trellis for the centre of the flower – I enjoyed that, even though it’s so tiny. So now I can start on the gold and silver strapwork!
First up is reverse chain stitch, which was a relatively easy way in. I like the stitch, and find it useful, so it’s familiar. The round-eyed Japanese needles are less so, and I struggle to thread them, but they were such a feature of the Online University courses that I feel I should persevere with them.
Finally Displaying Tudor Trinkets!
As I forecast, I had a rather entertainingly messy time with plaster bandage and acrylic paint to create my Trinket Tree.
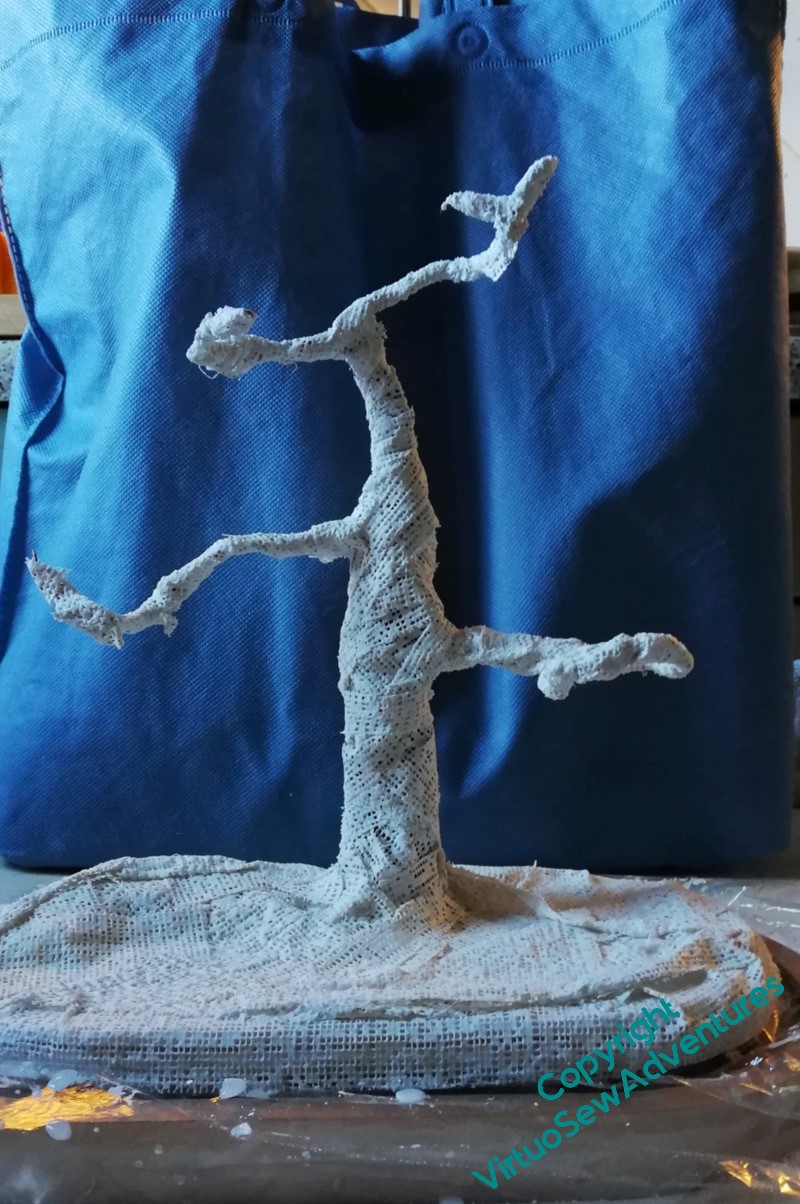
As you can see, foamcore, wire, crumpled paper and lots of tape were involved, as well as some tissue paper to vary the texture a little. Although I needn’t have worried – now the Trinket Tree is loaded, you can barely see it!
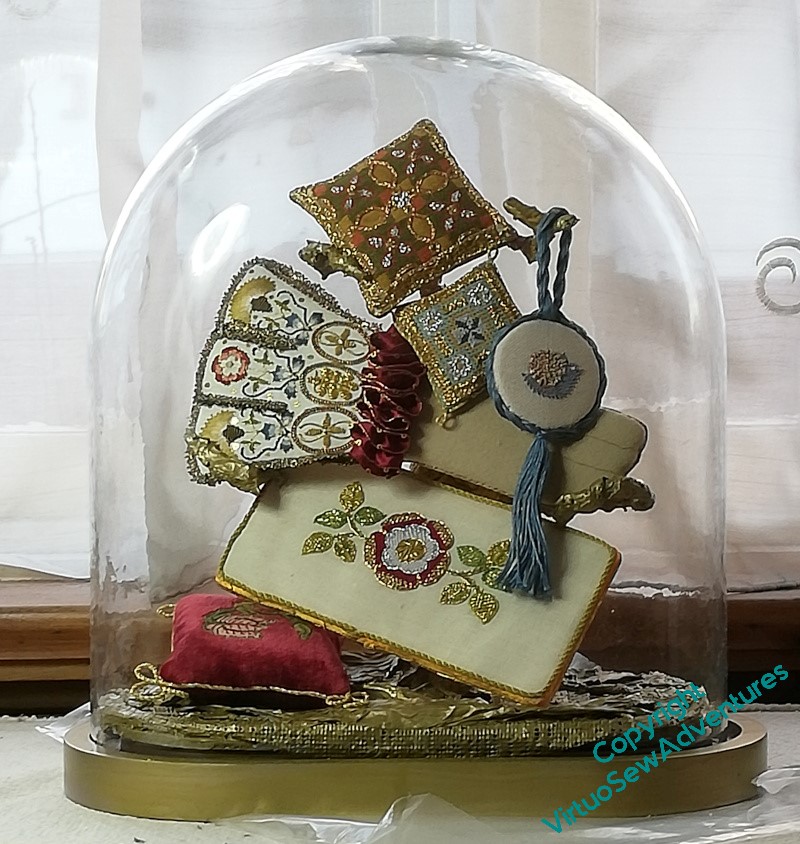
At present it sits on the hall table – the table it is on for this photograph is where I stitch and usually covered with bits and pieces relating to the current task. Not a good place for a glass dome, although it fits so neatly over the trinket tree’s base, that it’s quite hard to knock adrift!
A tree for the trinkets..
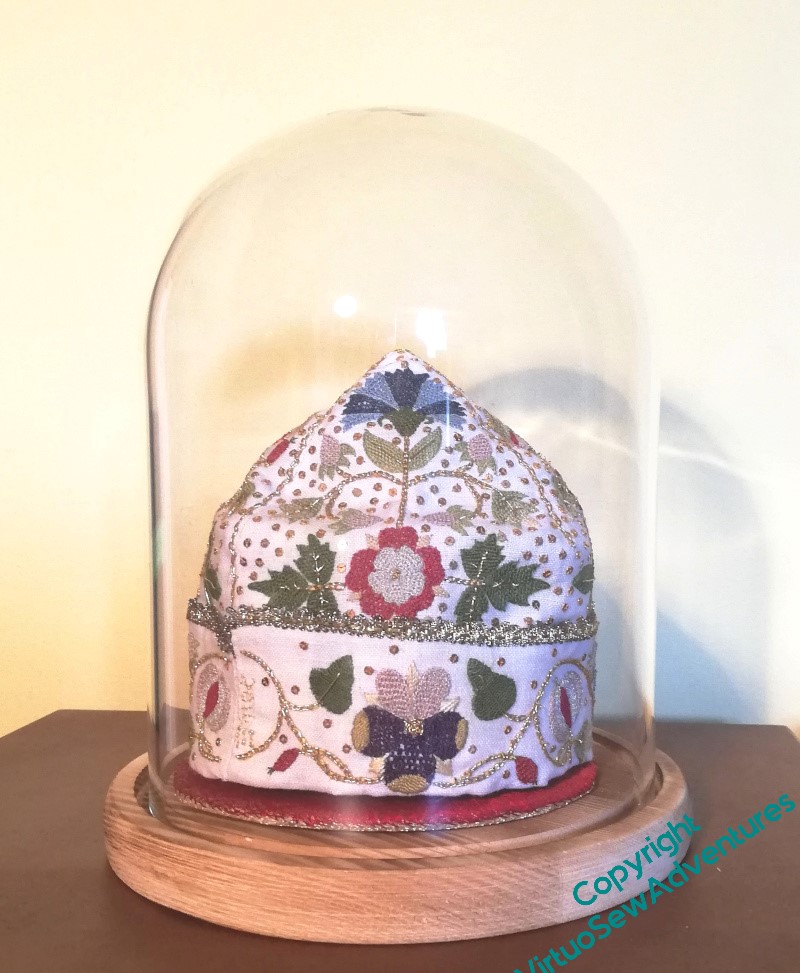
When I had the idea about using a parlour dome for the Violets and for the necklace, I realised that I would need to play with how I displayed them, trialled the Tudor Nightcap in the dome and realised that I could now put it on display.
So what about all the other Thistle Threads pieces?
Well, it turns out you can get parlour domes that aren’t round, so I got the largest I could bring myself to buy and then stopped to think…
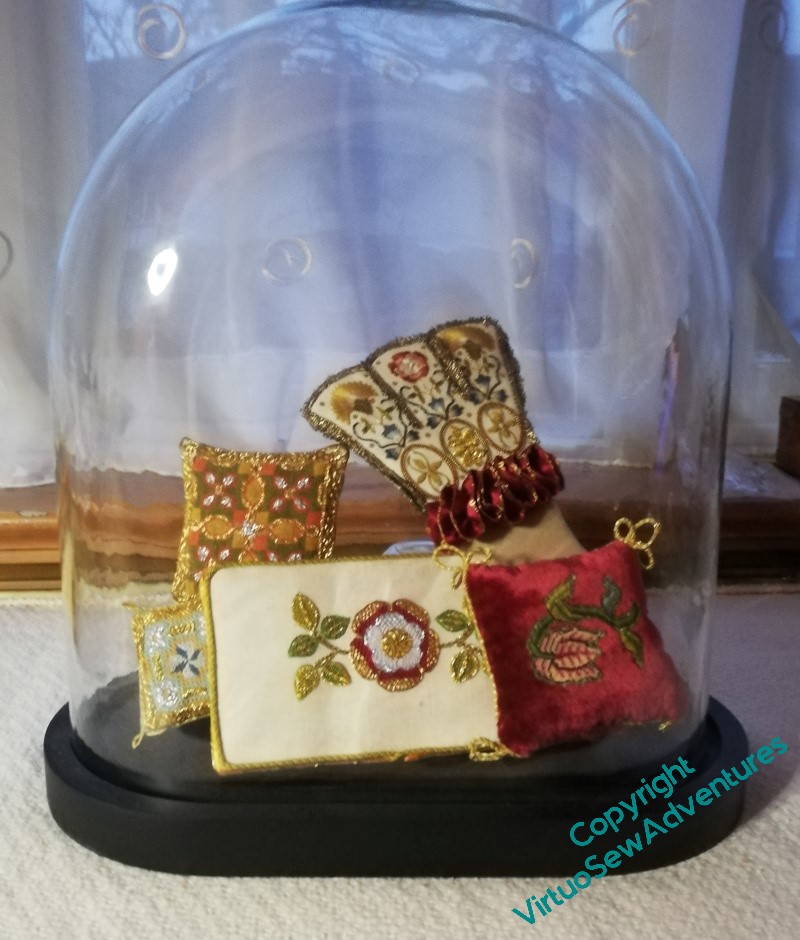
I started by playing around with propping the various pieces I’ve been planning for that Winter Decoration Corner against one another within the dome. It’s a flattened oval, and quite high, but anything I could improvise seemed not to have the height I wanted without taking up all the display space.
I think this shows the idea will work, but it doesn’t really have the presence that the pieces deserve.
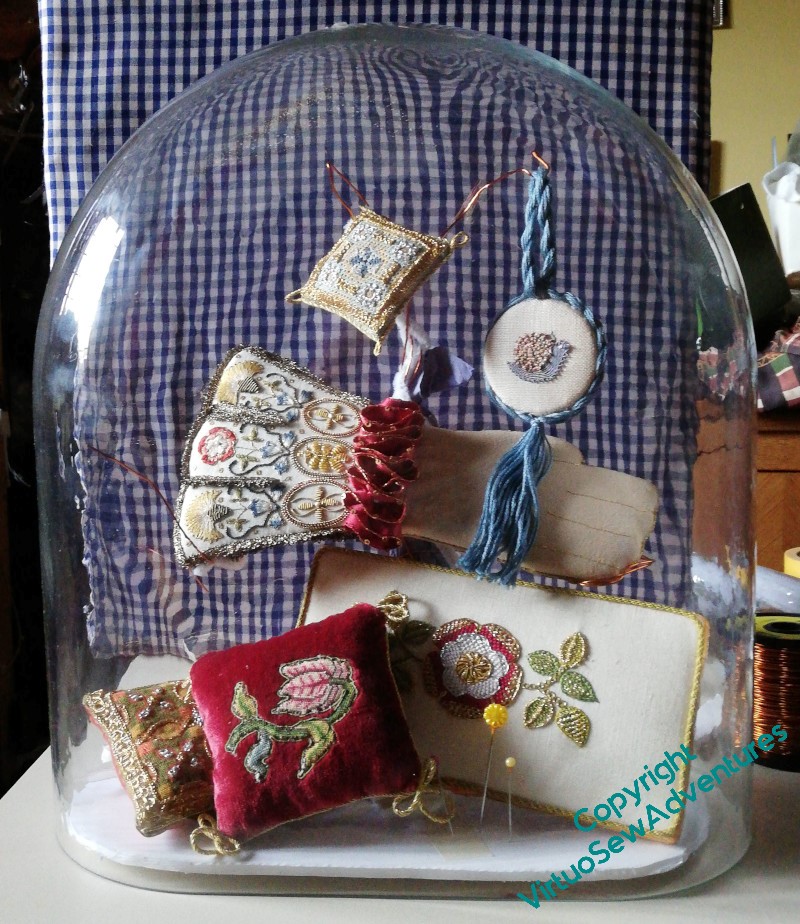
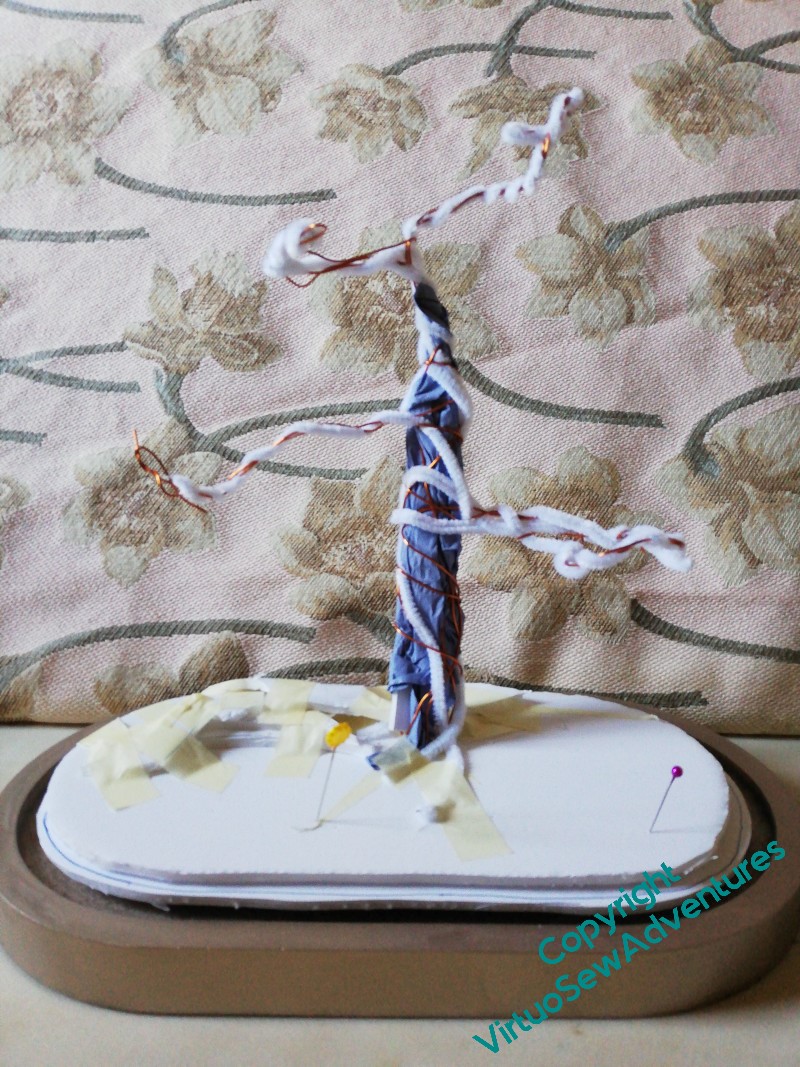
This is better. I’ve used offcuts of the foamcore that I bought to help me with Nefertiti and Akhenaten to create the base that will sit inside the glass, sandwiching the beginnings of the wires forming the tree between two layers. I’ve built up a support for the green and orange cushion at the back using smaller bits of foamcore, and wrapped pipe cleaners around the wires.
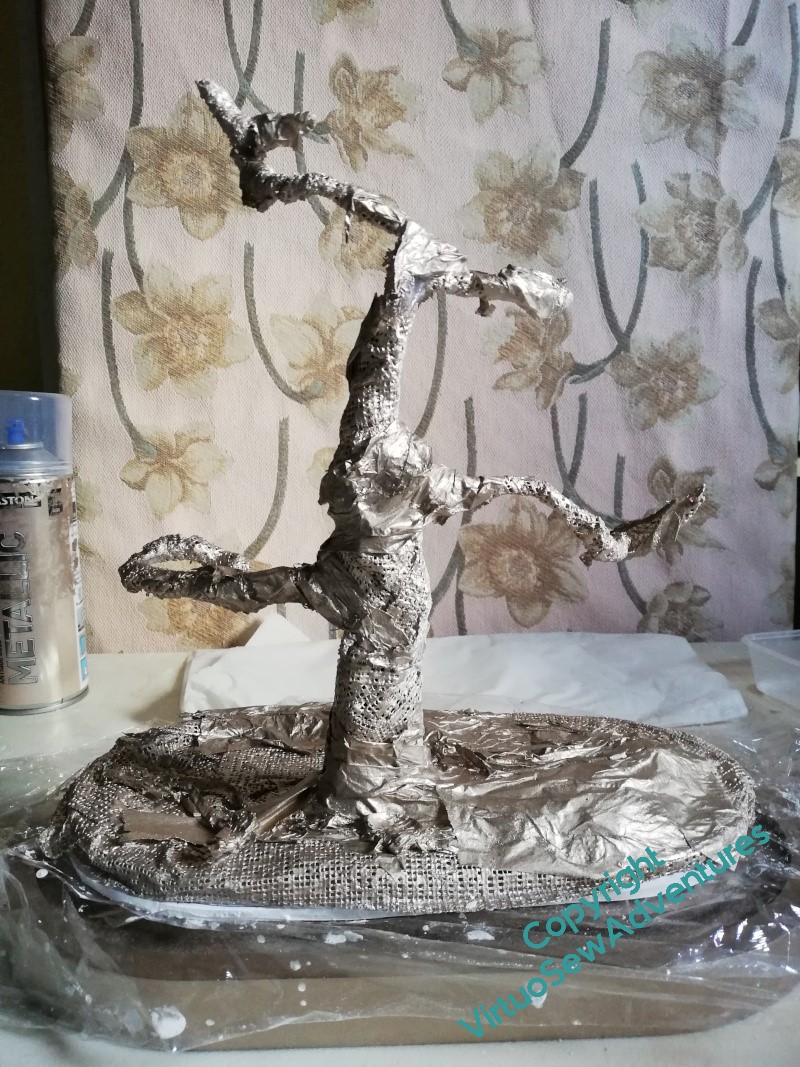
It’s not perfect, but I’ve set it up in the hall where I will pass it every day, to work out whether I like it. Then the idea is that I will have a lovely messy hour or so covering the wire with papier mache, allow it to dry, and paint the whole thing gold.
The Tudors were as fond of bling as the ancient Egyptians, after all!
Stuart Silk Purl Flower – Month 3
The small leaf was rather “meta”, in a way, because long “stitches” of silk purl were couched down with shorter ones. I’ve likened it to Burden Stitch, or even the couching form used in some opus anglicanum, and it includes colour changes as well.
All of these techniques have been simple enough in concept, but the execution isn’t simple at all. Spacing, angles, and cutting the lengths are all, as The Australian would say, non-trivial (mathematician-speak for “quite tricky”) and practice may make perfect in the end, but it hasn’t done so yet!
The final leaf was worked by alternating the hummocks and simple couched techniques of earlier months. In a way this shows that it is possible to create new textures by “layering” or “overlaying” techniques, so the only limits are in the stitcher’s imagination.
It creates an interesting ribbed effect, although with all my care, the raised hummocks aren’t all raised to the same degree. That said, I defy anyone looking casually at the real thing to notice the fact – at only about three inches by five, that would be a lot of detail to be able to distinguish!
And there are other dazzlements in store…

The final detail is to add spangles, which are reliably confusing and dazzling to the eye.
Just imagine all that flickering in the candlelight and shadows of the silk purl textures casting mysteries over each other!
I’ve thoroughly enjoyed this Online University course. Now I only need the time to sit down and read the extra information and watch the videos!
Stuart Silk Purl Flower – Month 2

There was quite a lot to do in the second month, learning new ways to wrangle silk-wrapped purl.
The first element was composed of the loops of purple, short lengths bent in two and controlled by an extra small couching stitch to hold them in place.
This is a technique I’m sure I’ve seen before, and I must say I rather like the effect, although I found it rather worrying to do. The purl is small and fragile, and I think that at the moment I still don’t quite have the headspace to do as well as I would like.
I do think, however, that the time for just not doing it is passed. If I want my skill to come back to me, I will have to use it! Who was it who said, “the more I practise, the luckier I get”? I would like my embroidery to be good because I have worked at it, not because I “just got lucky”!
The next was chipwork, which is just like chipwork in ordinary purl except for the added terror in case the silk wrapping comes off..
And then I got more practice with those nested loops, with the added adventure of adding shading as I went along.
Finally, there was more chipwork, and some little raised humps. These are made of purls stitched on like beads, but with a stitch slightly shorter than the length of purl chosen.
Again, these are not quite as consistent as I would like them to be, although I carefully used the ruler provided in the instructions to cut the lengths.
More practice needed!
Stuart Silk Purl Flower – Month 1

There’s a new course from Thistle Threads, concentrating on the use of silk-wrapped purl threads. It looked like fun, and it includes the bonus of some extra samples of different sizes and colours.
I’m always trying to learn more about the more obscure and interesting corners of embroidery, and the reconstructions of no-longer-current threads and materials play directly into my fascination with early technologies.
The first stage in this case is to work outlines in gold, and on this occasion I deviated slightly from the instructions.
Normal practice these days is to plunge the ends of the gold thread and sew them down at the back, but it used to be more common simply to cut the thread and oversew it firmly on the front. So I’ve done that. It saves a bit of the expensive gold thread, and as this is a small decorative panel and not for a garment or other item which will move a lot, I think it will be successful.
It’s still important to run the thread in the right way over the design to minimise the number of cuts, of course!
The final part of the first month’s instructions is the first element of the silk purl, couched in a spiral to fill a pair of leaf shapes.
You can see that I have rather crushed the silk purl into place, which is a pity as it has introduced breaks or cracks into the purl, but then, this is an extreme close up. Without a magnifier, it is simply an impression of colour and texture.
The spiral is worked inwards from the gold outline, which is probably the only way it could be done – imagine the difficulties of finding the right central point to start from!