
Tag: Petite Pincushion
Petite Pincushion Finished
Petite Pincushion - Embroidery Finished
I said the Petite Pincushion had accelerated – it’s finished!
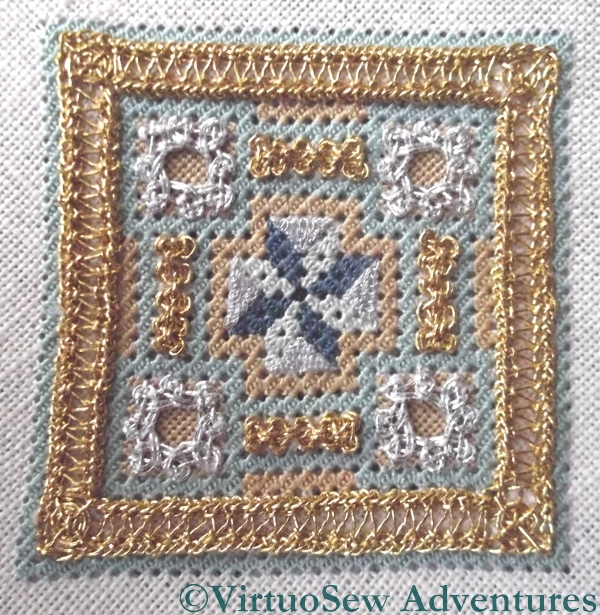
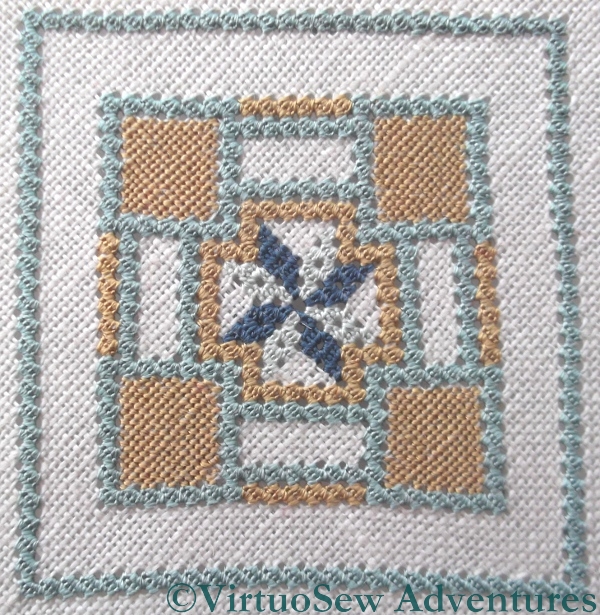
First here is a view of the finished embroidery, still stretched on the frame. You can see the zig zags of the the Hem Stitch on Ladder Stitch, the spirals of the Spider’s Webs, the intricate patterns of the Eight Sided Interlacing and the Figure Eight Interlacing, and the regular background texture of the Queen Stitches. Looks good, doesn’t it!
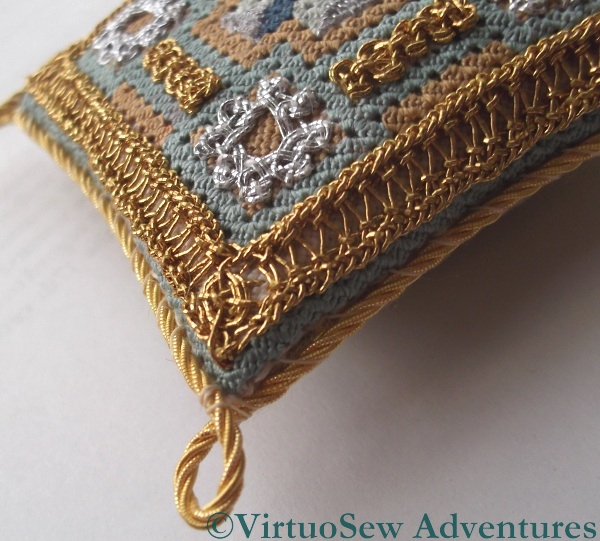
Making up the pincushion was relatively easy, especially after the Tulip Slip Pincushion and the Tudor Pincushion. The kit included a lovely piece of jacquard woven silk for the back, and Fine Grecian Twist to trim the pincushion. I backed the embroidered section with calico to keep the stuffing in – I couldn’t find silk in the right sort of colour (stash not big enough!) and the calico is unobtrusive. All the sewing was done by hand – I find it easier to do that than to get the sewing machine out!
Petite Pincushion Finished
Petite Pincushion Again
Goldwork on the Petite Pincushion – Stage Two
Petite Pincushion Eight Sided Interlacing
Somehow, progress on the Petite Pincushion accelerated hugely once the silkwork was finished. Each separate metal element (except the border!) proved to be fairly quick to do, and as I’ve already said, I enjoyed them immensely.
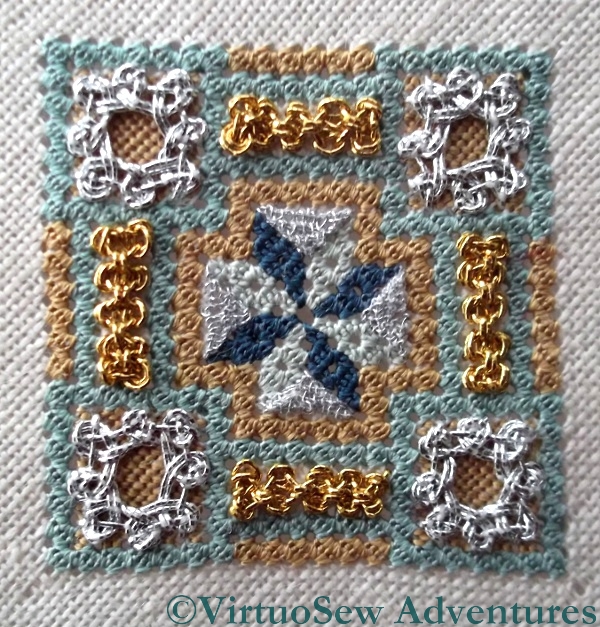
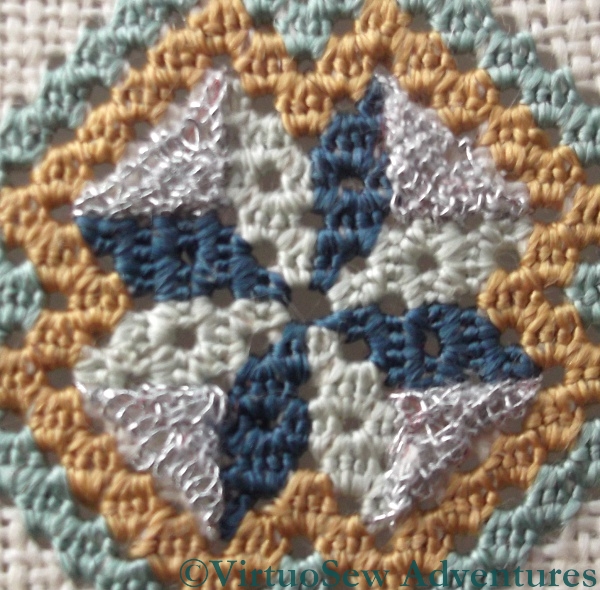
The next elements of the Petite Pincushion were the four spots of Eight Sided Interlacing in silver – so, yet another different metal thread to sample. Putting in the foundation stitches was made much easier because the foundation of tent stitches was square, and neatly segmented along each side by the Queen Stitches. Working these fairly zipped along, and I really enjoyed them.
Petite Pincushion - CloseUp
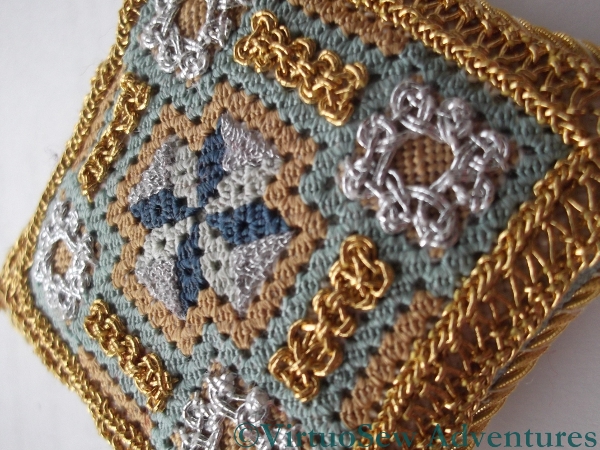
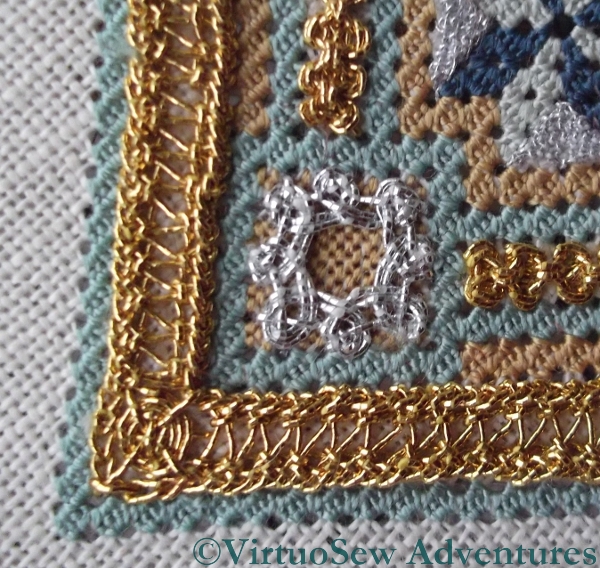
The final section was a border of hemstitch on Ladder Stitch, with Eight legged Spider’s Web stitch in each corner.
The Eight Legged Spiders Web stitches were easy and fun, filling in the otherwise blank corners beautifully. They’re more stable than the Four Legged variation, so if I were to be mad enough to use this as a pincushion when it’s finished, the spider’s webs would continue to look good under the strain!
I’ve been struggling with ladder stitch throughout the course – if you recall, when I first started working it on the Spot Sampler, I had serious problems with tension and with the thread breaking up. Practice makes perfect, I’m glad to say. By the time I’d worked Ladder Stitch all around the edge of the Petite Pincushion, it was going swimmingly – much to my relief.
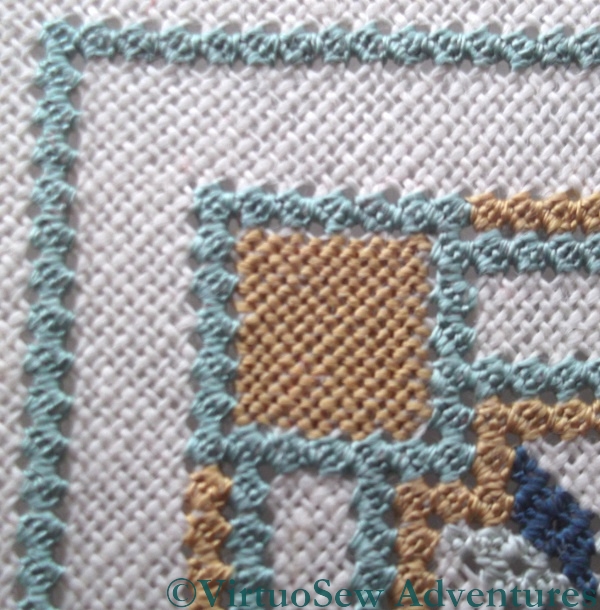
The Hemstitches on either side of the Ladder Stitches increase the thickness of the edges, and create a zig zag effect with the horizontals, subtly altering the overall effect.
Goldwork on the Petite Pincushion – Stage One
Petite Pincushion Detached Buttonhole
The diagram in the instructions listed the goldwork stitches from the centre outwards, so that is the order in which I decided to work them.
The detached buttonhole stitch at the centre was worked in a very fine silver thread. It was terrifyingly lively and had a will of its own, which made it hard to be sure of what I was doing. Yes, I had the magnifier, but looking at the closeup, the stitches are not especially consistent in size or shape.
I also caught down the detached fabric in the middle of the long side – not a step listed in the instructions, but one which seemed sensible at the time.

Petite Pincushion Figure Eight Interlacing
The Figure Eight Interlacing stitch filled in the strapwork in the middle of each side of the panel. I really enjoyed working this stitch, and this element of the Petite Pincushion seemed to be finished in no time at all! And believe me, I’m very glad I worked the detached buttonhole stitch first. I shudder to think how that whippy silver thread would have caught around edges of these panels, which stand proud of the surface to a considerable degree!
Finished the silkwork on the Petite Pincushion!
Petite Pincushion Silkwork Finished
Born teacher that she is, Tricia provided two additional projects with the Tudor and Stuart Goldwork Masterclass. After all, practice makes perfect, and practice is much more palatable when it produces something pretty at the end.
The silkwork of the Petite Pincushion is primarily worked in queen stitches. As you may have gathered, I’m not especially keen on counted work, regarding it as a salutary discipline rather than a pleasant pastime. I’ve been rather pleased that I’ve persisted with it in these cases, which is testament to the enjoyment I’ve been getting from learning the new stitches, and my desire to play with them even more.
Petite Pincushion Quadrant CloseUp
Not that it has been entirely straightforward. The tent stitch corner panels were quite a strain – it’s astonishing how, even with a magnifier, I’ve managed to miss the odd stitch or set it crooked and have to unpick it and try again.
I never thought I would say this, but the queen stitches were easier! They interlock nicely, creating a textured, almost brocade-like surface which will make a good background for all the goldwork stitches that fill in the strapwork.
Tudor and Stuart Masterclass – Beginning the Petite Pincushion
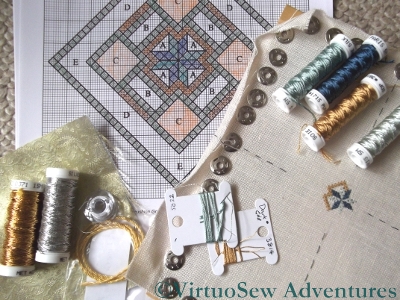
Starting The Petite Pincushion
There were two additional projects included in the Tudor and Stuart Goldwork Masterclass, to provide further opportunities to use some of the stitches we are learning. The Tudor Pincushion was one, and this “Petite Pincushion” is the second. The materials include a piece of silk brocade for the backing, some gold cord to provide an ornamental edge, and more spools of assorted metal threads for the goldwork stitches.
Whereas the silk stitchery for the Tudor Pincushion was in primarily in Tent Stitch, most of the silk work on the Petite Pincushion is in Queen Stitches. I’ve not done any since I finished the silkwork on the sampler, and I am finding that I am having to remind myself to pull them tight to create the openwork effect. I will have to remember to line the embroidered side of the pincushion or the stuffing will poke out through the gaps!
I stitched centre lines on the fabric, but as you can see, once I had the first stitch placed I snipped out the middle stitches and pulled them back out of the way.
I’ve already finished with two of the silk colours, which appear only in the central starburst. Now I just have to do rows of strapwork in the other two colours, as well as the four blocks of tent stitches that provide a basis for a rather intriguing-looking interwoven stitch which will probably be nearly the last element I add.