
Tag: Tulip Slip
A tree for the trinkets..
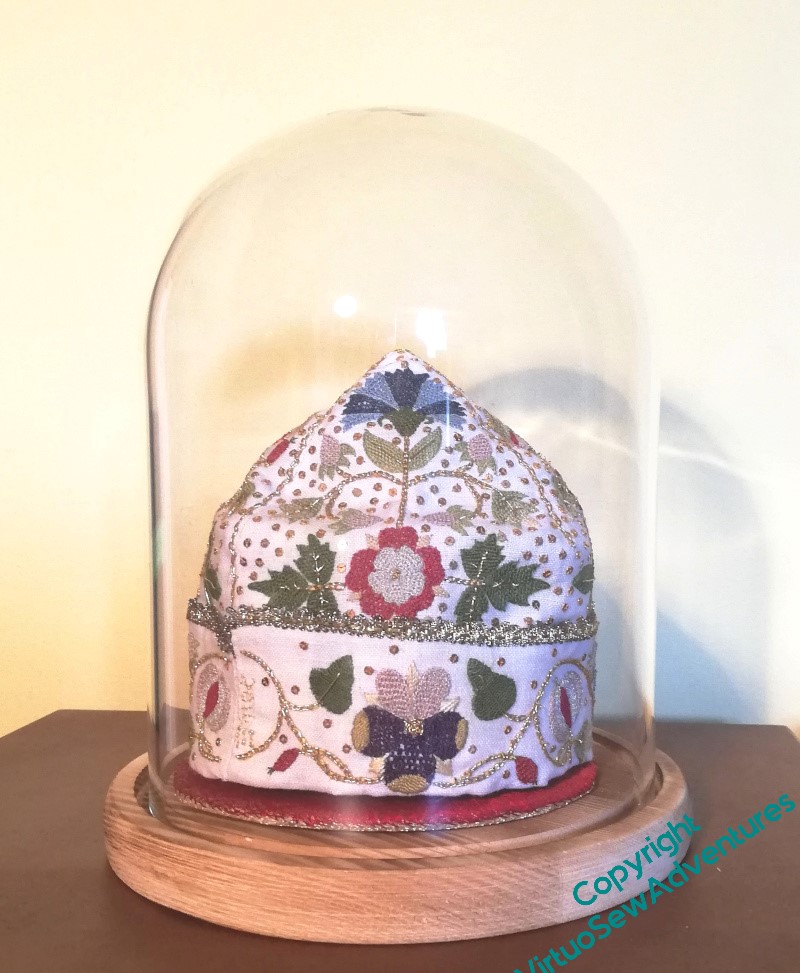
When I had the idea about using a parlour dome for the Violets and for the necklace, I realised that I would need to play with how I displayed them, trialled the Tudor Nightcap in the dome and realised that I could now put it on display.
So what about all the other Thistle Threads pieces?
Well, it turns out you can get parlour domes that aren’t round, so I got the largest I could bring myself to buy and then stopped to think…
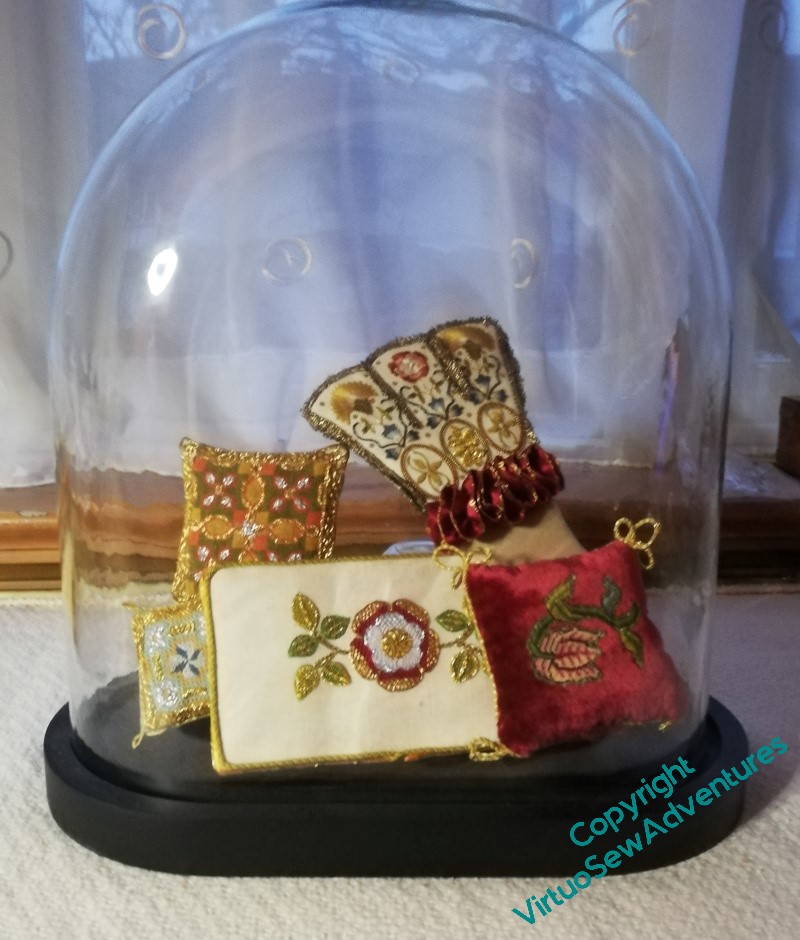
I started by playing around with propping the various pieces I’ve been planning for that Winter Decoration Corner against one another within the dome. It’s a flattened oval, and quite high, but anything I could improvise seemed not to have the height I wanted without taking up all the display space.
I think this shows the idea will work, but it doesn’t really have the presence that the pieces deserve.
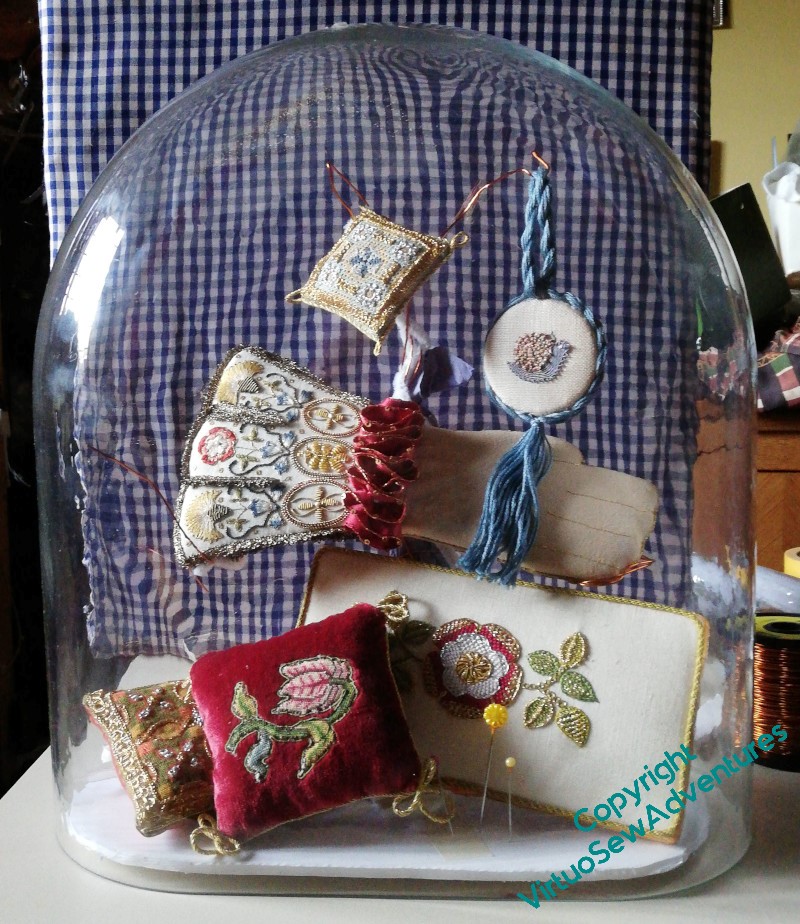
This is better. I’ve used offcuts of the foamcore that I bought to help me with Nefertiti and Akhenaten to create the base that will sit inside the glass, sandwiching the beginnings of the wires forming the tree between two layers. I’ve built up a support for the green and orange cushion at the back using smaller bits of foamcore, and wrapped pipe cleaners around the wires.
It’s not perfect, but I’ve set it up in the hall where I will pass it every day, to work out whether I like it. Then the idea is that I will have a lovely messy hour or so covering the wire with papier mache, allow it to dry, and paint the whole thing gold.
The Tudors were as fond of bling as the ancient Egyptians, after all!
The Tulip Slip Pincushion is Finished
The Tulip Slip Pincushion Completed
I have finished the Tulip Slip Needlework Nibble. I used a sewing machine to attach the silk brocade backing to the silk velvet front, because my fingers were still shredded from finishing the Floral Glove Needlecase, and the velvet was very hard to stitch.
The amount of stuffing needed for even quite small items never ceases to astonish me. By the time I finally managed to finish stuffing this one I was wondering whether it opened into the Fourth Dimension!
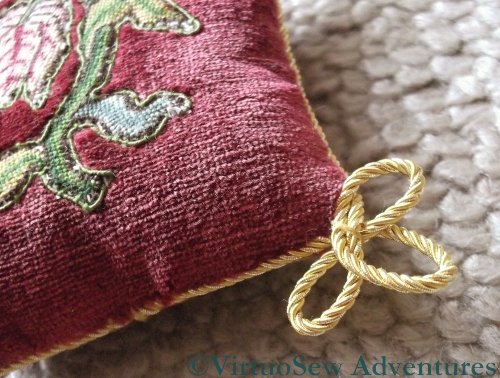
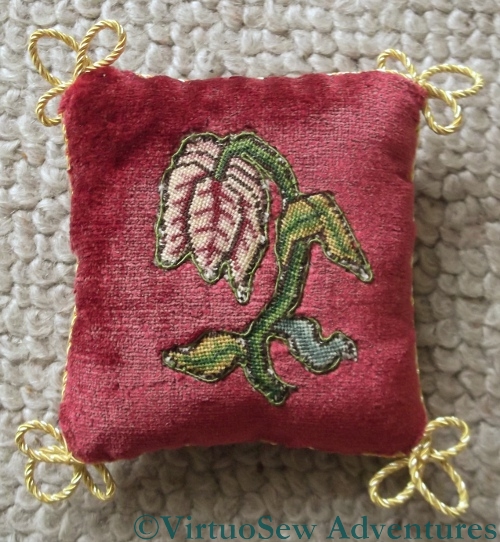
The Tulip Slip Pincushion - Corner Detail
The corner detail shows the trefoil shapes in gold cord used to finish the piece. Those, too, were rather a challenge. I was rather wishing for a third hand to help me hold the loops in place while I attached them, and as you can tell from looking at the whole thing, some of the loops are loopier than others.
The corner detail also shows more clearly the effect of the silk gimp outline which creates a crisp edge for the shape, and helps to keep the pile of the velvet from encroaching on the tent stitched Tulip.
This was rather fun to do, and it will make a great addition to my planned “winter decoration corner” of historical needlework projects…
Progress on the Tulip Slip
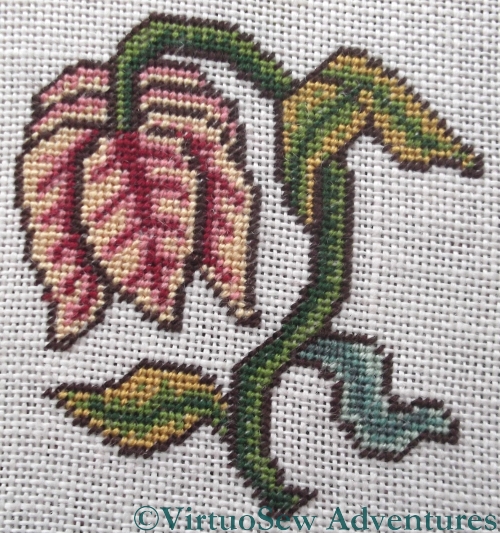
Tulip Stitched
I’ve now finished the tent stitch on the Tulip Slip Needlework Nibble.
I had a minor epiphany about halfway through, when I realised that in this particular case, absolute accuracy in colour placement isn’t really necessary. I’m not trying to create a picture which will look all wrong if every stitch isn’t exactly as charted. Tricia has created a stylised design which we are then going to use to learn the technique of working with tent stitch slips. So in minor details, the Tulip is not exactly as charted, but I doubt anyone will notice!
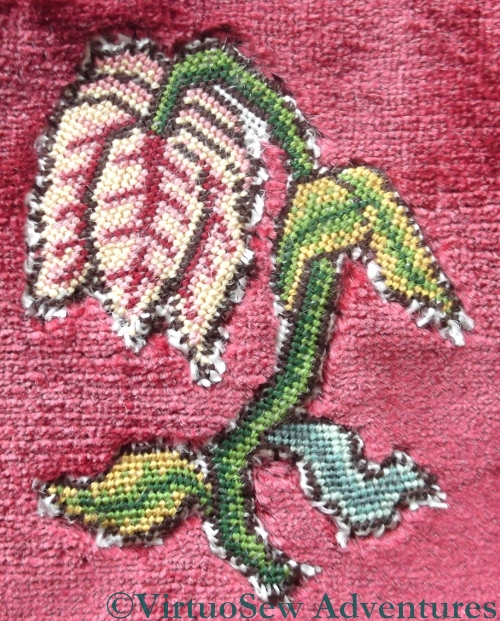
Tulip Applied
The next stage was to cut out the slip, and attach it to the velvet, turning the edges under as far as possible. I didn’t think this would be easy, and it wasn’t. Since linen for counted work is quite widely-sett (that is, the set up of the warp and weft allows a little air between the threads), it’s also rather prone to fray, and rolling the threads under with a needle turned out to be a slightly hairy experience.
On top of that – we all know that velvet “creeps”, don’t we? I unpicked and re-positioned the slip twice, and ended up pinning it firmly in place, regardless of the risk to my stitchery. I’m pleased to report that there seems to be no lasting damage…
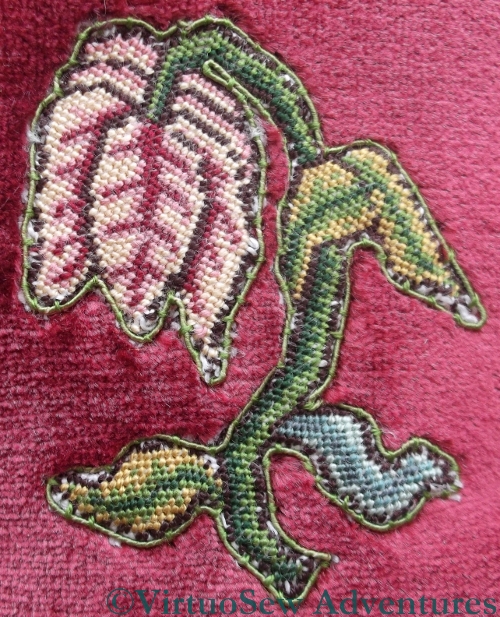
Tulip Edged
The final stage before assembling the pincushion (that will be another post!) was to edge the slip with silk gimp. The green gimp matched one of the green silk threads, so I used a single strand to couch it down. Except that the various fabrics were sturdy enough to make it quite an effort to stitch through them, this enterprise proceeded as planned. The instructions showed the slip simply outlined as a single piece, rather than having any details of outlining each separate section.
In real life, the slip doesn’t look as ragged around the edges as it does in close up!
Tulip Needlework Nibble – Getting Started

Tulip Kit And Finishing Kit
My kit and finishing kit for the Tulip Slip Needlework Nibble arrived very promptly. They have obviously got all this down to a fine art, now, at Thistle Threads, because I was expecting it to be another week at least!
My Tulip Kit contains the linen and silk for the embroidery, while the finishing kit contains silk velvet for the pincushion, gimp to edge the slip, and Grecian Twist to trim the pincushion when it’s finished. The parcel also contained information about the Exhibition being supported.

Tulip Kit - Silks and Chart
I’ve said before that I colour in charts when I’m about to start on counted work. I should have explained that I don’t colour in the whole thing, or at least, not necessarily. The second photo shows the linen and silks lying on my printout of the instructions. You can see that in this case I’ve picked one colour in each section to colour in. Usually it’s best to pick one of the middle tones, because if a design is properly charted, as this one is, the dark colours will have dark symbols, and the light colours, light symbols. The coloured shade is to help make it clear which of the medium-to-light tone of symbols is which.
It is really simply there to help me find my place on the chart just at a glance, without having to take to long to check I’m still doing the right thing!
Thistle Threads Fundraising Needlework Nibble

Tulip Needlework Nibble - image from Thistle Threads website
Encouraged by the success of the Needlework Nibble that supported the Museum of Costume in Bath, Tricia at Thistle Threads has launched another fundraising Needlework Nibble, this time to support the exhibition With Cunning Needle: Four Centuries of Embroidery at Winterthur Museum.
I’ve enjoyed the Glittering Snail, and the two Thistle Threads courses I’ve been following, so I’ve ordered my kit, and the finishing kit to go with it. I’ve printed out the instructions, as well.
Tricia has already reported that the fundraising is going well – about halfway to the target, thanks to the generosity of one of her readers who has matched the first thousand dollars raised. That means there are still kits available, although they are clearly moving fast.
Why don’t you join us?