
Tag: Learning Stitches
Some Interesting Stitches
I keep going on about Floral Feather Stitch as one of my favourites. I’ve done a video of it and uploaded it to my MakerTube “Interesting Stitches” channel, in hopes of seeing more people taking it up. It has been auto-captioned, and I’ve not worked out how to correct infelicities yet. But at least you may find it helpful.
Another stitch I’ve recorded, I’ve called Super Closed Feather Stitch. It doesn’t quite cross over, but on Stella’s Birds I found it made quite an interesting line, and since textures are very much part of the fun of embroidery, I thought it was worth sharing.
Finally, although it’s hardly new, I thought some of you might like to see again the recording of Holly Braid Stitch in its new home on MakerTube. This is one of the stitches from one of Jacqui Carey’s books about Elizabethan stitchery, and although it’s beautifully diagrammed in the book, the workflow didn’t quite work for me as diagrammed. Looking at this video helps me to rediscover it when I decide to use the stitch again. In particular, I usually work line stitches towards myself, and this one I can only work successfully in the other direction!
More progress on the Little Jacket
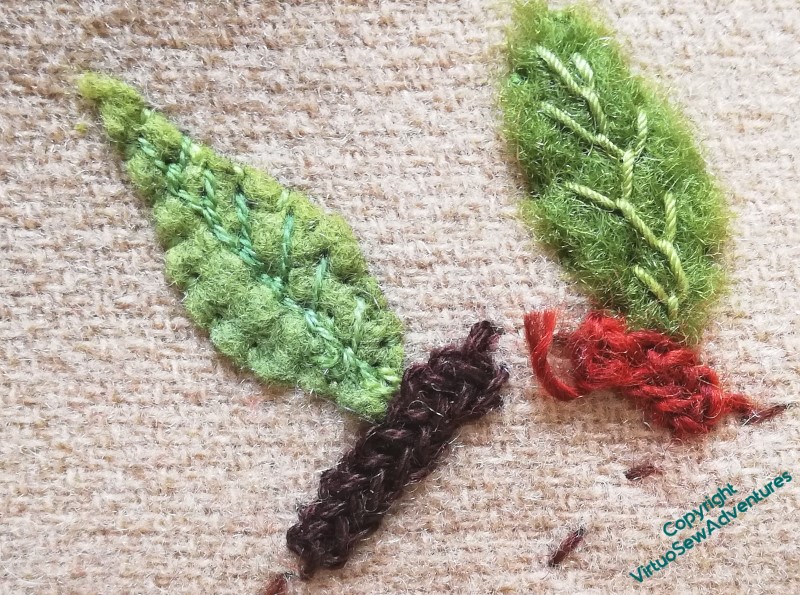
I decided that I was going to work all the major stems in one of the Braid Stitches, so I spent quite a bit of time revisiting Plaited Braid Stitch, the ordinary Braid Stitch, and others. For a while that was a little painful.
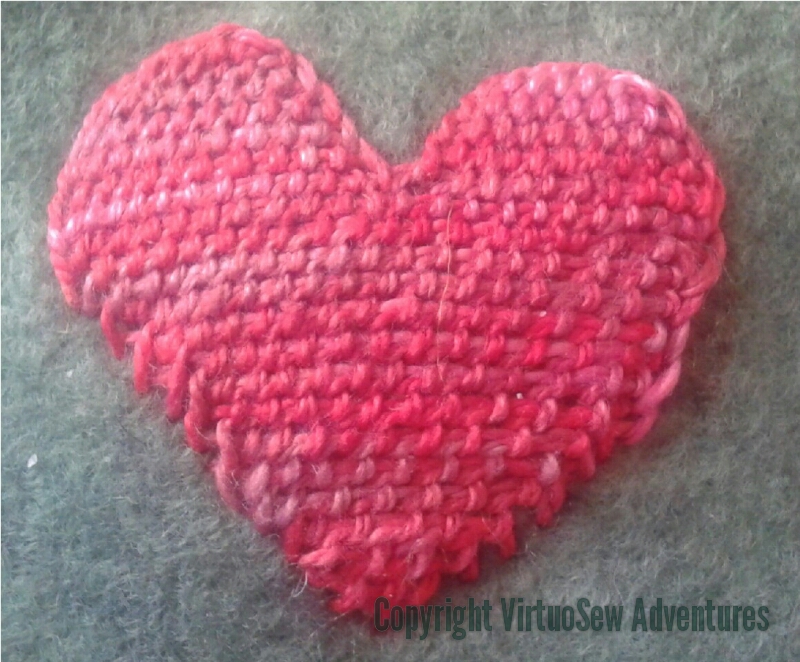
First of all, I was reminded that these stitches don’t stay in your hands the way (say) Feather Stitch does, and then secondly I was reminded that they are very thread-hungry. It’s (almost) all on the front, where you get the benefit of it, but metres get swallowed up in short order. And I knew there would be metres of whatever-stitch-I-chose. My stash doesn’t run to that sort of length, but having performed a few experiments, I realised that sock yarn would be perfectly useable, given the fabric I’m working on.
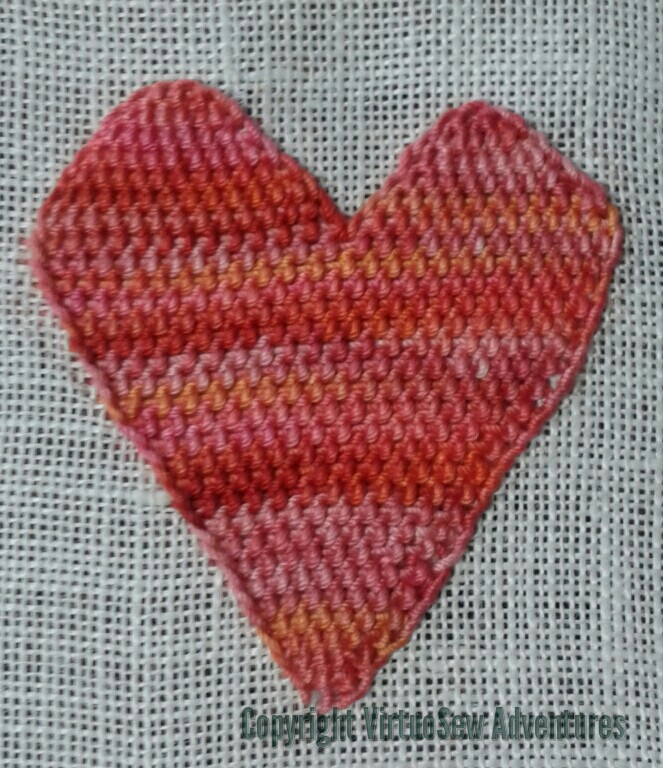
I finally chose to work Holly Braid Stitch, which I experimented with in 2014 when I was working on the Glittering Nightcap. I’d found it in Jacqui Carey’s book “Elizabethan Stitches”, and after some struggles it had worked pretty well. This time I tied myself in so many knots with it that I asked for help in the Historic Hand Embroidery group on fb, only to find that very few people had attempted it. However, those who did were very helpful, and several very intrigued people asked me could I video it if I got it to work…
So I have. What you see here is probably not enough to learn the stitch from without also following Jacqui’s diagrams and instructions, but I think it helps with the “workflow” of the stitch, which is not well represented in those diagrams, I suspect purely because, as a braidmaker, she thinks differently about the way a stitch works.
Once I had the stitch down pat, I bought a rather gorgeous sock yarn (Woodland Fire from The Yarn Gallery), and whenever I wasn’t sure about the details I wanted to add to a flower or leaf, I just kept on with the stems..
And on. And on!
And now, Episode 72 of Slow TV Stitchery is now live, in which we encounter difficulties in working a pattern backwards, experiment with French Knots, and recall “Leaving the Tyne”.
Embellishing the Circles Skirt – Part Four

Shell Chain

Wavy Chain
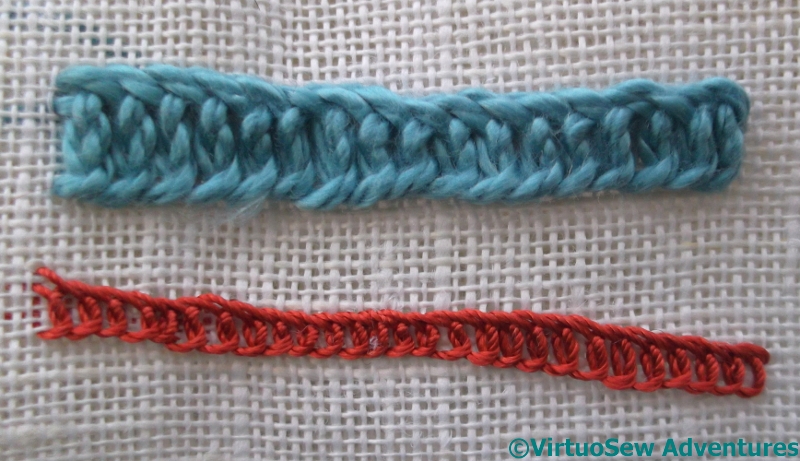
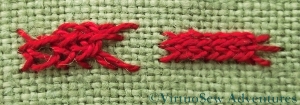
Some of the suggested stitch variations in Edith John’s books have worked very well for the Circles Skirt, others rather less so. I think these two samples might help to show why.
Shell Chain Stitch worked beautifully. In the pearl cotton thread I used, there’s a nice, crisp sense of the stitch pattern, but the stitch is still flexible enough to curve around the circular shape I wanted it to, whereas Wavy Chain stitch, a variation upon it, is a very “stiff” stitch. It is wide, but each group of stitches stems from the same point, and even using a much finer thread and shortening the stitches really doesn’t make it any more flexible.
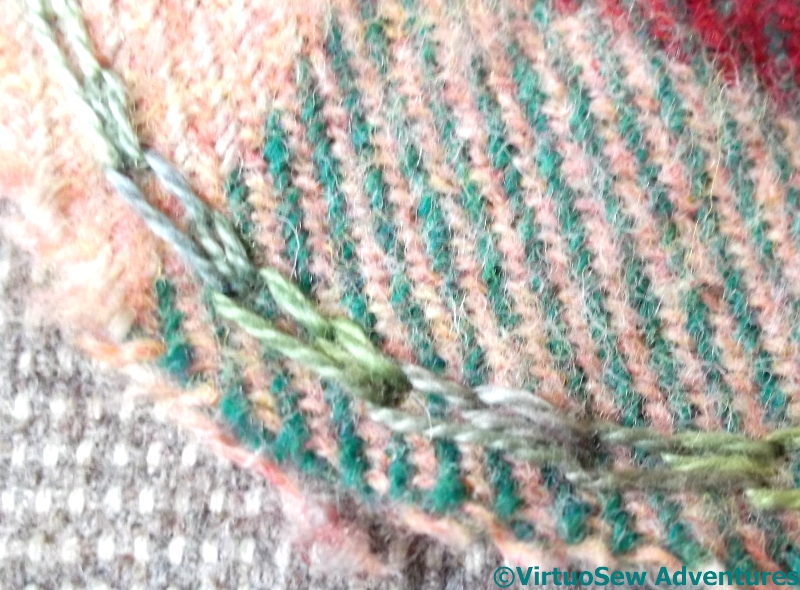
Shell Chain On Tweed
So here is Shell Chain on the skirt. It runs neatly around the edge of one of the checked circles, and although now I have worked the sample as well I might have preferred to shorten the stitches, it was fun to do, and easy to alter to match the curve.
I tried Wavy Chain several times in various places without managing to make it follow even the gentlest of curves, and eventually decided to give up until I’d thought it out some more, and maybe even done some practice.
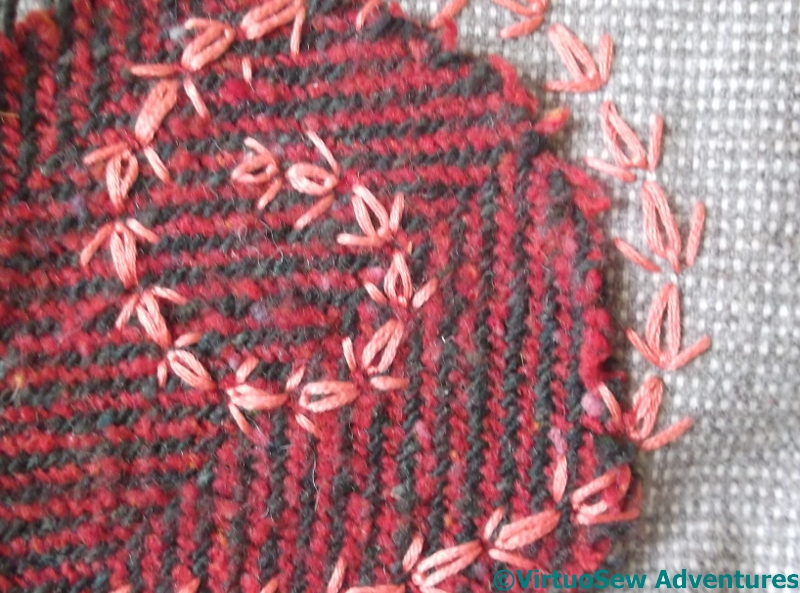
Wheatear Spiral
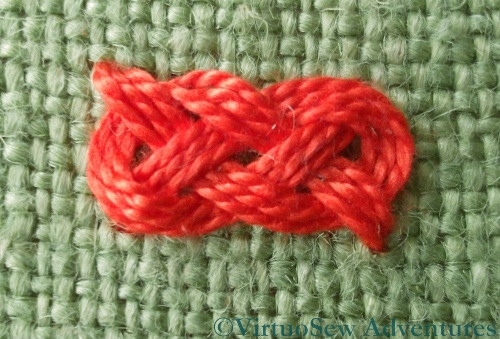
The Wheatear Spiral more than made up for my frustration.
It was a joy to do – the stitch itself is easy and effective, and the coral thread sings against the red and green tweed. Offsetting the spiral in comparison with the tweed also makes the whole thing more interesting, helping to connect the ground fabric and the embellishment. Maybe I should have swung the spiral further out over the base fabric, but this is what my needle wanted to do!
Further Experiments for the Glittering Nightcap

Elizabethan Holly Braid
Continuing my idea of using different stitches on the brim, I spent a little more time experimenting with stitches mentioned in Jacquie Carey’s book “Elizabethan Stitches”.
As I have mentioned before, the difference in mental models between a braidmaker and an embroiderer are clearly considerable, since although the diagrams are very clear, I spent much longer than I would have expected in puzzling them out, especially the Holly Braid Stitch. Eventually I decided that it needed a much stiffer thread than pearl cotton, and indeed, the silver thread version came together much more easily than I expected.

Elizabethan Double Twisted Chain
The Double Twisted Chain Stitch was much more straightforward to tackle, although wrangling the thread was quite a challenge at times – as you can see from the uneven stitch size and tension.
The Holly Braid Stitch is a little like a plaited braid stitch in that almost all the thread is on the surface in a neatly interlocked, textural pattern. It also uses up a lot of thread – maybe three or four times as much as the ordinary Reverse Chain Stitch that Tricia suggests for the stems. Unfortunately, I don’t think I have enough of the gold #381 in the kit to embark on stitch choices that are so profligate of thread, although if I find a spare tube in my stash, I may change my mind.
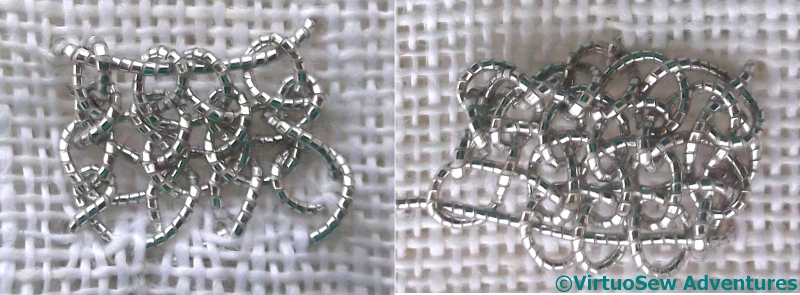
Two Forms Of Trellis Stitch
Nomenclature is a constant source of puzzlement. What Jacquie Carey refers to as Trellis Stitch – and offers an Elizabethan version for – I think of as Single Brussels Stitch. Jacquie’s is worked upward from the base cord, while Single Brussels I have always worked downward. I think I need to try again with these stitches, using something other than a metallic thread, because neither of these patches looks quite right!
Elizabethan Twisted Braid Stitch in Pearl Cotton and Silk
Elizabethan Twiseted Braid Stitch in Silver
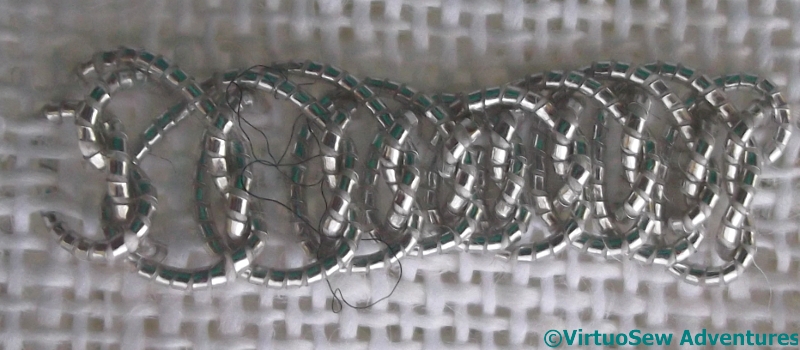
Elizabethan Twisted Braid Stitch was rather more fun. Most of the thread is at the front of the fabric, making it a good choice for a metallic, or other expensive thread. The appearance – when the eye isn’t completely dazzled by sparkle! – is of an alternating twisted bar and straight bar. I clearly need to work the stitch for longer to learn to keep it consistent in width and to learn to alter the stitch length for differing effects, but I was pleased to find that the structure of this one made sense to me quite quickly.

Elizabethan Twisted Chain
Elizabeth Twisted Chain differs from the modern version in that both of the ends of the stitch are inside the loop, instead of one in and one out as in the modern version. It’s also worked in reverse – although that, I find, is no longer a challenge for me. The reverse versions on Chain Stitch are so much easier to work in metallic threads than the ordinary version that it is becoming second nature, and faced with a thread that is difficult for other reasons, it is also becoming second nature to consider whether working in reverse might help.
It is a constant source of delight to me to find that the things I learn, and the things I thought I would learn, are not always the same. The Online University courses, and my own experiments have given me more, and different, strings to my bow…
The Crane – playing with silken thread, Part One
Japanese Bird
I decided to make a “Useful Pot For Putting Things In”, as Winnie-The-Pooh would have called it, for my cousin for Christmas. In fact, I cheated and merely embroidered a design for a lid!
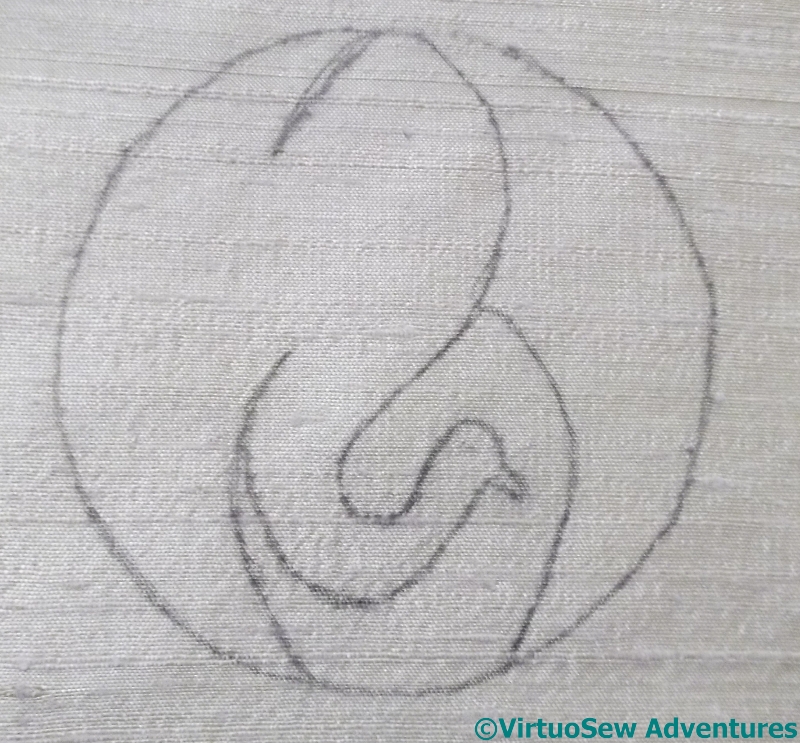
I found the motif in the Japanese section of “Pattern Motifs: A Sourcebook” by Graham Leslie McCallum. I think it’s a crane. The design is very pared-down, and I thought it would make a good way to show off some of the superfine silk thread from Stef Francis, maybe even an excuse to use some more unusual stitches to see how the threads show them off.
Hungarian Braided Chain Stitch
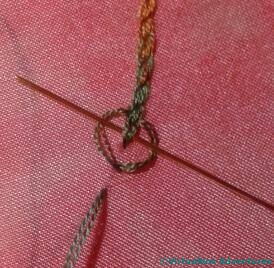
Those of you who follow me on Twitter may recall that I tweeted this picture of the stitch I eventually chose to use. It’s called Hungarian Braided Chain, and I found it in one of those books by Edith John that I mentioned when I began embellishing the Circles Skirt. If you think of it as Heavy Chain with the needle weaving over and under the threads as shown here, you will get the idea.
I’m very taken with the stitch, in fact. It creates a fascinating textured line, and colour changes in an over-dyed thread bring it to life even more. I can imagine using it in plain thread as an indication of braid on clothing, or ropes on a ship, or even simply in side-by-side rows to create a textured effect.
This is the first – so far unfinished version, in superfine silk on silk habotai. The relatively short colour changes in this thread create subtle changes from stitch to stitch, emphasizing the structural patterning and texture. When the destined pot arrived I decided the combination looked altogether too hot and bothered, and went rummaging in my stash again…

Close Up Of Stitching On The Crane
The fabric I finally chose is a rough dupion from The Silk Route, in a golden cream colour which is extraordinarily difficult to photograph, and I picked a slightly different silk thread, more restricted in colour range. Using four strands of thread produced a lovely cable-like appearance, which you will see if you open the photo at full size.
The dark section of the design, behind the bird’s head, I worked in a dense version of trellis stitch, with horizontal, vertical, and diagonal lies all tied down with tiny cross stitches. Even working in a hoop or frame, trellis stitch cane be a bit of a challenge to stitch, but I made it in the end!
A milestone on the Gentleman’s Nightcap, and an experiment
Silkwork On Cap Done
I’ve now finished the silk work on the main sections of the Glittering Gentleman’s Nightcap. The next stage is to work the metal thread embroidery, because I want everything on this side of the fabric done before I take it off the frame, turn it over and work on the brim. In the end, I found that the last few bits went quite quickly, perhaps because I had a whole day when I did nothing else and found the stitching speeding up. It’s taken me a while to realise it, but I now think that Detached Buttonhole Stitch With Return is one of those stitches which requires “flow”, which in turn doesn’t happen if you sit down with only time to do one leaf before doing something else!
Up until now, I have tended to regard the Online University projects I have done as a sort of salutary discipline, and worked them exactly according to the instructions (something I rarely do, even when I have instructions!), but during my last visit to a stitching show, I spent some time on Jacqui Carey‘s stand, talking to her, and acquiring her books about Elizabethan Stitches and Sweet Bags. One of the stitches she found, and “reverse-engineered” is effectively the “Detached Buttonhole stitch with Return” which forms so much of the stitchery on this piece, but it incorporates a border within the method of stitching. So I thought maybe on the brim I could used this bordered stitch instead of the standard stitch.
Unsuccessful Trial
In another departure from my usual procedure I decided to practise the stitch first, and it’s really just as well.
Perhaps because Jaqui is primarily a braid maker and not an embroiderer, it took me some time to adapt my way of thinking to make sense of her diagrams. She also shows the stitch as worked upwards, whereas I have worked downwards with this sort of stitch all my life – or at least ever since my first attempt, when I worked the Needlelace Embellished Blouse.
Second Trial Much Better
The fact that version one was worked on felt didn’t help, either, since the needle kept snagging it, and the felt sagged under the weight of the stitching.
So version two was worked on linen, using a mercerised cotton instead of pearl cotton. This time I think I have got to grips with the stitching and the way to create the border. The linen survived much better, but the mercerised thread kept trying to tie itself in knots!
Furthermore, try as I might to work the stitch as diagrammed – upwards and away from me – I kept turning the frame and working it sideways or downwards instead.
I probably will choose to use the stitch for at least some of the areas on the brim, but it will be interesting to see how I cope when I simply can’t turn the frame around!
Tudor and Stuart Masterclass – Month Seventeen
Eight Sided Interlacing And Josephina Knot
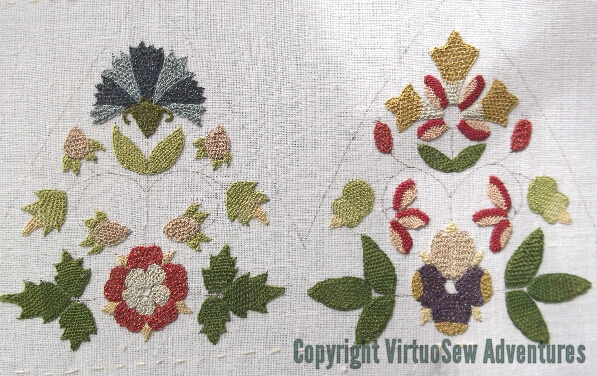
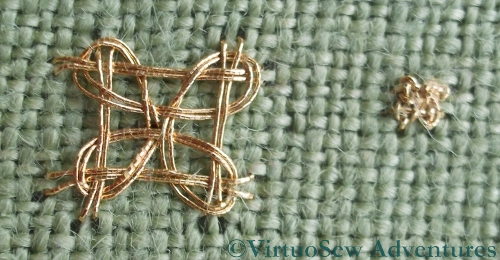
Month Seventeen’s stitches were Eight Sided Interlacing Stitch, and the Josephina Knot. I rather enjoyed them, too – they’re both very ornamental indeed!
The Eight Sided Stitch is less scary than you might expect on first sight, although I was slightly surprised to realise that the foundation layer interlaced in the direction contrary to the one I expected.
It will be more exciting at the smaller size on the real sampler, but I feel that I understand the structure, at least, and that is the important point, at this stage.
Josephina Knot in Pearl Cotton
However, if you look at the gold Josephina Knot in the top picture, you will see that I didn’t quite get the hang of that one…
This pearl cotton version shows what I was aiming for. It’s a really lovely ornamental spot stitch, with a slightly Celtic feel to it. However, if the interlacing goes wrong at any point during the working, it is very hard to recover – and not always easy to see before you’ve finished, either.
I made extensive use, for these stitches, of a belated birthday present from Elmsley Rose – a set of bone needlework awls/stilettos. I have a steel laying tool, but it’s so sharp that it’s not a good tool for coaxing threads into place. My birthday presents were just perfect – Thank You, Megan!
Tudor and Stuart Goldwork Masterclass – Month Sixteen
Four Sided Interlacing Stitch
The stitches for Month Sixteen are stitches that create prominent large “spots” of intricate pattern. They are simple enough in concept – there is a foundation of straight stitches, and an interlaced pattern worked around the foundation. Naturally, the actual working of the stitch proves to be less than entirely straightforward. I try to vary the scale of the stitches I work on my practice cloth, but in the case of Four Sided Interlacing Stitch when I was trying to work it as a counted stitch, the only variations I could create successfully were “Huge” and “Tiny”. At the smaller scale shown there is really little point in using an interlacing stitch like this, and one might more sensibly choose something a little simpler to work. At the large size, the effect of the metal thread is diluted by the background fabric.
Diagonal Four Sided Interlacing Stitch
In the case of Diagonal Four Sided Interlacing Stitch my two different scales worked slightly better.
I know, by the way, that in the case of one of these stitches, I made a mistake in the foundation layer which lead to a further mistake in the interlacing. I can’t find it now, and I’m going to be intrigued to see how often I get these stitches right, when I start working them on the sampler itself!
Tudor and Stuart Goldwork Masterclass – Month Fifteen

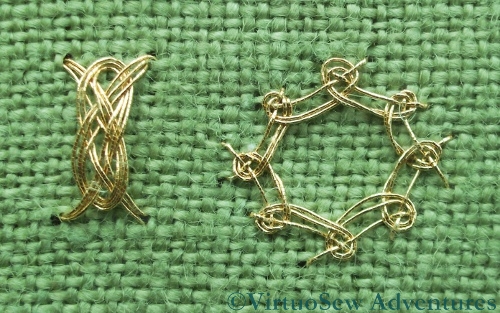
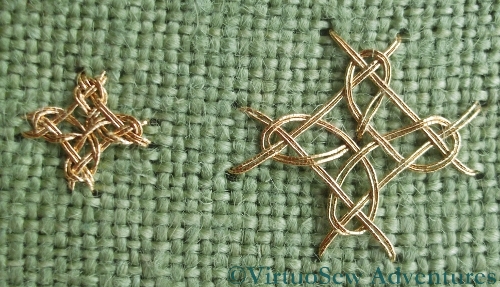
Circular Interlacing Stitch
There were two more interlacing stitches this month, Circular Interlacing Stitch and Figure Eight Interlacing Stitch.
I know I’m always talking about scale on these stitches, but I’m pretty sure that at a reasonable scale of thread to fabric, the Circular Interlacing Stitch will create a lovely neat boss which would have all sorts of wonderful uses in representing jewellery and embellishment. Instead, on my loosely-woven practise cloth it looks rather leggy and a bit thin. I’m glad to see that I got the interlacing right, and don’t have any twists or tangles in it, though!
The most difficult part of the stitch, I found, was laying the foundation interlaced crosses using the correct proportions and directions. Sometimes a larger thread count makes life harder rather than easier!

Figure Eight Interlacing Stitch
By contrast, it isn’t at all obvious that I even got the Figure Eight Interlacing Stitch right, although I am pretty sure that I did. It might have been better to pull all the wraps tighter to create a neater effect, rather than allowing the loops to create the uncontrolled springy appearance that they have at present. This is partly a result of the fact that I’m still reluctant to pull metal threads into tight loops because I don’t want them to strip their surfaces.
I do like the rich, textured braid effect that this stitch creates in the photographs in Tricia’s instructions, so I think it will be worth playing with it using different threads – not all of them metal, either – and seeing where it takes me.
Tudor And Stuart Goldwork Masterclass – Month Fourteen
Plaited Braid Stitch In Pearl Cotton
The Plaited Braid Stitch was one of the reasons I wanted to do this course. There are instructions in at least half of my books on embroidery, and I’ve watched Tracy Franklin demonstrate the stitch. I even spent a whole day practising it at one of her courses. Sometimes it worked, sometimes it didn’t, and frustratingly, I never felt I knew what I was getting wrong.
Consequently, when I sat down to tackle this month’s Stitch, I was expecting frustration and fury to reign. I started with Pearl Cotton, thinking that I would be less fretful about errors if I was not conscious of using an expensive thread. I watched the animation first, and although you can see that the first inch of my practising got very tangled up, I’m sure that it helped.
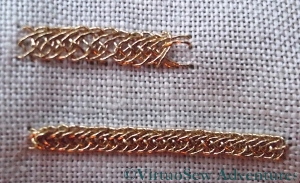
Plaited Braid Stitch In Gold
As I’ve repeatedly mentioned in my posts about this course, I’ve become acutely aware that the question of scale is critical to the success of some of these stitches. My first effort in pearl cotton was at too large a scale, and the thread floats were too floppy. In the case of the second trial, I reduced the size of the stitch, and suddenly found it coming together, which gave me some confidence that I was beginning to understand the structure of the stitch. The tension was still a little slack, but all in all, it was beginning to make sense.
So then I found a piece of scrap linen, and started playing with gold thread. Again the two rows are at slightly different scales, but now I really feel that I am going to master this stitch.
I also think I’ve cracked the problem of why the vast number of books I have on the subject don’t help. With the honourable exception of The Right Handed Embroiderer’s Companion, by Yvette Stanton of White Threads, they all use the same inadequate set of diagrams, presumably copied from an earlier publication. Furthermore, judging by the (slightly differing) diagrams in Tricia’s notes and Yvette’s book, they diagram the left-handed technique. Since all their other diagrams are for right-handers, these books provoke considerable confusion! Still, I now know where to go when I need to be reminded how to do the stitch, and I feel confident that with a bit of practise I will be able to pick it up any time I need to.
And I will need to. I have a few ideas buzzing around in my head, and Plaited Braid Stitch will take its’ place in them!