
Tag: The Map of Amarna
Continuing to think about display ordering..
You may recall that I wondered whether I should reverse the order I had planned for these two main panels of the Dreams of Amarna.

When I finally add the border panels and the “spots”, my intention as far as possible to have the spots that were already known set with the Map, and the spots which are more closely linked with Mary’s experiences at the dig set alongside the View of the Excavation. I’m still not sure which way around to put them, but perhaps if I can arrange the border panels to be moveable, we can change that depending on what else is in the exhibition? There was a suggestion, pre-Covid, that particularly northern British museums associated with the EES might be interesting in combining my embroideries with their finds. Now that’s an enticing thought…
I don’t think I’ve quite finished adding details, and I still need to think out my reasoning and placement for these two, but although the extra shadows are barely visible, even in person, they have, I think, brought a better sense of focus. I do, however, have a few highlights and details to add!
One thing I really like is the clear, un-seed-stitched section at the bottom. When the fabric is washed and ironed, I think that area of plain cloth above the title and surtitle will help to make everything settle together.
Adding more detail..
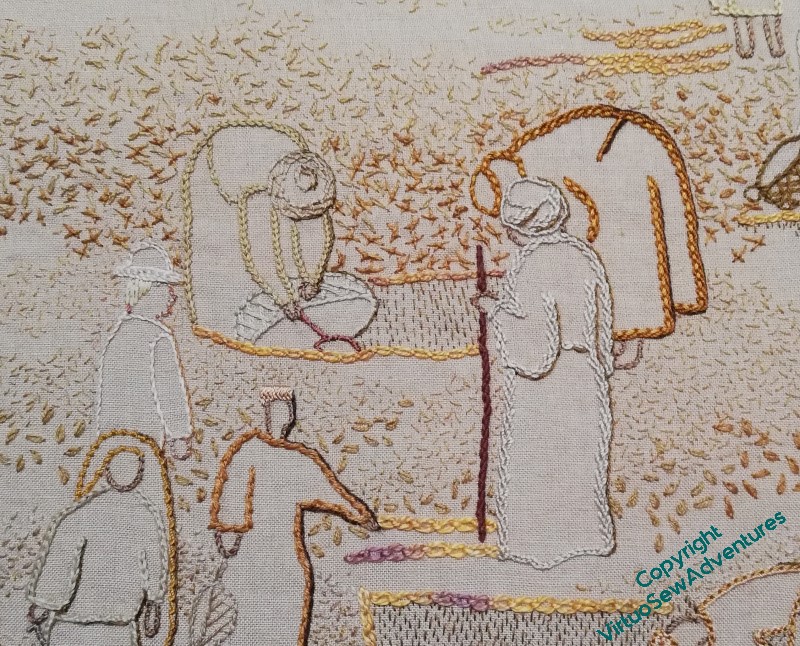
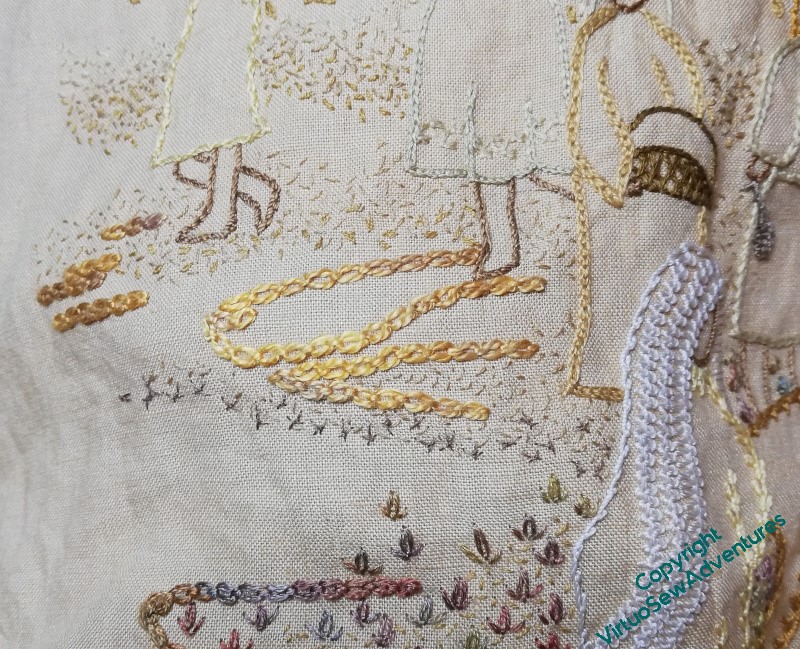
I started by tacking a shadow line along the edge of the Gufti with the staff, decided that it did indeed help, took out the tacking stitches, and started adding very fine stem stitch shadows in single strands of cotton or silk along the right hand sides of the figures.
I used different shades , and different levels of detail – I want the archaeologist in his pith helmet to remain only semi visible. He’s clearly consulting with the Gufti, but he’s not the focus of the flurry, he’s part of the pattern.
The middle distance figures gave me a little trouble, as the colours seemed a more emphatic, close to, than I remembered.
I’m looking across the room at them now, however, and they have settled back into place, just the slight thickening and darkening at the edge helping to make sense of the pattern that’s developing. Even the slightly darker basket, which I had doubts about when I’d stitched it, doesn’t unbalance the whole view.
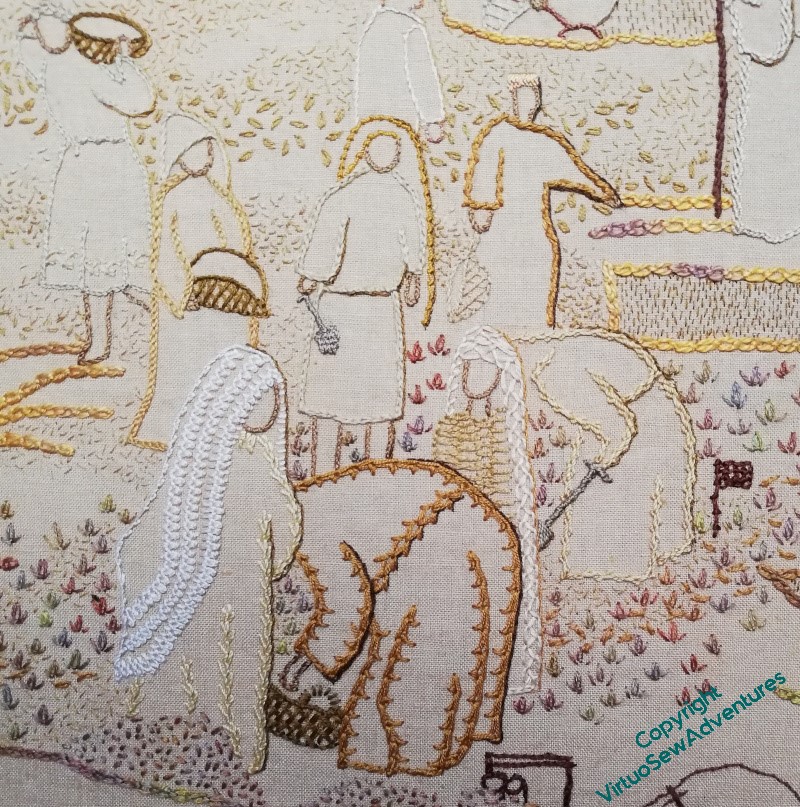
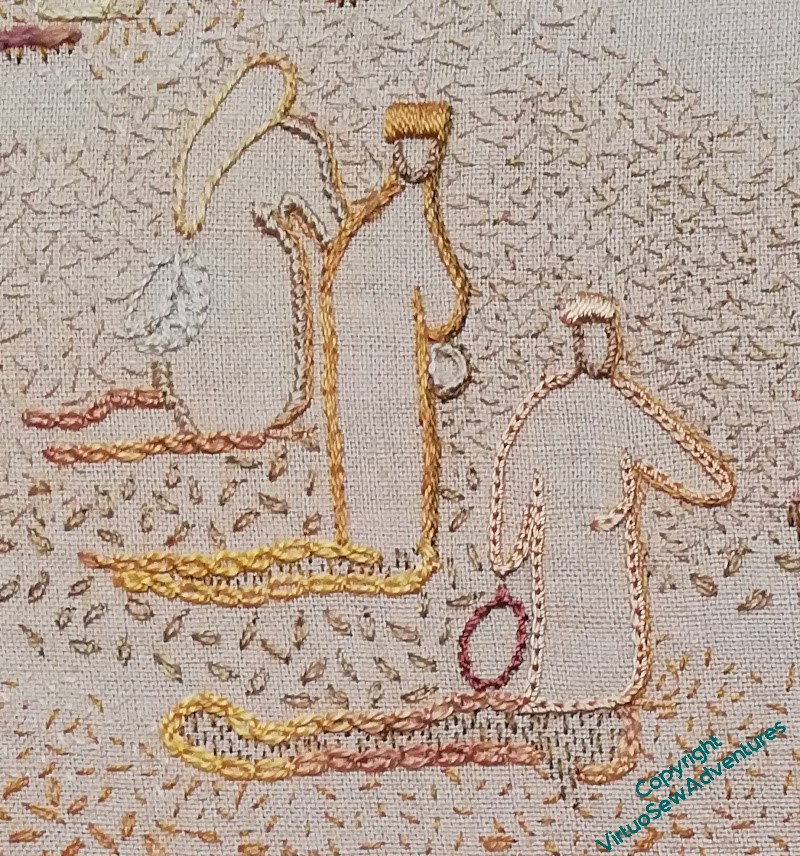
In this bit of foreground, you can see that I have been varying the amount of detail I shadow. Some of these figures may get a little more detail, to bring them forward even more.
I’m even wondering about putting a shadow on the edge of the creamy white veil the foremost figure is wearing.
More to do, more to think about..
Having finished the title text and got to a point with the seeding where I think it is more or less complete, I pinned up the View of the Excavation over the lovely frame prepared for it, and then set it beside the Map, sat back, and stared thoughtfully.
I think the conversation is beginning to happen, now. There are still a few infelicities – the area at the far right where the tete de boeuf stitch falls away from the trench, and the area above it where there’s a sort of funnel shape between the areas of seed stitches. I think, too, that in the far distance, the seed stitching maybe tracks the shapes of the people a little too closely, and I need to make the edges a bit wispier.
When summoned to act as Cardboard Programmer, or Rubber Duck(!), The Australian said that he was having a hard time making out some of the people, and could I put a very narrow shadow that would balance pulling them out of the scene with not emphasising them to the point of obliterating the dust?
And then I had another thought. I have always put them in this order: Map on the left, whatever else I was going to do on the right. Should I keep to that, or should I change my mind?
Developments on the View of the Excavation
I love my worklight. It gives a wonderfully crisp and bright light to work from, and it can even be useful in bright daylight because it washes out deep shadows that confuse the eye. By and large, it also gives a better idea of true colour than the earlier one I had, which didn’t have the “throw” to reach from my side table to my hands, and tended towards the blue.
However, just every now and again, it doesn’t quite hit the nail on the head, as it were, and this is a case in point. That row of Knotted Cross stitch is plainly in too cold a colour for the surrounding stitches, and yet when I was picking the colour, using my worklight, the thread looked good, a warm darkish olive-brown. When I looked at the stitches having completed them, it looked much colder, just plain Wrong. Out it comes!

I tend only to unpick first thing in the morning, so rather than continue with the seeding, I went back at that point to the title stitching. And it’s finished!
It’s not entirely even, but neither was the stitching on the Map, and I like the unevenness. It recalls the unevenness of the ground, particularly as the dig advances across the area, and it is just the right weight to anchor the picture.
Working on this section has reminded me of just how much I enjoy working on embroidery in the hand. As I work on William, or on goldwork pieces, or even canvaswork, all of them in a frame with fabric held taut, there is something that I miss about holding the fabric in my hand, taking my stitches and wrapping my threads. I think I need to make sure, for the future, that I have a suitable “in the hand” piece on hand, as it were, to keep me connected to my first love of stitching – the stitches themselves.
The Map of Amarna is Finished – Part Two
Continuing my look back over the Map of Amarna now I’ve finished it…
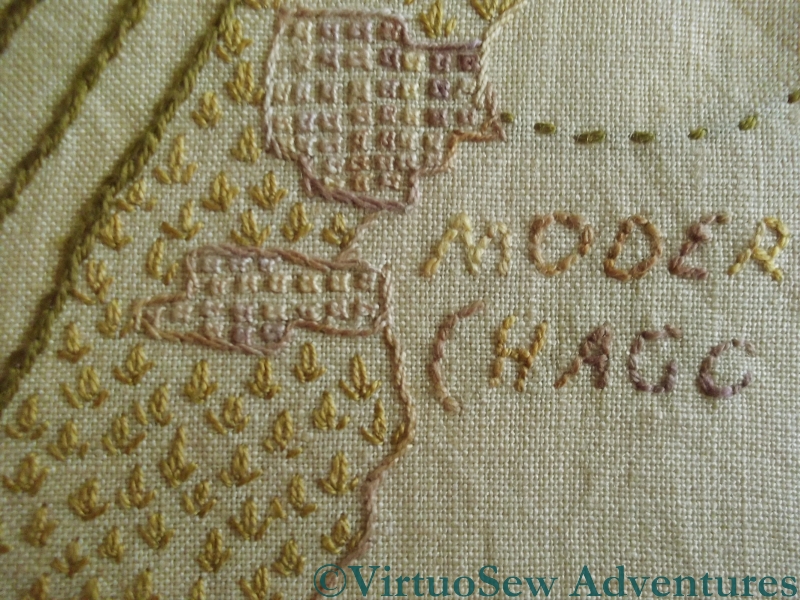
Detail Of Villages And Cultivation
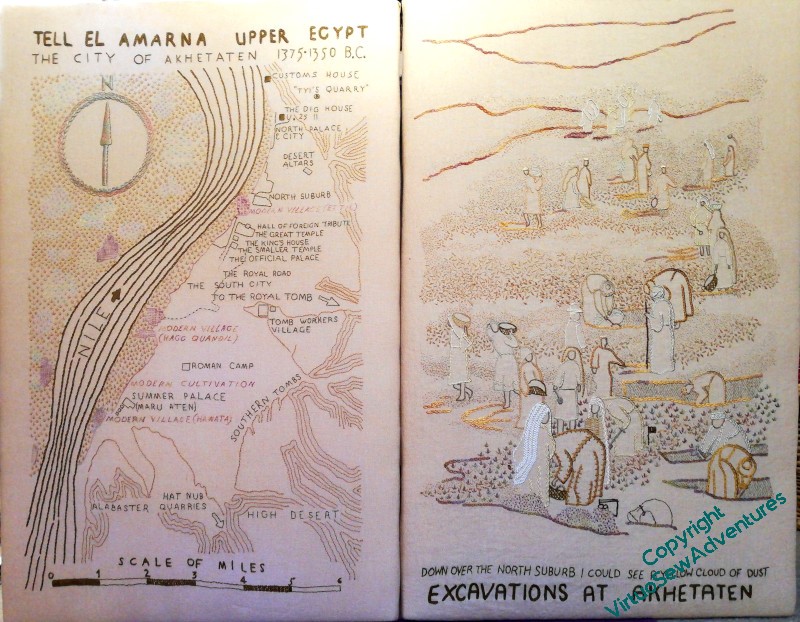
Regular readers will recall that I spent a long time thinking about the stitch I intended to use for the cultivation, and not just that, but selecting the appropriate thread or threads to use for it. In the end I chose tête de boeuf stitch for the cultivation (upside down in relation to the diagram on the page I’ve linked to, making it look more plant-like) , and although you can’t see it in this photo (zoom in on the main photo on the first post on the completed map instead), I used four different fine silk threads to create changes of colour and effect, reminiscent of different crops.
For the modern villages, I used a variegated silk thread, which I used for the text relating to those villages as well, and chose Sorbello stitch, stitched very small, and very regularly spaced. It’s unlikely in the extreme that any rural village, anywhere in the world, would be laid out in a grid pattern, but again the intention is to create a marked textural contrast between the cultivation and the settlement.
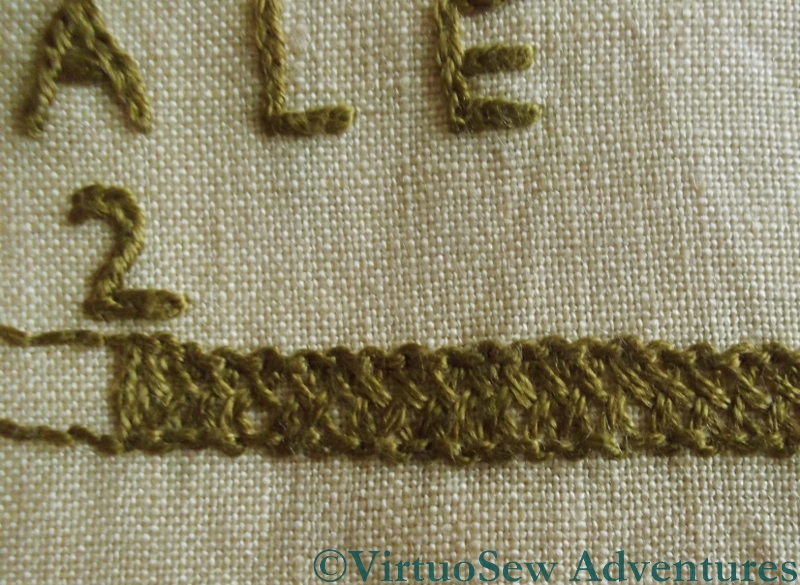
Detail Of Scale
Working the scale for the map gave me some trouble. For the text, again I used split stitch, as I had on the second level title, and eventually I chose to use an interlaced stitch for the dark sections of the scale.
This stitch echoes the reverse herringbone stitch I used for the contour lines. I know that most of the people who see this when I eventually finish it won’t appreciate that sort of detail, but there will be some who will!
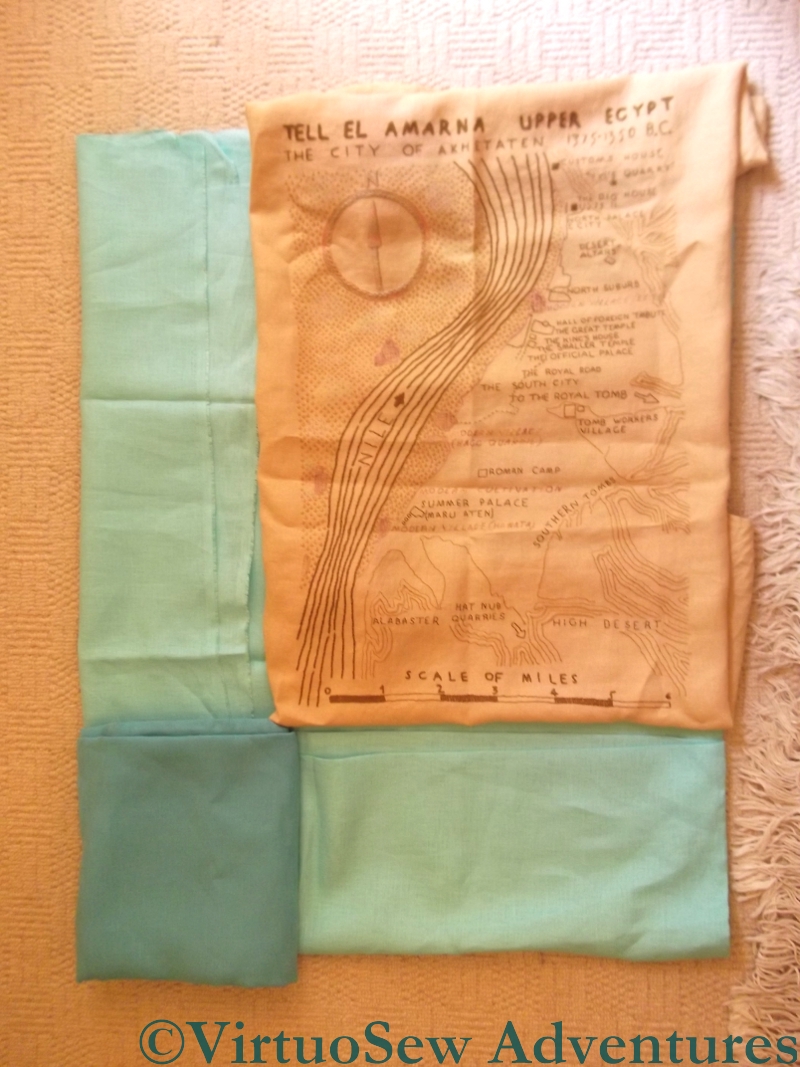
Map With Edges
This was the point at which I laid out my finished map on the floor with the other fabrics which I intend to use for the borders, and gave myself a serious fright.
Remember these diagrams in my post in August 2010? These borders are where the “patches”, like the Felucca and the Faience Hippopotamus, will go. Of course this is very approximate – I don’t intend to cut into these fabrics until I’m much more sure of how I’m going to put the pieces together than I am at present – but these borders are about the right proportions, and as it stands they aren’t going to leave much space for the patches.
I may have to edit my patches and fragments very much more ruthlessly than I had intended.
The Map of Amarna is Finished – Part One

Finished Map of Amarna
At last I have finished the Amarna Map!
This has been a very long road. I started work on this panel – itself intended only as the background of a larger piece – before I started this blog. About four years ago, in fact. I am going to write two posts about this, because while I am looking back over my choices, I am also planning the use to which the panel will be put….

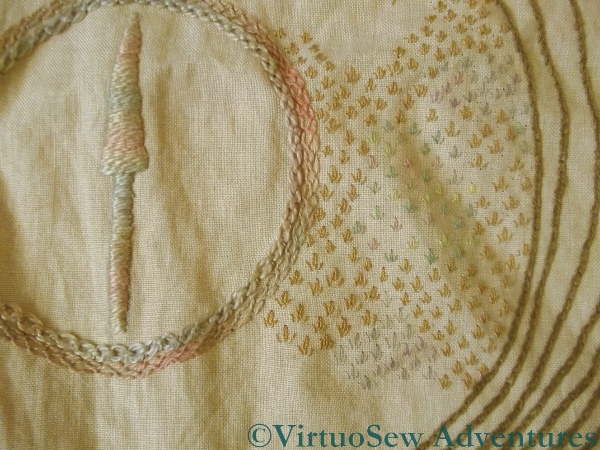
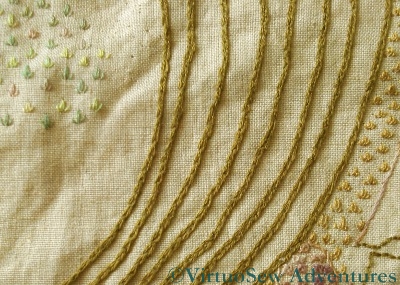
Contour Lines
When I first started on it, it was easy to choose reverse herringbone stitch, or shadowwork for the contour lines. When the piece is pressed and mounted the reverse herringbone will create a slight contour effect. Click on the image and enlarge it and you wll see what I mean.
This is one of the primary concerns of my stitch choice – to create an effect that is reminiscent of the item or object being depicted without attempting to show it in a direct fashion.
The choice of back stitch for the main text was easy too. I wanted a simple line to create the text wiithout drawing undue attention to itself, and back stitch is about as unobtrusive as a stitch can be!
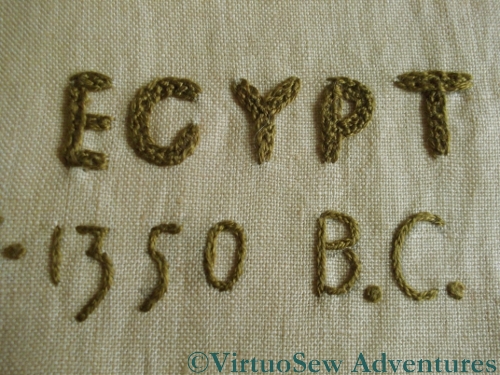
Title Text Detail
When it came to the Main title at the top of the panel, I chose split stitch for the second title, because again, I was looking for a plain stitch, with a little more weight than the back stitch, but not too eye-catching. For the main title I picked up one of the stitches from the Tudor and Stuart Masterclass – it’s lovely to find myself using a stitch I’ve learnt recently in a project I first started thinking about over fifteen years ago, when I first read the book that inspired it, “Nefertiti Lived Here“, by Mary Chubb.
Quick Update on The Map of Amarna
Fields Of Amarna
The cultivation on the Map of Amarna will take quite a while to do, but since I’m really quite happy with the progress it is making, I thought I would post a quick update on it.
The scatter of tête de boeuf stitches is as much as I have managed to do since I finally decided that that was the solution I was going to use. Granted, I’ve been working on a lot of other pieces at the same time, and sometimes I am simply not in the mood for single-stitch work, but it’s also more time consuming than you might expect. I’m trying very hard not to use a regular pattern of stitches – the scatter is as random as I can make it, given the human proclivity for pattern-making.
Since what remains to be done is about four times as much as I have done, I expect it will be quite some time before you see it again, but rest assured, I haven’t forgotten…
Dreams of Amarna – Progress on the Map

Progress On The Map of Amarna
You may recall that having worked most of the Map of Amarna, I then ran into a brick wall, and could not decide which thread to use for the last, rather extensive element – the depiction of the cultivation.
I decided, in the end, that I would use the more golden of the plain silk threads, but rather than spacing the stitches widely I would stitch quite densely, creating a sort of background pattern of tête de boeuf stitches. Then I began to worry that this would be visually too weighty and might even create the impression of a sort unlikely to be accurate given that in Mary Chubb’s time the villages were probably groups of smallholdings..
So instead, although some of the cultivation (on the eastern side of the river, running in a narrow band the length of the site) is worked in a single colour (or will be, when I finish it), the western side of the river will have some patches where the stitches are worked in one or other of the variegated silks.
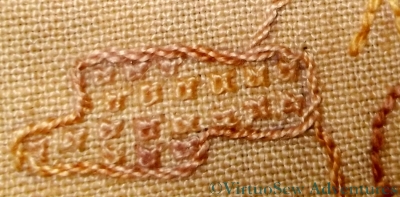
Patches On The Map of Amarna
The close up shot shows one of those patches already in place, with the single colour on the other side of the river and the modern village in a different variegated thread.
Or at least I think it will. It would not be the first time I’ve had a bright idea that really didn’t work when I tried it. I am prepared for the possibility that I will have to unpick all the variegated threads and restitch in a single colour!
Dreams of Amarna – The Patches on The Map
After finishing the text and the villages on the Map, I need to decide what to use for the cultivation… You may recall from my earlier post that I have decided on the stitch I’m going to use – tête de boeuf stitch – but that I’ve not quite worked out what thread to use.
Trial Patches On The Map
I’ve stitched a variety of trial patches, using stranded cotton, flower thread, pearl cotton, and several different silks, and now all (all!) I have to do is make a decision. I’ve propped up the fabric in the living room and stand staring at it every chance I get!
So far, I feel sure I won’t be using the pearl cotton (too chunky) or the flower thread (also too chunky), but that leaves me two variegated silks (one pale green shading to pinkish purple and one brighter green shading to terracotta) and two plain silks (one slightly darker than the colour of the fabric, and one the same colour as the stranded cottons I used for the contour lines. I’ve tried very hard to get a photo that does reasonable justice to the various threads and colours, but I don’t think that the one I’ve got here helps very much…
Sorbello Stitch Village
I chose Sorbello stitches to represent the modern villages. These are worked at a very small scale, as you can see from the thread count. Again, had I followed the cartographer’s symbols, I would have used something like Jacobean Couching, but I felt that this stitch in fact reflects the idea of buildings rather better. I’ve used the same gold-shading-to-purple thread for all the modern villages, both the names and the associated areas. It doesn’t draw the eye, in real life, quite as much as you might expect.
Dreams of Amarna – Approaching The Final Decision on the Map
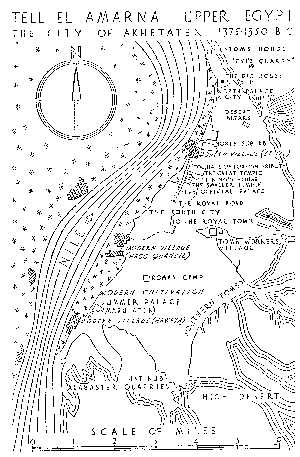
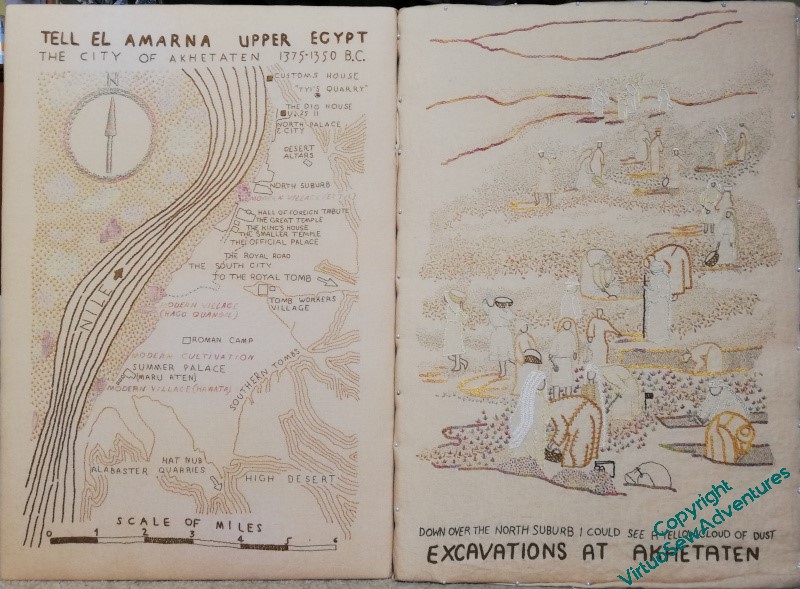
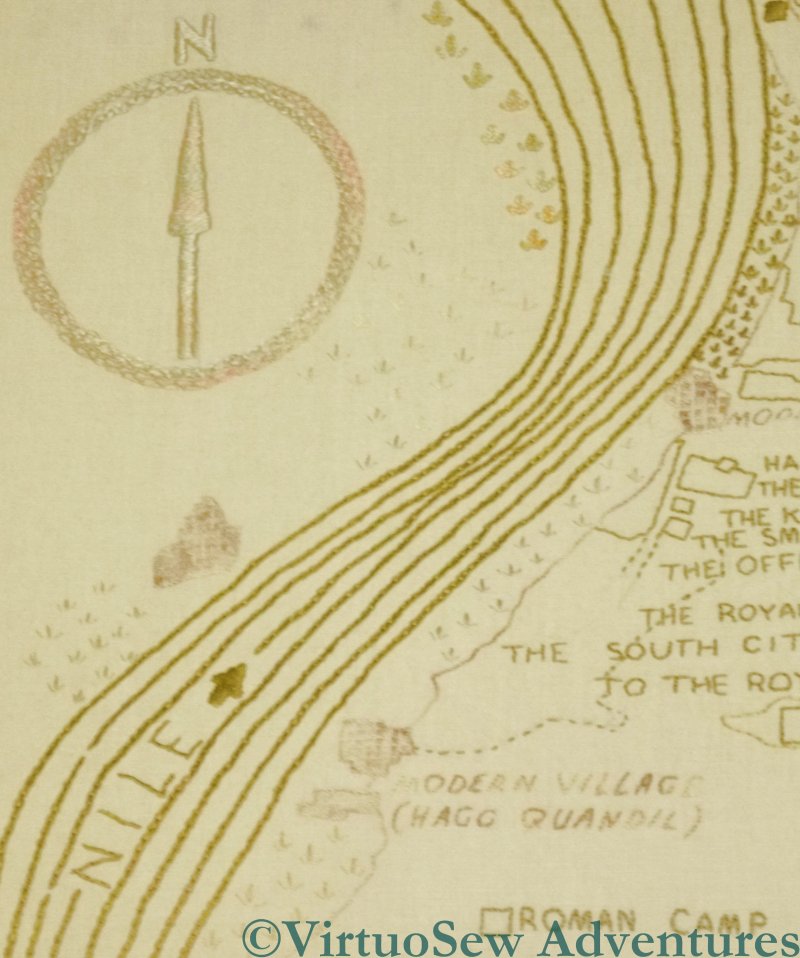
Map of the dig site at el-Amarna
You may recall that the first large element of the panels for Dreams of Amarna that I am stitching is a map of the site shown in Mary Chubb’s book.
It was easy to decide that I wanted to use reverse herringbone stitch for the contours of the high ground around the site, and unbroken lines of chain stitch for the Nile.
The compass rose and the titles were more difficult, although I made a decision eventually.
Now, however, I am near to finishing the text, and I can’t really put off my final decision any longer.
Areas of cultivation are shown on the original map using stars drawn roughly using four strokes. The obvious choice is to use Star Stitch, which exactly replicates the symbol used by the cartographer, but I don’t want to do that.
The aim of my stitching is not to reproduce a painting or a drawing, or even to reproduce those effects. I want to use embroidery techniques to produce impressions and effects that couldn’t be produced any other way, but that are inspired by the subject.
Tricky.
I finally settled on a stitch, after considerable thought and several hours leafing through my (never-ending shelf of) embroidery books – tête de boeuf stitch. But I’m still trying to work out what thread to use, and at what scale. So I’ve worked several test patches, and when I’ve finished the other stitching (the text and the villages), I’m going to wash and iron the whole thing and then sit back and look at them for a while…