
Tag: Tudor and Stuart Goldwork Masterclass
Golden Accessories – Pansy
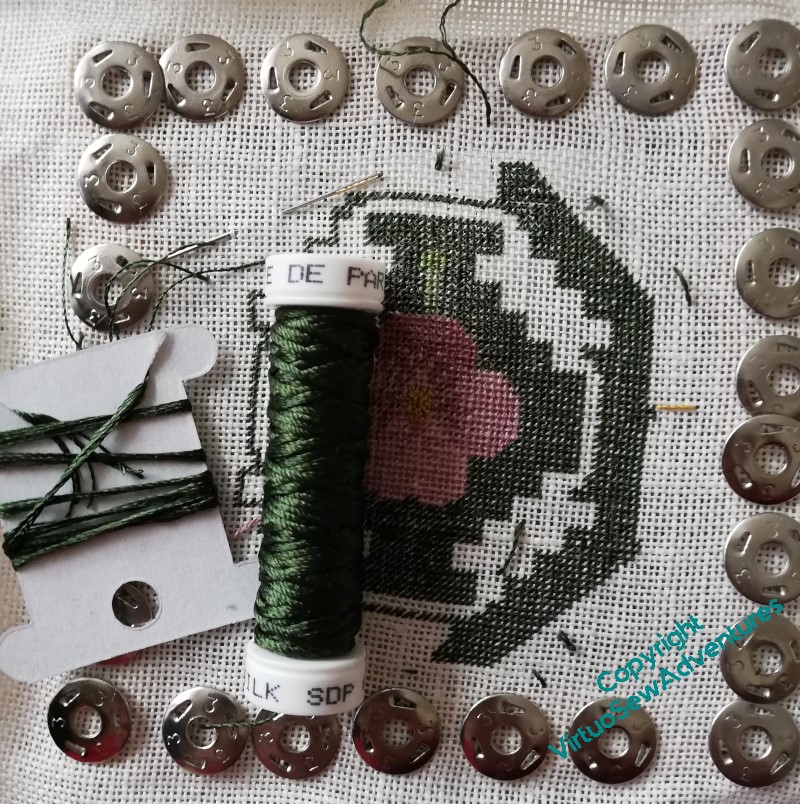
The Pansy continued apace, with only one alarming period when I thought the small amount on the card was all I had left to finish the dark green.
Then I found an entire full reel, gleaming at me from the bottom of the project box.
I was greatly relieved, to say the least!
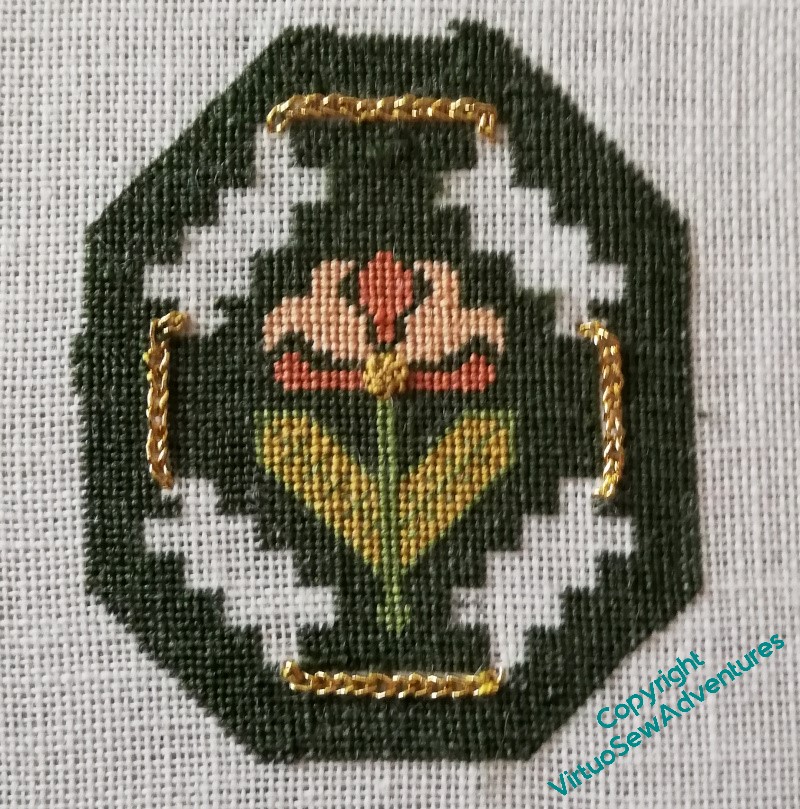
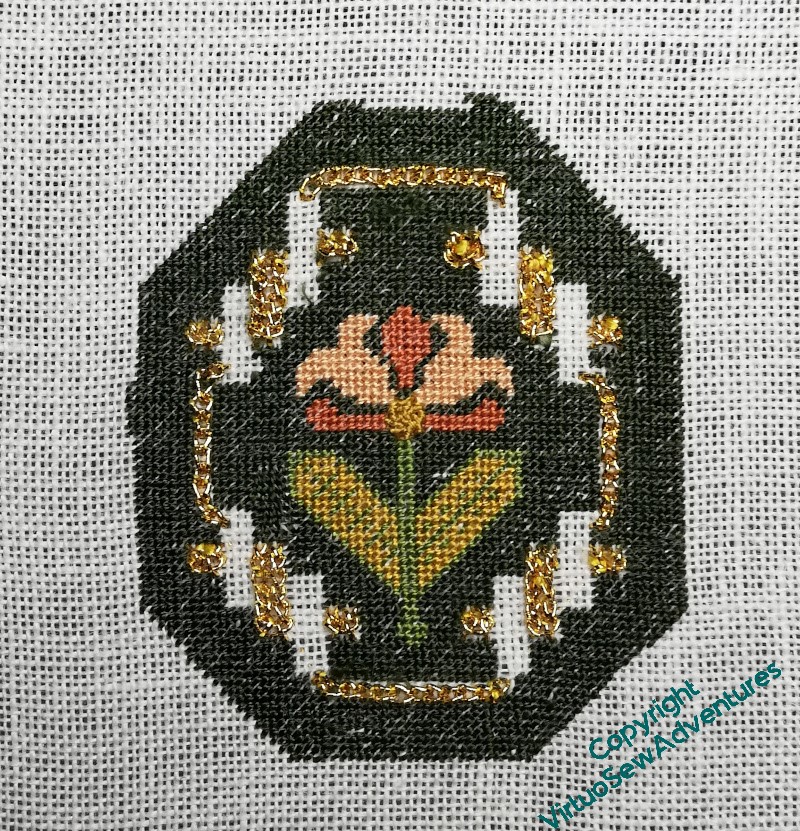
Next, however, on to the gold and silver.
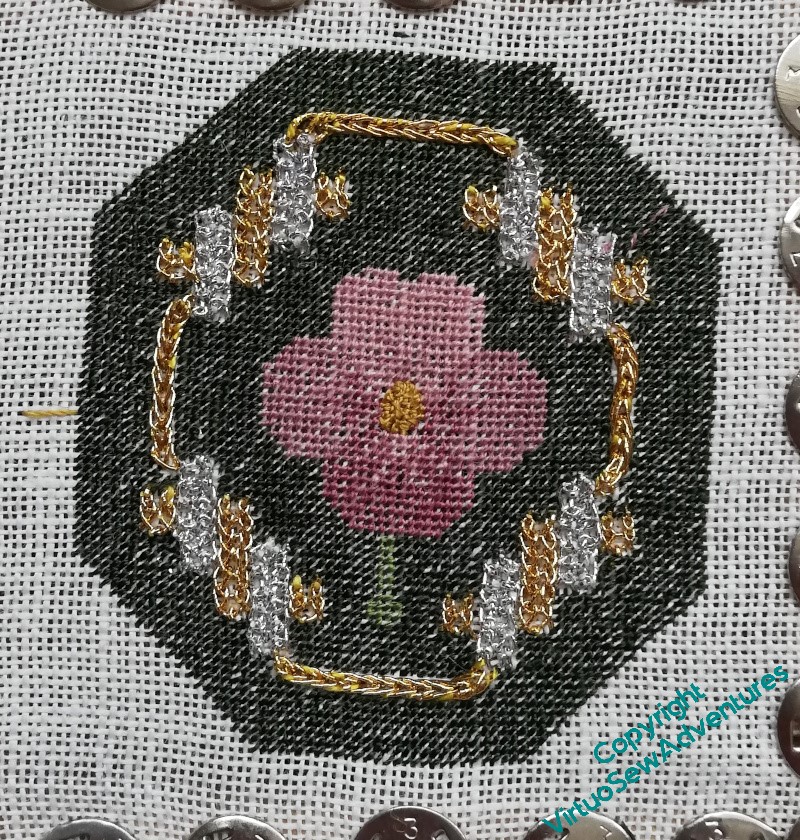
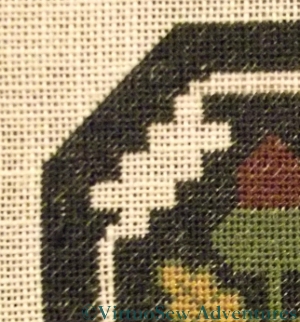
Some of this echoes the other two, and was fairly easy to put in place – reverse chain stitch in the narrow sections. I learnt from last time, however, and this time I put the silver strapwork panels in before the gold, which was again Ceylon Stitch.
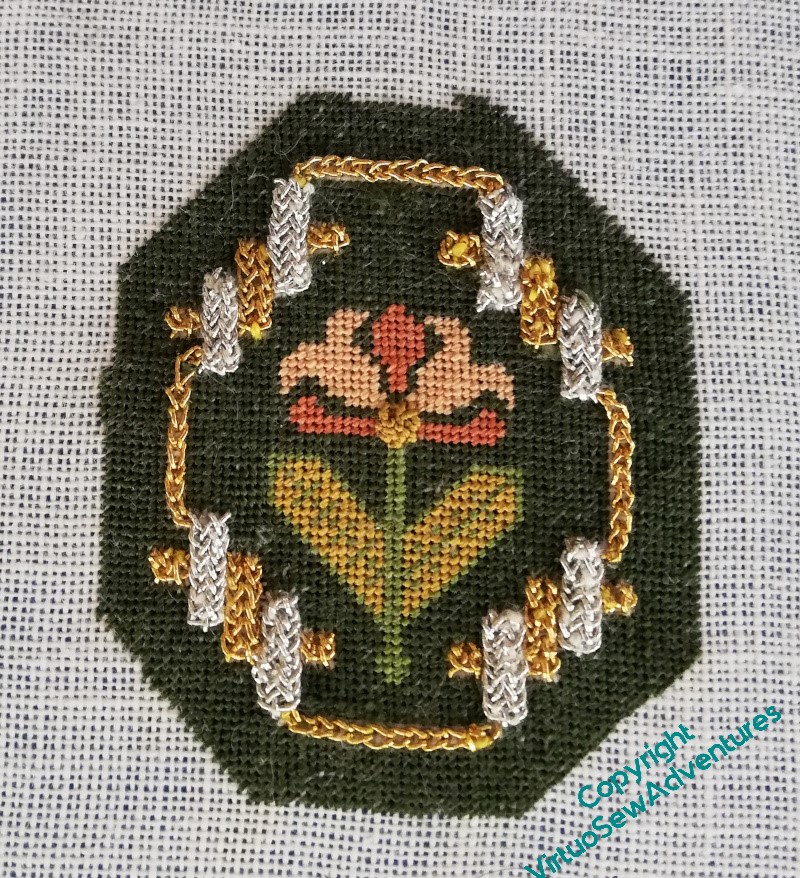
The silver was reverse chain stitch with buttonhole edging – so it’s the stitch I used for the titles on the Map of Amarna and the View of the Excavation. Nicely familiar, and very satisfying – but also very much easier without the Ceylon Stitch in place. Next time I will try to think through the order of my stitching!
However….
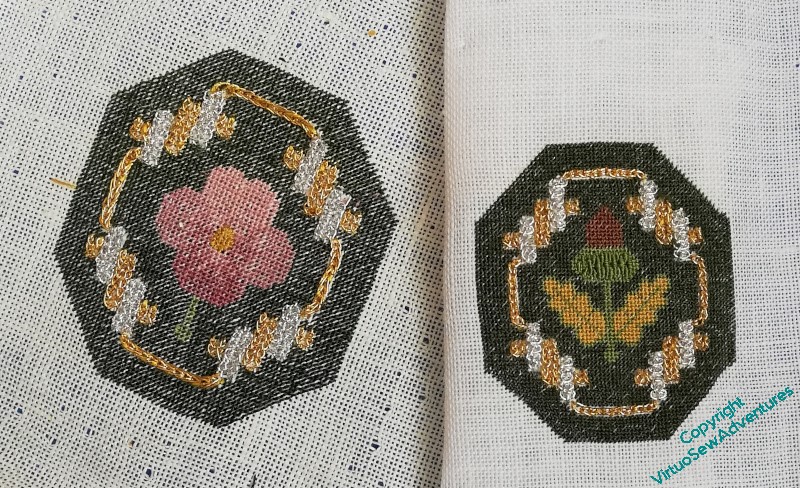
It turns out that when I fished out a piece of linen to do the last of these pieces, I didn’t check it very well. The stitches are markedly bigger, and more spread out.
Next time, Rachel, take the time to count the threads!
Starting the Pansy (Golden Accessories)
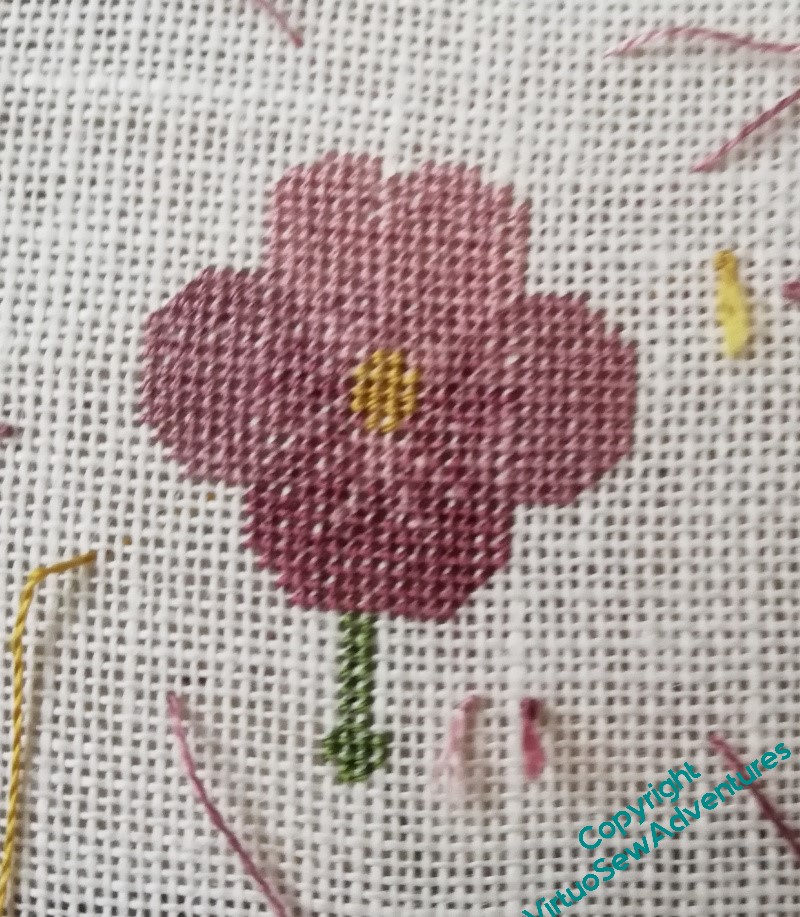
To begin with, the Pansy design of the Golden Accessories went much better than I feared.
In some lights the colours of the pansy are much closter than in others, making progress quite slow until I worked out which combination of lighting to use. But the petal shapes are simple enough, and although the weave is fine enough that I keep mistrusting my counting, I am also reminding myself that it doesn’t actually matter too much if the patterning on the petals aren’t exactly as charted. I shan’t be showing people the chart when I show them the pieces, and besides, if they go in the parlour dome, it’s fair to assume any onlookers will be too dazzled to pick up any oddities!
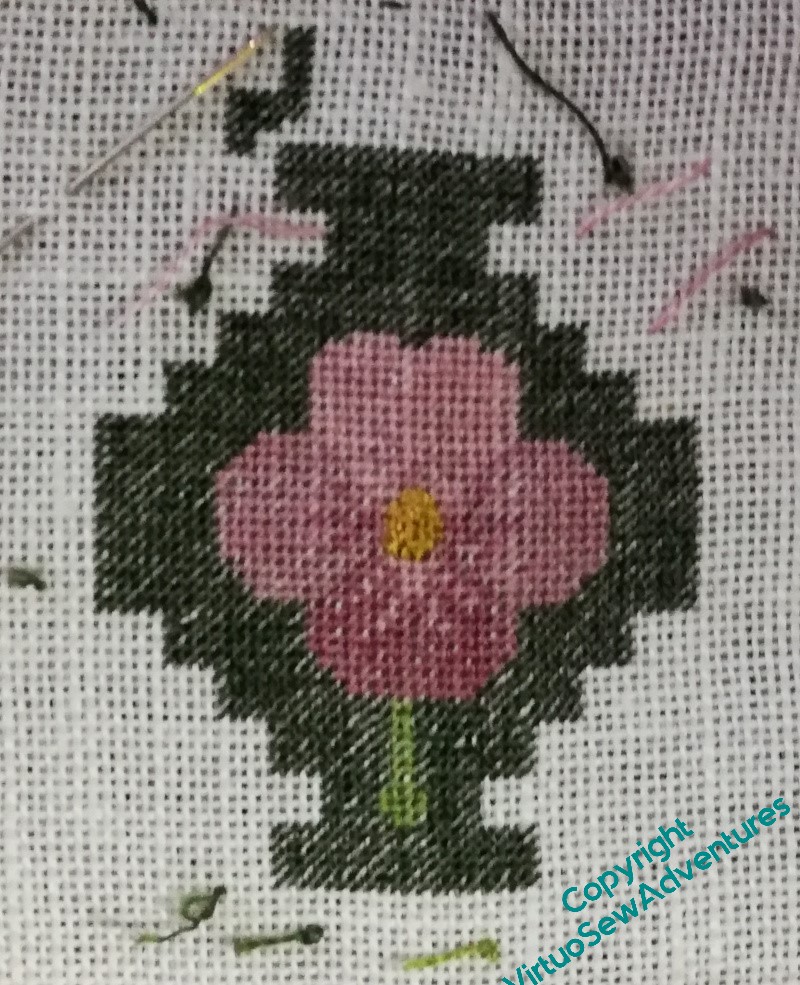
I’ve also learnt from last time.
Last time, I tried to outline the strapwork sections with tacking stitches, so that I could stitch without counting. That didn’t work – I actually misplaced the tacking stitches and had to count anyway. Grrr.
So, this time, I counted out from one point, and then followed the chart to outline, in one row of tent stitch, all the internal edges of the strapwork, and then went back to fill in the gap.
Well, that worked pretty well so it seemed reasonable to assume I could do something similar for the outside.
Which I could – except, do you see the card with the silk wrapped around it?
When I got to the point I pictured, I had got down to just that bit left, and was contemplating switching to half cross stitch, which has neither coverage nor any real cohesion, in a forlorn attempt not to run out.
Then I looked in the project box and discovered I have an entire reel as yet unstarted!
Phew.
More on the Golden Accessories (honeysuckle)
So, where had we got to…?
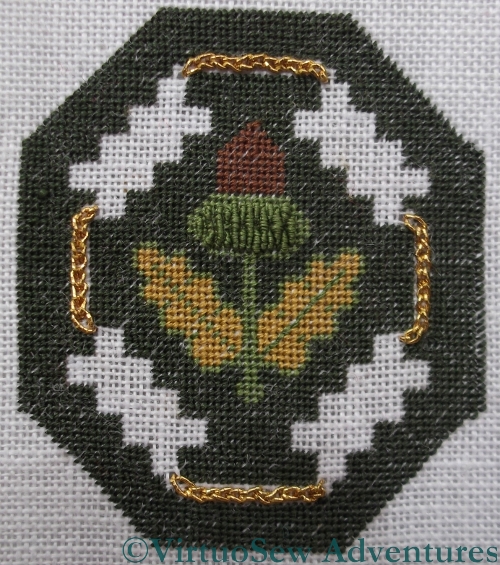
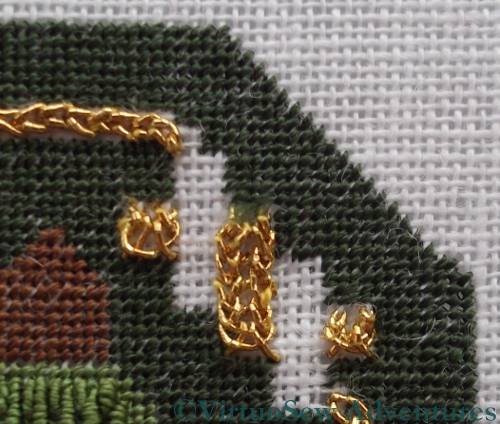
Ah, yes. Spiral trellis stitch in silk for the centre of the honeysuckle flower, and then the outermost narrow band of the strapwork in gold reverse chain stitch. Straightforward enough, you’d say.
Well, yes, but I’m out of practice with gold threads and these sort of stitches, and the whole thing involved more contortions than I thought possible. There are also , I think, a few places where I had to undo and re-do the green background, where I haven’t tidied up the back or held fast the stitches quite as well as I should have done. We’ll see how the whole thing survives…!
The next was gold thread again, and Ceylon Stitch. There’s only space for two columns of the “chain stitch” effect in each strap, so everything is quite tight and compressed.
I’m struggling quite a bit with the Japanese needle and the fragile gold thread here. I’m sure I became more at ease with it when I was doing more of the Tudor and Stuart style, so I’m going to just continue. From any reasonable viewing distance, the breaks shouldn’t be obvious, and in truth, at this point, I just want these finished and added to the heap in the parlour dome!
Finally, the strapwork is completed with plaited braid stitch in silver. And if I’ve said the gold was fragile, the silver was even more so – as in fact I commented, a decade or so. As I said, my suspicion is that this relates to atmospheric conditions while the thread was being made. It’s not helped by the fact that, even after a few inches of revision stitching, Plaited Braid Stitch has left my muscle memory and every twist and turn was hard-won.
I still like the look of it, though!
Found and to be finished
Very long term readers may recall that over a decade ago, I was working on some additional designs from the Tudor and Stuart Goldwork course, became thoroughly fed up with them, and shoved them in a dark corner until my good temper returned.
It’s taken a while…
Anyway, I’ve found them again, and while the Parterre Knotwork is being difficult, the Amarna finish-work is being difficult, and Aethelflaed is being difficult, I thought I would see whether my good temper had returned, and I could get them finished.

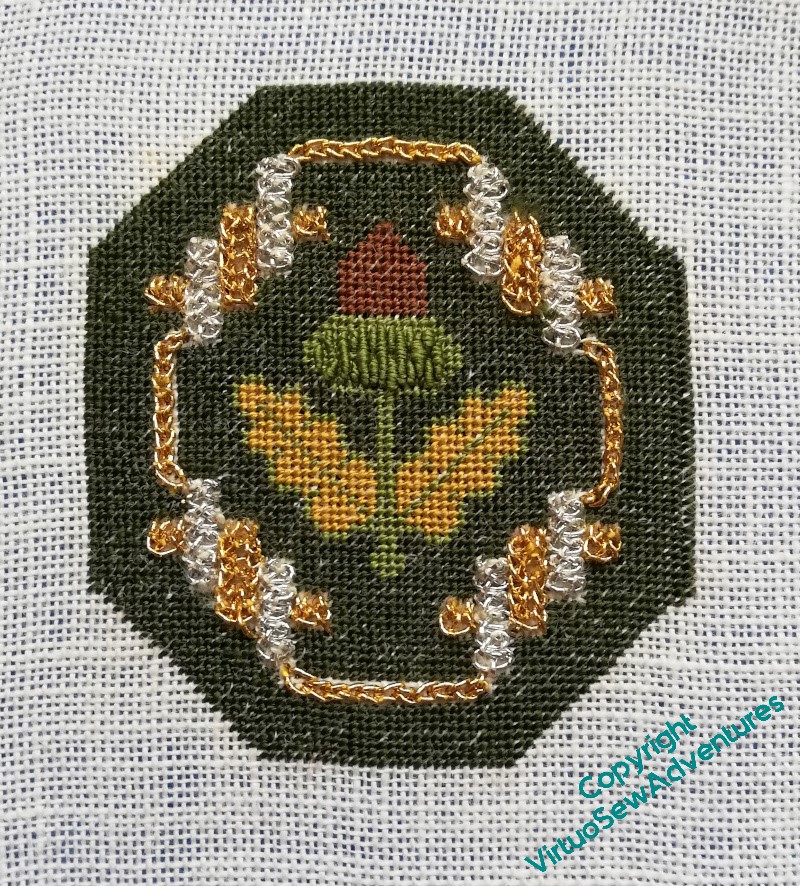
The Acorn was completed – some time in 2012, apparently, and I’d started on the tent stitch for the Honeysuckle, and found myself with some miscounting and unpicking, which I think may have contributed to the loss of temper.
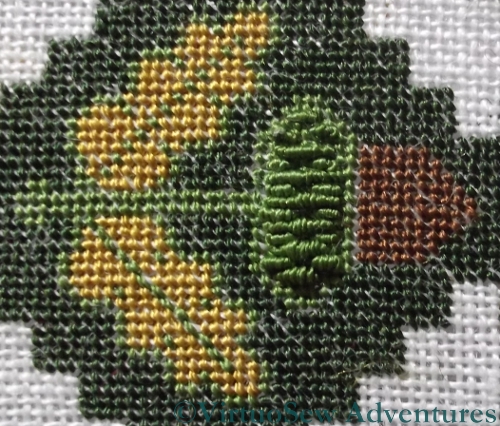
So the first thing to do was to finish all that tiny dark green tent stitch. In fact what you see here was some considerable way into the process – almost all the right side outside the strapwork gaps is new – but with my new-since-I-started working light with magnifier, and my working spectacles, it actually went rather better than a decade ago.
The first addition was silk Spiral Trellis for the centre of the flower – I enjoyed that, even though it’s so tiny. So now I can start on the gold and silver strapwork!
First up is reverse chain stitch, which was a relatively easy way in. I like the stitch, and find it useful, so it’s familiar. The round-eyed Japanese needles are less so, and I struggle to thread them, but they were such a feature of the Online University courses that I feel I should persevere with them.
A tree for the trinkets..
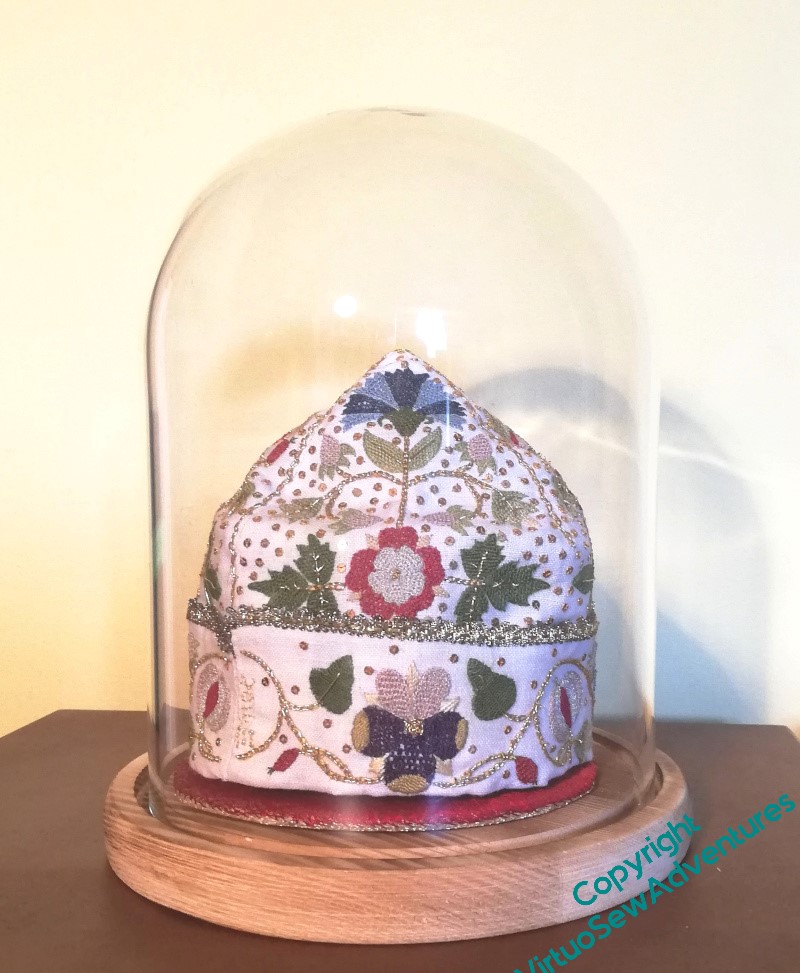
When I had the idea about using a parlour dome for the Violets and for the necklace, I realised that I would need to play with how I displayed them, trialled the Tudor Nightcap in the dome and realised that I could now put it on display.
So what about all the other Thistle Threads pieces?
Well, it turns out you can get parlour domes that aren’t round, so I got the largest I could bring myself to buy and then stopped to think…
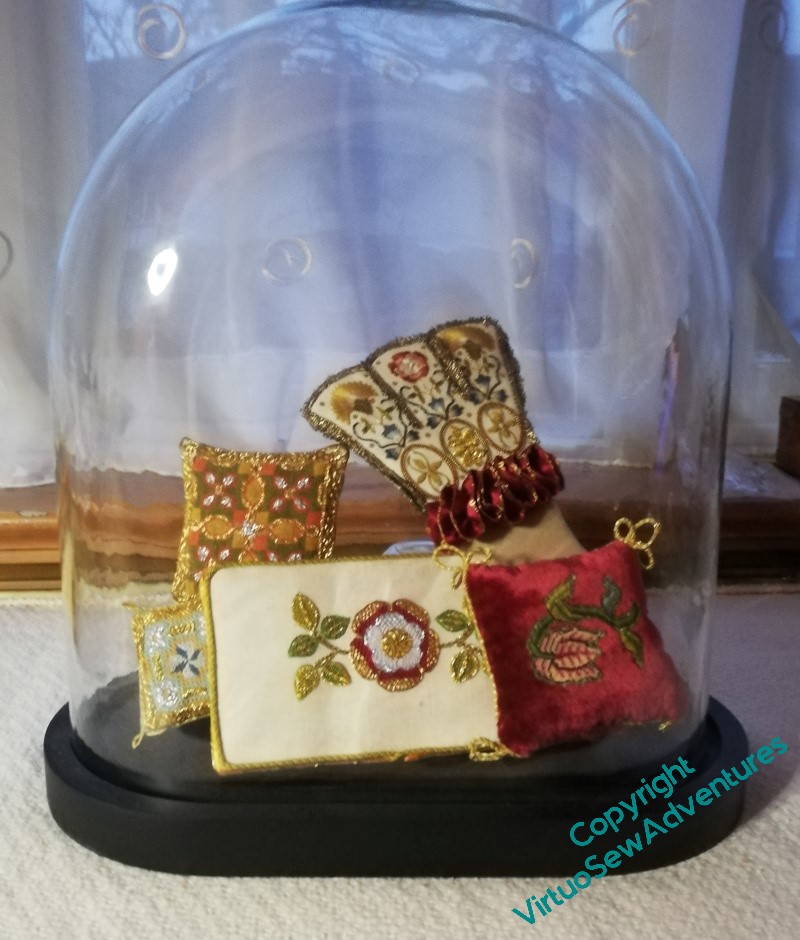
I started by playing around with propping the various pieces I’ve been planning for that Winter Decoration Corner against one another within the dome. It’s a flattened oval, and quite high, but anything I could improvise seemed not to have the height I wanted without taking up all the display space.
I think this shows the idea will work, but it doesn’t really have the presence that the pieces deserve.
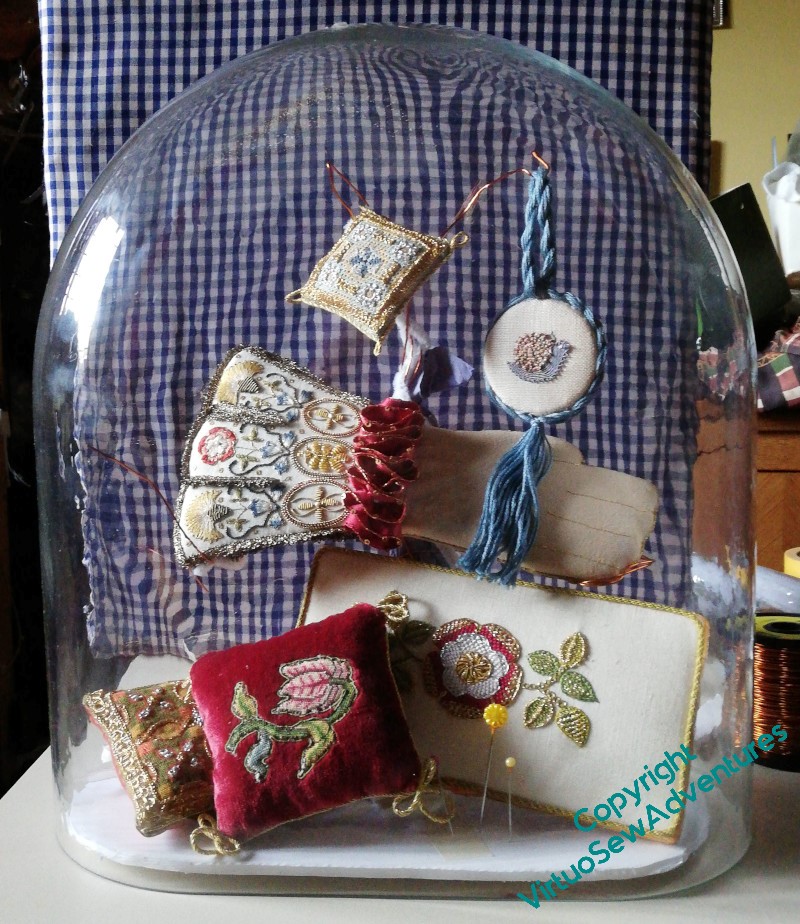
This is better. I’ve used offcuts of the foamcore that I bought to help me with Nefertiti and Akhenaten to create the base that will sit inside the glass, sandwiching the beginnings of the wires forming the tree between two layers. I’ve built up a support for the green and orange cushion at the back using smaller bits of foamcore, and wrapped pipe cleaners around the wires.
It’s not perfect, but I’ve set it up in the hall where I will pass it every day, to work out whether I like it. Then the idea is that I will have a lovely messy hour or so covering the wire with papier mache, allow it to dry, and paint the whole thing gold.
The Tudors were as fond of bling as the ancient Egyptians, after all!
Tudor Rose Progress
Rose Outlined
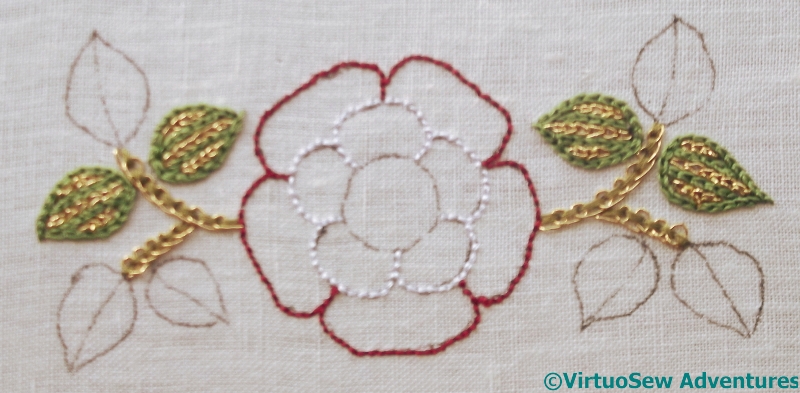
At this point, the challenges abruptly increased… The petals are to be filled with Up and Down Buttonhole Stitch With Return (which is one of the stitches from the Tudor and Stuart Goldwork Masterclass), but in a combination of metal and silk threads. The outer petals will be red and gold and the inner petals white and silver, and we are explicitly instructed to finish the back stitching (both white and red) before tackling the filling.

Detail Of Red Petal
The red silk is used for the return – the straight bar stitch – and the gold for the up and down buttonhole stitch. This means, of course, that there are long stitches on the back of the fabric, but it also creates a rather lovely chequerboard effect of gold and red. Up and down buttonhole stitch is one of my favourites, but as a detached stitch it offers a few challenges, especially in the gold thread. I was very glad to be working this in a frame resting on a stand, as there were times when both hands, and one of my bone stilettos, were needed to bring the gold thread under control.
I’ve noticed that in the metal thread, the stitch is squarer than in the silk, which compressed itself into a much denser fabric. I suppose this adds to the contrast in textures, but it will be interesting to see whether it becomes more even as I become more experienced with it!

Red Petals Complete
I’m rather pleased with it so far. In a couple of the petals, the rows somehow are not as straight as they should be – I’m not quite sure how that happened – but, if you click on the image you will see the larger version, and I think it shows evidence of improvement in technique. Which, after all, is the whole point of my following these courses…!
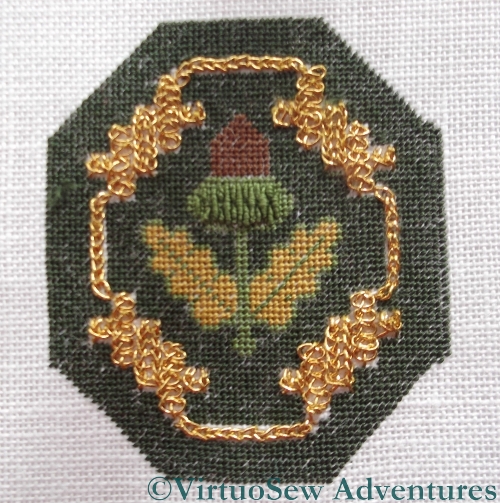
Dealing with the Golden Acorn
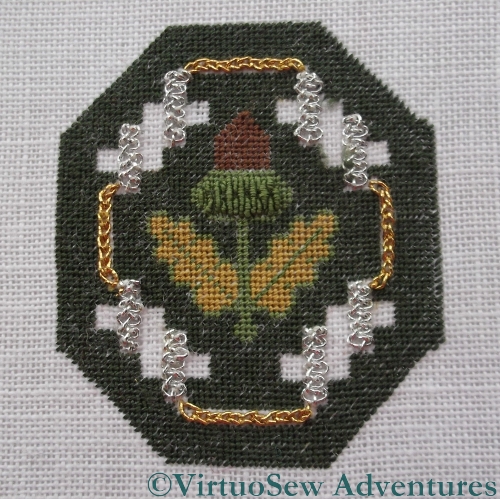
Silver Braid Stitch
You last saw the Golden Acorn in July, when I was thoroughly fed up with it.
Since I’d got so engrossed in stitching that I’d neglected to pay attention to the details and had to unpick the lot, when I came to re-stitch I decided to put in the braid stitch in silver first.
I found the silver to be a more temperamental thread than the gold, although structurally it was exactly the same. However, these threads are all made more or less by hand, and must be hugely susceptible to temperature and humidity.
I know from my textile technology studies that natural fibres – such as cotton, wool, and silk – are susceptible to environmental conditions, because the basis for the success of the Lancashire cotton industry was due in no small part to the fact that ideal conditions for growing cotton are far from ideal for turning the cotton into cloth. In fact, nowadays, textile factories are built with climate control, because the speed of modern production demands that all possible variables be thoroughly ironed out.
In the same way, if you visit a woollen mill, you will see piles of wool at various stages of production, just sitting there. If you are a time-and-motion person you’ll get very uptight about this, and talk about “Just In Time” manufacturing – only to be told, in no uncertain terms, that if you want to pay for all the failed batches that will result from not allowing the wool to relax (technical term – yes, honestly) between processes, you’re welcome, but the manager won’t let it out of the factory with their name on it.
The silver and gold threads we are using have natural fibre cores, so sensitivity to climate is only to be expected!
Second Time Lucky
I found both of the two main stitches in the strapwork, Ceylon stitch and Braid Stitch, rather troublesome in metal thread, although Braid Stitch in pearl cotton is one of my favourites. There’s no denying that they produce a rich and exotic effect once they are in place, though!
I became slightly fed up with tent stitch – there was such a lot of it! – while I was working this, so I’ve been giving myself some time away from it. I’ll get started on the next one of these when I feel ready for fine tent stitch again.
I’m also waiting until all three are stitched before I decide which to finish to create which stitching accessory. If I recall correctly, there’s a scissors keep, a needlecase, and a pincushion. I suspect they’ll end up in that famous Winter Decoration Corner I keep threatening to do!
Golden Accessories – more on the Acorn
I need to learn to pay attention to the instructions.
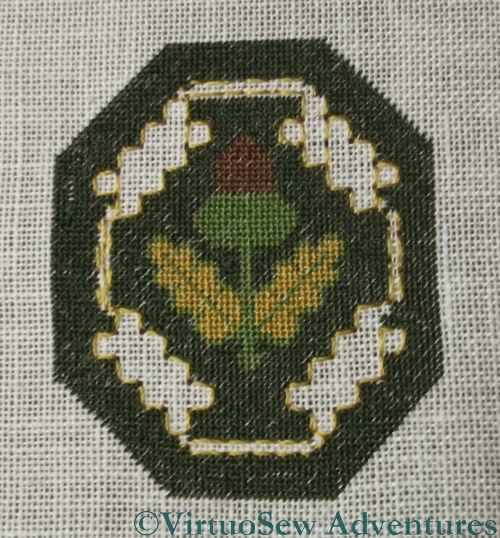
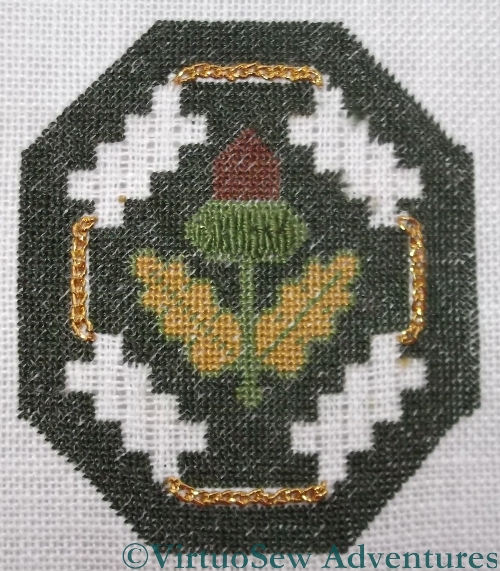
Acorn With Outline
Outline Removed
Still, before we get to that – I’ve finished the tent stitch on the Golden Acorn!
Here you see it, first with the outlining for the strapwork still in place, and then in close-up with the outlining removed. That was exciting at times – the gold thread had been caught in a few places by the green.
Bullion Knots
Broad Chain Stitch in Place
Next, there was a pattern of bullion knots to create an interesting effect on the cup of the acorn. Several different lengths interlock here. I’m not particularly keen on Bullion Knots, but I’m glad I included them – I think they look really good.
The beginning of the strapwork was a row of Broad Chain Stitch in each of the narrow channels left in the green background.
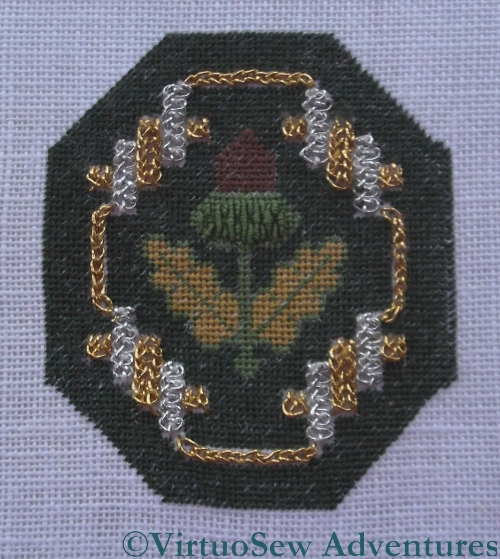
Ceylon Stitch Straps
Strapwork Looking Clunky
All is still well in the first of these pictures, where I’ve put in the Ceylon Stitch strapwork in gold.
Then, concentrating painfully on my Braid Stitch I went on to add the second lot of straps, and didn’t stop to think until I had finished all four corners. At which point I looked at it and thought it looked rather clunky and that it really didn’t have the delicacy or charm I’ve come to expect from Tricia’s designs.
That’ll Larn Me!
So then (not soon enough!) I went to have a look at the instructions.
The Braid Stitch should be in silver.
Out it all came.
That’ll larn me!
(“Larn” is a dialect word, so what I mean is “That’ll teach me!”)
Golden Accessories – Progress and preparation for the goldwork.
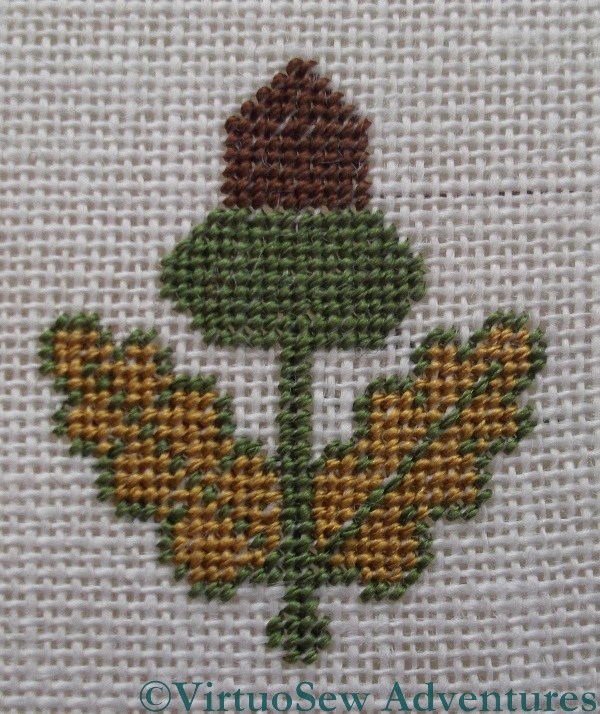
The Acorn Complete
The Acorn itself was finished rapidly, and looks pretty good. For some reason I found it easier, with the second leaf, to work by reference to the first leaf, rather than the chart. You would expect that that would lead to the result being asymmetrical, but I think removing the extra step of checking with the chart was a good idea!
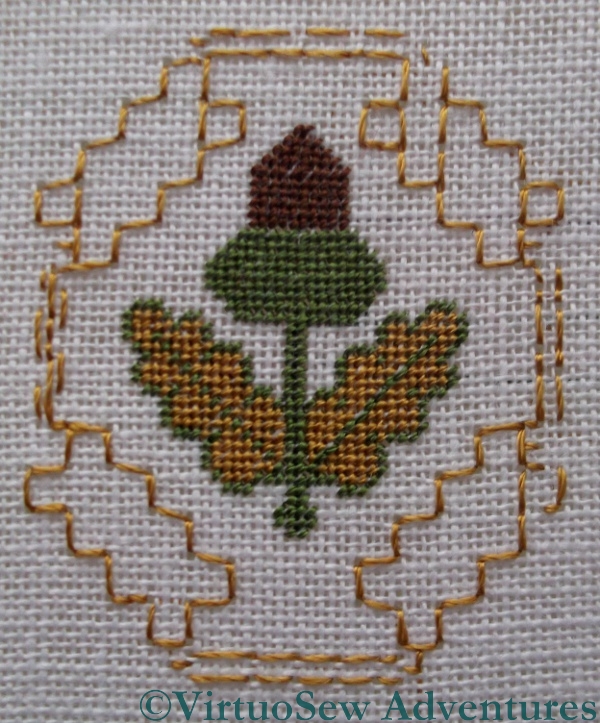
Space For The Gold
The next stage is to work the background, leaving space for the goldwork stitches that will embellish it. I really do not want to have to refer to the chart with every line of tent stitch, so I’ve taken some time to outline the placement of the goldwork stitches in back stitch. Doing this has nearly driven me absolutely mad, but it will means that I will be able to count the background from the edge of the goldwork rather than from the acorn, which will be ever so much easier.
The background is dark green tent stitch, and I will next post about this when I’ve finished it, and started the goldwork stitches. It will take a while. There is only so much dark green I can cope with at any one time!
Beginning on the Golden Accessories

The Acorn Begins
The Golden Accessories is a set of bonus instructions for three needlework accessories which was supplied with the Tudor and Stuart Masterclass, and now that the Petite Pincushion is finished, I’m starting on the first of them.
The silk work seems to be entirely in tent stitch, so, although the fabric is very fine, it will be simple enough to work. The cold snap at the beginning of the year has roughened my hands, so the silk sometimes catches a little – but in fact, surprisingly little, and at least the wristwarmers make stitching possible at all!
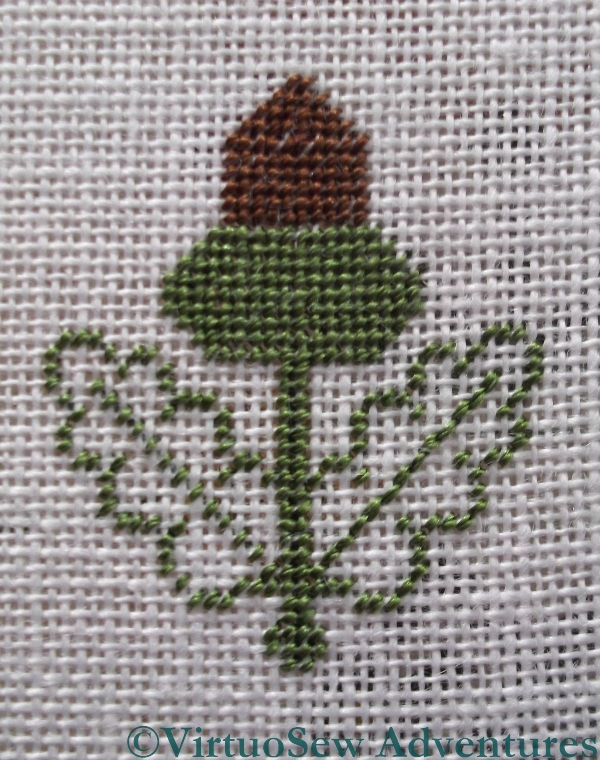
Acorn - First Stitches
I’ve been fortunate, since the weather has been kind, giving me good light to stitch by. So good, in fact, that the first two colours seemed to be stitched in no time at all, leaving me positively flabberghasted by my progress. Strange to say, although tent stitch has never been a favourite of mine, I’ve thoroughly enjoyed starting work on the Acorn – I think it is something to do with the silk thread, which is just gorgeous to work with!