
Tag: Assembly
Overlay experiments
You may recall that I spent some extra time trialling other methods for creating the overlays. My original screenprint idea had long since been abandoned, partly because the past five years when I’ve been painting as well has given me much more confidence in myself, and partly because finding somewhere to make such big silk screens – as a one-off, what’s more! – was proving impossible.
When I’d looked again at the first overlays I used in the first photoshoot, it was clear that they wouldn’t survive much longer, so I thought I would try with my acrylic inks. I cut stensils and dabbed, I used brushes and painted, I played with pre-wetted fabrics and with spraying the fabric with water afterwards.
In fact, I had several wonderful messy days.
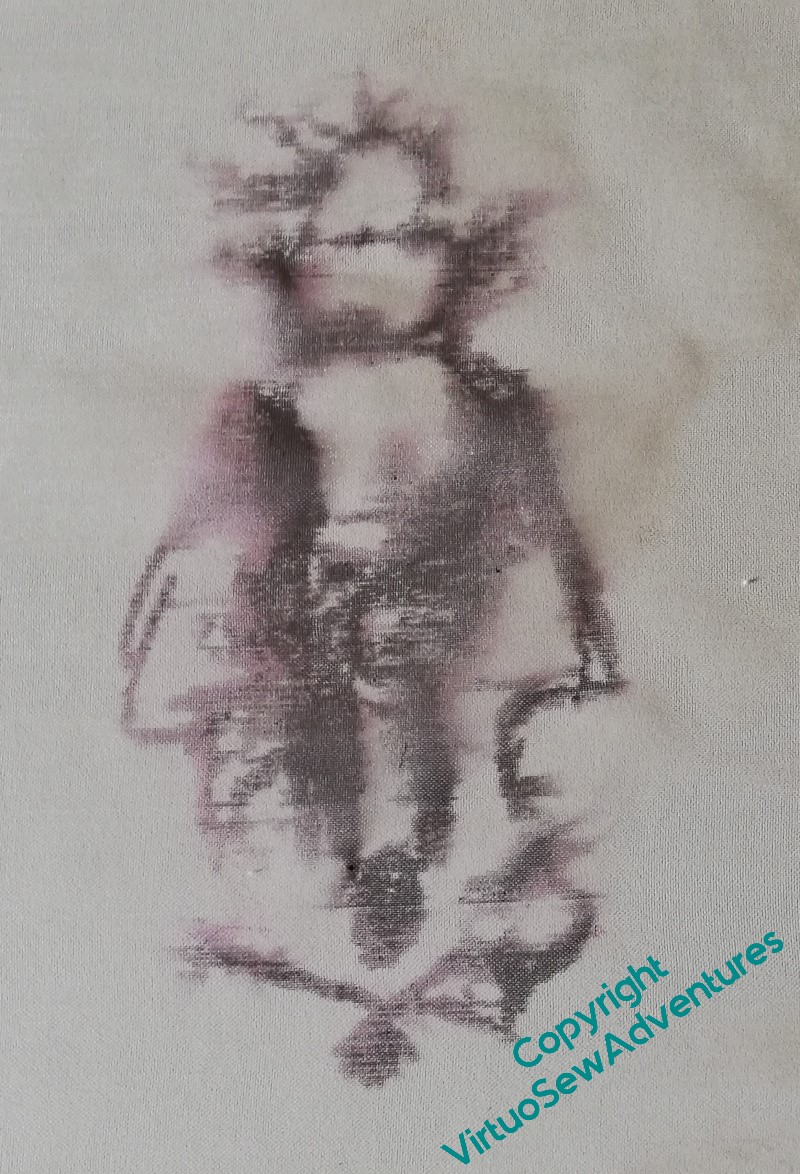
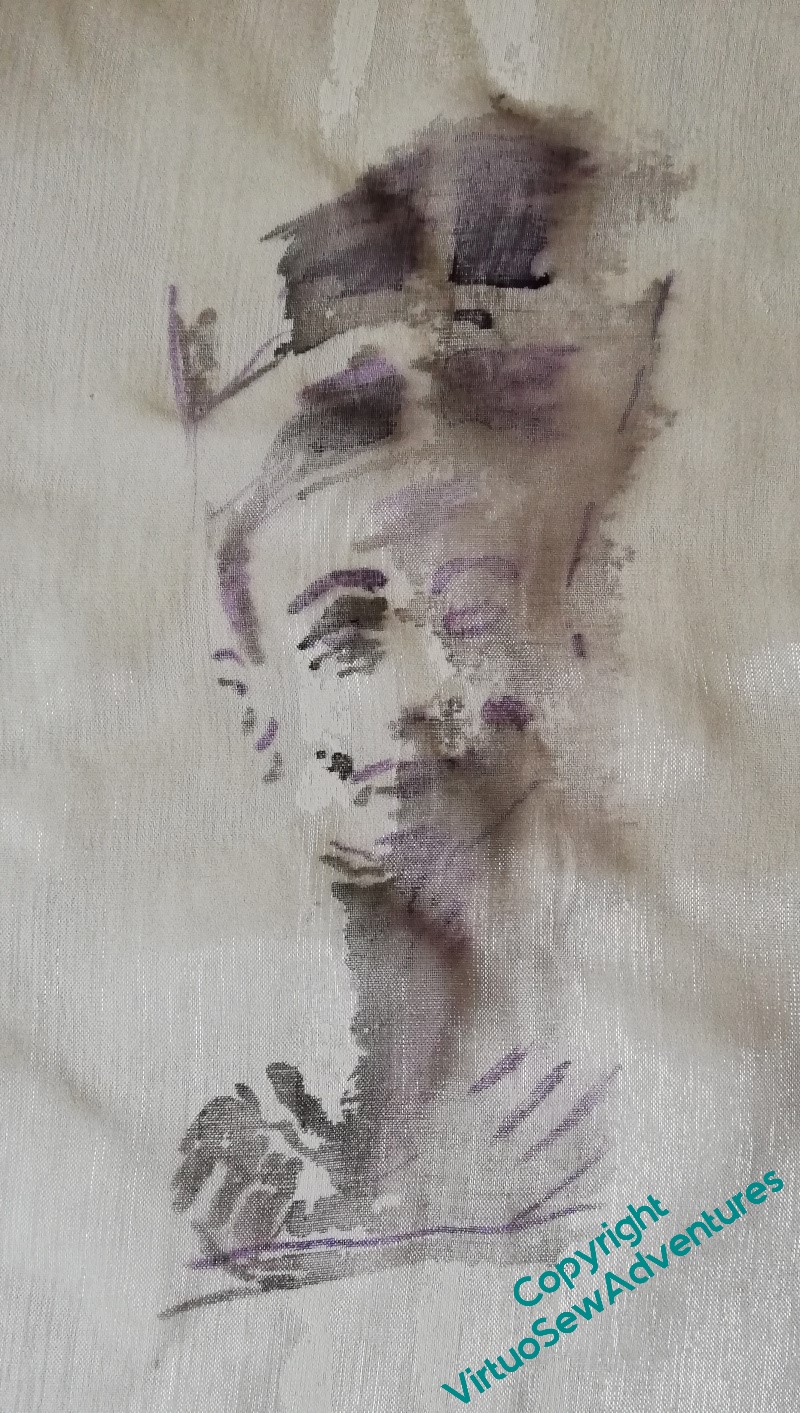
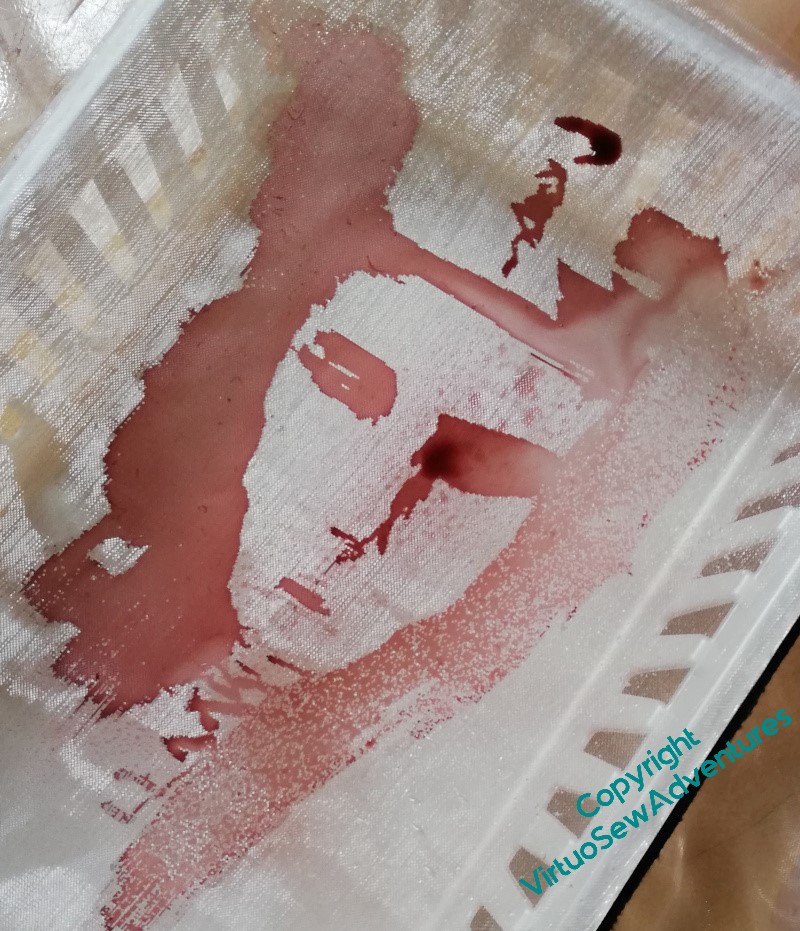
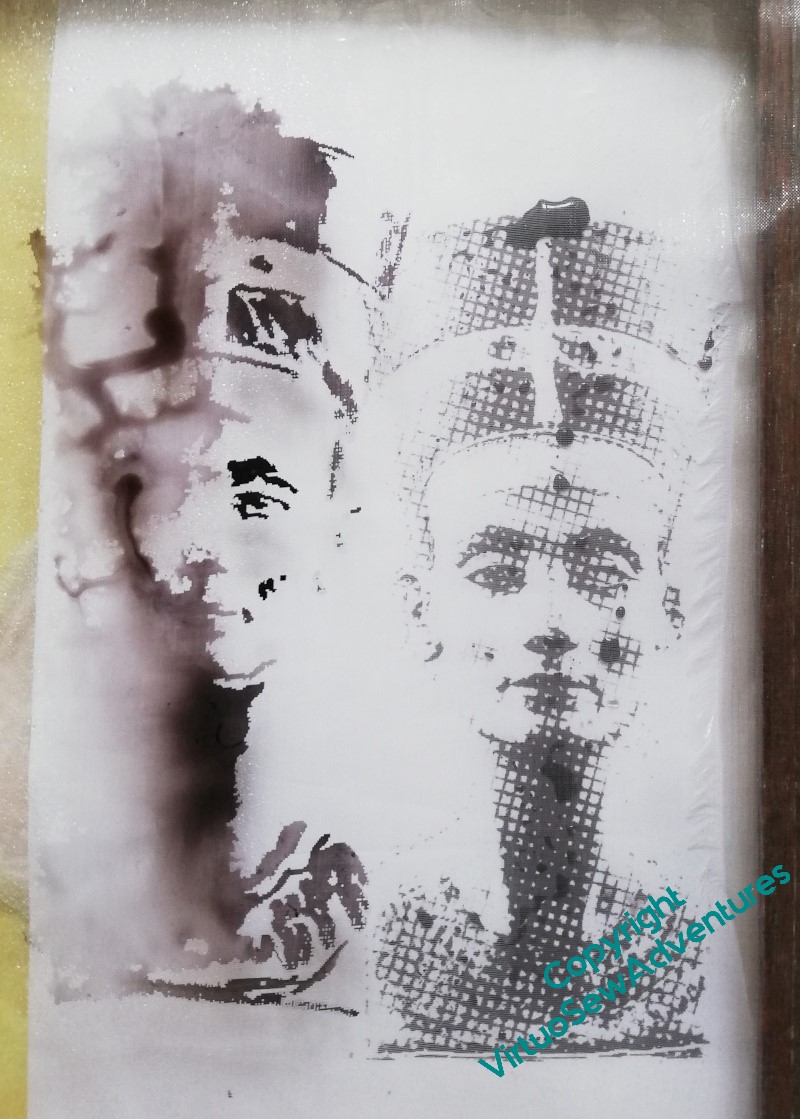
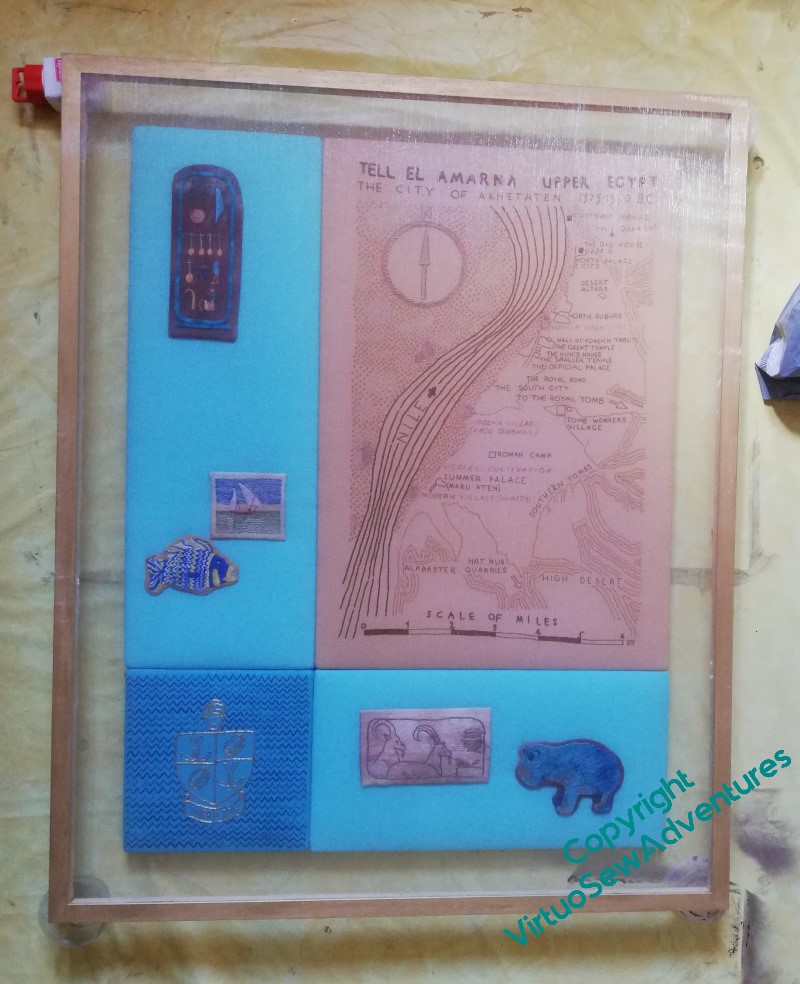
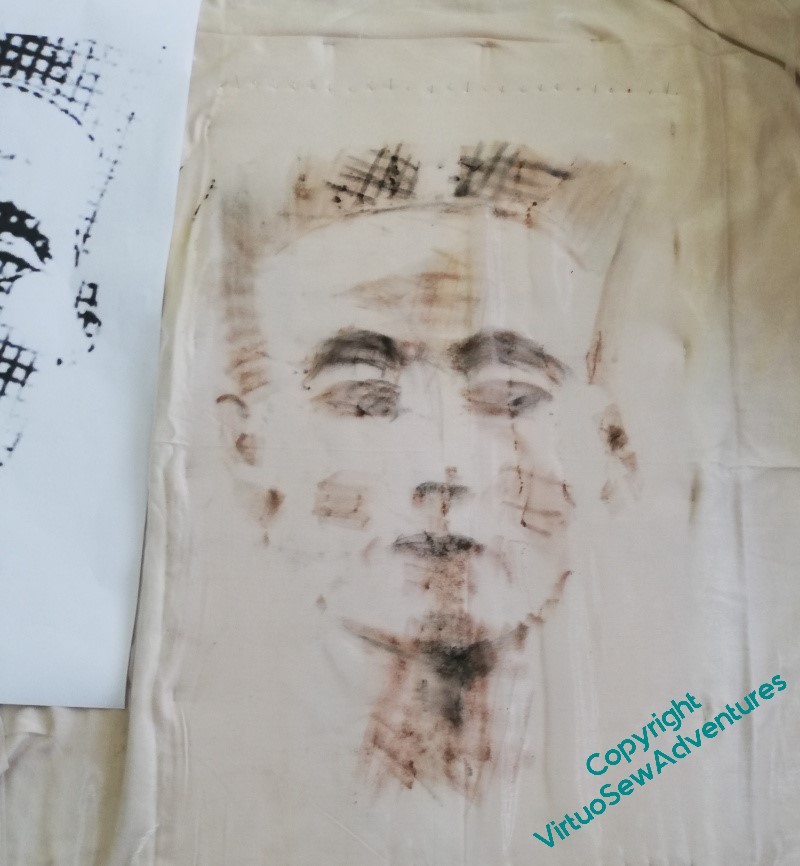
And as you can see, some of them were really striking, and wonderfully vague, and set against a plain background the washed out and tendrilly ones do create the appearance of decay and dissolution which is appropriate. The Amarna period was washed out of history in ancient times, and while Akhenaten has had the last laugh, for centuries his name and that of his Great Royal Wife were never spoken.
However, set in front of the embroidery, they confused the eye too much. The one on the left is too detailed, the middle one is seeping away before our eyes, and the one on the left has acquired spotches I never intended.
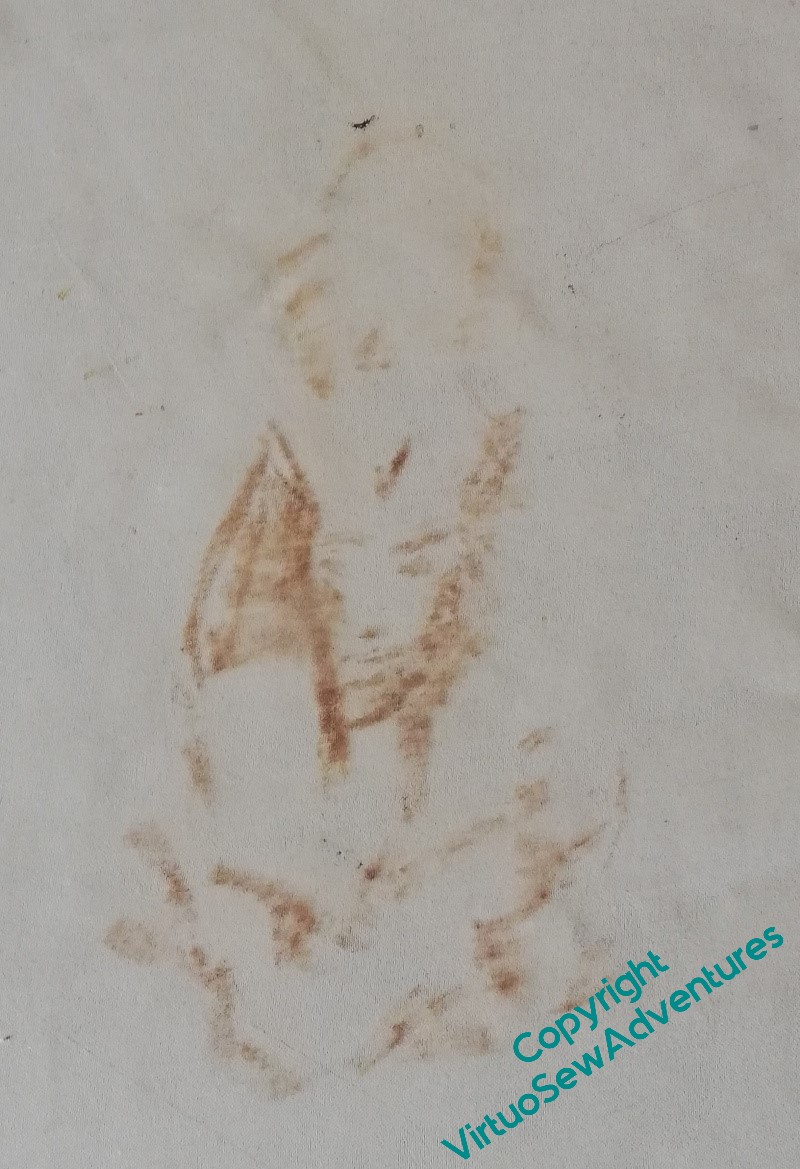
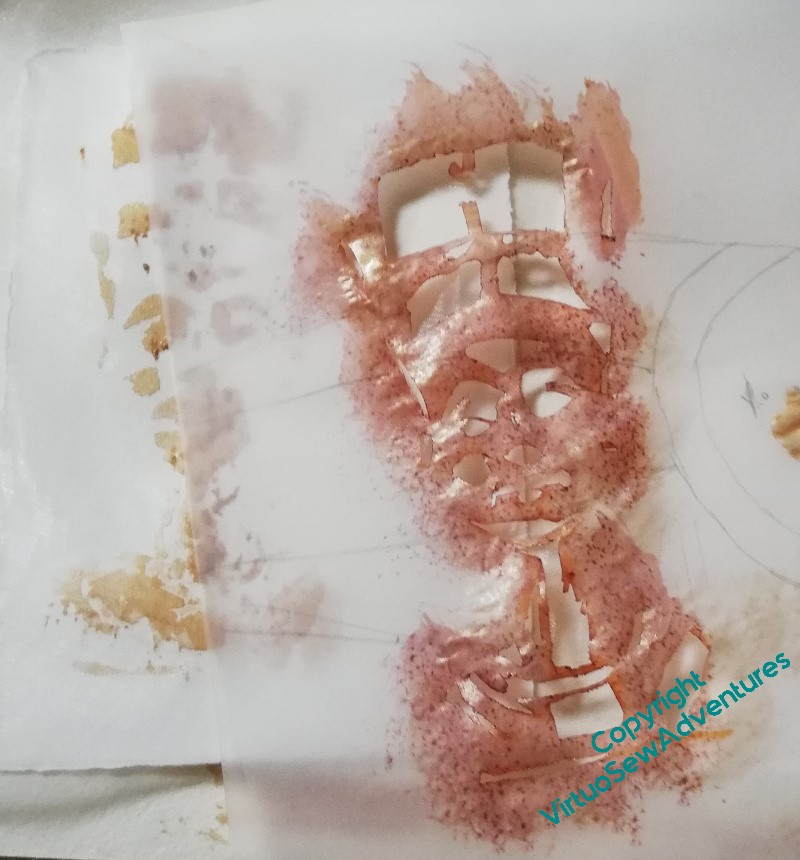
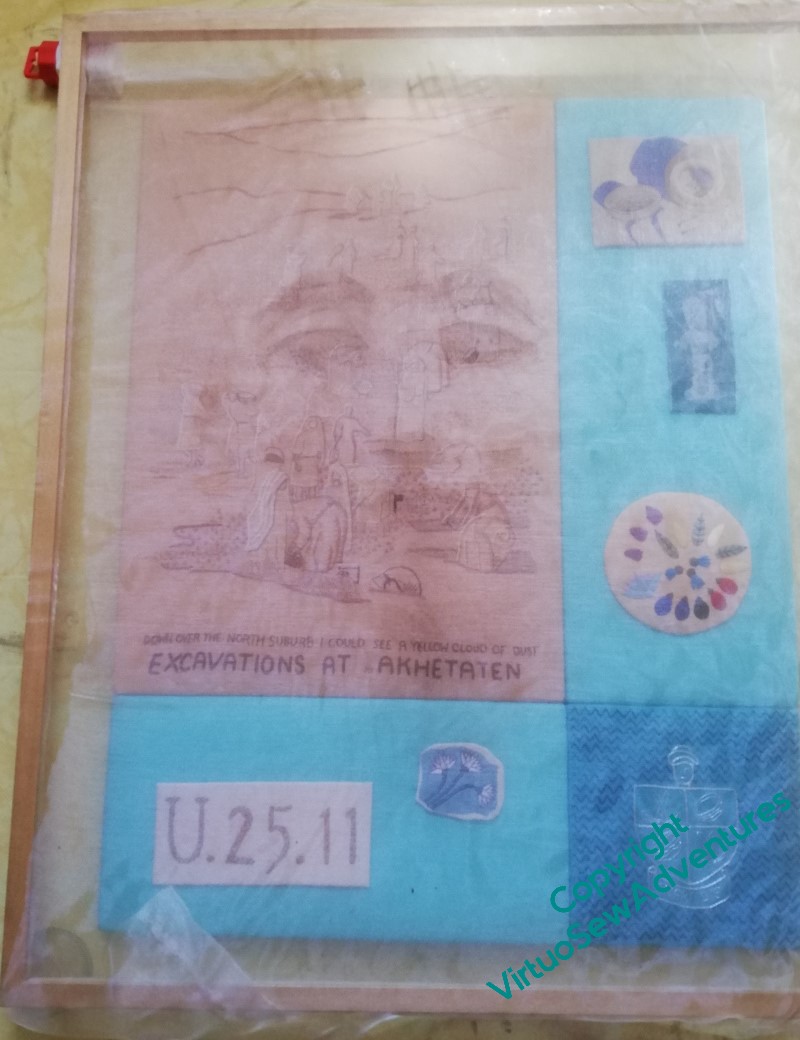
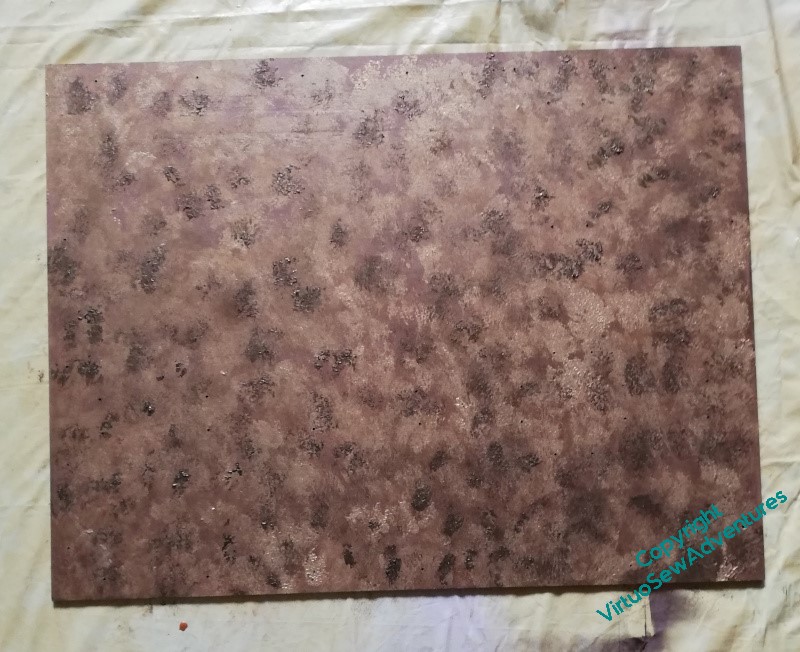
And then there was this one. I had thought that using a brown or sandy colour would aid the “there and not there” appearance.
It certainly nailed “Not there” – it didn’t really show at all!
So in the end, as I described, I went back to the inktense blocks, but with the added support of some pastel fixative. Since I’ve used the fixative, and the overlays are now stretched over frames and not subject to abrasion in storage, I hope very much that I did indeed find the best solution.
But if anyone tries to tell you that artists and designers get it right first time – don’t believe them!
Design placement for the overlays
So, we left the overlays mounted, but determining placement wasn’t entirely straightforward.
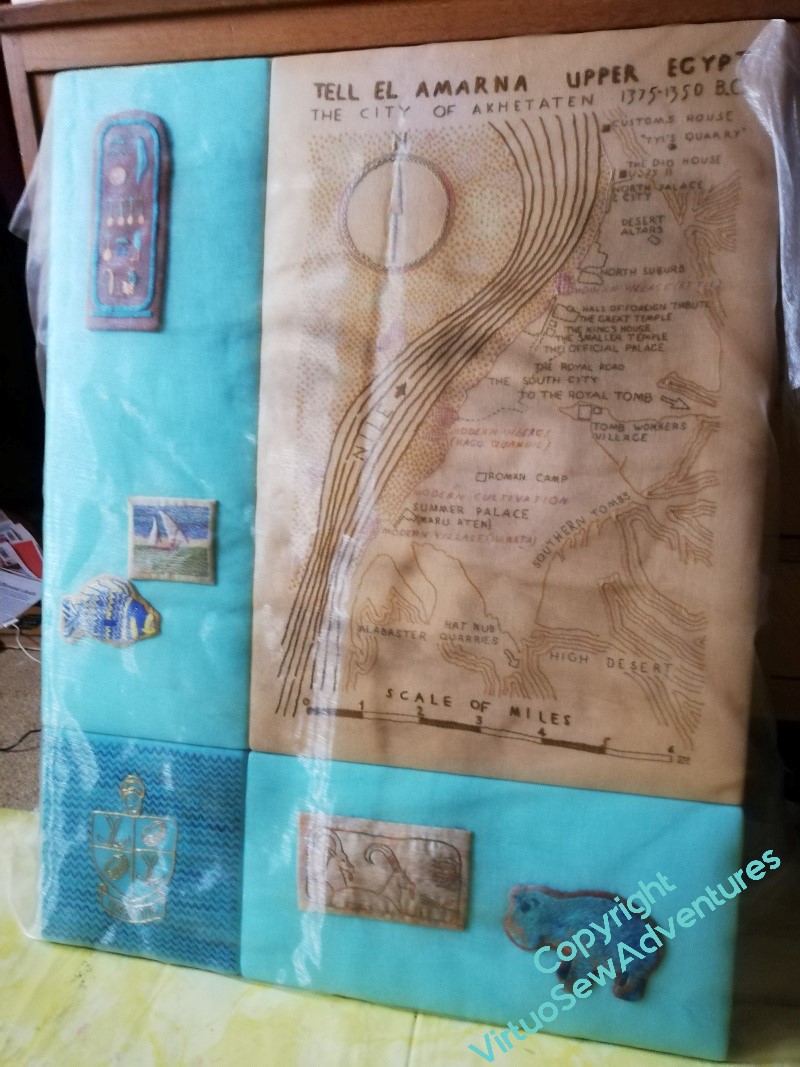
I didn’t want the images of Akhenaten and Nefertiti over the whole panel, just over the sandy part of it..
So once I was happy with the mounted gauzes, the glue was dry, and the glue pot firmly shut, I got the panels out, laid them on the floor and found some little pots to hold them up at the corners.
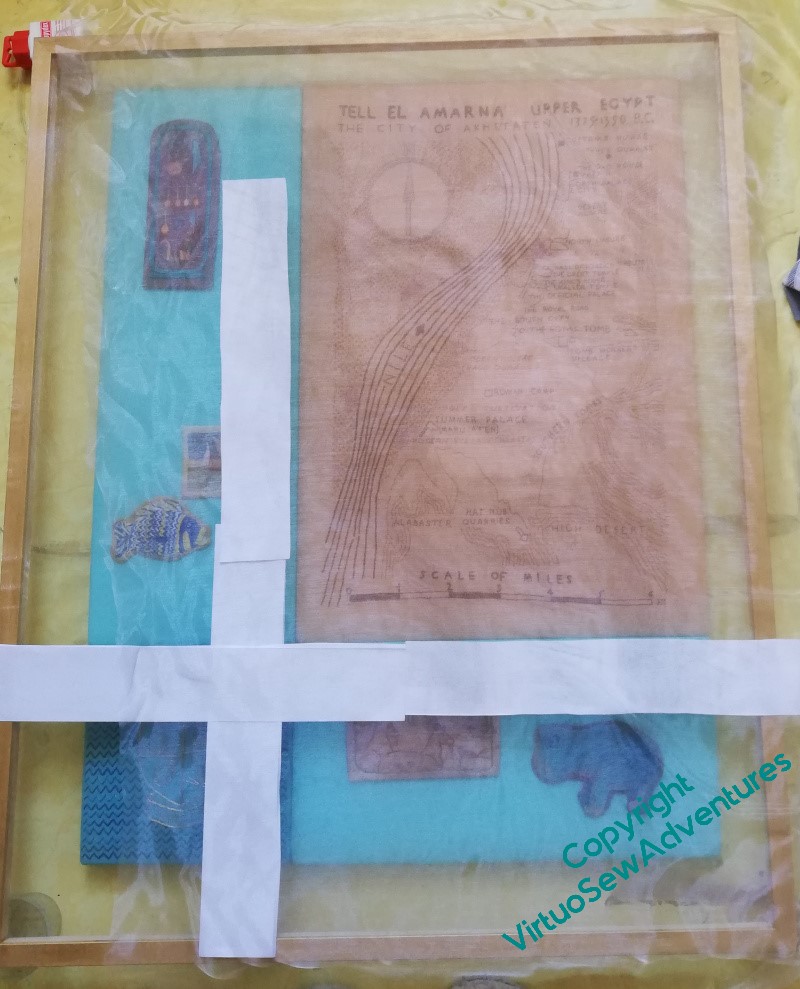
You can see from this photo that the gauze is fine enough that it is not going to interfere with the view of the panels – except for those who want to examine very closely, and I think we are going to be able to come up with something for them!
The mounted gauzes are bigger than the panels, deliberately, so I had to take that into account as well. You can see that I’ve not got Nefertiti quite right here – I was using the old overlay to work out placement – she’s too close to the centre.
Once I’d worked out where they were to be placed, I took copious notes. I had to work on the images from the back, because of the size of my padded mat, so I not only had to make sure I had the right placement – I had a story in my head for who would be in front of each panel, and they weren’t interchangeable!
A closer look at the overlays
It occurred to me that I rather skipped over quite a few elements of the rather haphazard development of the overlays, and a slightly closer view of the way the overlays have been managed might be rather interesting, at least for some of you, so here we are.
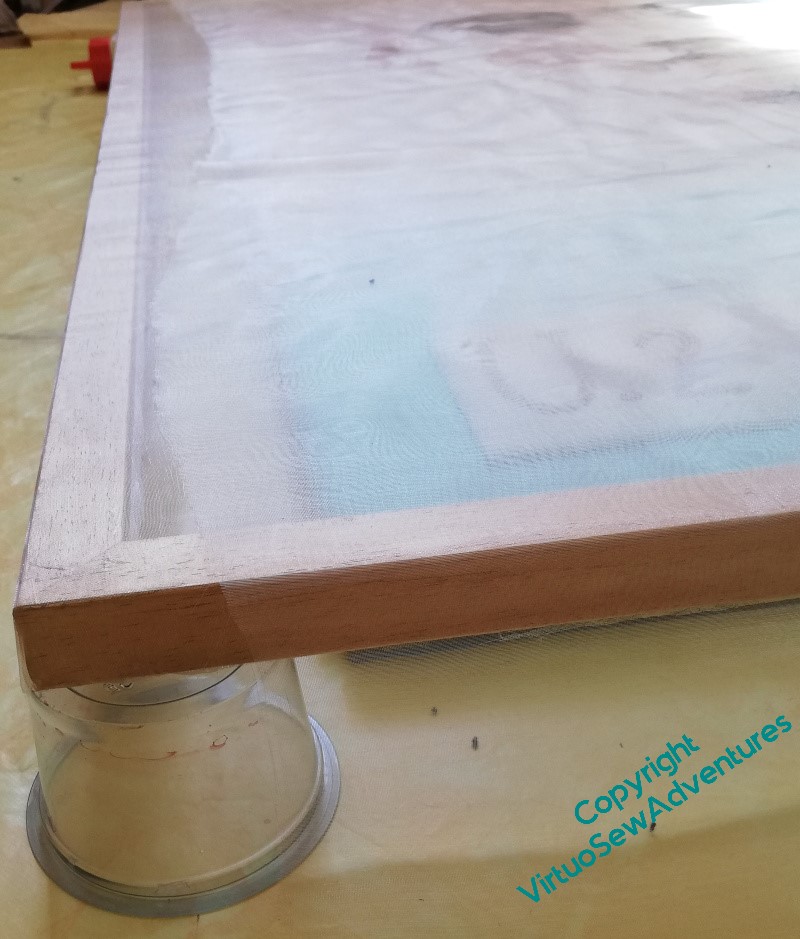
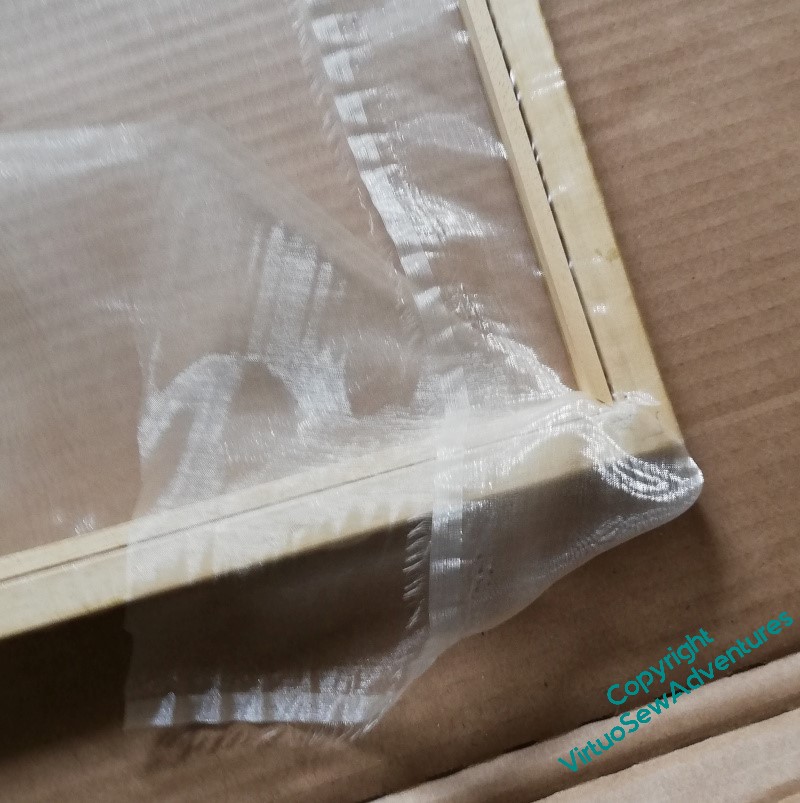
In fact I got the framer to make two frames, one the frame that will be seen, which is what I painted gold, and the other a fillet, very fine “infill”, in effect, that will not be visible, but will be part of what keeps the gauze tensioned and in place.
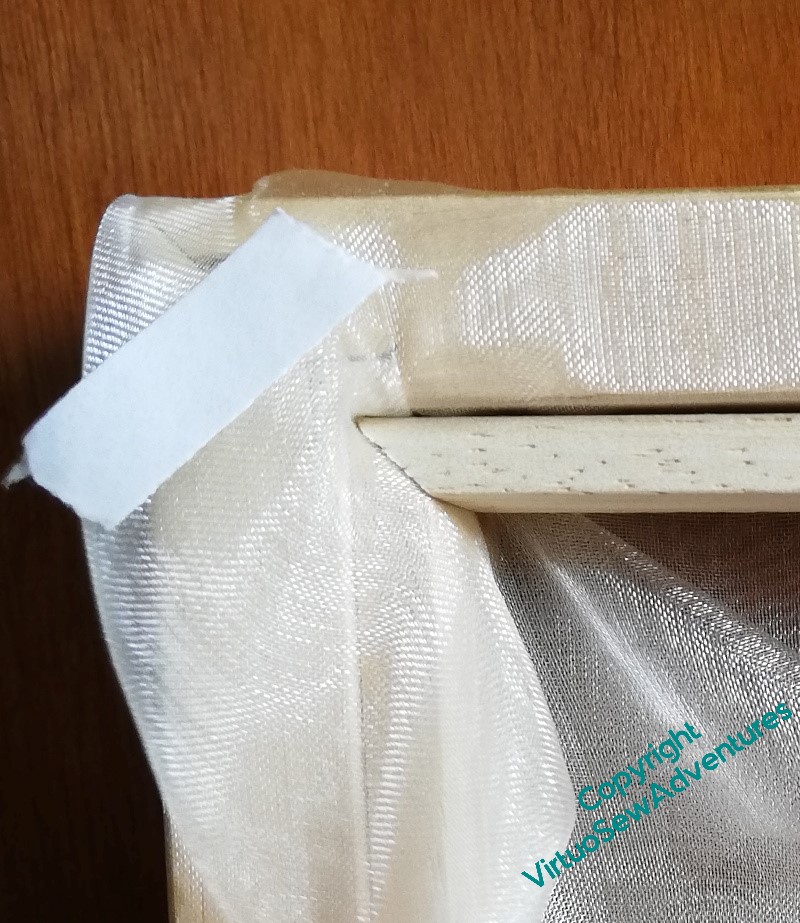
Here is a close view of the corner. This is the point where I had quite a bit of wrangling to do. The gauze stretches over the front of the frame, and around the back, and is then caught into the ledge that would normally hold the glass. There is double sided table on the frame, and double sided tape on the fillet, and in effect I used it to tack the gauze in place.
So I worked from front to back, and around the frames, to make sure that the gauze was taut, and on the straight grain. Then we (at this point, The Australian was acting as Studio Assistant!) hammered nails through the fillets and the gauze and into the frame. And then turned it over, all panicky in case something had sagged.
Which, fortunately, it hadn’t. So then I spent a bit more time wrangling the gauze, gluing and trimming it in place. In fact as long as the glue holds long enough to keep the gauze held back until it doesn’t want to straighten into odd directions, that will do me, but the other advantage of copiously gluing the gauze (me and glue – aren’t I being brave!!) is that it now won’t fray.
The next complication is that I need to work out how to get the design element in the right place, given I don’t want it bang in the middle…
So it turned out I hadn’t finished…
I took out the finished Amarna panels to measure them recently, and found the overlays looking faded and muddy, so I need to do something different…
Cue much experimentation and puzzlement. It came in two parts. The first was, can I use different media to create the image in a way that will be more stable? The second, can I make the overlays less susceptible to damage?
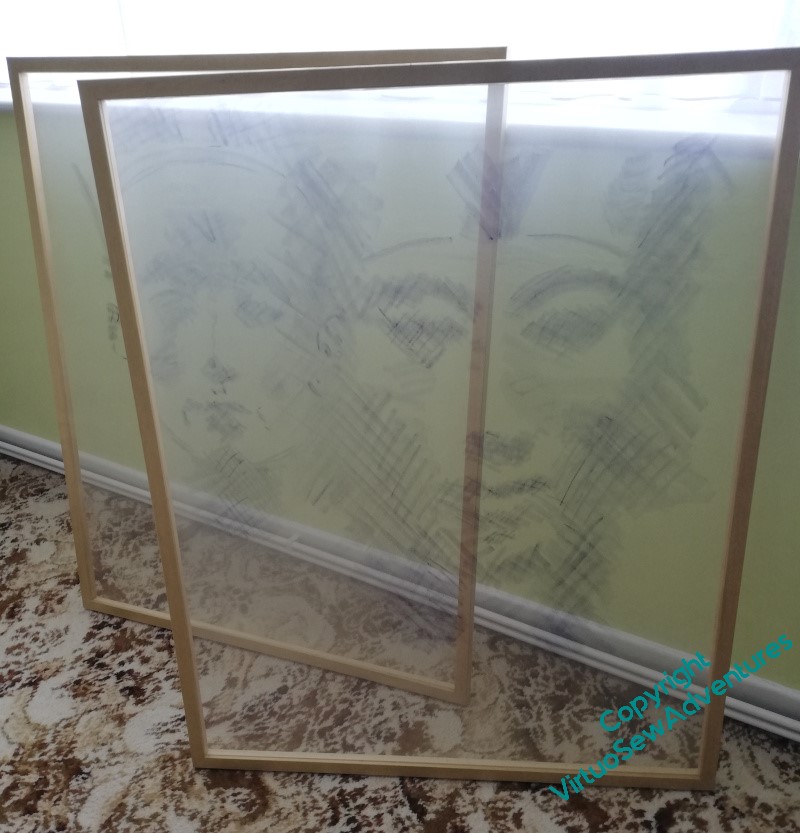
That second part was easily answered – I have always expected that the overlays should be properly framed, so I just (a word to beware of!) have to work out how to do so. I had concerns about tension and keeping everything square, but when I talked to my fabulous framer, she seemed much less worried than I, so I commissioned her to make some large frames in plain wood that I could paint with gold.
Yes, I know one can buy mouldings which are already gold – they’re all much too bright. I don’t want the frames drawing the eye, I want you to look through and past them, into the main panels.
Then I did some experiments to see whether I could find new ways to put the faces on the gauze, less prone to disintegration. I had a lot of fun playing with acrylic inks on small offcuts stretched over embroidery frames, picture frames, anything to hand. I sprayed water on the gauze before, or after, painting on the images. I tried thickening the ink with pva glue or aloe vera gel. I tried ordinary acrylic fabric paint. I stencilled. I dabbed with a sponge. I tried all sorts of experiments!
And once the ink was dry, even black ink seemed to vanish. The fabric paint filled up the weave too much, and created a rather clumpy effect.
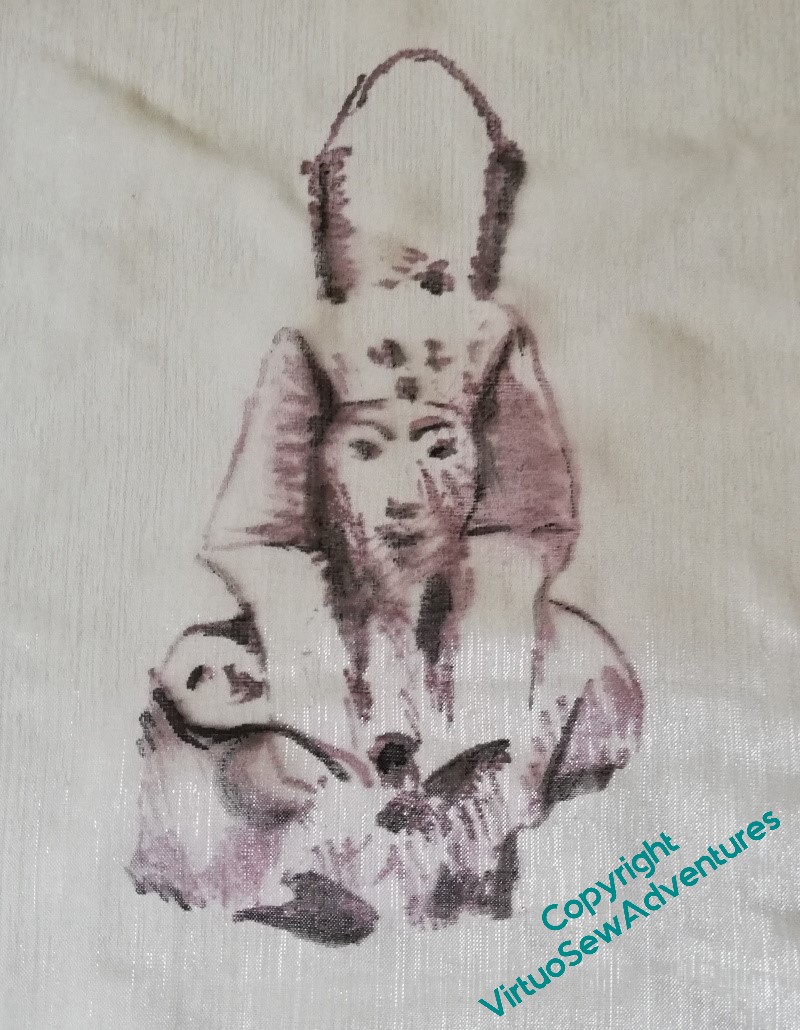
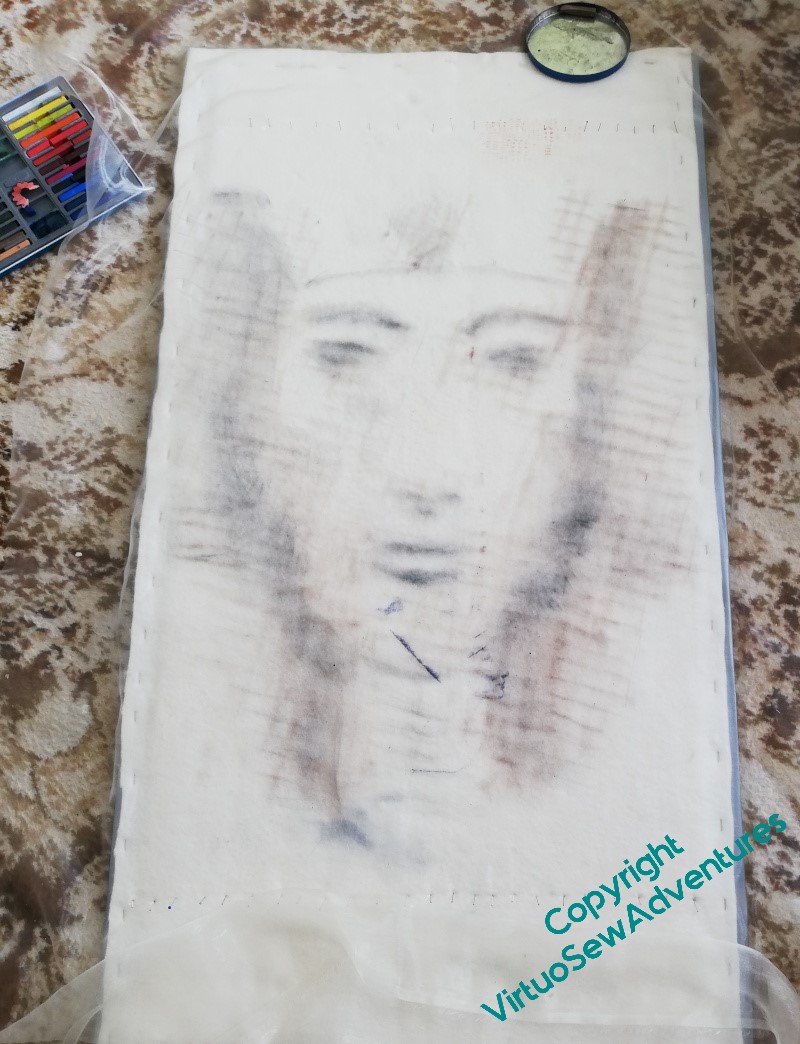
So in the end I went back to the inktense blocks (in purple, not that you can tell!), put my newsprint style guides under the gauze, and put them in, quickly and vigorously. Then I sprayed the gauze lightly with the sort of fixative pastellists use for soft pastels. I have no idea at all whether this will work in the long run, but it seems to me it has a reasonably good chance…
More work on the assembly
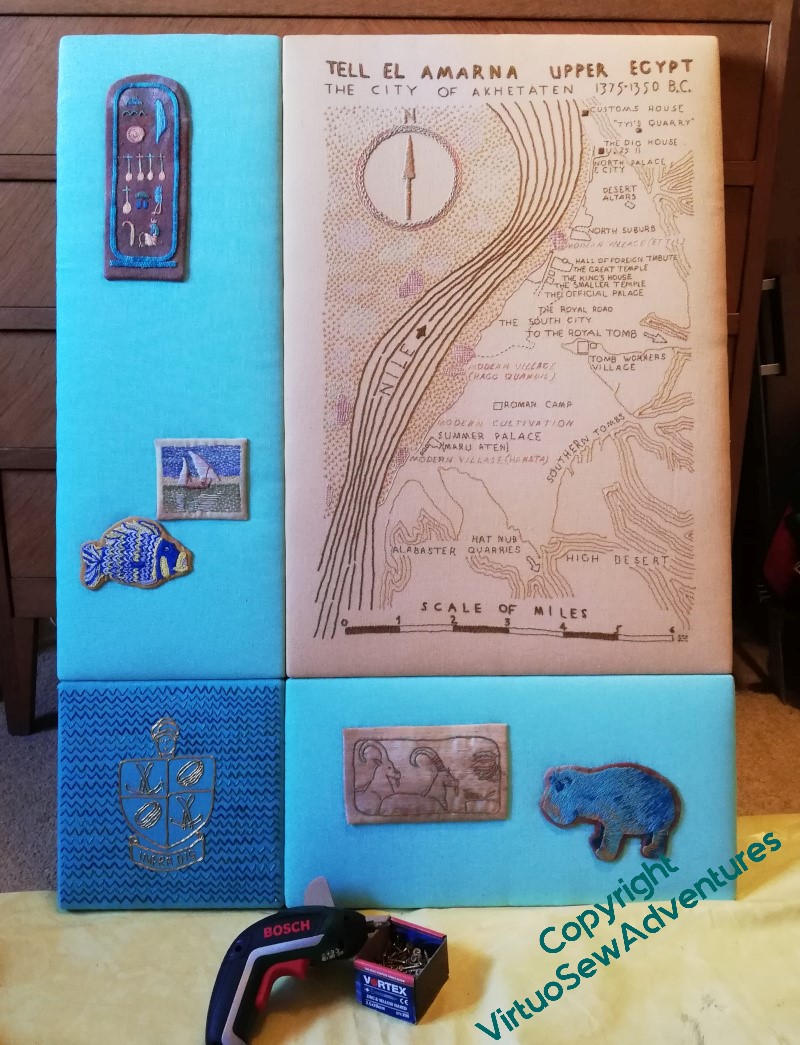
Once the backing boards had been drilled and painted, the pieces could be properly assembled.
And oh, what a world of pain those words conceal!
Never mind, moving on…
I like the look of this – it is the first time I got to look at the panels upright, and it’s astonishing what a difference it makes. I’ve been through the entire process a prey to Doubts, and they are beginning to dissipate at last.
So the next thing was to make it possible to hang the overlays in front. I don’t want to have the gauze touching the embroidery, permanently in place, in fact ideally I would like to be able to remove them more or less at will when the pieces are exhibited, so I’m still working out how to achieve that. In the meantime, I decided to put channels top and bottom of the gauzes, so I have an interim solution. That will mean that, for example, I can start to think about booking the second photography session.
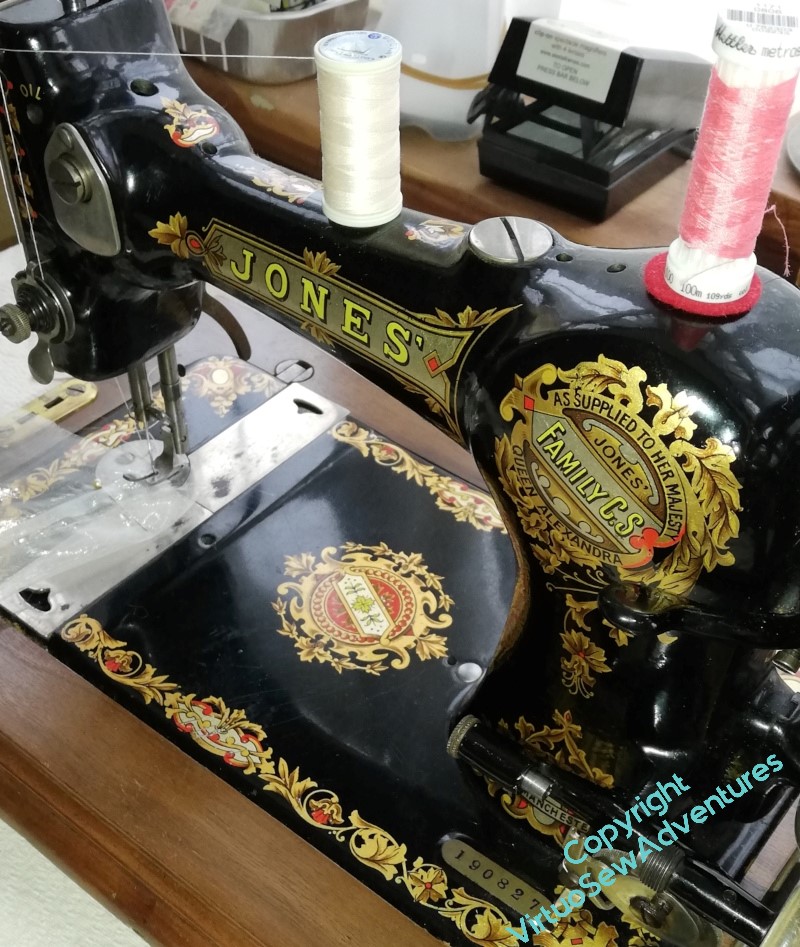
Deciding on that interim solution, however, meant fishing out my old friend Jones. Jones was given to me when I was eight, and I did a fair bit of dressmaking with him, until I was deemed old enough not to do myself a mischief using my mother’s Bernina. He weighs rather a lot so with years of a bad back, I’ve not used him for years and years, so I was rather pleased that, first, he worked, second, that when it came to it, I also remembered how to wind the bobbin, and third, getting him out didn’t make my back go “spoing!”…! As you see, the bobbin is not quite the same as modern ones, not least in that it is long and thin, and the bobbin carrier (not on display) looks more like an asymmetric torpedo, with a very sharp point.
Now I’ve draped the gauze over the top of the panel it is clear that I need to be absolutely on top of the ironing, since crumples in the fabric interfere with the face showing. It has also shown, however, that the effect that I was reaching for can be achieved.
Next steps – decide whether I need to cover the places where the panels butt together, and (definitely!) iron the gauzes.
But for now, I’m pleased with progress!
Assembling the Panels, first stage
There’s always more involved than you think, isn’t there…
I had all sorts of thoughts about keeping the four panels together, but in the end the simplest solution seemed to be a large panel on the back, with screws through to the wooden frames. So my first visit was to our wonderful local framer, because I thought the sort of hardboard she uses to back her frames would be enough.
No, she said, it’s not strong enough, you need something a bit beefier. So I went to a local(ish) building supplies store that is willing to cut material to size, and they duly did so. But not quite right (fortunately, too big) so I had to go back and get them to do it again.
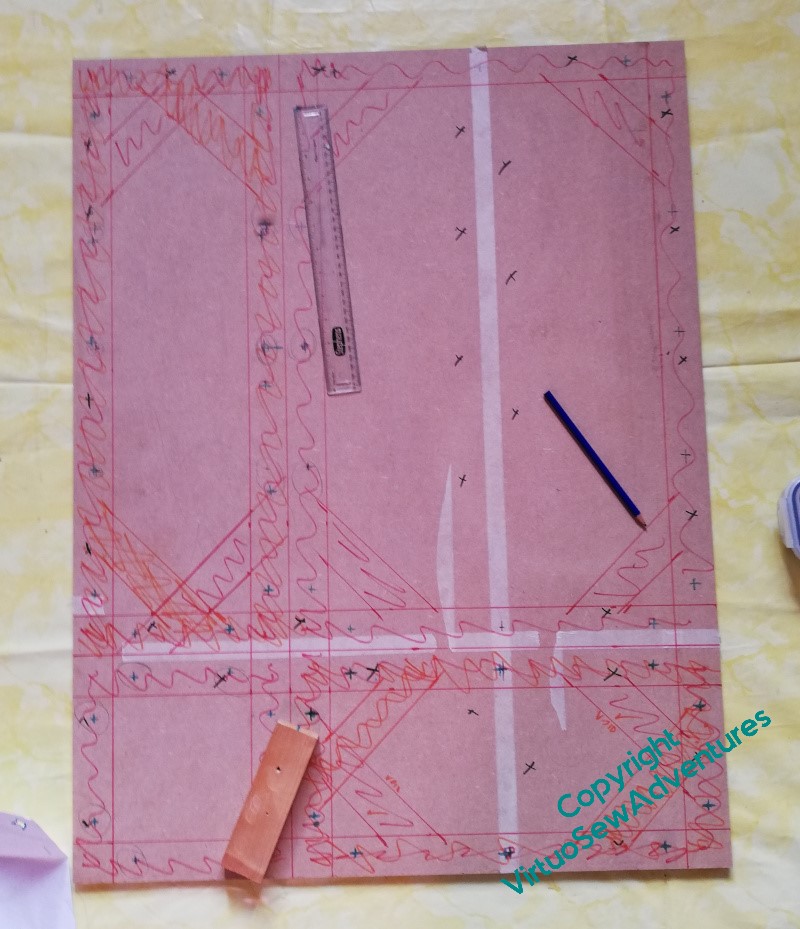
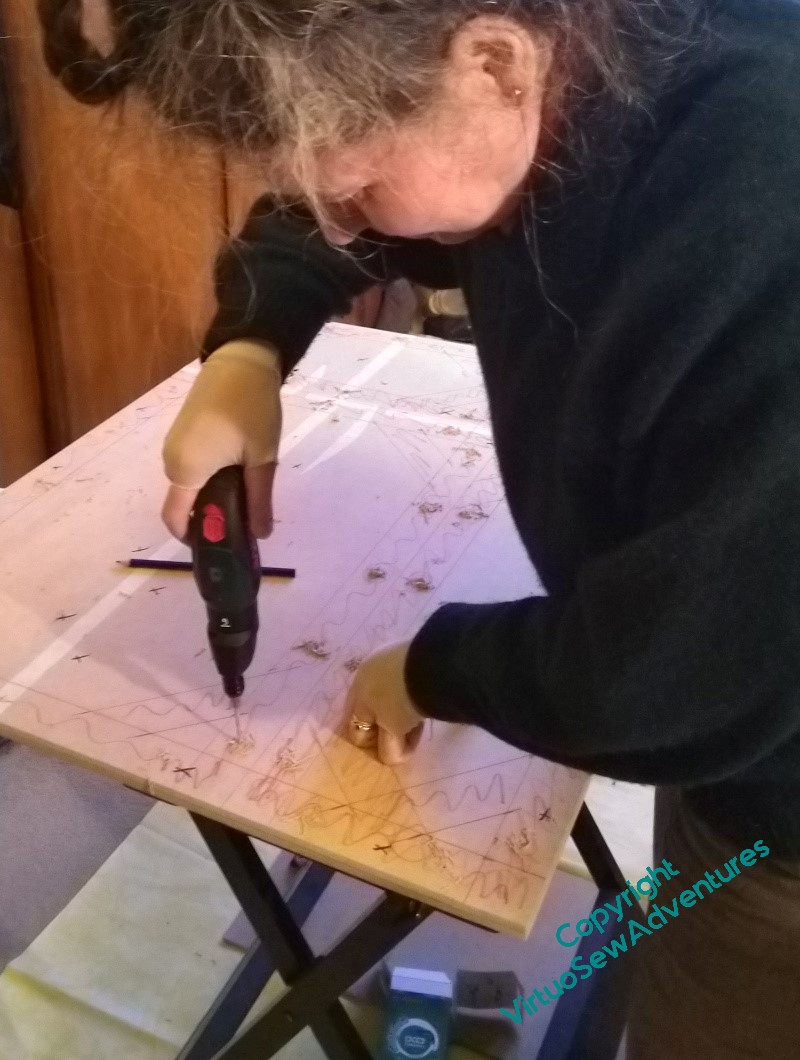
Once the boards were the right size, I set out to map the frames onto the board, so as to work out where to put the holes for the screws. I got thoroughly confused and lines and more lines and planned holes and replanned holes and very nearly howled with despair on more than one occasion, but in the end, I had a Plan of where to place my screws.
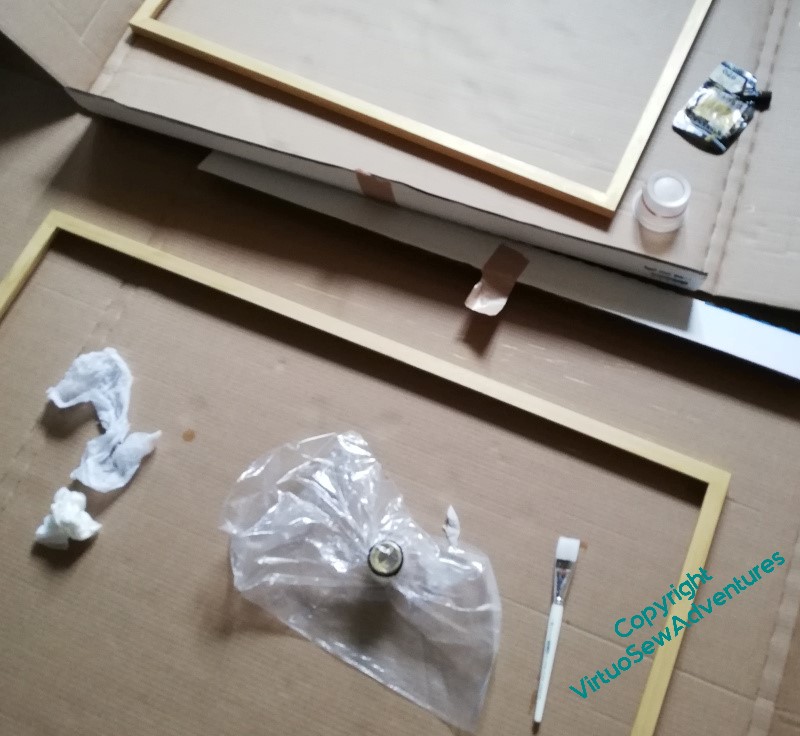
Then we taped the two boards together so that one set of drilling would do (that was a very good thought of The Australian’s), and spent ages drilling those holes.
In the interests of having a nice looking back, not covered with a zillion lines in fibretip pen, I’ve sponged the back with two shades of gold acrylic paint.
We’ll get to the end of this eventually – I hope!
Beginning The Overlays
I had originally intended to screenprint the gauze overlays for the main Amarna panels, but it was proving difficult to find a way of doing it large enough, without excessive cost. Besides, since I have been sketching, painting, and drawing very much more often over the last few years, I’m much more willing to risk my arm (as it were) by doing it in a more immediate manner.
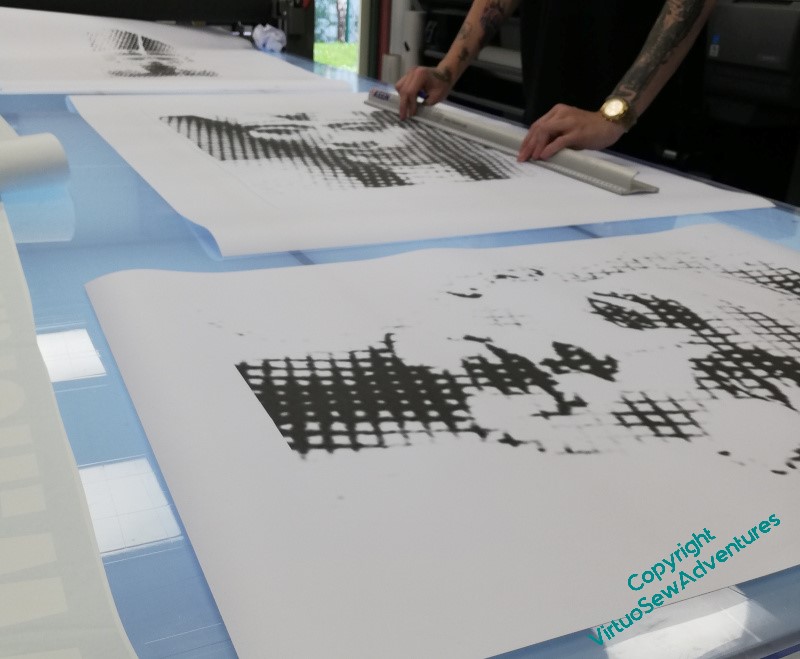
So I found a local printer who was willing to print out my manipulated images of Akhenaten and Nefertiti so I could use them as guides. They had a torrid time with a brand-new printer that kept on not doing as they expected, but they got there in the end, and I stretched my gauze over the printouts, attached to a padded board, fished out some brown inktense blocks, and got started.
Of course it’s difficult to see where you’ve been on a gauze when the template (for want of a better term) is as strongly marked as these, so when I felt I’d been all over the image once, I drew out the template and went back in by eye.
I still don’t consider I have all that accurate an eye for angle and form, so that was truly terrifying.
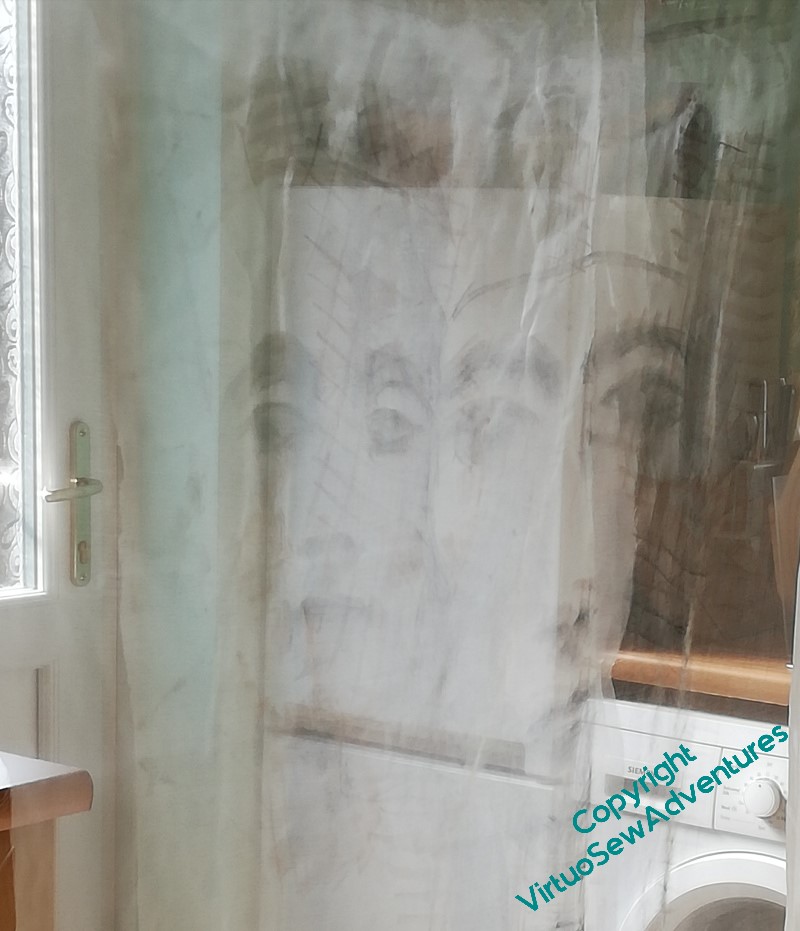
When I hung them from the laundry rack in the kitchen, however, they were “there and not there” in a very promising manner.
Whether or not these are the final versions I use (I’ve enough gauze to go again if they turn out to be the wrong colour or if I need to tweak the tones), will have to wait until I’ve been able to set them up in front of the panels, but until then, I think I can say that I’m very pleased!
Mounting Choices Again

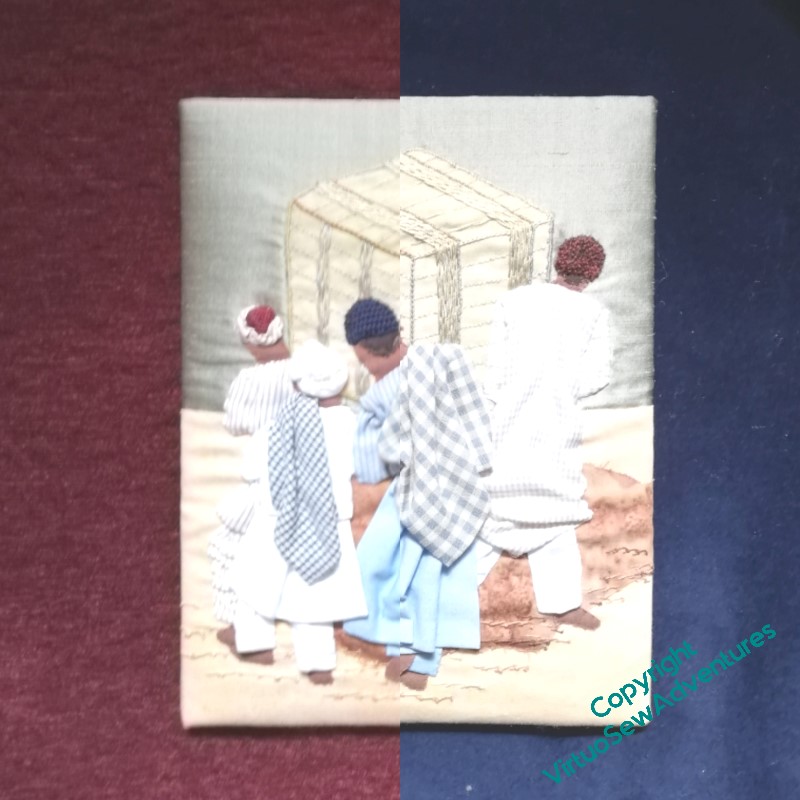
There were some quandaries about mounting “Loading The Felucca”. Burgundy? Navy? Copper? Brown? I posted these pictures on various social media sites – each of which picked a different preference, which wasn’t helpful at all, but at least left me free to apply my own judgement.
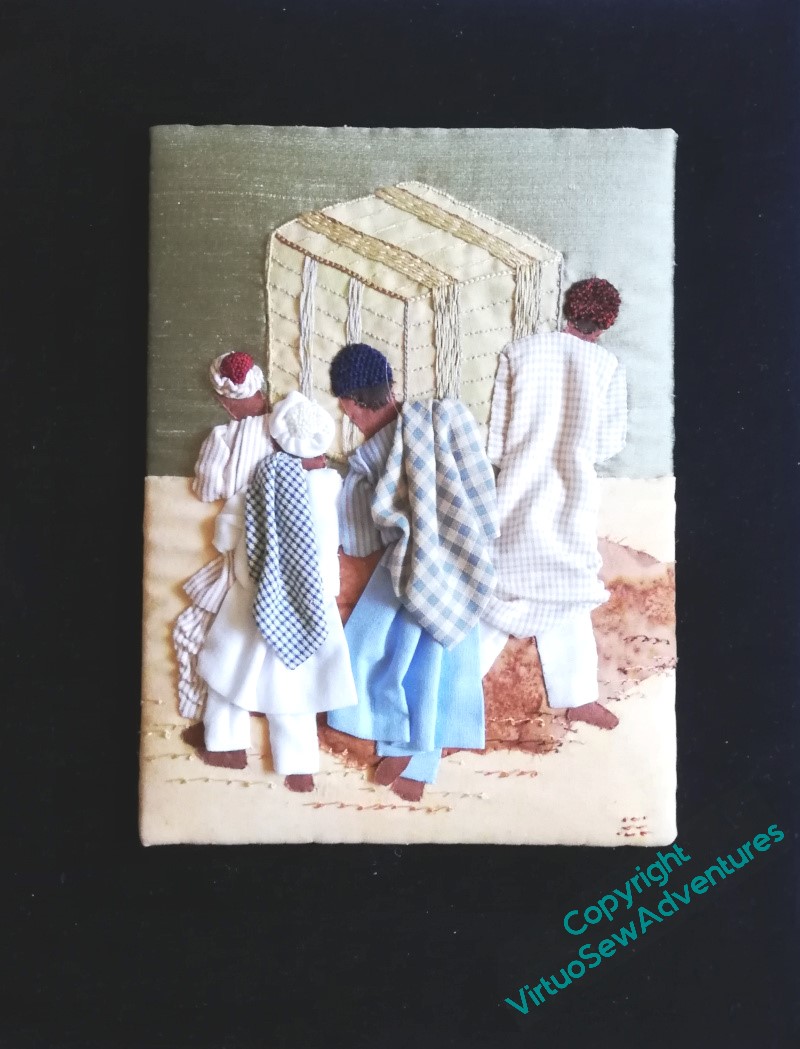
So I chose the same navy blue velvet I used for the Amarna Royal Family. All the other fabrics had something going for them, but the navy blue brought out the colours and shapes more emphatically and truly – although I fear you will have to take my word for it, as my photograph doesn’t really bring out the blueness of the velvet!
However, in the course of the final mounting process, I discovered that the embroidery was no longer visibly signed. Curses!
Then I checked, and neither was Ankhsenspaaten. Curses again!
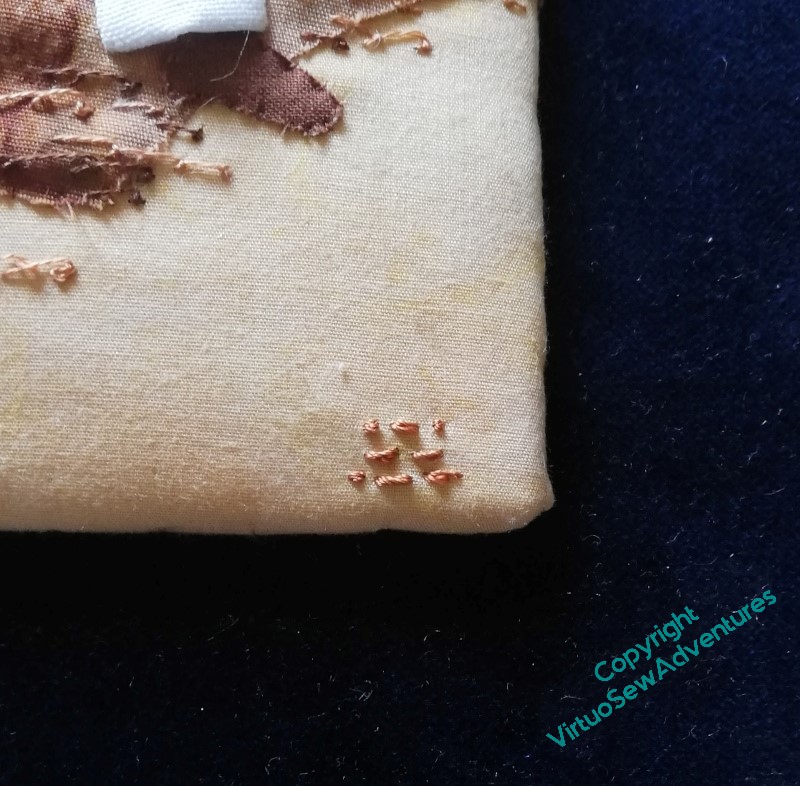
They are now…
Cushion For The Coiled Pot
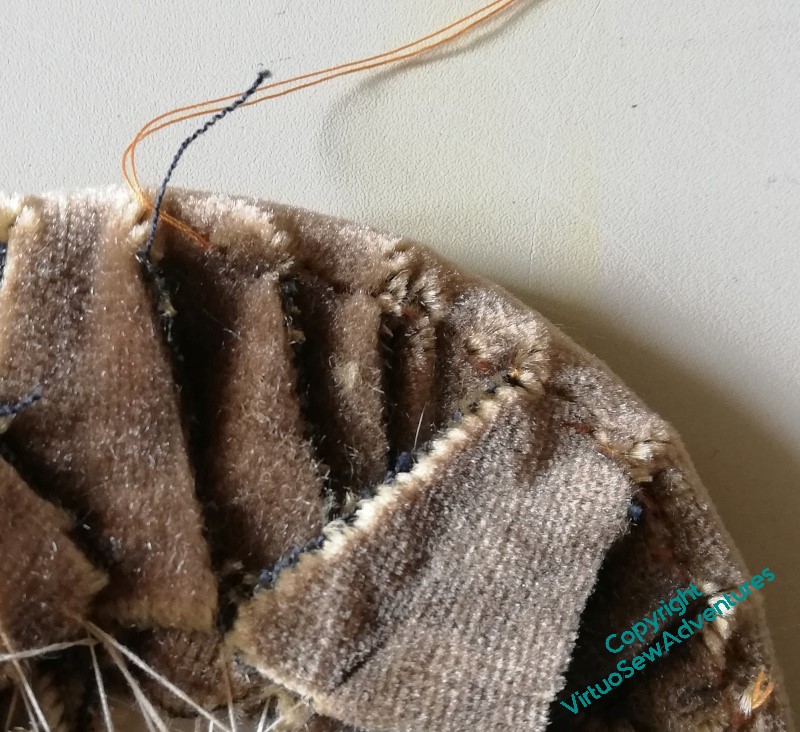
I clipped the edges of the cushion for the coiled pot, and laced the tabs together. That was a bit less bulky than before, but still clunky and rather unstable.
<thinks hard> I wonder whether this will work…?
I stitched (that curved needle again!) close to the edge of the card mount, using a strong, doubled, cotton thread. Fortunately I’d backed the card with some heavy pelmet vilene, which meant that some stitches went into that as well as the velvet.
Then, with great trepidation, I cut off the first tab. And then the one it had been attached to.
Ooh, the whole thing didn’t disintegrate!
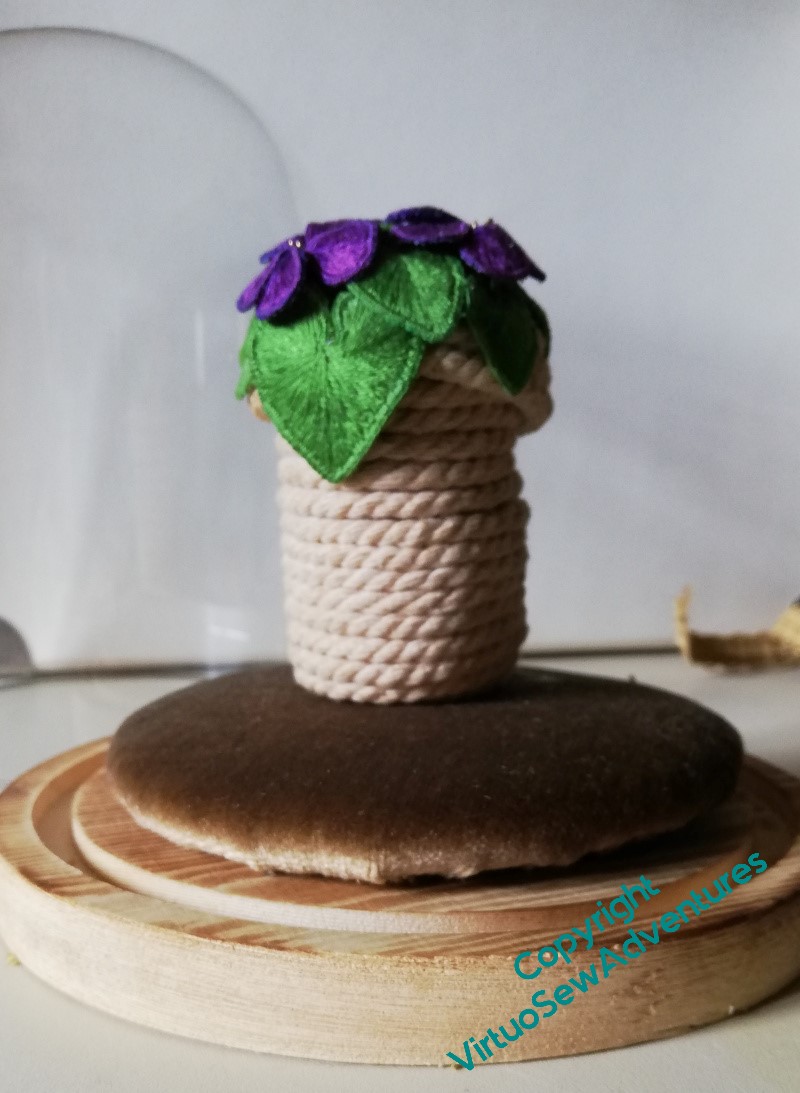
So I carried on , and it still didn’t disintegrate (although velvet is a very messy fabric to cut!). I tried it in place – much better, stable, lower, neater. But yes, still shedding fragments of velvet. That’s easy to fix – a couple of layers of pva glue on the underneath (me, reaching for glue? who am I, all of a sudden?!), and there’s no more shedding.
However, I do think it looks a little unfinished.
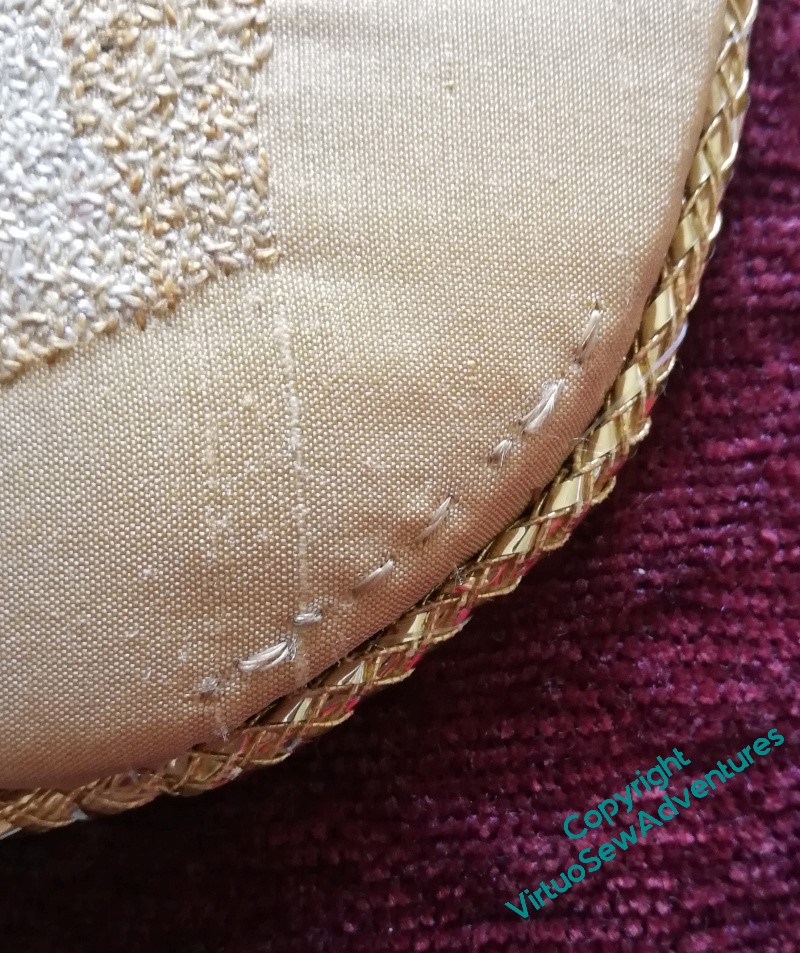
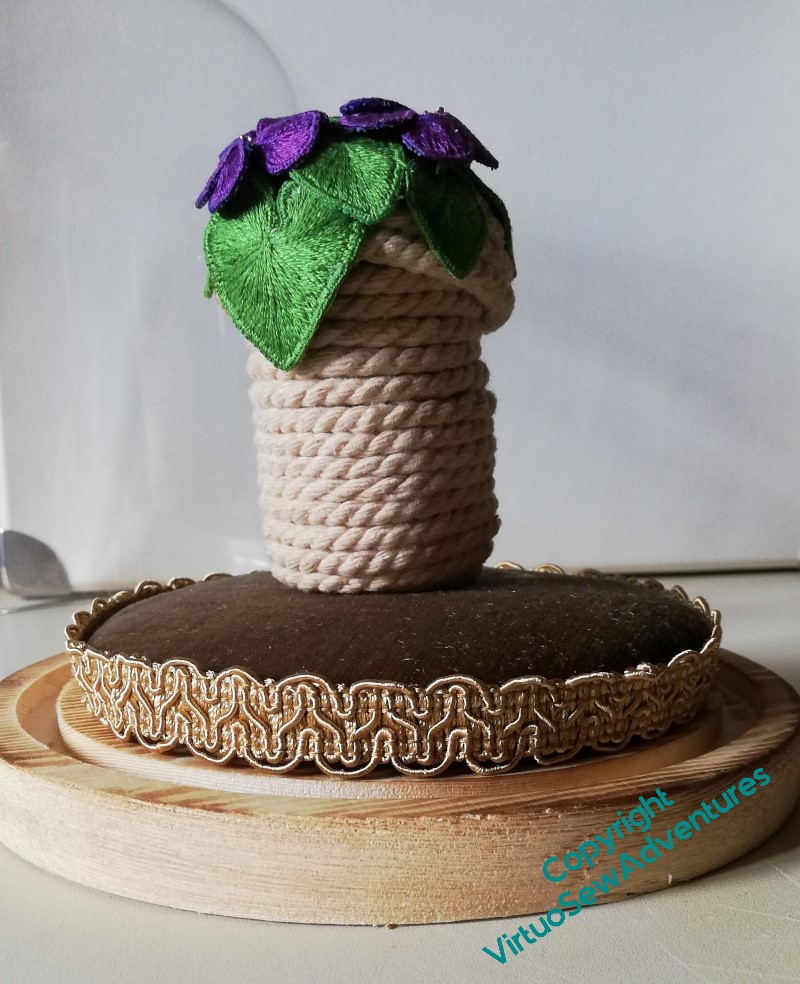
So, trimmed with a bit of furniture braid, which makes a neat little edge, slightly camouflaging what I’ve done and how.
If the daisy beads escape, it might help to keep them safe, as well.
Mounting Ankhsenspaaten
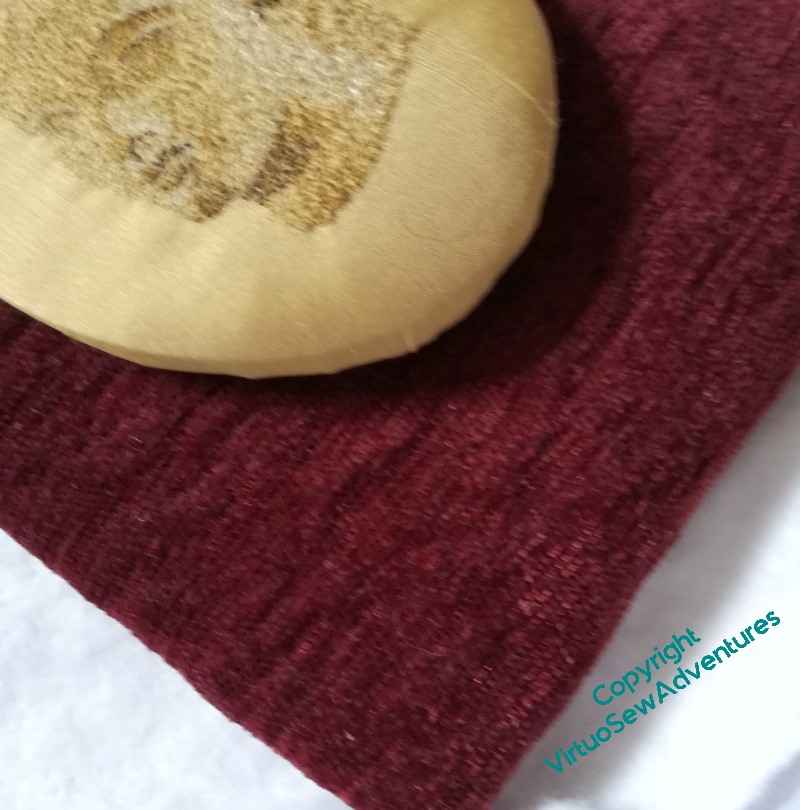
After some thought, I decided to take the inspiration of mounting for the Head of Ankhsenspaaten from Victorian mounts for minaiture portraits, so I went to my local framer, who goes by the not-at-all-exaggerated business name of “Framing Genius” (seriously, quite apart from any headaches I may give her, I’ve seen some of the other things she’s been asked to do!), and we worked out what size of oval would work for this idea. Then her clever computer controlled cutter cut out an oval that was exactly the size and proportions I wanted.
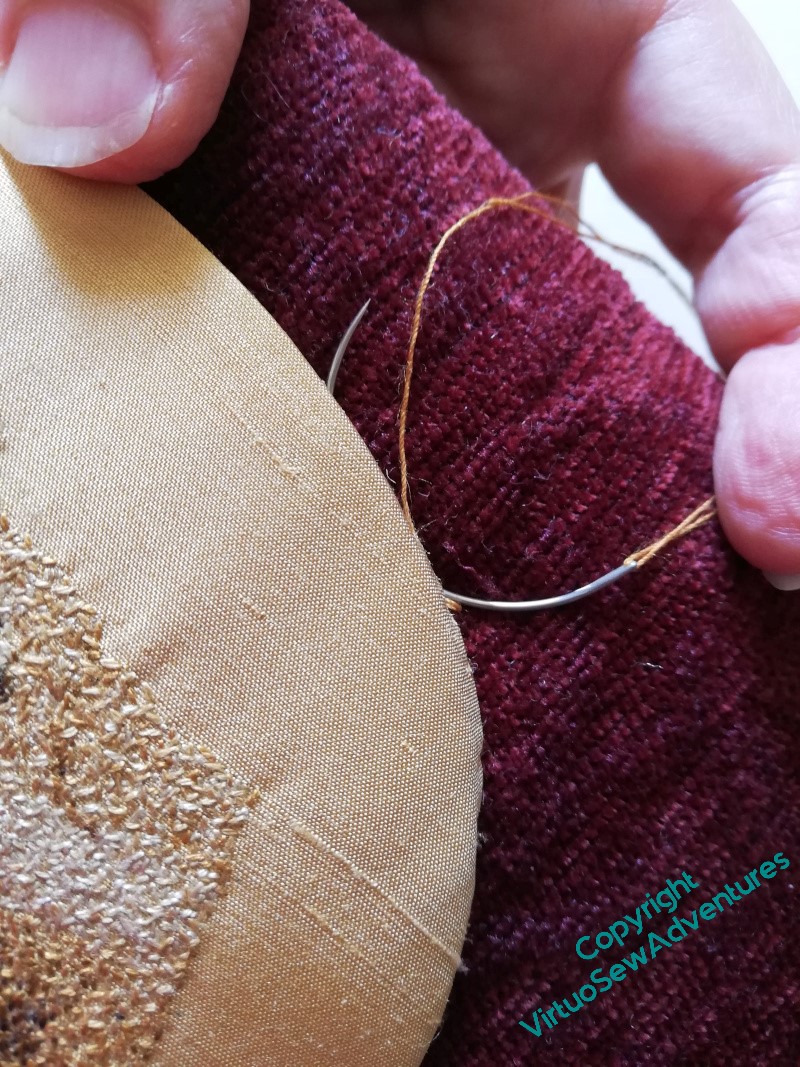
Further thought, and some playing with cards and fabrics, helped me to decide to use for her background the same burgundy chenille upholstery fabric that I eventually used to mount the Colossus of Akhenaten. None of the Amarna pieces are going behind glass – if eventual owners wish to do so, that’s their prerogative, but I like the immediacy of feeling you get, looking at a fabric or thread without any glass in the way – so the next job was to stretch the burgundy over a wooden frame and use that wretched curved needle to ladder stitch the two together.
I may be being unfair. I still don’t find a curved needle at all natural to use, but I am at least beginning not to whimper every time I look at it. It’s very useful for the purpose I’m using it for!
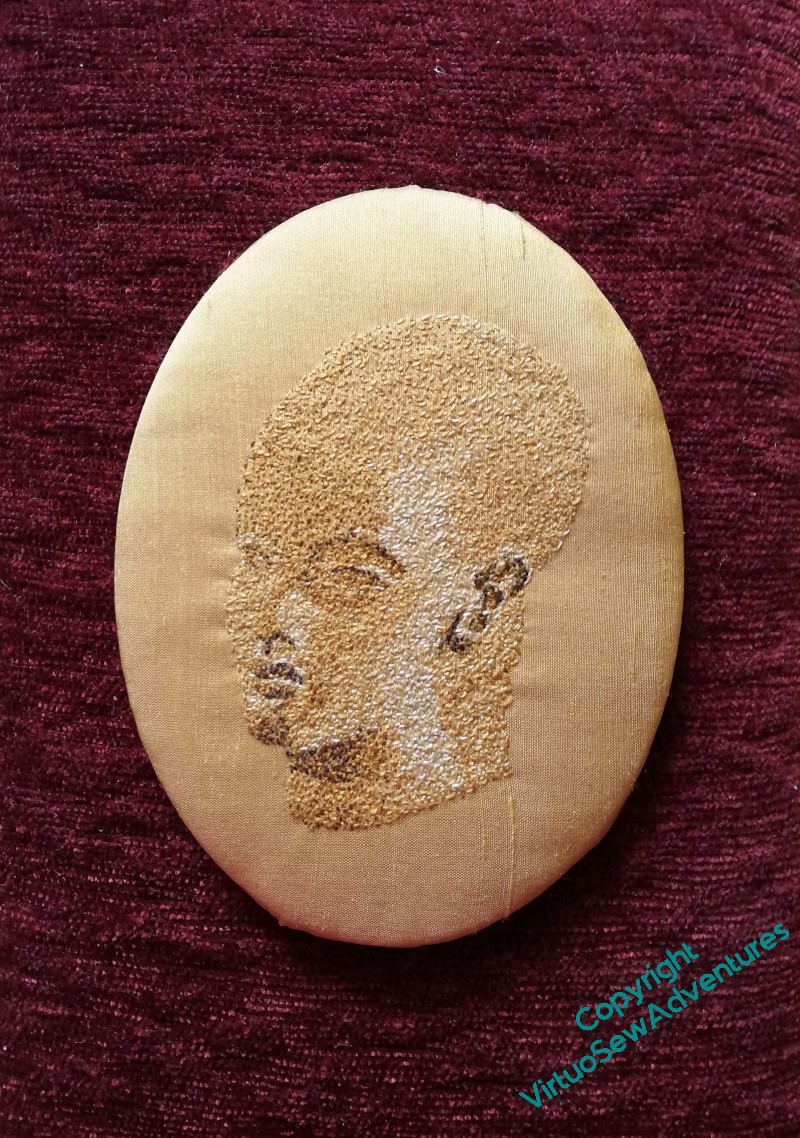
Once I had her neatly mounted, I sat back for some of my usual Thoughtful Staring.
The original inspiration sometimes had a cord or ribbon trim around the oval of the miniature – maybe as it stands the transition is a little abrupt?
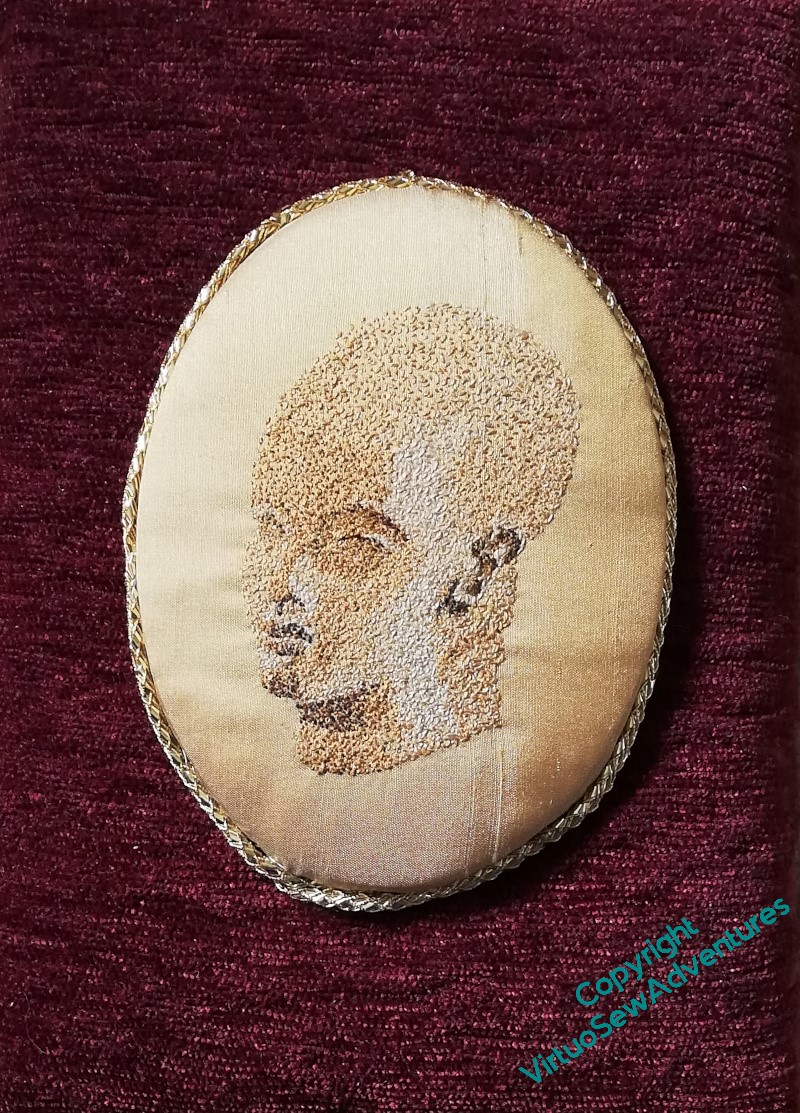
I’ve a small collection of odd metallic cords bought at an Embroiderer’s Guild Sale, so I rummaged in that, and found something that might work.
Then I looked a little harder and realised that the thread I had used to attach the oval to the velvet would show. For the first time, I found a use for the Peri-Lusta Invisible Thread I found in my Grandmama’s workbox!
I’ve not got the gold thread quite correctly placed yet (I ran out of patience with myself at this point), so I need to spend a bit of time tweaking that, but I think where it is in the right place it is definitely improving the look.