
Tag: needlefelting
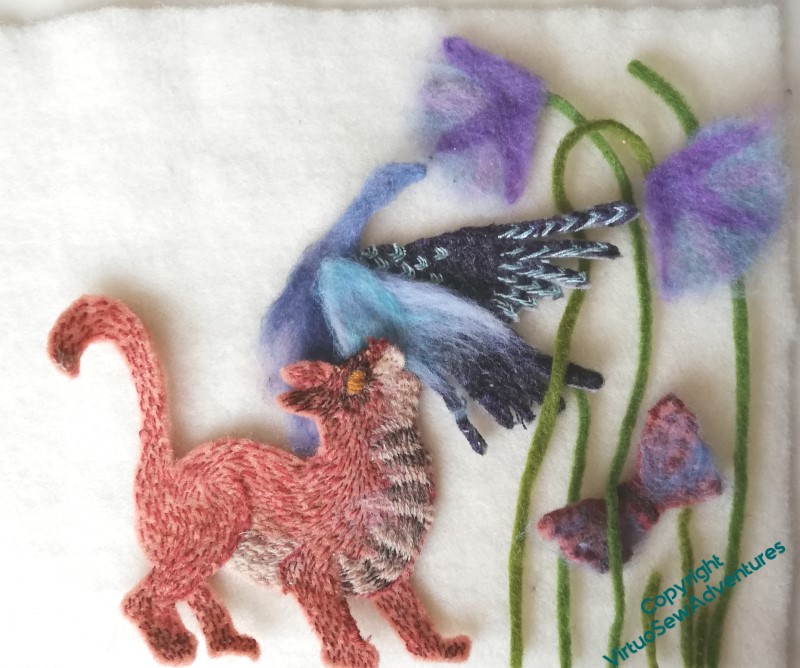
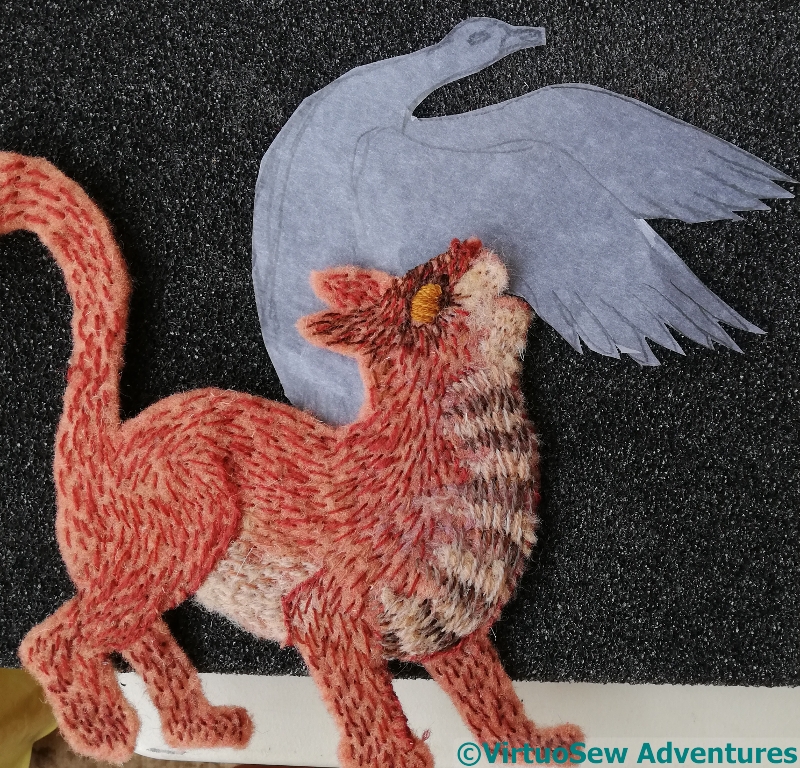
Hunting Cat finished – I think
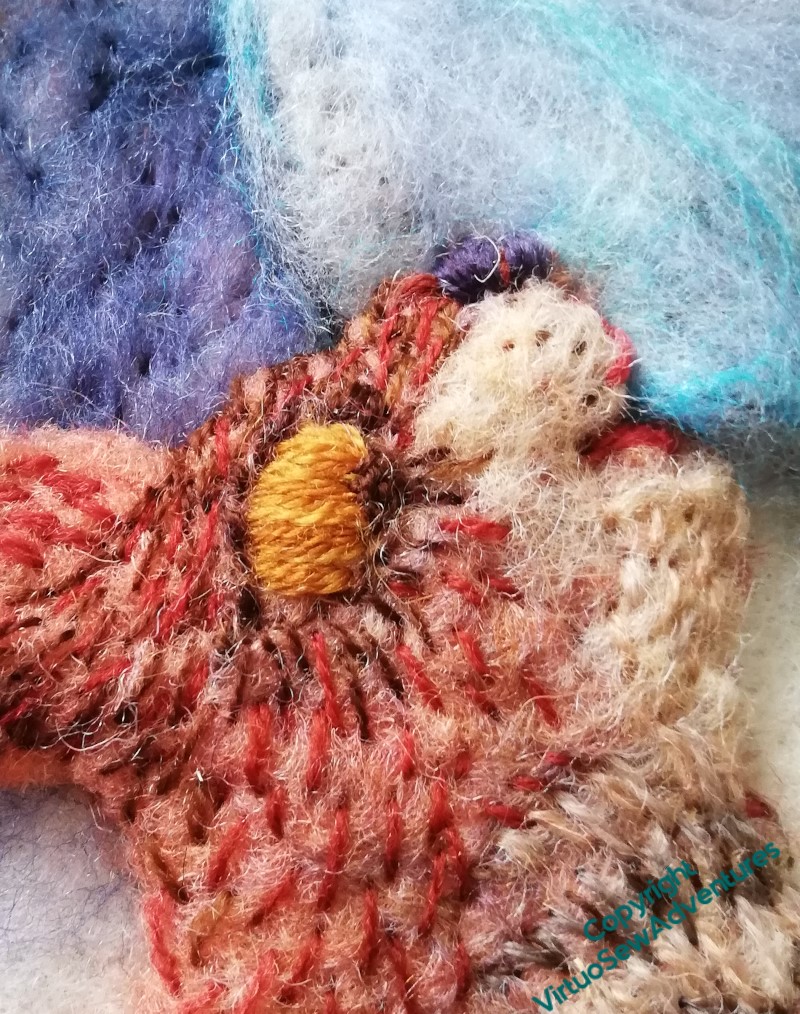
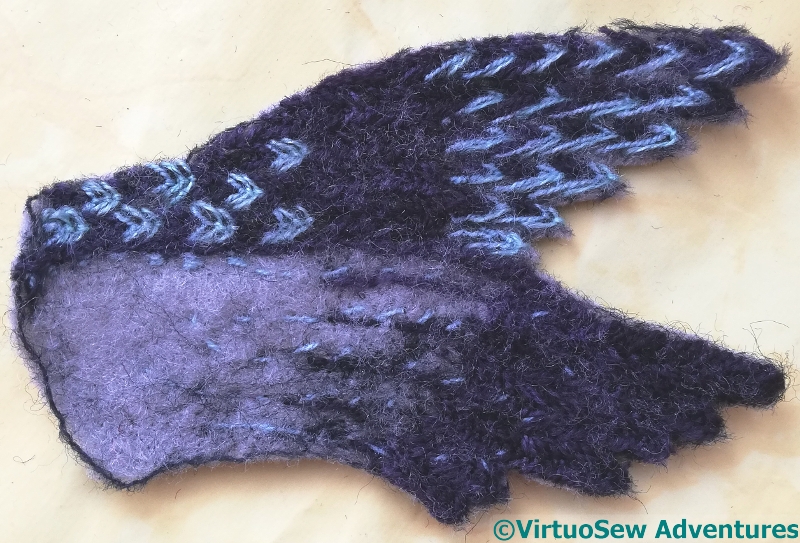
I mixed needlefelting and stitching in attaching the various motifs to the background. You can see the characteristic marks of a needlefelting needle on the blue of the bird’s body behind the cat’s head, but I’ve tried to bury the stitches in the depth of the fabric so that they disappear.
I’ve added a couple of tiny blue-black stitches for the cat’s nose, and some tiny pink stitches to the inside of his mouth. It’s amazing how much difference those few stitches make. Those characteristic needlefelting marks also suggest the cat’s whiskers, which is just as well, because I’m not sure I would attempt to put them in as stitches!
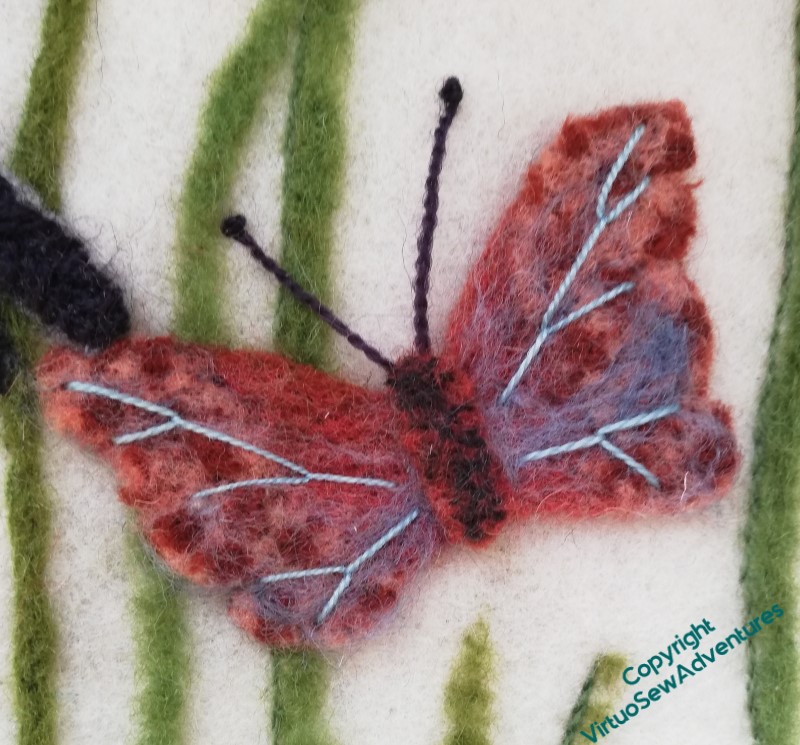
The butterfly in the fresco was entirely in browns, like the cat, and the wings were much longer. I’ve folded up the body so that the extra length of the wings is underneath, raising the body from the surface. I’ve also needlefelted some wisps of blue over the wings and added the blue veins to lighten the impression still more.
I’ve stitched on one side of some of the stems, and begun to narrow and round them with needlefelting, breaking one of my needles in the process. Again, I don’t want to overdo this: the wispy, matte surface of the needlefelt helps to recall the fresco, and too much stitchery unbalances the effect.
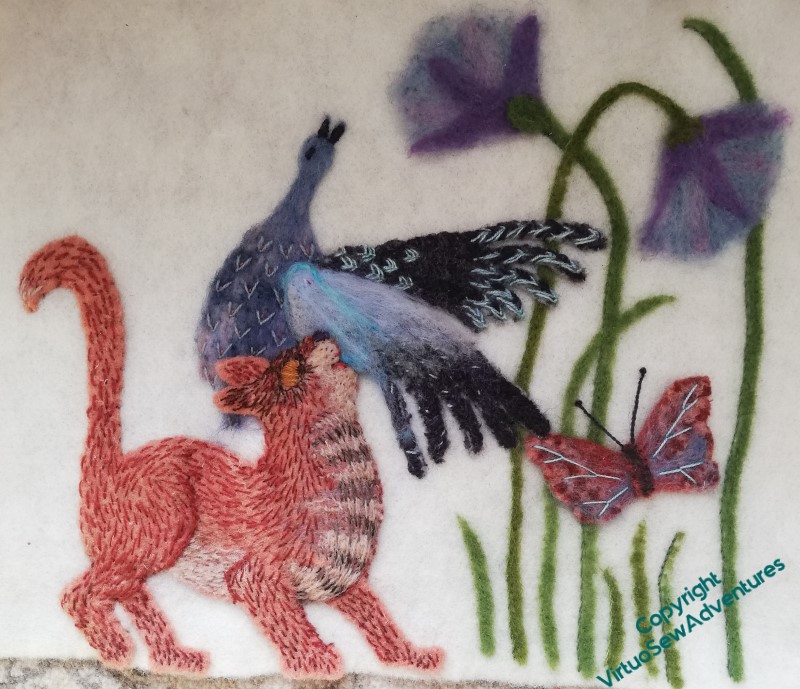
I think that’s all now. I’ve added some rough fly stitches to the bird’s body, opened his beak to shout his alarm, and stitched the eye. The stand of stems and lotus flowers gives some reason for the butterfly to be there, and it pulls together the blues of the bird and the browns of the cat. The heavy stitching on the cat is echoed in the back wing, and the front wing echoes the wispy lotus flowers.
All in all, there’s a reasonable sense of lightness and activity, which I think is what I needed to achieve here. Thank goodness for that!
And, on another subject entirely, Episode 63 of SlowTV Stitchery is now live. In which thoughts of pony trekking in Northumberland lead to musings on the architecture of justifiable caution, and, by way of a complete change of direction, to planning the embroidery of stems on a jacket.
Back to the Hunting Cat
It has been a very long time since you saw the Hunting Cat, partly because I got distracted, and partlyly because I had such a disheartening time with the bird’s wings. Once I’d got the Amarna Family completed, at least to the point of wondering how to display it, the Cat started to haunt my off-duty moments, mewing imperatively that he wanted to be Finished.
It is extraordinarily difficult to concentrate on anything with a felt cat howling in the background. I wouldn’t wish it on my worst enemy!
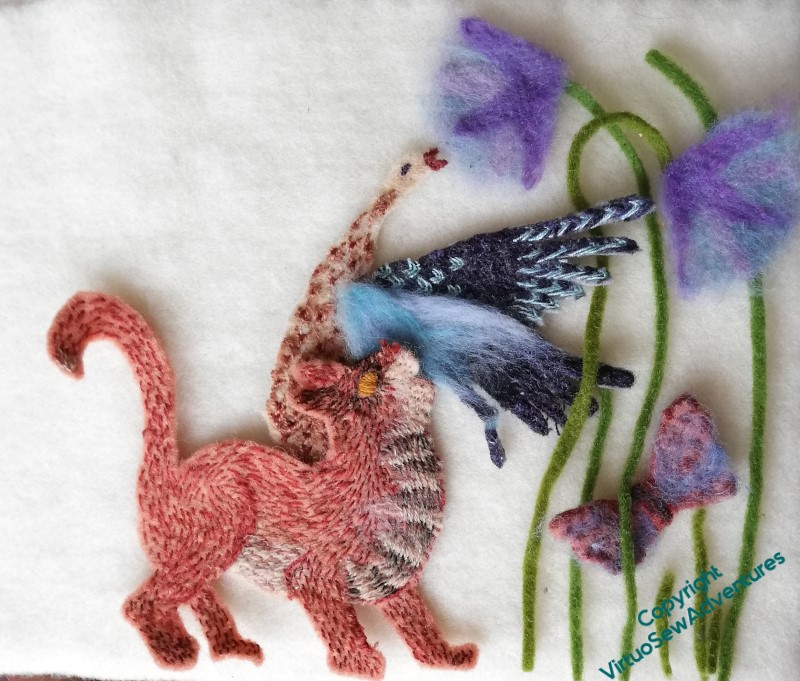
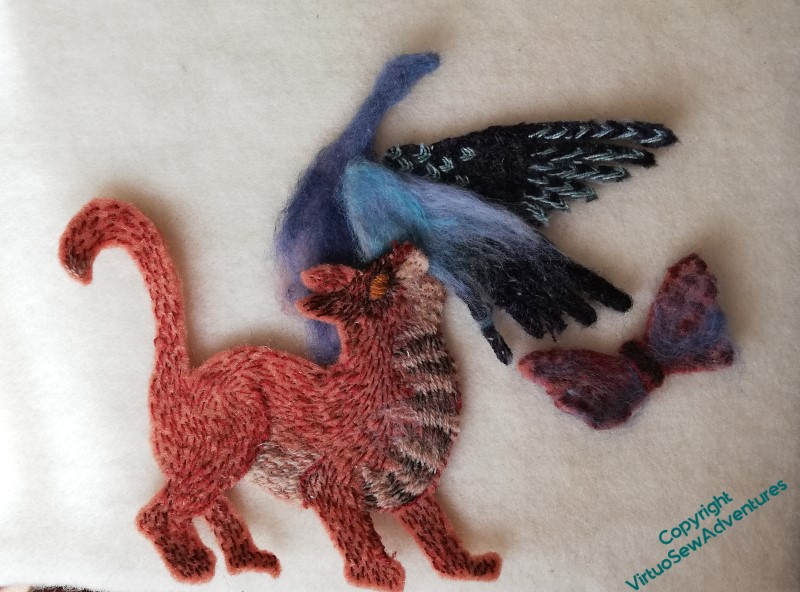
I took the bits and pieces to my mother, the artist, and we wrestled with several versions of the bird, orientations of the butterfly, and my additions of the lotus flowers and stems.
As with the Two Little Princesses and the Frolicking Calf, I want to balance my source material with my invention, and the purity of a single technique (needlefelting) with the variation available through stitchery. Cutting between the pinions of the wings helped to lighten the effect, and the wispiness of the front wing and the lotus flowers begin to balance one another.
The blue body of the bird, and the stems and flowers, begin to move away from the original inspiration, but begin to reintroduce the lightness of the original, which I lost when I tried to reproduce it. So I think you could say there is hope!
Episode 58 of SlowTV Stitchery is now live In which we begin to finish Tynemouth Priory, and I am pleased to find myself still content with how I started it. I begin also to consider another jacket embellishment.
Finishing the Frolicking Calf

I ran the embellisher over the whole thing, to knock back the colours and the stitches a little, and tugged at the fabric to even it out. Then it was on to the calf, cut out separately and given darker patches on his back and legs. I’ve attached him using single-needle needlefelting, by hand. His ear is sharpened with a twisted chain stitch, his eye is a tiny chain stitch and his hooves are straight stitches.
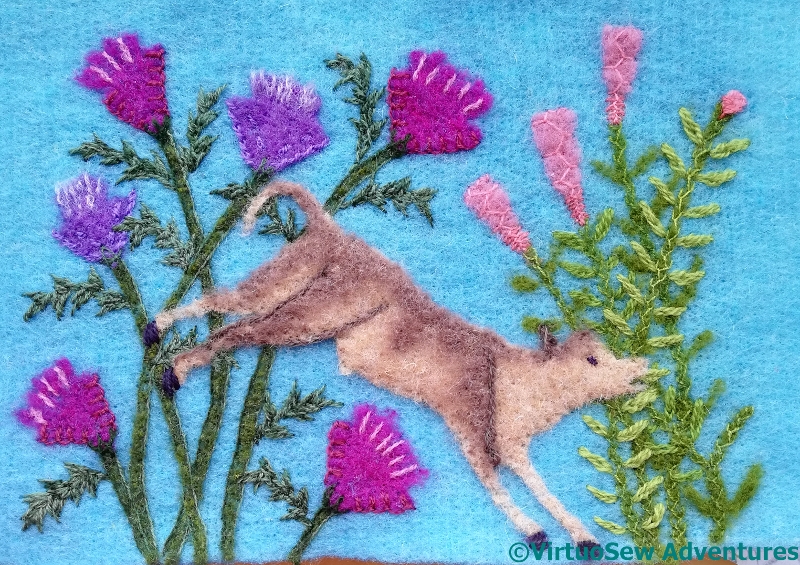
I intend to cut an irregular shape and attach it to a padded wool felt background stretched over a frame, as I did with the Two Princesses. I mustn’t forget to sign it at that point!
Adding details to the Frolicking Calf Fresco
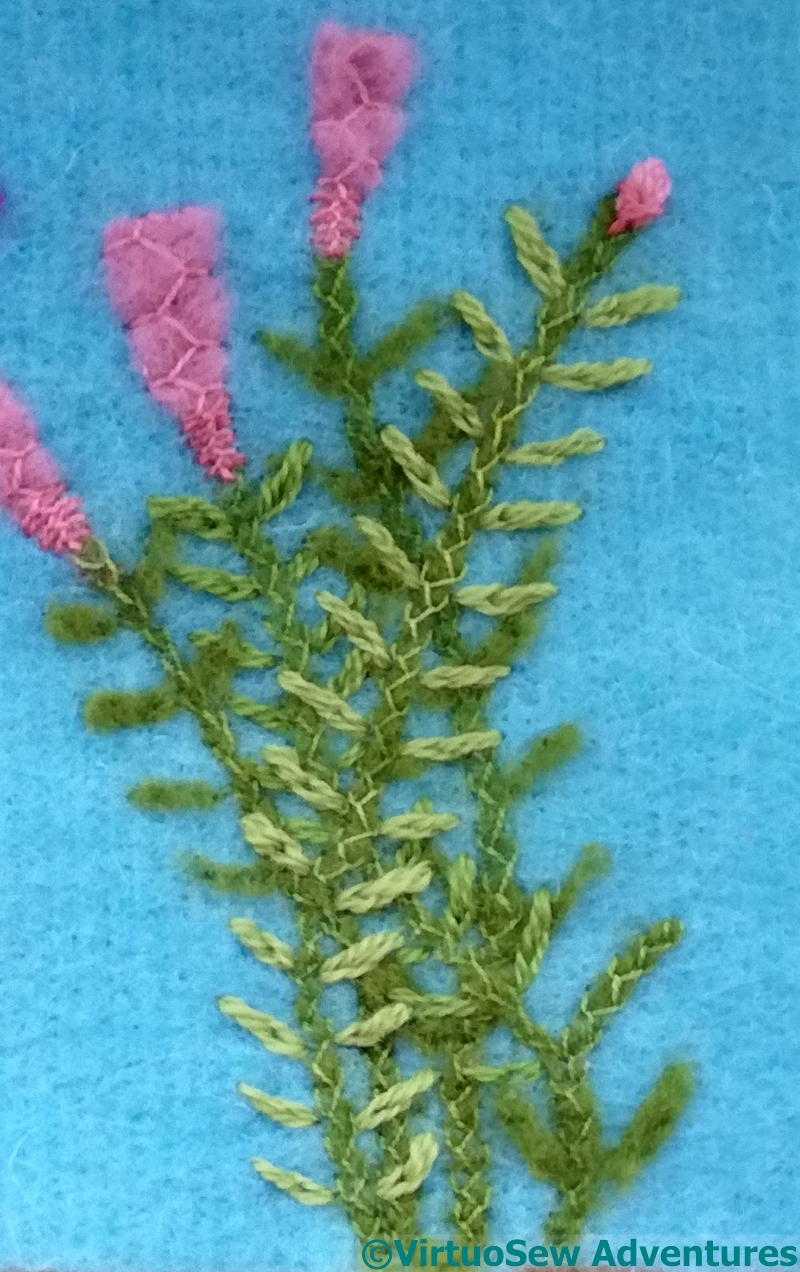
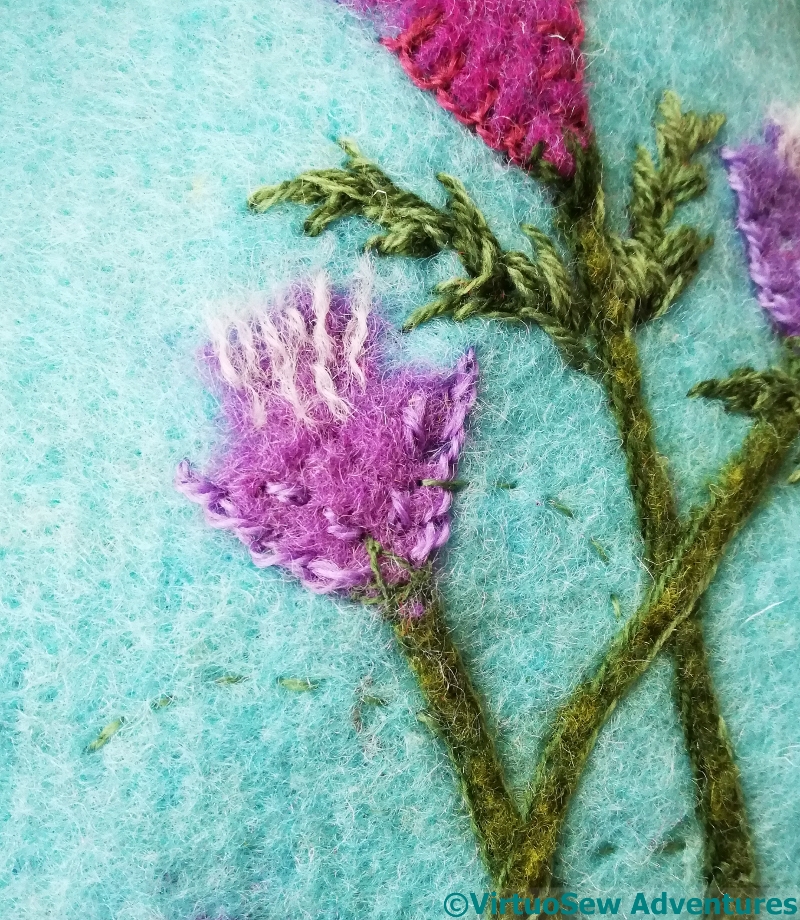
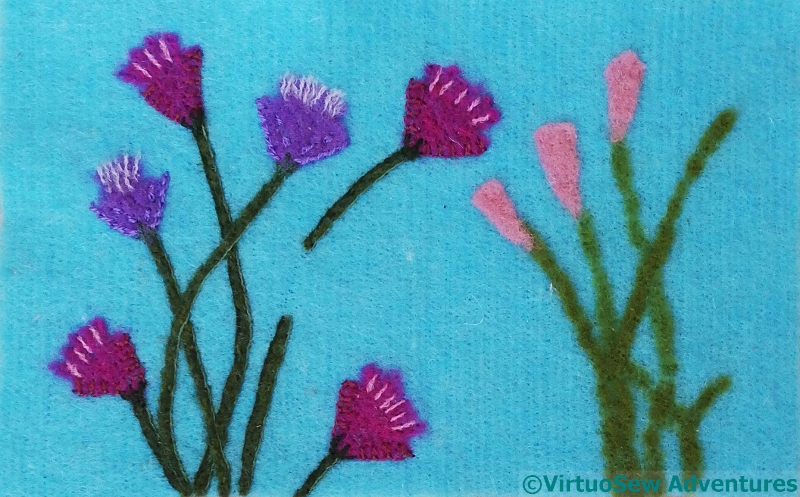
In the case of these plants, instead of stem stitch on either side of the stems, I narrowed and neatened them with a single felting needle, and then added feather stitch over the top, using another of those lovely Gumnut Yarns. The flowers have a flourish of Cretan Stitch, with two colours at the base.
Then I started to think about the leaves. At first, I was going to add fragments of felt for all of them – the original fresco looks as though they are in a single colour – but then I reminded myself that I’m an embroiderer, and after all, texture is one of the reasons why.
The back couple of stems have felt leaves, but then I used loose, large split stitches in Persian Yarn. This maybe looks a little more dense and “jungle-y” than the original fresco, but the Nile valley is famously fertile, after all…
The sharp, curved leaves on the other side were a little harder to deal with.
In the end I decided to make life easier for myself by putting in running stitch curves to help me place them. I’ve spaced them out a little more than in the fresco itself, because the variegated wool thread has created a lot more activity in the embroidered leaves than the frescoed ones.
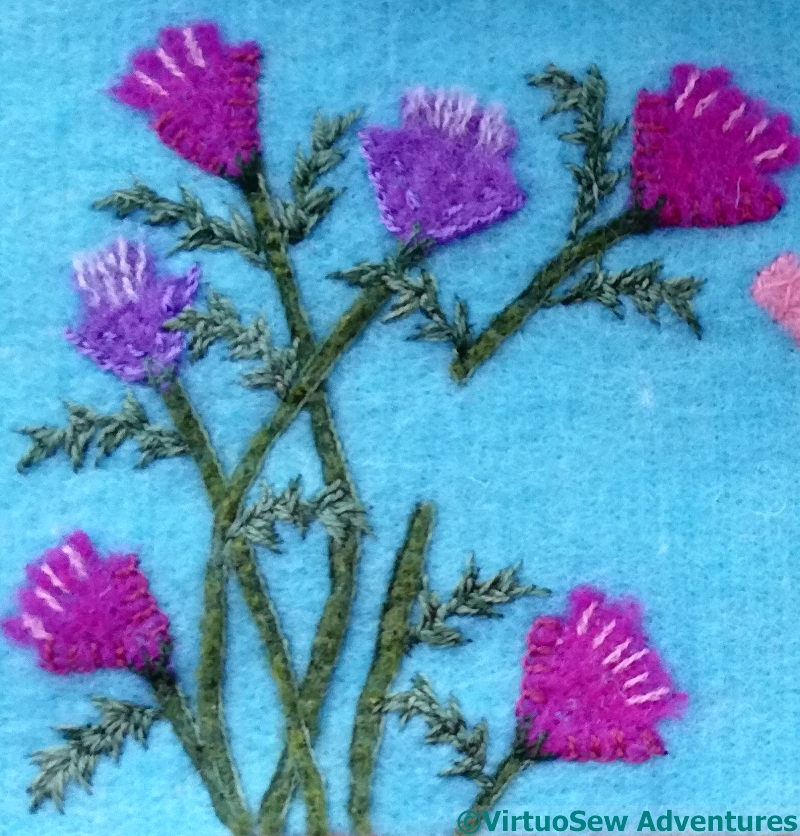
I think that’s clear in this photo of this section. The sharp, curving shapes, the variegated thread and the varying stitch direction all create a rather busy effect, and I’m even thinking of removing the lighter pink stitches in the flowers. That decision can wait until everything is in place.
So I have a little more thinking to do.
More floral details for the Frolicking Calf
False Start 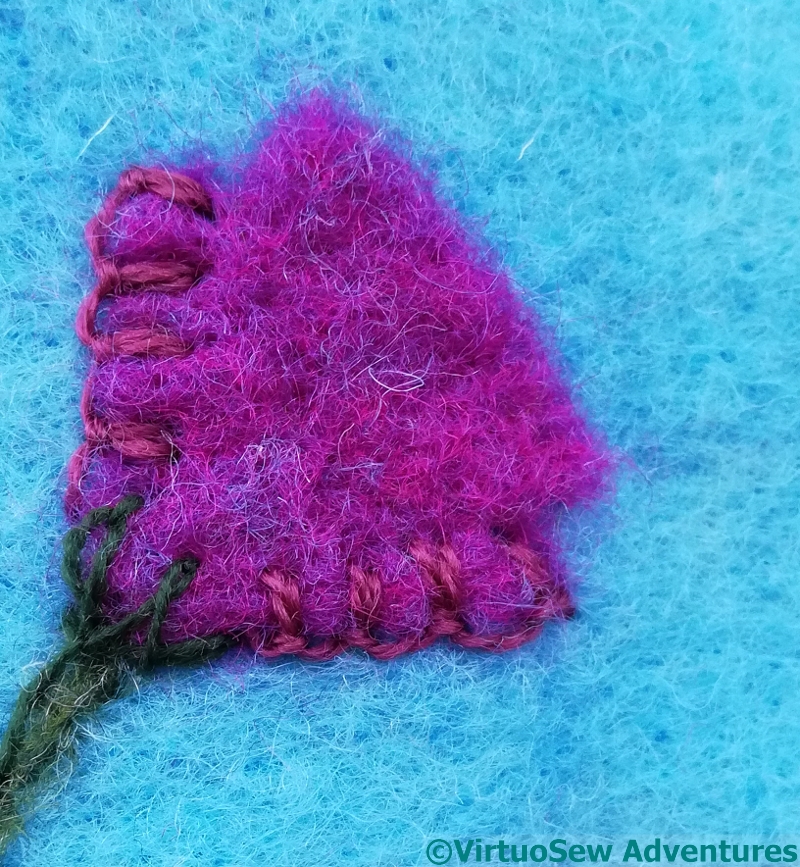
A Better Start
I wanted to do something slightly different with the pink flowers, but still modify the colour with stitching. The braid stitch made the shape too angular, and emphasized the edges too much; up-and-down buttonhole stitch, a favourite from the Jacobean Coat, might do a better job. Certainly, it provides a delicate edge that doesn’t impose itself too much.
You will see that the left-hand side looks sharper than the right hand side. There is stitching and there has been extra needlefelting on the stems and flowers, while the right-hand side still looks rough, like a quick, splodgy sketch. I found I rather enjoyed narrowing the stems and rounding them off – by hand, with a single needle, not the embellisher, of course. There’s a gap in one of the stems because the calf will go over the top!
I may not have managed quite enough curve and flow in the lighter stems, but we will see how I manage to develop them later. They will have leaves added, and that will change the effect and the emphasis…
The Frolicking Calf Fresco Fragment
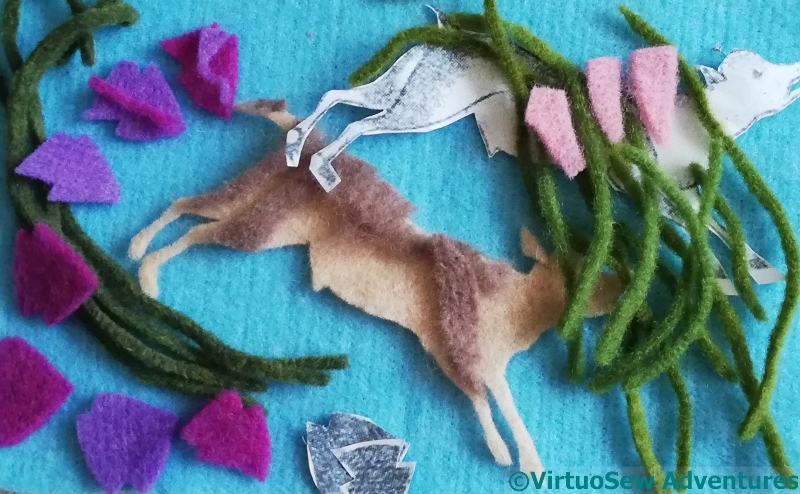
In among my image sources, I found a really joyful image of a calf bounding through vegetation, kicking up its heels. I decided it would be fun to do another felted piece. Like the Two Princesses, there will be stitchery, too, but it’s a change of pace and scale compared to Akhenaten, and I try to have more than one project on the go so that I can think about tricky bits of one while doing easy bits of another…
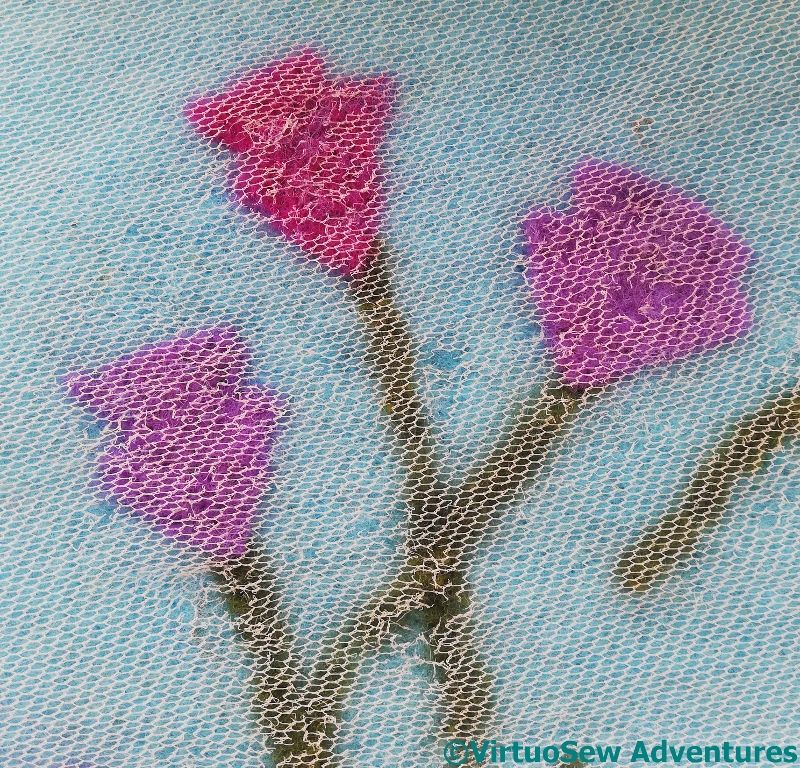
When I first bought my embellisher, the lady demonstrating them told me about using hexagonal net to control pieces of felt and wool while running them under the embellisher. So I bought several yards of cheap hexagonal net, and I’ve found it very useful indeed. It doesn’t get felted in, or at least, not to the extent it can’t be picked out with tweezers, and you can see through it to what you’re working on. So I begin by laying out the pieces I want, hand-needlefelt it roughly in place, and then lay the net over the top and run the embellisher in little moving circles to attach the layers properly.
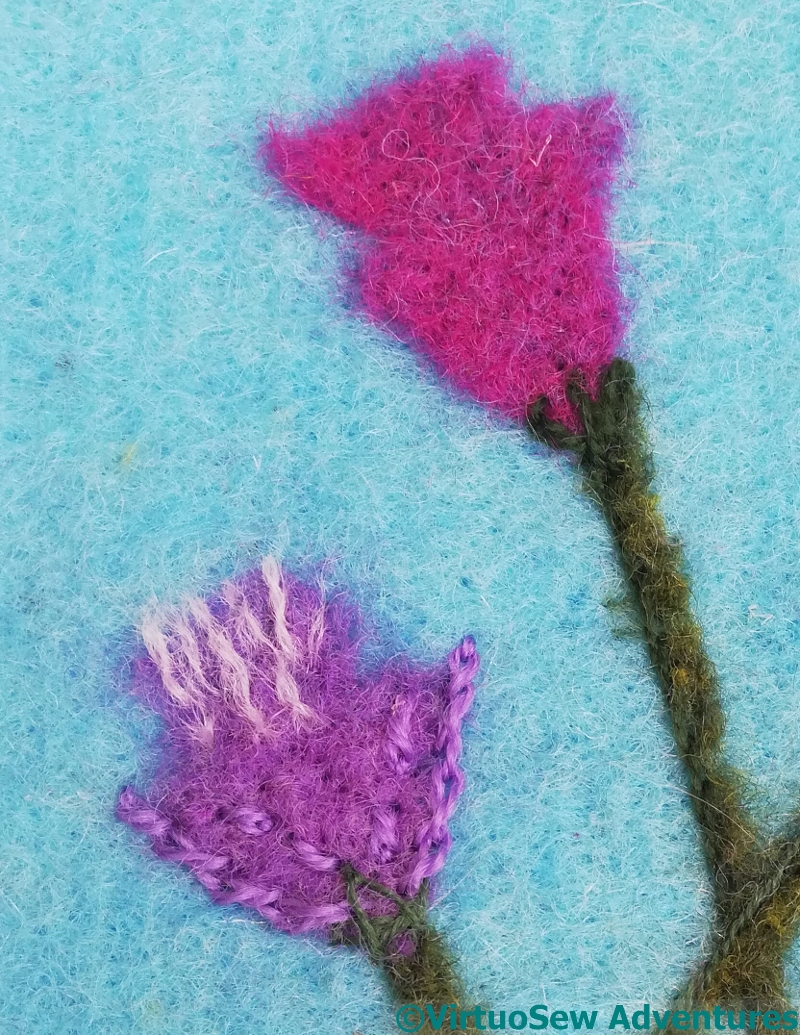
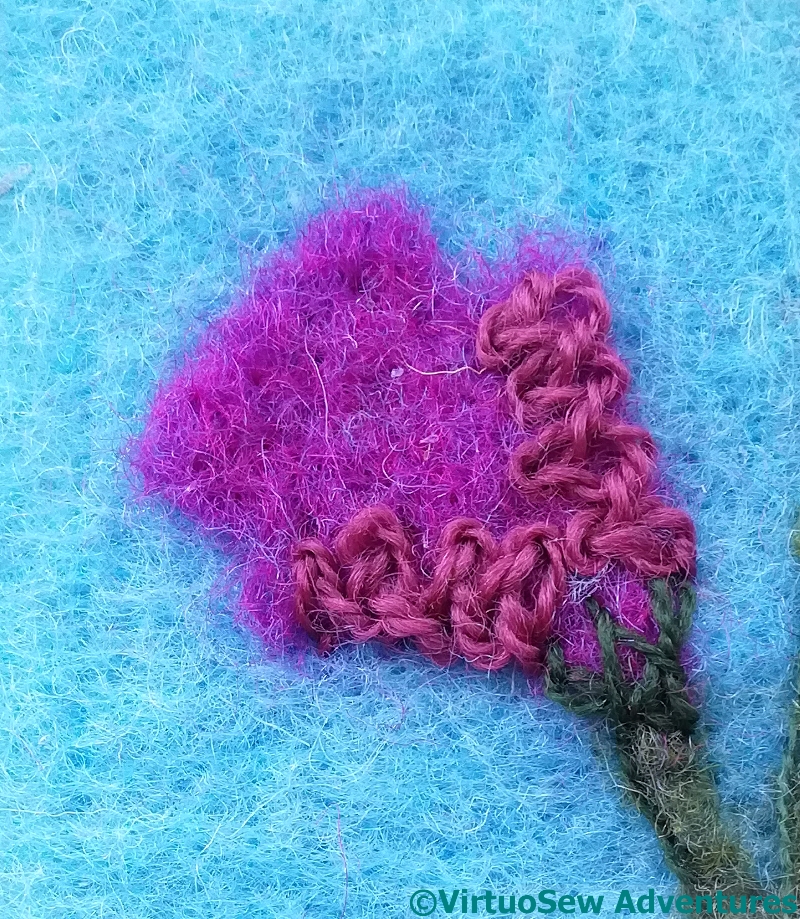
Once the initial felting has been done, I can start adding stitchery. In this case, I’ve stitched a dark line down one side of each of the stems, and twisted chain down the edges of the lilac flower. I wanted a slightly ruffled effect to the mouth of the flower, so I’ve hand-needlefelted some detwisted yarn into place. I’m not quite sure that I’m pleased with it as it stands. Still, more to do!
The pink flower is still entirely un-detailled. I don’t want to use the same stitches and processes for those, so there’s more thinking to come…
The bird’s wings
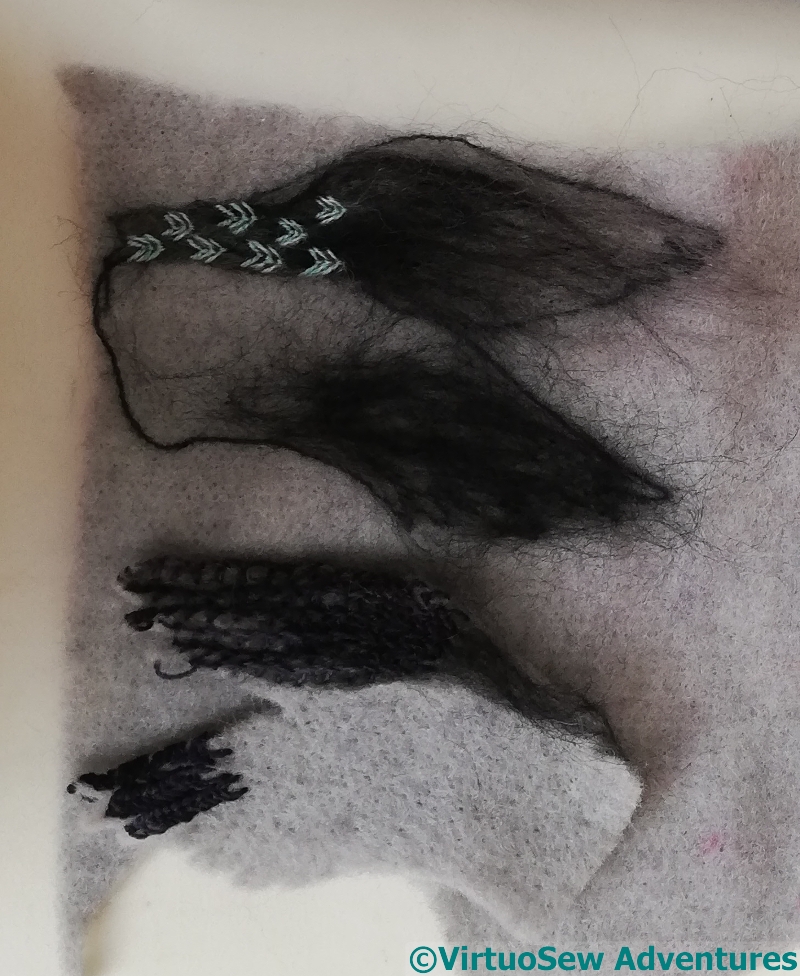
The wings caused much struggle and heartache.
After a morning’s stitching, I realised that all the details I had added were on the wrong side of the felt base, with the result that the wings were facing the wrong direction for the composition.
So here you see a start on the second pair of wings. I learnt from the first attempt, and the difficulties I’d had around the edges, and left the wings as part of the fabric as I worked them, using rows of fly stitches for the pinions.
After working over the wings with the embellisher to reduce the potential for stitches unravelling, I cut them out, with as much precision as I could. But I’m really not happy with them.
They are dark, heavy and clunky, too densely stitched, and much too sombrely coloured. No bird will soar on wings like this.
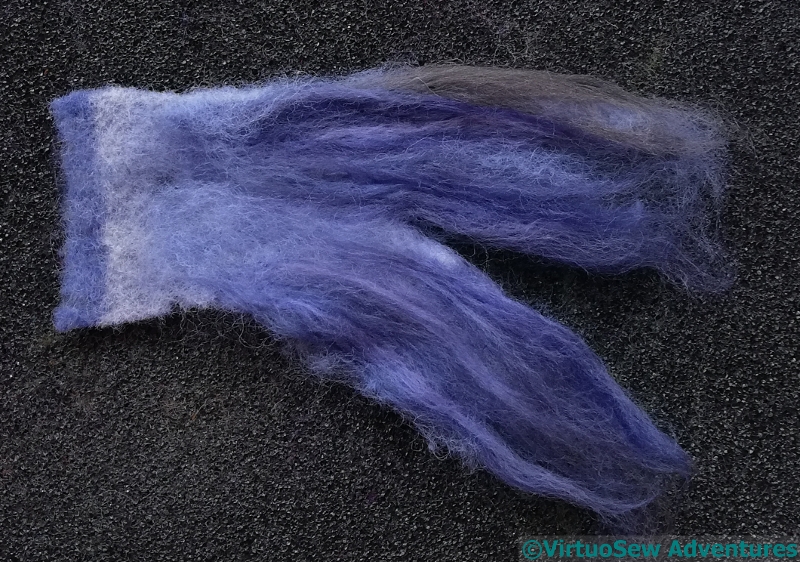
So, the third attempt begins. I used a fragment of felt as the leading edge of the wings and then added lengths of fibre. I’m outlining the wing shapes using a single needlefelting needle, and I’ll try to creep up on more successful wings, learning from all my past mistakes.
Starting on the Hunting Cat Fresco
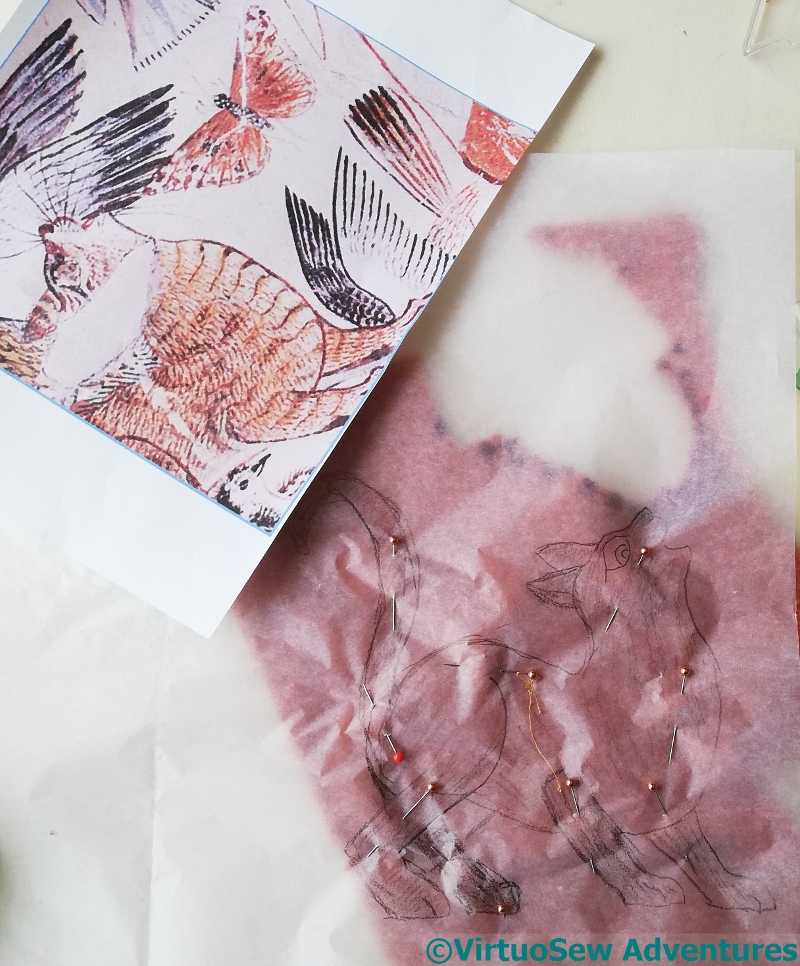
I was leafing through my image sources, looking for some relief from the concentration of Akhenaten, when a fragment of fresco caught my eye. I’d not really registered it before, but it’s full of vitality, and I thought it might give scope for more Fun With Felt.
I may simplify – or complicate – my ideas as I go along, but since I wanted to include the whole cat, the first thing I did was spend some time looking at pictures of cats on the internet (which just goes to show that one can find a research excuse for almost anything!) to see whether I could draft some suitable hindquarters to replace what my source didn’t show.
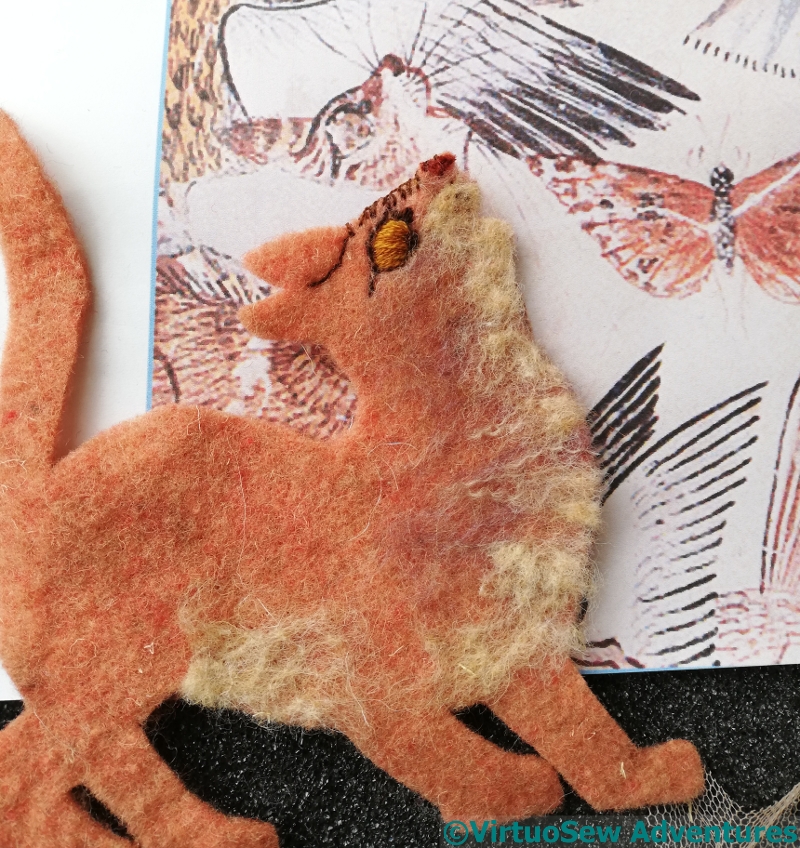
I’m sure my cat isn’t quite the way the Egyptians rendered him, but as ever, I’m aiming at a “reinterpretation” or “realisation”, not a photographic rendering. As it was, I had to tug at my felt and give thanks that there’s no grain in non-wovens to get it to fit at all. Especially since I had decided to make use of the leftovers of stitching for the cushions for the Two Princesses to give me a head start on his nose.
I began with a few lines of stitching, and a golden eye, and then needle-felted fragments of felt and untwisted plies of thread onto his neck and chest (for some reason I feel as though the cat is a very young boy cat!).
The next thing to do was to do an initial layer of stitching all over my cat. I’ve just used simple straight stitches, to echo both the cat’s fur and the simple brush strokes of the ancient Egyptian painter. When the cat is needle-felted onto the eventual background, that will blur the stitches into the felt, and created a softer effect.
I had to draft a body for the bird as well. This might be less successful, but I think it will do..
Two Amarna Princesses – Finishing Details
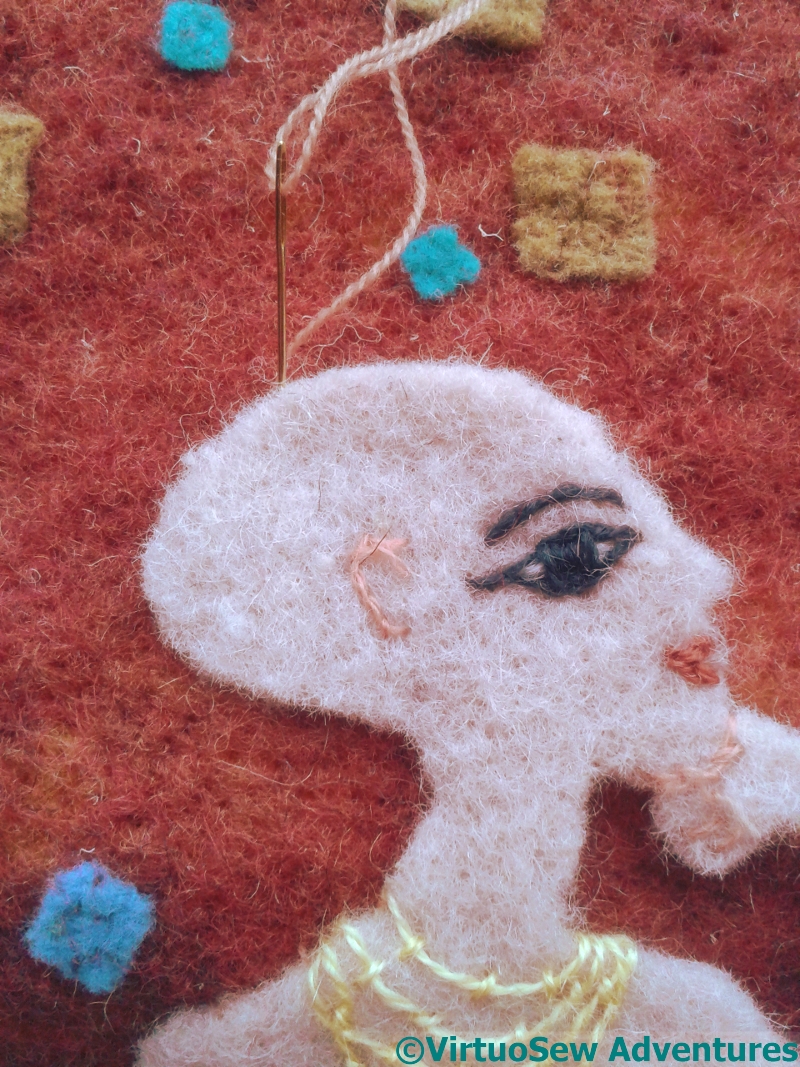
Sewing On The Princess
I decided that I would actually sew down the princesses. Everything else has been needlefelted into place, but the texture that creates, especially on a light felt, is a bit too regimented for the impression I want to convey.
I’ve very carefully, and as near as I can make it, invisibly, attached the felt around the edges, stitching into the thickness of the felt that makes the two girls and using a wool thread that is close in colour to the felt.

Ready For Her Close-Up
So far, so good.
I then used a hand needlefelting tool and went just around the edges, and into the sections that are further back. I’m trying to create a slightly sculptural effect, so that the princesses have a slight roundness to them. Remember how, at the beginning, I said I wanted to recall the scene as the original fresco artist may have seen it, as well as recalling the fresco itself?
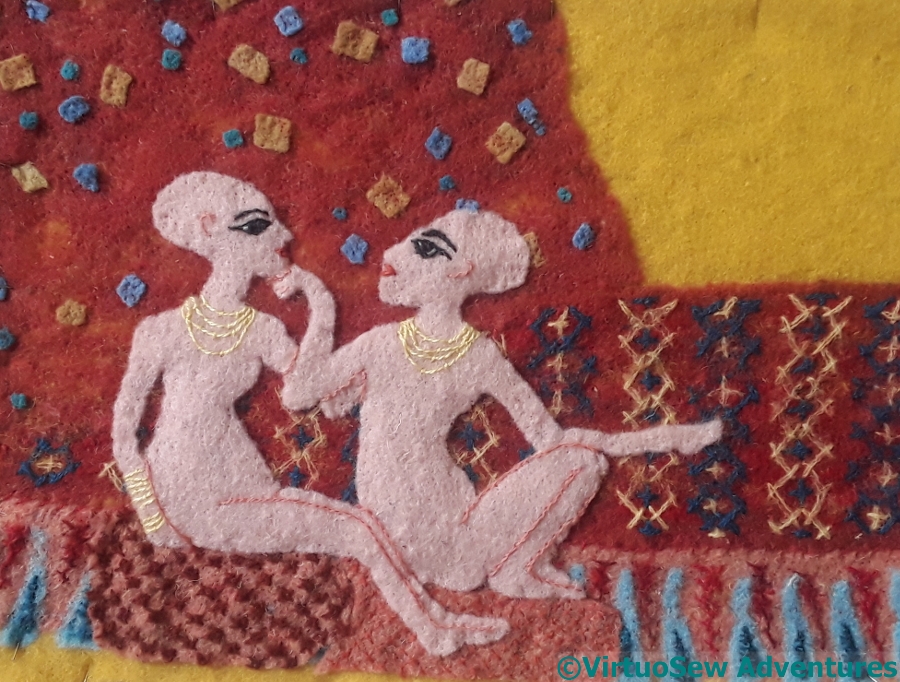
Two Amarna Princesses
I’m rather pleased with my two little princesses.
I need to work a little magic in straightening up the panel and working out how to display it, as I think the three felt panels that I’ve done so far would all die if put behind glass, and may not even be happy in frames. A question for another day.
Dig House Progress
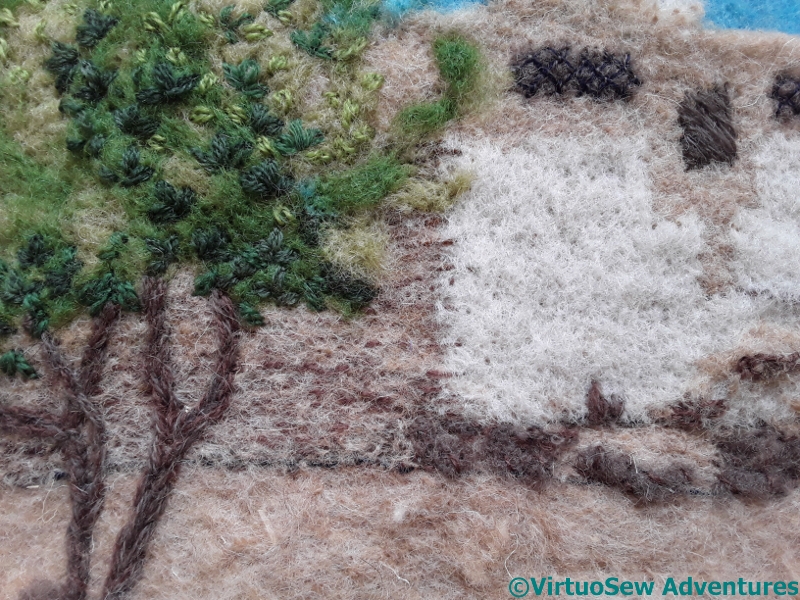
Dig House Texture
I’ve not finished the Dig House panel yet, but I’m working on it!
I’ve tried to add detail and shading to the walls of the house by running threads underneath the top layer of felt, and then running the embellisher over the top to help that added layer to show through a little more.
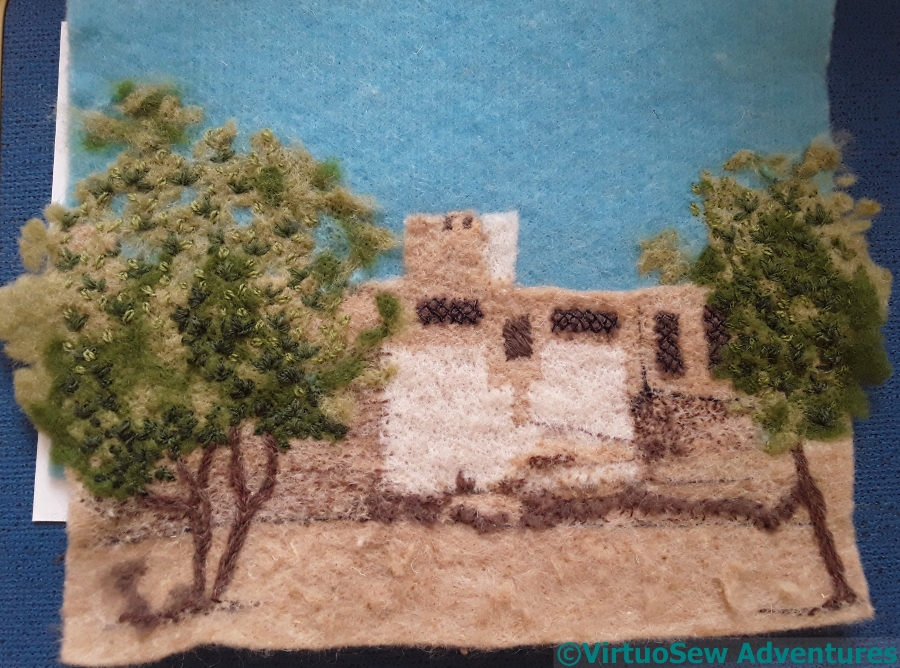
Dig House Progress
I’m also adding a lot of detached chain stitch leaves to the trees. This is overbalancing the detail on the whole piece, pulling the eye out to the side, so although I still need to do more of this, I need to sharpen up the details on the central section a bit more as well.
It’s easy to make this sort of mistake when you’re making something up as you go along – they don’t always arrive in your head fully formed! – but fortunately, a bit of my favourite thoughtful staring helped me to work out what I need to do.
Now it is just a matter of actually doing it right….