
Tag: Glittering Nightcap
More thoughts on display
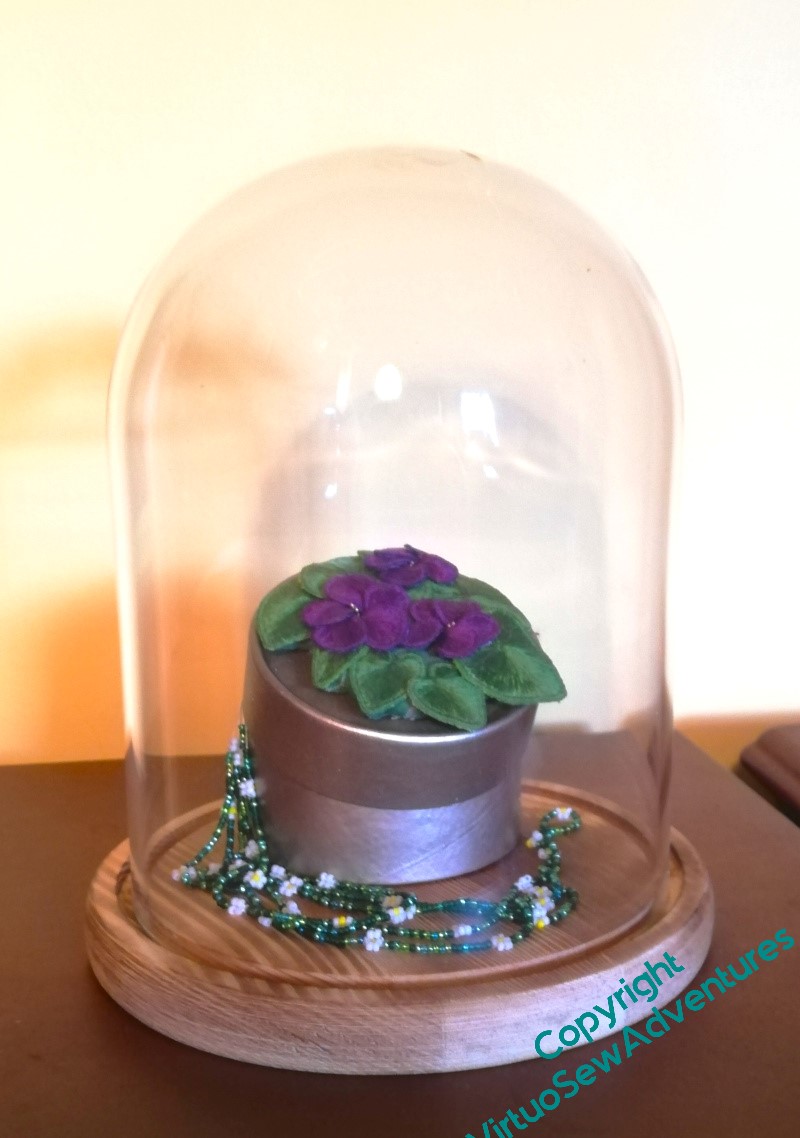
Two elements that sprang into mind very early in my work on the Amarna panels were the Clump of Violets and the bead necklace. The violets are to call to mind Mary’s exasperating experience, familiar to any language learner, of having useful vocabulary and structure retained only with the greatest of efforts, while the entirely useless just sticks – in her case, the Arabic for “violets” stuck in her head with no difficulty, whereas the words for “bread”, “bath”, or “dig” proved recalcitrant. The bead necklace is my reinterpretation of one of hers, owned in childhood and subsequently lost, like the necklaces she helped to excavate.
These two pieces link directly to Mary, and not to Egypt itself, and because of that, and because of their colour, they don’t sit well with the main panels, and I was left somewhat perplexed about them. Until something brought parlour domes to my mind, and the lights went on!
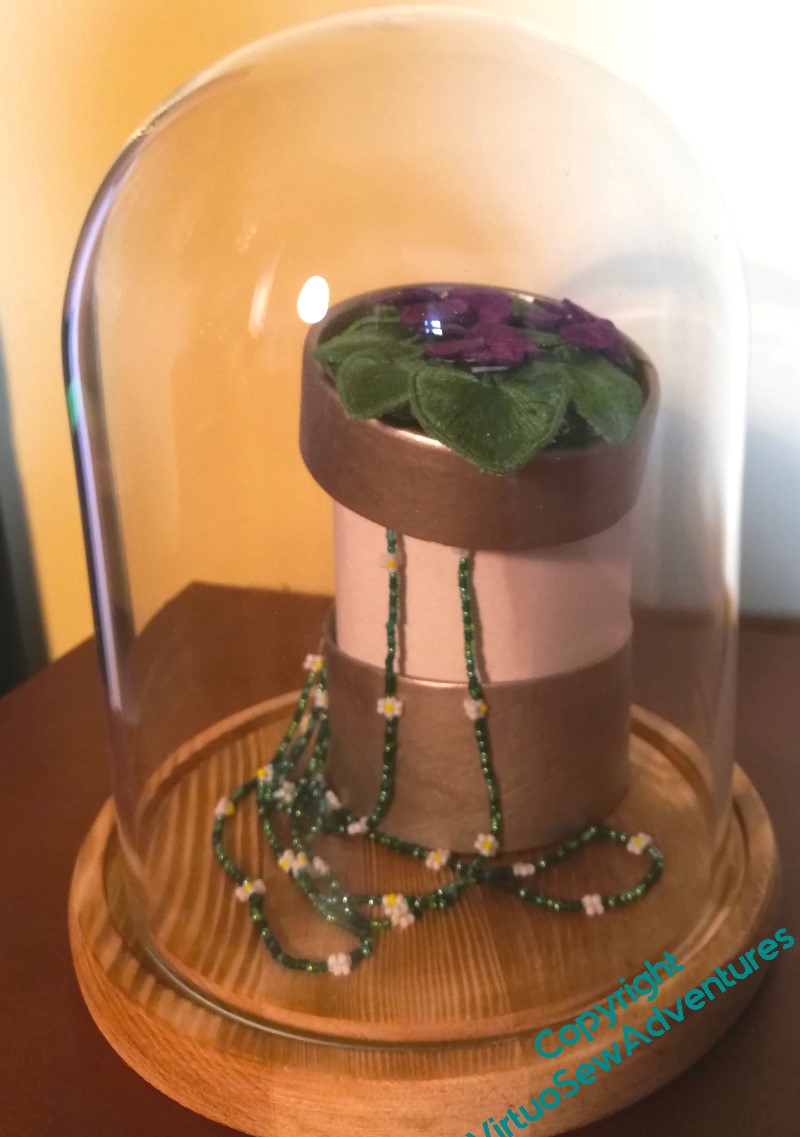
I thought that maybe if I used the clump of violets to top a golden trinket box, and allowed the necklace to spill out, the two pieces might live together happily as my representation of Mary herself. I found a small round cardboard trinket box and sprayed it gold (a very pale, insipid gold, it turned out, too, not at all what I wanted!), and began to experiment.
I think the whole thing needs to sit on a cushion within the dome, and the trinket box should be between the tall experiment and the short one in height, and a little narrower to allow the leaves to droop over the edge.
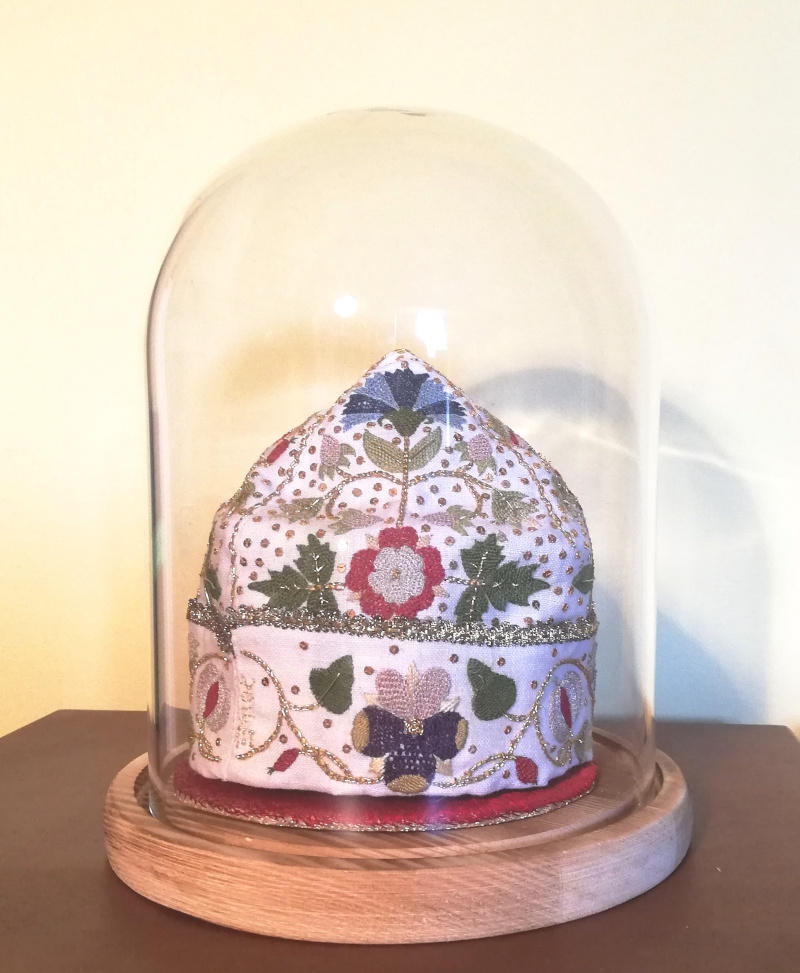
So while I work on achieving that, I have put away both violets and beads, and replaced them in the dome with the Glittering Nightcap.
Which is so happy that it is refusing to give it back, and I will have to buy another parlour dome for Mary’s trinket box!
Assembling the Gentleman’s Glittering Nightcap – Part Three
Pincushion
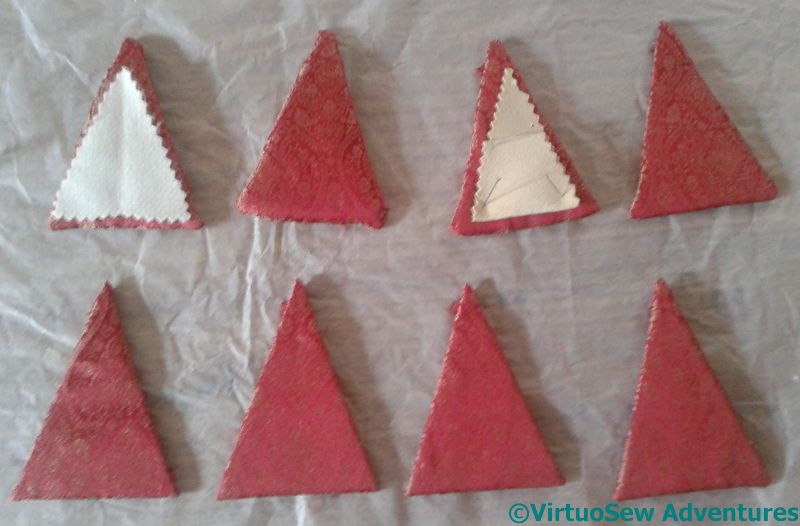
Having attached the ultrasuede and doctor’s flannel to two of the triangles, and made a brocade pocket on the third, the fourth was given extra padding, and extra stitches created an almost upholstered effect, making a pincushion.
Once the brocade backing triangles were attached, the four triangle assemblies had buttonhole loops added at the top corners, to provide a channel for the ribbon that will hold the étui closed. Then they needed to be joined in a chain at the bottom corners, and attached to the circular brocade-covered skirtex base to create a square-based pyramid.
Etui Done
It turned out really well.
I’ve had lots of practice with trellis stitch and detached buttonhole stitch with return, I’ve Spangled until I’m seeing stars, and I’ve done a lot more reverse chain stitch in gold.
I can’t quite see myself using the étui in my ordinary stitching life, but I can see myself putting it in a carefully lit corner and gloating over it!
Assembling the Glittering Gentleman’s Nightcap – Part Two
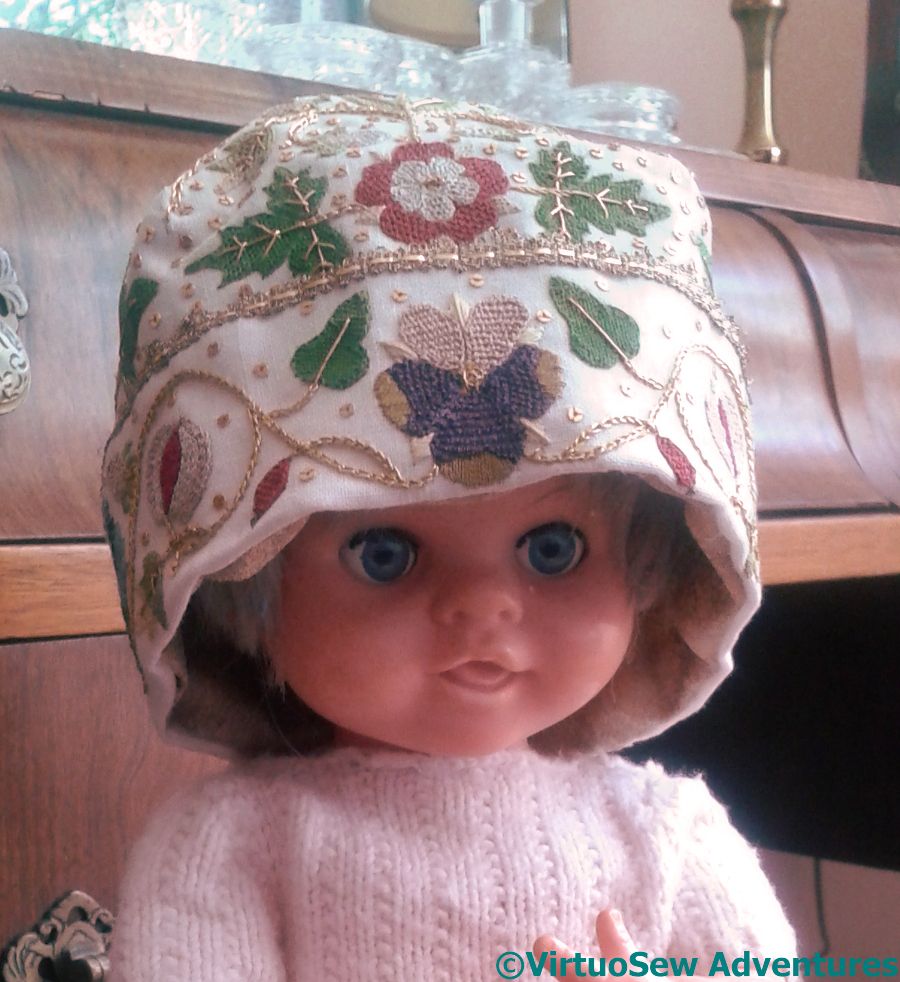
Mandy Modelling The Nightcap
Before we move on – here is the Glittering Nightcap, being modelled by Mandy, who was given to me for my first Christmas. My grandfather made me a cradle to fit her, and I intend to make some bedding, and some clothes for Mandy, to go with the patchwork coverlet my grandmama made for the cradle. Unfortunately, I carried Mandy around by her hair for years, so the hair you can see is a wig, which in turn meant that that when I found Mandy again I didn’t think any modern little girl would welcome her. The cradle, with bedding and Mandy will end up as a sort of display piece. Eventually.
In the meantime – doesn’t she look sweet!
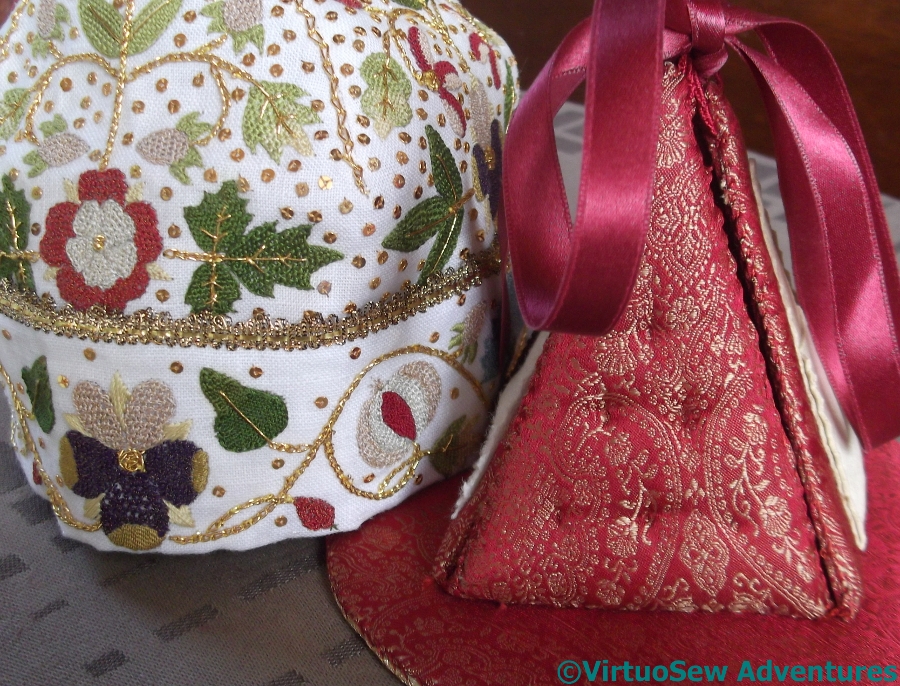
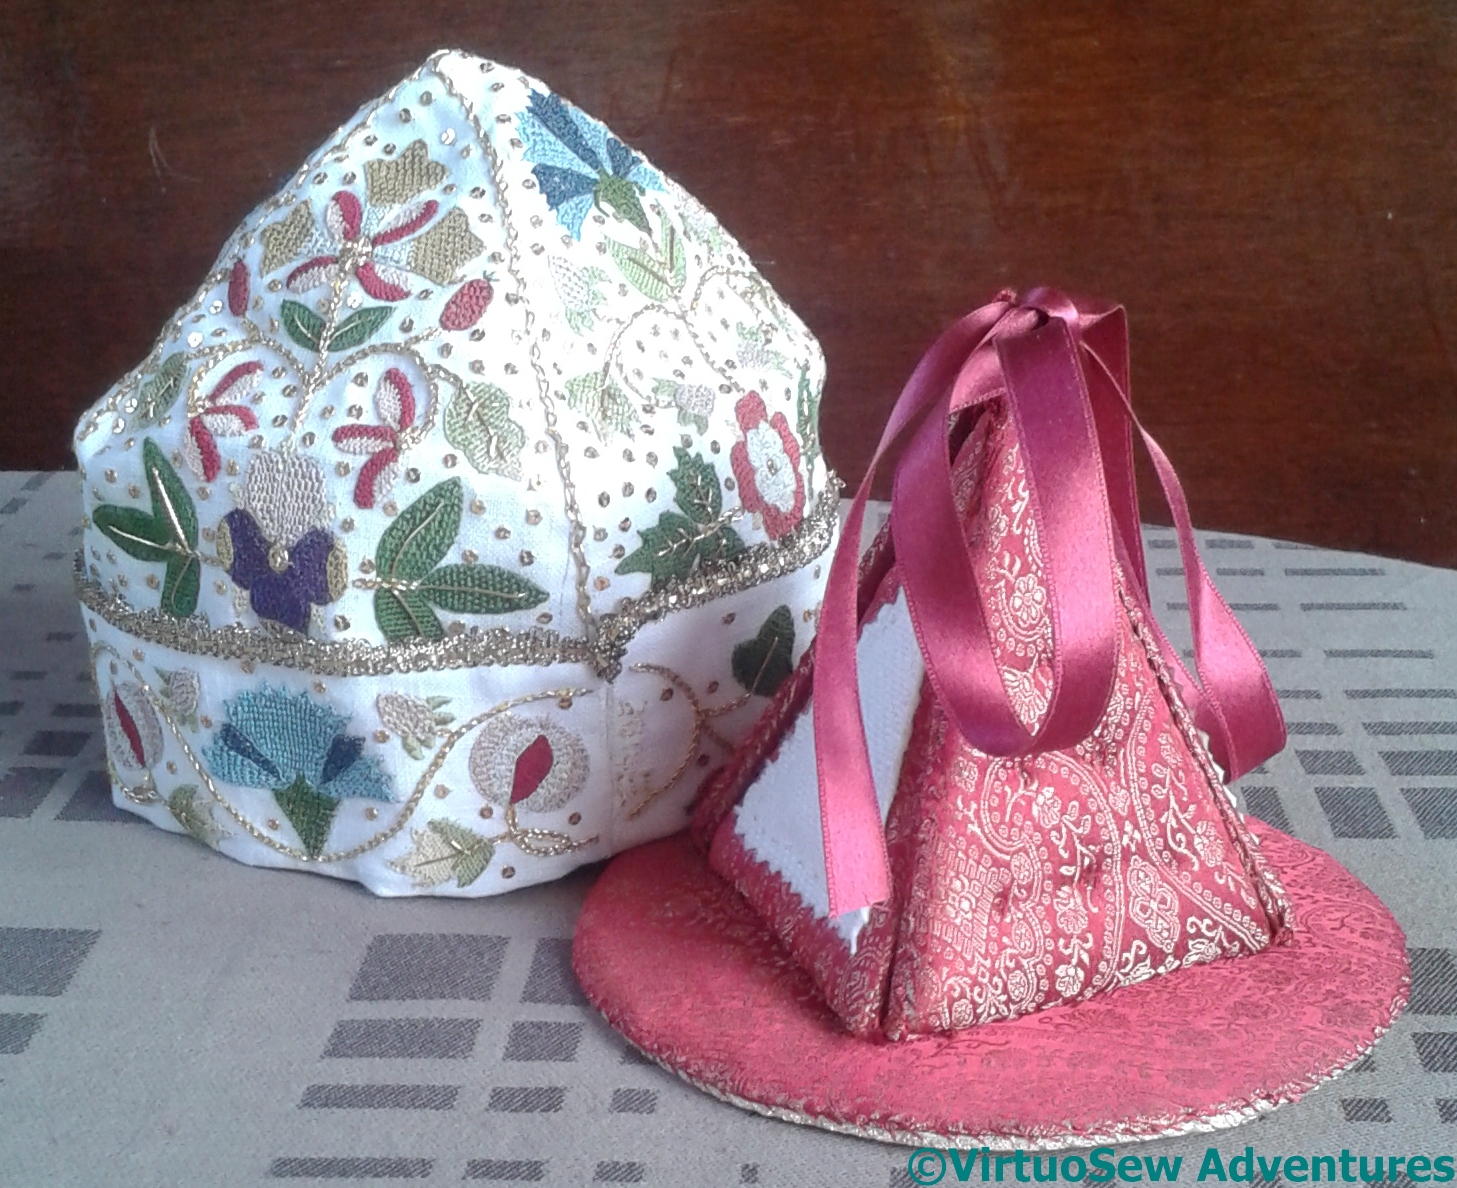
Etui Sections
The étui is made of triangular sections covered with brocade and mounted on brocade covered circles to create a little pyramid. Each external face consists of skirtex with padding covered with brocade, and then has a different element – a doctor’s flannel panel for needles, an ultrasuede scissor pocket, a pincushion, and a brocade pocket for stilettos or mellors. The ultrasuede is a real trial to stitch – very, very tough to get the needle into – but it’s done now.
Each face is backed by another triangle, of card covered with brocade, and the two slip stitched together. Then there will be the interesting challenge of mounting the triangles somehow.
Assembling the Glittering Gentleman’s Nightcap – Part One
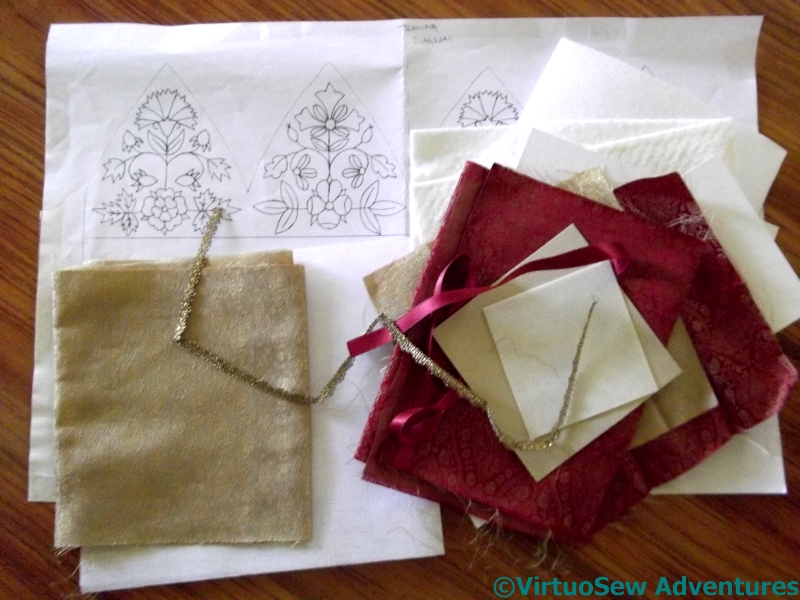
Materials To Finish The Nightcap
So now, having finished the embroidery, I need to assemble the Nightcap. In addition, Tricia has designed a stand for it, which is in the form of an étui. Consequently I have a rather distracting heap of brocaded silk, doctors flannel, ultrasuede, ribbon and gold lace. Not to mention batting and buckram…!
As I’ve said before, I am never entirely at ease finishing a piece into three dimensional form. So there was a slight hiatus while I gathered my courage to begin.
In Three Dimensions
I decided to finish the Nightcap itself first, as – not least – I was rather keen to see it!
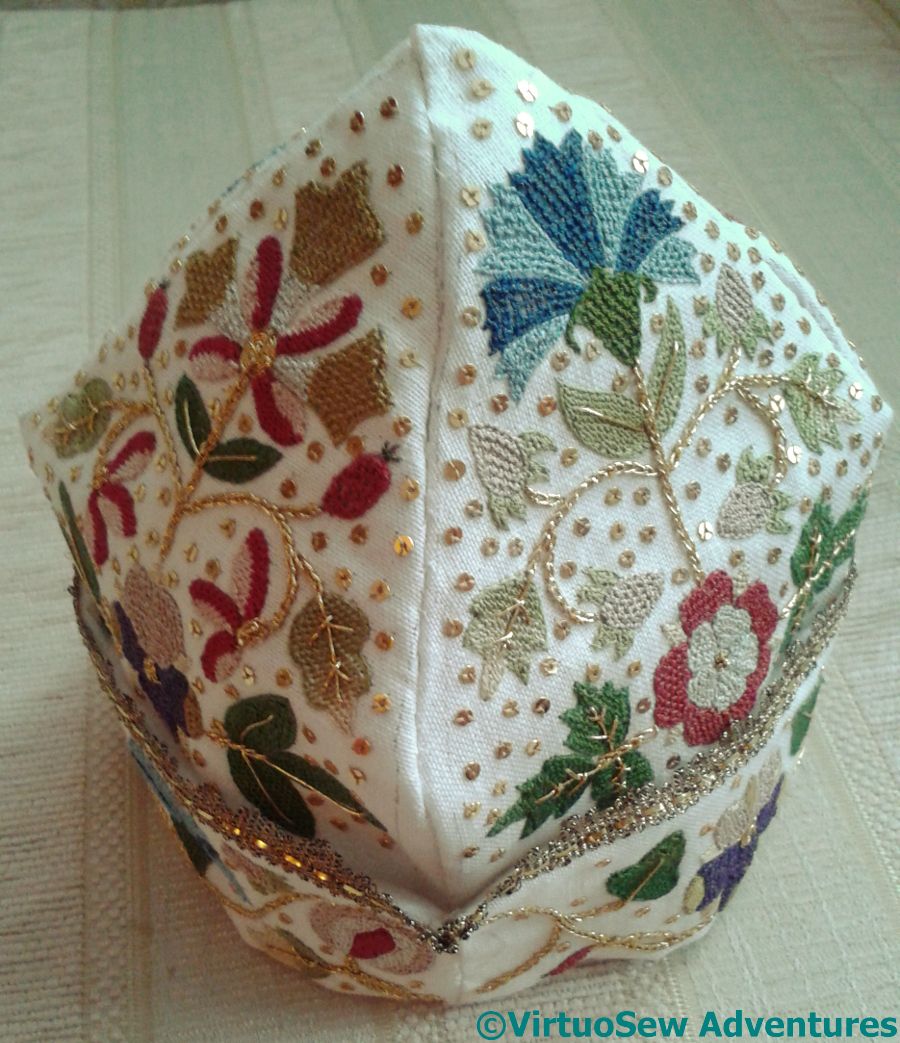
The first stage was to add the lace to the top of the brim, and then create the shape by sewing up the seams on the crown. The lace was easy enough to apply, once the folds were in place, but sewing up the seams on the crown was surprisingly fiddly!
I had wondered, in looking at the instructions, why the seams were embellished with reverse chain stitch, and I think you can see why in this photo of the Nightcap finished (externally) apart from that detail.
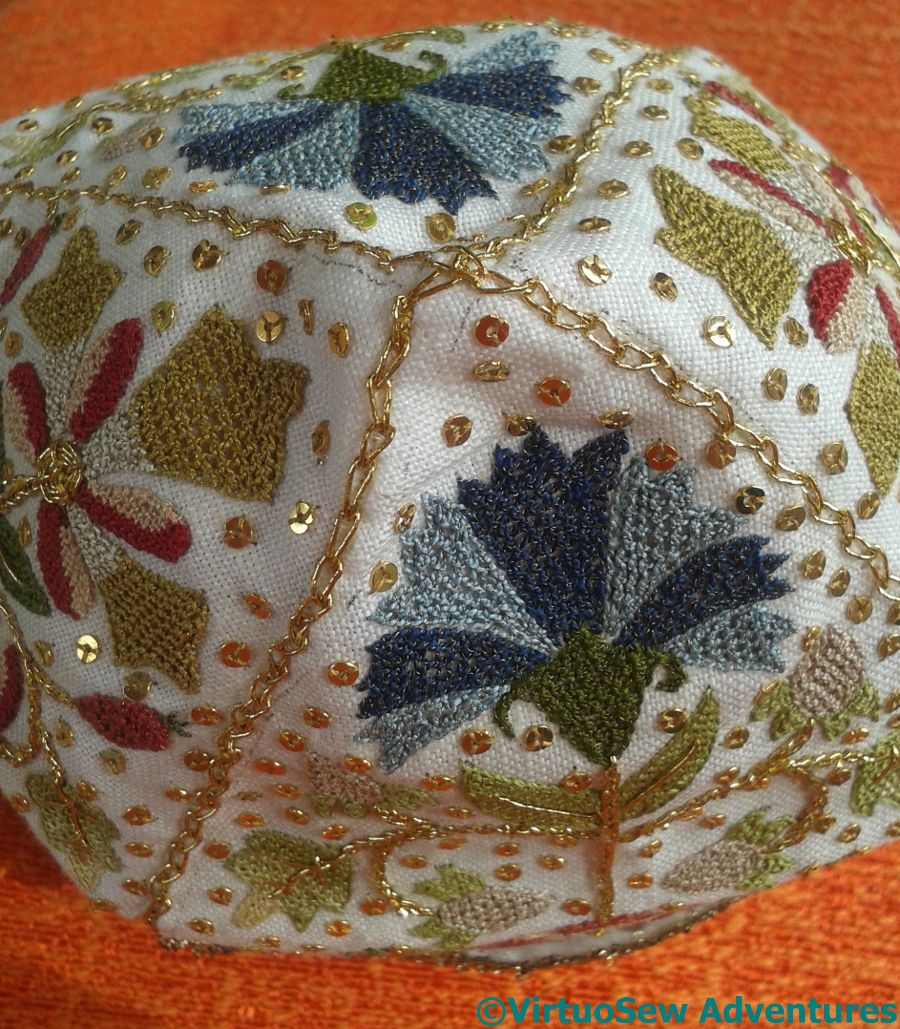
Aerial View With Gold
As this picture shows! Admittedly the orange background also helps to bring the Nightcap to life, but the reverse chain stitch in gold is another detail – like the pearl centres on the Floral Glove – that adds sparkle and polish to the piece.
The next stage was to line the Nightcap – using a lovely pale gold silk brocade. Again, simple enough to state, but slightly tricky in execution!
Lining completed, another deep breath and pause prepared me for the next stage…
The Glittering Nightcap – Comparisons
The pictures in this post link to some close-ups I find positively terrifying. It’s astonishing to think that not so long ago I could never have taken a shot like these without buying some pretty serious equipment. I spent some time picking my digicam, but there is absolutely nothing special about it, and yet…!
-
- DBSIntoChainOnCrown
-

- BorderedCordedOnBrim
Even looking at the real thing it is hard to see details. The eye tends to be overwhelmed by the glitter – which is very useful if there are elements one would prefer others not noticed, but positively counter productive if the aim is to analyse the techniques.
-
- SilkDBSOnCrown

-
- SilkDBSOnBrim
I am trying to compare and assess the differences between the Detached Buttonhole Stitch with Return worked into Chain Stitch, which is what I did on the Crown of the Nightcap with the Bordered Detached Buttonhole Stitch with Return, which is what I used on the Brim.
In the case of the silk used for the leaves, one of the reasons the stitching on the crown appears loose and floppy compared with the stitching on the brim is that in the latter case I decided not to heather my threads.
-
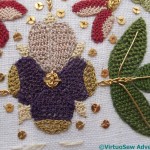
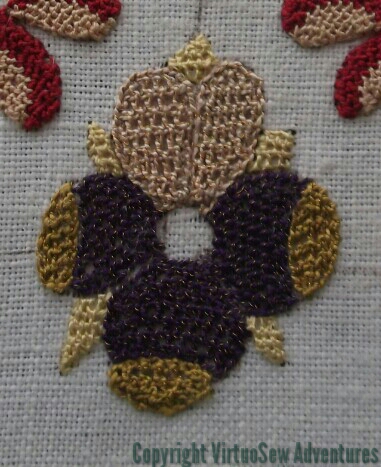
- PansyOnCrown
-
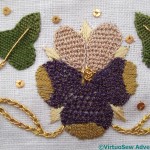
- PansyOnBrim
I had the impression while I was stitching that the stitching on the Brim was ending up neater and tighter than the stitching on the Crown. Looking at these photos I still can’t decide whether I was right or not!
-
- CarnationOnCrown
-
- CarnationOnBrim
Maybe in some cases it is. Maybe when the whole thing is made up and I can get the Crown and the Brim in a single photograph, I might be able to come to a decision!
Glittering Nightcap – Embroidery Finished!

Silkwork On Brim
Finally!
It has been a very long haul, but at long last the silkwork on the brim of the Glittering Gentleman’s Nightcap was finished. That in turn meant that I could get going on the goldwork, of which there isn’t really very much – only the stems, and the centres of the pansies.

Goldwork On Brim
In fact, it took rather longer than I expected, because the gold thread was rather more tender than I remembered, ravelling and fraying if I so much as looked at it. It’s the same thread as I used on the crown, so I can only imagine that either I have forgotten how it behaved last time, or that the tail end of the spool has loosened slightly in the time I’ve not used it. I can quite believe that would happen, since it’s over a cotton core, and natural fibres can be rather sensitive to atmospheric conditions.

Spangles On Brim
Once the goldwork was done, I could put the spangles on. Continuing my slight alterations to the instructions, I’ve used rather fewer spangles than on the crown. I’m hoping that that, too, will help to provide contrasts of light reflectance and texture.
Of course, now I need to gather both courage and wits to put the thing together!
All these pictures are clickable so you can look at them in more detail, but I will take some more close-up pictures to compare the brim and the crown. In particular, I want to see whether there are obvious differences between the Detached Buttonhole Stitch with Return that I worked on the crown, and the Bordered Detached Buttonhole Stitch with Return that I worked on the brim, and if so what they are!
Further Experiments for the Glittering Nightcap

Elizabethan Holly Braid
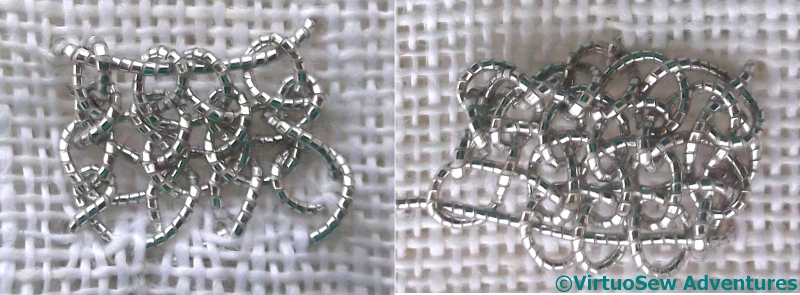
Continuing my idea of using different stitches on the brim, I spent a little more time experimenting with stitches mentioned in Jacquie Carey’s book “Elizabethan Stitches”.
As I have mentioned before, the difference in mental models between a braidmaker and an embroiderer are clearly considerable, since although the diagrams are very clear, I spent much longer than I would have expected in puzzling them out, especially the Holly Braid Stitch. Eventually I decided that it needed a much stiffer thread than pearl cotton, and indeed, the silver thread version came together much more easily than I expected.

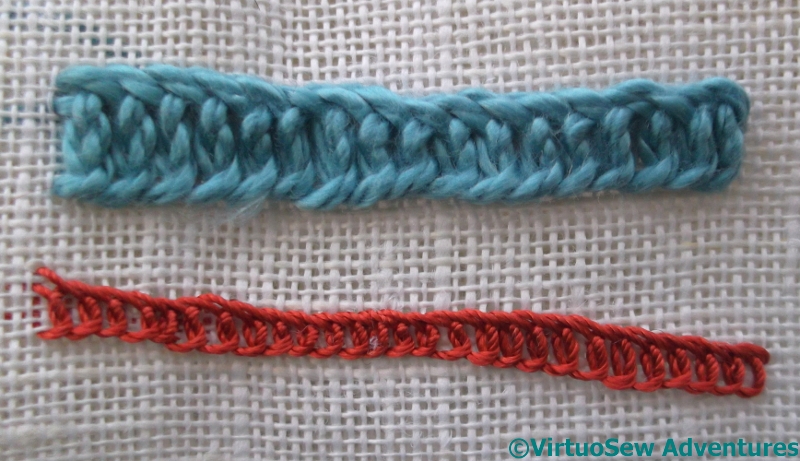
Elizabethan Double Twisted Chain
The Double Twisted Chain Stitch was much more straightforward to tackle, although wrangling the thread was quite a challenge at times – as you can see from the uneven stitch size and tension.
The Holly Braid Stitch is a little like a plaited braid stitch in that almost all the thread is on the surface in a neatly interlocked, textural pattern. It also uses up a lot of thread – maybe three or four times as much as the ordinary Reverse Chain Stitch that Tricia suggests for the stems. Unfortunately, I don’t think I have enough of the gold #381 in the kit to embark on stitch choices that are so profligate of thread, although if I find a spare tube in my stash, I may change my mind.
Two Forms Of Trellis Stitch
Nomenclature is a constant source of puzzlement. What Jacquie Carey refers to as Trellis Stitch – and offers an Elizabethan version for – I think of as Single Brussels Stitch. Jacquie’s is worked upward from the base cord, while Single Brussels I have always worked downward. I think I need to try again with these stitches, using something other than a metallic thread, because neither of these patches looks quite right!
Elizabethan Twisted Braid Stitch in Pearl Cotton and Silk
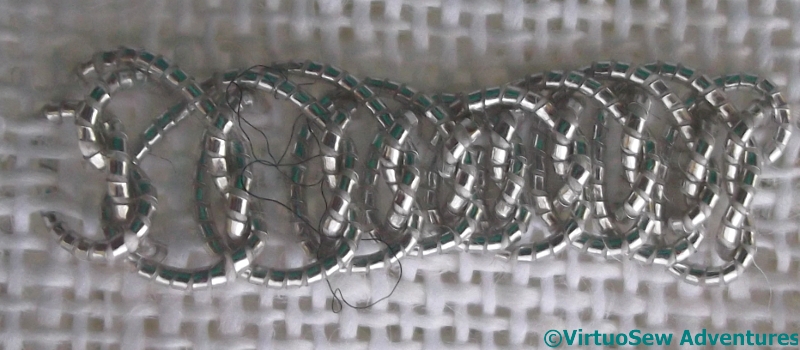
Elizabethan Twiseted Braid Stitch in Silver
Elizabethan Twisted Braid Stitch was rather more fun. Most of the thread is at the front of the fabric, making it a good choice for a metallic, or other expensive thread. The appearance – when the eye isn’t completely dazzled by sparkle! – is of an alternating twisted bar and straight bar. I clearly need to work the stitch for longer to learn to keep it consistent in width and to learn to alter the stitch length for differing effects, but I was pleased to find that the structure of this one made sense to me quite quickly.

Elizabethan Twisted Chain
Elizabeth Twisted Chain differs from the modern version in that both of the ends of the stitch are inside the loop, instead of one in and one out as in the modern version. It’s also worked in reverse – although that, I find, is no longer a challenge for me. The reverse versions on Chain Stitch are so much easier to work in metallic threads than the ordinary version that it is becoming second nature, and faced with a thread that is difficult for other reasons, it is also becoming second nature to consider whether working in reverse might help.
It is a constant source of delight to me to find that the things I learn, and the things I thought I would learn, are not always the same. The Online University courses, and my own experiments have given me more, and different, strings to my bow…
Slow Progress on the Glittering Nightcap
Just as it does every winter, my work on my current Thistle Threads project has slowed to a crawl. The bay window where I have a decent light to work by is too cold to be inviting, and the grey, overcast, and rainy days result in very poor light even at the best of times. Given the effects of this past winter on other parts of the UK, the lack of light to embroider by is a very minor matter – but it does explain why canvaswork became so very appealing to me!

Gilt Sylke Twist Finished
However – trumpets, please! – I have now finished all of the Gilt Sylke Twist on the brim of the Glittering Nightcap! The photograph above does enlarge if you click on it, but I’ve noticed that it is slightly blurred at the edges. That isn’t surprising, as it is quite a long piece, and it was quite hard to get all of it in the frame at once.
Half Of Design
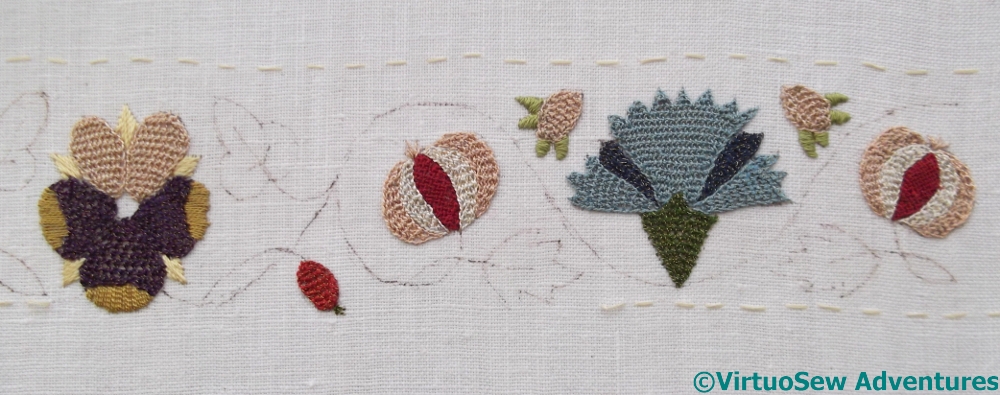
So – to make it easier to look at – here is one half of the design as I have stitched it up. You will remember that I decided to work the brim slightly differently to the main section of the cap, so that when it was finished it would be even more of a sampler of techniques than it is already.
All the detached buttonhole with return was worked in the style I found in Jacquie Carey‘s book Elizabethan Stitches, in which the border of the stitch is integral to it. This in fact makes it rather easier to stitch – once you have a grip on how it works! – because you aren’t trying to stitch into a chain stitch border, so the thread isn’t quite so mauled about and the gilt wire doesn’t break quite as often.
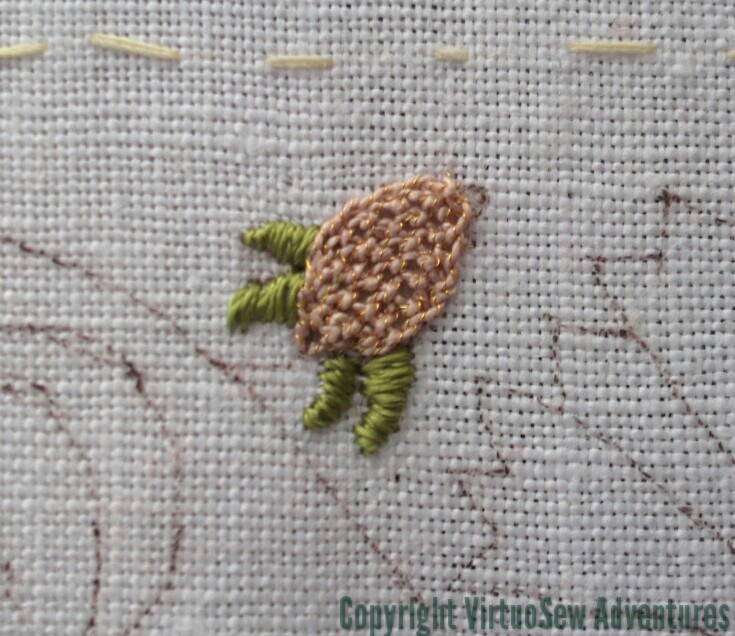
I also substituted satin stitch for the sepals to create a change of reflectance. I’m now wondering whether the little scarlet buds should be taken out and worked in double padded satin stitch, too, maybe even in the silk thread used in the trellis stitch pomegranate centres, rather than the gilt sylke twist.
The Latest on the Glittering Nightcap

Progress Report
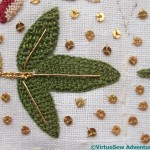
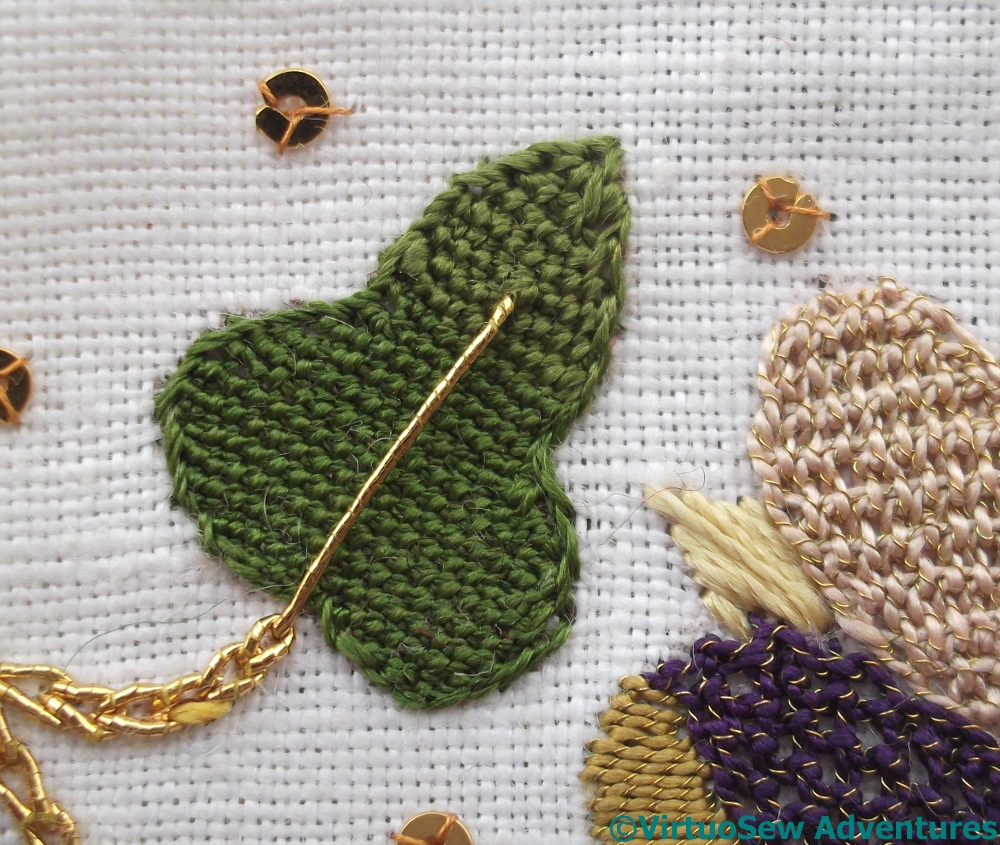
It’s been very difficult to get back to the Glittering Nightcap, but I must, because in December the Tudor Rose course is starting. There are, I think, four pomegranates, two carnations, and two pansies to do, as well as all the leaves.
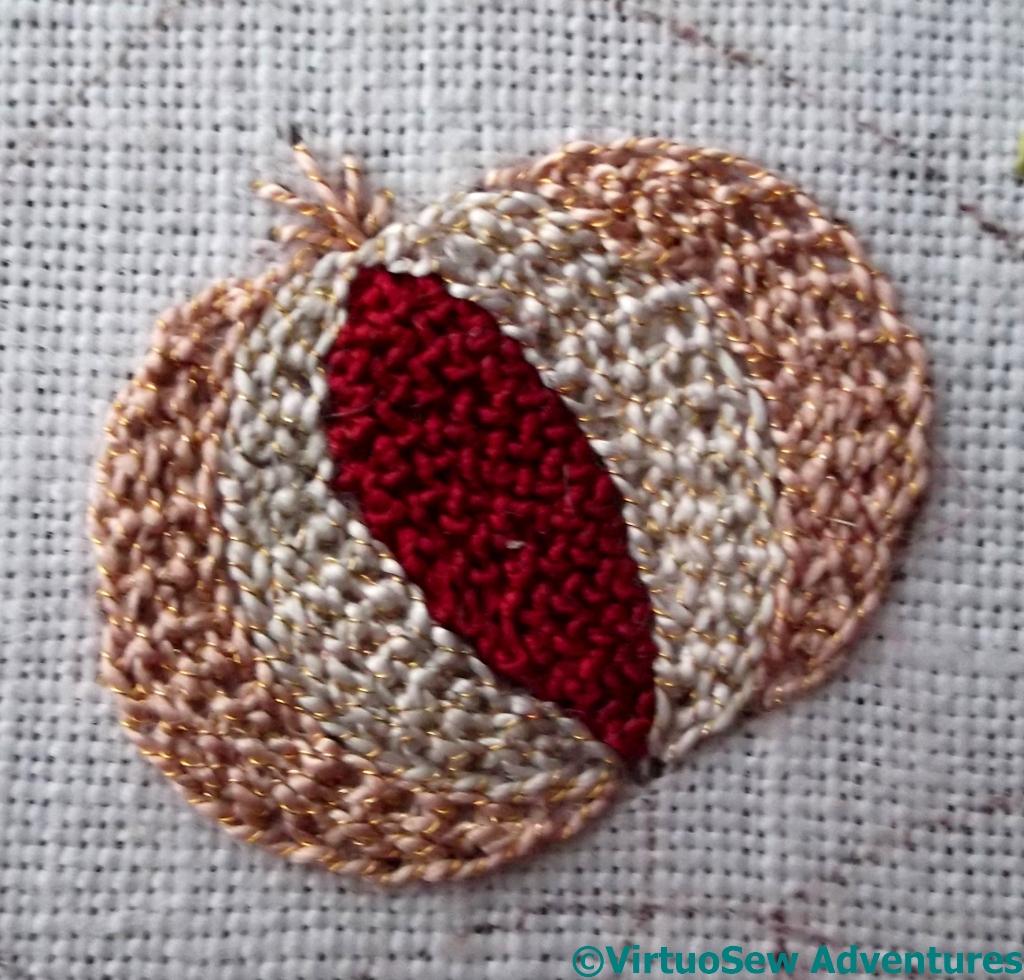
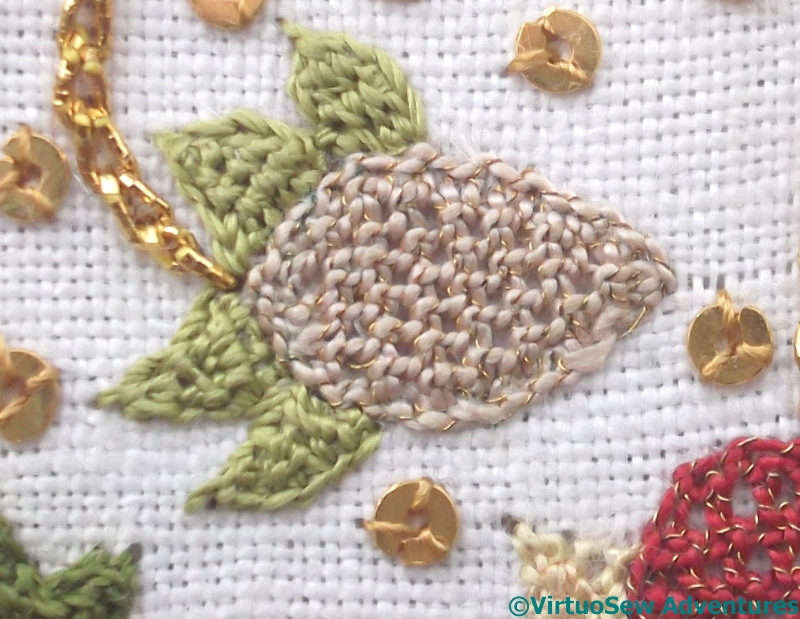
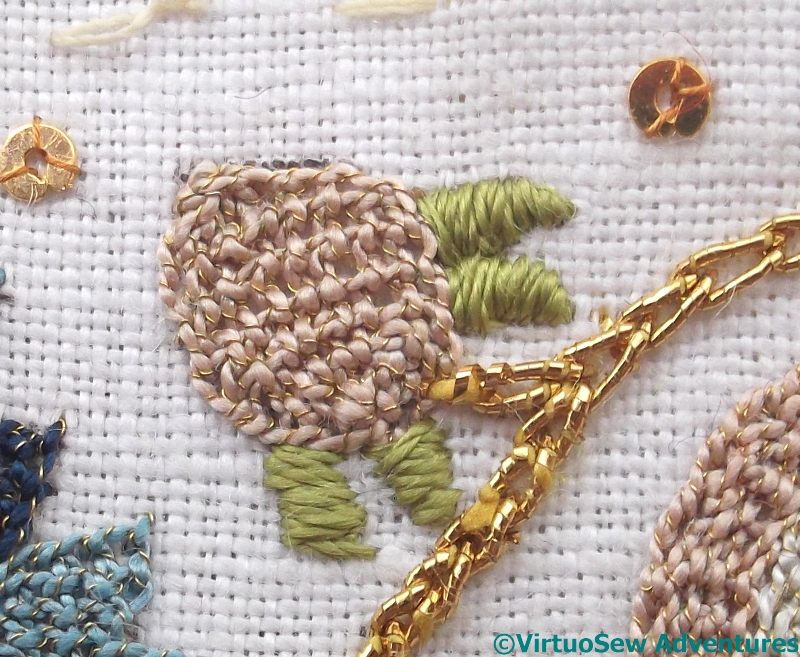
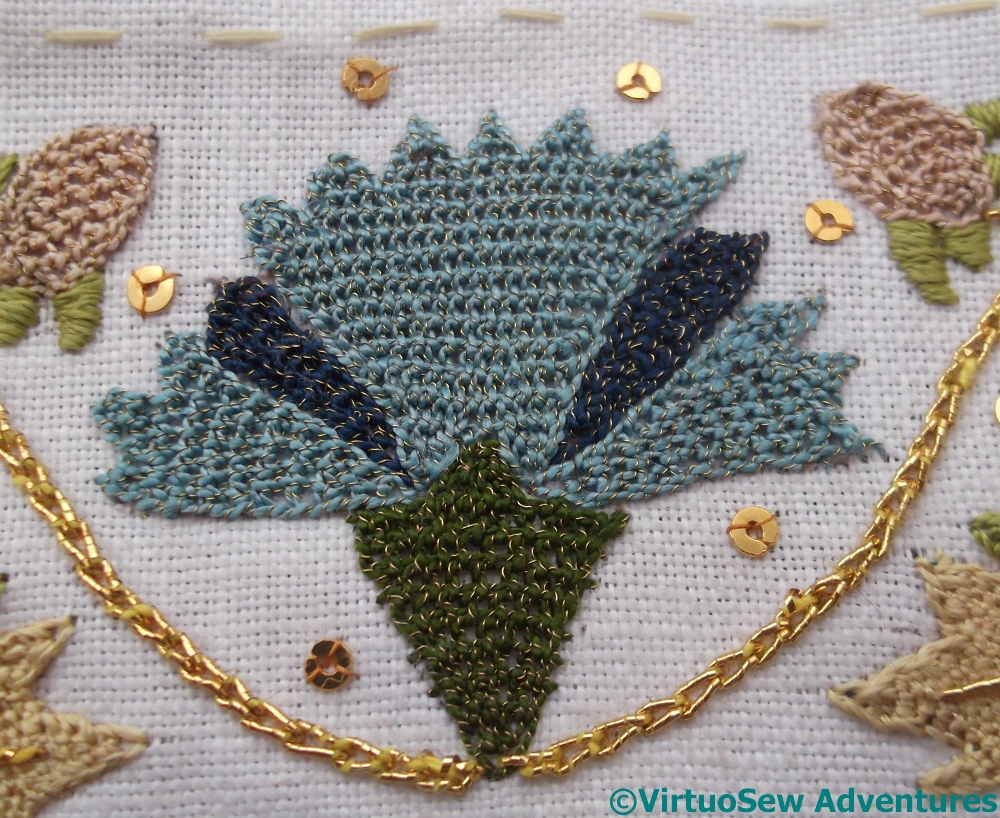
First Pomegranate On Brim
The pomegranates are going to be quite a trial. The central section is worked in Trellis Stitch, using the Soie Perlee. I seem to have begun with the one section that was easy to work, because the central section of the next pomegranate – still unfinished – took me several sessions to do, purely because of the angles at which I was attempting to work.
Of course, fugitive winter light isn’t helping, either. Sometimes I finish the other stuff I need to do, sit down at my frame, decide after about three stitches that there isn’t enough light to see what I’m doing, and get up again, muttering discontentedly!
I’ve continued to make changes in the working, as well. I’ve used the Bordered Corded Brussels stitch for both the white and pink sections of the pomegranate, and rather than working the white in a “vertical” alignment, I’ve worked it all “horizontally” – relative to the body of the motif, not to the weave of the fabric, of course.
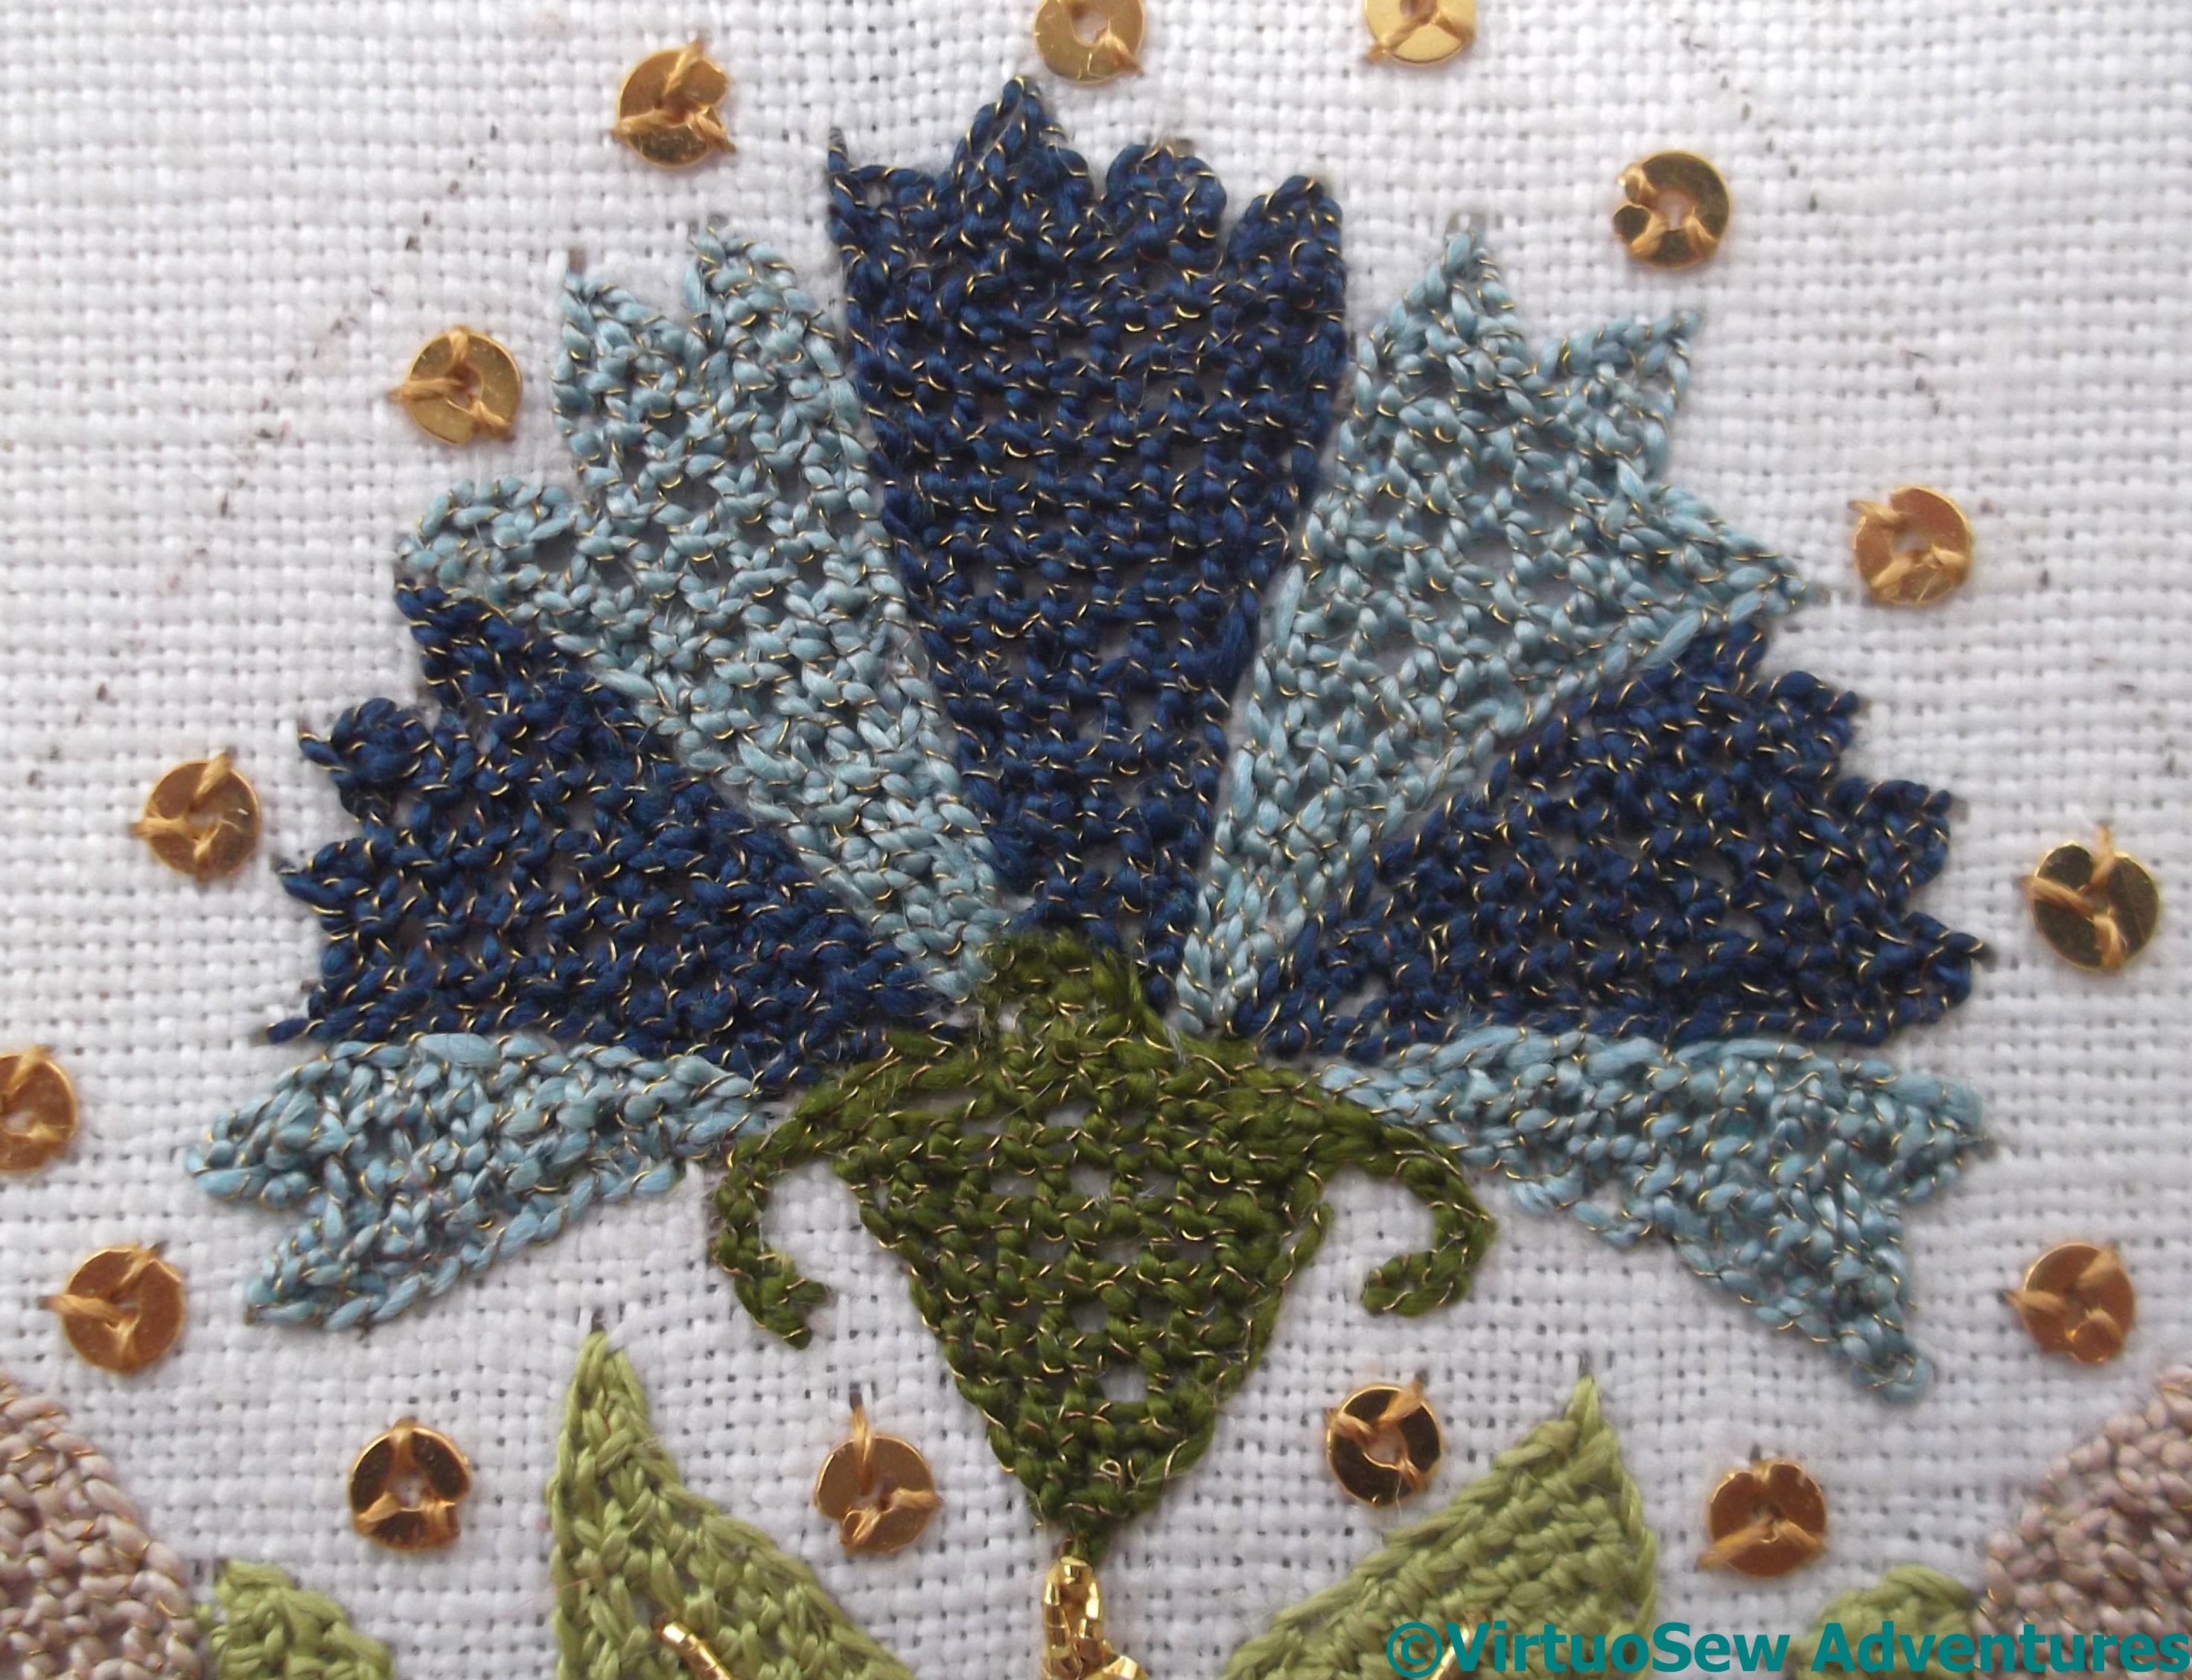
First Carnation On Brim
If you look at the top right hand corner of this carnation, you will see one of the hazards of working with Gilt Sylke Twist. The gold wire has scrunched itself up into a single length that looks almost like a bullion knot. What must have happened was that the wire snapped, and then for one reason or another caught on the right side of the fabric instead of continuing through with the needle to make the stitch.
I’ve decided that I definitely prefer Bordered Corded Brussels Stitch to working Corded Brussels stitch into a Chain Stitch border. It is much easier to work, because there’s no fighting through the stitching of the border, and it looks very clean and crisp – at least when I get it right.
I’ve done the buds, the pansies, and one carnation, so now I have three pomegranates and one carnation to do before I move on to the leaves.
Glittering Nightcap – Making Changes
Although I have already commented that I usually regard Online University pieces as tutorial pieces to be worked according to the instructions, I’ve decided to make a few changes on the brim. This will mean I will be able to compare directly some of the working methods I’ve learned about since I began on the Nightcap, so I should learn even more!
 The first change was to use Bordered Corded Brussels Stitch for much of the detached buttonhole stitch. I can’t say that I am finding the Gilt Sylke Twist markedly easier to use now than it was when I started. However, I do find that the Bordered Corded Brussels stitch is easier than working Detached Buttonhole with return into a border of chain stitch, and less prone to breakages of the gilt wire.
In the case of the strawberries I have also chosen to use satin stitch in place of trellis stitch for the sepals. I’ve padded the satin stitch, to give it a little more life.
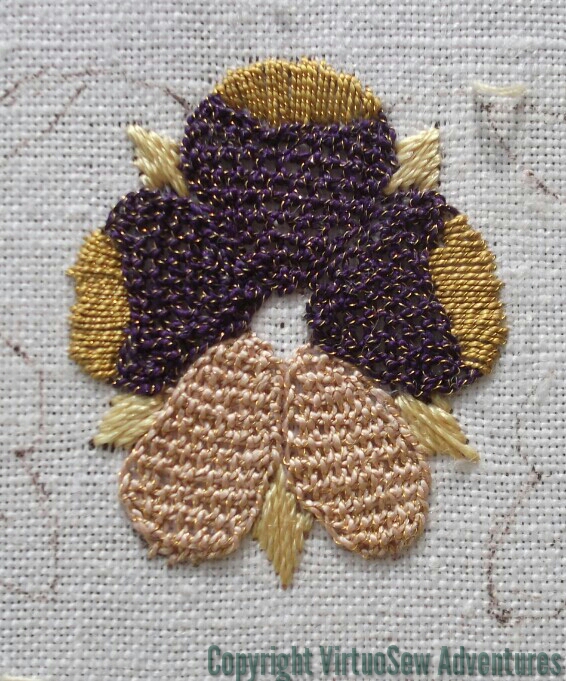
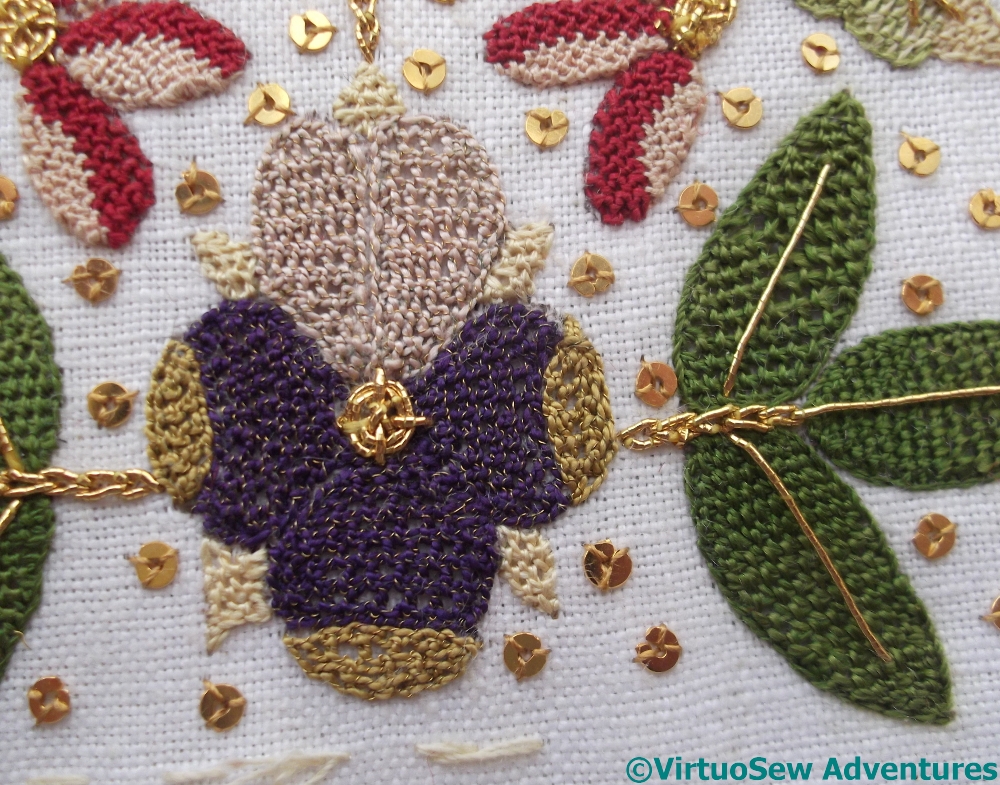
New Version Pansy
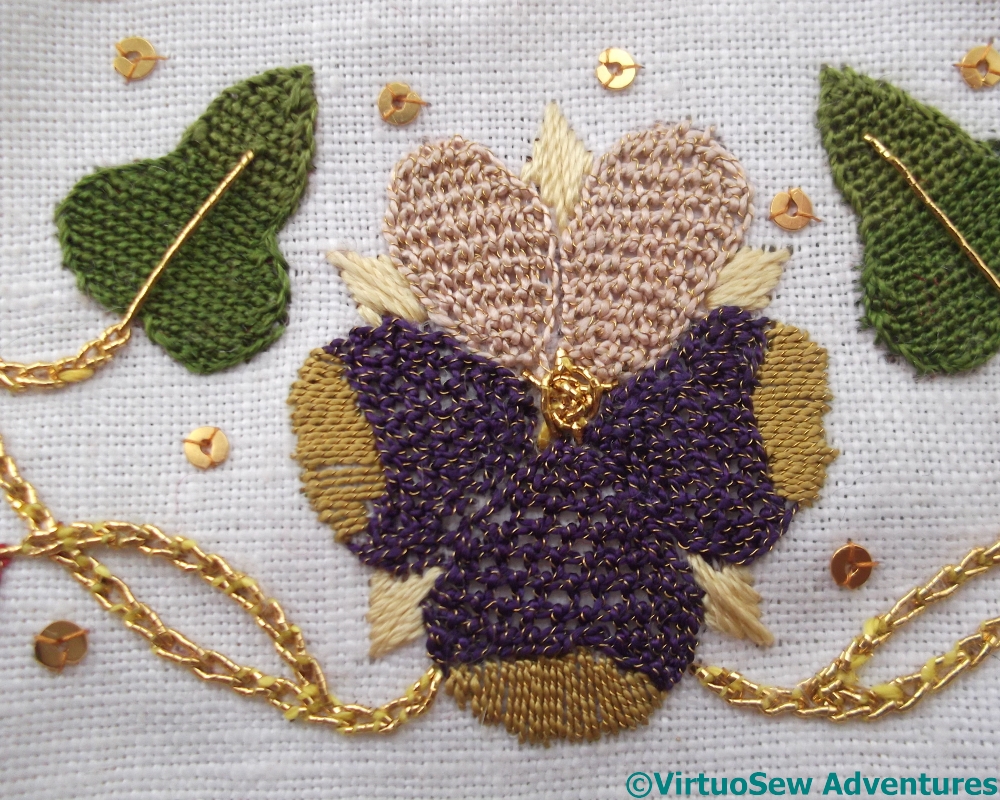
Old Version Pansy
There are changes to the Pansy too. Again, the petals are worked in Bordered Corded Brussels stitch, but the curled edges I worked in satin stitch. The outer edge is padded with a line of back stitch to lift it a little. Possibly not enough, so when I work the second pansy I might choose to pad the edge with chain stitch, or whipped back stitch to see whether it makes a difference.
The straw-coloured sepals are unpadded satin stitch this time, rather than the trellis stitch suggested in the instructions. It’s much less fiddly to do, but I wonder whether these changes rather undermine the style, looking a little too modern, too simple, too plain.
And if there is one thing I have learnt from the exhibition “In Fine Style“, and from its fabulous book, it is that the Tudors believed very much that more is more – more texture, more glitter, more colour, more everything.