
Tag: Miss Hunter
The Lady In The Garden – Progress
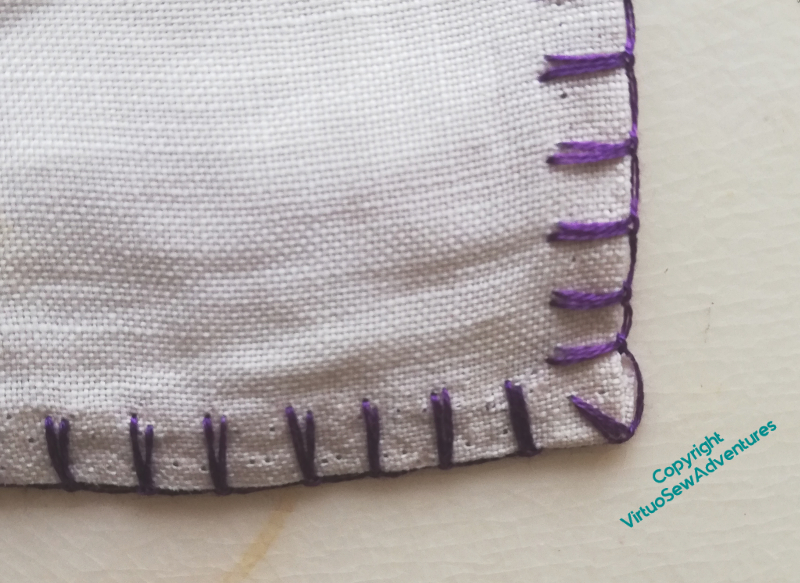
In a slight variation of what Grandmama did, I used Up and Down Blanket Stitch, which is one of my favourites, to work the purple section of the edging. It’s not as comfortable to work as an edging stitch as it is as a surface stitch, but I enjoyed it (as usual), and I’m pleased with how it looks.
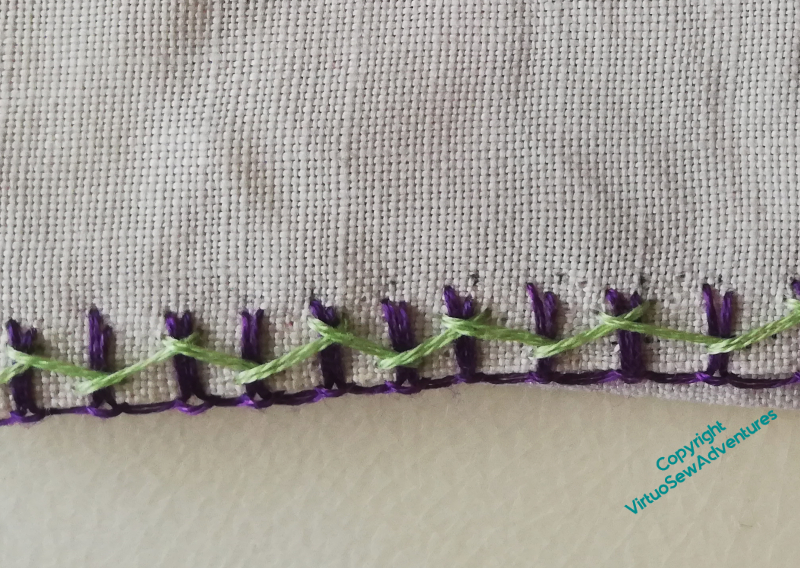
The second layer of the edging was in herringbone stitch, just as Grandmama worked it, but using a pale apple green instead of the pink. It will work much better in Mam’s room that way.
I’ve used two strands of cotton, which is what Grandmama did. I suspect that’s why the edging has collapsed in spite of not being used for decades!
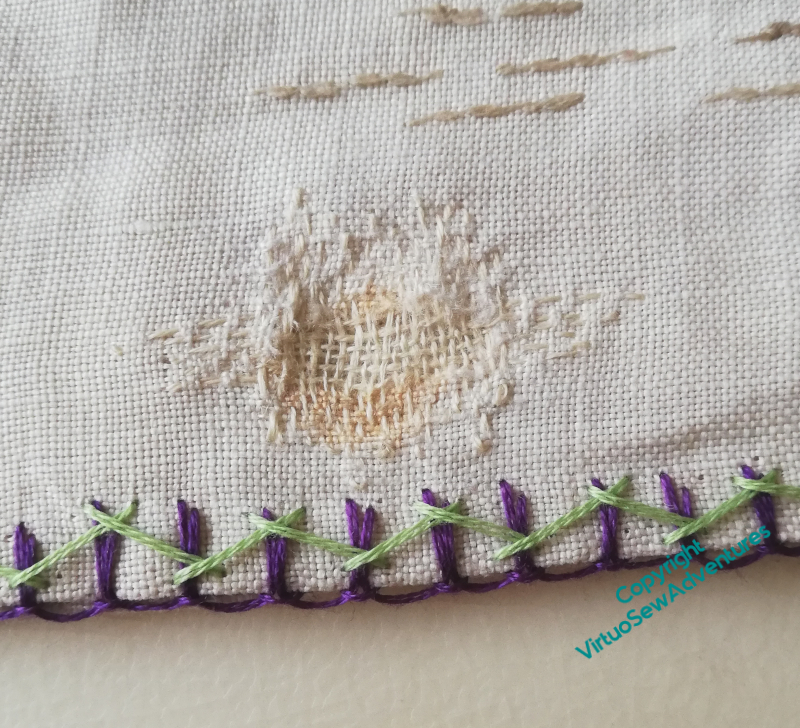
I’m not as satisfied with the darn, but I think it should stop the hole getting worse, and I’ve had a variety of suggestions for tracking down a suitable material to patch it with. At the best of times, that would be a tricky task, and in the current situation, it may well be years before I find something!
Progress continues in other areas, too – Episode Nineteen of SlowTV Stitchery is now up. It concerns, among other things, flyaway thread and the importance of writing things down…
Mending the Lady in the Garden

Grandmama worked this pyjama case for my mother when she was a little girl. It’s beautifully worked, but slightly faded now, and the decorative stitching over the edges has all but disintegrated. Mam has asked me to reinstate that stitching.
It’s a good thing that my collection of stranded cotton includes some of Grandmama’s threads and that of various great aunts. That gives me a chance of finding something not a million miles removed!

There’s some damage to repair as well. I’m not quite sure how I’m going to do so – there’s nowhere with spare threads to repair to attempt an invisible darn. So for now, I have outlined the area in split stitch, and I am going to concentrate – or try to concentrate – on putting in place a suitable border. The original was purple blanket stitch overlaid with pink herringbone, but we’ve decided that purple overlaid with green will work better in the room it will live in.

But we’ve already made a discovery. This slightly Art Deco looking border is the internal edging. It’s still undamaged, and I’m leaving well alone, but my Mam says she never remembers registering the detail here when she was a little girl!
We are pretty sure that the legendary Miss Hunter was involved in the stitching of this, so I’ve got a lot to live up to!
Meanwhile, in other news, Episode Fifteen of SlowTVStitchery is available, and concerns ideas for managing details, and the management of Very Long Projects.
Poppies And Wheat, Cleaned and Conserved
Some of you may recall that some time ago, my mother and I were planning to reframe one of my Grandmama’s embroideries, and discovered to our horror that it had been glued to a backing board made of strawboard.
In due course, we found a textile restorer, not too far away, and I took it to her. And now we have it back again. In the course of the work, it was discovered that two different sorts of glue had been used. One of them was unstuck fairly easily, but a particularly acidic glue had been used on the back of the embroidery itself – almost as if the framer did not believe the work had been finished off properly. Which it had – apparently it was very difficult to find some threads to take out to test for colourfastness!
-
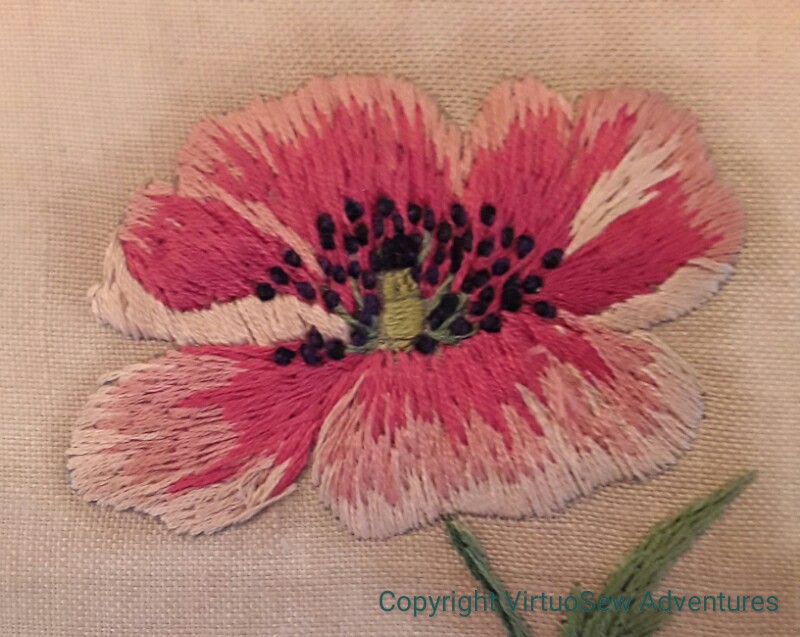
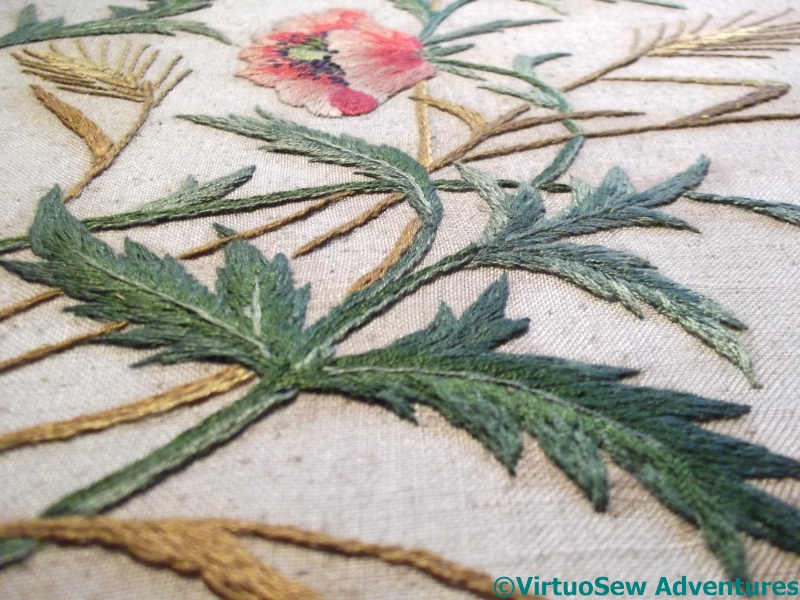
- Poppy – Brighter and Lighter
-
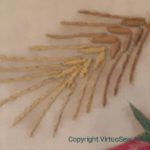
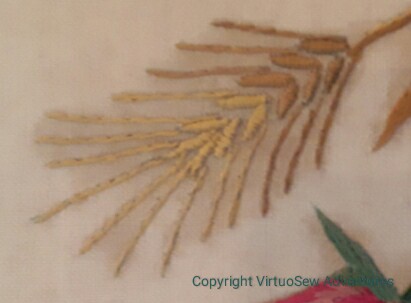
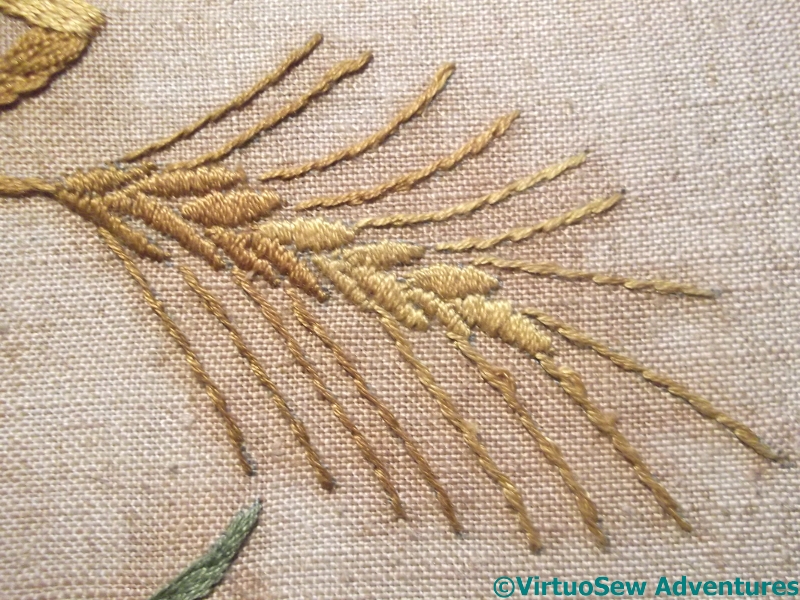
- Wheatear – Brighter and Lighter
-
- Further Detail – Brighter and Lighter
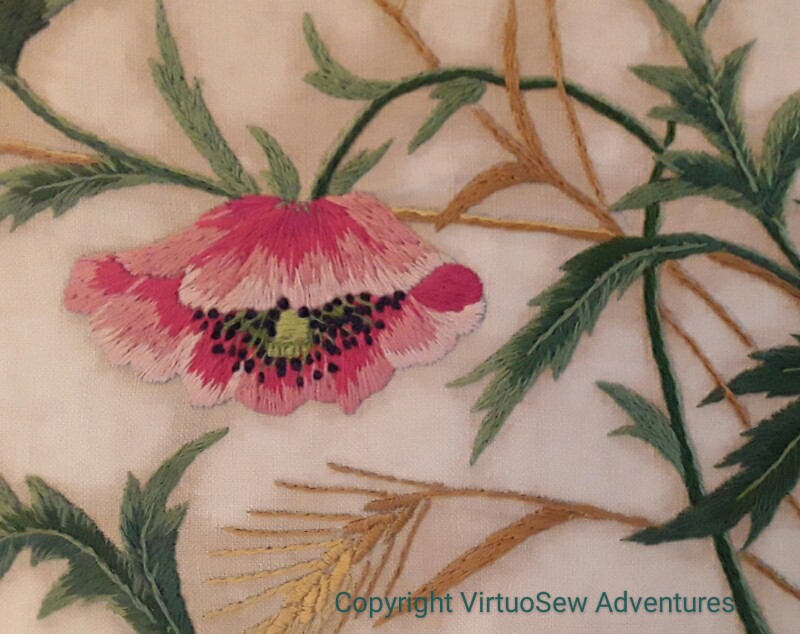
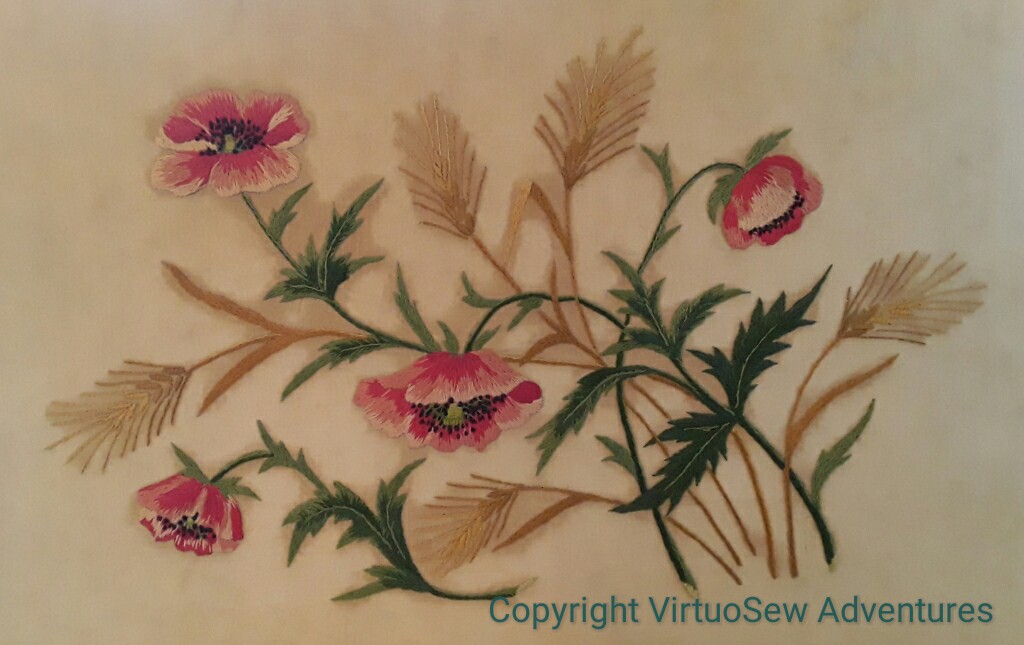
The fabric and thread are both much brighter than they were, but the very acidic glue that was used is the reason for the bloom of staining around the embroidery. It’s much reduced, but unfortunately it wasn’t possible to remove it entirely.
So, Gentle Reader – be careful with glues and boards. Avoid if you can, use neutral-pH as far as you can, or someone in the future will be muttering imprecations in your direction!
A Lovely Teacloth

One Corner Of Teacloth
This teacloth was worked by my mother as a schoolgirl.
The design came from a transfer, and there was another girl in her class that was working the same one. With rather a difference. Her flowers were all lazy daisy stitch, and anything else was stem stitch, apart from the edges, and she got the whole thing finished in a term.
Needless to state, as her mother’s daughter, and with the spectre of Miss Hunter in the background, my mother wasn’t going to use a stitch with “lazy” in the name.
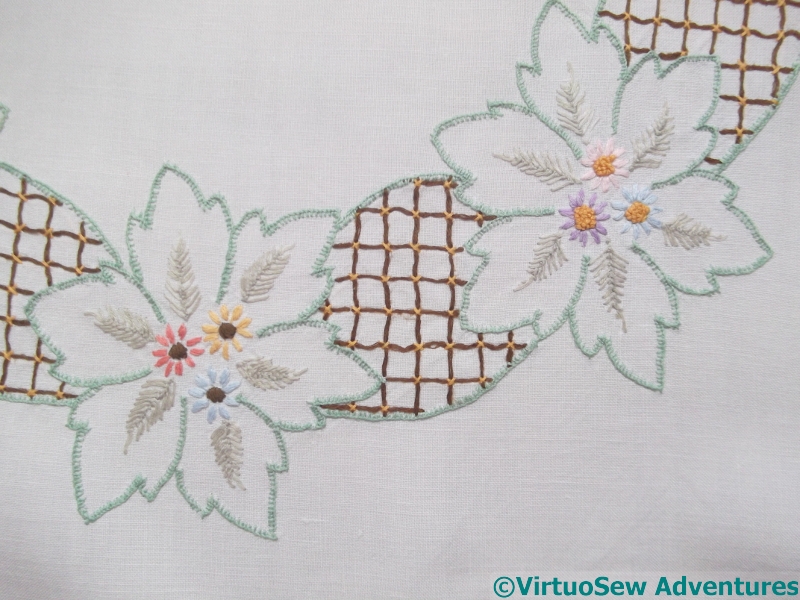
Central Ring
She did all the edges in blanket stitch – which with my recent experience with the Azorean Cutwork has me extremely impressed. It takes so long to make any noticeable progress with it!
The leaves are all in feather stitch, and they’re beautifully shaped, and the flowers are satin stitch – very neat satin stitch, which again is one of my least favourite stitches, and one I only do neatly in short bursts and with something else to do in between!
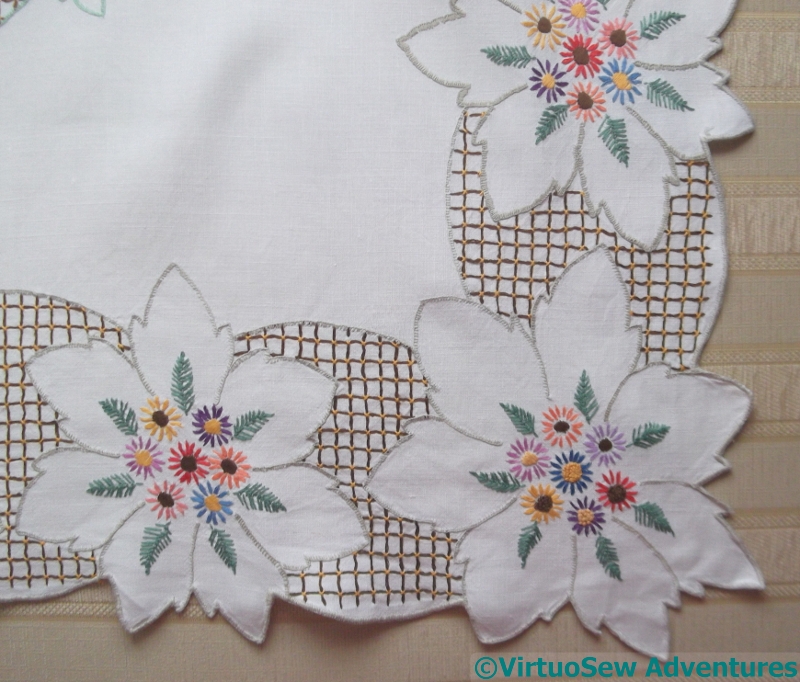
Detail Of Corner
Of course, my mother didn’t get her teacloth done in a single term – but her teacher was so impressed with what was finished that she took it home and handwashed and pressed the completed corner to put in in the end of term exhibition.
In spite of the fact that I very much doubt whether the teacher had contributed anything at all to my mother’s skill in the matter!
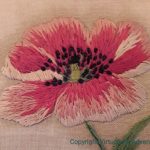
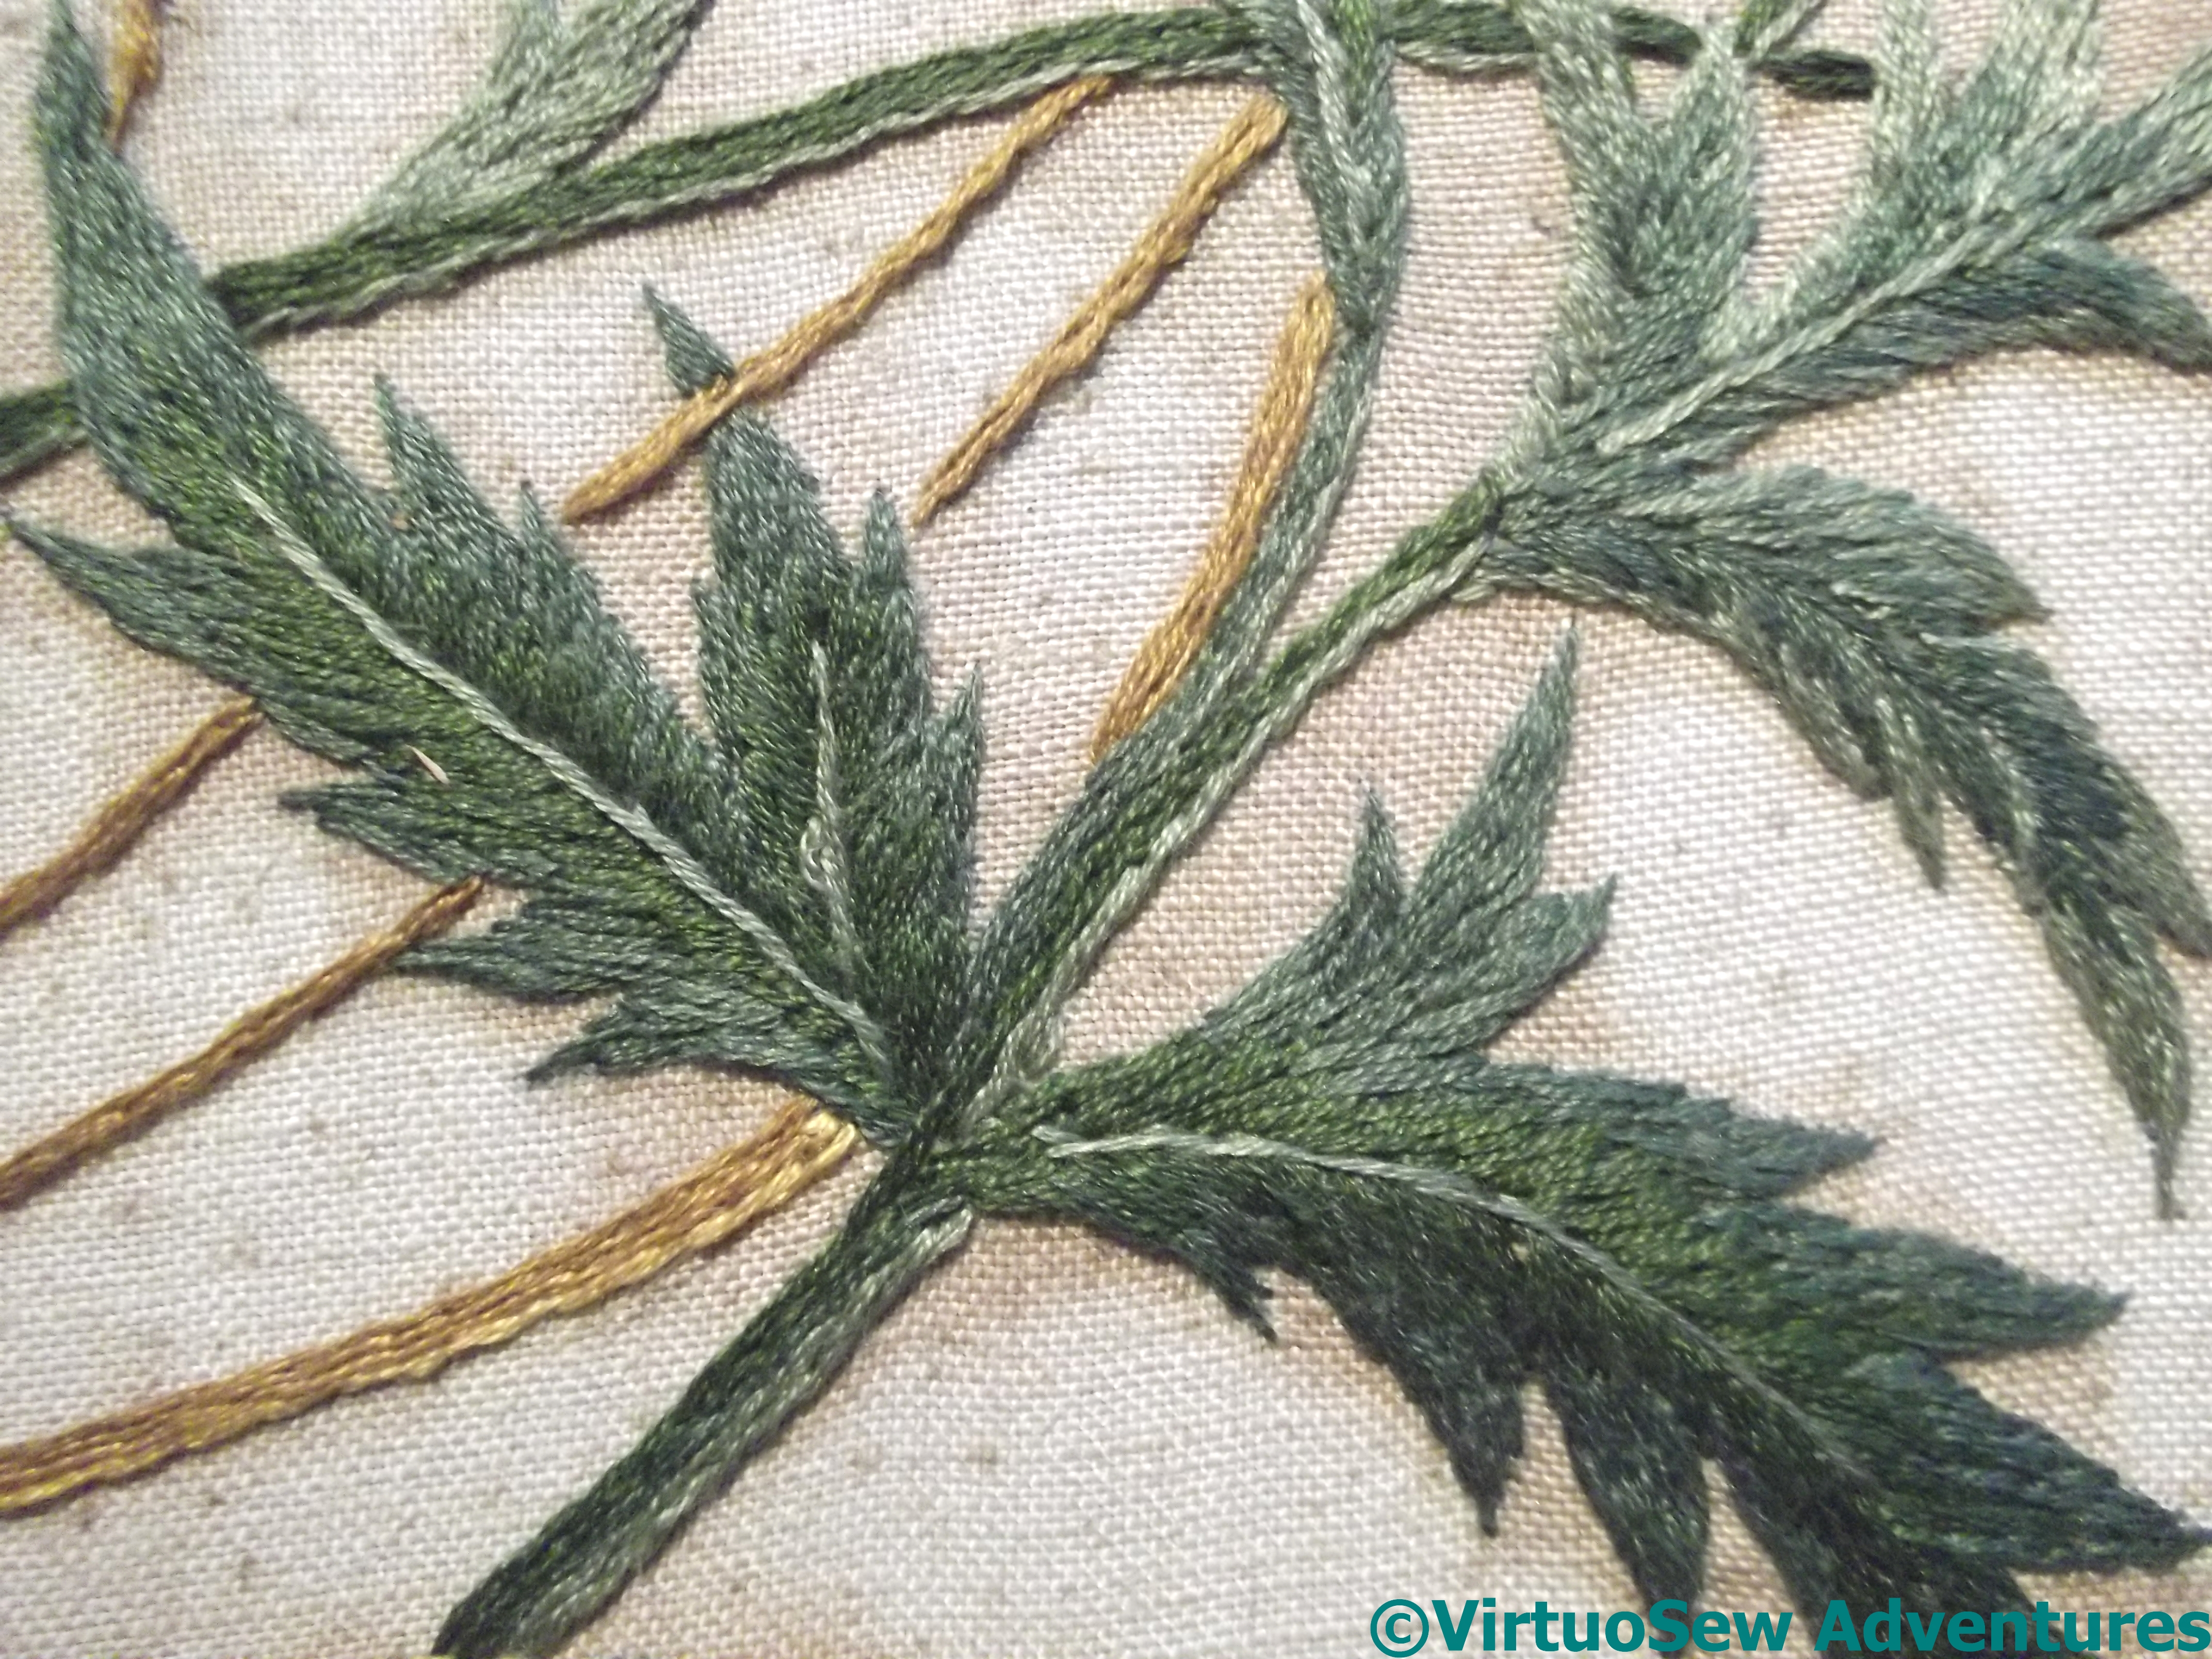
Tiger Lilies
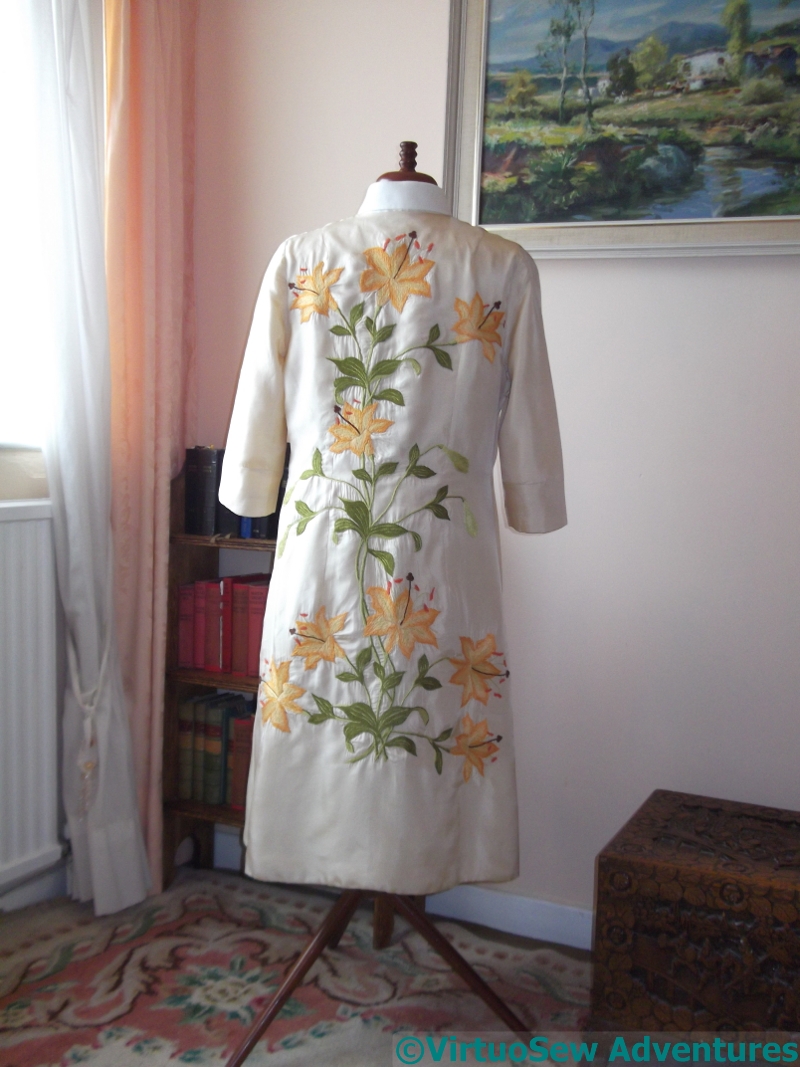
Tiger Lilies – Long View
This rather fabulous coat was a collaboration. My mother made it for herself to wear at a friend’s wedding in the early nineteen-sixties, and when she began to run out of time, Grandmama stepped in and stitched like a whirlwind to get it finished!
The original outfit was a silk dress and coat combination, a very simple sheath dress, and this edge-to-edge, three-quarter sleeve coat. The front is completely unadorned, because, after all, at a Church wedding people will mostly see each other from the back!
The design of Tiger Lilies is from a transfer. Actually, we think it was three of the same transfer, cut and put together to create a design that fit the coat back. After the darts had been put in…

Tiger Lilies – A Flower
I’ve seen a few cream running stitches which suggest to me that, rather than using the transfers as transfers, the design was stitched through the paper. Given the sensitivities of silk, that was probably very sensible!
The embroidery is worked in stranded cotton. It’s all very simple stitchery, long and short stitch, stem stitch, French Knots, and a few buttonhole wheels.
It relies for its effect not on complexity of stitching, but on the colour and pattern combination.
If I’m going to be picky, the silk was a bit light for the stitching – although the puckers may be a result of years and cleaning, as I can’t imagine Grandmama, after Miss Hunter’s training, would have stitched with such tension, and no more would my mother, after Grandmama’s training!
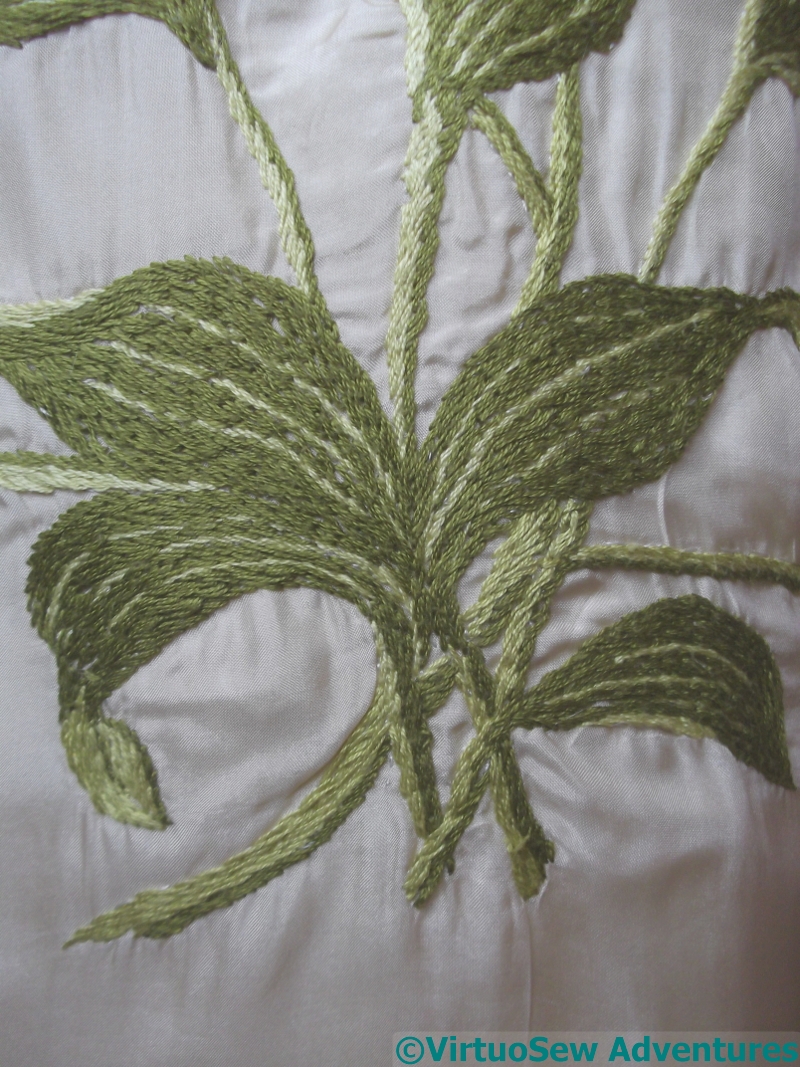
Tiger Lilies – Leaves
Grandmama also contributed assistance in making a pillbox hat, ornamented with swirls of gauze to match the colours, and then they painted a pair of shoes (Rayne, no less!) and a handbag (Marks and Spencer, alas) to match the green gloves which were bought new. A three-strand green stone bead necklace completed the outfit, and my mother remembers receiving a lot of compliments, at that occasion, and several others later.
Many years later still, when I was in the Upper Sixth, with a pale orange sheath dress underneath, I wore this for the Founders Day Service at school. We went into town afterwards, and my goodness, how people jumped to serve us!
Regrettably the coat fits neither my mother nor myself these days, and we’re wondering what to do with it…
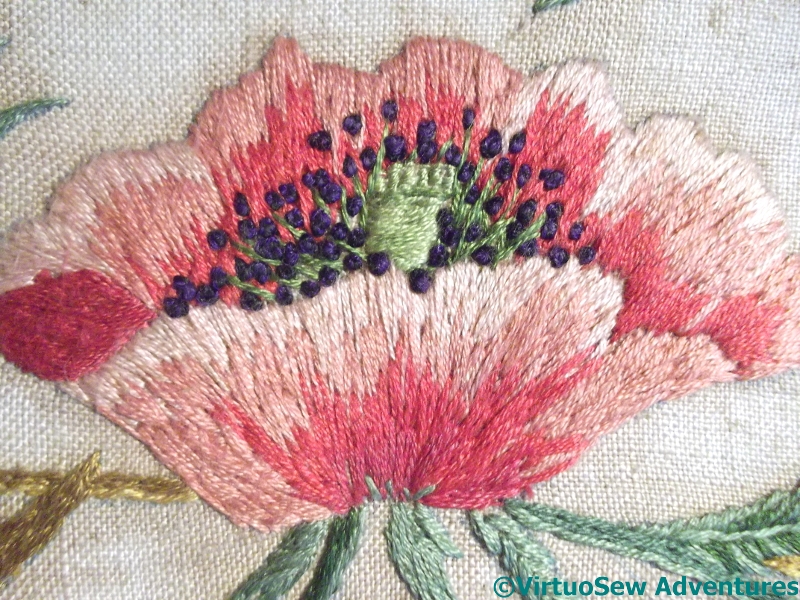
Poppies and Wheat – a closer look at Grandmama’s embroidery
 When we took the tray to pieces to remove the embroidery, we had a Nasty Shock.
The fabric was glued to the backing board and cut off flush with it. So much for our blithe expectation that we would be able to remount the fabric – carefully, of course! – and then get it properly framed to advantage.
In retrospect, we should maybe have guessed from the staining around the stitching that maybe some glue had been involved, but since I always mount over padding, it would never have occurred to me that Grandmama’s framer would have done anything else, still less that the legendary Miss Hunter would have presided over all that beautiful embroidery and then permitted it to be mounted onto any old piece of board using any old glue that happened to be to hand!
The embroidery is worked in long and short stitch, satin stitch, stem stitch, and French knots. I think Grandmama used two strands of stranded cotton throughout, and as it was wartime I’m impressed that she managed to gather ten different colours of thread for it.
It’s a salutary reminder to me that a riot of ornamental stitches and overdyed threads isn’ t always the very best way to achieve a striking result.
We are going to ask a textile conservator to have a look at the piece as it is, glued to its backing board, and give us some advice about the next step. Grandmama would be in pleats with laughter at the idea of any of her embroidery going to a conservator, but I hope she would be secretly pleased as well…!
Poppies and Wheat – Another of Grandmama’s Pieces (Introduction)

Tray – Poppies And Wheat
The design for this tray was embroidered by my Grandmama during the period when she and her sister and all their children were evacuated to Burton in Westmorland during the Second World War.

Signed On The Back
We know that because it has been signed on the back!
Besides, my mother remembers it being used on ceremonial occasions. It was always a trial – it’s very heavy (because of the glass), rather slippery (glass again) and doesn’t have much of a rim to keep what’s on it safe. Especially with four children and a dog in the house.
In fact Grandmama, and now my mother, both resorted to propping it up somewhere and using it as a cross between a picture and an ornament. It makes a rather large ornament, too. I’ve seen mirrors over fireplaces that weren’t much bigger!
And of course – again because of that wretched glass – most of the time you can’t really see the embroidery for the reflections. Which is a pity, because it is exquisitely worked, probably one of the pieces overseen by Grandmama’s embroidery teacher, Miss Hunter. Recently my mother decided to take it out of the tray, find some way of cleaning it of some of the discoloration, and mount it properly as an embroidery. Naturally we will find some way to remount the signature from the back as well.
Needless to state, this turned out not to be as easy as we might have hoped.
Another of Grandmama’s pieces
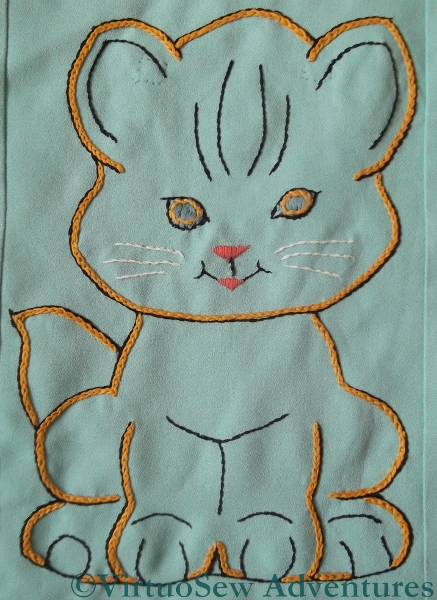
Pyjama Case
Grandmama must have worked embroideries galore for her assorted grandchildren. This pyjama case with a chubby kitten on the front was worked for me – I think as a birthday present – when I was about nine, and I’ve rediscovered it among a host of other reminiscences of childhood.
You can see the lingering “Make Do And Mend” ethos of the wartime years when she was bringing up her own family in looking at the whole thing, which is actually pieced together to create the final, full size of the pyjama case. It’s worked on a synthetic crepe, too, which many embroiderers today would tend to despise.
However, if you zoom in on the picture, you will be able to see the legacy of her teacher Miss Hunter in the beautifully even stitches of the embroidery (nothing complex – chain stitch, stem stitch, and satin stitch). That legacy is also apparent in the care that Grandmama took in lining it just as beautifully. She’s even sewn tapes to the inside of the case so that the strain on the press studs is reduced.
I’d almost forgotten about this piece and I was thrilled to find it again!
As from today I am going down to just one post per week. I’m planning a lot of work on the house, and I don’t want to be resenting lost embroidery time. Not least, the ultimate goal is to have a studio, or at least a studio corner, so eventually the work should result in a better life for my embroidery. I will still be embroidering, and still writing posts (I’ve found more of Grandmama’s bits and pieces, too!), but I hope at a slightly more relaxed pace.
Found in the Archive – a traycloth
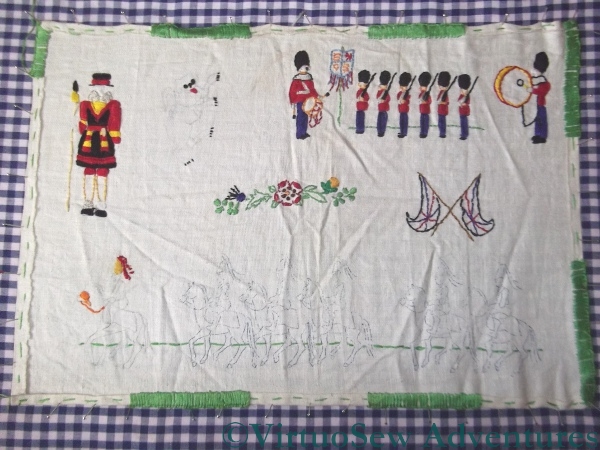
Something Else In The Archive
My mother and I have been trying to make sense of the various boxes and bags that travelled from my grandparents’ attic to my parents’, and we’ve found all sorts of things.
This traycloth must be something that Grandmama began to work quite late in life, when her eyesight was no longer what it had been, because it’s worked in four strands, and the back would not pass Miss Hunter‘s scrutiny. Judging by the subject matter – maybe she began it in 1977 for the Queen’s Silver Jubilee?
I suspect she intended to alternate the colours of the blanket stitch edging to create the same effect as the coloured blocks of fringing on a ceremonial trumpet’s banner.
I rather like the idea of tackling the parade of guardsmen at the bottom, so I’m planning to add this to my list of projects at some point. It would be the only project of which I would be able to say I had finished what Grandmama started!
I daren’t wash the piece or iron it, because the tracing has already begun to break up in some places. The unstitched motif in the top row is a heraldic lion, and most of his outline has rubbed off. It’s really just as well that I was keen on heraldry as a teenager and still have my books on the subject. I should be able to recreate him without too much trouble.
Grandmama’s Embroidery – One
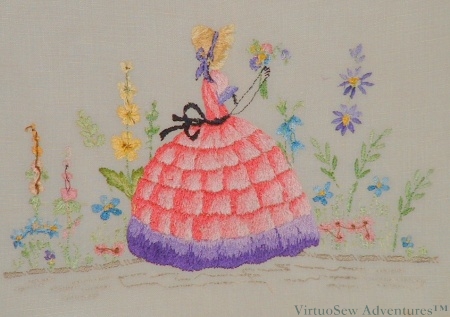
Grandmama embroidered this lovely lady on a nightdress case for my mother during the War, when they were evacuated to Westmorland. The colours have faded rather now, but it is still beautiful, and the long and short stitch puts me firmly in my place!

- The Front of “The Lady in the Garden”
The reason it is all so neat is that Grandmama had an embroidery teacher at the time, called Miss Hunter (I mentioned her in an early post). I’m sure Miss Hunter must have been trained at the Royal School of Needlework, because her standards were ferociously high. Grandmama once told me that one of the other ladies in the class at the time was working a Willow Pattern design in single strands of stranded cotton.
The back shows how the colours once appeared, and also how neatly Grandmama worked it all. With the exception of the centres of the hollyhocks, you really can’t be sure you aren’t looking at the front!
The Back of "The Lady In the Garden"
Miss Hunter’s influence still prevails. A few years ago I taught an engineering friend of mine to do counted cross stitch, and he rapidly picked up our habit of checking that the back was as neat as the front!