
Tag: wool
David’s Hares – close ups
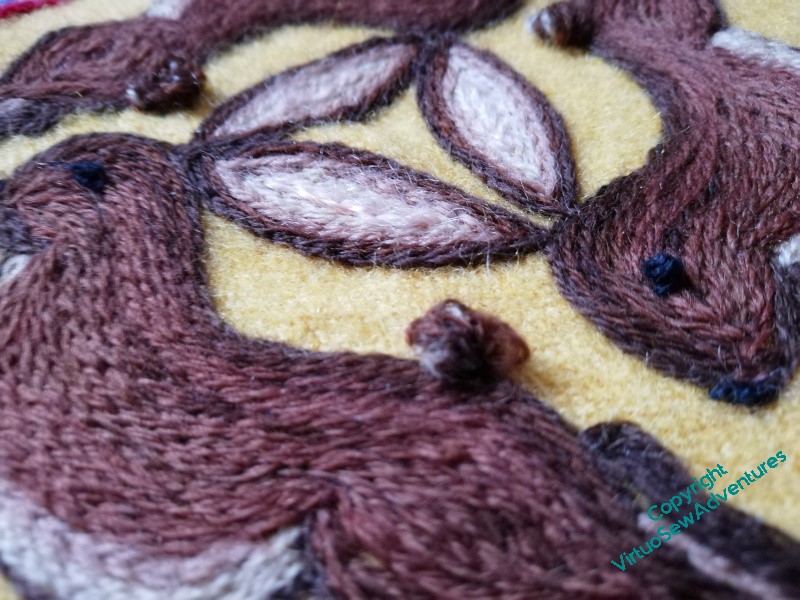
I really enjoyed working the Hares, and I thought you might enjoy a few close up and oblique views. I think there’s not much to say, as I’ve already said it, but if you have questions, please use the comments section and I will do my best to respond usefully!
More on David’s Hares
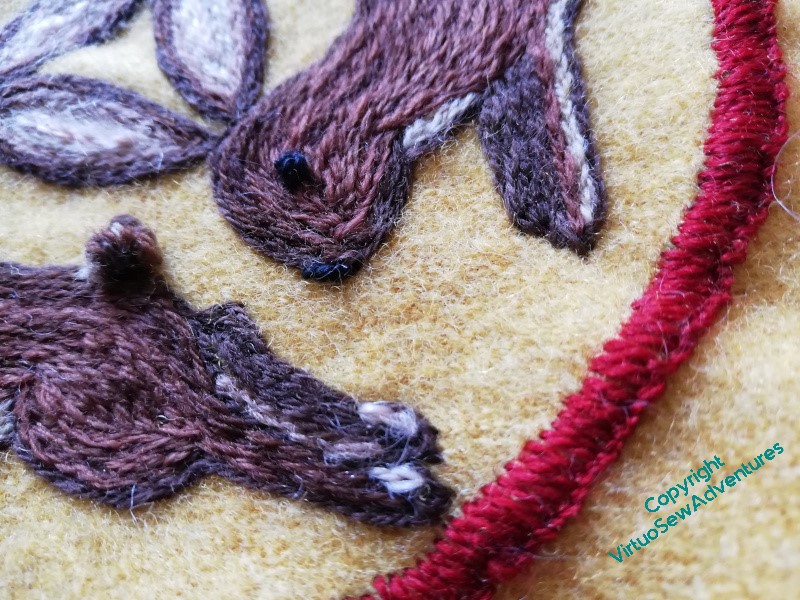
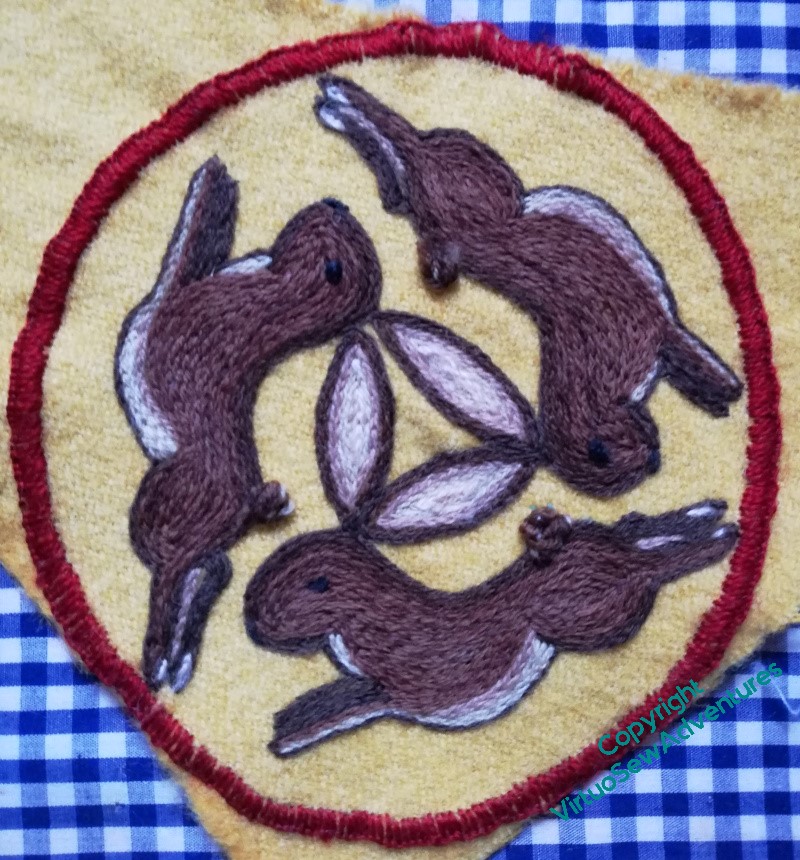
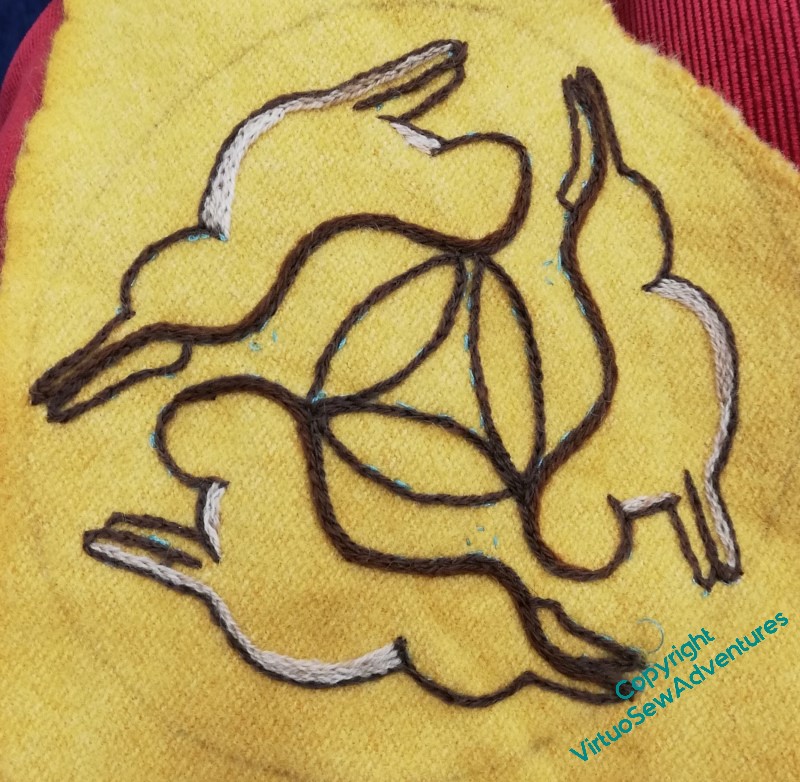
The yellow wool was really a lovely fabric to be stitching on, but being a bit mobile around the edges, I decided I wanted the circle of blanket stitch in quite soon, and didn’t keep it quite as neat as I might have hoped.
However, it looks lovely, the red contrasting nicely with the ground and will the brown hares (I keep wanting to call them bunnies, but hares have bigger ears, which must make it easier to share them!)
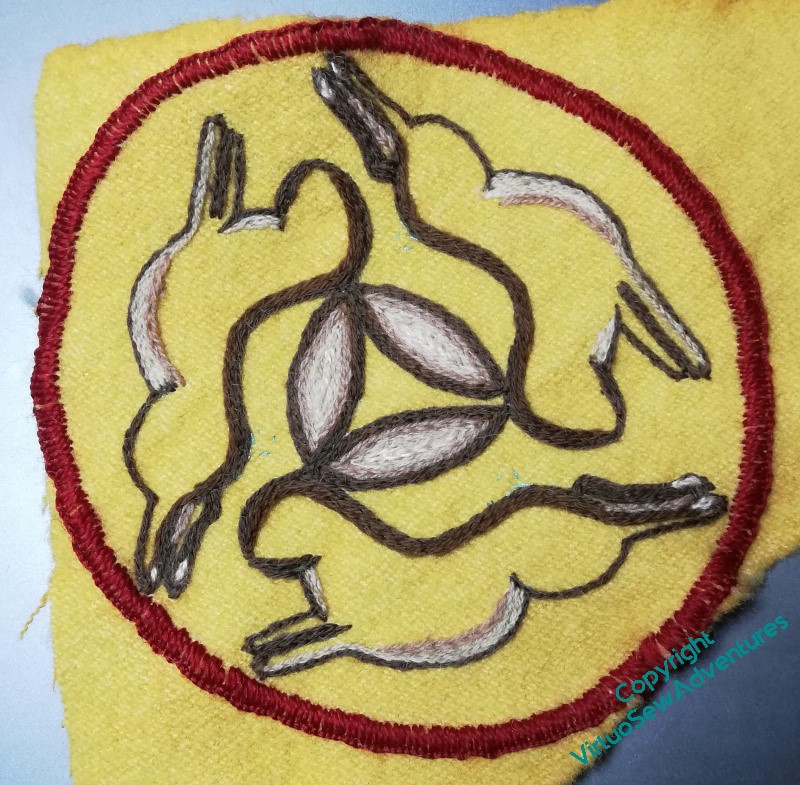
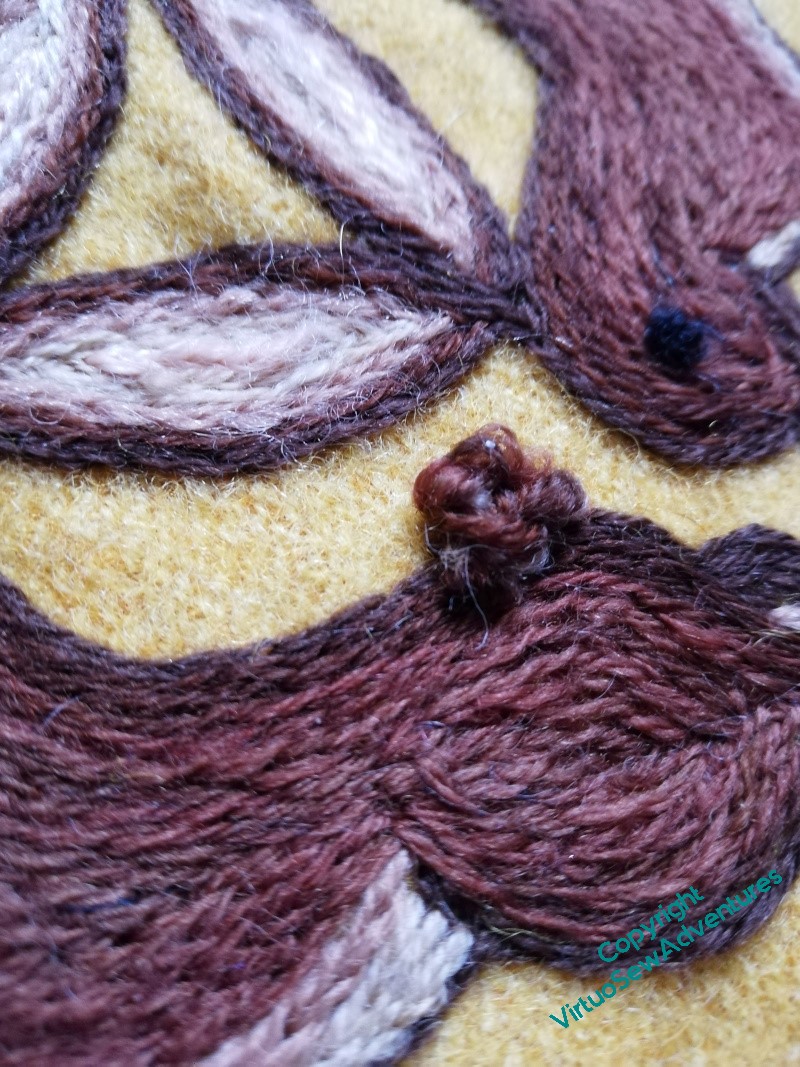
The innermost line on the ears is a pinky-cream mohair, and I’ve also used it for little pink pads on the hind paws. I’ve no idea whether this is accurate to life, but it gives the design a lift at the edges, and I think that has helped enormously.
You will note that I’ve kept all three Hares at the same rate of development all the way through. That’s made it easier to think of it as a single design, “David’s Hares”, rather than three versions of one hare. It also means that when I was working the progression of shades in the ears, I didn’t have to make notes, and while it’s true I’m a more note-taking-minded stitcher than I used to be, something like this is meant to be more freestyled!
I don’t know what I’m going to attach the Hares to, but I’ll think of something..
Here you see I’ve actually finished the stitching, including a pile stitch for the tails. I’ve not cut it, but left it soft and curled, which makes for a slightly stronger shape, and possibly more hardwearing too. But my goodness, pile stitches take more thread than you expect, even when you’re expecting it (if you follow me!)
Close ups will come in a later post, but in the meanwhile…
In Memoriam, David Singmaster, mathematician, metagrobologist, mischief, and friend. Thank you, David.
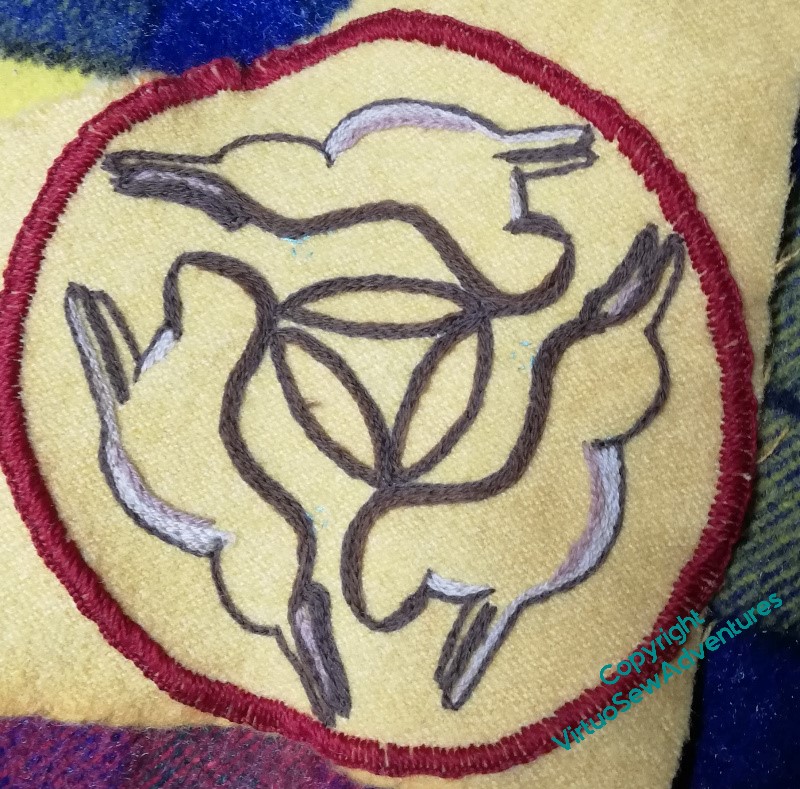
David’s Hares
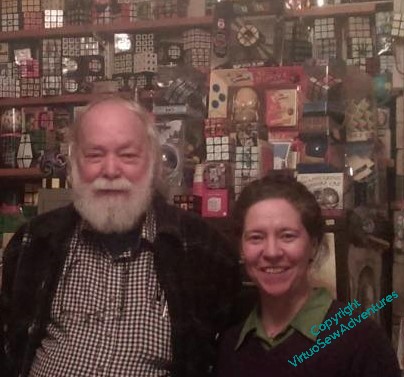
Last year, The Australian’s world of mathematics and recreational mathematics lost one of its titans: David Singmaster, mathematician, metagrobologist, and discoverer of the wreck of a Punic warship (as you do!). David had a fine mind, contributing hugely to pure mathematics over the years, but his intense curiosity about, well, everything, lead to him writing the first book about solving Rubik’s Cube, and being involved in a fabulous book detailing the spread of the Three Hares pattern along the Silk Route. He was also a really lovely man, who enjoyed sharing puzzles with all and sundry. He was always seen with a drawstring bag embellished with those Three Hares, from which an assortment of physical puzzles and embodiments of mathematical principles would be taken for the bafflement of anyone within range.
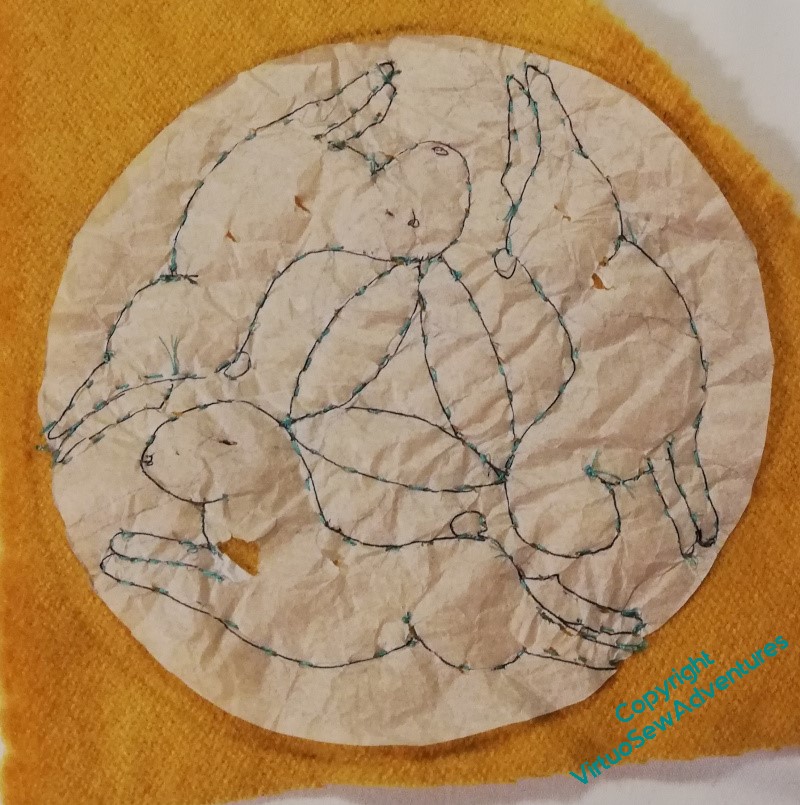
It follows that when the British Society for the History of Mathematics invited The Australian to speak at a one day conference in David’s memory, I decided to sit quietly at the back, stitching a new version of the Three Hares. It’s a lovely woollen fabric, and I’ve chosen some wool I rather like to stitch it with, and started by transferring the design using running stitch through tracing paper.
I got it to this stage in the hotel the night before, and then got rid of the tissue paper in short order.
It was a wonderful day, many old friends, some lovely tributes to David, and some fascinating expositions of his work. And all through the day, I sat quietly stitching away at the Hares, for some of the time beside David’s widow, Deborah, who made the original bag that gave me the idea.
I’m quite pleased with how it’s going so far, especially as I was using my new Sketching Glasses (aka bifocals), so that I would be able to see the slides as well!
The Jacket of Many Stitches
I promised pictures of the jacket being worn, so here they are!
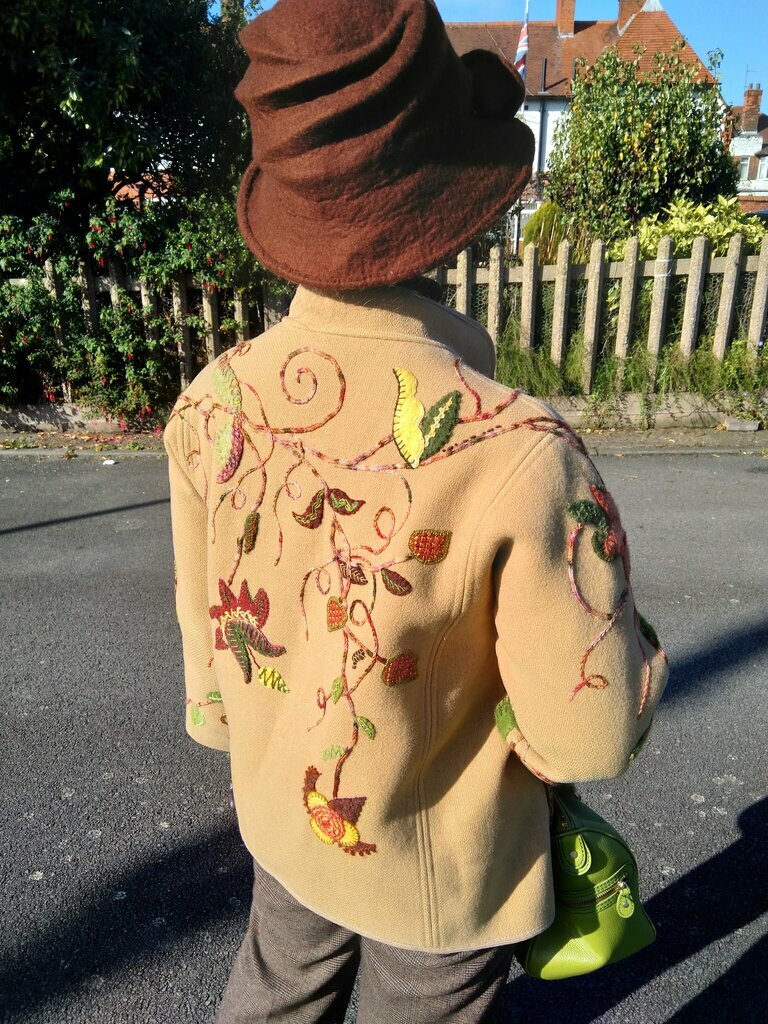
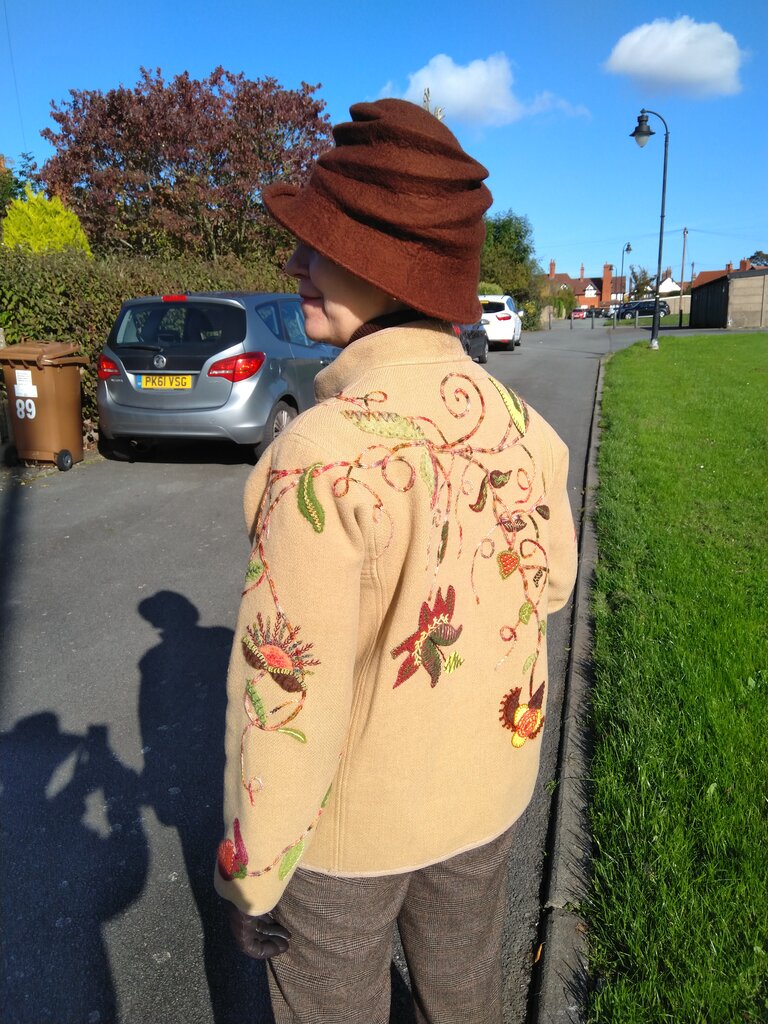

We had some nice weather, and the Jacket smiles in nice weather. The hat is by Felt by Bridget, bought some years ago at the Harrogate Knitting and Stitching Show.
The necklace came from Harrogate too – a stone pendant, with a cord I made myself in kumihimo. It’s the green and orange one on this page.
And finally, another view of the masks!

A sign of the times
It has occurred to me that one of the reminders of the past two years will be in the number of garments that have masks to go with them. I am planning two dresses for myself, and even though I doubt I’ll get to wear them until times are much less alarming, I’m going to make matching masks, just to be prepared!
Having finished the Jacket of Many Stitches, signed it in Morse Code (of course!), and noting that it’s definitely a garment for chillier weather, I thought that some winter-weight masks might be in order. So I took a pattern from one of the bought ones we’ve got, and drew myself some ideas.
I have some cream wool left over from a jacket I lost in Paris when I was working there. I’ve always regretted that jacket, so I’m hoping that using the leftovers for something else will reduce the sting a little. It’s been thirty years, so it’s about time!
It was trickier than I expected to get my motifs small enough to fit on the mask, especially since I decided to use up some of the fragments of leftover felt at the same time, and sometimes I was a bit short of felt.
I started off with a little butterfly, and made him quite simple, enlivened with a thread with a bit of sparkle in it. I think it’s a machine thread, and the sparkle goes from gold to brown and back. I made up that mask, and realised that it was a bit on the small side. It does cover everything it needs to, it’s just that I prefer to feel there’s a bit of extra space in it.
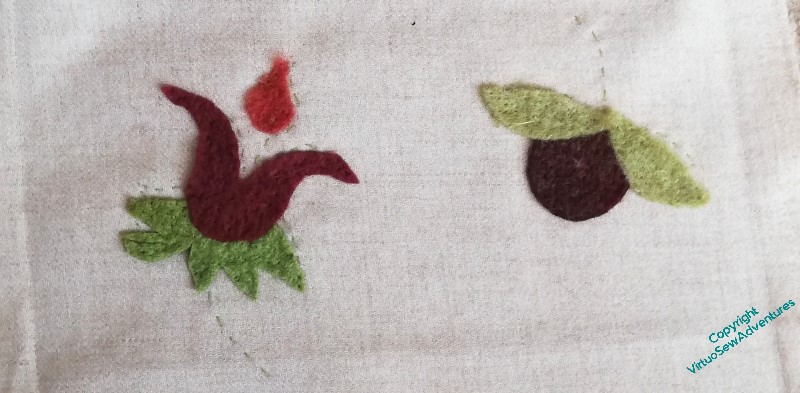
So I tweaked my pattern a little, and drew my idea for the motifs on the fabric. At which point I realised that the pencil wouldn’t rub out, so I running stitched over the lines and turned the fabric over.
Nothing to see here, folks, moving on!
Little Jacket Finished
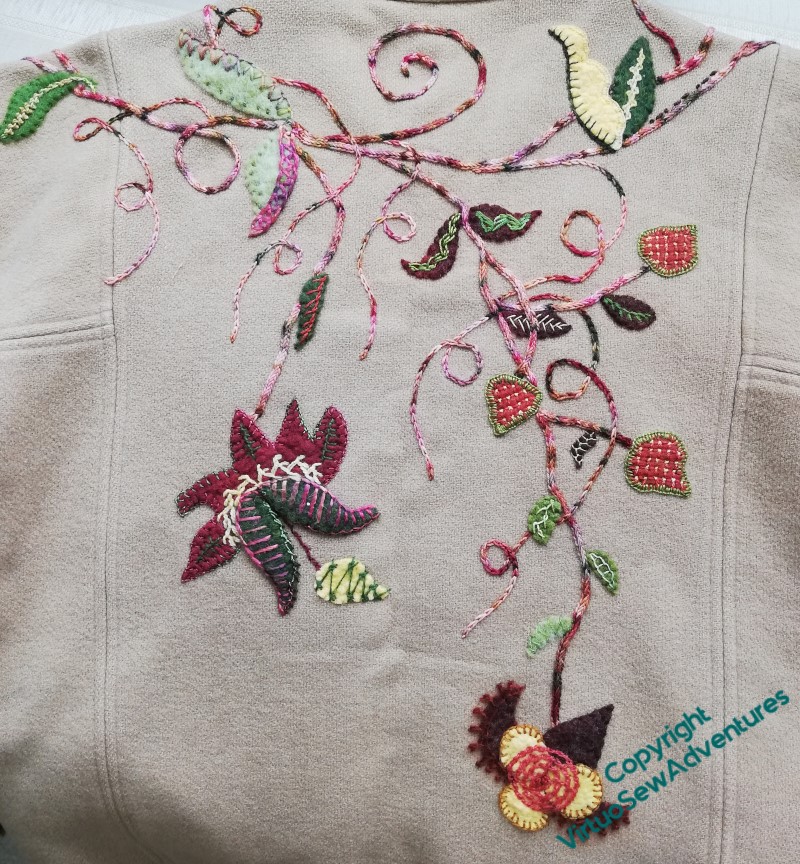
So, here’s the finished back view. When I had done most of the work, I looked at it, and realised that there was still a rather spare look to it – hence the assortment of chain stitch tendrils, worked out by asking my mother to wear the jacket while I scrawled chalk tendrils in all the places I thought they were needed.
The front left (from the inside) didn’t seem to me to be quite as open as the back, so it didn’t need quite so much in the way of tendrils. Just a couple, making sure that all of the pattern goes across all of the jacket.
I could maybe do with a bit more practice at drawing curlicues, but to be honest, drawing on a garment on a live body is not something I am likely to do very often!
You might also have spotted one of the tiny leaves I decided to put in covering a blemish near to the lowest bloom. I was rather pleased with that idea – if there are more difficulties, or weaknesses in the fabric, I will merely be adding more decoration!
The butterfly makes a neat little reference to the bugs and beasties in Jacobean embroidery, while covering the worn section on the patch pocket, and the tiny green stitches on the brown felt lift the colour nicely.
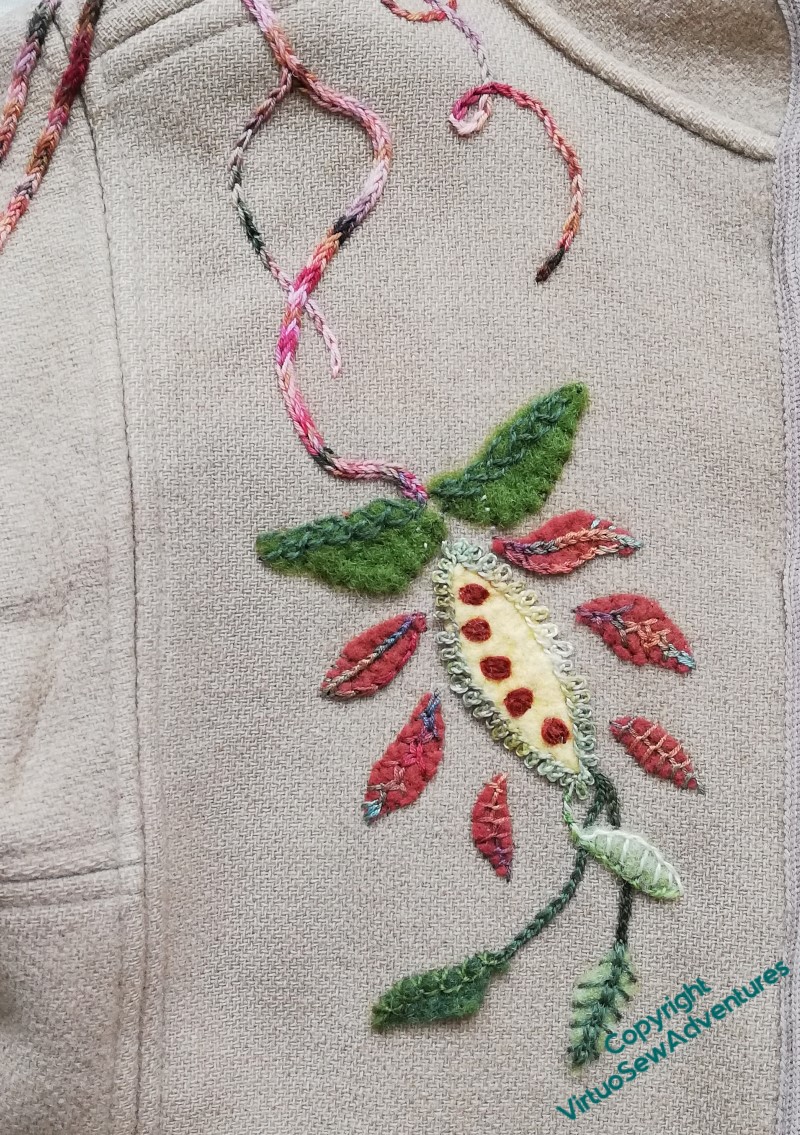
The front right also didn’t need too much additional work – a couple of tendrils, that’s all.
I realise as I look at this, that I didn’t change the curlicues on this fruit/flower thing for lighter ones, or, indeed, add stems to the brown leaf shapes, but I don’t think it was necessary, in the end.
I’ve already chosen a lining material – a bright, warm green.
I’m looking forward to wearing this later in the Autumn!
Little Jacket Again
You might recall that this shape gave me some trouble when I was working the Coat of Many Flowers. Somehow, that wasn’t the case this time. It appears twice, and while this one is very different to the other, I think it works.
I like the contrast between the Mountmellick stitch facing inwards on one leaf and outwards on the other, the Bonnet stitch edging over the central red section.
I do wonder whether there should be more of the single twisted chain stitches, but I think I’m happy to leave them as is. You might also note, just behind the copyright notice, a tiny Fishbone Stitch leaf. There are a few blemishes on the fabric – to be expected with a jacket that’s probably at least thirty years old – and I’m covering them with these little leaves. I can add more if I find more snags or blemishes, and they will add a bit more fragmentation and frivolity.
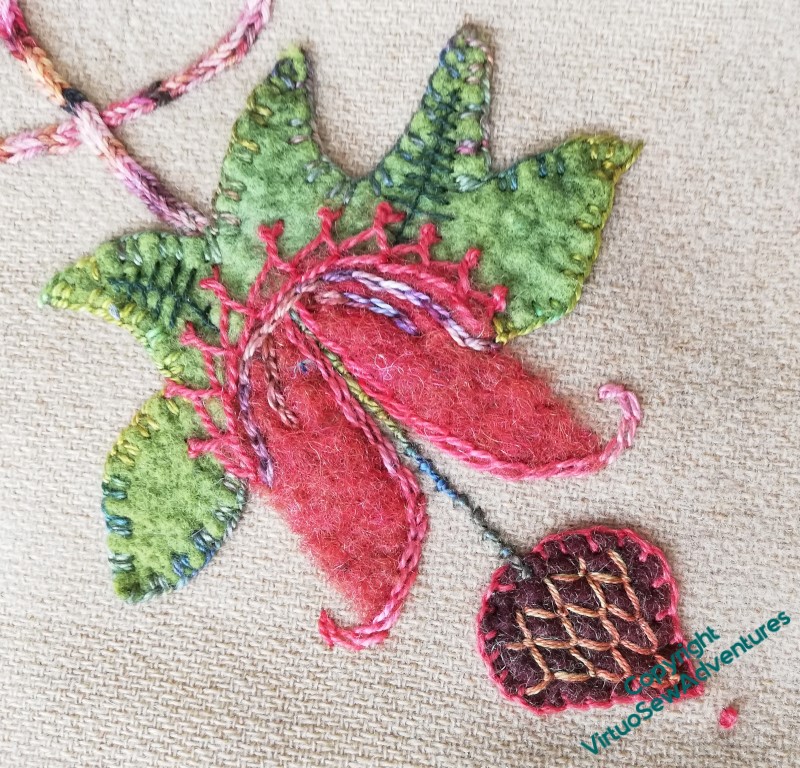
The whole theme of this design (if you can call it a Design, when it “just growed” like Topsy!) seems to be counterchange.
This one shows variegated thread and plain thread against plain felt and variegated felt. I’ve kept greens with greens and pinkish reds with pinkish reds, but the whole idea still lies in the layering of detail.
I’m pleased that I found a place for coral stitch as the stem supporting the brown shape, although the rayon yarn is an absolute monster to use. It tangles if you so much as look at it sharply, and while I would normally use a hoop to hold the fabric, giving me two hands for the thread, I’m reluctant to use a hoop on this fabric, so there was instead much muttering ..

There was much muttering, also, as I took the toggle loops off. I’m not quite sure how I’m going to finish the edges of the jacket, when I get there, but I’m already sure I won’t use the toggles and toggle loops which were already there.
They were attached by multiple overlapping lines of machine stitching, and since I wanted to avoid damage to the edging braid in case that remains the finished edge, I had to be very careful. Two evenings of fiddling and muttering produced this rather sad little heap of redundant loops.
But at least they are now off the jacket!
Little Jacket – still more foliage
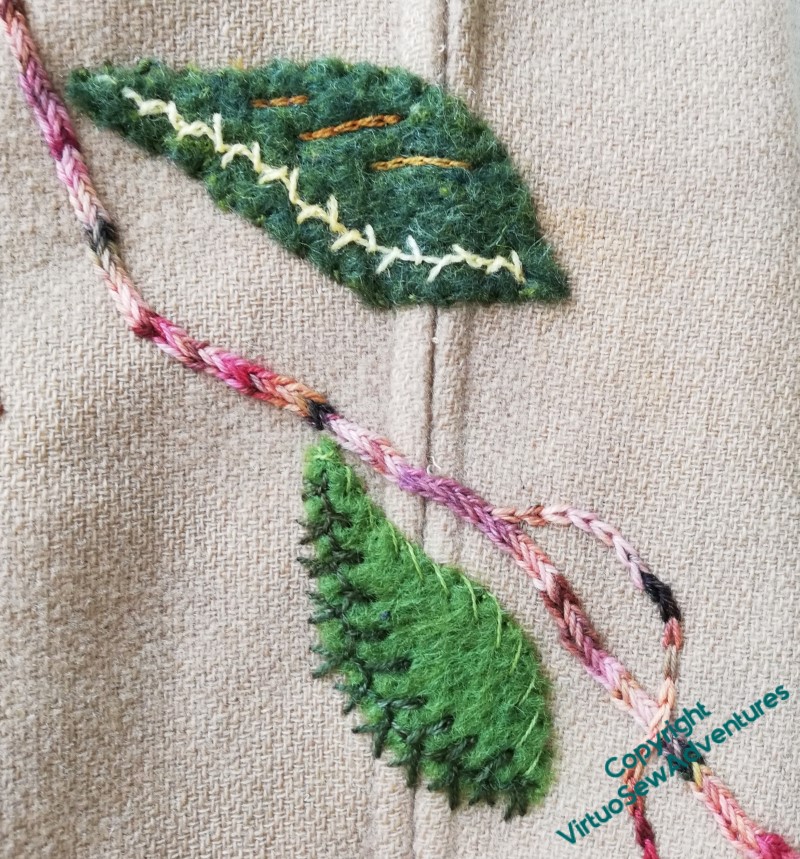
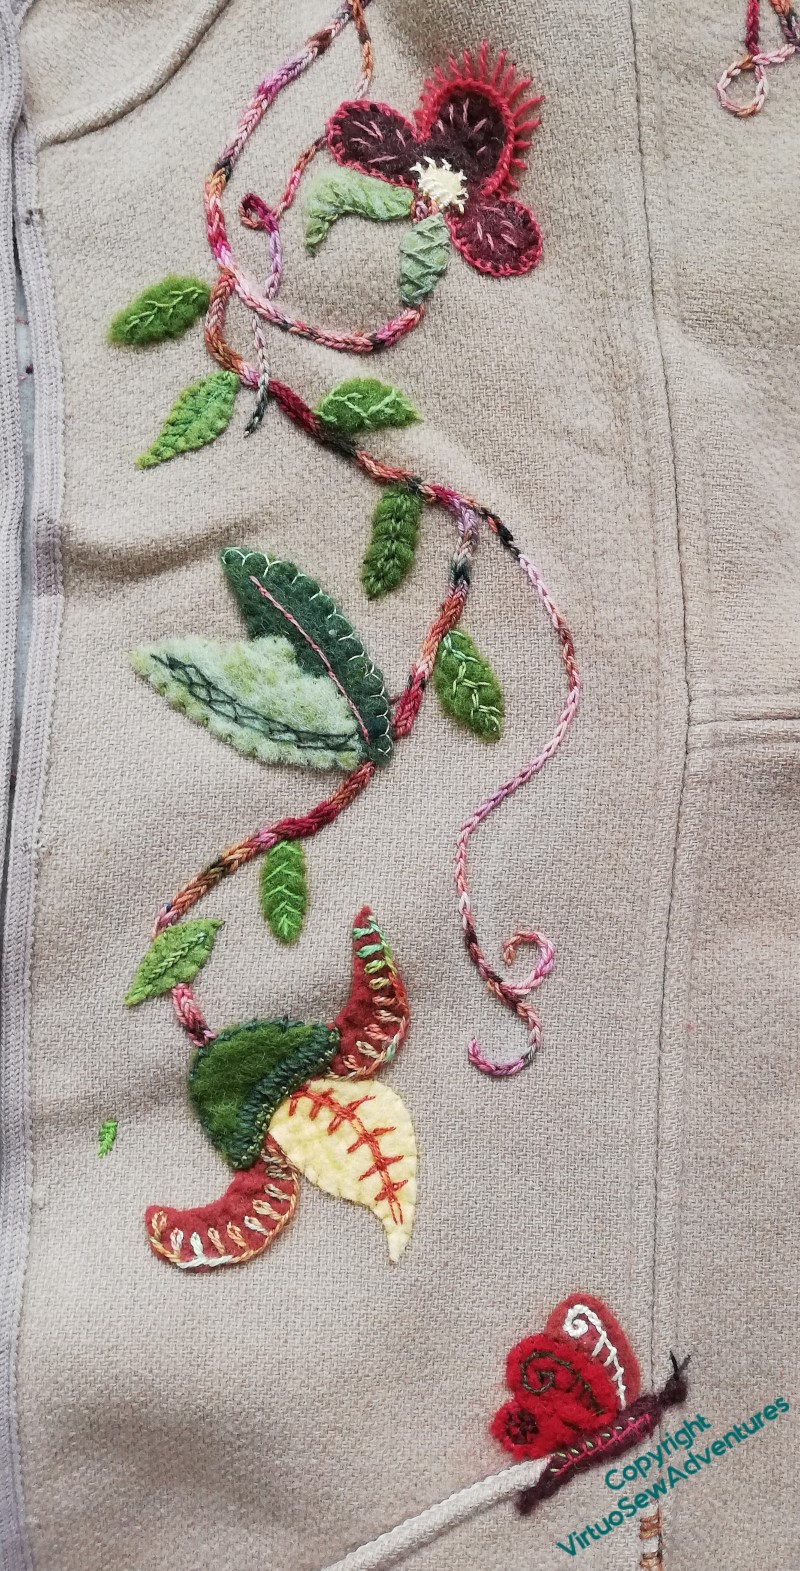
Adding the large leaves involved some thinking, because I wanted to keep the variations going. Some of them are edged, some of them emphasise “veins”, and some, like these two, are asymetrical.
The darkest green felt helps the pale yellow (alternating twisted chain, I think) to shine, and the three lines of darker yellow just add another variation which ties in with some of the colours in the yarn I used for the stem.
I found the middle shade of felt a little harder, always. I wanted to ensure there were contrasts and changes of texture, but middling shades are just trickier to balance. The different textures here help a bit – mercerised cotton as against a fine crewel wool.
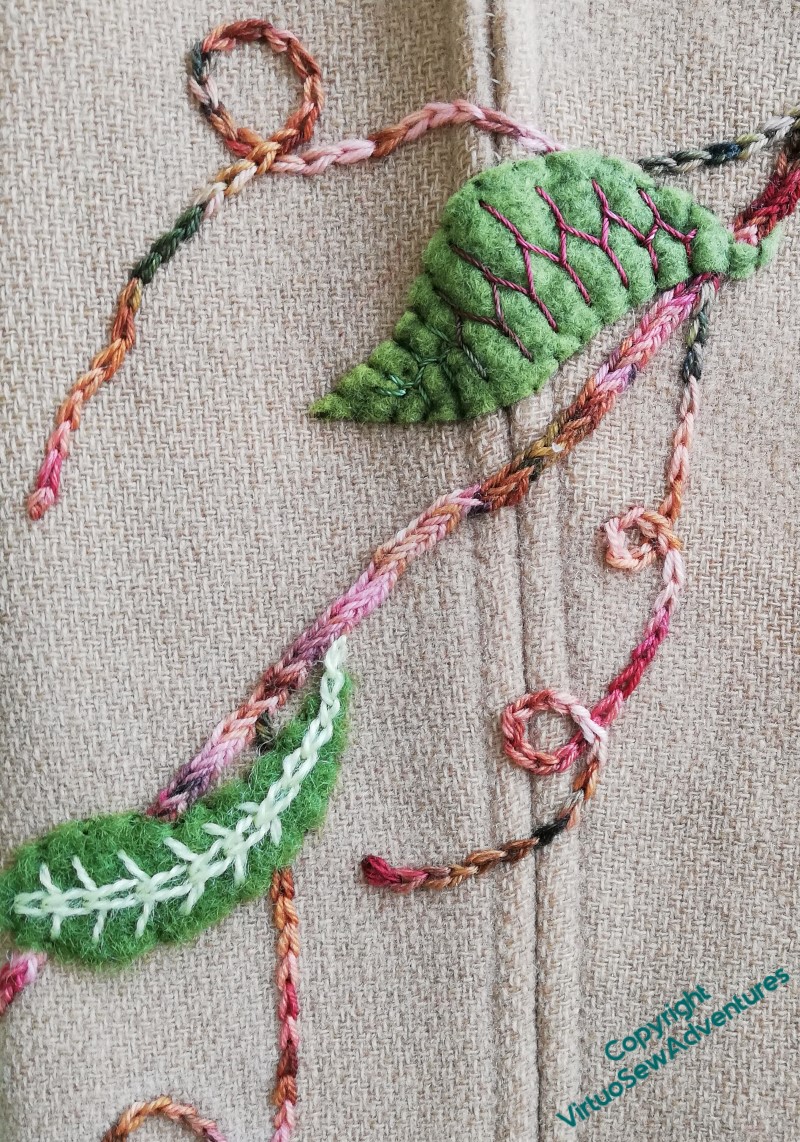
Wheatsheaf stitch down the centre of the lower leaf turns into chain stitch as the leaf narrows, and the Cretan Stitch in the upper leaf presents a nice contrast, dark red-browns in a finer yarn opposed to the fluffy wool of the lower leaf.
All of these leaves also run over one or other of the seams I had to release to do most of the stitching, so they were a bit trickier for that reason as well. I will have to steam-press these when I’ve finished, to settle the seams back the way they should be.
This picture also shows that I am adding chain stitch tendrils. One of the things I learnt from all the Online University courses with Thistle Threads is that sometimes More Really Is More. As most of the stitching came together, the jacket still didn’t look quite luxuriant enough or joyful enough, so again, my Mam modelled it for me, and I drew in tendrils in chalk to stitch over later. That way I could be sure they made some sort of sense when the garment was on..
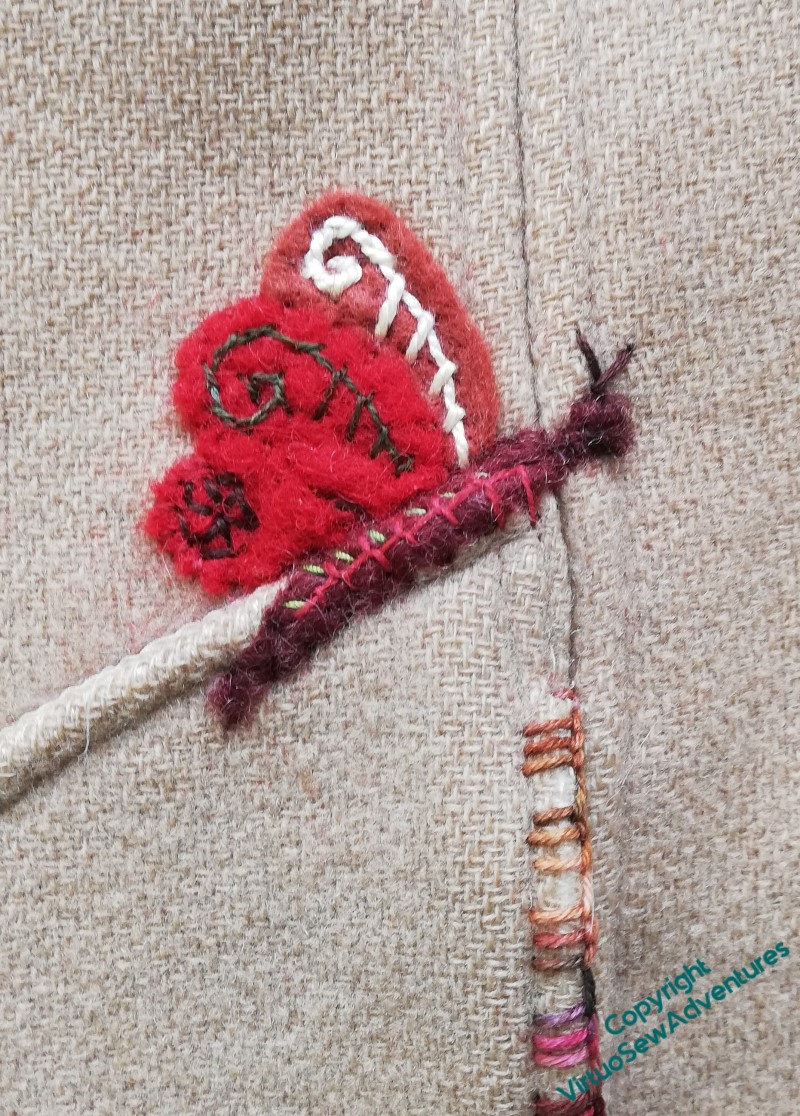
Some of the leaves over seams were to cover patches of wear, and as I looked over the jacket, I found more wear, on the top of one of the pockets and down the pocket edges.
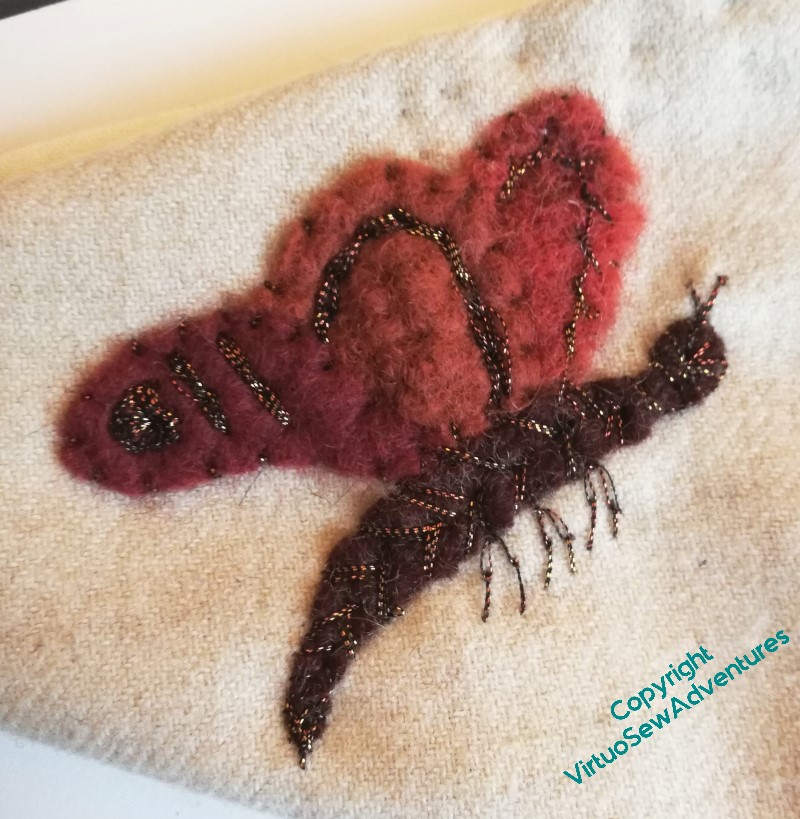
Taking the pockets off wasn’t a good choice, as the fabric would look different underneath them, so I had to think of something else to do, and this is it. Grouped blanket stitches down the edges of both of the pockets, and a sneaky little butterfly to cover the bit of wear on the top of one of them.
You can see that the butterfly is one case where I’ve added lots of little details, including tiny little stitches on the body to break up the fragment of dark felt that I needlefelted in place as the starting point.
Who would think the top of the pocket was worn right through the top layer of fabric?
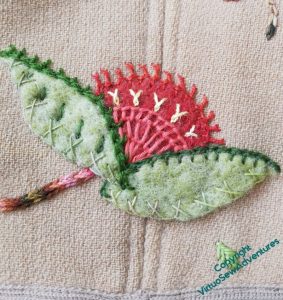
Little Jacket – dealing with a difficulty
Remember this one?
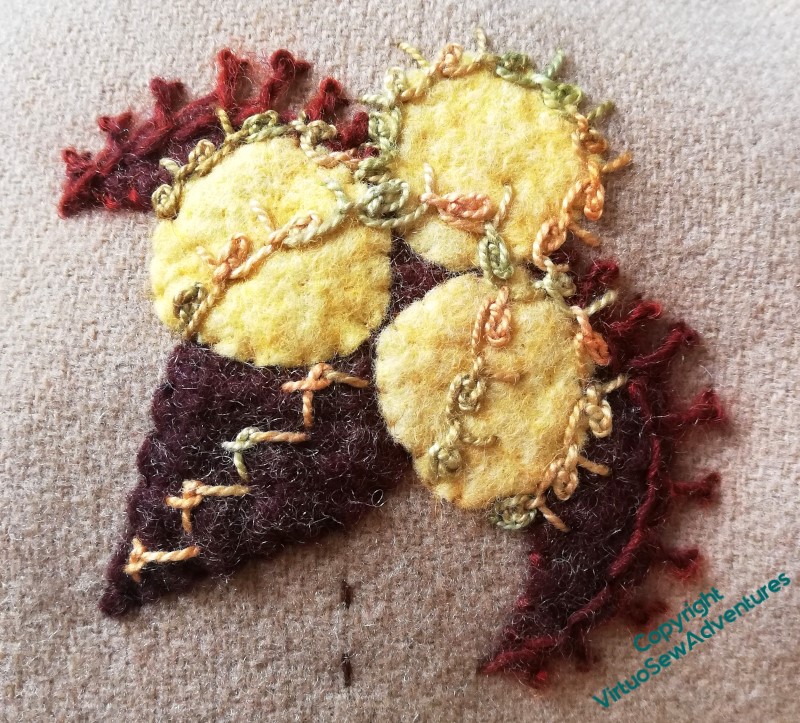
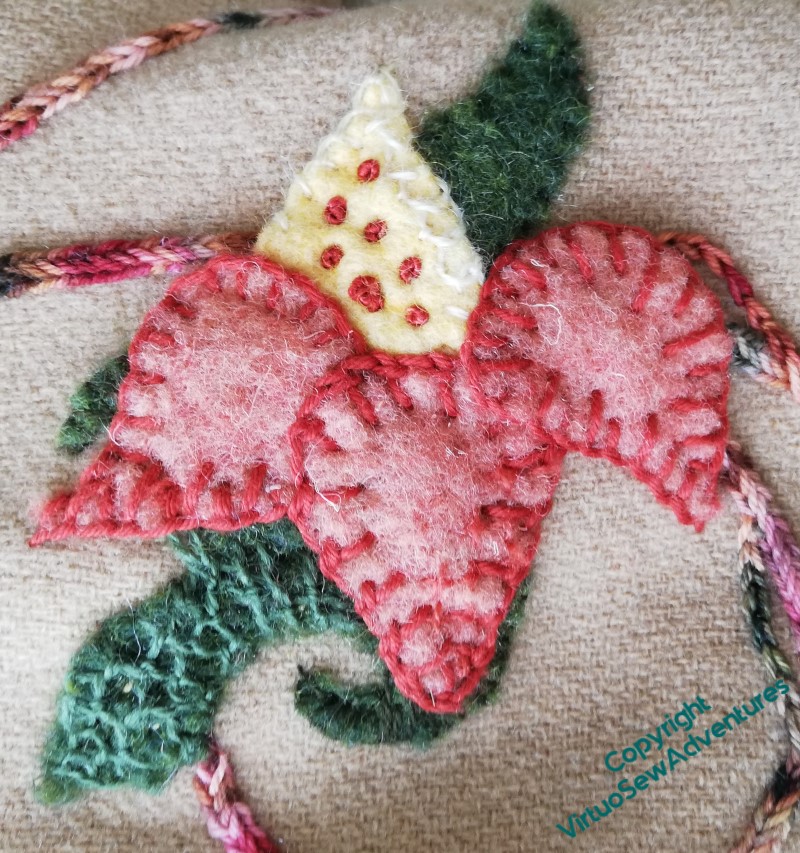
All the stitches came from Edith John, I think. Crested chain edging on the brown petals, and an odd combination of rosette chain and blanket stitch in the yellow-green pearl cotton. The stitch running in a spine down the lower brown petal is called “Wing Stitch”, and looks to me like a cross between fly stitch and twisted chain stitch.
I liked the stitches, but not the effect, and one way and another, I couldn’t work out what to do with them all. So I unpicked it and stitched other things along the way, playing with textures and threads and hoping that inspiration would return…

I took out all the pale variegated pearl cotton, and decied that what I need to do was to simplify the shape, and make it less frilly. So I’ve left the crested chain in brown bordering the top petals, but pulled everything else in and calmed it down. Blanket stitch edging the pale circles, and a spiral of twisted chain stitch to pull them together.
It still doesn’t really look like any flower that grew, but I think it makes a better pattern, and a better contribution to the whole thing.
And that is what matters, after all!
Still more on the Little Jacket
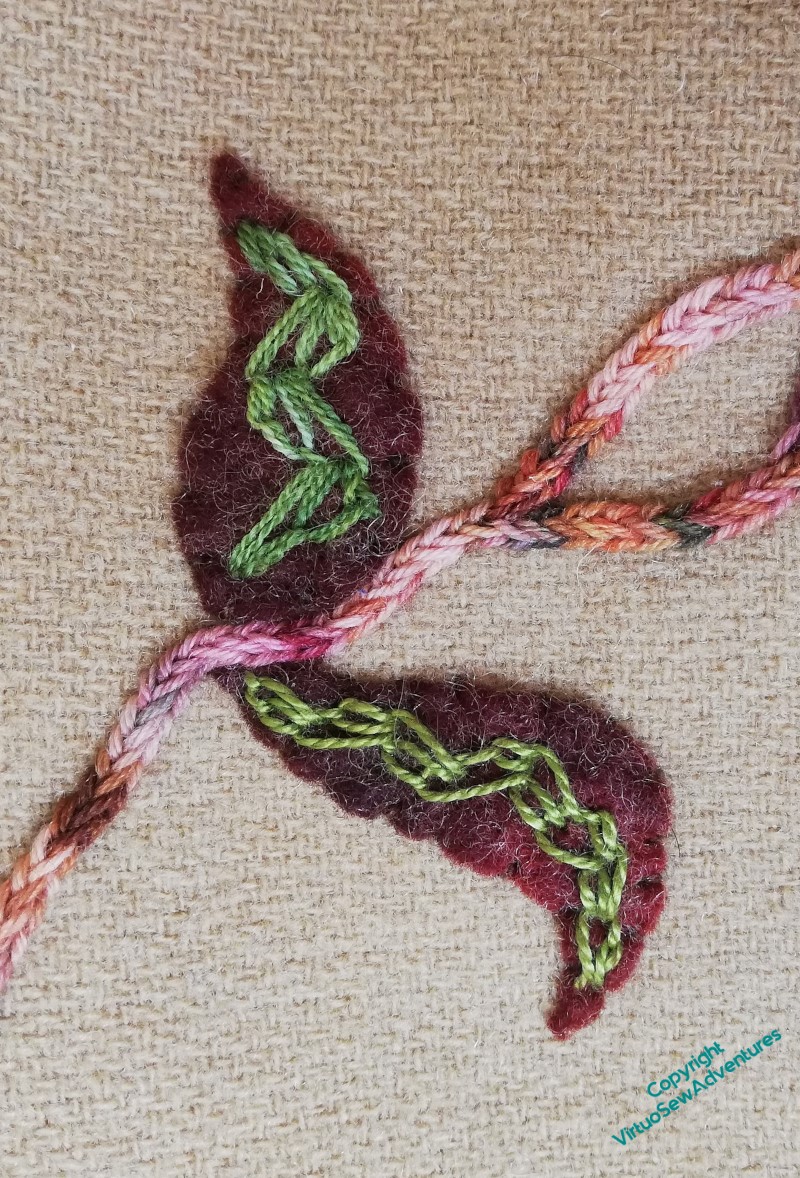
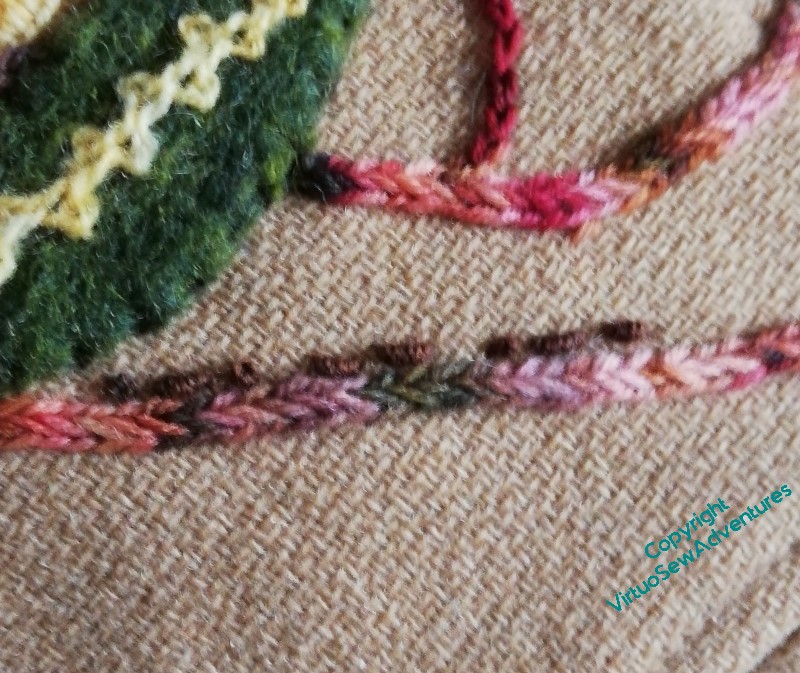
The two stitches here are both chain stitch variants – wavy chain (top) and shell chain (bottom). Wavy chain is a tricky one to use, because it is very difficult to curve, which rather limits the applications it might have. It does a good imitation of ric-rac or braid, but so far that is the best I’ve managed with it. Suggestions on a postcard, please!
Shell chain does take curves nicely, and can be used in most places you might think of using closed feather stitch or heavy chain stitch.
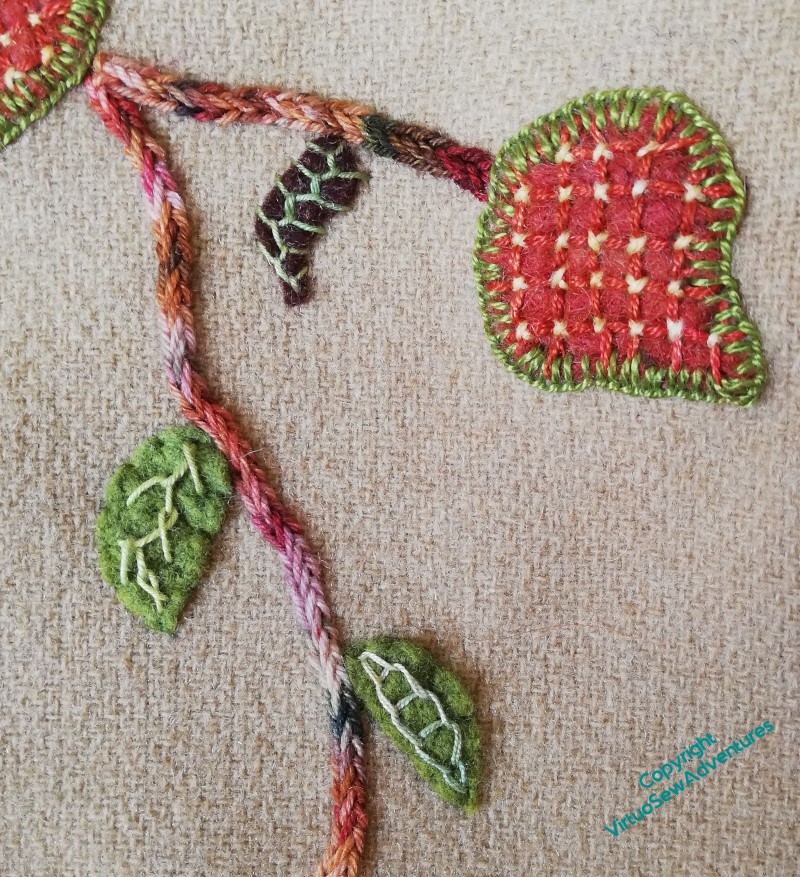
There are three of these buds, or berries, and they seemed a perfect place for trellis couching, which has been a favourite stitch ever since the first embroidered cushion cover I ever did. I’ve edged them, rather conventionally, I’m afraid, with ordinary blanket stitch, and the leaves use Cretan stitch, another of those odd variants, which alternates feather stitch with twisted chain stitch, and then open chain stitch, which one of my books describes as “an ugly stitch, fit only to be the basis for ornamentation”. Which seems a bit harsh.
This final flower took a bit of jockeying with, because I didn’t quite place the original green elements as I might have done if I’d left them until later. Be warned by me, and when you start to get tired, STOP! Otherwise it takes ten times as long to sort out afterwards
However, I got there in the end, I think, with some chained blanket stitch, some French knots, and some needlelace stitches on the calyx.