
Tag: New Techniques
Another decision to make!
Underside couching, I’ve decided, is rather like satin stitch. In concept it is simple, not to say obvious. The execution, accurately and aesthetically, is very much less so!
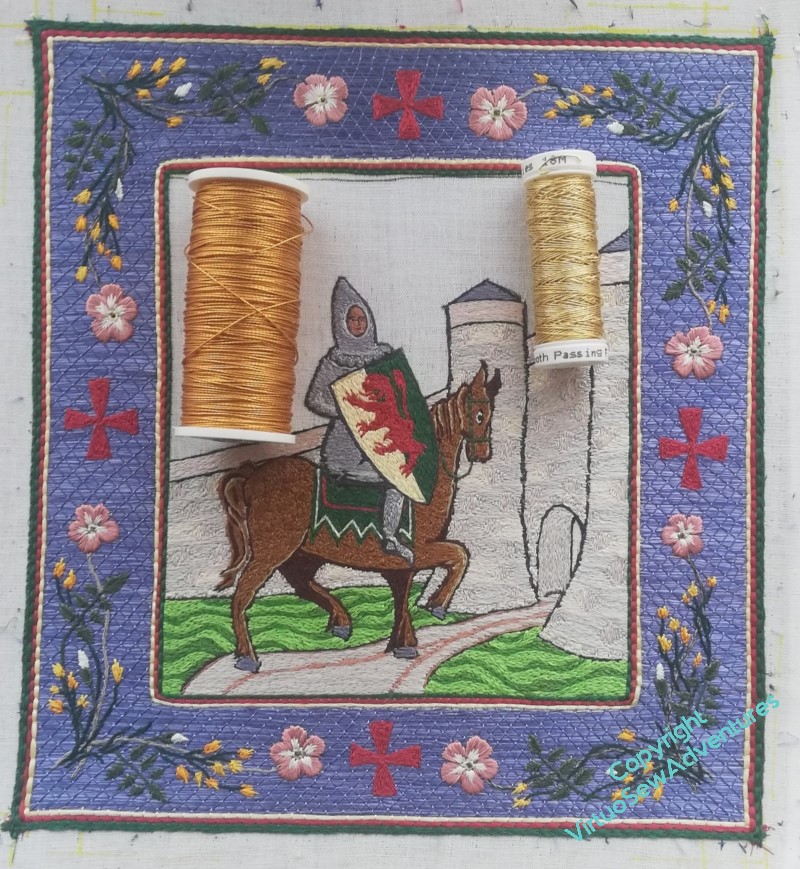
I had intended to use the gold thread left over from the Amarna Family Group as my thread for William’s background, in the interests of economy, if nothing else, but then I had advice from Tanya Bentham and others, to at least try the Smooth Passing, which might for a multitude of reasons behave rather better.
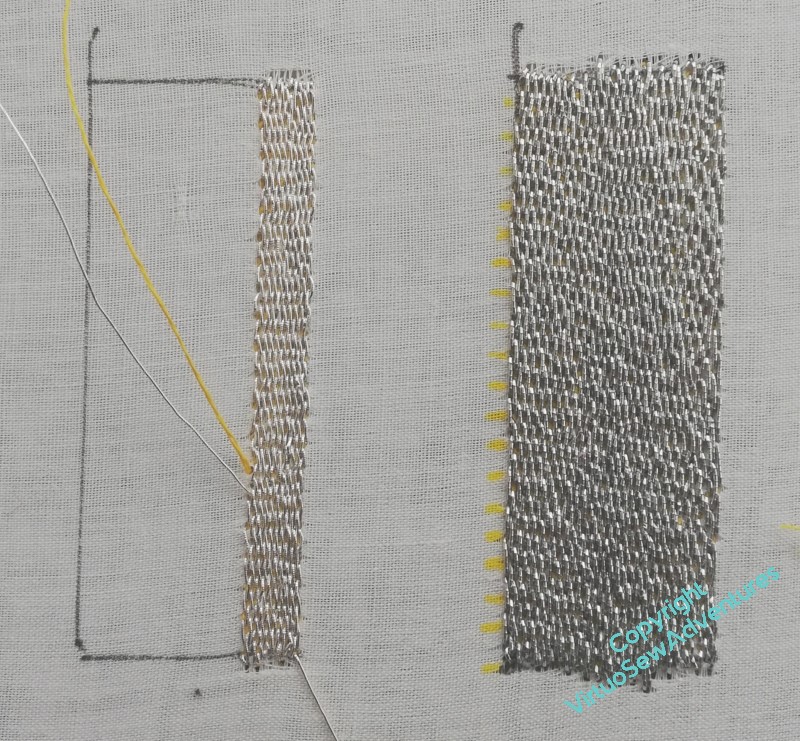
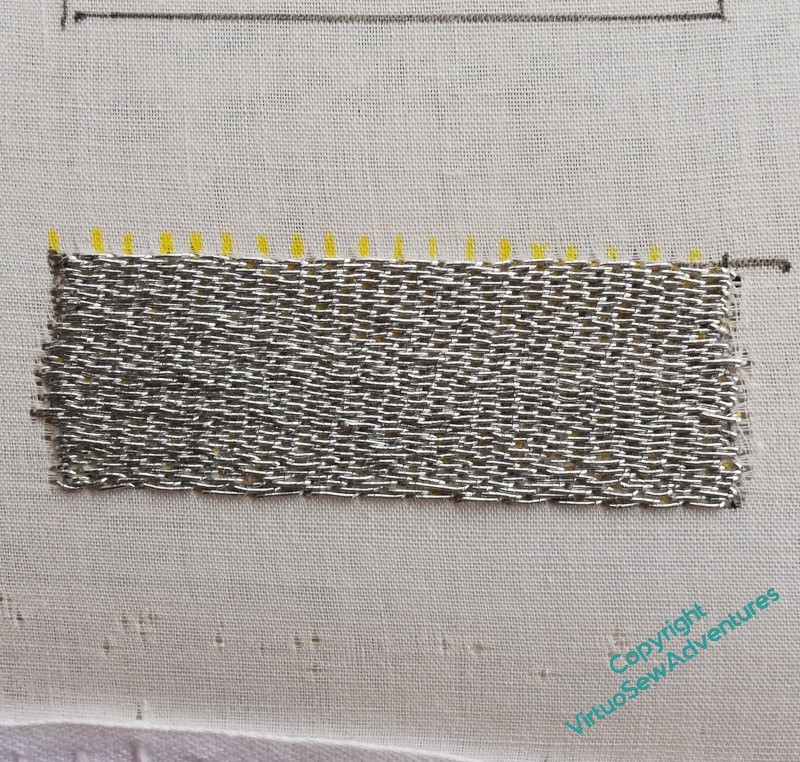
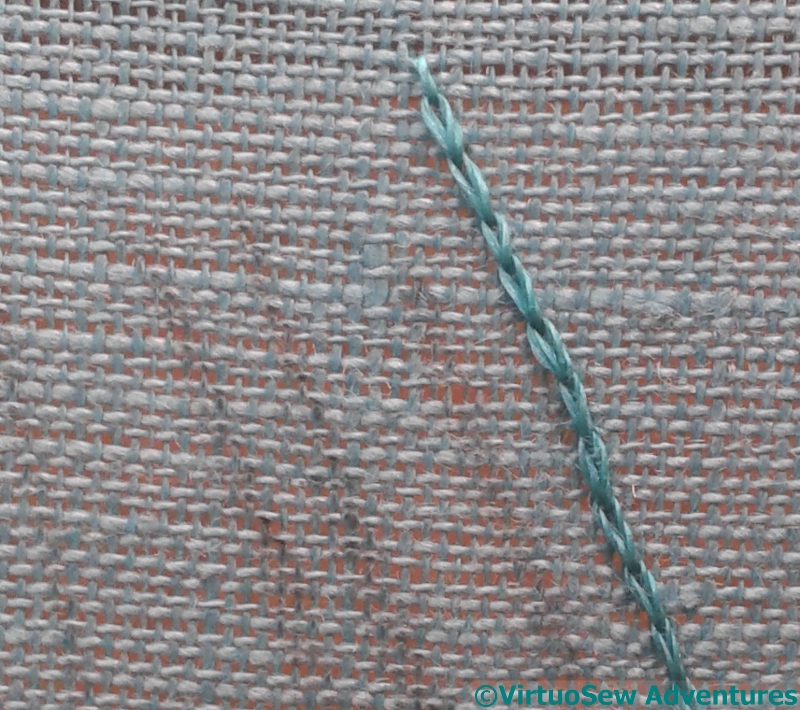
So here you see the second practice block started, again using silver, but this time smooth passing thread.
The passing thread is, as suggested, much pleasanter to use, and creates a smoother and less shadowed surface, which in turn, I think, should help the pattern I intend to use. Which, you may note, I’ve not yet got around to practicing!
However, that brings me to my decision. I do not think that I can be certain that the spool of Gold Smooth Passing I have left over from a Thistle Threads project will finish the job, so I shall have to buy some smooth passing. And it turns out that Gold comes in more than one shade!
The decisions are never at an end, are they…
And since I’m working on pulling the Amarna pieces together properly at present, I can’t claim to be giving my whole mind to the decision-making!
Practice Beforehand

The crosses in place, and the whole border looking very much like a Book of Hours, or at least, a rather tame Book of Hours, I sat back and drew breath.
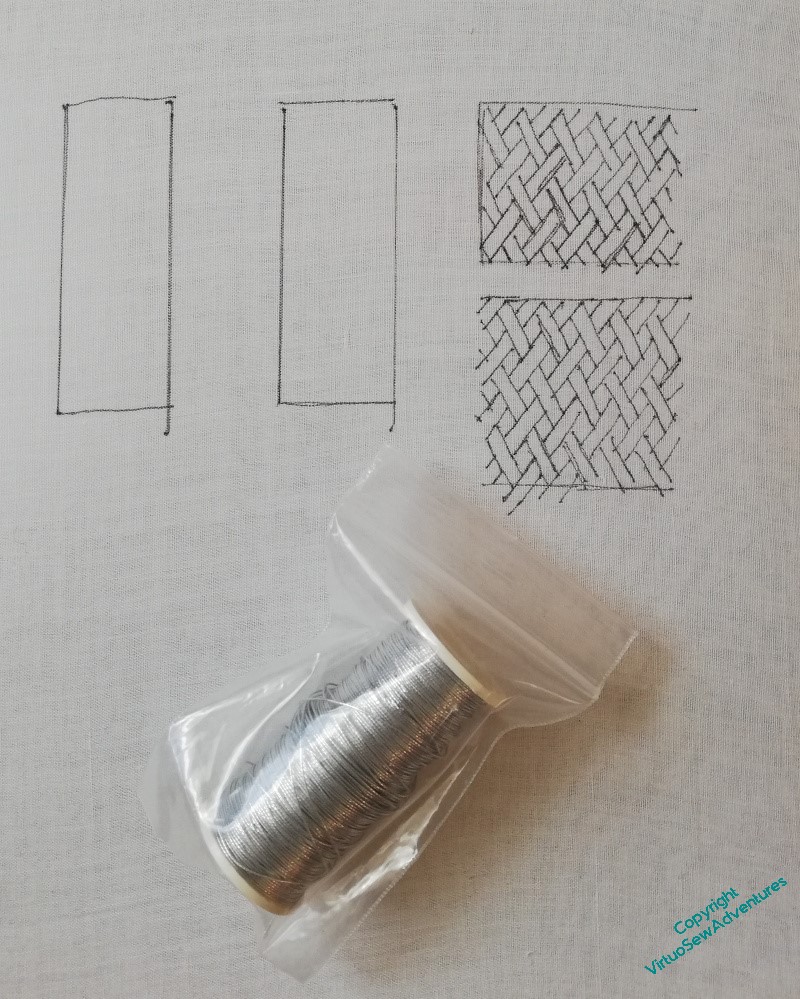
Having got William and his border done, and being really very pleased with how he’s turned out, I now need to tackle the sky. And from the first, I have intended the sky to be in basketweave pattern underside couching, which is an entirely new technique to me.
Regular readers may have spotted that I only rarely practice beforehand, regardless of the technique, preferring to throw myself headlong into the novelty, mind concentrated by terror. The exception tends to be in goldwork, when an exception occurs, and indeed, I had some of the fabric stretched in a frame, ready to practice, well before I had got William to that stage of finishing. Mindful of the advice from Tanya Bentham’s Opus Anglicanum book, however, I decided not to try practicing while I was still working the silk. In winter it is hard enough to keep the hands from catching on silk without making it worse by using metal threads!
I’m using silver for my practice pieces. One could practice with silk, or pearl cotton, but they would both spread and cover any failure to keep the lines close. I think this silver is the same size as the gold I intend to use, so it will make a better practice material.
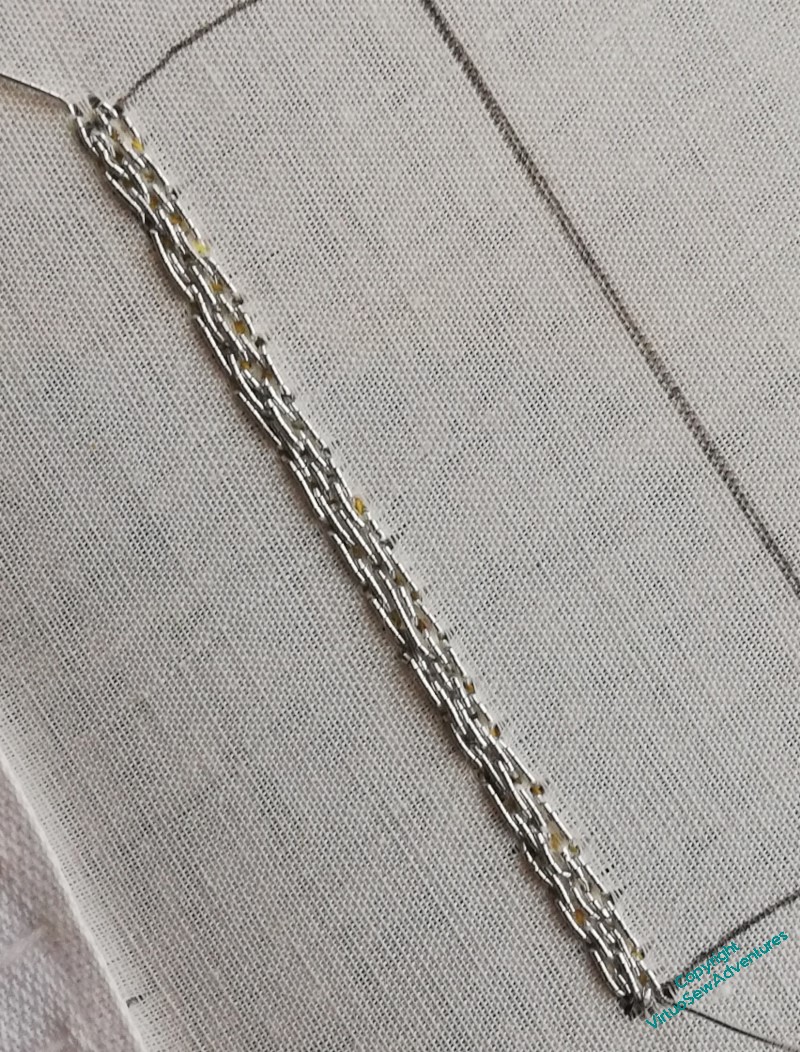
It’s easy enough to understand the principle underlying underside couching, but there are all sorts of hazards, As always, I suspect that once the management of the thread becomes second nature, all the difficulties will fall away, but packing the thread closely without cramming, making sure the stitches lie happily on the surface, and stopping the couching thread (a sturdy linen, beeswaxed before use) from showing, are all proving challenging at present.
I am determined to practice this properly, so I’m going to do this inch-wide strip before even considering practicing the basketweave pattern.
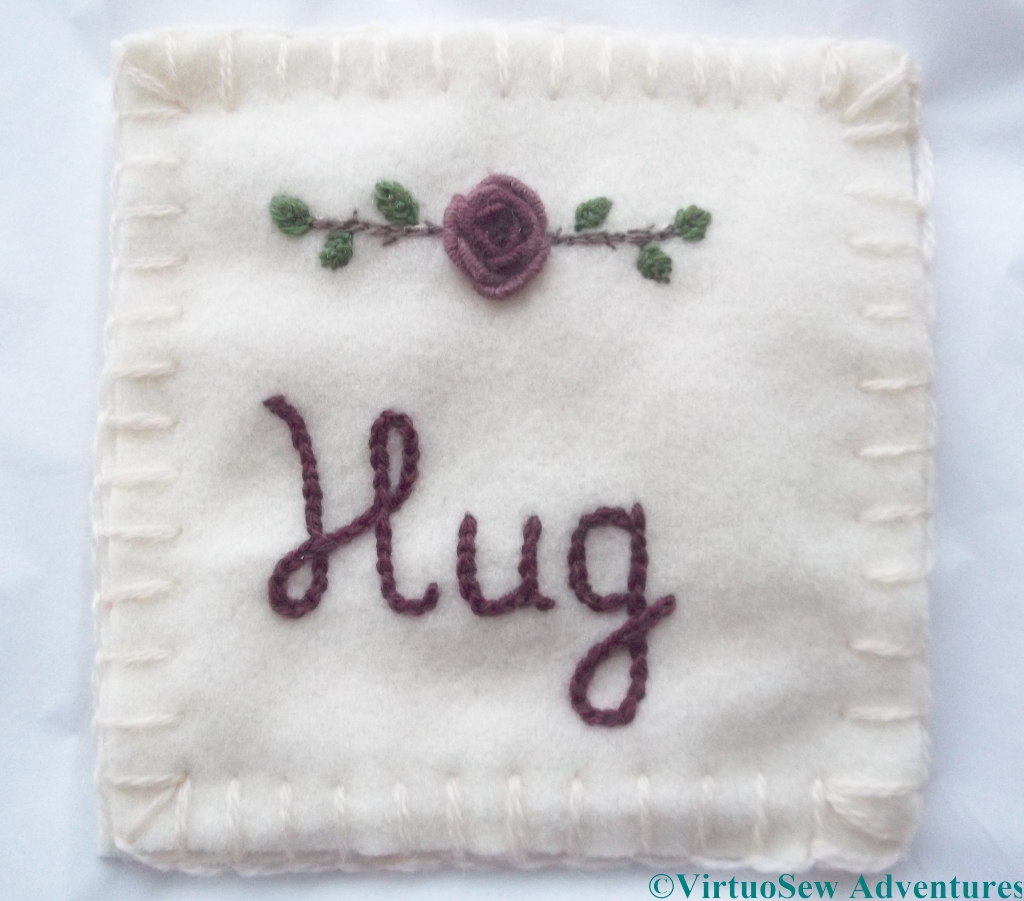
I have been looking further at Ko-fi, and how it might be used as a shop front, at least for digital items, and as an experiment, I’ve uploaded the Hug For A Handbag instructions to my Ko-fi Shop as a free/pay what you feel download. If anyone would like to go through the process and tell me what it’s like, and give me the opportunity to see what happens from this side, I’d be very grateful!
The Head of Nefertiti – further details
Additions For Nefertiti
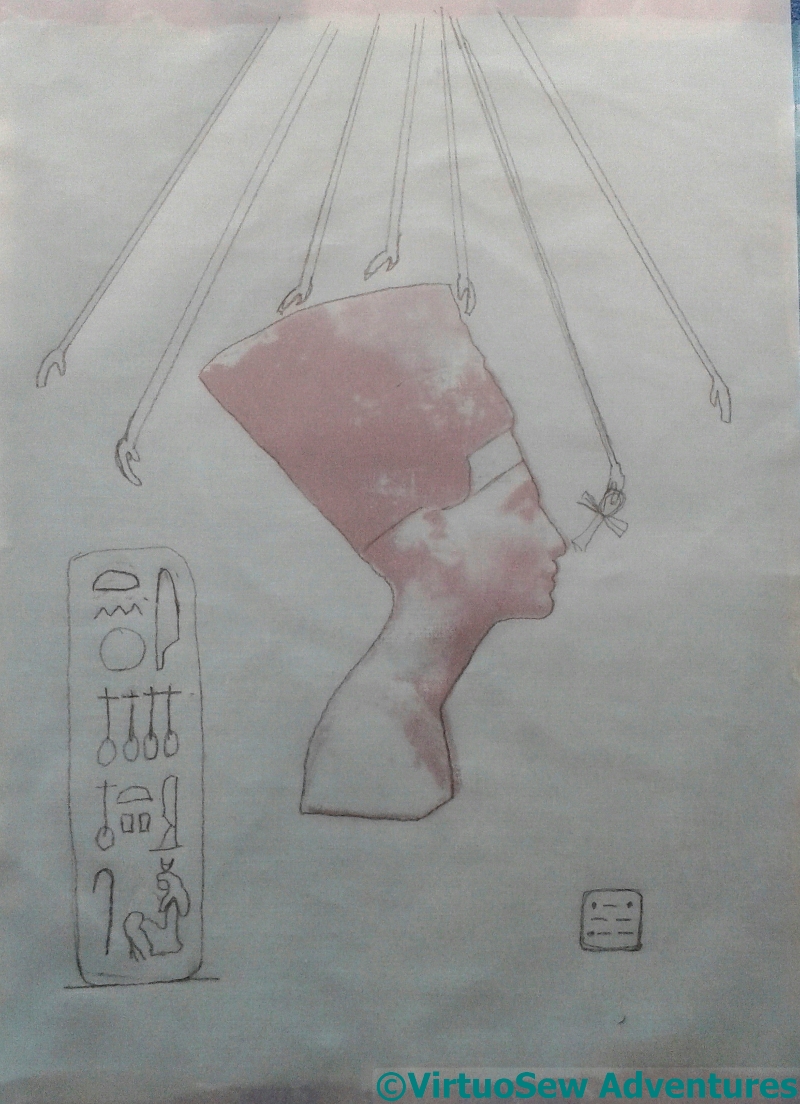
I suddenly realised that I haven’t got any representations of the Aten in the panels. Considering that Akhenaten’s new, monotheistic devotion to the Aten actually created Amarna (Aketaten in his day), that is more than a little remiss of me. So the extra details I am planning for Nefertiti – shown here, drafted on tracing paper laid over the the print I didn’t use for stitching – begin to right that wrong.
I’ve drawn the rays of the Aten ending in little hands outstretched in blessing, as seen in many wall-carvings and paintings at Amarna. For some reason (research to be done…!) the hands nearest the noses of Nefertiti and Akhenaten often hold an ankh, so that is also included.
I’ve added in Nefertiti’s cartouche, although I think I may have drawn it too large for the design as a whole, and my own, which will include my initials in Morse Code, as this is a standalone companion piece.
Barely There
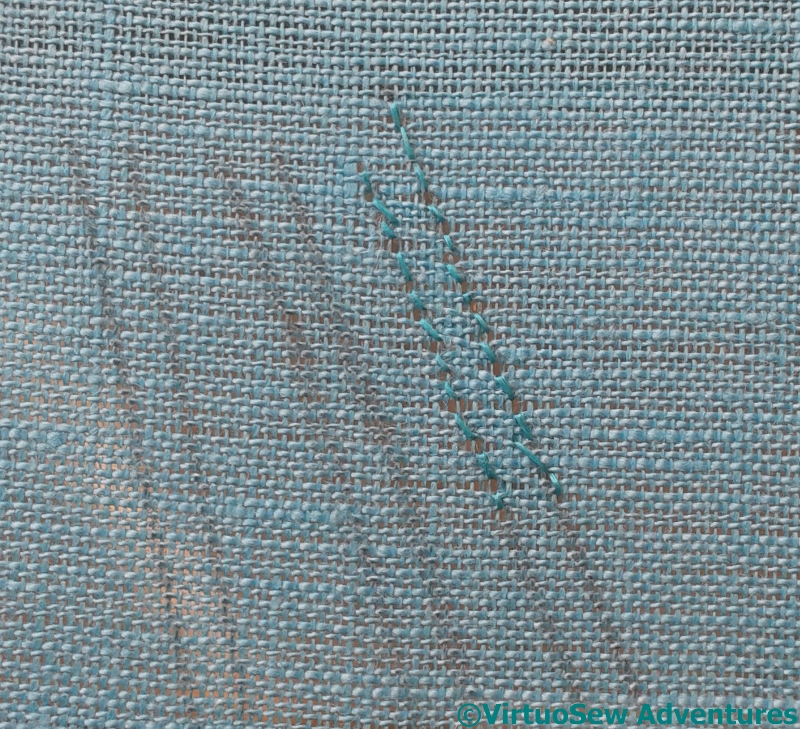
I want the lines to be there, and yet not there, so I found some filament silk that I bought at Texere Yarns before they closed their store, and had a go with it, using reverse herringbone stitch, as I did for the contours of The Map of Amarna.
And it completely disappeared.
Oh dear!
Much Better
So this is the next version, reverse chain stitch using a 2-into-1 twist. I’m much happier with that, although twisting the thread before I stitch with it does rather slow down the stitching part of it!
But still, here I am, stitching with hand-twisted thread, twisted by me. Never would fifteen-year-old me have believed I would be doing that!
If my Grandmama could see me now….
Tudor Rose Progress
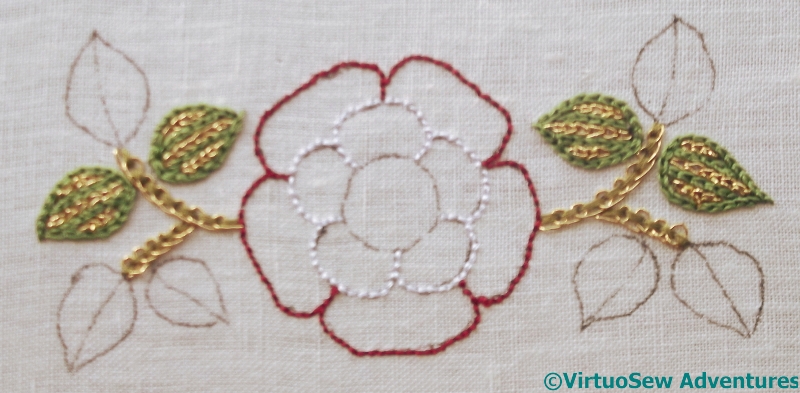
Rose Outlined
At this point, the challenges abruptly increased… The petals are to be filled with Up and Down Buttonhole Stitch With Return (which is one of the stitches from the Tudor and Stuart Goldwork Masterclass), but in a combination of metal and silk threads. The outer petals will be red and gold and the inner petals white and silver, and we are explicitly instructed to finish the back stitching (both white and red) before tackling the filling.

Detail Of Red Petal
The red silk is used for the return – the straight bar stitch – and the gold for the up and down buttonhole stitch. This means, of course, that there are long stitches on the back of the fabric, but it also creates a rather lovely chequerboard effect of gold and red. Up and down buttonhole stitch is one of my favourites, but as a detached stitch it offers a few challenges, especially in the gold thread. I was very glad to be working this in a frame resting on a stand, as there were times when both hands, and one of my bone stilettos, were needed to bring the gold thread under control.
I’ve noticed that in the metal thread, the stitch is squarer than in the silk, which compressed itself into a much denser fabric. I suppose this adds to the contrast in textures, but it will be interesting to see whether it becomes more even as I become more experienced with it!

Red Petals Complete
I’m rather pleased with it so far. In a couple of the petals, the rows somehow are not as straight as they should be – I’m not quite sure how that happened – but, if you click on the image you will see the larger version, and I think it shows evidence of improvement in technique. Which, after all, is the whole point of my following these courses…!
The Tulip Slip Pincushion is Finished
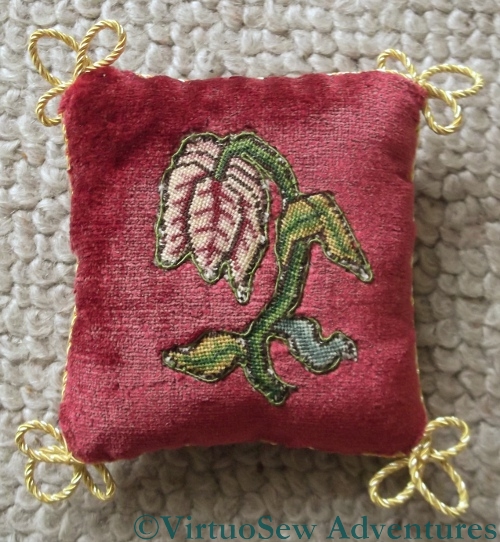
The Tulip Slip Pincushion Completed
I have finished the Tulip Slip Needlework Nibble. I used a sewing machine to attach the silk brocade backing to the silk velvet front, because my fingers were still shredded from finishing the Floral Glove Needlecase, and the velvet was very hard to stitch.
The amount of stuffing needed for even quite small items never ceases to astonish me. By the time I finally managed to finish stuffing this one I was wondering whether it opened into the Fourth Dimension!
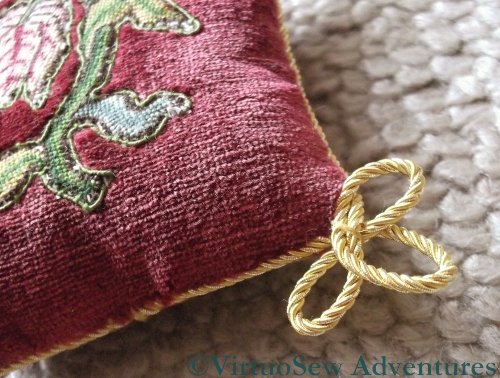
The Tulip Slip Pincushion - Corner Detail
The corner detail shows the trefoil shapes in gold cord used to finish the piece. Those, too, were rather a challenge. I was rather wishing for a third hand to help me hold the loops in place while I attached them, and as you can tell from looking at the whole thing, some of the loops are loopier than others.
The corner detail also shows more clearly the effect of the silk gimp outline which creates a crisp edge for the shape, and helps to keep the pile of the velvet from encroaching on the tent stitched Tulip.
This was rather fun to do, and it will make a great addition to my planned “winter decoration corner” of historical needlework projects…
Tudor and Stuart Goldwork Masterclass – More Gold!
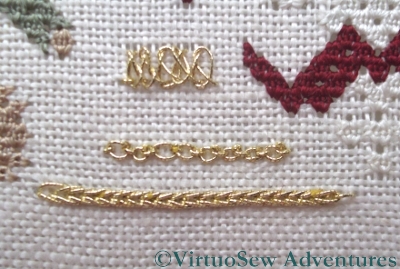
More Goldwork On The Sampler
I’ve been doing more work on the metal thread embroidery on the Spot Sampler. The photograph shows (top to bottom) Braid Stitch, Cable Chain Stitch, and Heavy Chain Stitch.
I’ve used the real metal thread and the Japanese needle for all of them, which may have been a mistake. At the very least, the Japanese needle is a tool that I’ve not got to grips with, and which has had unanticipated side-effects on my technique!
As you can see, Heavy Chain Stitch worked beautifully. There are only a couple of places where the thread has broken and shows the core, and it has created a beautifully smooth and glimmering line.
With the Cable Chain Stitch, I think I need more practice in keeping the tension correct when using a “stab-stitch” technique, which is necessary because Japanese needles are short. This stitch is one of my favourites, but it was actually quite a struggle here, precisely because I couldn’t take up a piece of fabric on the needle as I usually do.
This was even more the case with the Braid Stitch. In fact it is worse than that. It wasn’t clear when I was stitching it, but now I see this section enlarged in the photo, it’s pretty clear that I’ve actually got myself into a dreadful tangle with a couple of my braid stitches. I need to pick up my practice cloth, fish out all my books, and try again. And yet I know I can work this stitch beautifully – I worked it on the logo for the Teddy Bear Cot Blanket, and for the Prince’s Bow on the Persian Fantasy!
Australian wildlife – backgrounds
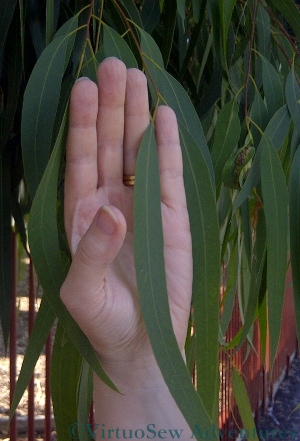
Eucalyptus Leaves
One of the hallmarks of Australian Embroidery, as shown in the magazines, is a willingness to mix techniques and “play”. So while I have no idea of how I am going to show the Rosella, I’ve been thinking in terms of creating a background of tessellated Eucalyptus leaves, one way or another. There are several ways this could be achieved, which would be to some degree in the spirit of what I have read, and I still haven’t worked out which to use. Although I hate working samples, I may have to do so this time, as I haven’t the faintest idea whether they will work!
- For example, the simplest, once I’ve developed and charted a tessellation, would be to work the background on canvas, using complete coverage. That might be a little dull..
- Another possibility would be to use a painted canvas or to overlay the canvas with gauze, and then just work the leaf shapes themselves and leave everything else un-stitched. I like that idea, but I think it will need playing with, to get the right gauge of thread to provide suitable coverage and at the same time not puncture the gauze too obviously. I won’t be able to unpick it either, so stitching it might be a nervy business!
- Then there is the possibility of using waste canvas over a felt or a linen background fabric, so I can chart the tessellation without being stuck with canvas as the whole background.
- Finally – although this is well outside my usual range of stitching – I could create cut-outs of the leaf shapes and sandwich them between layers of gauze, with minimal stitching to hold them in place.
Gosh. When I sat down to write this, the last couple of ideas hadn’t come to me at all! That’s one of the unanticipated benefits of blogging, because in sitting down to explain what I am doing, or planning, I concentrate so much more on the subject that I get even more ideas, and what’s more, I’ve got them written down, so when I actually get to that part of the project, I have my notes – often illustrated notes! – to help me reconstruct my ideas.
It would be nice to work this while I’m actually in Australia, using Australian sourced materials, so I think I need to spend more some time planning the project before our next visit.
Starting the Christus Natus Est Or Nué Panel

Christus Natus Est - Materials
I know I should try to limit the number of projects I work on at once, but my fingers have been itching to start the Christus Natus Est Panel, and I finally decided to have a go.
I bought the silk thread (Pearsall’s Filoselle) and the gold passing thread, at the Knitting and Stitching Show in Harrogate last year. The Filoselle is a beautiful stranded thread, and I’m using a single strand to couch down the colours of the thread, and a different, very fine thread to couch down the bare gold sections.
I was somewhat afraid that choosing to work my or nué panel in the circular and curving fashion would create considerable headaches, especially in starting the spiral at the centre of the circle, but actually it was fairly straightforward. I’ve put the gold thread into a little gauze bag, which keeps it from unwinding- mostly- and means I don’t have to worry about it snagging or catching as I work
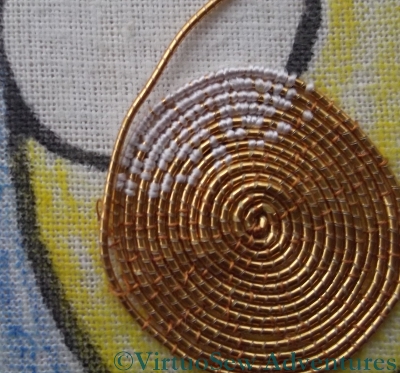
Close-up of Starting The Or Nué panel
As my spiral becomes larger, and the number of colours I am using in each circuit increases, the work will become slower, and more confusing, but so far, I am enjoying it very much. It would be much easier if I had a proper slate frame and trestles to stand it on, as I can see that the pins holding the calico to the frame will need to be moved occasionally as the fabric stretches. However, the silk thread covers the gold reasonably easily, and since I was aware from reading about the technique that the silk would distort the rows slightly, I’ve not been unduly disturbed by the way the spiral isn’t quite circular anymore. It won’t be that obvious when the piece is finished, after all!
In fact I’ve been enjoying myself so much that I just have to be a little careful not to get so wound up in it that I stitch for too long and end up with fuzzy eyes!
Australian Wildlife – Introduction
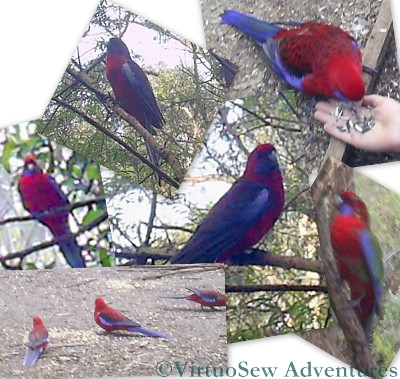
Rosellas
My life and personal circumstances are not often relevant to my embroidery, but in this case…
My husband is Australian, so we try to go to Australia to visit his family as often as we can, which is usually about every two years.
To someone brought up in Northern Europe, among the Oak and Ash and Thorn of Puck’s England (do you know “Puck of Pook’s Hill“?), the blue-green foliage of the Eucalyptus is a strange sight, and strolling through a reserve amid the smell of eucalypt and tea tree, spotting kookaburras, koalas and kangaroos, is an experience which never becomes over-familiar.
In addition, the Australian embroidery magazines have a completely different focus to those in the UK, and a huge variety of styles and projects, like nothing I see at home.
So perhaps it is not surprising that, although I haven’t yet worked an Australian project, I have a huge collection of photos I’ve taken as inspiration, and magazines I’ve bought to read, and re-read, and – frankly – gloat over. I’ve a book about working Australian flowers in Stumpwork, and one of these days I intend to work a bouquet of them…
In particular – being accustomed to rather more dun-coloured birds – I’ve been rather taken by the idea of working something depicting, or inspired by, a Rosella. I took a lot of photos on one of our visits a few years ago, and, as with all of my projects, I’ve been thinking about it on and off ever since.
During our visit at the beginning of this year (we had New Year’s Eve on the beach!), some of the ideas began to crystallise out a little more, and I have been writing them down to make sure I don’t lose them.
Watch this space!
The Glittering Snail – part one
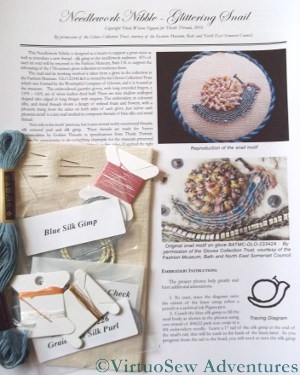
The Snail Kit Has Arrived In The Post
You may recall that in December I wrote about the Thistle Threads project to Stitch A Snail For Storage. We’ve been away for a while, but came back to find a huge pile of post which included a jiffy bag from Thistle Threads.
Since I’ve already printed out the instructions (as soon as I ordered the kit!), I can start just as soon as I’ve gathered my wits and drawn the design on the linen. Even though the basic concept of the design is simple, it will be complicated and probably a little tricky to do, because the snail is only about an inch from nose to tail!
Tricia had two reasons for developing the kit – one was to sell something in aid of the Fashion Museum in Bath, but the other was to introduce some new threads to us. So of course, the first thing I did was to rummage through to look at the the new threads, the silk gimp and silk wrapped purl. They look highly intriguing, and I am looking forward to playing with them…