
Category: Needlepoint
Finishing The Penknife Case
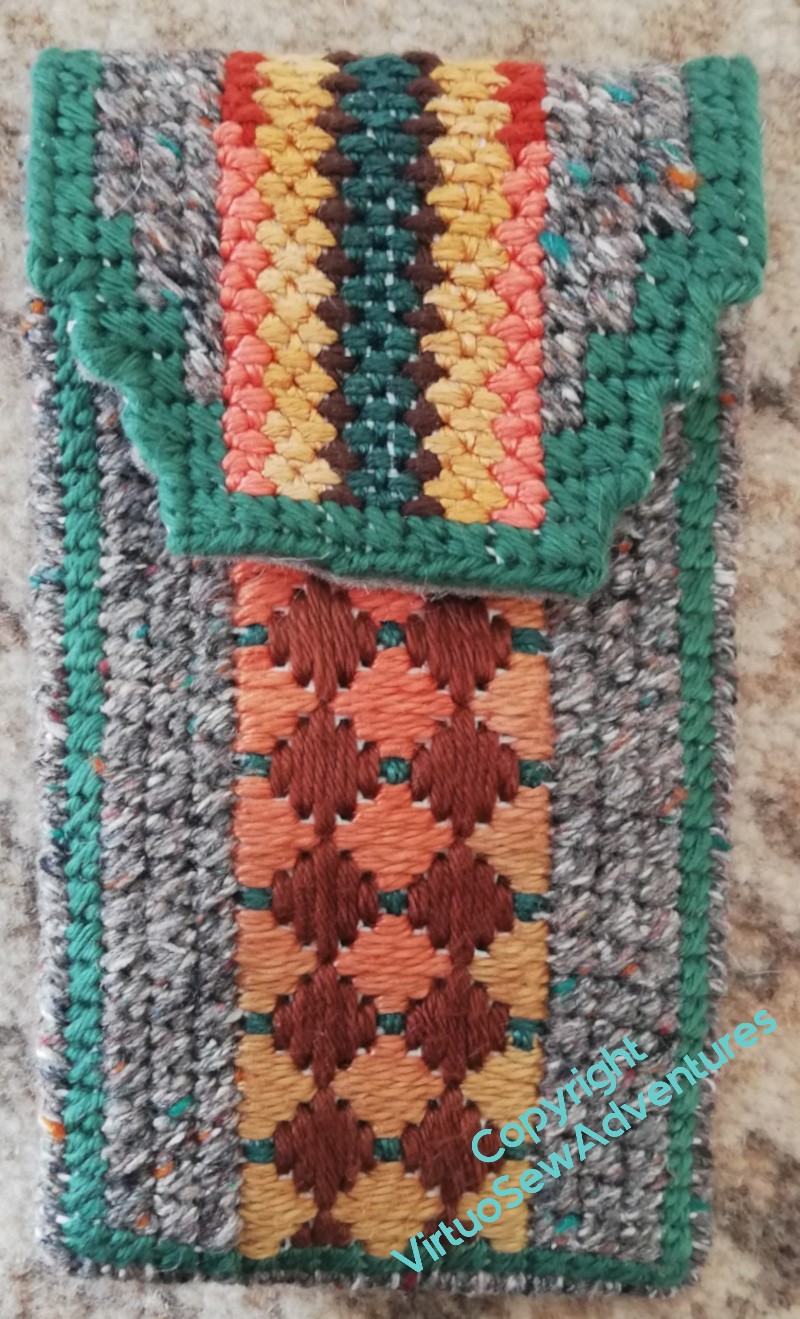
The penknife case came together fairly well in the end.
Some years ago I settled on a satisfactory way of joining two canvas pieces at an edge. It’s a sort of long armed cross stitch, which goes into each hole twice. That means it’s fairly secure, but doesn’t take security to excess, and it’s easy to do, even when I’m a bit weary.
I used the dark green thread I used on the front for the cross stitches, and I think the top, “hinge” seam has turned out well, if a little stiff.
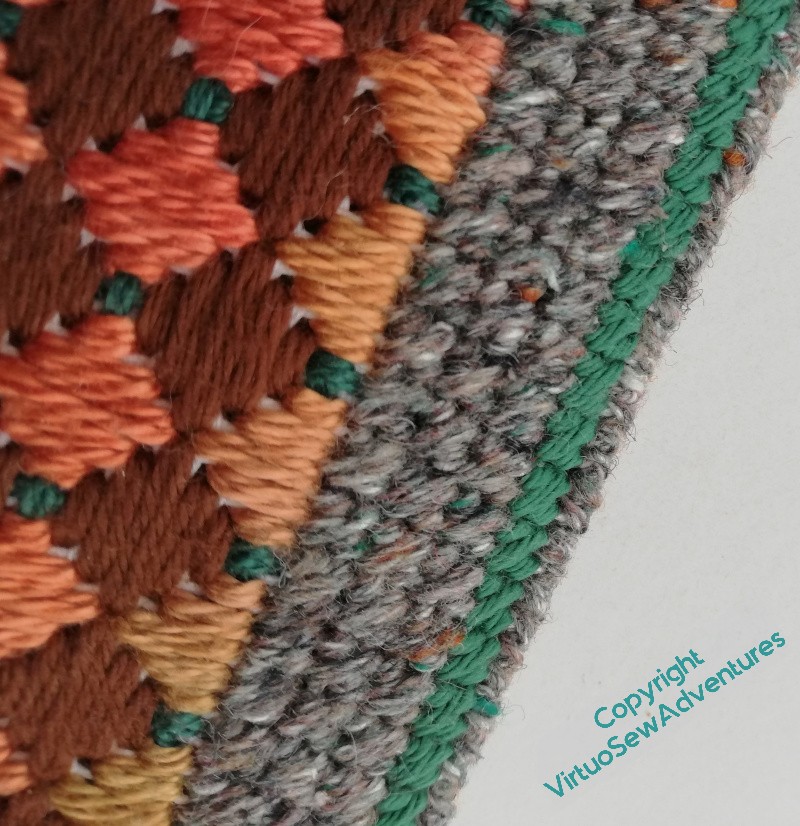
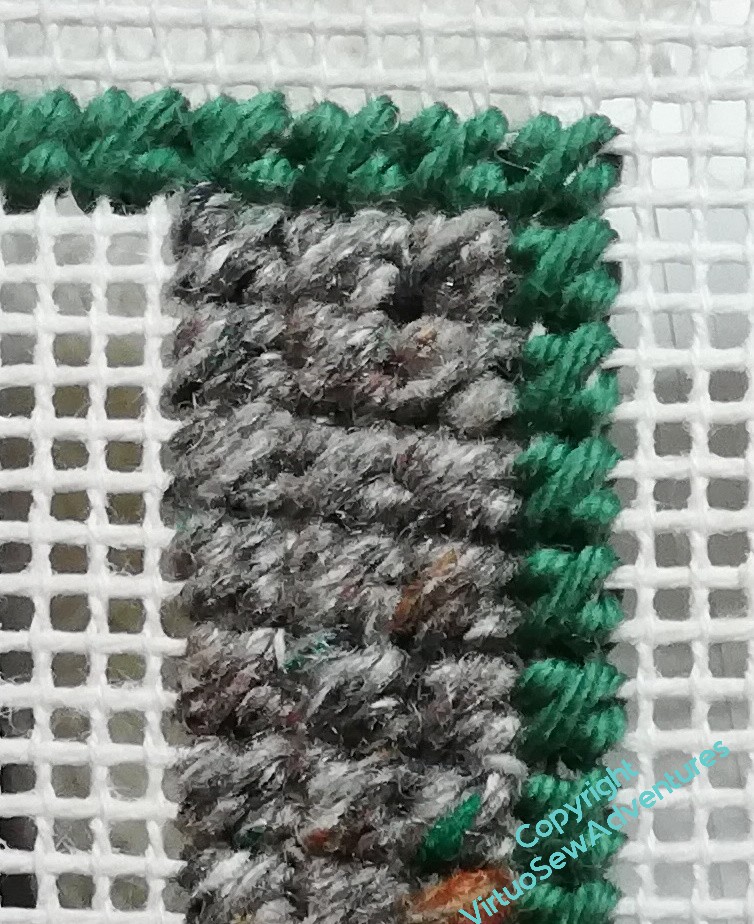
For the side seams, having run out of the green, I used the grey mottled thread.
That was a bit more of a challenge. I didn’t quite have to heave the needle through with pliers, but it was, nevertheless, quite an effort at time.
I don’t think this seam is going anywhere in a hurry!
However, it’s all nicely finished and secure now, and I didn’t buy any thread at all for it. Or canvas. Or felt to line it with.
Given how often avowedly “Stash Busting” projects turn into “Stash Growing” projects, I am going to take that as a significant win!
I believe that by now, anyone who signed up for my talk a couple of weeks ago should have received access to the recording.
Thank you to those who were there at the time, and thank you for the kind comments I’ve received. Please do ask more questions if they occur to you!
More on the Canvaswork Penknife case
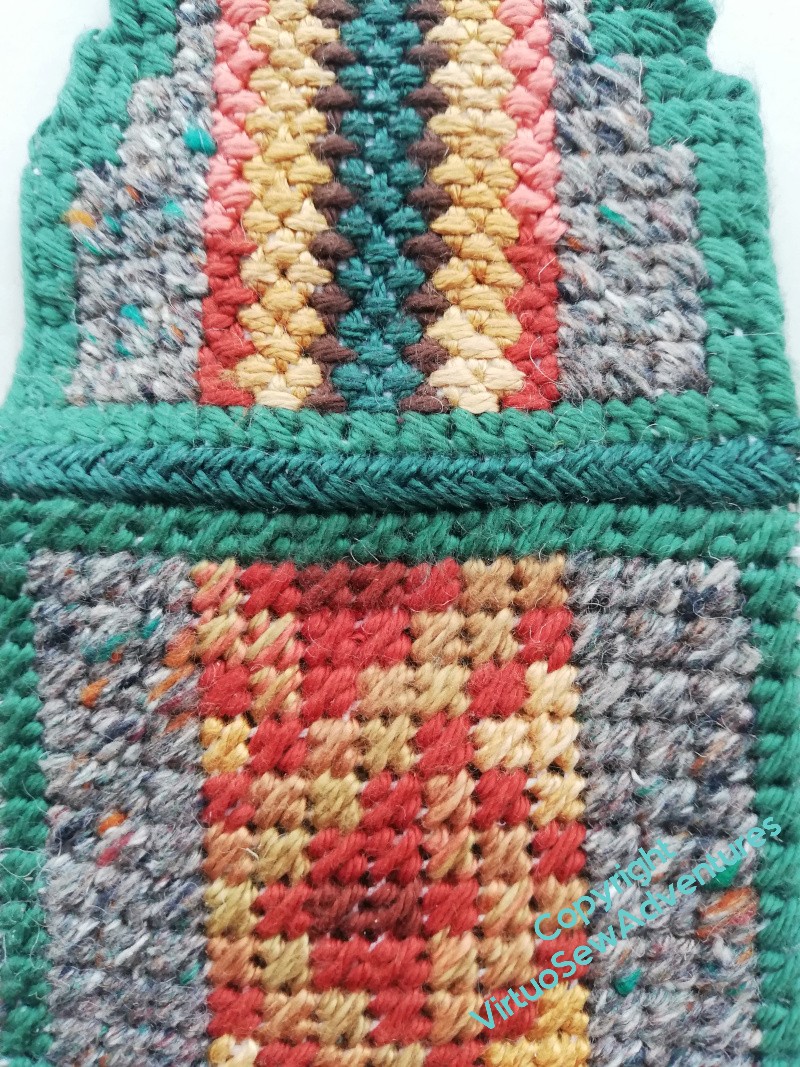
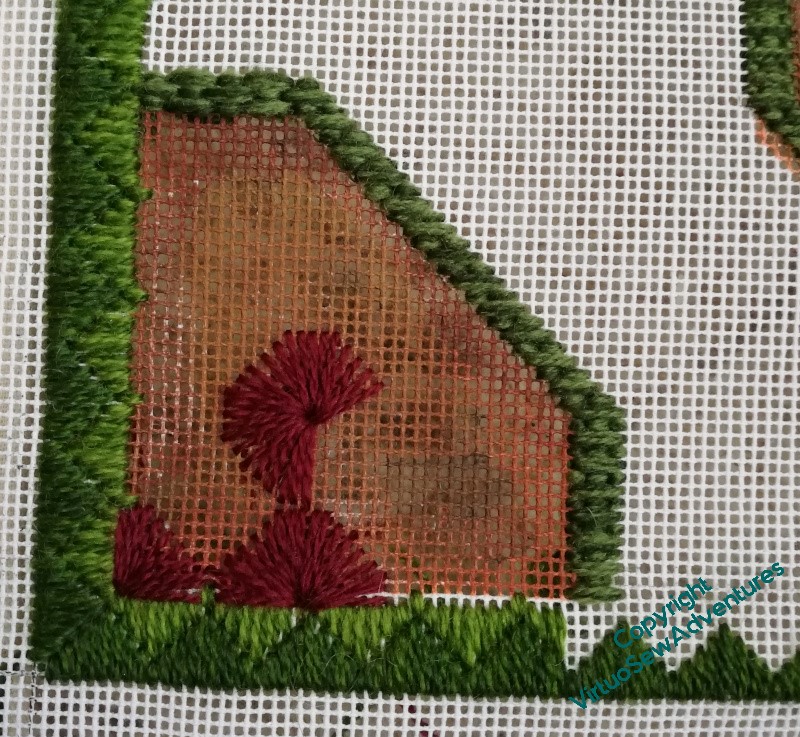
When you last saw this panel, there were gaps. They’ve now been filled with green cross stitches.
Yes, that works, I like the way the Caron Collection Watercolours thread runs from yellow to orange, the brown provides a bit of stability, and the green ties the inside and outside together. . It’s not the stitch pattern I was aiming for (I’m not sure what went wrong), but I like it.
However, that was, if I am honest, the last easy thing about this canvaswork!
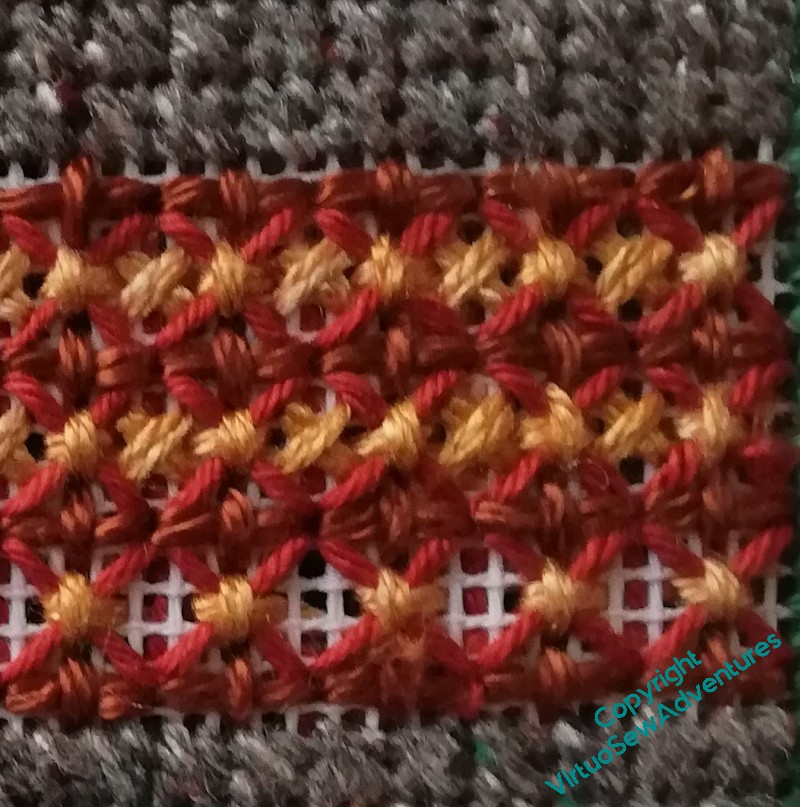
I wanted to put a different stitch on the back, maybe more hardwearing, because I was considering using the finished object on belt loops. This, however, isn’t it.
Again, somewhere along the line it’s not the stitch pattern I was aiming for, and I’m not sure quite what happened. Suffice it that reading charts and diagrams seems to be a somewhat episodic skill for me, and I am at present in an “Off” period!
Furthermore, the coverage I want is requiring too many passes, too much tangling, and looking altogether too busy. Out it comes!
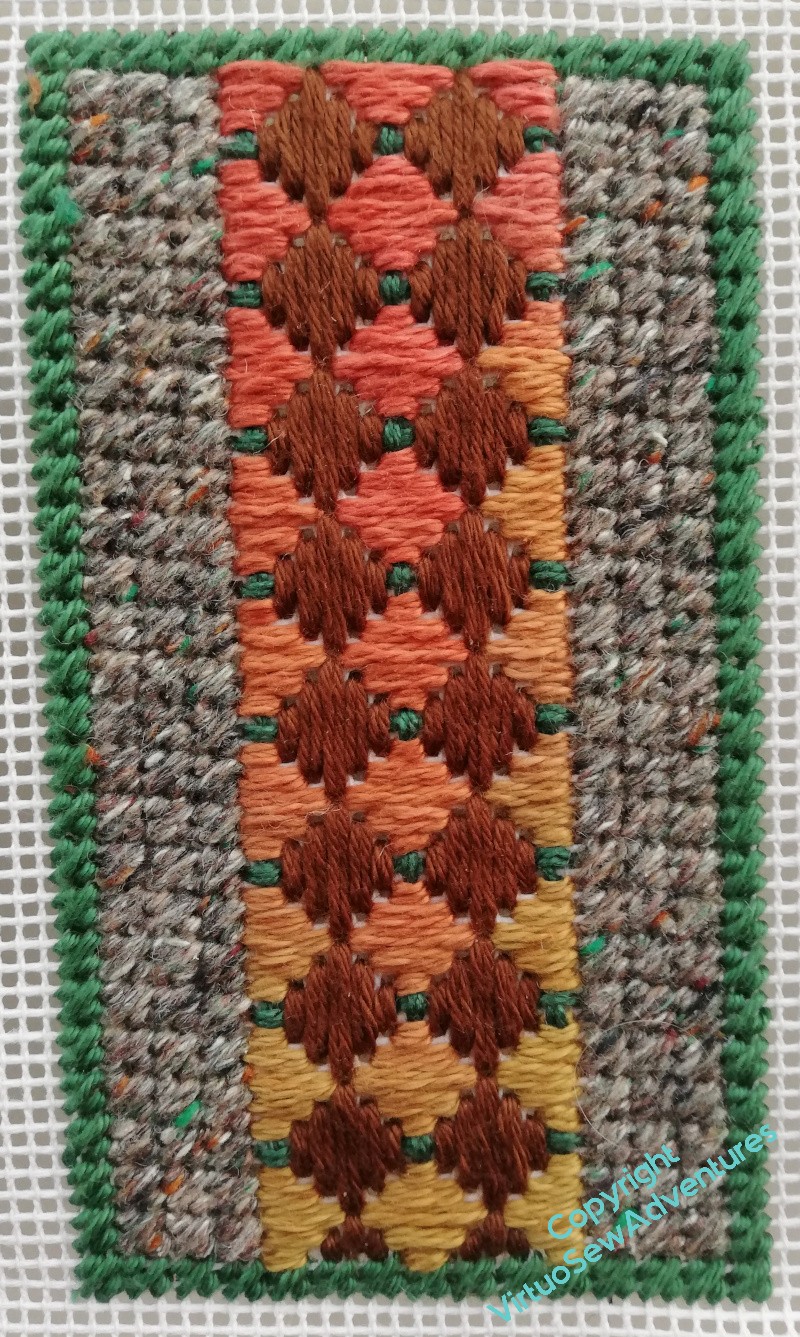
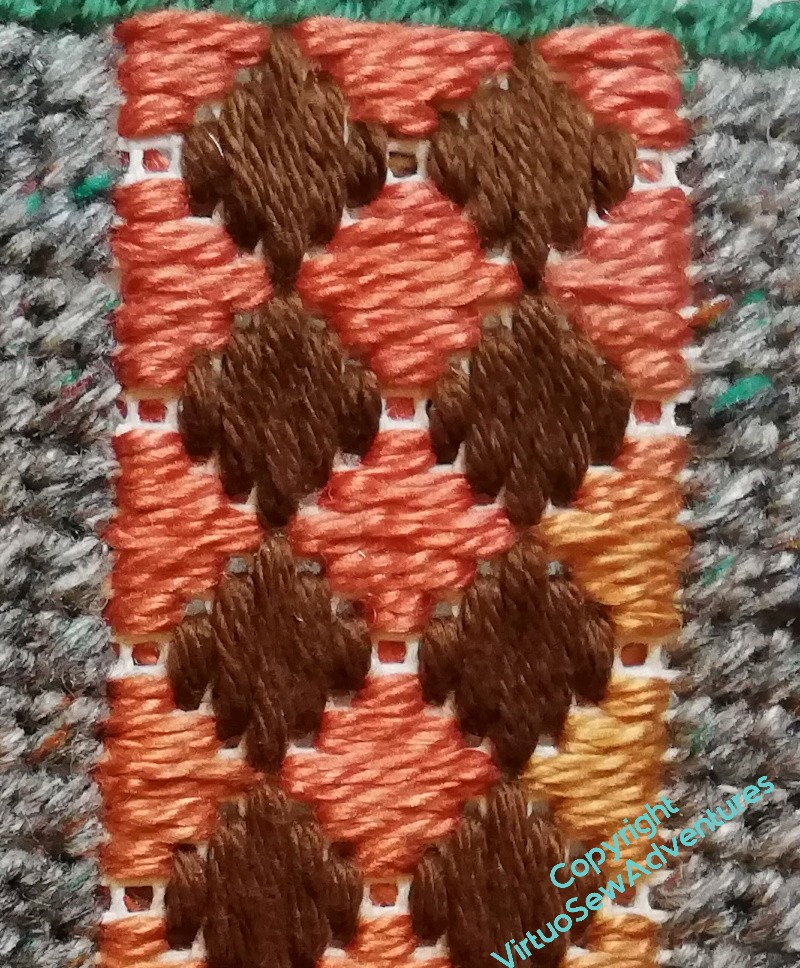
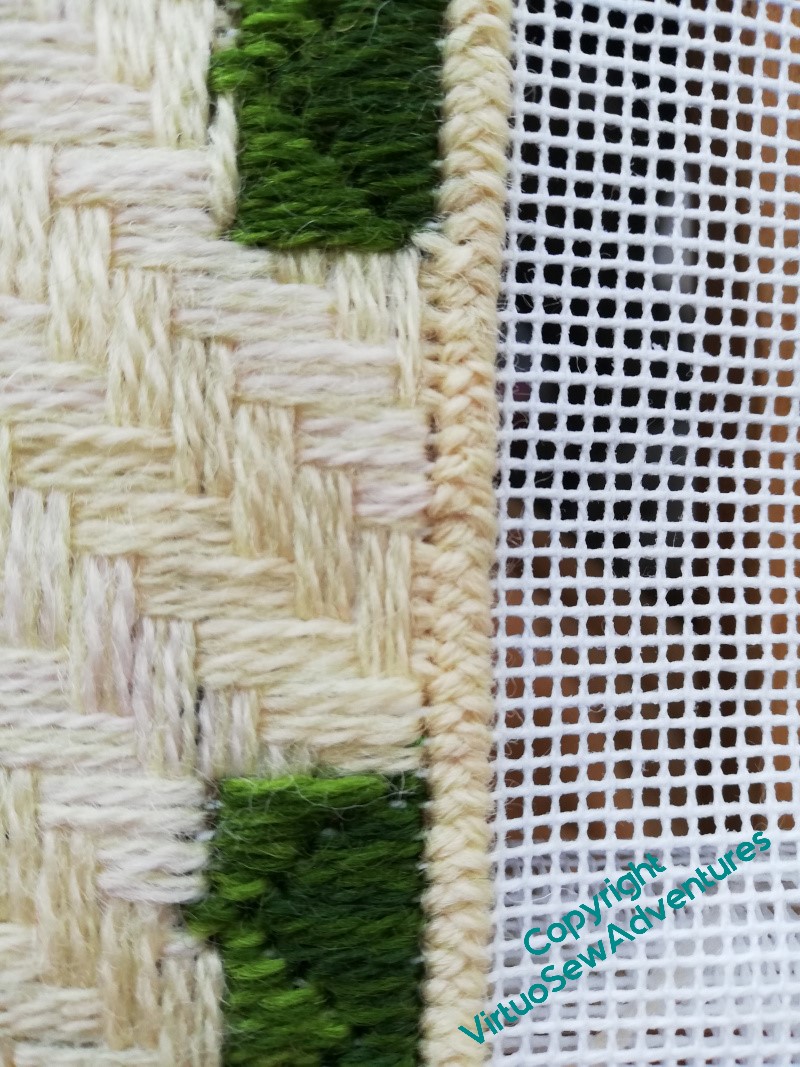
In the end, I went back to Mosaic Stitch.
It is built up in a rather haphazard fashion of zigzags, starting with two rows in the Watercolours thread, again, then moving outward with soft cotton in two shades of brown and adding a few details in a goldeny mustardy pearl type thread that I think is absolutely gorgeous. Unfortunately I’ve not the vaguest idea where I got it from, or when. It might even be silk – and here’s me putting it on a cover for a penknife!
Oh well, better to enjoy using it than have it sitting in a box asking me When it will Get A Chance To Play!

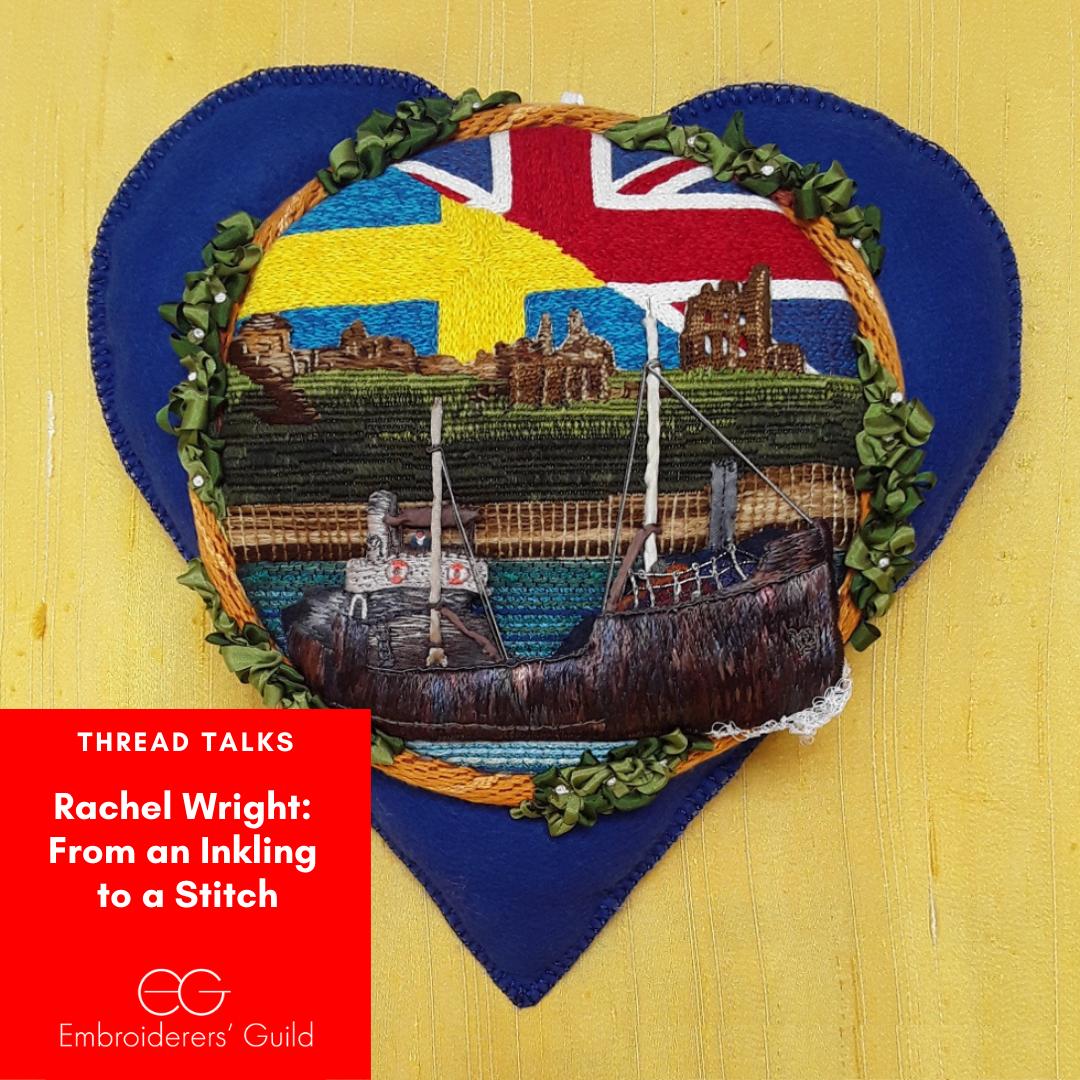
Now – a very exciting thing! – I shall be giving a talk for the Embroiderers Guild on June 3!
I believe I’ve turned this image into a link to the Eventbrite page, and for anyone not in the right timezone, or otherwise occupied on the day of the talk, the Guild makes recordings available for some time afterwards.
I shall remind you every week until it happens!
Penknife Case In Canvaswork
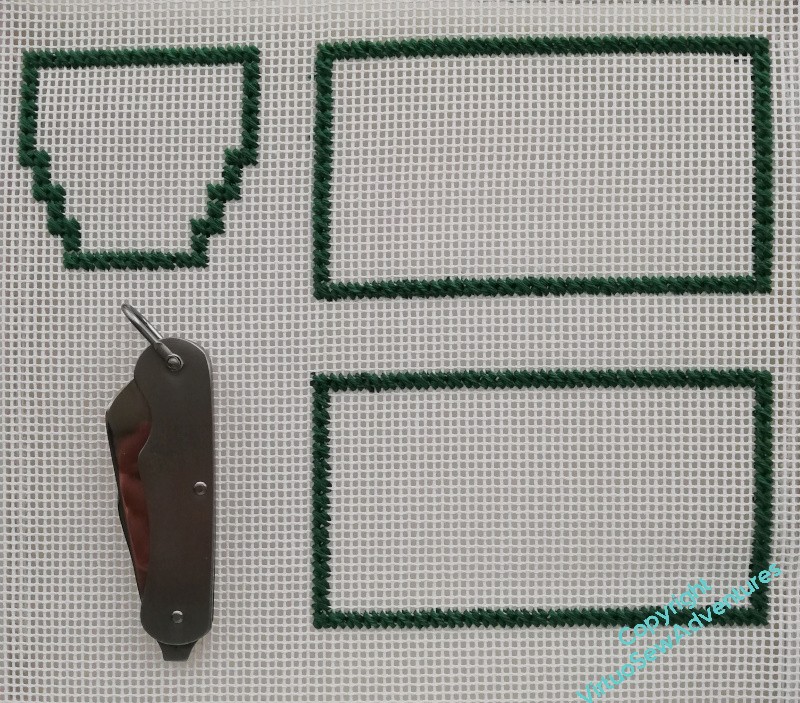
I’ve decided this penknife needs a case. (Of Course I Have!).
Canvaswork is often a good choice for this sort of thing, and I’m going to try to keep to stash. That may make things a bit harder, because my canvas is not especially fine, and as it turns out I don’t have much that’s suitable for that count of canvas.
I have prior experience of making something that ended up too small to do the job, so this looks very much too big. By the time it’s done, it might be the right size, but if it’s too big, even with padding and lining, I’ll simply start again, and use this for something else!
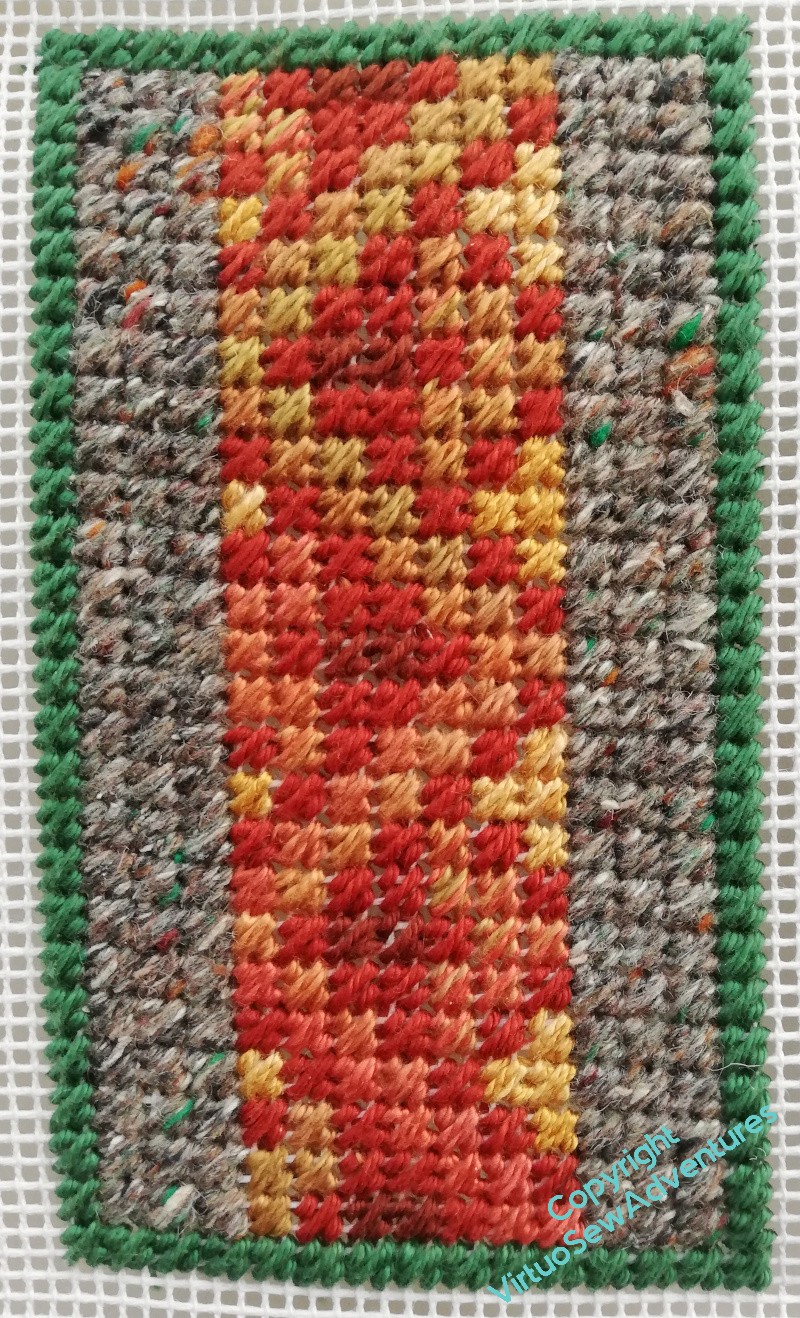
I actually started with the grey flecked yarn. It has flecks of green, and a browny-orangey colour, so I thought that might make an interesting challenge to combine. The panels are outlined in Mosaic Stitch, using a soft cotton in a green that goes with the green flecks. The grey had to be used double, so I think this is going to be quite a close run thing to get to the end with enough yarn to do the job!
The next panel started as Pavillion Steps, from Jo Ippolito Christensen, but I couldn’t quite make sense of the diagram, so it’s become something much simpler. Caron Collection (Wildflowers, I think) in one direction, soft cotton in the other, both of them used double to achieve reasonable coverage.
It’s clear I need to fill in that gap with Something, so now I need to rootle around in the stash to find something suitable. Several somethings suitable, in fact, as I don’t think the remaining stock of these threads will be enough for the rest of the case. I can do more Mosic stitch on the back, perhaps, but making sense of the top flap if I can’t run the same pattern across it is going to take a bit of thinking about.
Now – a very exciting thing! – I shall be giving a talk for the Embroiderers Guild on June 3!
I believe I’ve turned this image into a link to the Eventbrite page, and for anyone not in the right timezone, or otherwise occupied on the day of the talk, the Guild makes recordings available for some time afterwards.
I shall remind you every week until it happens!
Parterre – no, these are the final stages!
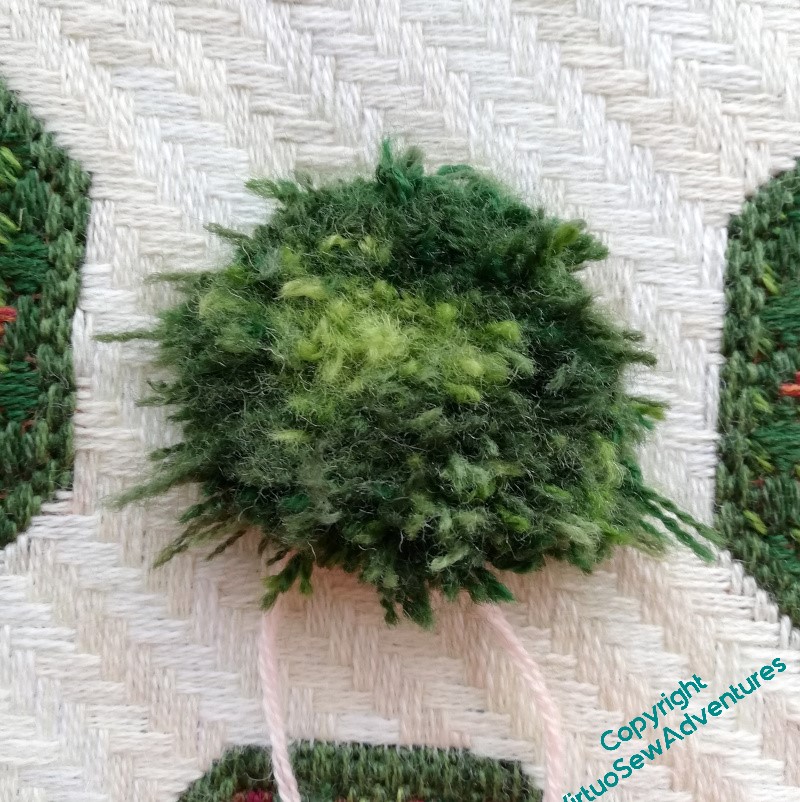
So you may recall that, when last seen, I was working the Surrey Stitch boss for the centre of the Parterre. This is something else that uses a lot of thread, so I had a nervous time wondering whether I would run out of the wool I wanted to use before I finished it. And because the stitches were pushed down for quite a while as I was working it, I tied some thread around the finished stitches for a few days to help them stand up to be trimmed.

Then I realised that some of those stitches were still loops and might not be standing up to where they should.
So the semi-final trim took a bit longer than I perhaps hoped, and is maybe not quite as short and trim as it should be. That’s because I don’t have enough wool to do it again, and I am absolutely terrified of trimming it too short!
However, any further trim can wait – it’s something that can be done off the frame, and I wanted to see how the whole Parterre had turned out.
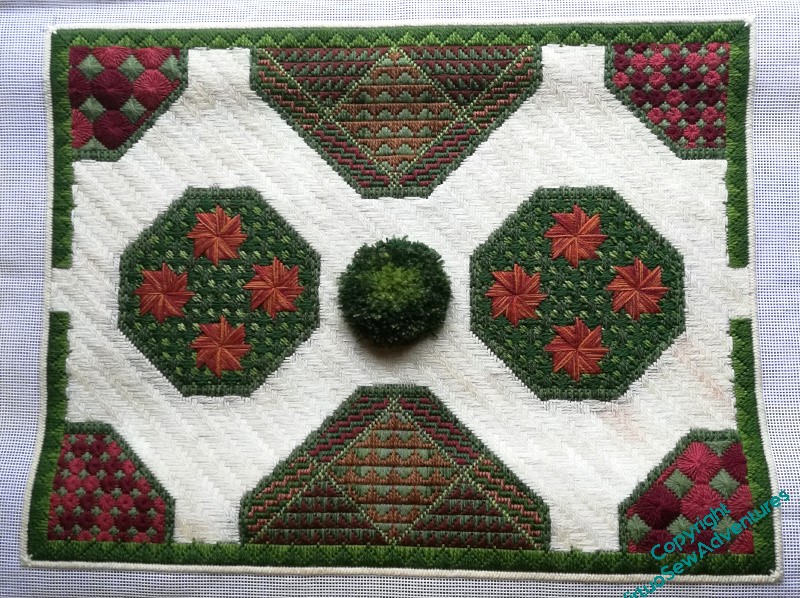
Pretty well, I think. It is squarer than it looks, I just need to block it a bit to take the frame-kinks out of the canvas!
Parterre – final stages
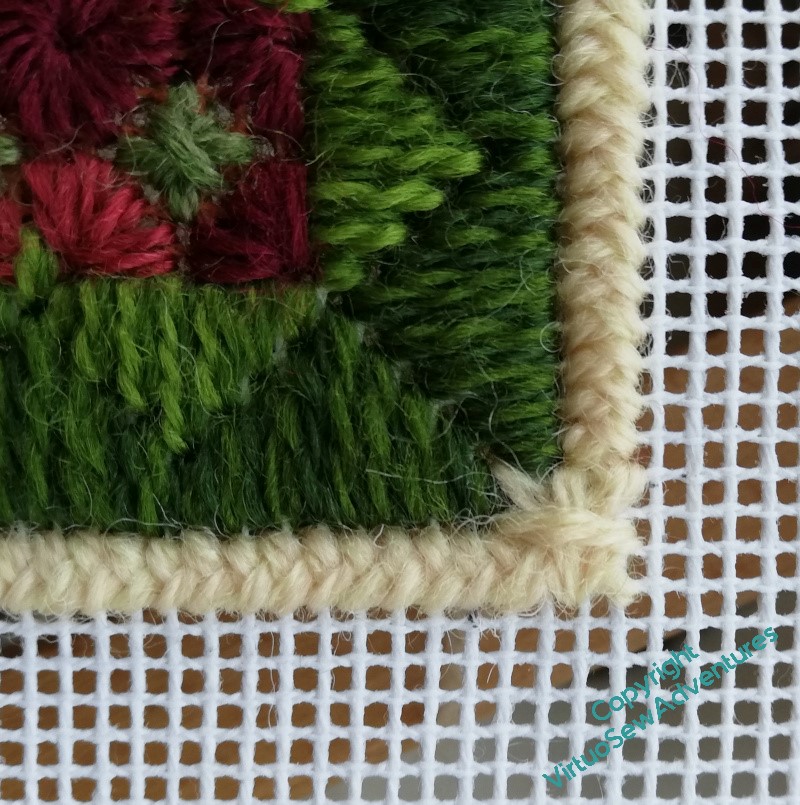
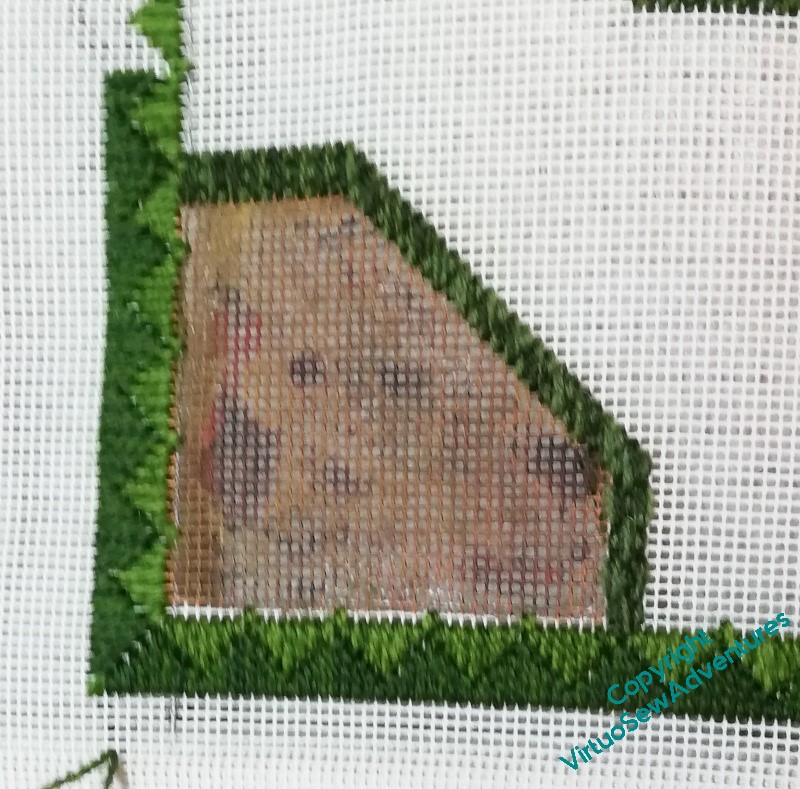
While I was stitching away at the limestone pavement, it occurred to me that I maybe needed to think of some way to “finish off” the edges. I’d left a corner space in the green border, being unwilling to go down to a straight stitch over a single thread, which rarely looks good.
I decided that the best way to to deal with the whole look would be to pull the inside and outside together, using the cream to run around the whole garden – limestone chippings to separate one garden room from another!
Using a double cross stitch boss in each corner seemed to work – just enough emphasis to put a full stop at the end of each run of the plait stitch.
The plait stitch also helped by tidying up the gap in the short sides. I left the gap because the “hedge” repeat didn’t fit into the short side neatly, and when I got to the edge with the limestone pavement, I wasn’t happy with the way it looked. I am now, though – I think the plait stitch worked well, stopping the pavement falling off into the view!
Once I’d got everything else done, I could start to work on the central boss. My book told me that Turkey Stitch, which I was intending to use, is Unsuitable For Mono Thread Canvas, which was a bit of a facer, but fortunately offered Surrey Stitch as an alternative.
So I got started on the Surrey Stitch – which turned out not to be as quick as I expected..
So, not quite the final stages!
Parterre Progress
Interior design involves balancing places for the eye to rest with things for it to look at, but having that happen at different scales and different distances from the eye means that you can have just as much visual excitement as you want.
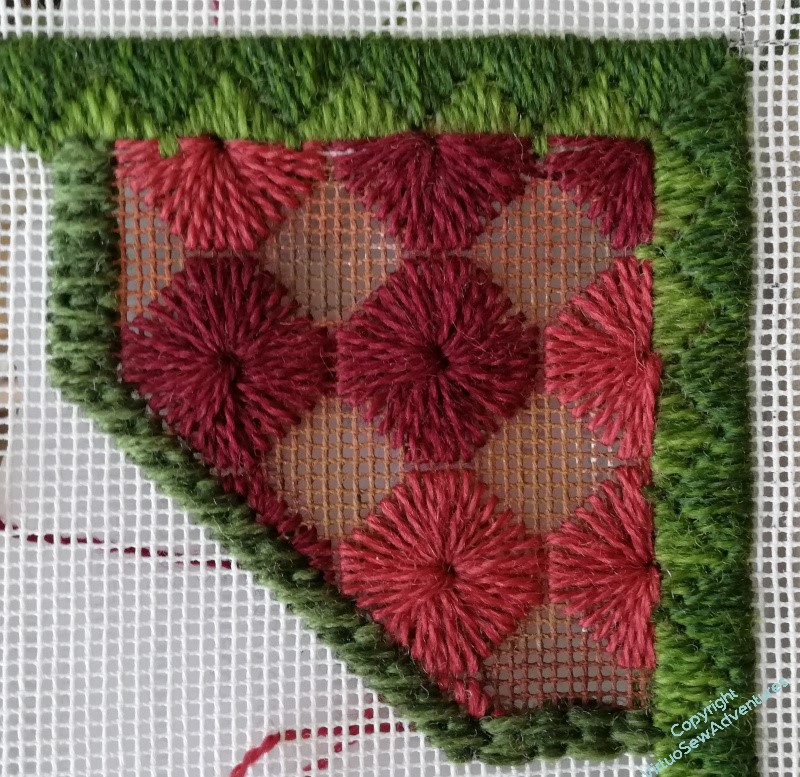
Once I put my “hero” stitches – the pinwheels – in the octagonal borders, I needed to find something to surround them. It needed to be much quieter, to allow the heroes to be truly heroic, but at the same time, I wanted something that would be visually interesting if you bothered to look.
This is the first two stages of Palace Stitch, which was one of the stitches I interviewed for the limestone pavement. Heathering the yarns means that even close up you have something to look at, and it helps me eke out my stash of Paternayan, too. It’s too beautiful not to use, but doing a large project is becoming something of an exercise in invention!
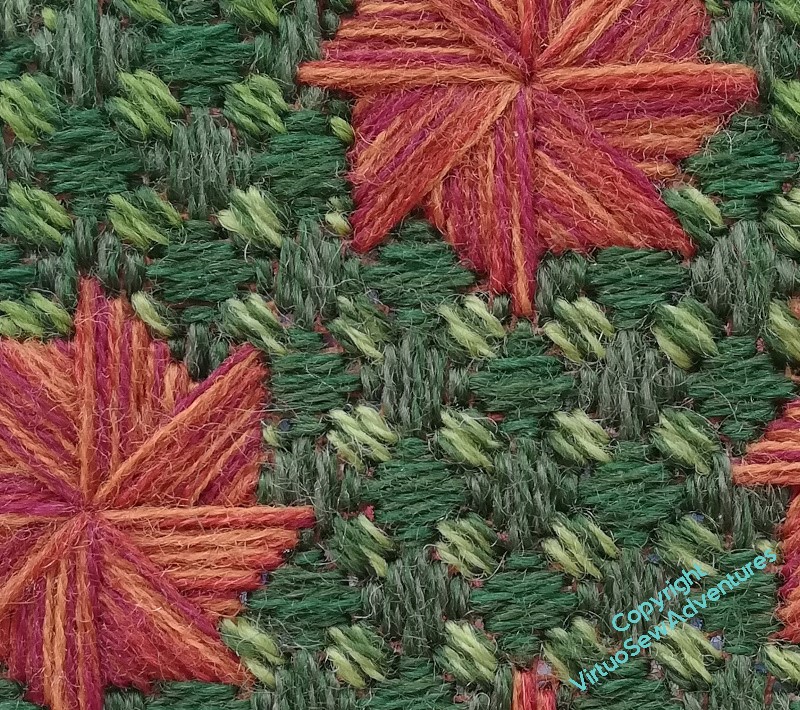
The final stage of Palace Stitch involves small squares of diagonal stitches. Again I have heathered yarns, this time using lighter, yellowy greens.
The placement of all my colouring variations isn’t quite exact, but I like it that way. Plants don’t grow identically, and a lot of the charm of knot gardens and parterres lies in the crisp shapes with the subtly varying colours of the plants filling them. I’ve been trying to paint hillsides and forests of late, and I never thought I’d say this, but the canvaswork is easier!
I think this is a success. The slightly lighter centre, the darker edges, and the varying colours of the pinwheels (four different shades of Appletons Crewel Wool held together) all create a varying effect which is properly geometrical and definitely canvaswork while still managing to be vaguely horticultural.
I do like it when a Plan comes together!
Parterre – where had I got to again?

There was a lot of path to stitch, but that gave me plenty of thinking and experimenting time. I started playing with the Milanese Pinwheels when I wanted a break from the endless limestone pavement, and began by using them in the interlocking form shown in the book.
But I didn’t like the look of it, too congested, too solid in the wrong sort of way.

So then I tried a square.
It looked better with somue actual pinwheels, rather than the skeleton pinwheels I used to determine the placement, but again, I thought this was too congested, pulling away from the border a bit too anxiously.
Nope.
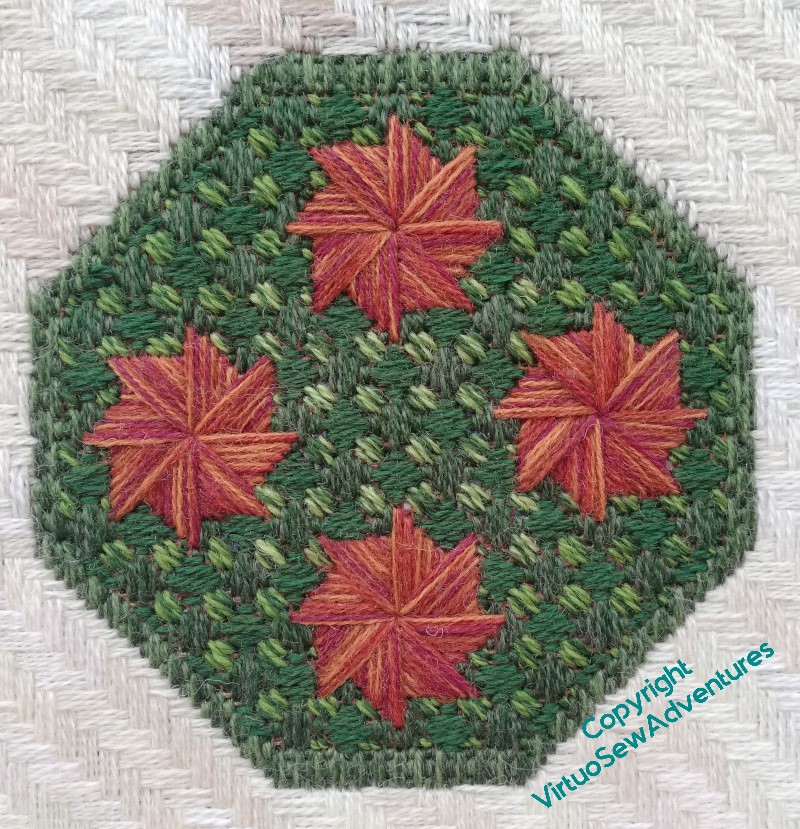
So I asked for comments, and my cousin said, have you tried the diagonal placement without the central one – four pinwheels, rather than five, more space for them to breathe.
I think this is going to work, in fact. There’s plenty of space for the heroic pinwheels to make themselves felt, and if I can find a stitch pattern for the background that runs all the way across, I think they will be nicely set off by it.
It’s good to have progress to report!
Octagonal Borders Taking Some Time To Resolve!
I felt that the Octagonal borders needed to be less subdivided than the long borders, which in turn meant finding a large stitch pattern. After some to-ing and fro-ing, I decided that I like this one – Milanese Pinwheel (again from Jo Ippolito Christensen).
I’m not so keen on the fact that it doesn’t really tesselate neatly – there’s a peculiar shape left in the middle if you interlock the stitched in the obvious way, and it just didn’t look pleasing. So it was obvious to me that I had best space them out to create islands in an inner sea, as it were. Not like this, however – this was to be a set of five closely interlocked, leaving any partial pinwheels unstitched, to be replaced with some other stitch. But I think it’s already looking congested.
So, trying again.
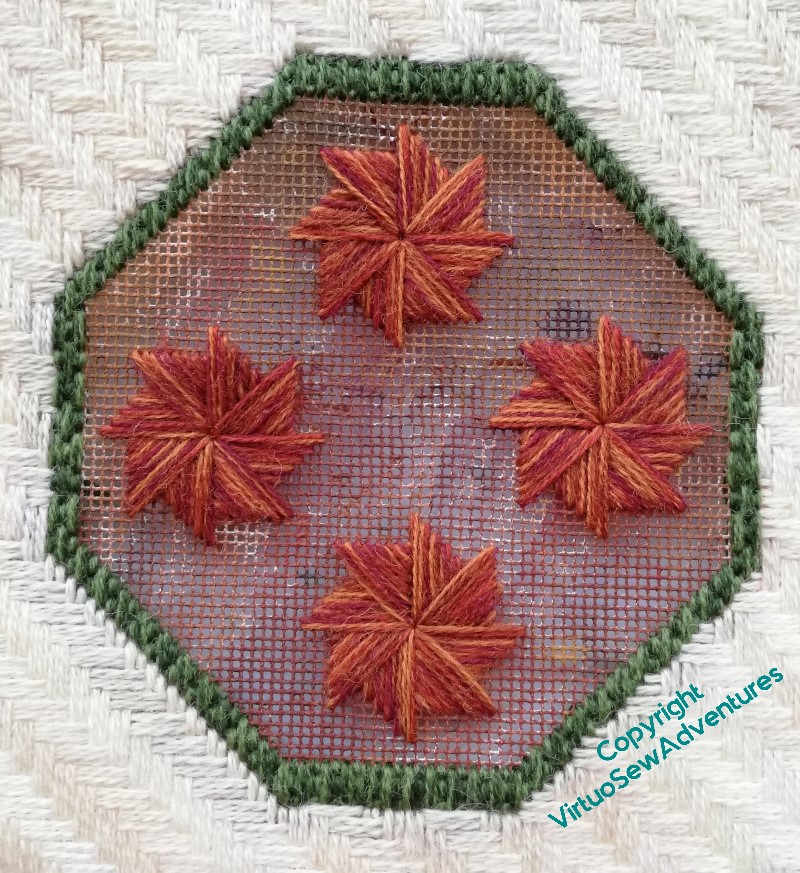
This time, four, spaced out to form a square. I’m really not convinced by this, either. The slanting sides of the octagons push the pinwheels too close together, so again we have a slightly congested look. Furthermore, as I observed with the borders for William Marshall, the square form can look very static, and in this case, that’s not playing nicely with the swirling movement in the pinwheels.
I think this does, however.
Upending the square onto the diagonal makes it possible to push the pinwheels further away from one another, and while it may only be a couple of threads, I think it looks less congested. That leaves room for me to put another, smaller, pattern “behind” the pinwheels, as it were.
You may notice that while I was wrestling in thought with those pinwheels, I kept on at the path.. So, now I have to do the pinwheels in the other octagon, and decide what to run into the background…
Borders in the Knot Garden
There’s still a great deal of to-ing and fro-ing on the Knot Garden/ Parterre. There’s a lot of border elements to do, and I’m quite certain that I’m going to have to find a way of making sense of a middle section on the short sides: the “Princess Stitch” border I’ve chosen for the outside border is symmetrical around a stitch, and the circular border in the centre is centred around a thread, so something may well look a bit too “off” to be fudged, if I’m not careful!
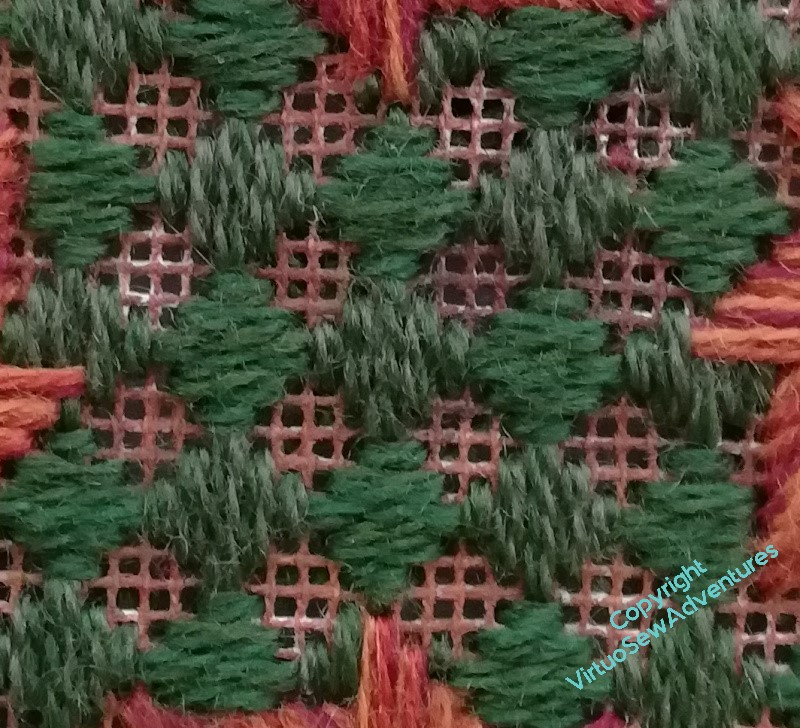
This pattern is called “Squared Daisies” in my copy of Jo Ippolito Christensen’s book on needlepoint. It looked like a very big pattern in the book, full of interest and personality, but while it has personality , it looks a bit small here, and I’m having Doubts about it.
So, in the spirit of exploration and investigation that I usually apply to needlecrafts, I found another corner and tried again, twice the size.
Yikes, that’s big. And Yikes, again, for the number of threads going through the central hole.
But I think I might rather like it.
In fact, I’ve carried on, and decided I do rather like it. I’m varying the colours to maintain the variation shown in the original inspiration, and now I’m thinking that – again in the spirit of variation – I will also finish the smaller stitch size version.
The other two corners can be the same stitches but in the other order, so that the similar corners are set diagonally to one another. And the only trouble with that is that these stitches are remarkably trying to do, and after a day wrestling with goldwork or Amarna, all I want to do is curl up with a good book!
Knot Garden progressing
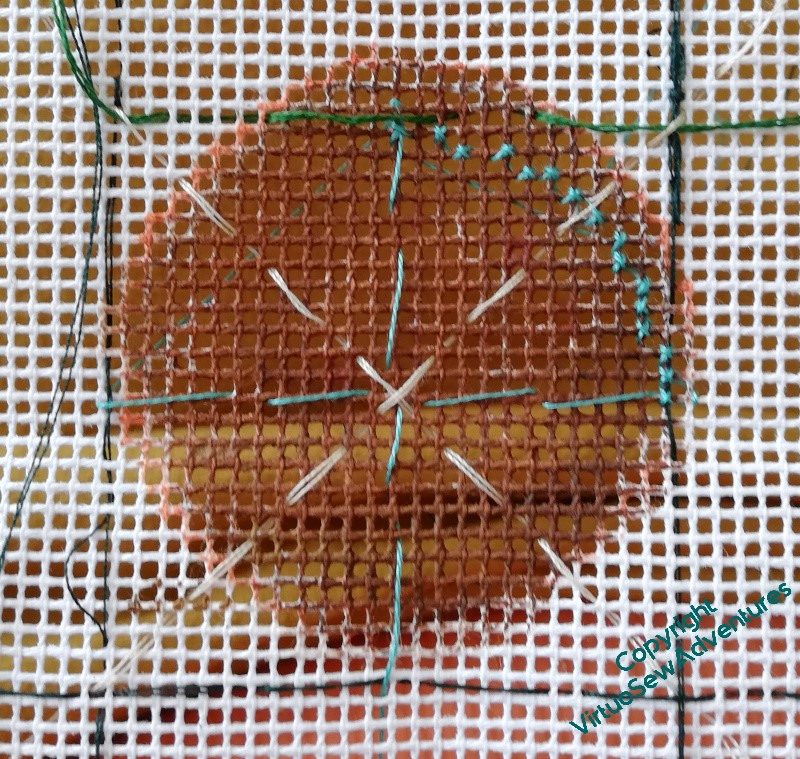
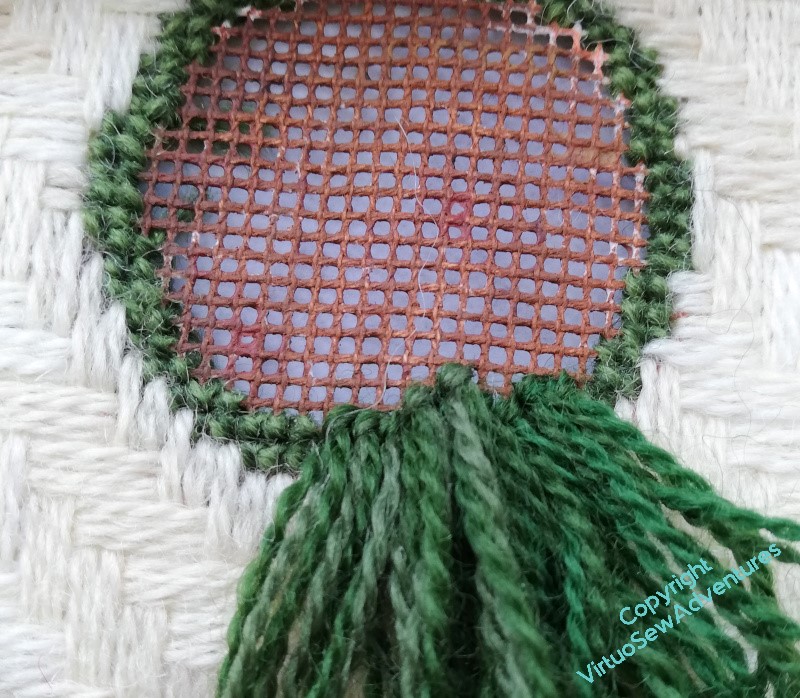
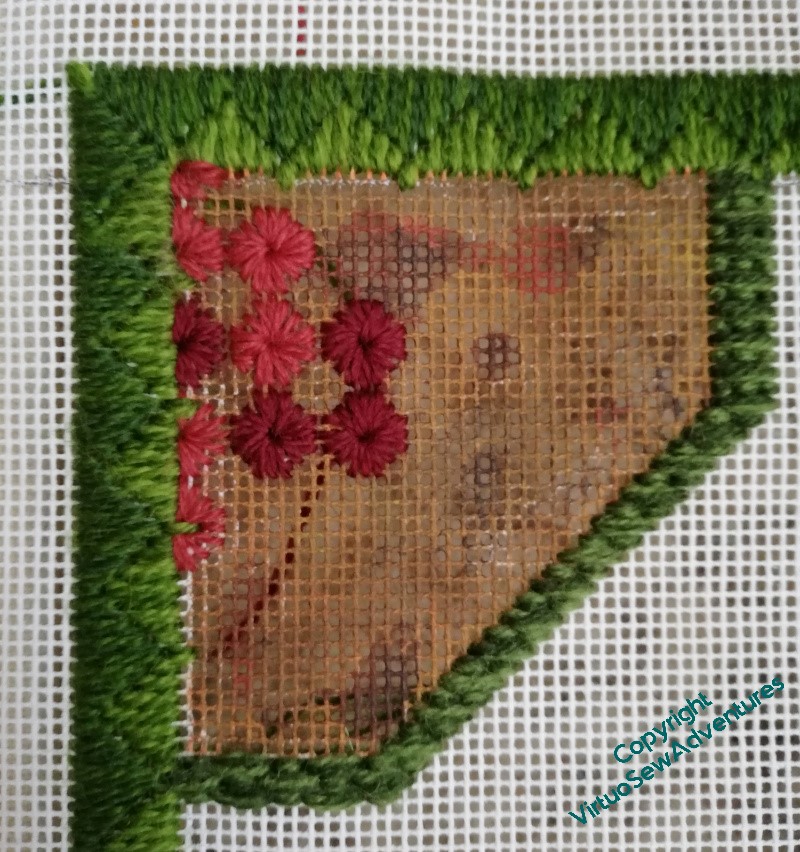
One of the original stars of the inspiration picture was a circular bed with something exuberant in it, at the centre of the garden. As you can see, I put some effort into planning where it would go, and how I would get something close enough to circular, using the gauge of canvas I’m using.
The intention is to create a sculpted Turkey Work boss, but now I have the outline in place, I think that should wait until the last moment, when everything else is done, and I’m not scrolling backwards and forwards across the frame all the time.
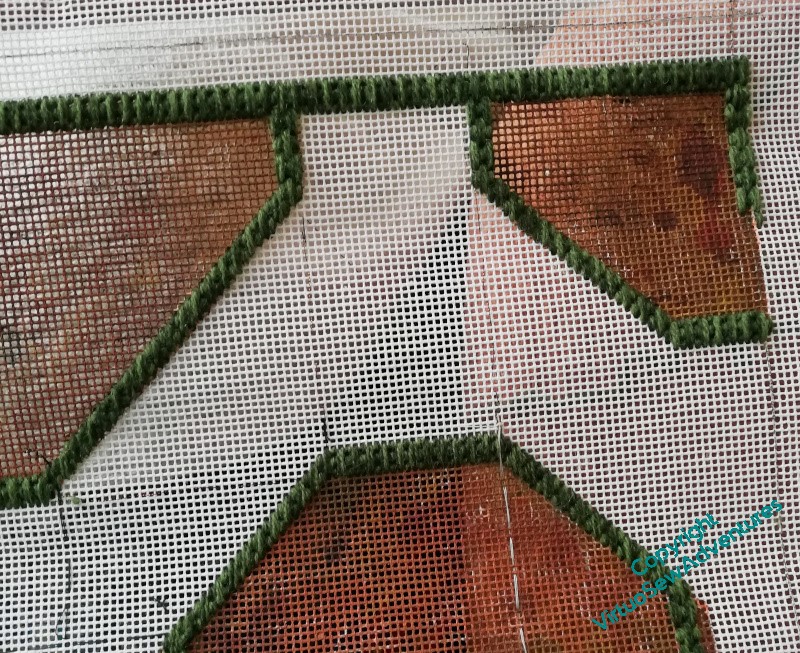
So I went back to the borders representing the outlines of the beds, trying to keep the design crisp and balanced, so that whatever I put in the borders can be suitably displayed. And therein lies a problem. When I sat back and looked at what I’d done, I thought it didn’t look nearly strong enough for what I was going to create.
Why, I wonder?
Well, I think it relates to a certain sameness. All the borders are the same stitch, and it makes it look less like something inspired by a garden, and more like something inspired by a drawing of a garden.
So I’ve changed the outer border to something chunkier and with a slightly different shape, and so far I think it may be working!