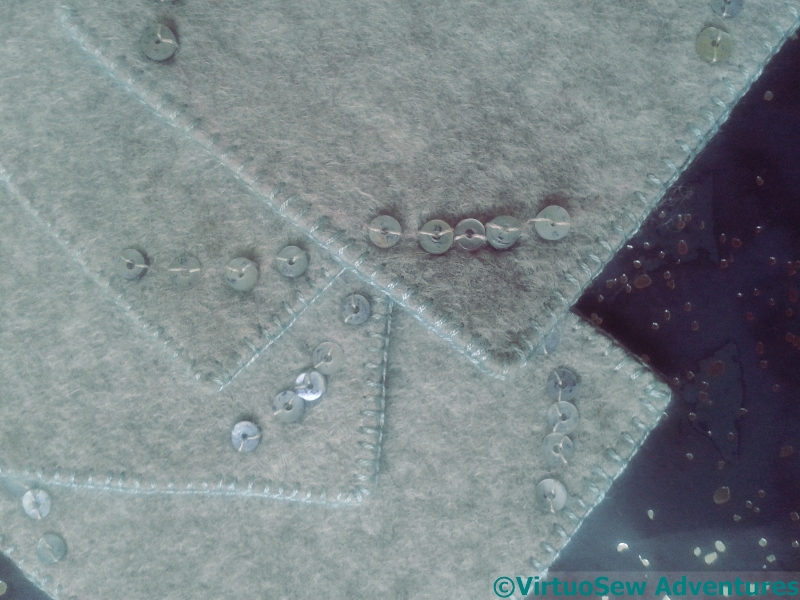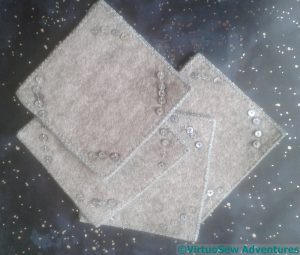
Coasters
It pays to be as organised as possible when you are dealing with weddings, but I’ve not been very organised in general this year. That said, not knowing what sort of things our friends’ combined taste would run to until two months before the wedding was rather a handicap. In the end, we bought something from the list and then I decided to do a little something extra.

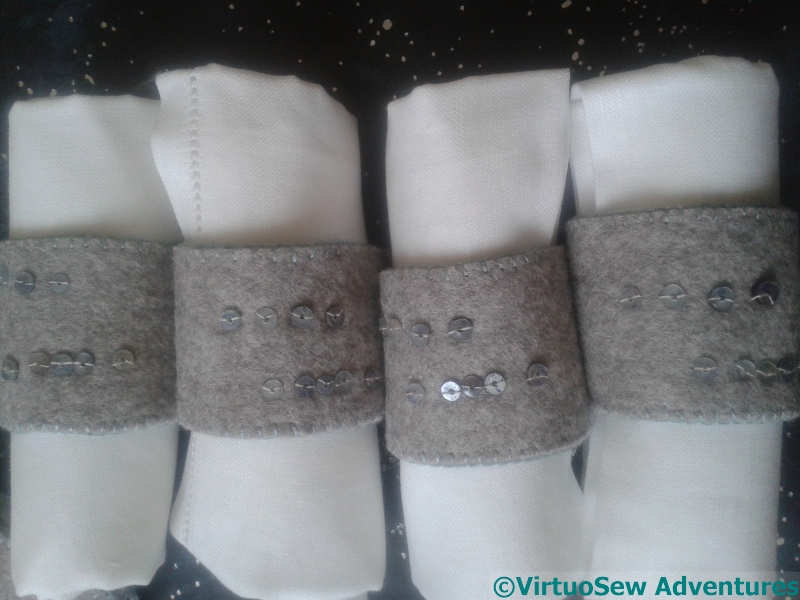
Napkin Rings
I’ve made a set of coasters and napkin rings in felt, in colours that should work with the crockery they’ve chosen, although they aren’t the same. The two layers of felt are bonded and then blanket stitched together using a vintage silk thread that just happened to work rather well.
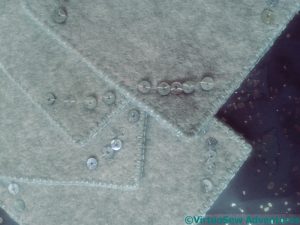
And the embellishment is made using tiny sequin-like beads made of shell.
MorseCode
And what is the embellishment, I hear you ask? What else, I hear myself reply, but the initials of our friends’ given names in Morse Code. Fortunately the letters in question are both symmetrical and palindromic, so they work in whatever orientation they are placed. The coasters have each initial twice, in opposite corners, and the napkin rings once each.

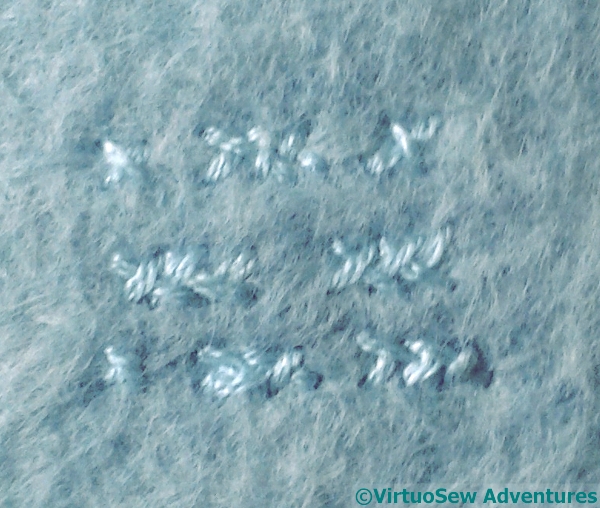
Signature
As old friends, they know of my proclivities for using Morse Code, so, lest they be disappointed, I have signed each coaster on the back with my initials in Morse Code.
Harrogate 2017
It’s That time of the year again!
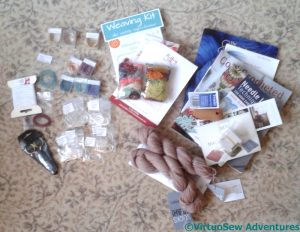
No, not Christmas (not yet!), but the Knitting and Stitching Show in Harrogate. This is my best chance to stock up on the obscure, the intriguing, or the plain difficult to find. It’s also a good chance to meet up with old friends (it was lovely to see Elizabeth again), and sometimes even to make new ones.
This year, as well as some sock yarn and some tangled reel ends of silk (which are a very useful source of odd colours for odd purposes, often in quite fine thread, which might be hard to find), I spent some considerable time looking at, and finally ordering, a new worklight, which I hope will extend my working hours on those days when I can settle to it.
I also bought a couple of books, one on needlelace, which at the moment I have no particular reason for, except that I want, one of these days, to write up my Grandmama’s needlelace tablecloth. I’m sure I will find something I want to work in needlelace. The other is a book of crocheted hats. Something different to do, as a change of pace!
The most important purchases, however, were made at Golden Hinde. The Akhenaten embroidery is going to involve a good many materials and techniques I am only vaguely acquainted with. So I took with me the pricking for Akhenaten, so I could show the sizes and shapes I was trying to fill, and describe what I was trying to achieve. Soon a torrent of purls, twists, and silver plate were tumbling into my basket, accompanied by much advice from Sarah and Sue. I’m still wondering whether I will succeed with this one, but I’m looking forward to the challenge!
Where I had Got To..
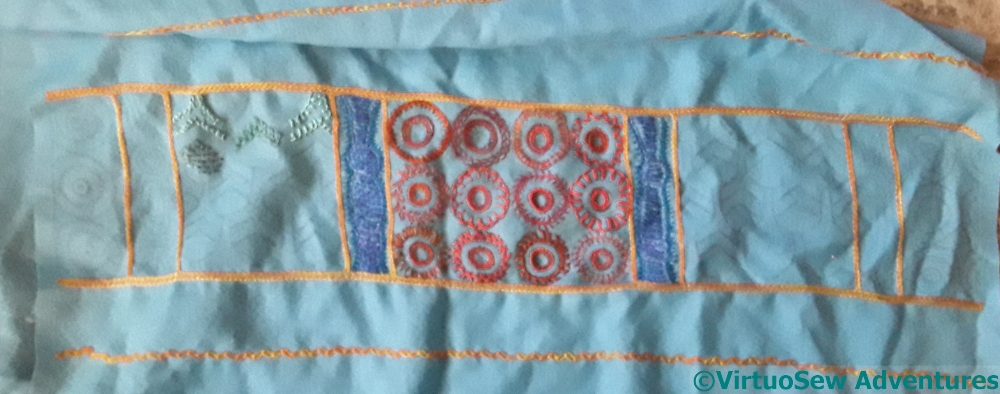
I’ve run into a bit of a problem here. I still love the idea, and I still want to finish the Nefertiti Shawl, but I’ve lost all momentum, and all sense of structure.
Red and Blue Sections
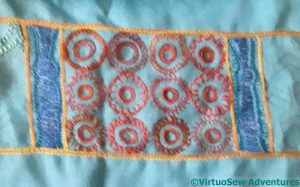
I’m happy with all the red circles. I like the colour variation and the unevenness – in real life, in a half-decent light, which winter in Britain rarely provides, there’s a vibrant, lively feel, and the use of the line stitches reflects the original pattern I used for the filling. Good.
Blue Section
The blue section is where the trouble started. I’ve done two of them already in spite of my doubts because I’ve come across all too many instances where a piece only worked when I’d kept on through the doubts.
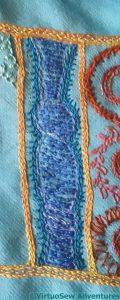
I’m not sure whether it is the yarns, the colours, or the stitches that are the problem, or even whether there is a problem at all.
The pashmina is in a lovely twill weave which flows beautifully, but it’s quite fine, and a lot of the threads are thicker.
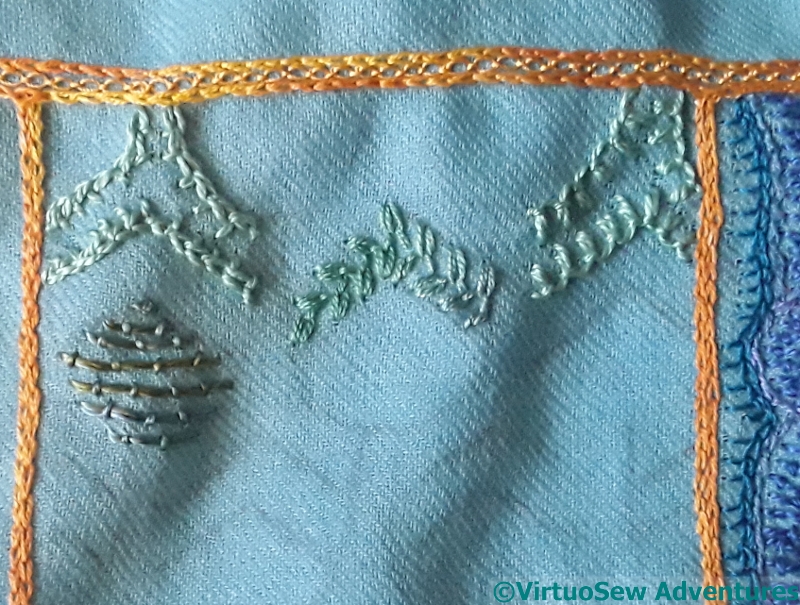
Green Section
But the problems of the blue section fade into nothing when I get to the green. I love the overlapping scale pattern, and I was really looking forward to stitching it. But I can’t find a pattern of stitching that works, and again, I’m not sure whether this is the colour, the thread, or the stitch.
I have no idea how to sort this one out. Unless inspiration strikes, it will be some time before you see it again.
Very Fine Pearl Purl Added
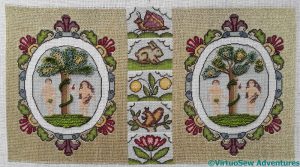
The next stage in the goldwork cartouche frames for Eve in the Garden of Eden was to add a row of very fine gold pearl purl inside each double row of the crinkle strip. Now, this doesn’t need a stitch in every gap – it’s more like a very fine, very tight spring, and follows curves quite well – but it is quite fiddly and concentrated, and there’s rather a lot of it. Fortunately I did each cartouche individually, so I had a rest from pearl purl while I tackled the next stage….
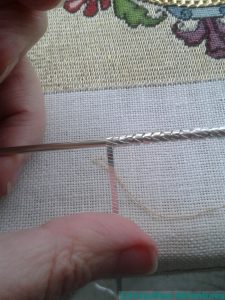
Twisting Silver Strip
Which was this!
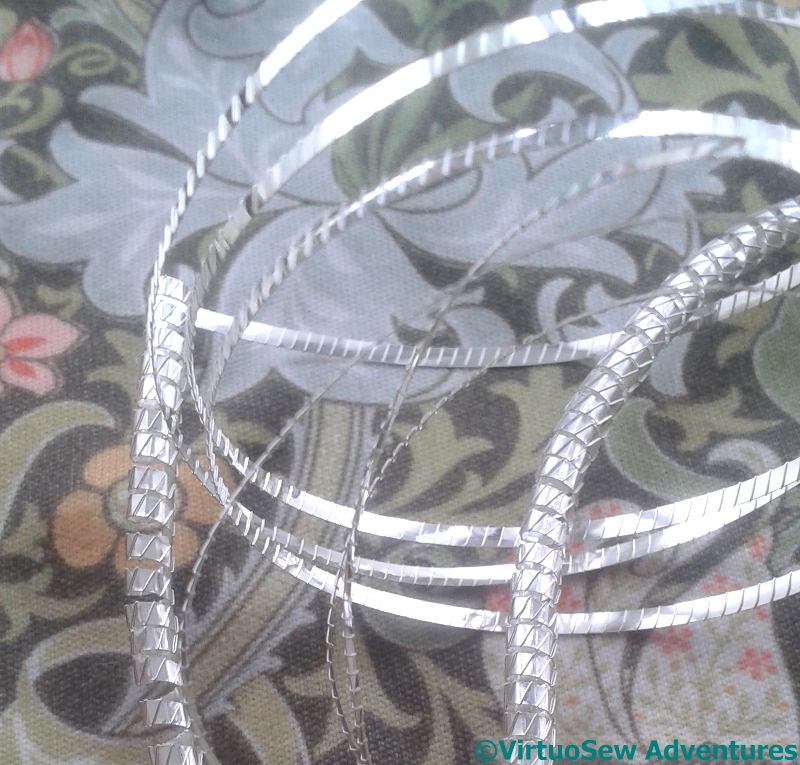
The Silver Strip which was to be the central row of the cartouche frame arrived flat – or at least, loosely coiled in its box. In order to spring to life and create a gorgeous, opulent central row for the cartouche frame, it had to be coiled into a spiral around the second of the knitting needles that arrived with the kit.
One of the things I enjoy about Tricia’s courses is that sometimes our materials require further elaboration before we use them…

Half Twisted
Here you can see the texture of the Wrapped Silver Strip. I think it is engraved or embossed, rather than actually wrapped, but it does add to the general variety of response to light, and that, after all, is part of the reason for having metal threads on an embroidered piece….
You can also see how the effect is enhanced by twisting the strip into a spiral!
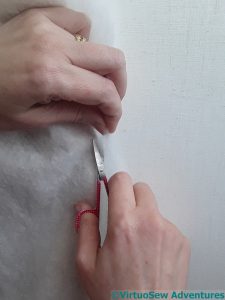
Trimming Excess Padding
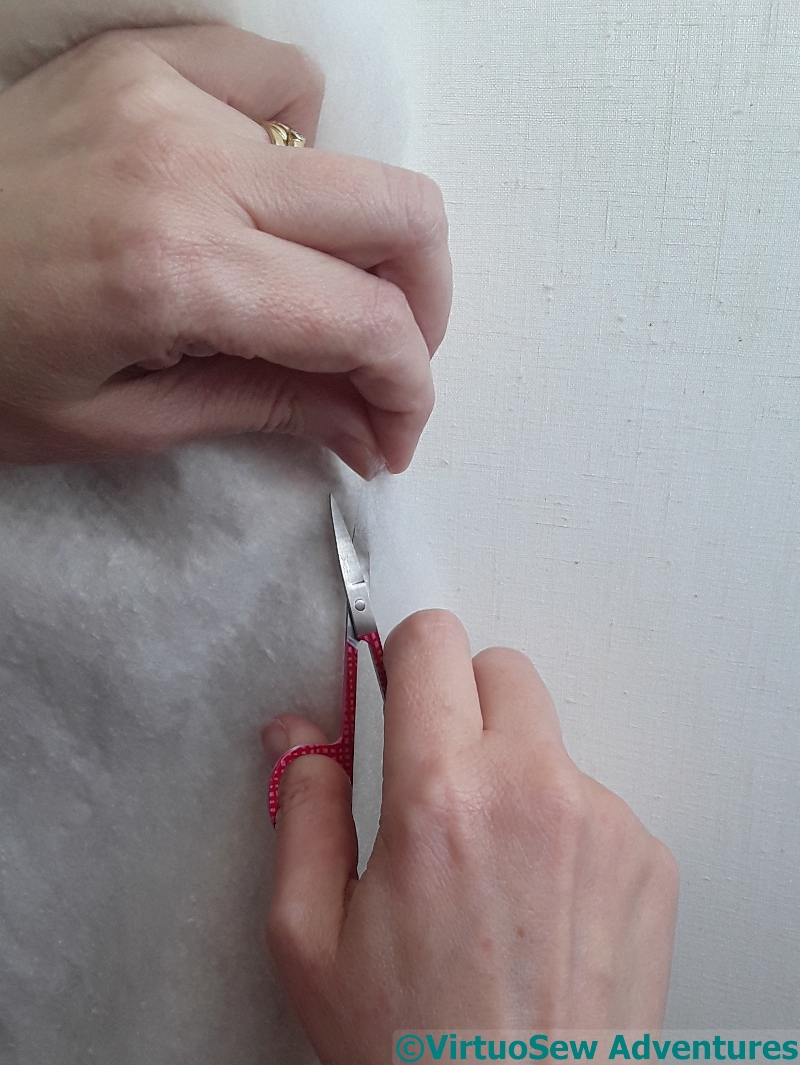
I did say the next bit was scary!
I undid the stitches holding the silk and top layer of wadding to the calico backing, and cut away the polyester wadding close to the back stitches outlining the figure. Quite apart from the fact that I had to tie myself in knots to follow the edge around, particularly around the neck and shoulders, and beneath the arms, I was terrified of cutting through the backing, or the padding I didn’t want to cut, or, worst of all, cutting through the silk.
If you are of a nervous disposition, do not attempt this technique. Try something soothing instead. Like base-jumping.

View From The Back
The next bit was hardly less scary.
Having been terrified of the prospect of cutting any of the layers, I then had to cut slits in the calico at the back, in order to stuff the figure more firmly.
I’ve had occasion in the past to express my conviction that holes into items to be stuffed actually open into the Fourth Dimension or something. The capacity of the item to be stuffed always seems to be higher than is suggested by the measurements.
And guess what, it happened again. I’ve done my best to stuff evenly, using small pieces of stuffing, but I won’t be at all surprised to find that after the next stage (whatever that turns out to be!) I will be doing more of it.

Spine Embellishment
Once the foliage and the snake were done, I could start on the goldwork.
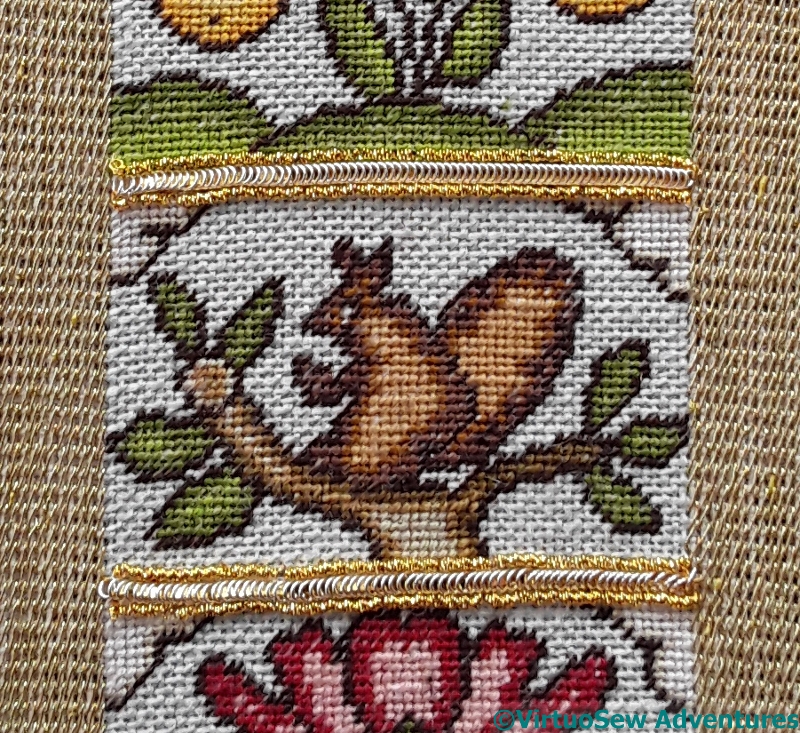
First, the spine. Each gap between the polychrome panels was filled with three rows of metal threads. The middle one was silver wrapped around a gilt strip, and the two outer ones in each case were of a very fine check purl. This last was very fragile, and if I had realised in advance just how fragile, and how inclined to catch on cuffs, sleeves, and threads, I think I might have worked the spine last.
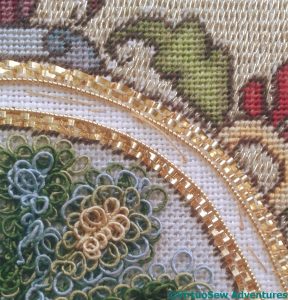
Gilt Crinkle Strip
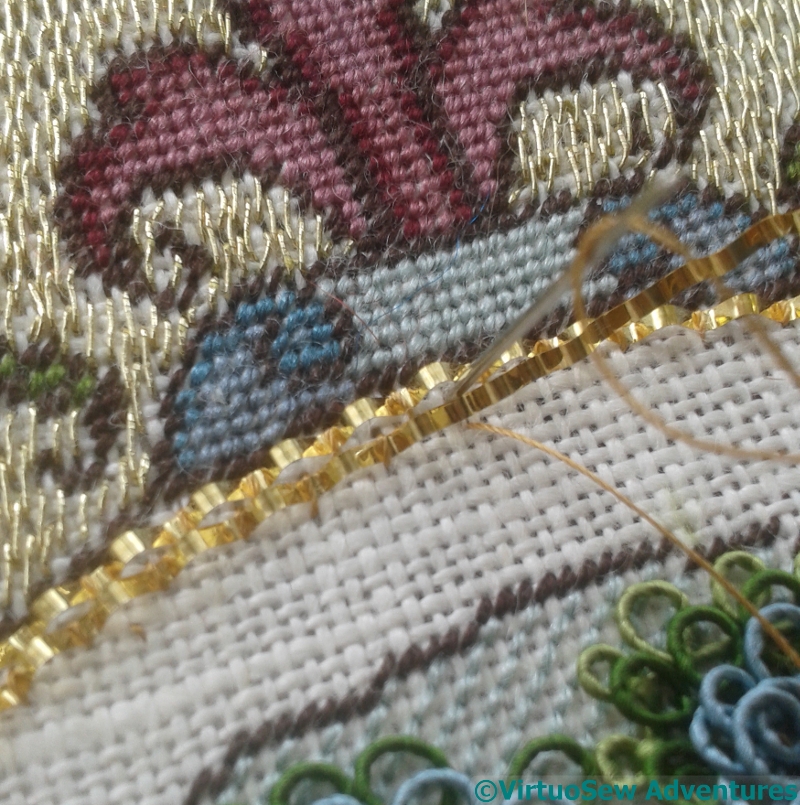
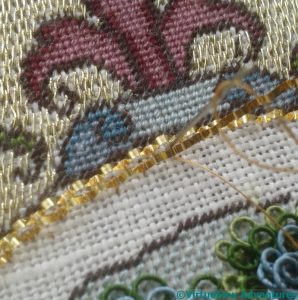
The goldwork around the cartouches began with four rows of Gilt Crinkle Strip, two couched around the outside of the frame, and two around the inside.
The instructions said to place a couching stitch in every valley of the crinkle, which was certainly necessary – it doesn’t willingly follow curves when it is couched flat – but I might not have thought to do without instruction. It makes for a wonderful effect, if rather visually confusing when you’re working it, because the hills and valleys of the crinkle strip bounce light every which way, in a rather delightfully dazzling fashion…
You might think, by the way, that this is fairly straightforward and done in no time at all. You’d be wrong! That Gilt Crinkle Strip looks lovely, but my word, it has a mind of its own, and being very springy and having lots of little corners to catch, it makes a spirited attempt to tie itself in knots. A third – and even fourth – hand might have helped!
Starting Akhenaten
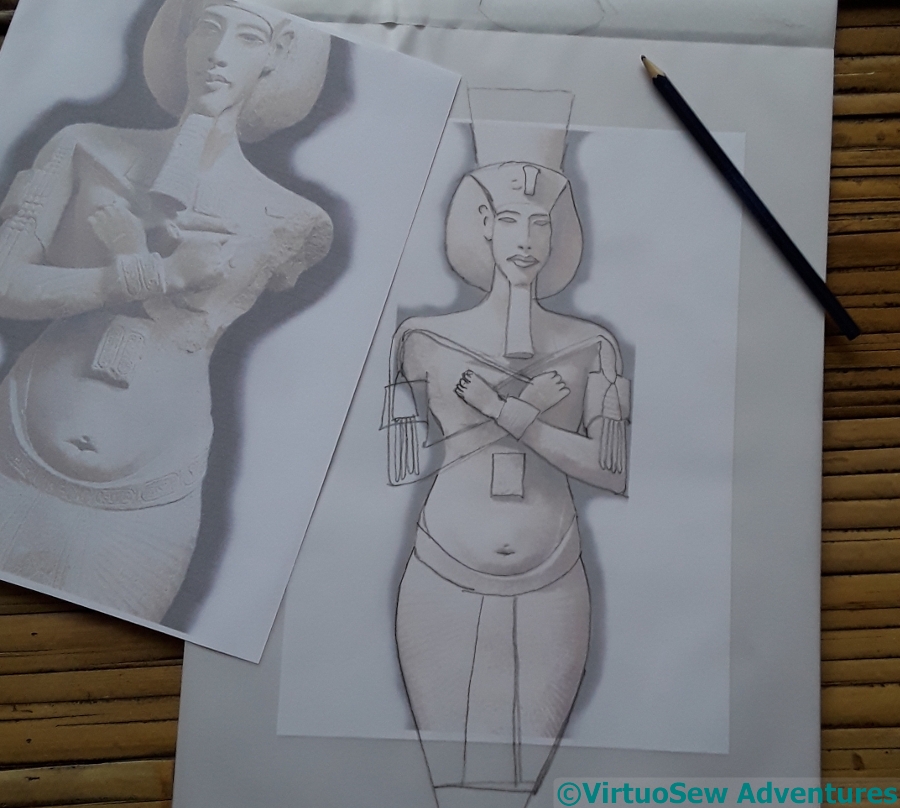
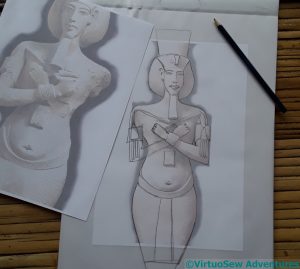
Naturally, once I’d done the Head of Nefertiti, I wanted to do something of Akhenaten. The question was, what?
But I needn’t have worried. Almost before I have posed myself the question, an idea had sprung, fully formed, into my mind, rather as Nefertiti had done. It’s going to be a sort of unholy, but with any luck, truly gorgeous, combination of trapunto and goldwork.
I’m basing the design on the four colossi of Akhenaten, all of which are damaged in different ways, allowing me to put together something that should resemble an undamaged one. Then I started to forage among my silk fabrics to find something suitable, finally choosing a sort of pinkish orangey-brown which reminds me a bit of pink granite. The colossi aren’t made of pink granite, but the Egyptians did use it, and besides, this is a work of artistic interpretation!
Outline Stitched
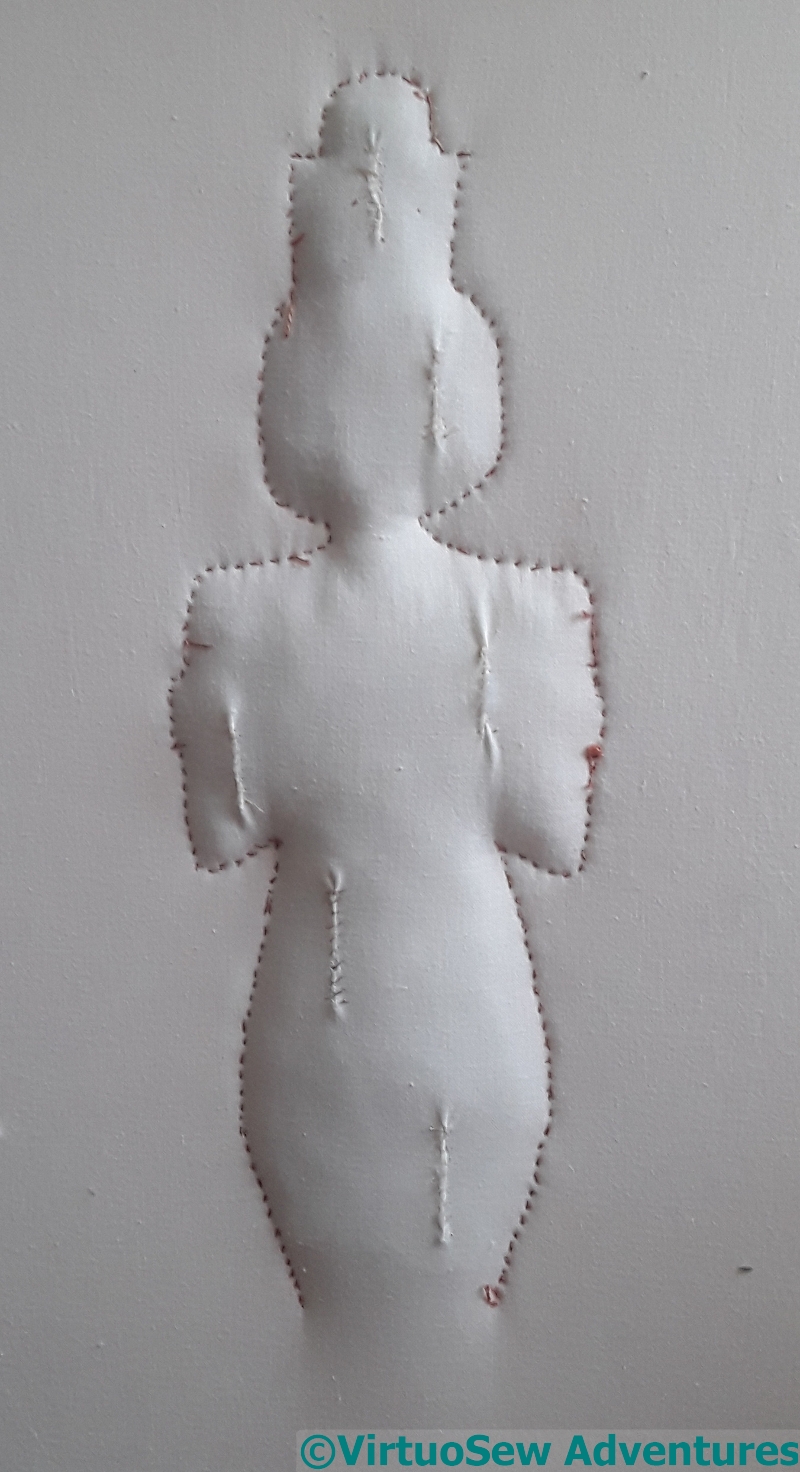
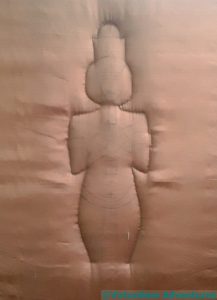
Since the idea is such a mash-up of techniques, I’m not at all sure whether it will work, or what order to do what in (if you follow me!). I’ve started by stretching the calico backing fabric in the frame, overlaying it with two layers of a fairly lofty synthetic wadding and a denser layer of cotton, and then stretching the silk over the top.
Then I stitched the outline, using close back stitches. It doesn’t look very good at this point, because there is extra wadding where I don’t want it.
But the next stage is a bit scary, so I had to clutch my courage in both hands…
Second Tree Done
It took me quite some time – several weeks, in fact, before I got myself over my frustration with “Eve”, gathered up my patience and my courage, and had a go at the second lot of foliage.
The curls of gimp are a bit tighter, and more closely packed than in the first one, and the bunches of foliage are spaced out a bit to allow the branches to show through. There was a great deal of muttering, and I spread out the frustration by doing one clump at a time, then getting up and doing something else instead.
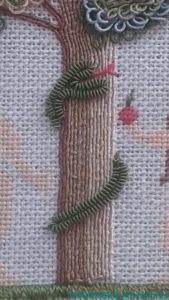
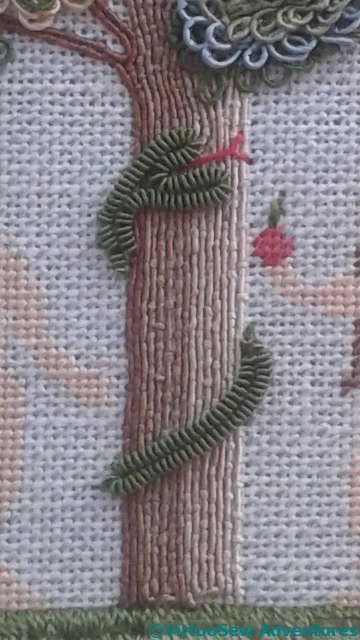
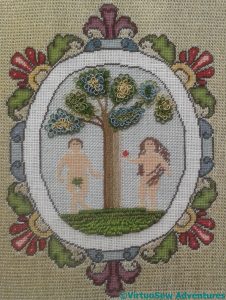
Snake In Silk Purl
Naturally no garden of Eden can be complete without a Snake. In this case, using green silk pearl purl, carefully couched down in two sections to create the head (with flickering red silk forked tongue) and then the tail, to give the impression that the snake has wound itself around the tree.
I rather enjoyed the Snake (both of them!), because I only seemed to need the two hands I already have, rather than the three extra that seemed to be needed for the foliage! The silk thread used to couch the pearl purl also made a leaf for the apple.
And now I’m ready for the next stage…
Both Snakes Added

Sewing On The Princess
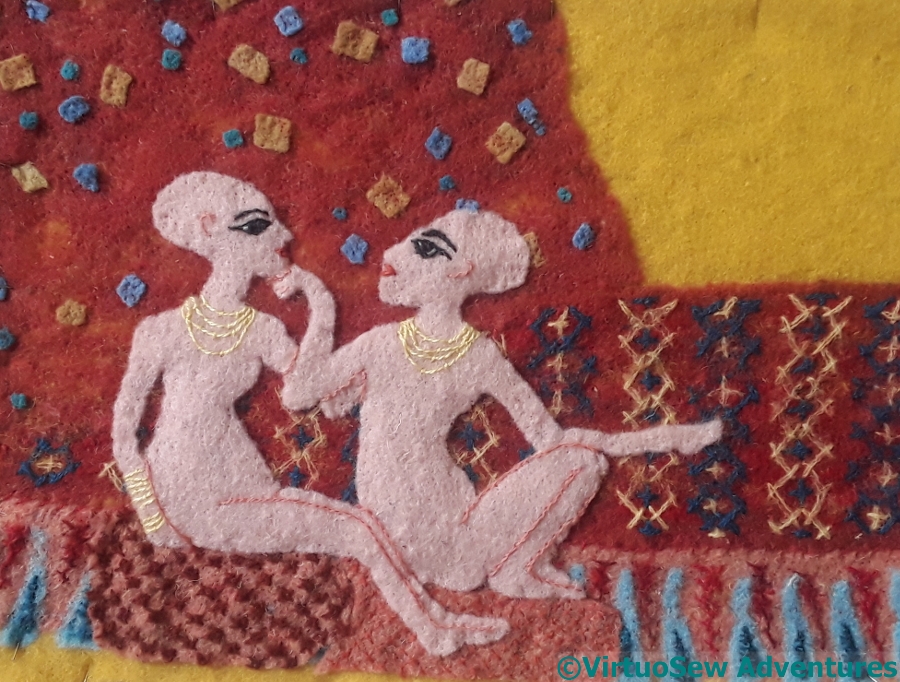
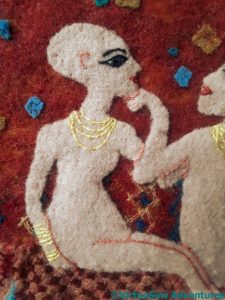
I decided that I would actually sew down the princesses. Everything else has been needlefelted into place, but the texture that creates, especially on a light felt, is a bit too regimented for the impression I want to convey.
I’ve very carefully, and as near as I can make it, invisibly, attached the felt around the edges, stitching into the thickness of the felt that makes the two girls and using a wool thread that is close in colour to the felt.
Ready For Her Close-Up
So far, so good.
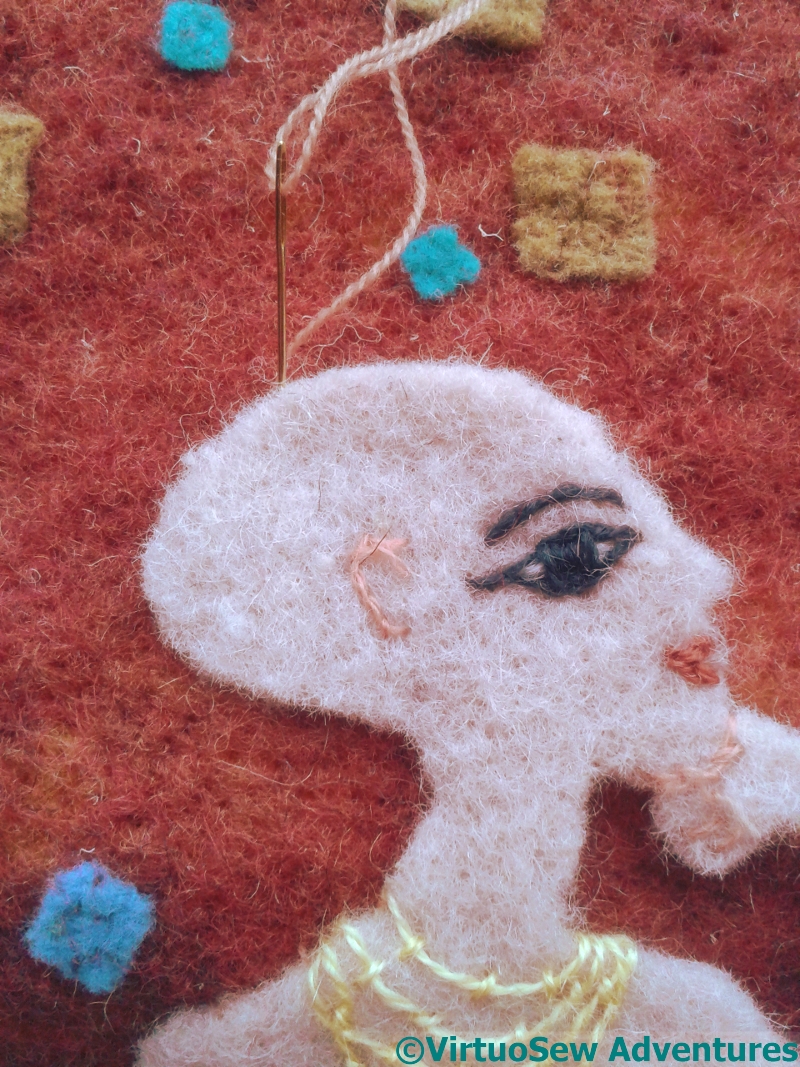
I then used a hand needlefelting tool and went just around the edges, and into the sections that are further back. I’m trying to create a slightly sculptural effect, so that the princesses have a slight roundness to them. Remember how, at the beginning, I said I wanted to recall the scene as the original fresco artist may have seen it, as well as recalling the fresco itself?

Two Amarna Princesses
I’m rather pleased with my two little princesses.
I need to work a little magic in straightening up the panel and working out how to display it, as I think the three felt panels that I’ve done so far would all die if put behind glass, and may not even be happy in frames. A question for another day.

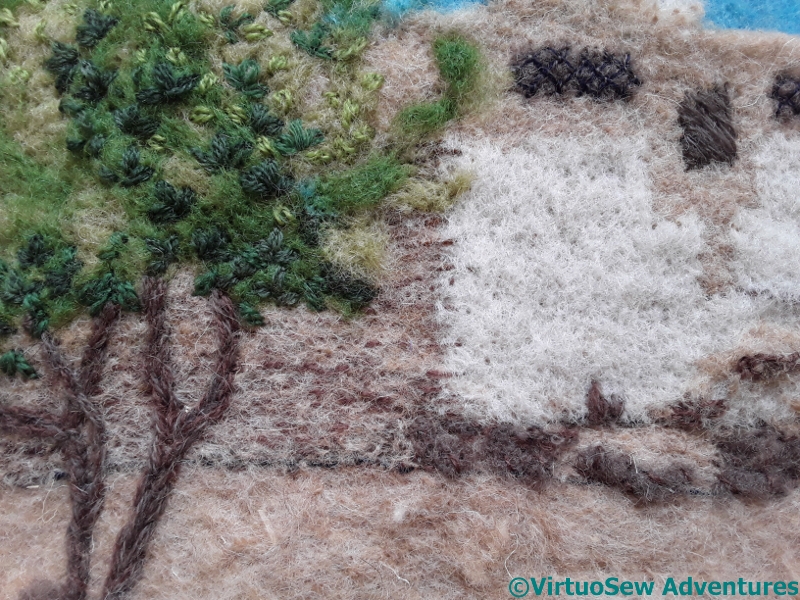
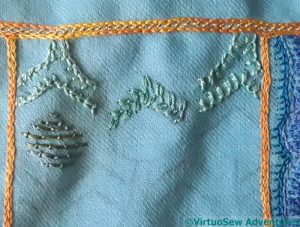
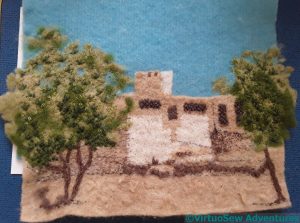
Dig House Texture
I’ve not finished the Dig House panel yet, but I’m working on it!
I’ve tried to add detail and shading to the walls of the house by running threads underneath the top layer of felt, and then running the embellisher over the top to help that added layer to show through a little more.
Dig House Progress
I’m also adding a lot of detached chain stitch leaves to the trees. This is overbalancing the detail on the whole piece, pulling the eye out to the side, so although I still need to do more of this, I need to sharpen up the details on the central section a bit more as well.
It’s easy to make this sort of mistake when you’re making something up as you go along – they don’t always arrive in your head fully formed! – but fortunately, a bit of my favourite thoughtful staring helped me to work out what I need to do.
Now it is just a matter of actually doing it right….