
Tag: Crazy Canvaswork Cushion
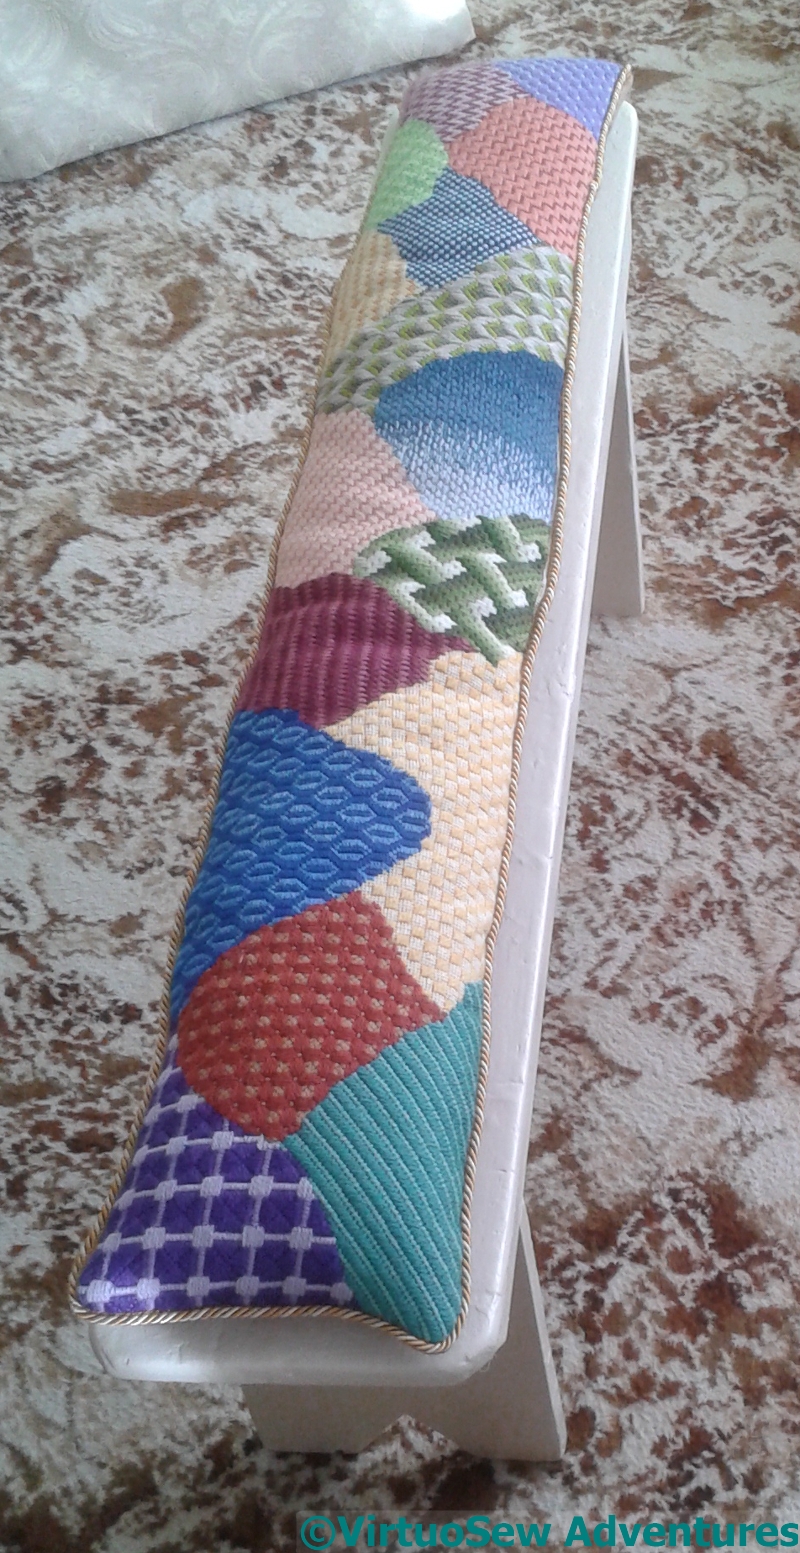
Finally! Crazy Paving Canvaswork finished!
In fact, it was finished a long time ago, and somehow I didn’t get around to writing it up…
Not that there is much to say. All of the interest (almost!) was documented in the stitching.
The old form has been scraped, holes filled, sanded, and repainted, and the cushion is a simple shape, tidied up with piping cord.
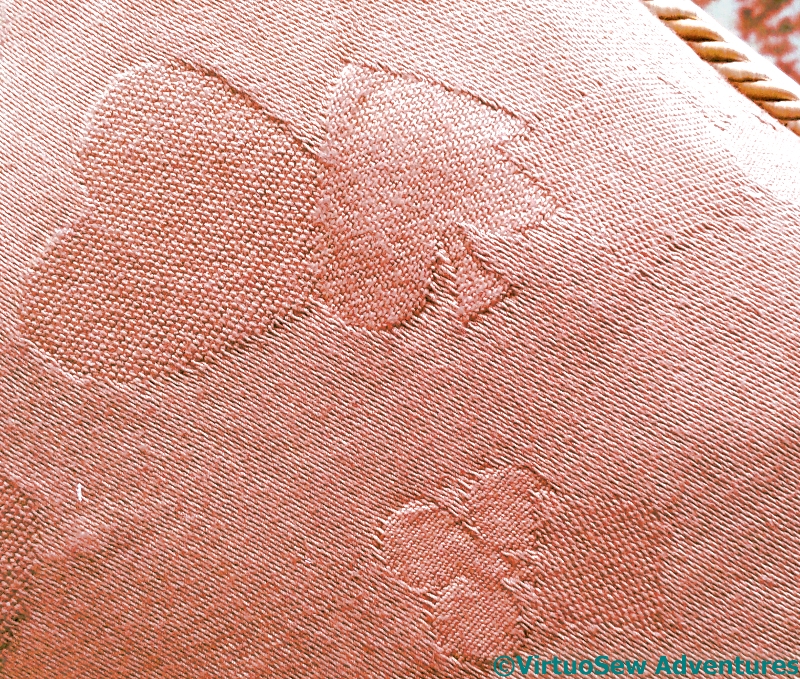
Some of the interest, in fact, is in the backing fabric. It’s an unremarkable jacquard woven pattern in cotton on a synthetic warp, but the design – rather ironically, since I’m card-blind for all practical purposes! – is a design of suits I created during my MSc in Textile Design Technology. It’s clunky, and not well-differentiated, but it was the first time I designed a jacquard pattern. The only time, too, but it was fun while it lasted, and I’m glad I asked the technician to weave a half-metre for me instead of the 10 cm that was all that was needed for the module.
Finishing the Form Cushion – Stage One

Corner of the Form
When I’d finished the stitching of the canvaswork for the Form Cushion, it was a little puffy and warped, and badly in need of blocking, but being long and thin I had nothing suitable for blocking it on. Until I had an inspiration – use the form itself!
We covered the form with an old towel, and then worked on alternate sides of the form. I’ve put an old length of cotton curtain header over the canvas, so that when I come to remove the staples, it will be fairly easy to do.
In theory…
It took quite a lot of heaving and tweaking, and the combined efforts of my mother and myself (for a client, she’s having to put a lot of effort in here, isn’t she! – she’s started on renovating the form too.), but in due course we managed to get the canvas firmly attached, and stood back to look at it.
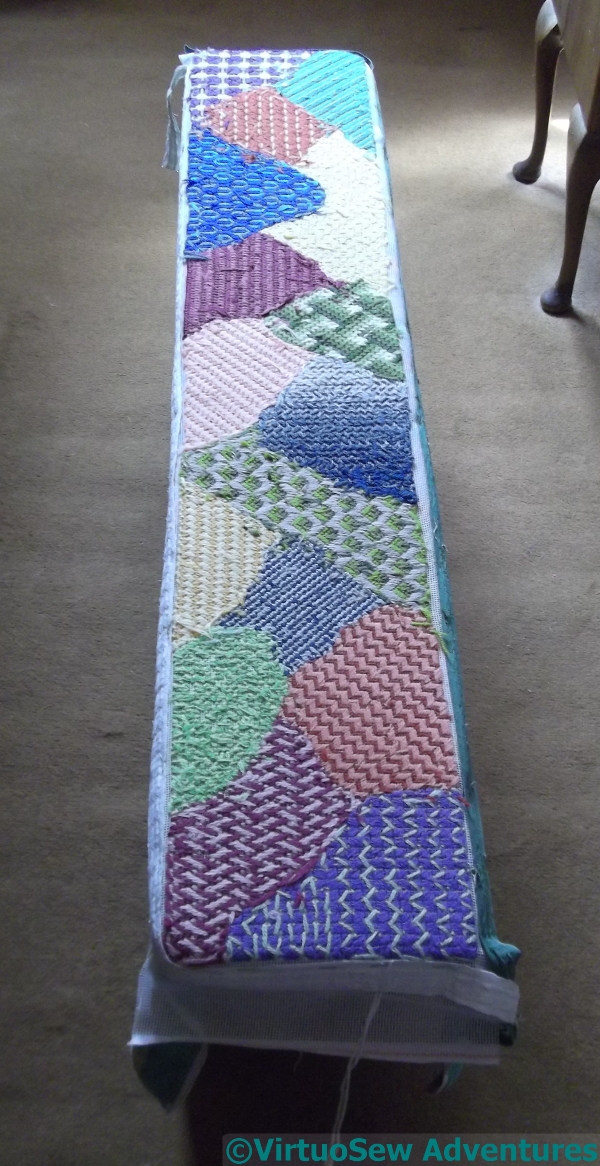
Taking The Long View
It didn’t look nice and smooth as it does here. It was bumpy and lumpy, and not very happy at all.
So I steamed it gently, using a steam iron but not letting it touch the wool. Very, very carefully, and slowly..
It started looking a great deal better (even upside-down), but then we set it aside, still stapled in place, for a few weeks. We wanted to be sure that it was very thoroughly dry before we moved on to actually making the cushion.
And besides, I’m not entirely clear on the type of cushion it will be!
Crazy Canvaswork Cushion – Part 10
Section Sixteen
The last section, Section Sixteen, gave me a lot of trouble. I suppose that is partly because the end was in sight, and I wasn’t quite as focused as I could have been!
I was originally looking for a crossing stitch, but every single one I tried either looked wrong, or simply failed to cover the canvas. I sent several tweets enumerating my trials, with one or two strands being too fine, and three strands too heavy, and in the end I abandoned the crossing stitches entirely.
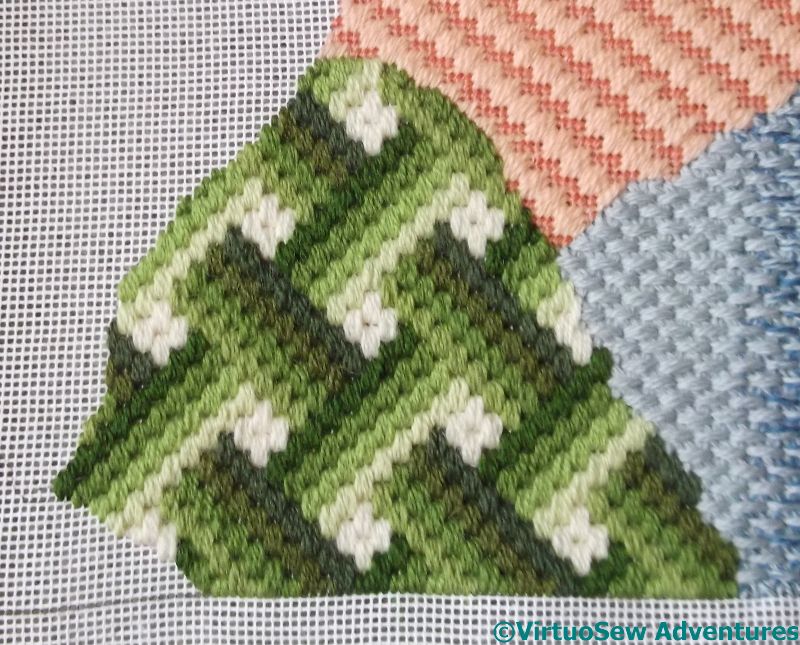
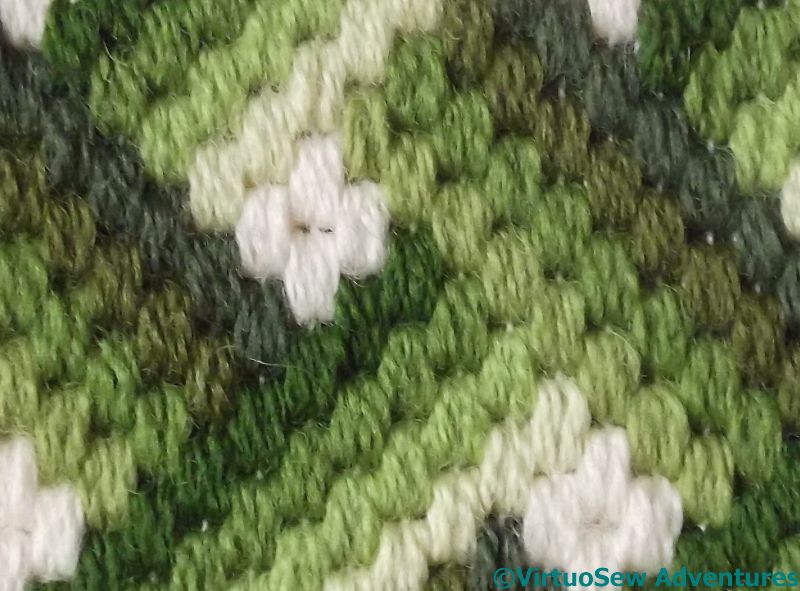
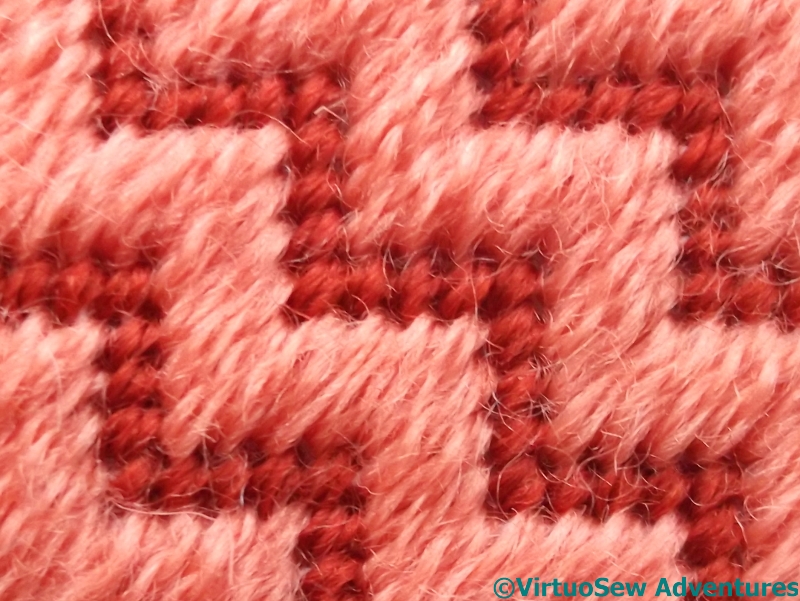
Framed Triangle Stitch
In fact I devised my own variation on Triangle Stitch, which I’ve called Framed Triangle Stitch. I rather like the way it has turned out. It is a bit of a trial to stitch economically, but since I am attempting to reduce my stash, that is scarcely a problem!
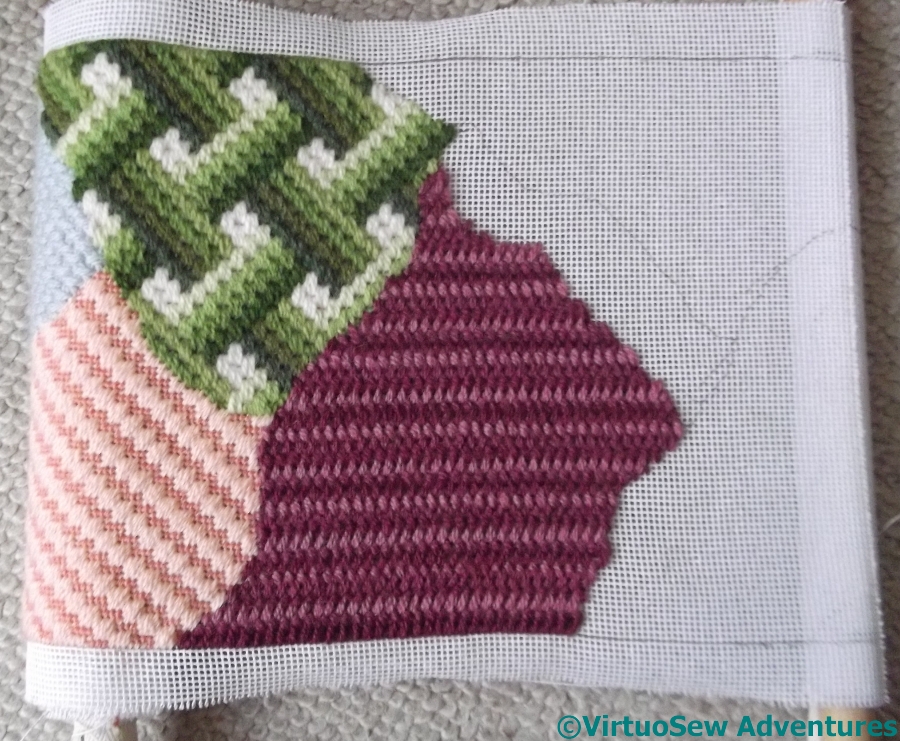
Although I like the pattern it creates, I’ve been somewhat concerned about the scale of the pattern, which is perhaps a little too similar to the blue pattern of Section Thirteen.
However, I now have the challenge of unrolling the whole piece, blocking it, and working out how to finish the cushion.
As they say – watch this space!
Crazy Canvaswork Cushion – Part 9
Section Fourteen
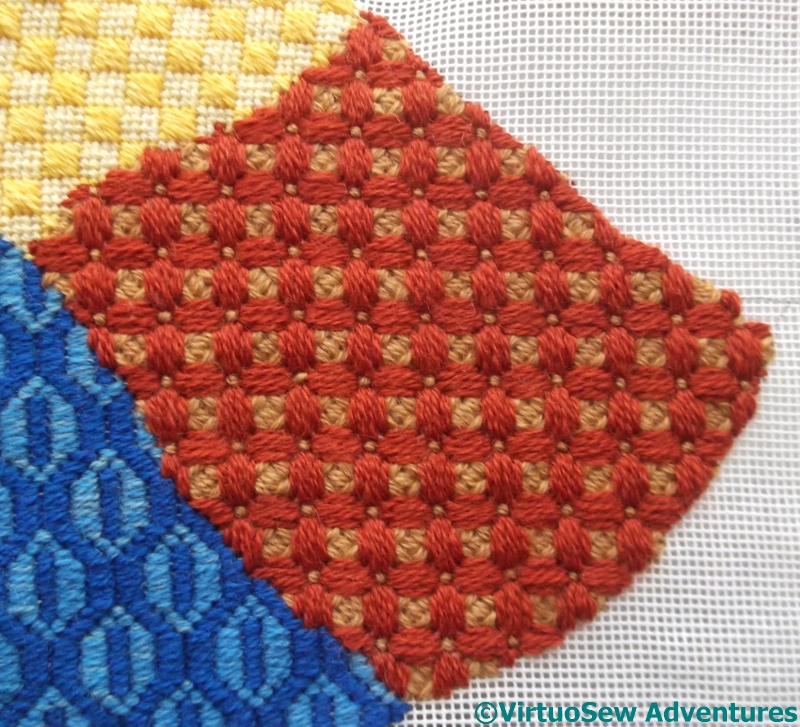
As I mentioned in Part Eight, I gave myself a framework for the patches, alternating crossed, diagonal, and straight stitches.
Looking at the photograph now, there is a slight look of Victorian floor-tiles about the combination of the blue and yellow of the previous sections, and the brown and beige of this one. The proportion of brown isn’t correct for Victorian floor-tiles, but still…
It occurs to me that we might have a lot of fun looking at this cushion when it’s done, looking for other things that it reminds us of!
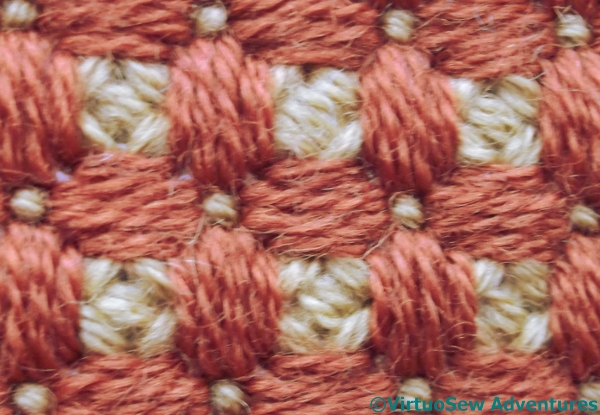
Caged Rice Stitch
I chose a Rice Stitch caged with straight stitches. I suppose this could be regarded as a combination of crossed stitches and straight stitches, which may throw my scheme slightly off-balance. I like it, though – the straight stitches look nicely padded, even though they aren’t, and the rice stitches add texture. I can imagine it looking “floral” in some colour combinations, but in this version, I think it emphasizes the “Victorian Floor Tile” feel I mentioned before.
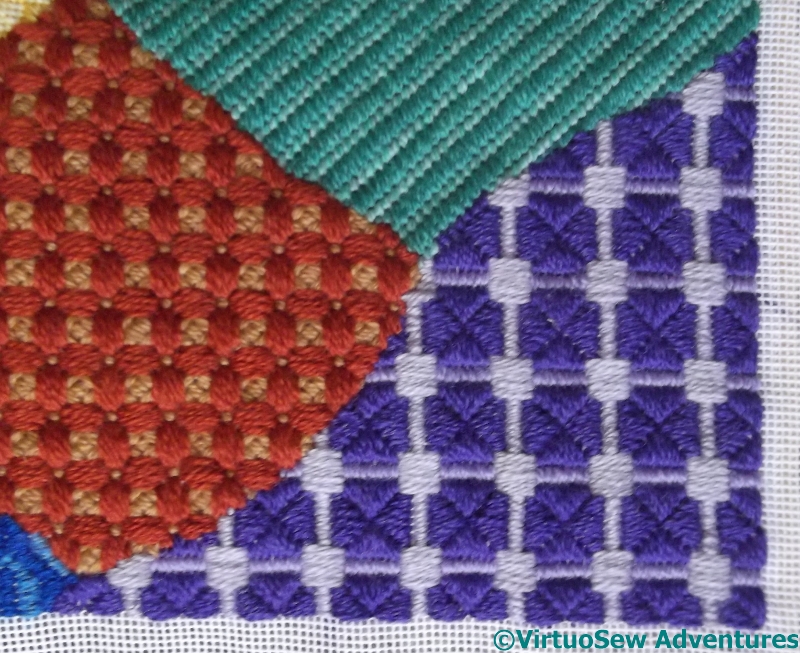
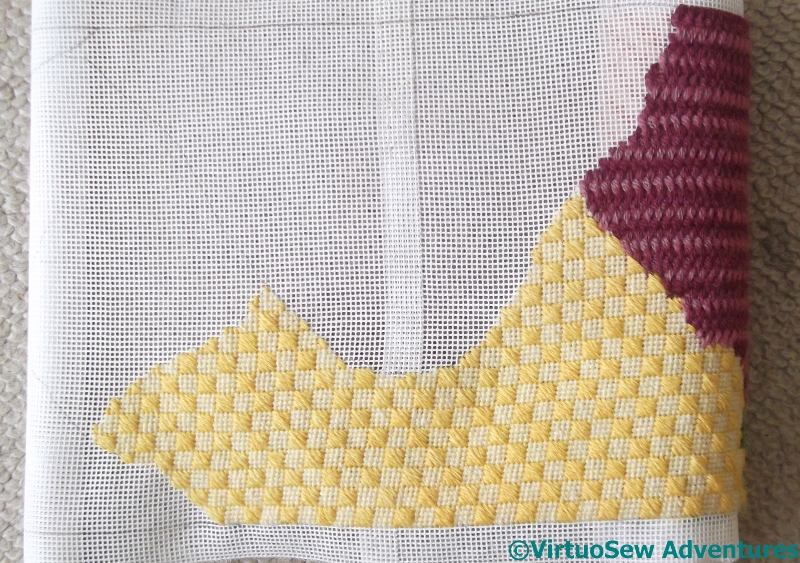
Section Fifteen
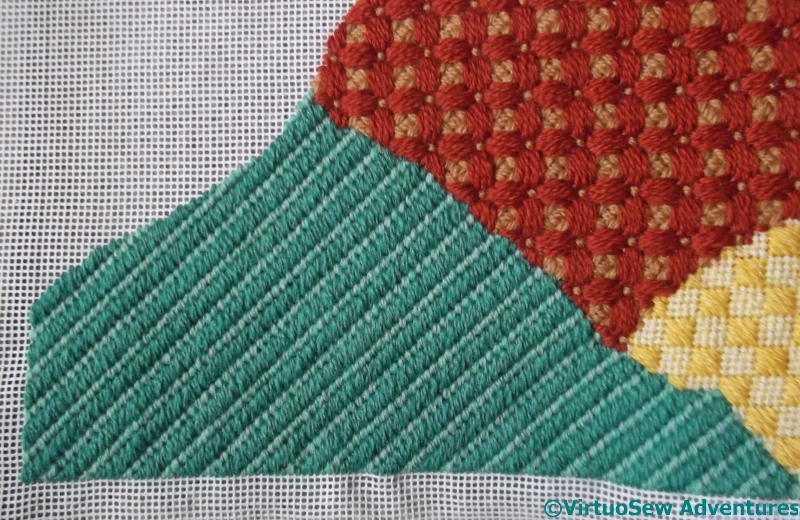
I am getting really close to the end now – Section Fifteen is the last but one, as you can see by the square corner. Since I didn’t work on this project over the summer, I’m a bit surprised by that. I wish the project had been as good at stash busting as it has been at growing!
You might have noticed that teal is one of my favourite colours and wondered why you haven’t seen more of it, but my stash is partly inherited and I don’t have very much of some colours.
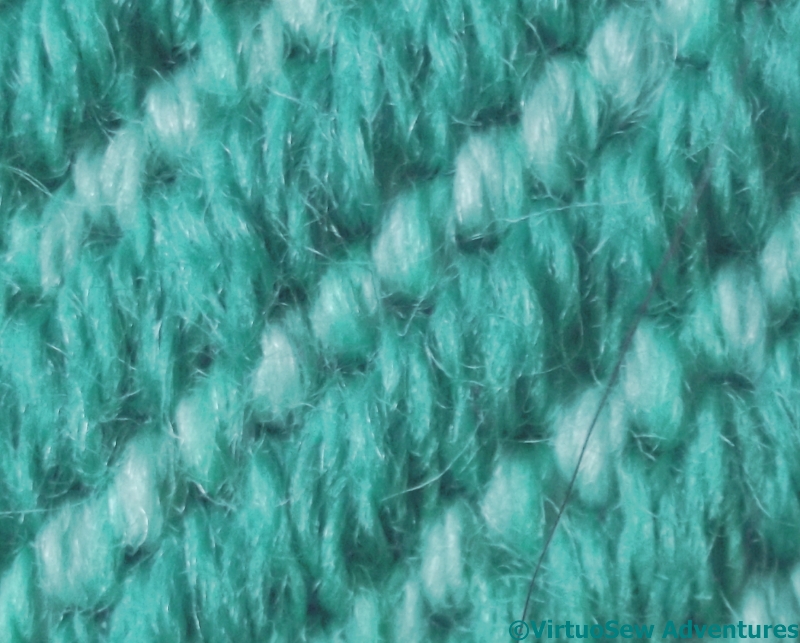
Double Twill Stitch
After the complexity of Caged Rice Stitch (which, while fun, is on the complex side!) I went very simple indeed for Section Fifteen – Double Twill Stitch.
So now I need to work out what colour – and what stitch – to use on the last section. And then how to finish the cushion…
Easy, right?
Crazy Canvaswork Cushion – Part 8
Section Twelve
Moving on…!
I’ve made something of a principle of alternating the types of stitch as I progress along the Crazy Canvaswork Cushion, so as far as possible a crossing stitch is followed by a diagonal stitch, and a diagonal stitch by a straight stitch. This is part of my strategy for making an abstract, random piece slightly less random, and more under control.
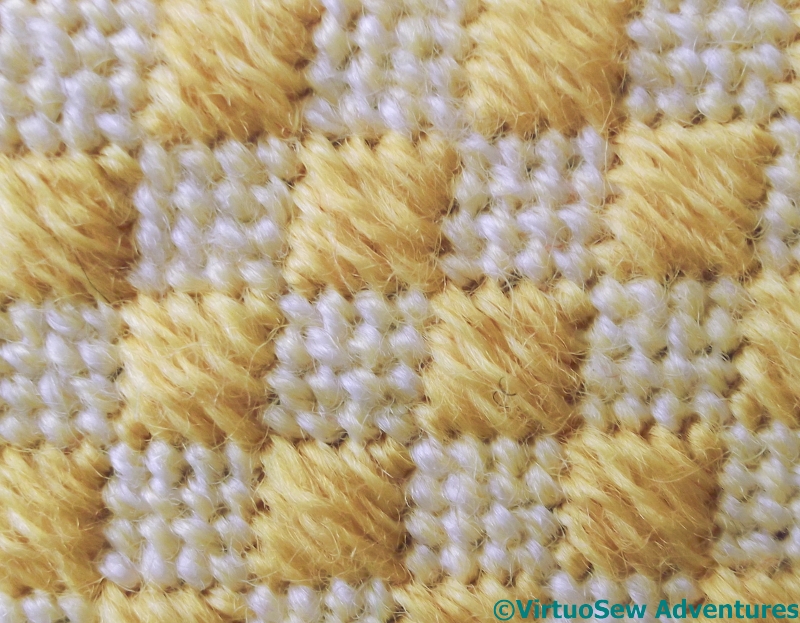
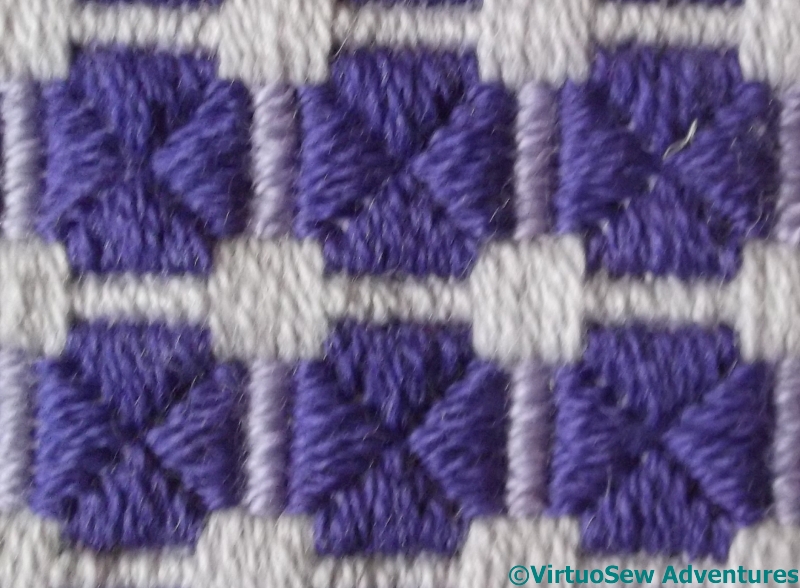
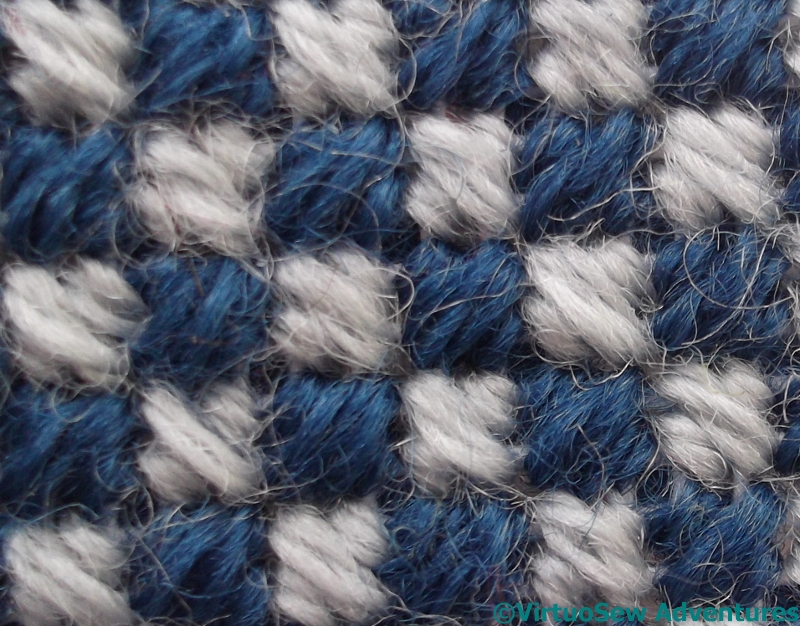
Chequer Stitch
In this case I also needed a sturdy stitch that would help to confirm the “weld” of the canvas, since although it had been tight when I first worked it, the pieces of canvas moved against each other as I worked the earlier sections.
I picked Chequer Stitch because it alternates squares of tent stitch – which will control the two layers of canvas very firmly – with squares of diagonal straight stitches.
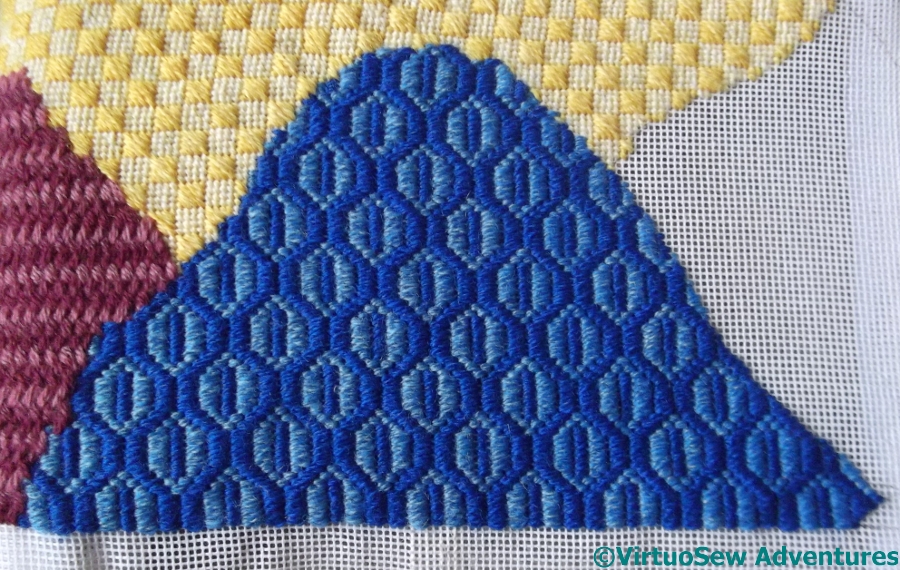
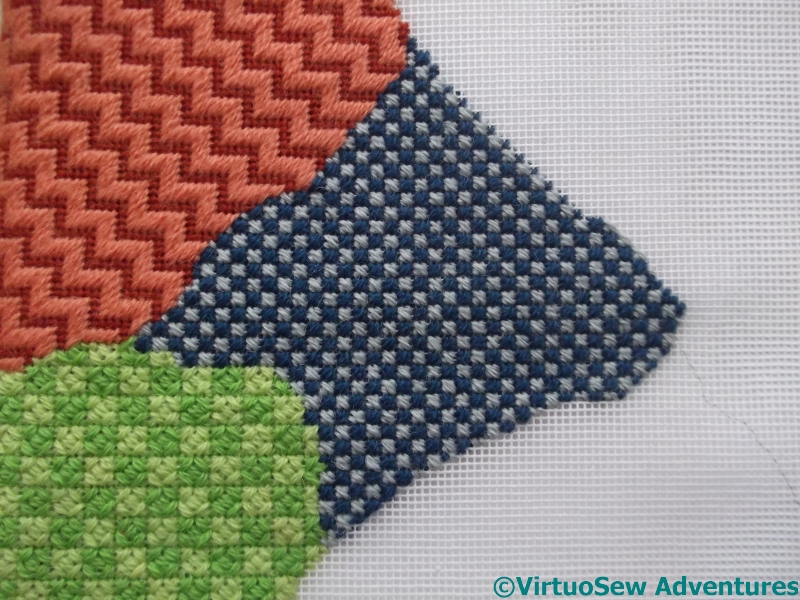
Section Thirteen
Section Thirteen is actually a fairly simple Bargello lozenge pattern. I realise – rather late – that this may be the only place in the cushion in which I have used a straight stitch pattern, with the straight stitches oriented parallel with the long sides of the cushion. I am going to have to hope that this doesn’t make the section stick out like the proverbial sore thumb when I finally unroll the whole thing!
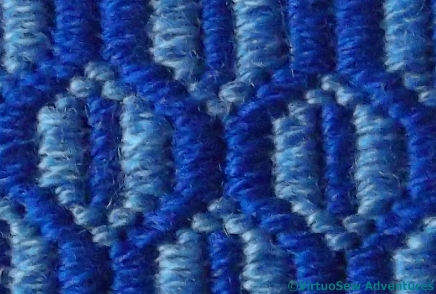
Bargello Lozenge
I found the Lozenge pattern in the “Dictionary of Canvaswork Stitches”, by Mary Rhodes, which I must have picked up in a second-hand shop somewhere, and a quick look inside shows it was a library book before that. It’s marked “Copyright 1980”, but I think there is a rather 1970s feel to this pattern. Thank goodness I didn’t choose to work it in brown!
Crazy Canvaswork Cushion – Part 7
Section Ten
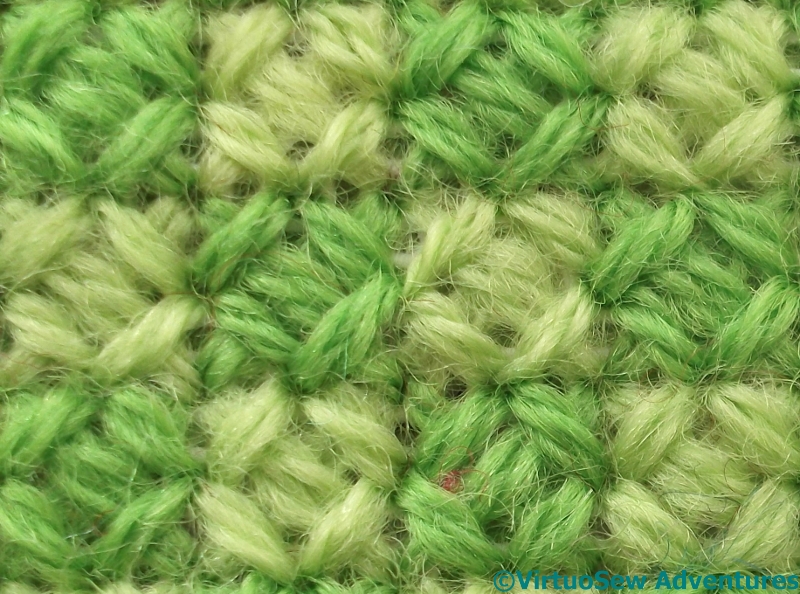
It has been ages since you saw the Crazy Canvaswork Cushion – I got stuck and fed up with it and threw it aside in a huff, but since I’ve now sorted out the frustration I can cry “Onward and forward!” and show you Section Ten, which against my original idea, mentioned in Part Six, of choosing a horizontally striped pattern, I chose a basketweave bargello pattern. This is a pattern I have been longing to use and never had a use for.
Basketweave Bargello Pattern
What hadn’t quite registered with me was the scale of the pattern. It’s easy to work, although getting the colour progression right is a little tricky when you’re stash-busting!
I did maintain the orientation of the dark to light in both of the colour sections, but I wonder whether the light squares are too light. One of the advantages of this project is that it will give me references in the future to help me to remember what I need to think about when I choose to use some of these stitches and patterns.
Section Eleven
Section Eleven was the problem that caused me to make disgusted noises and set the whole thing aside. I started the section using and interlocking and crossing stitch, but it didn’t cover the canvas thoroughly enough, I didn’t enjoy working it, and it was using a lot of thread. Now, I want to use up as much of my thread as possible, but I also want the shapes and sizes to balance nicely.
All of this made me downright grumpy with the whole thing.
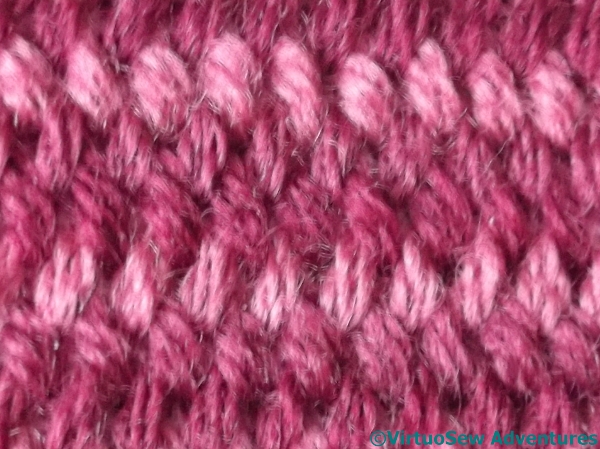
Plaited Stitch
Finally, over Christmas (having packed everything else away so I would have to solve the problem!) I unpicked the stitch I didn’t like, and started again, leafing though my books of stitches and patterns. Finally, I chose Plaited Stitch. It creates the horizontal stripes I had first thought of for Section Ten, but it is a diagonal stitch, so it contrasts with the Section Ten I finally did, and it is a crossed stitch, which contrasts with the diagonal stitches and straight bargello stitches of sections Nine and Ten.
Crazy Canvaswork Cushion – Part 6
Two Thirds Done
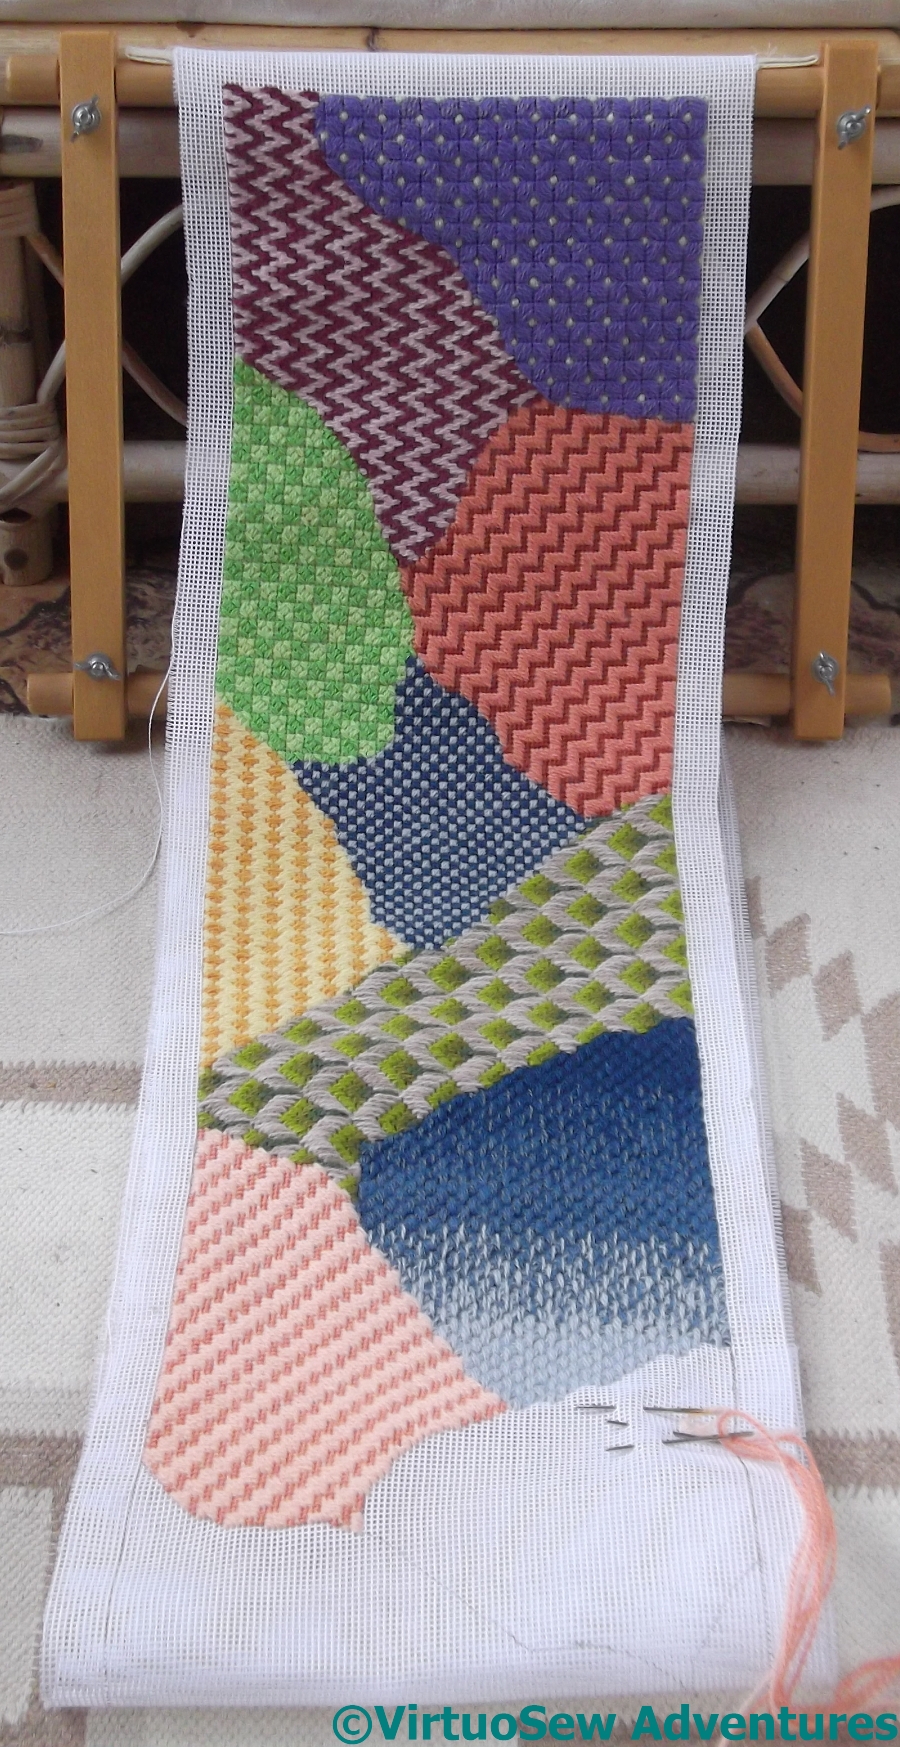
We interrupt our normal programming…. to bring you your first sight of the whole Cushion.
Probably your only sight until I take it off the stretchers, too. As it turned out, getting the canvas rolled up neatly again, under sufficient tension, was really quite a task, involving two people and much changing of minds, as well as many rollings and unrollings. Furthermore, since the rollers are permanently set in their sockets, it won’t be possible to show the whole thing without taking it off the stretchers. I shan’t be doing that, because I really don’t enjoy the mounting process!
However, I can report that I am really very pleased with how it is going. I think I need another set of greens for the next section, since there seems to be a rhythm of sorts going on there. I certainly need something bright, with a bit of punch and impact. I like the last two sections — they work well together – but they are beginning to look a little too well behaved. It’s not quite as riotous as I was hoping…
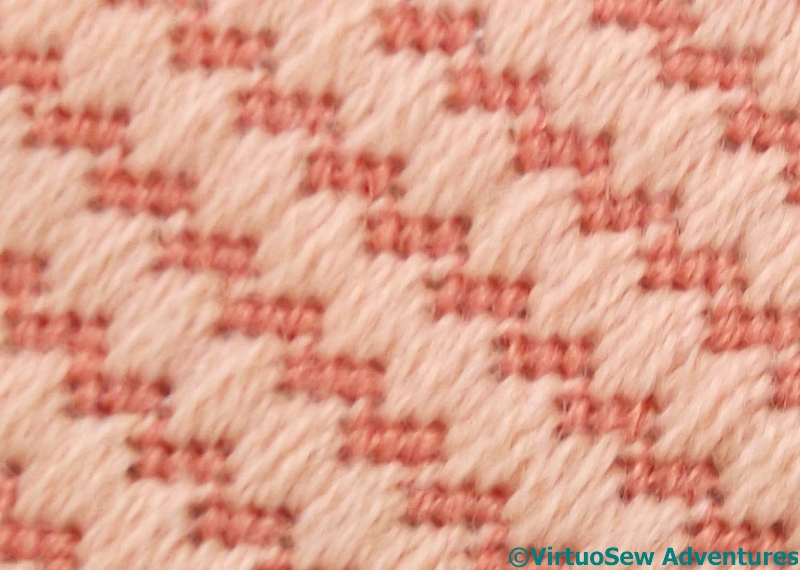
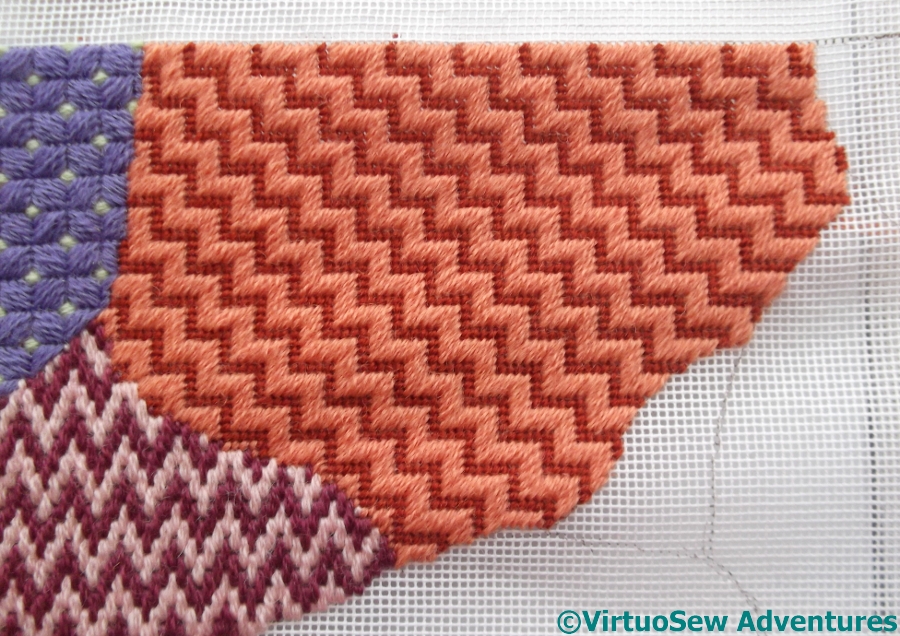
Moorish Stitch
Section Nine of the Crazy Canvaswork Cushion is worked in Moorish Stitch, a diagonal stitch to set against the crossed stitch of the previous patch.
There is one heathered thread in this pattern – the solitary tent stitch vertically separating the short dashes. That’s turned out a bit too subtle, but it does help to maintain the difference between Moorish Stitch and Jacquard Stitch, for example.
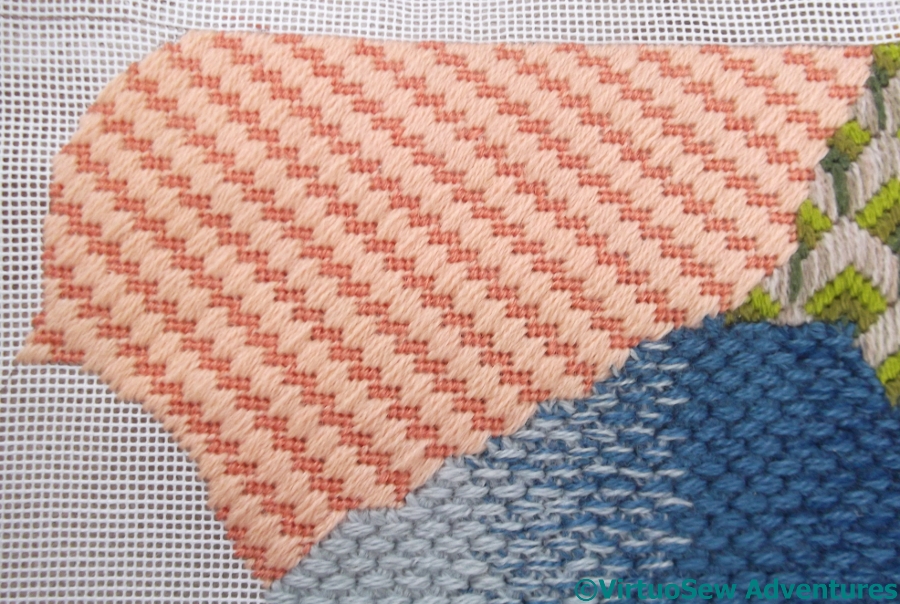
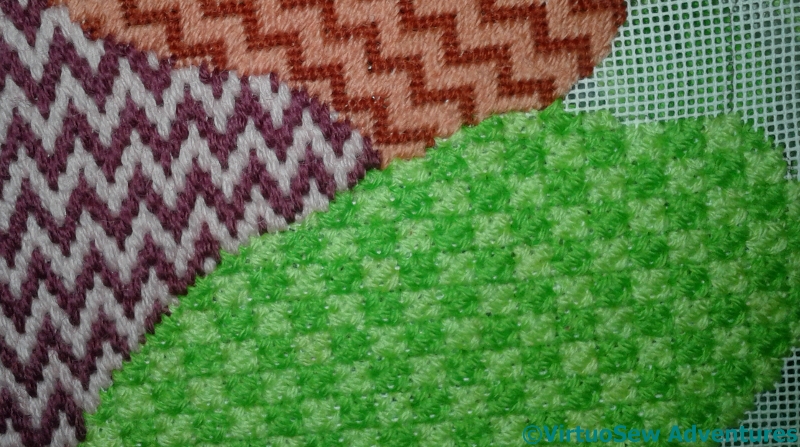
Section Nine
This patch took longer to do because as the weather warms up, wool becomes a less appealing material to work in. In addition, the main, peach wool proved to be rather harder to separate that I expected. It’s labelled Paterna, and should be exactly the same as all the other threads, but it was harder to strand, and has slightly less sheen.
Now I need to pick a stitch – I think it should be a straight stitch, with pattern that runs horizontally – and then pick the colours for Section Ten…
The Crazy Canvaswork Cushion – Part 5
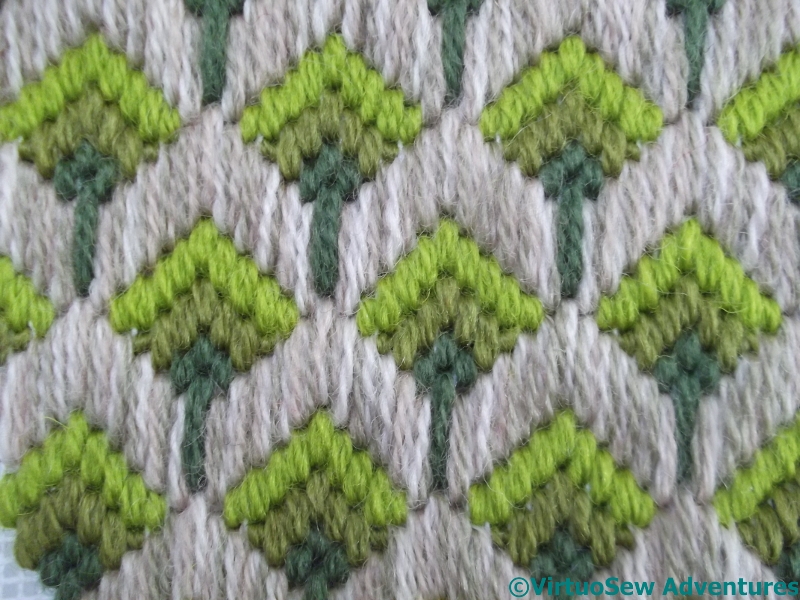
Tree Pattern
This tree pattern is one I’ve been looking for an excuse to do for quite some time. The book in which I found it suggests using it for small pieces like spectacle cases, but I’m not sure I agree. I think it might make for a rather overpowering pattern if not contained by something else. That same book said it was easy, and I’m not sure I agree with them about that either – I had to unpick all the trees the first time I did them, because I’d repeatedly got one element of the stitch placement wrong, in a rather unfudgeable fashion!
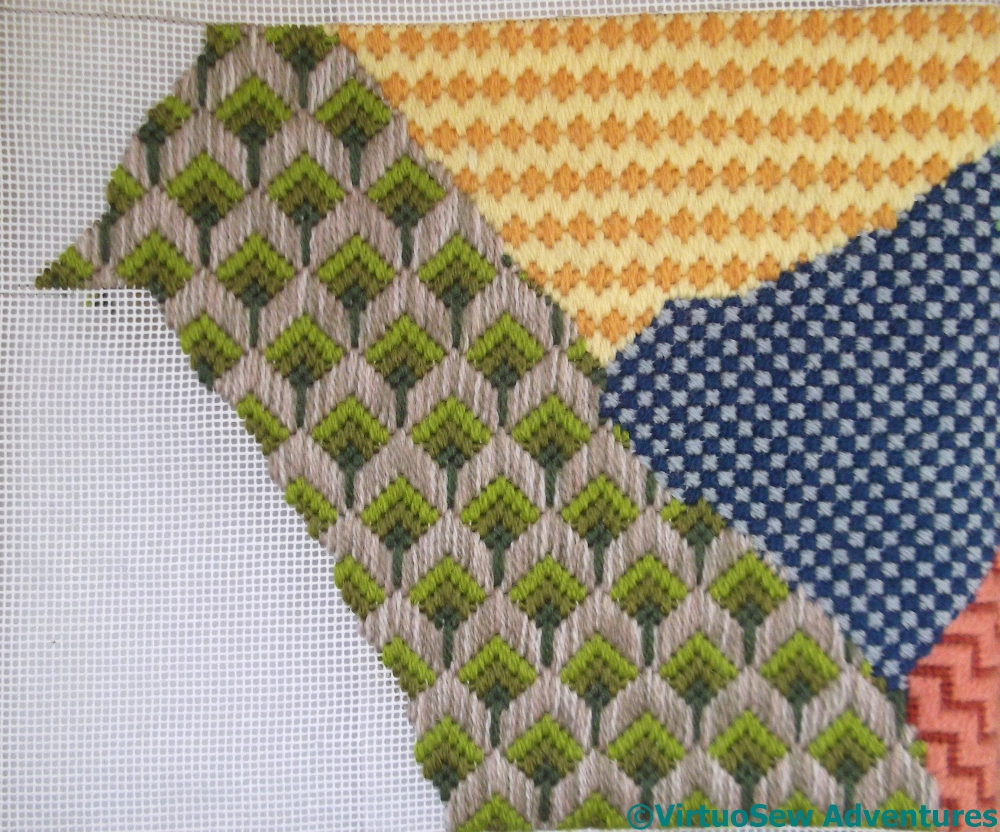
Section Seven
Section Seven covers – just – the whole width of the cushion, and makes a good interruption to the rhythm I’d built up.
It occurs to me that it might be a good candidate for a single colour design, one of these days, especially a light colour that will allow the ends of the stitches to cast shadows and build up the pattern.
As though I don’t have enough plans swirling in my head!
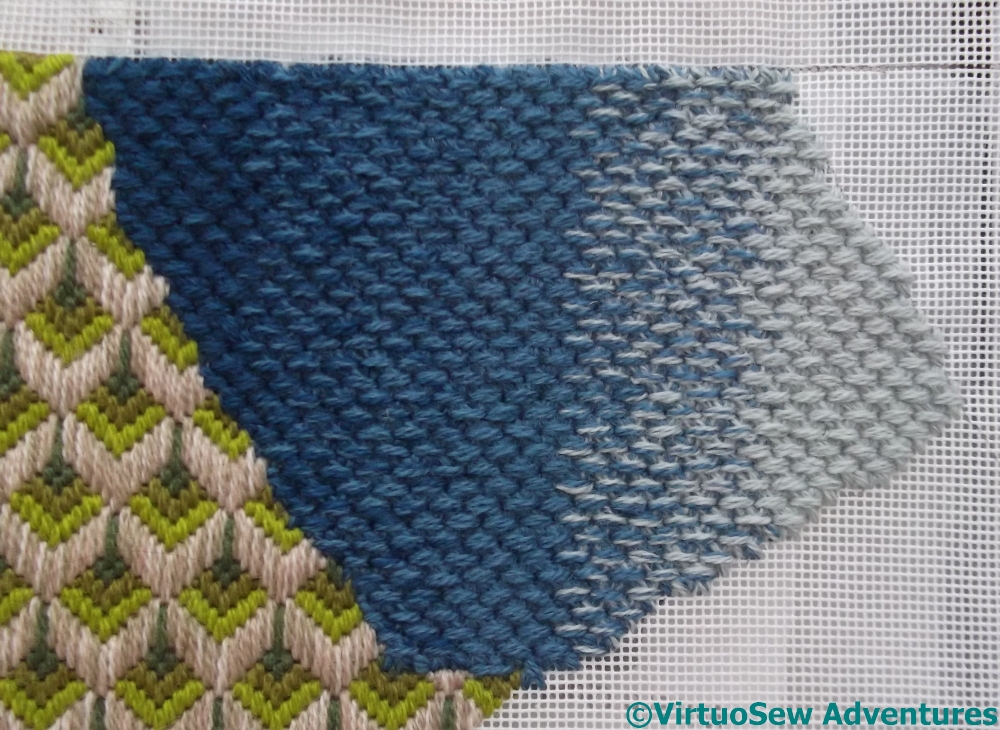
Section Eight
It turned out that the next section was rather tricky to pick a colour for, until my mother suggested blues, to help reflect the pattern around Section Seven.
I decided to create a shaded effect on Section Eight. I used three strands of wool, which meant that I could create a fairly subtle graduation starting from three dark strands, and progressing through 2 dark and 1 medium, 1 dark and 2 medium, 3 medium, and then 2 medium and one light, 1 medium and 2 light, then finally 3 light.
Dutch Stitch
The stitch is Dutch Stitch, found in Mary Rhodes’ Dictionary of Canvaswork Stitches. It is a condensed, closely worked crossing stitch. In fact it is so condensed as to be quite an effort when worked in three strands on this canvas!
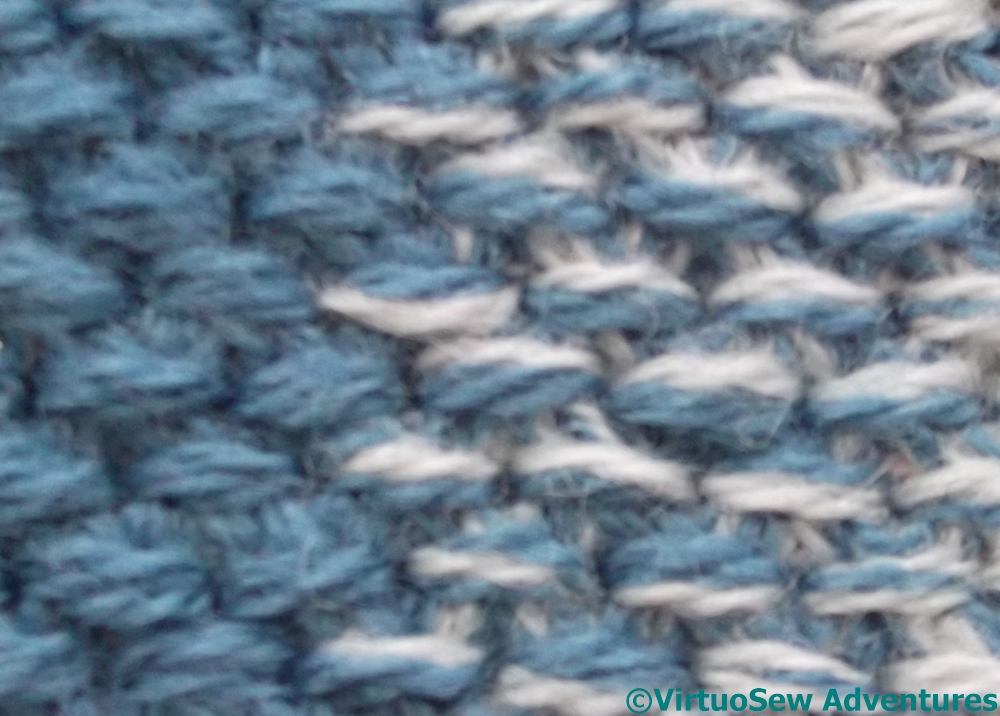
Still, I expect it will prove a hardwearing stitch, and the texture is a good contrast with the smoother textures of the straight stitch patterns.
The Crazy Canvaswork Cushion – Part 4
Reversed Mosaic Stitch
Section five needed to be worked in something that would help to calm down the acid green of section four.
I chose two shades of blue, and Reversed Mosaic Stitch, which at this scale is a small, neat pattern. The dark blue stitches are at ninety degrees to the light blue ones, hence the term “Reversed”. It also echoes to some degree the orientations of Brighton Stitch in the very first section. Just as in good script writing for a series, odd references may be made to incidents several episodes in the past, in designing large pieces of embroidery, references of colour, style and stitch help to give some cohesion to the overall item.
Section Five
I am a little concerned, in fact, that this pattern has calmed everything down too much, that it is looking rather grey and dull – which in turn means I need to take some time and effort to pick the next section, both stitch and colours.
I have even braced myself (reluctantly!) for the possibility that when the whole thing is finished and unrolled, I may look at this section askance and rip it out!
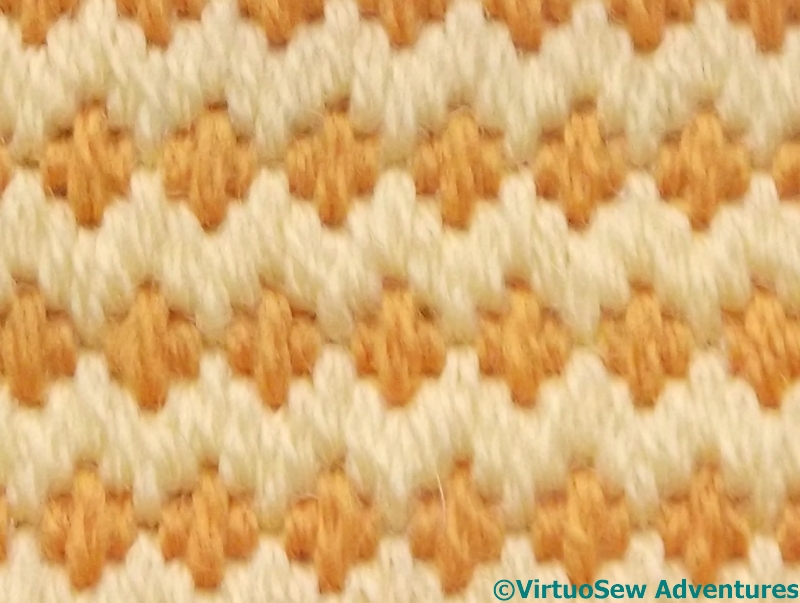
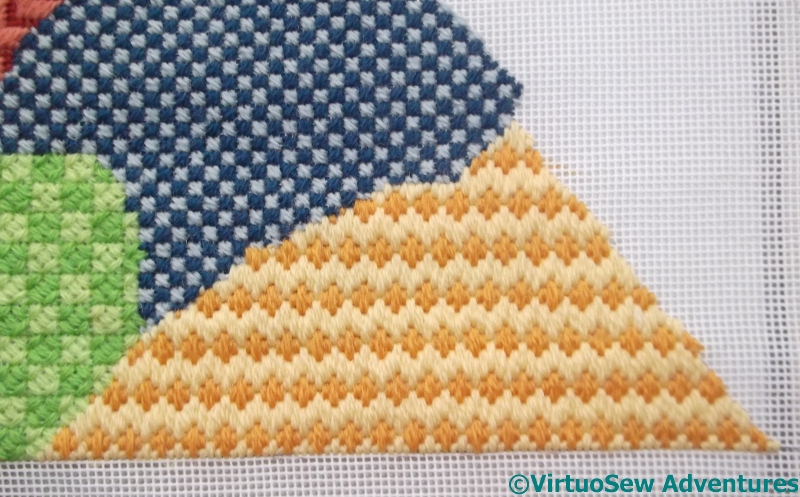
Hungarian Grounding
Moving on to Section Six, I wanted to choose a warm colour again, to counterbalance the warm colours of the Jacquard stitch, and eventually picked out two shades of warm yellow for the Hungarian Grounding Stitch. This is one I have wanted to do – I haven’t the faintest idea why! – ever since I found it, but have never had the right project to put it in. It’s a particularly useful one because it’s stripy, but at the same time spotty, so it reflects and recollects several different stitches.
Section Six
Seen from a distance the effect is stripy rather than spotty, but since the finished cushion is probably destined for my mother’s studio, it will be examined close up as well as from a distance!
The next pattern I choose will be much larger, and involving more colours. I am now far enough towards the centre to move on to the more multi-coloured sections, for maybe four sections before moving back to two colours. Some heathering will be involved, as well. Although my stash seems extensive it’s completely unstructured, being the leftovers of several of my own projects as well as inherited bits and pieces, and heathering will allow me to extend some of the colours to fill the elements I need them to.
I hope!
The Crazy Canvaswork Cushion – Part 3
Jacquard Stitch
The third section is in Jacquard Stitch. I’ve always liked this stitch. It creates an effect rather reminiscent of a twill weave, which is one of my favourite fabric structures – you may recall that the Persian Fantasy screen was embroidered on a cotton twill, and that I used a cotton twill fabric for the superstructure and bridge of the Camberwell. It’s a little tricky to start, and doing the compensation along all the wiggly edges had me counting and recounting to try to make sure I didn’t create any steps that were longer than others. It is very much easier to do when the edges are straight!
Third Section
This view shows that whole shape of the third section.
As you can see, I am trying to change around between diagonal stitches and straight stitches, stripes and squares. Although Jacquard Stitch and Florentine stitch are both striped, one uses diagonal stitches and the other straight stitches. And strangely, again, the section used approximately the same amount of wool as the previous sections. By now I was beginning to be confident enough to pull out that number of strands from the hank and see what happened..
Section Four
For my next section, I looked for a square stitch which involved crossing threads. Since I chose to alternate the colours, the amount of each colour would be approximately the same. This is a rather acidic green, and swore violently at some of the other colours in my stash – although it does look better in real life than it does here!
Rice Stitch
I chose Rice Stitch. This is probably the simplest way of using two colours for Rice Stitch, although later I may use the variant which has the corner crosses in a different colour to the underlying diagonal cross stitch.
Next time I may also choose to use three strands in the needle. Two are usually sufficient with a crossed stitch, but although this looks hardwearing , in real life it looks a little “thin”.