
Tag: Tudor and Stuart Goldwork Masterclass
Elephant’s Anklets Identified!
Ladder Stitch Foundation
I’ve been struggling to decide what to do with the anklets for the Elephant of Infinite Charm. When I look at the Elephant without anklets it’s clear the design needs more visual weight lower down in the design, but when I asked the Elephant what sort of anklets he wanted, he just humphed at me. For days!
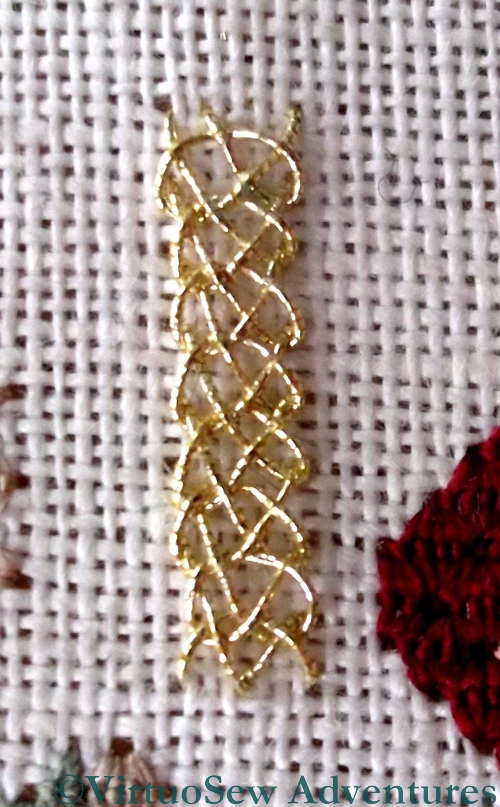
Now, however, I think I’ve cracked it. And one of the really pleasing things about the idea is that it helps me to practice my Ladder Stitch, which I’ve been struggling with for the Tudor and Stuart Goldwork Masterclasss. It’s easier in silk, partly because I’m not quite as conscious of the expense of the thread (I can’t believe I just wrote that!), and partly because the thread slides over itself more easily.
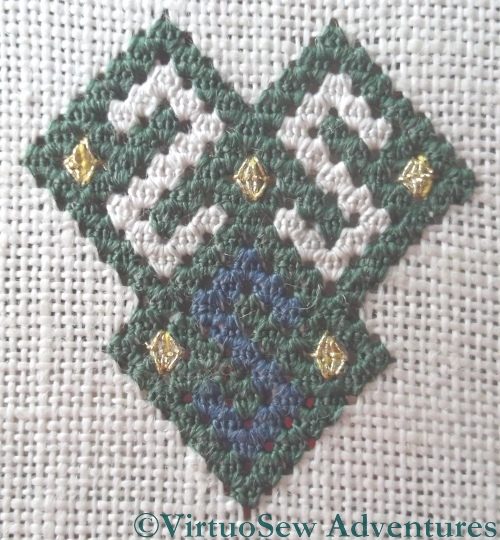
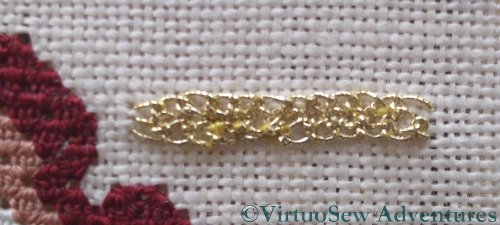
Zig Zag On LadderStitch Anklet
So here is my choice – ZigZag on Ladder Stitch. It adds a bit of patterning and structure , but it’s not out of scale with the Elephant or with his feet. The only slight difficulty is that because it it a complex stitch on top of a fairly complex foundation, it’s not exactly lightening-fast. Still, I’ve got one done, and the Elephant isn’t humphing anymore. When I’ve done both, I will need to decide whether to put a second anklet further up the leg. The original ceramic version does, but then in the ceramic version the anklet is smooth…
Tudor and Stuart Goldwork Masterclass – Bonus Instructions
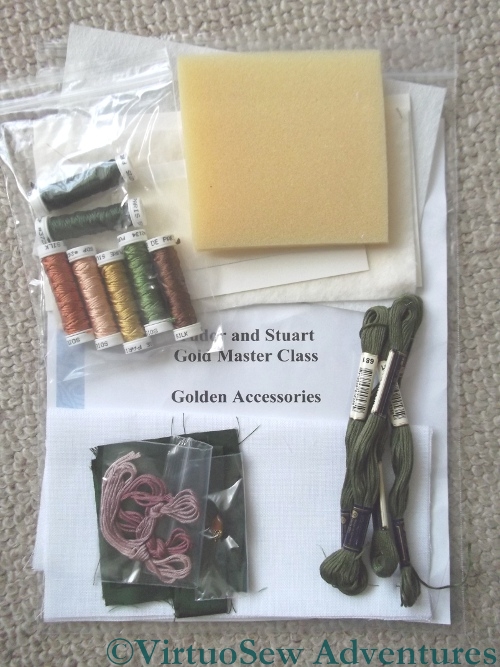
Golden Accessories Kit
There was a set of Bonus Instructions in the instructions for Month Fifteen, from a teaching project that Tricia had retired from use. She was asked whether she’d produce kits of the materials for those of us who don’t have easy (or even difficult!) access to a really good needlework shop. Yet again, apparently, demand outstripped her expectations (a good problem to have!), and here is my kit.
It includes finishing materials for the various accessories, as well as the fabric and the silk thread, but not the metal thread, since all of us already have large spools of that from doing the main Spot Sampler.
My intention is to finish these to add to that planned “winter decoration corner” I’ve mentioned a couple of times. I’ve found some masks which I’m going to decorate in silver and gold, and I will use some metallic gauze or something similar for the background. Already the two Needlework Nibbles, the Floral Glove Needlecase and the Tudor Pincushion look like they will create some wonderful reflective textures for a dark corner…
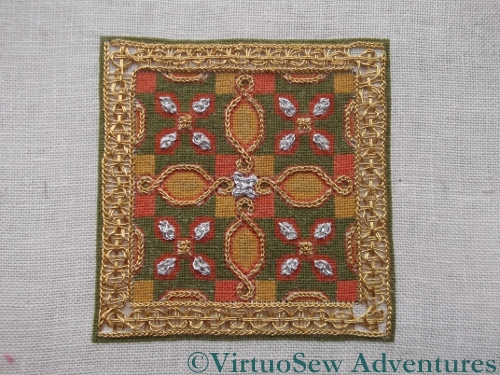
Tudor and Stuart Masterclass – Beginning the Petite Pincushion
Starting The Petite Pincushion
There were two additional projects included in the Tudor and Stuart Goldwork Masterclass, to provide further opportunities to use some of the stitches we are learning. The Tudor Pincushion was one, and this “Petite Pincushion” is the second. The materials include a piece of silk brocade for the backing, some gold cord to provide an ornamental edge, and more spools of assorted metal threads for the goldwork stitches.
Whereas the silk stitchery for the Tudor Pincushion was in primarily in Tent Stitch, most of the silk work on the Petite Pincushion is in Queen Stitches. I’ve not done any since I finished the silkwork on the sampler, and I am finding that I am having to remind myself to pull them tight to create the openwork effect. I will have to remember to line the embroidered side of the pincushion or the stuffing will poke out through the gaps!
I stitched centre lines on the fabric, but as you can see, once I had the first stitch placed I snipped out the middle stitches and pulled them back out of the way.
I’ve already finished with two of the silk colours, which appear only in the central starburst. Now I just have to do rows of strapwork in the other two colours, as well as the four blocks of tent stitches that provide a basis for a rather intriguing-looking interwoven stitch which will probably be nearly the last element I add.
Tudor Pincushion Finished
Tudor Pincushion Final Stitch In Place
The final stitch in the Tudor Pincushion was the central boss in Four Sided Interlacing Stitch, which slotted nicely into place after I received the instructions for Month 16.
I decided – after staring at it intermittently while I’ve waited for the stitch to turn up – that I was happy enough with the border and did not need to unpick it. So the next phase was to attach the silk backing and stuff the pincushion.
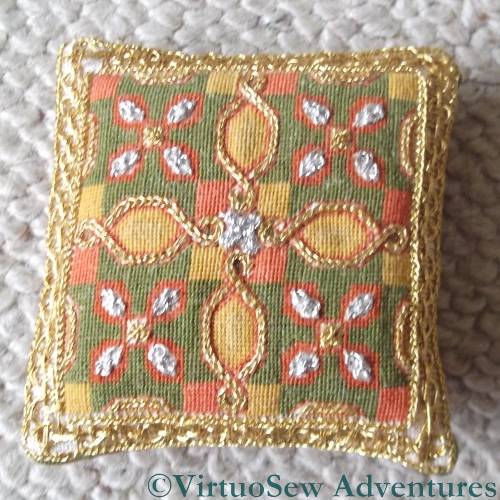
Finished Tudor Pincushion
I’ve tried not to over-stuff it, since I intend to use it as a decoration and not as a pincushion, but I still found myself pushing more stuffing in than I expected. Unlike the Tulip Slip Pincushion, where the velvet was so tough that I used a sewing machine, this one is finished entirely by hand, and stuffed enough to look plump and fat, but not so much that the fabric is strained.
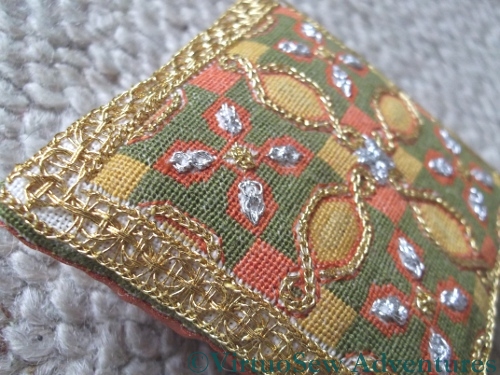
Close Up Of Pincushion
I’m finding with Tricia’s various pieces that photographing them from an angle sometimes produces a much clearer view of the stitching. There is certainly less likelihood of “glare” from the metal threads. Besides, after all that effort, I’m more than happy to show off a little…!
Tudor and Stuart Goldwork Masterclass – Spot Sampler Progress
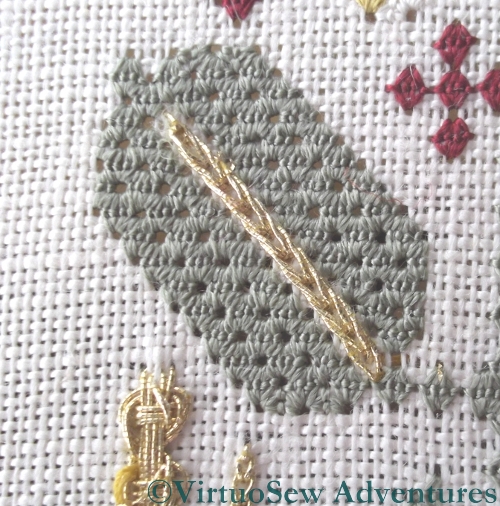
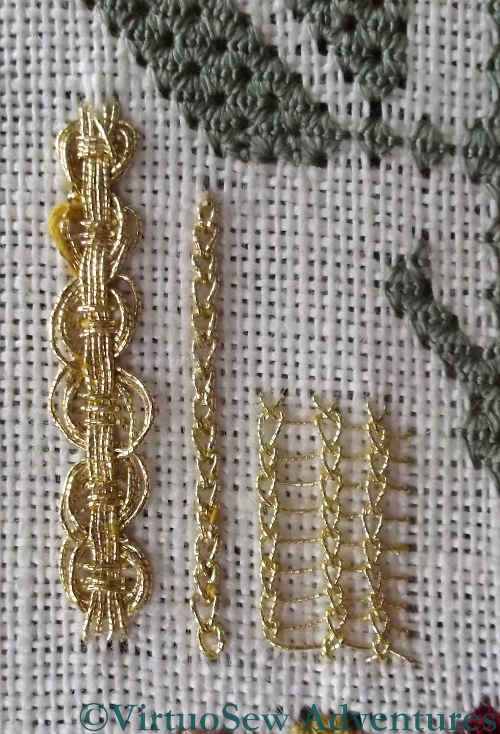
Heavy Chain Stitch
I’m only adding a few stitches at a time to the Spot Sampler, partly because I want to take my time, and partly because I’m rather keen on the Christus Natus Est panel at the moment and seem to spend most of my daylight stitching time on that.
I was a little disappointed with this Heavy Chain Stitch when I worked it, because it seemed rather thin and attenuated. I tried using my laying tool to keep the loops open and reduce the abrasion of the yarn, but since the laying tool is a sharply-pointed piece of metal, it presented its own hazards. I might work the other leaf of this pair in the other thread to see whether it creates a different effect.
More On The Sampler
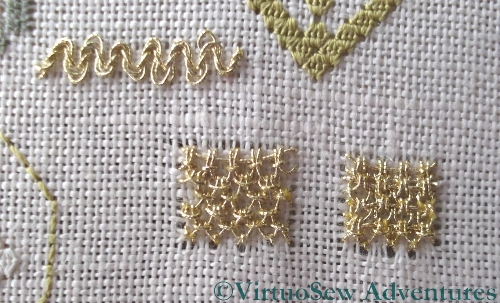
The two stitches shown here are the Up and Down Buttonhole Stitch variations. In the alternating variation, I realise now I look at the close up, I forgot to include the “return” or straight stitch across at each level. Yet another stitch to re-do in the margins!
The bar at the top is Diagonal Half Guilloche Stitch, and it looks much tidier at the proper size, rather than in close-up!
Tudor and Stuart Goldwork Masterclass – Month Sixteen
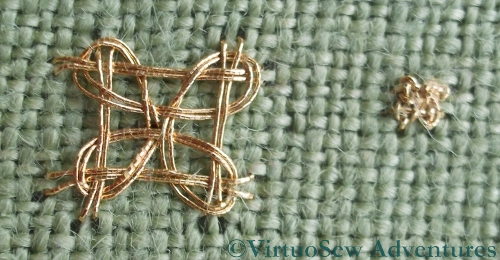
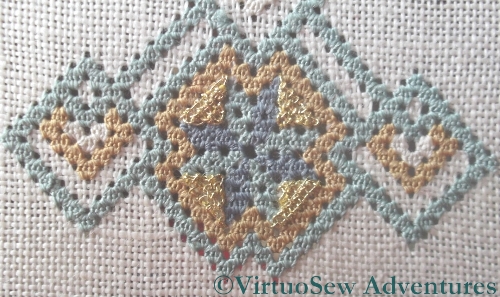
Four Sided Interlacing Stitch
The stitches for Month Sixteen are stitches that create prominent large “spots” of intricate pattern. They are simple enough in concept – there is a foundation of straight stitches, and an interlaced pattern worked around the foundation. Naturally, the actual working of the stitch proves to be less than entirely straightforward. I try to vary the scale of the stitches I work on my practice cloth, but in the case of Four Sided Interlacing Stitch when I was trying to work it as a counted stitch, the only variations I could create successfully were “Huge” and “Tiny”. At the smaller scale shown there is really little point in using an interlacing stitch like this, and one might more sensibly choose something a little simpler to work. At the large size, the effect of the metal thread is diluted by the background fabric.
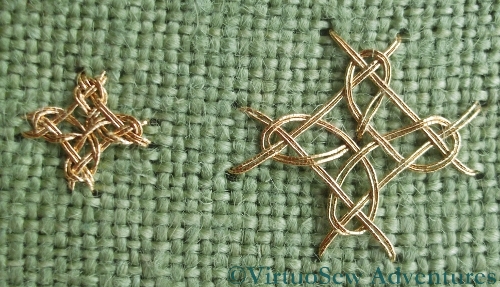
Diagonal Four Sided Interlacing Stitch
In the case of Diagonal Four Sided Interlacing Stitch my two different scales worked slightly better.
I know, by the way, that in the case of one of these stitches, I made a mistake in the foundation layer which lead to a further mistake in the interlacing. I can’t find it now, and I’m going to be intrigued to see how often I get these stitches right, when I start working them on the sampler itself!
Tudor and Stuart Goldwork Masterclass – more gold added
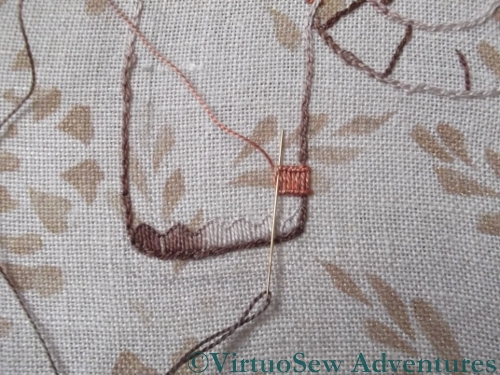
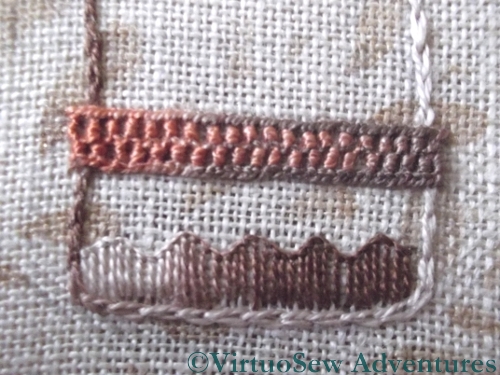
Detached Buttonhole with Return, and ZigZag on Ladder Stitch
I’ve been persevering with adding the goldwork stitches to the Spot Sampler. Tricia set up a Yahoo Group for the course so that we could help each other out, and I posted some of my headaches to that.
I received a good many helpful suggestions, and on top of that, Tricia posted a very long response on the Question and Answer blog, which included the reassuring detail that when she’s reverse-engineering the stitches, she uses the point at which the thread sheds to help her determine whether she is really doing the stitch that she’s trying to. Some shredding is to be expected, then…
Gold Queen Stitches Added
I think I’m doing better now, as I am finding there is rather less shredding (although there is still some). I suspect my tension is sometimes too tight, and Tricia has suggest that my Ladder Stitch in particular could do with being loosened up a little. Having the tension too tight will abrade the thread further as I make each stitch.
Gold Detached Buttonhole with Return
The detached buttonhole with return that forms the first embellishment on the large pattern at the bottom of the sampler was rather a surprise. It’s more raised than the photo of Tricia’s finished piece suggests, and I got into a tangle working it, although that is because the position of the stitches on the frame were not as comfortable to work from some angles as others. I find myself wondering how RSN needlewomen manage with those large slate frames!
One Collared Elephant
You can tell that the Elephant’s inspiration was the right one – suddenly he’s taken off!
The Elephant Collared
I’m using one set of variegated silk thread (shading from orange to brown) for the harness and headcloth and saddlecloth, and another (shading from cream to brown) for any small bits of the Elephant that show through all his finery. I shall have to redraw his head and headcloth – the transfer has rubbed off – but I’m pretty pleased with progress.
The collar is worked in six rows of braid stitch, which is a stitch that always looks better in a round yarn like this silk perlé. The roundels hanging from the collar are two rows of buttonhole stitch, and the roundels on the ear-covering are spiral trellis stitch – at the moment. I’m not quite sure that they are right. I first used Spiral Trellis on the Jacobean Work Panel, and really enjoyed stitching it, but I think these look too fussy. One big one might be better, and it would allow the colour change in the thread to show a little more.
I’m glad that I have worked out something to do next, as his anklets are giving me trouble.They are smooth and domed in the original model, but I think satin stitch might look a little ordinary.
I’ve used small satin stitches to outline the border of the saddlecloth, but only because I wanted something quiet to contain the excitement I intend to put inside it – I’m planning to use one of the complicated interlacings from the Tudor and Stuart Goldwork Masterclass for the saddlecloth, but extended to form an all-over pattern.
Watch this space…!
Tudor and Stuart Goldwork Masterclass – Month Fifteen

Circular Interlacing Stitch
There were two more interlacing stitches this month, Circular Interlacing Stitch and Figure Eight Interlacing Stitch.
I know I’m always talking about scale on these stitches, but I’m pretty sure that at a reasonable scale of thread to fabric, the Circular Interlacing Stitch will create a lovely neat boss which would have all sorts of wonderful uses in representing jewellery and embellishment. Instead, on my loosely-woven practise cloth it looks rather leggy and a bit thin. I’m glad to see that I got the interlacing right, and don’t have any twists or tangles in it, though!
The most difficult part of the stitch, I found, was laying the foundation interlaced crosses using the correct proportions and directions. Sometimes a larger thread count makes life harder rather than easier!

Figure Eight Interlacing Stitch
By contrast, it isn’t at all obvious that I even got the Figure Eight Interlacing Stitch right, although I am pretty sure that I did. It might have been better to pull all the wraps tighter to create a neater effect, rather than allowing the loops to create the uncontrolled springy appearance that they have at present. This is partly a result of the fact that I’m still reluctant to pull metal threads into tight loops because I don’t want them to strip their surfaces.
I do like the rich, textured braid effect that this stitch creates in the photographs in Tricia’s instructions, so I think it will be worth playing with it using different threads – not all of them metal, either – and seeing where it takes me.
More Goldwork On The Spot Sampler
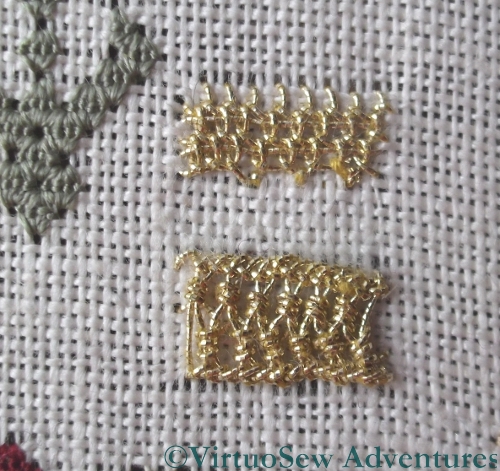
Guilloche Stitch, Reverse Chain Stitch and Ceylon Stitch
I have been working more on the Spot Sampler of late, slowly catching up with the metal thread stitchery. If you are confused by my posts on this, you aren’t alone – I spend a few minutes every time I sit down trying to work out where I’d got up to!
Some of the stitches are familiar – Ceylon Stitch, for example, I have used before. In this case I have used the lighter and floppier of the metal threads supplied. It creates a more lacy effect than Tricia intended, but I thought the thread might “strip” less dramatically (I was right, too!). When I finish the main body of the sampler I may go back and work new versions of some of the stitches around the edge, so in this case, for instance, I would choose to use the heavier, thicker thread. This will make the sampler even more useful by giving me some sense of the variation of appearance available through different threads..
As you can see, I still haven’t entirely got to grips with Guilloche Stitch, although using the stiffer thread did make the whole thing slightly easier. I was becoming slightly anxious about finishing the panel without starting a new length for the last course of interlacing!
Reverse Chain With Buttonhole Edging
I’ve already used the Reverse Chain Stitch with Buttonhole Edging since I learnt it on this course, when I was working the Title of the Map for the Amarna Panels. Now I look at the photograph I see that my tension wasn’t entirely consistent across the whole width of this spot, and the thread stripped and clogged in a couple of places. But then, samplers are for practising on… I may choose to re-work this later, using the finer thread, since I think that if worked fine and delicately this stitch could find a host of new uses.
Plaited Braid Stitch on the Spot Sampler
I felt when I finished my practising for Month Fourteen that the real test of my grasp of Plaited Braid Stitch would come when I came back to the stitch after a week or so. As you can see, I’ve worked it as a counted stitch here, in the larger size and using the heavier thread, and it seems as though I got it right. I kept the instructions to hand all the time, of course, but I’m very pleased with this. It is a real testimony to the clarity of the instructions, and the way they gave me some grip on the structure of the stitch, that I didn’t feel at all anxious when I was working this.
Can you hear me purring?