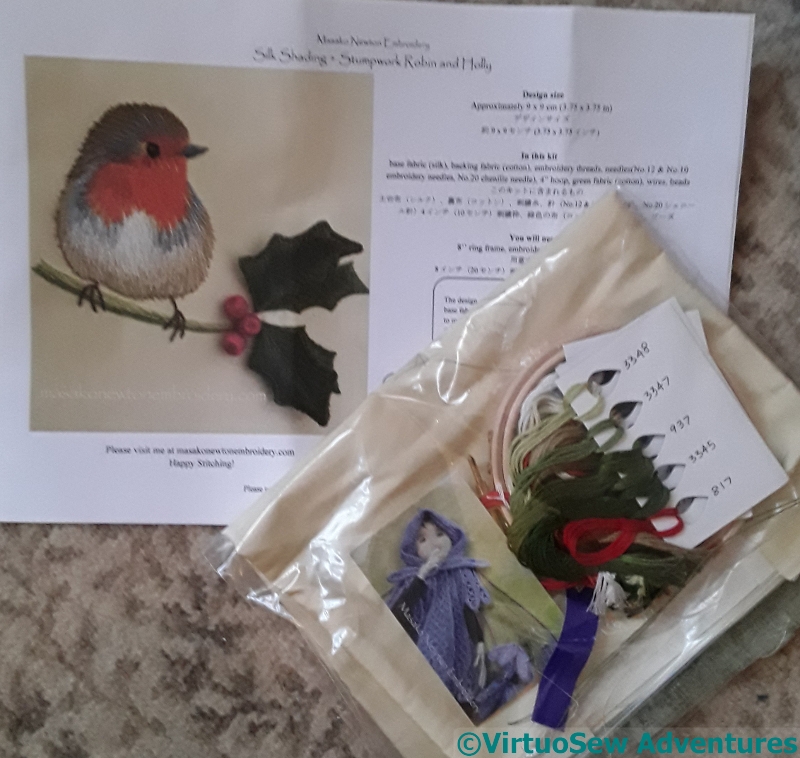
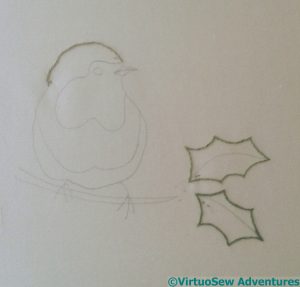
Robin Stumpwork Kit
I’m a very lucky woman. Sometimes, as in this case, I have to say so through slightly gritted teeth…
In this case, I am expressing my good fortune in having a family that takes my embroidery as seriously as I do – and the gritted teeth are because my parents elected to give me a learning opportunity for Christmas.
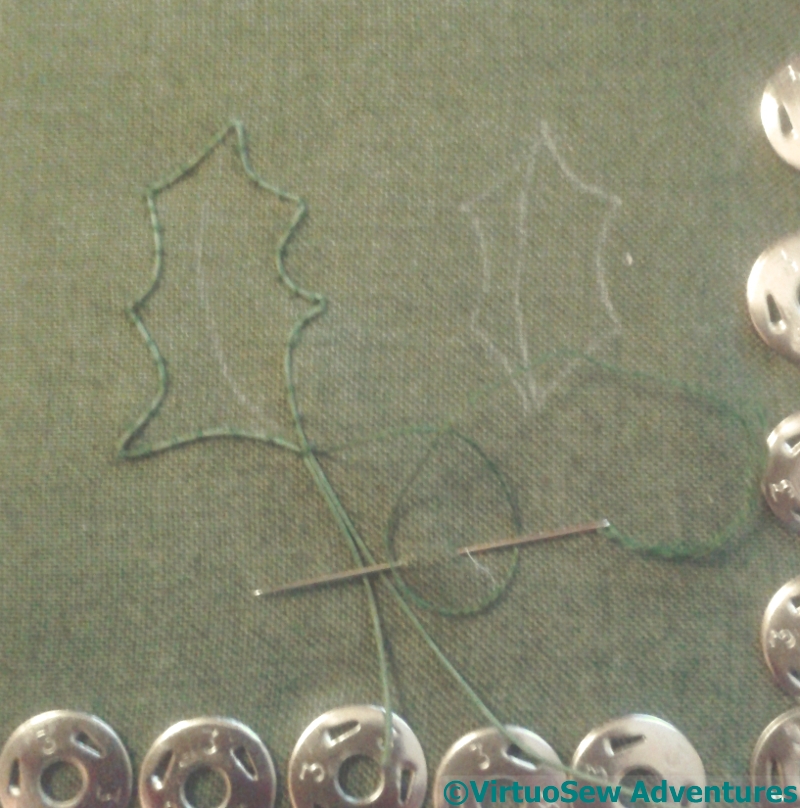
Starting The Wired Leaves
Silk shading is something I know I should work at, but would be most unlikely to choose to do, because the naturalistic representation it tends to be used for is not really my forte.
All the more reason, of course, to make an attempt, at least, to get to grips with it, but I haven’t been able to convince myself to do so!
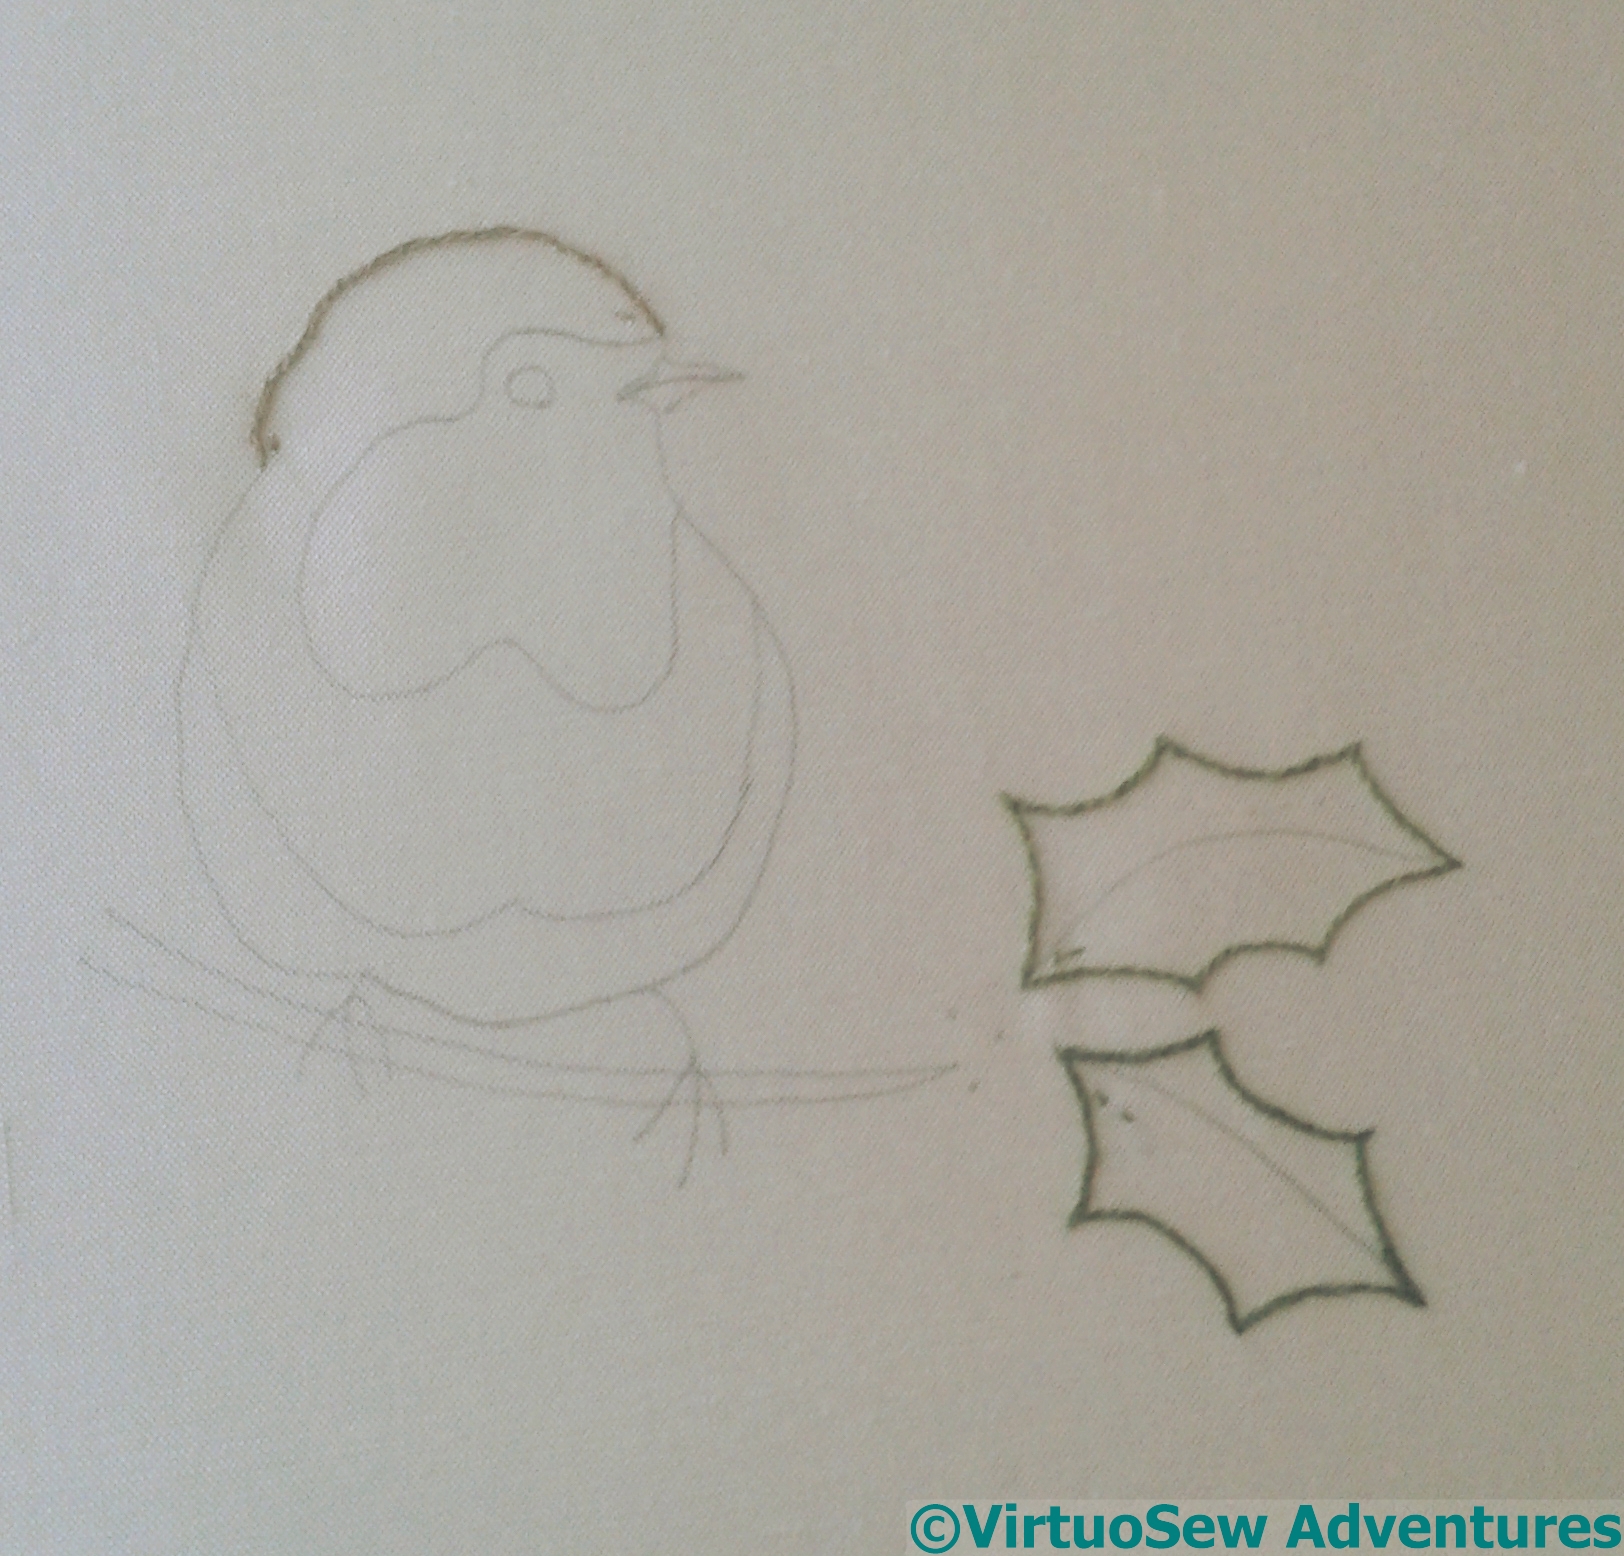
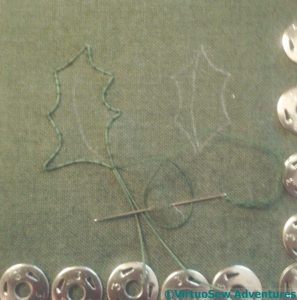
Beginning The Split Stitch
That said, Masako Newton‘s Silk Shading and Stumpwork Robin and Holly is really very sweet indeed, and I am sure I will enjoy working it.
Furthermore, unlike the Jane Rainbow kit my parents gave me for Christmas twenty years ago, there’s no chance of this one being finished quickly.
I will certainly learn a great deal from doing the Robin, and he is going to be classed as one of my New projects for 6 and 6 in 2018.
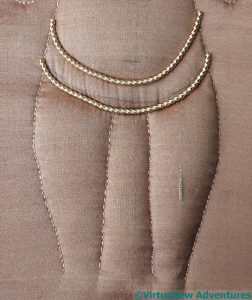
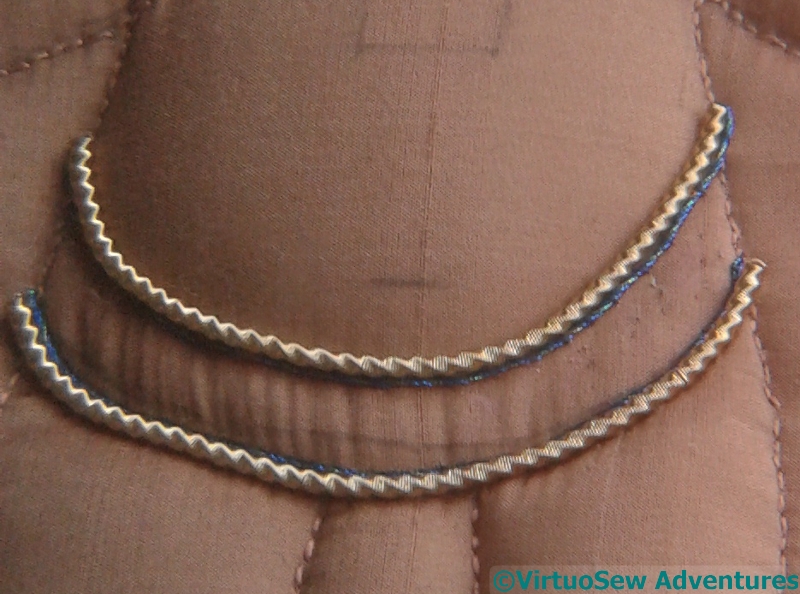
Beginning Loincloth
While I mull over the gold section of Akhenaten’s headdress, I’ve decided to work on his loincloth and belt.
The original inspiration here was for the silver purls to represent the pleats of the loincloth, but when I talked with Sarah at Golden Hinde, when I was buying all the wonderful metal threads, she suggested that I should probably do the belt and fall first, not least, to have somewhere to tuck any untidy ends of the purls while I’m still getting the hang of it!
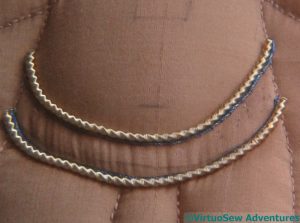
Adding Blue Twist
So I started with a very large gold purl with a sort of twist on it, and settled it neatly into the stitching lines from the quilting. That was followed by a slightly iridescent blue twist. It’s going to be tricky to keep that as visible as I want it to be, and I may very well end up playing around with the placement, or even removing and reinstating it later.
Still, onwards and forwards….!

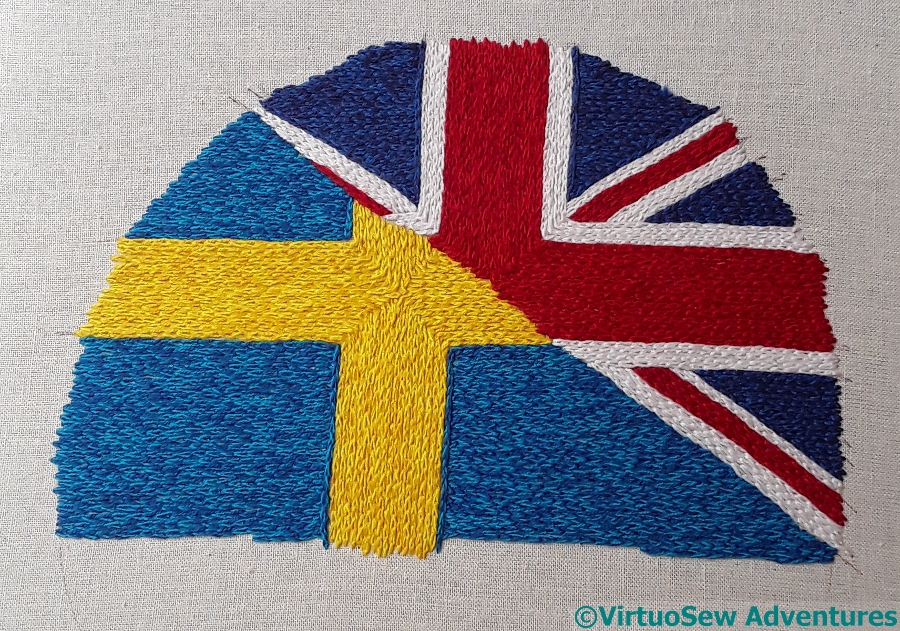
Flag Sunrise
I hope this is going to work as well in real life as it does in my imagination.
The flags provide good, bright, heraldic colours (of course) and I am hoping that I have done a large enough area to create the Roundel in the manner that I have “seen”.
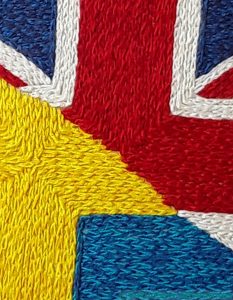
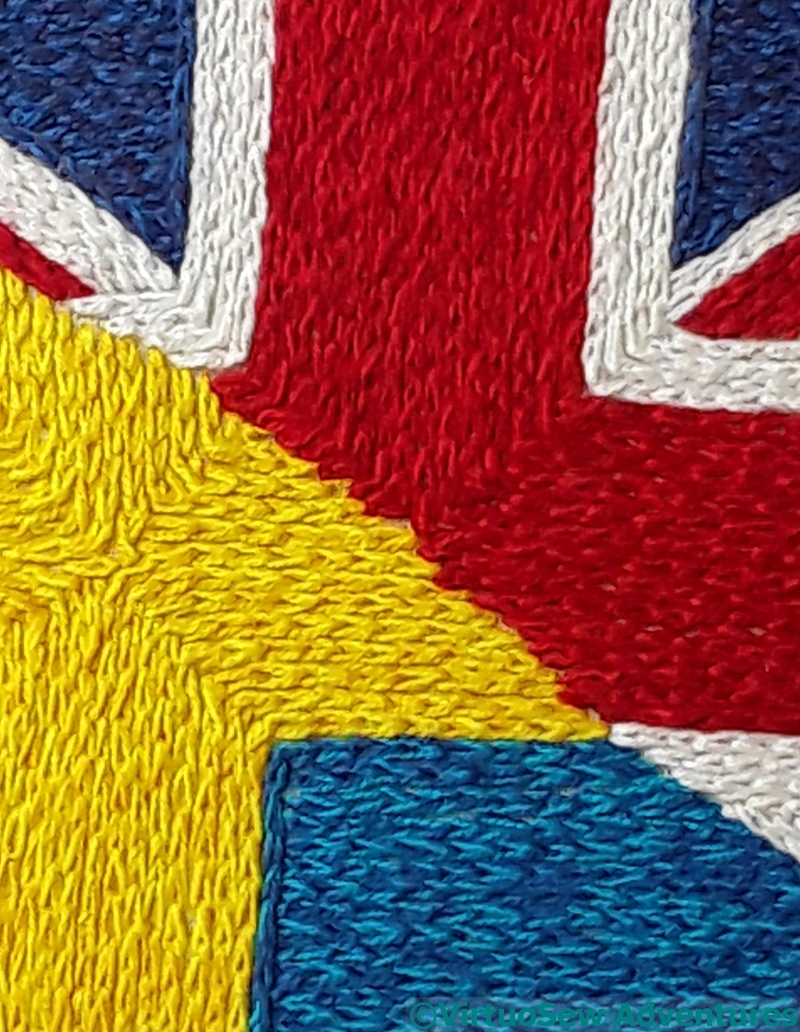
Flag Sunrise Detail
This section has been embroidered on a piece of calico I had conveniently to hand, using Danish Flower Thread, which is not at all shiny. That will help the sunrise to settle back behind the other elements. I’ve used closely-set rows of chain stitch and reverse chain stitch alternately, so as to keep the stitches facing the same way while minimising the number of ends that need to be finished off.
I’ve used two slightly different shades in the needle for each colour. That helped me to get the colours as accurate as I could while keeping within the colour range I had to choose from. In the case of the blues, I used three shades only – the middle shade appears as the darker one in the Swedish section and the lighter one in the British section. I’m very pleased with how that worked, as the two very different blues live very happily together here.
When I read the post on Meredithe’s blog for the March round up of the “6 and 6 in 2018” project, I thought maybe I should do my own. More especially, as I do indeed have progress to report!

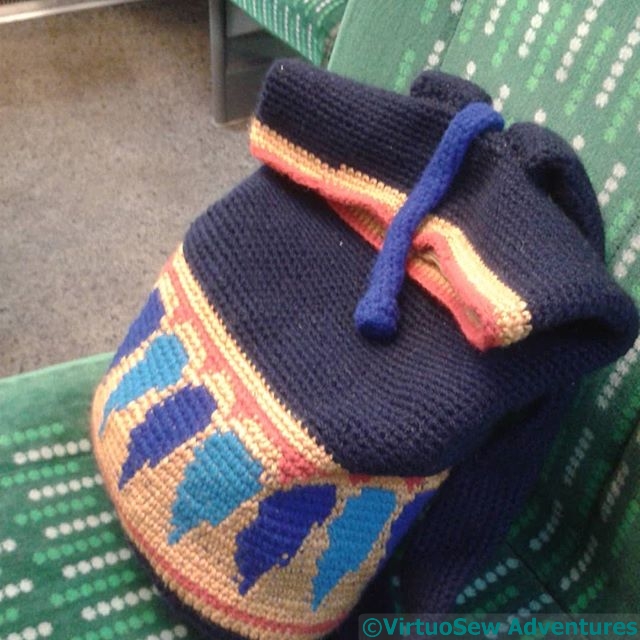
Backpack OnTour
One definite advance this year is that the Amarna backpack is finished. After the straps were attached, it had a very brief trial outing. After which, I decided it needed a lining (a lovely sandy coloured printed cotton) and a zip. The zip was something of a struggle to install, but I managed in the end, and the backpack had its first real outing when I took it with me to “Sewing for Pleasure” in Birmingham.

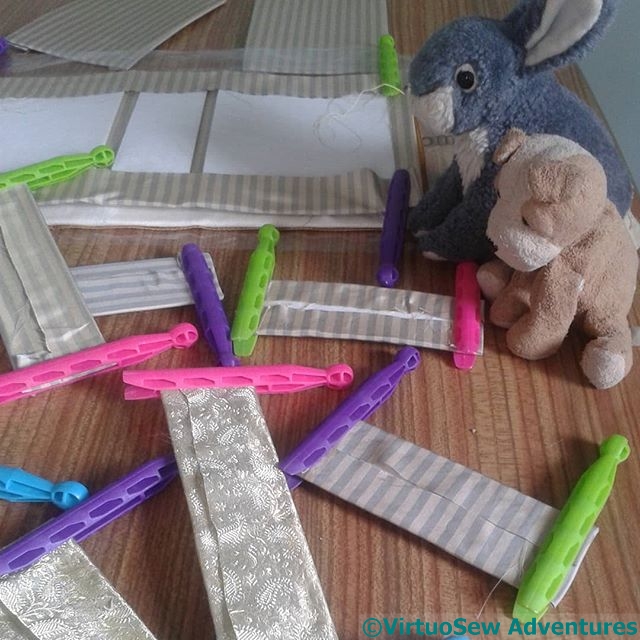
Glueing In Progress
I’ve started to make progress on Eve in the Garden of Eden as well. Regular readers know that I’m very uncomfortable with using glue near fabric – or indeed, at all! However, my friends Small Rachel and Harry The Hound of the Doleful Countenance came to supervise and encourage, and remind me to take it slow and steady.
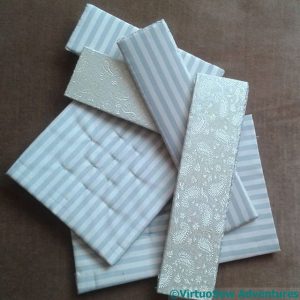
Components Piling Up
And the reminders paid off. The glueing is done, and the next phase involves quite a lot of sewing. The box sides are made of an outer and an inner, and while each of those is glued on the back, in the case of the lining over some padding, the outer and the inner are sewn together.
Again, this is happening bit by bit. It’s concentrated and fiddly work, and I couldn’t yet sit down and expect to finish it in a sitting.
But the glueing is done!
As for new projects, so far there is the cover for Maggie the Magnifier, a Learning Opportunity, and of course the Embroiderers Guild 100 Hearts piece.
So watch this space, there will be more!
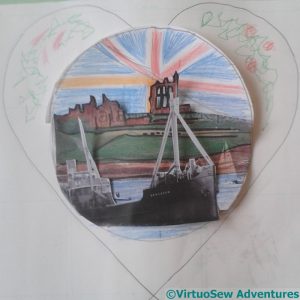
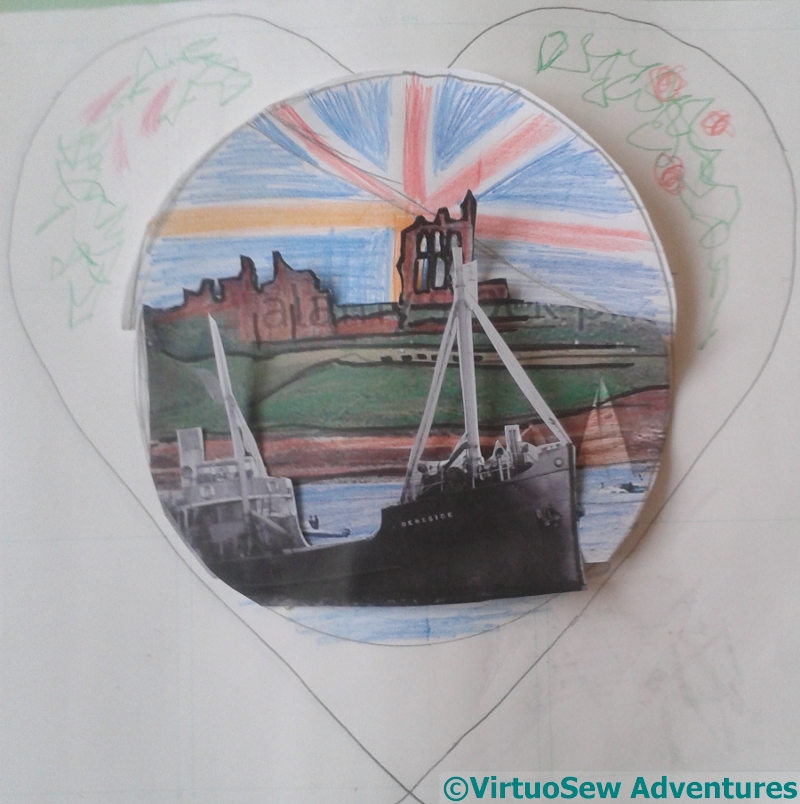
First Draft of my “100 Hearts” project
I found some pictures of Tynemouth Priory online to help me draft my design, and then went rummaging for pictures of vessels built on the Tyne that were in service at the time of the war.
Of course this is all entirely speculative; we have found Great Grandfather on a crew list of 1915, but unfortunately so far we haven’t found any images of the ship. His crewmates include many local lads, of course, but also Danes, Finns, a Russian, and even other Swedes. There must be so many untold stories there…

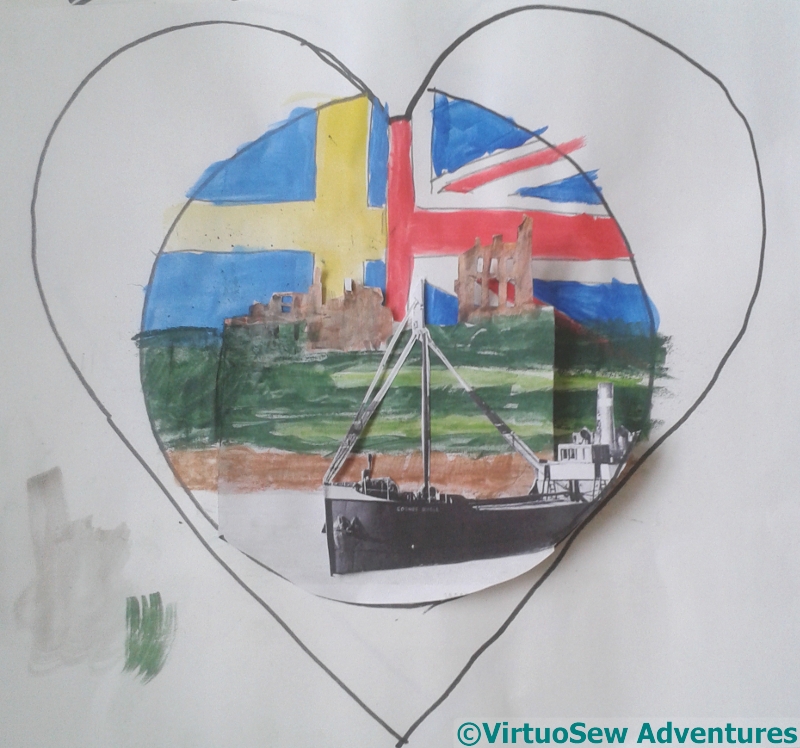
Second Draft of my “100 Hearts” project
In the first draft, I was still working on the idea of the gold cross being like the St George’s cross, and I was very disappointed that the Swedish flag almost seemed to vanish.
In the second, I corrected that misapprehension, trialled a vertical rather than diagonal division, and used a different vessel, this one slightly smaller and coming inward rather than departing.
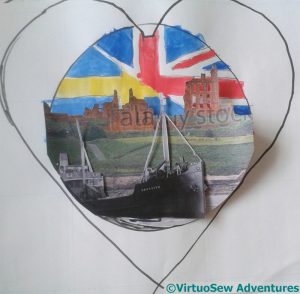
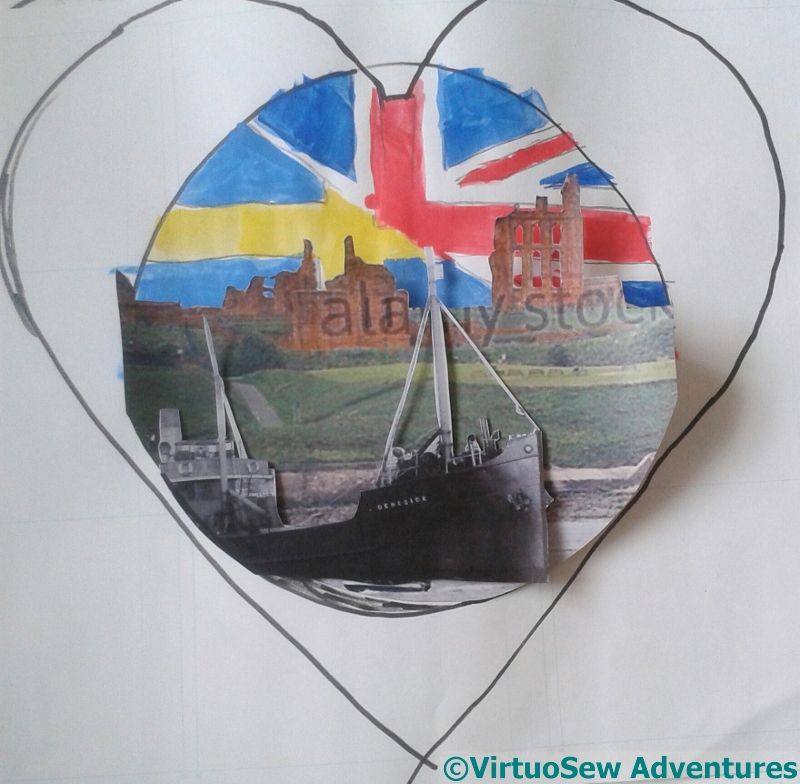
Third Draft of my “100 Hearts” project
I’ve also moved the Priory to the right a little so that there is rather more of a sense of balance.
In the third draft, I reinstated the diagonal, left the Priory shifted rightwards, and returned to the first vessel. I’ve also slightly enlarged the Priory.
As I look at these, I find myself thinking that the design rather resembles naval ship badges, so perhaps what I need to do is to shrink the whole design a little, tweak it a little more, and edge the circle with a wreath or rope motif.
So I’ve not finished thinking yet!
The Embroiderers Guild “100 Hearts” project
I am now a member of The Embroiderers Guild, and when my membership card arrived, so did some information about a project they are doing in collaboration with SSAFA, called “100 Hearts”. It offers embroiderers and textile artists the opportunity to create their own memorial to all those who fought and died or came back changed, to all those who kept the home fires burning, and, in summary, to all the many untold stories of that time.
Now, generally speaking I’m not very good at responding to a brief I’ve not created myself, but as I sat reading the information and pondering whether to join in, I thought about my Grandmama, who taught me to embroider, but who would probably be bemused and (I hope) impressed in equal measure by what I have done with what she taught me. Her father was a Swedish immigrant to the UK, who became a British citizen shortly after her birth. He won’t have been a young man when the war broke out, and I’m sure he wasn’t called up, but he was a mariner, and I expect that he was working in coasting freighters, keeping the supply of food and fuel moving. From that I thought that he could stand for the many immigrants and naturalised citizens who, in the face of the hysteria and suspicion of the time, continued to serve their adopted home loyally and well.
So my design will be specific and local – he lived in South Shields, and I’m using the headland and the shape of Tynemouth Priory to stand for that – but it stands for much, much more than that.

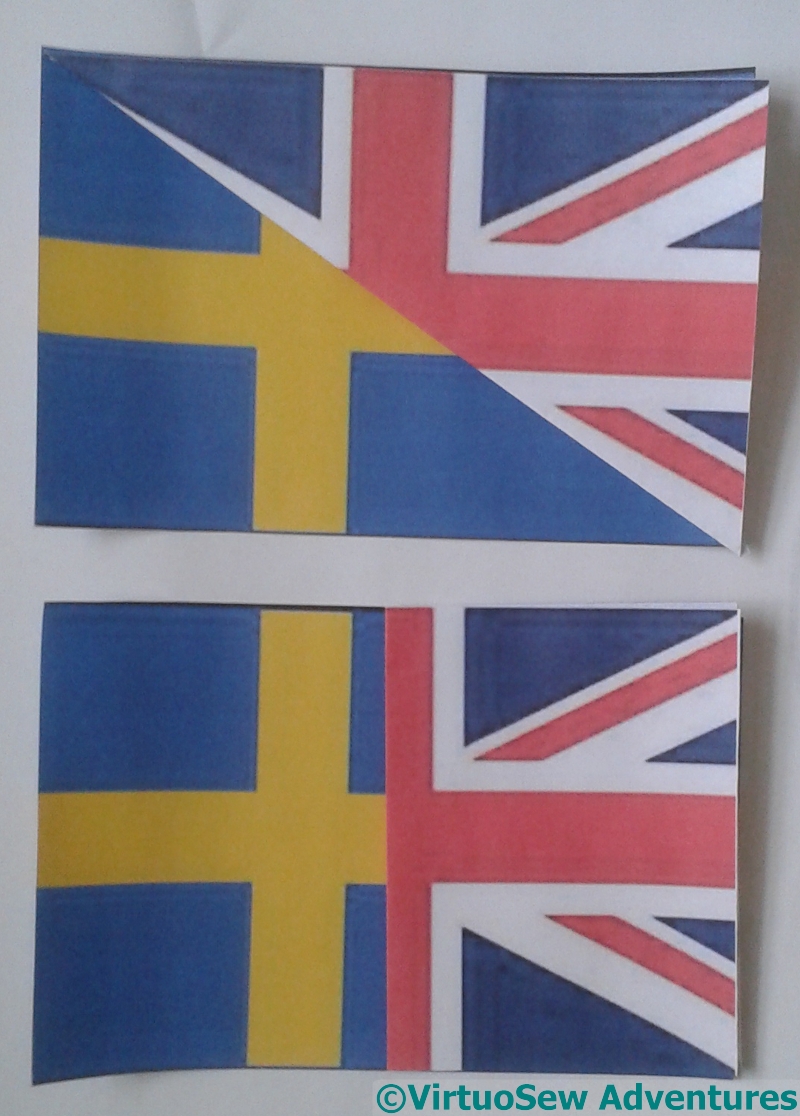
Trialling combinations of the Swedish and British flags
I will be searching to see what more I can find out, about Great Grandfather, about what he might have been doing, and about what records there may be concerning the war service of immigrants and naturalised citizens, and we will see what I manage to come up with!
To begin with, I want Tynemouth Priory to be set against a “sunset” of the two flags of Sweden and the United Kingdom. I had originally misremembered that the gold cross on the Swedish flag was essentially the same as the cross of St George, but no, the vertical line is set closer to the hoist (the part of the flag nearest the flagpole).
Once I’ve decided how large my sunset needs to be, I can start stitching it while I go to have a look at Tynemouth priory….
A Blank Sheet
This post has its roots in some conversations I’ve had with friends who are involved in education and enrichment, and in our mutual realisation that, although we may have different words for it and although we may face it differently, there is an experience we all recognize, and which it is very hard to coach students through.
No matter what you are doing, there is always a point early in a project where you find yourself staring at a blank sheet, wondering where to begin, what to do, and how to approach the challenge. This happens in every field of endeavour, whether it is obviously “creative” in the sense of painting, embroidery, or sculpture, or in a more academic field such as mathematics (The Australian is a mathematician, so I know about these things, even though I’m not one myself). And it isn’t limited to beginners.
You stare at your blank sheet, mind racing – or frozen – completely overwhelmed. Everyone devises their own strategies to overcome this, and the sooner you find your own, the easier your life will be.
There was a lot of this!
The first is to pick something – anything – and try it. I am coming to realise that one of the signs of not being a beginner any more is the willingness to do work which may be abandoned – unpicked, reverse stitched, torn up as leading down a blind alley. Sometimes you have to see What is wrong, and How it is wrong before you can pick the Right Thing.
Another very useful strategy is to create limitations – to lay down rules that limit your choices. The idea is that part of the reason you’re overwhelmed is that with so much you could do, it’s almost impossible to choose which. In mathematical or computing terms, what you need to do is restrict the search space. It might seem paradoxical, but when you restrict your choices it can become very much easier to make progress. So the strategy of making a set of rules, or creating a framework within which to make decisions (to write a sonnet, say, instead of blank verse), can help you get started. Once you’ve got started, you can then decide to break the rules if the effect will be better. The important point is that you’re now over the Fear of Blanks and into the flow of the project.
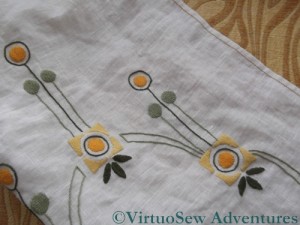
Table Runner – colours chosen to match the dining room
When I’m working on a new project, I have to make decisions about the design, the fabric, the colours, the threads, and the stitches. Some of those decisions may be made for me. For example, if the project is “domestic” – a table runner, a cushion, the cover for Maggie the Magnifier – then I know where it’s going, and the colours will have to work in the room in question. Or if I’m embroidering a garment I already have, I have no choice about the fabric, and very little choice about the threads. I don’t have to worry about those, and can spend my energy on design and stitch choice.
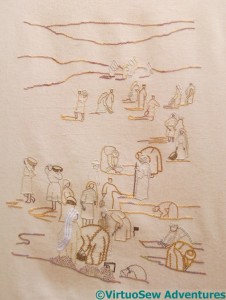
View Of The Excavation
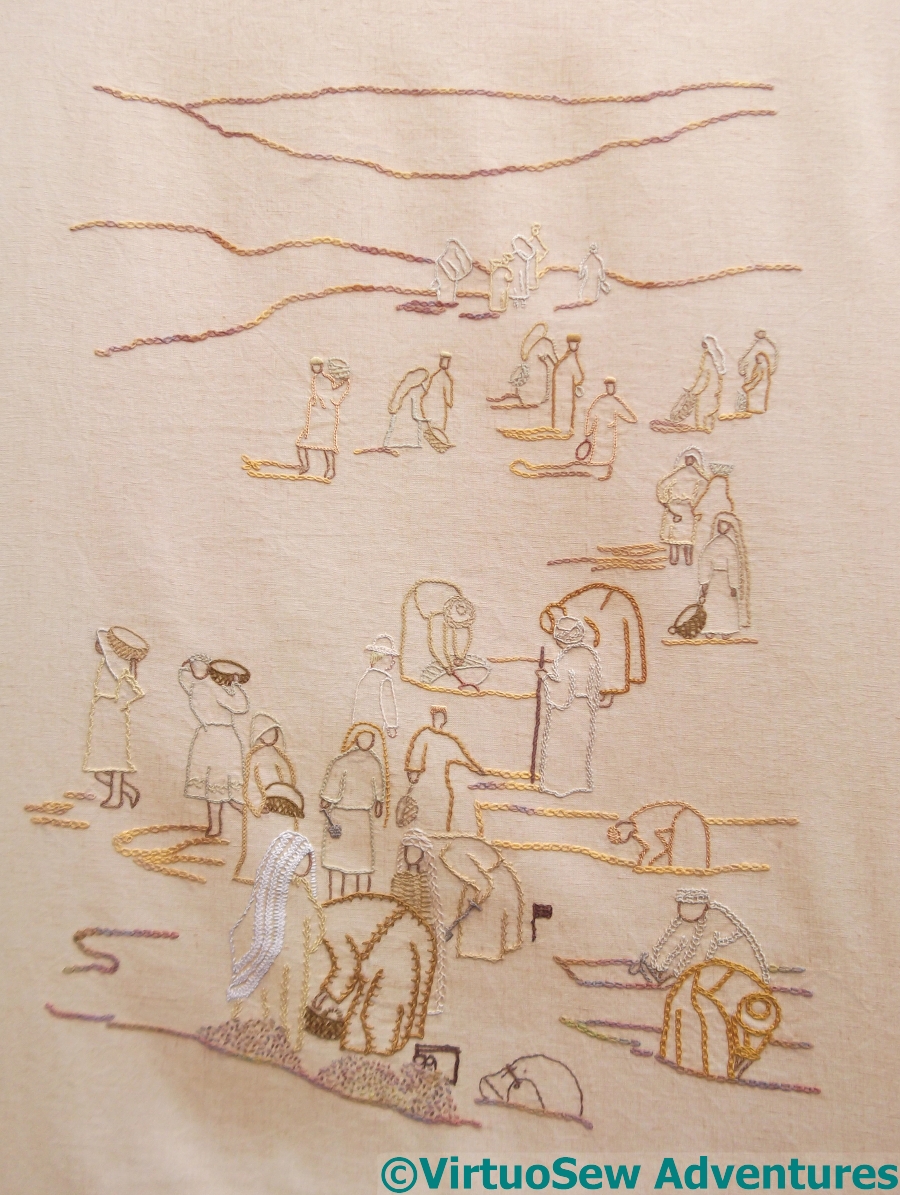
But in the case of The View of the Excavation, for example, I had the design, but I then spent days – weeks! – staring at it and wondering what stitches and colours to use where.
So finally I devised a series of Rules:
1 – Narrow, plain stitches for distant figures, becoming broader and more textured close to the front;
2 – Pale colours for distant figures, more emphatic colours close to the front;
3 – Ground features in the same colour and stitch wherever they are.
I still had freedom to choose stitches, threads, and colours, but The Rules restricted the range within which I was choosing, and so made the decisions easier. Furthermore, because I’d picked a stitch and thread for ground features, I could get started, and think while I stitched, which meant that as I came to apply my various rules, the blank fabric was already no longer completely blank.
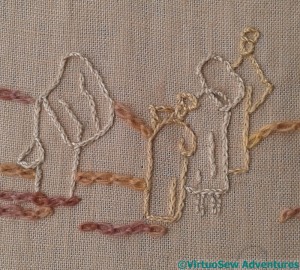
Very Distant People
Each of the first two rules could be elaborated further, so for Rule One, I picked two different pale colours to choose between, and chose one stitch to use. Again, the decisions are thereby reduced and thus easier to make, which means that progress can be made while thinking about the next stage.
This is the manifestation in embroidery of one of the reasons that school maths can be dull and repetitive – it is trying to inculcate skills which will allow us to work mechanically on the simple stages or processes of a problem or puzzle, leaving the brain free to tackle to the more complex parts that will require serious, creative, and inventive thought. My sitting quietly working the “easy” bit while I think about my next step is exactly analogous to the mathematician rattling through some calculations while they consider what part of the problem to tackle next, or the writer writing a descriptive section while the back of their mind is busy mulling over the plot.
So next time you’re stuck over something, try this: pull some rules out of thin air and stick to them. Then break them. Thoroughly. And with enthusiasm!
Sinking Ends
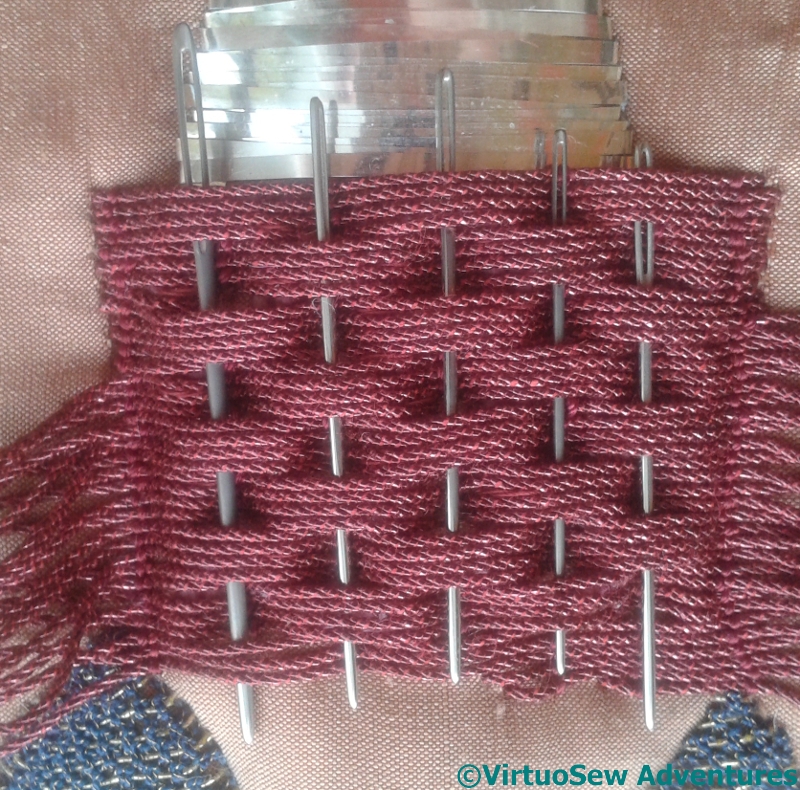
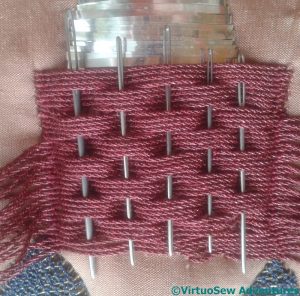
When you last saw Akhenaten I was starting to sink the ends for the headdress. There were so many ends to sink, and so much tugging to do so, that I was beginning to worry that I would lose the texture of the basketweave. So I threaded some old, blunt needles through the floats to keep them raised, and reduce the rearrangements and tweakings I needed to do as I went along.

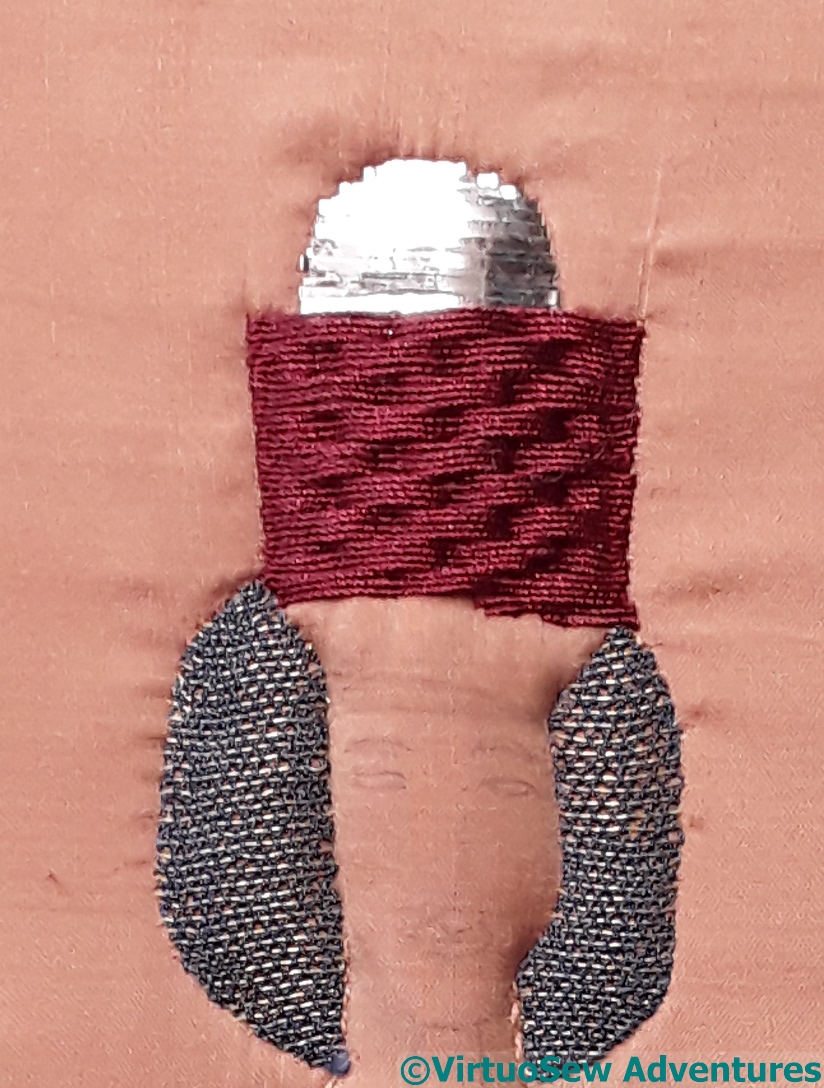
Progress On The Headdress
And once all the ends were duly sunk – which took several sittings! – the crimson section of the headdress did turn out rather well.
The next section will be golden, and will bear the cobra and the vulture heads, but I’m not quite sure how to tackle it, so I’m going to leave the ideas to marinate a bit before doing it. I think it may be separate from the rest, and run up over the crimson, which is why the basketweave couching runs further down the head than it ordinarily would.

Amarna Backpack Finished
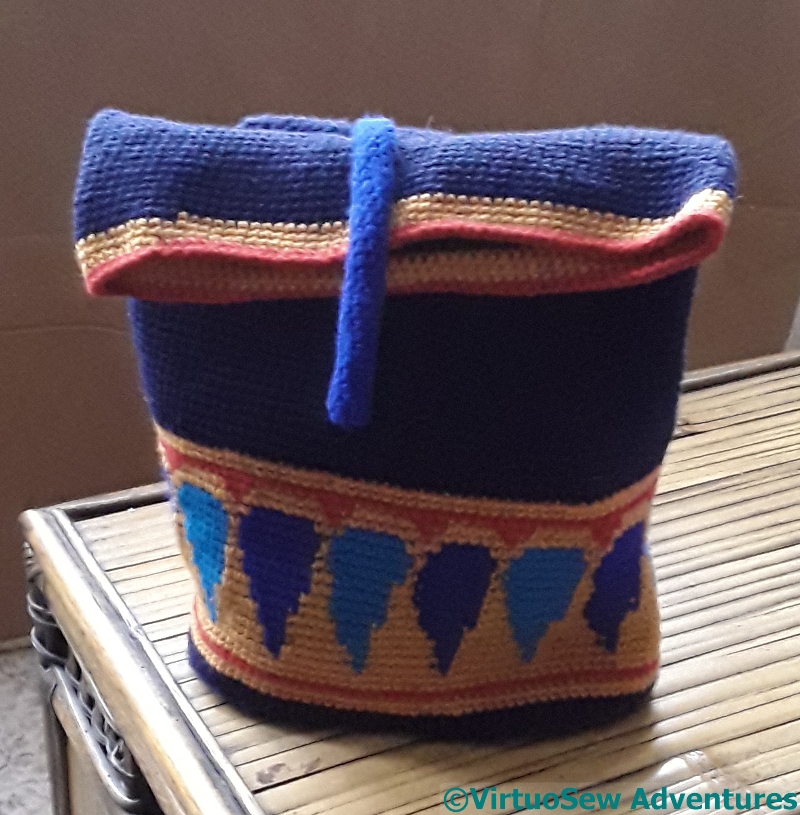
I rejoice to report that the Amarna Backpack is finished!
Well, nearly. It is in want of a lining, and it needs a weight in the end of the strap that weighs down the top.. But I have finished and assembled the bag itself, and in the process I have learnt that I am not keen on constricted tubes of crochet – so not keen that I ended up doing broader tubes. They might have taken more yarn, but they involved less muttering!
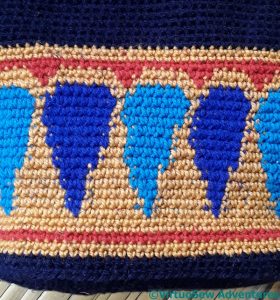
Pattern Complete
The pattern worked out rather well, I think. It is deeper than the pattern in the magazine, and more complex, because the main section involves three colours in each row. The three yarns tangled constantly while I was working this section, and the pattern hasn’t quite turned out as neatly or as evenly as I might have hoped, but I am still rather pleased that it is genuinely reminiscent of the inspiration!

Straps Attached
I may have to change the placement of the straps, but until I have used it a few times – I want to carry sketching things in it – I won’t be sure what will be comfortable, or even useable…
I went to the knitting shop where I bought the materials just before Christmas, to buy materials for another project, and was highly entertained to find that I am there known as “The Egyptian Bag Lady”, because the project intrigued them so much. So next time I go, I must remember to take the backpack with me so they can see it.
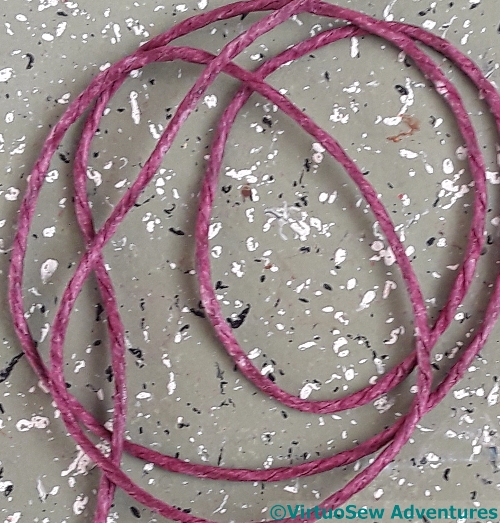
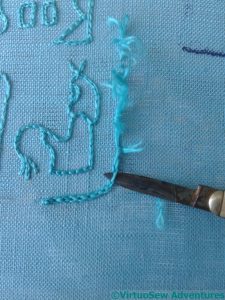
 I’ve decided that Akhenaten’s headdress should continue with basketweave couching in crimson twist. I was in a quandary about the padding for this – it would be dreadful to have white padding leering at me where the twist changes from up to down – when it occurred to me to colour my own. So this is the ordinary cotton “string” used for padding, which I have coloured with one of my inktense blocks and a little aloe vera gel, and then waxed once it had dried.
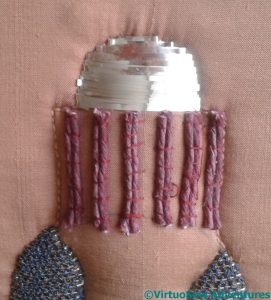
Couched Coloured String
Of course, the colour didn’t seep all the way through, as you can see from the whitish-grey ends of the couched pairs here, but at least the colour will ease back rather than drawing attention to itself.
You would think, by the way, that the waxed string would be fairly easy to couch in place, but it wasn’t. It had a will of its own, and far too many ideas about wandering off!
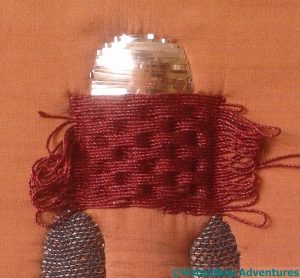
Bastketweave Couching
But it worked beautifully.
As I understand it, basketweave couching can be worked turning the thread at the end of each row, or sinking it. I would have liked to have turned it, as that is the more economical technique, but I felt that this would create the impression of a compact and complete shape, whereas – however stylised it is – this shape represents a three-dimensional object, the headdress wrapping around Akhenaten’s head.
That means more than 70 ends to sink, through silk, thin padding, and calico.
Oh well, onwards, ever onwards!