
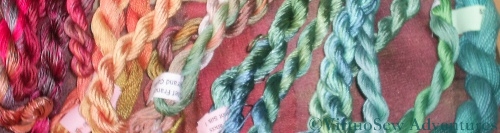
Tag: overdyed threads
The Crane – playing with silken thread, Part Two
Japanese Crane Design
Here is the Crane design, finished and ready to be mounted for display.
I picked a wooden pot from Framecraft Ltd. People who have been stitching for a long time may remember them as “Framecraft Miniatures”, and they were always a good source of silk gauze and other supplies for people interested in furnishing dolls’ houses. They also supply a huge variety of other items with spaces for inserting embroidery – you might remember my Homage To The Opal, if you’ve been reading my blog for a while.

View Of Crane Pot
Framecraft supply a plastic cover to protect the embroidery, but as my cousin isn’t the type of person to maul a piece of embroidery with sticky fingers, I decided she would probably prefer to see the embroidery properly. They also supply padding, but it is a light foam, and I substituted two layers of a very fine cotton wadding instead. The cotton wadding has a bit more substance to it, and created a nice firm dome, which looks much better when the embroidery is displayed without a plastic cover.

Crane In Place
The colour changes and textural stitches keep the design from looking too stiff, but because the silk thread has a slightly matte appearance it looks soft and doesn’t dazzle the eye.
When my cousin took it home, she strolled around her house asking the Crane where he wanted to live. He chose the bedside table in the spare room, where his colours talk nicely with the wallpaper and the bedspread, and the wooden pot echoes the dark wooden bedhead and wardrobe.
The Crane – playing with silken thread, Part One
Japanese Bird
I decided to make a “Useful Pot For Putting Things In”, as Winnie-The-Pooh would have called it, for my cousin for Christmas. In fact, I cheated and merely embroidered a design for a lid!
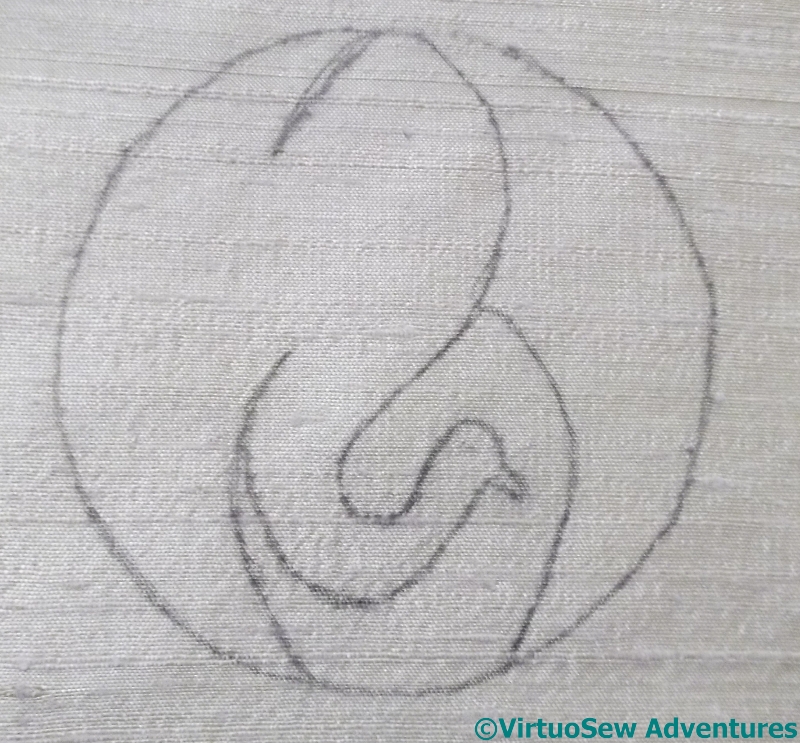
I found the motif in the Japanese section of “Pattern Motifs: A Sourcebook” by Graham Leslie McCallum. I think it’s a crane. The design is very pared-down, and I thought it would make a good way to show off some of the superfine silk thread from Stef Francis, maybe even an excuse to use some more unusual stitches to see how the threads show them off.
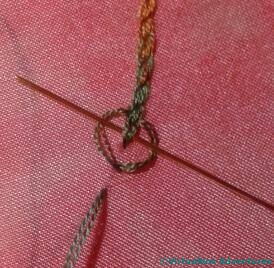
Hungarian Braided Chain Stitch
Those of you who follow me on Twitter may recall that I tweeted this picture of the stitch I eventually chose to use. It’s called Hungarian Braided Chain, and I found it in one of those books by Edith John that I mentioned when I began embellishing the Circles Skirt. If you think of it as Heavy Chain with the needle weaving over and under the threads as shown here, you will get the idea.
I’m very taken with the stitch, in fact. It creates a fascinating textured line, and colour changes in an over-dyed thread bring it to life even more. I can imagine using it in plain thread as an indication of braid on clothing, or ropes on a ship, or even simply in side-by-side rows to create a textured effect.
This is the first – so far unfinished version, in superfine silk on silk habotai. The relatively short colour changes in this thread create subtle changes from stitch to stitch, emphasizing the structural patterning and texture. When the destined pot arrived I decided the combination looked altogether too hot and bothered, and went rummaging in my stash again…

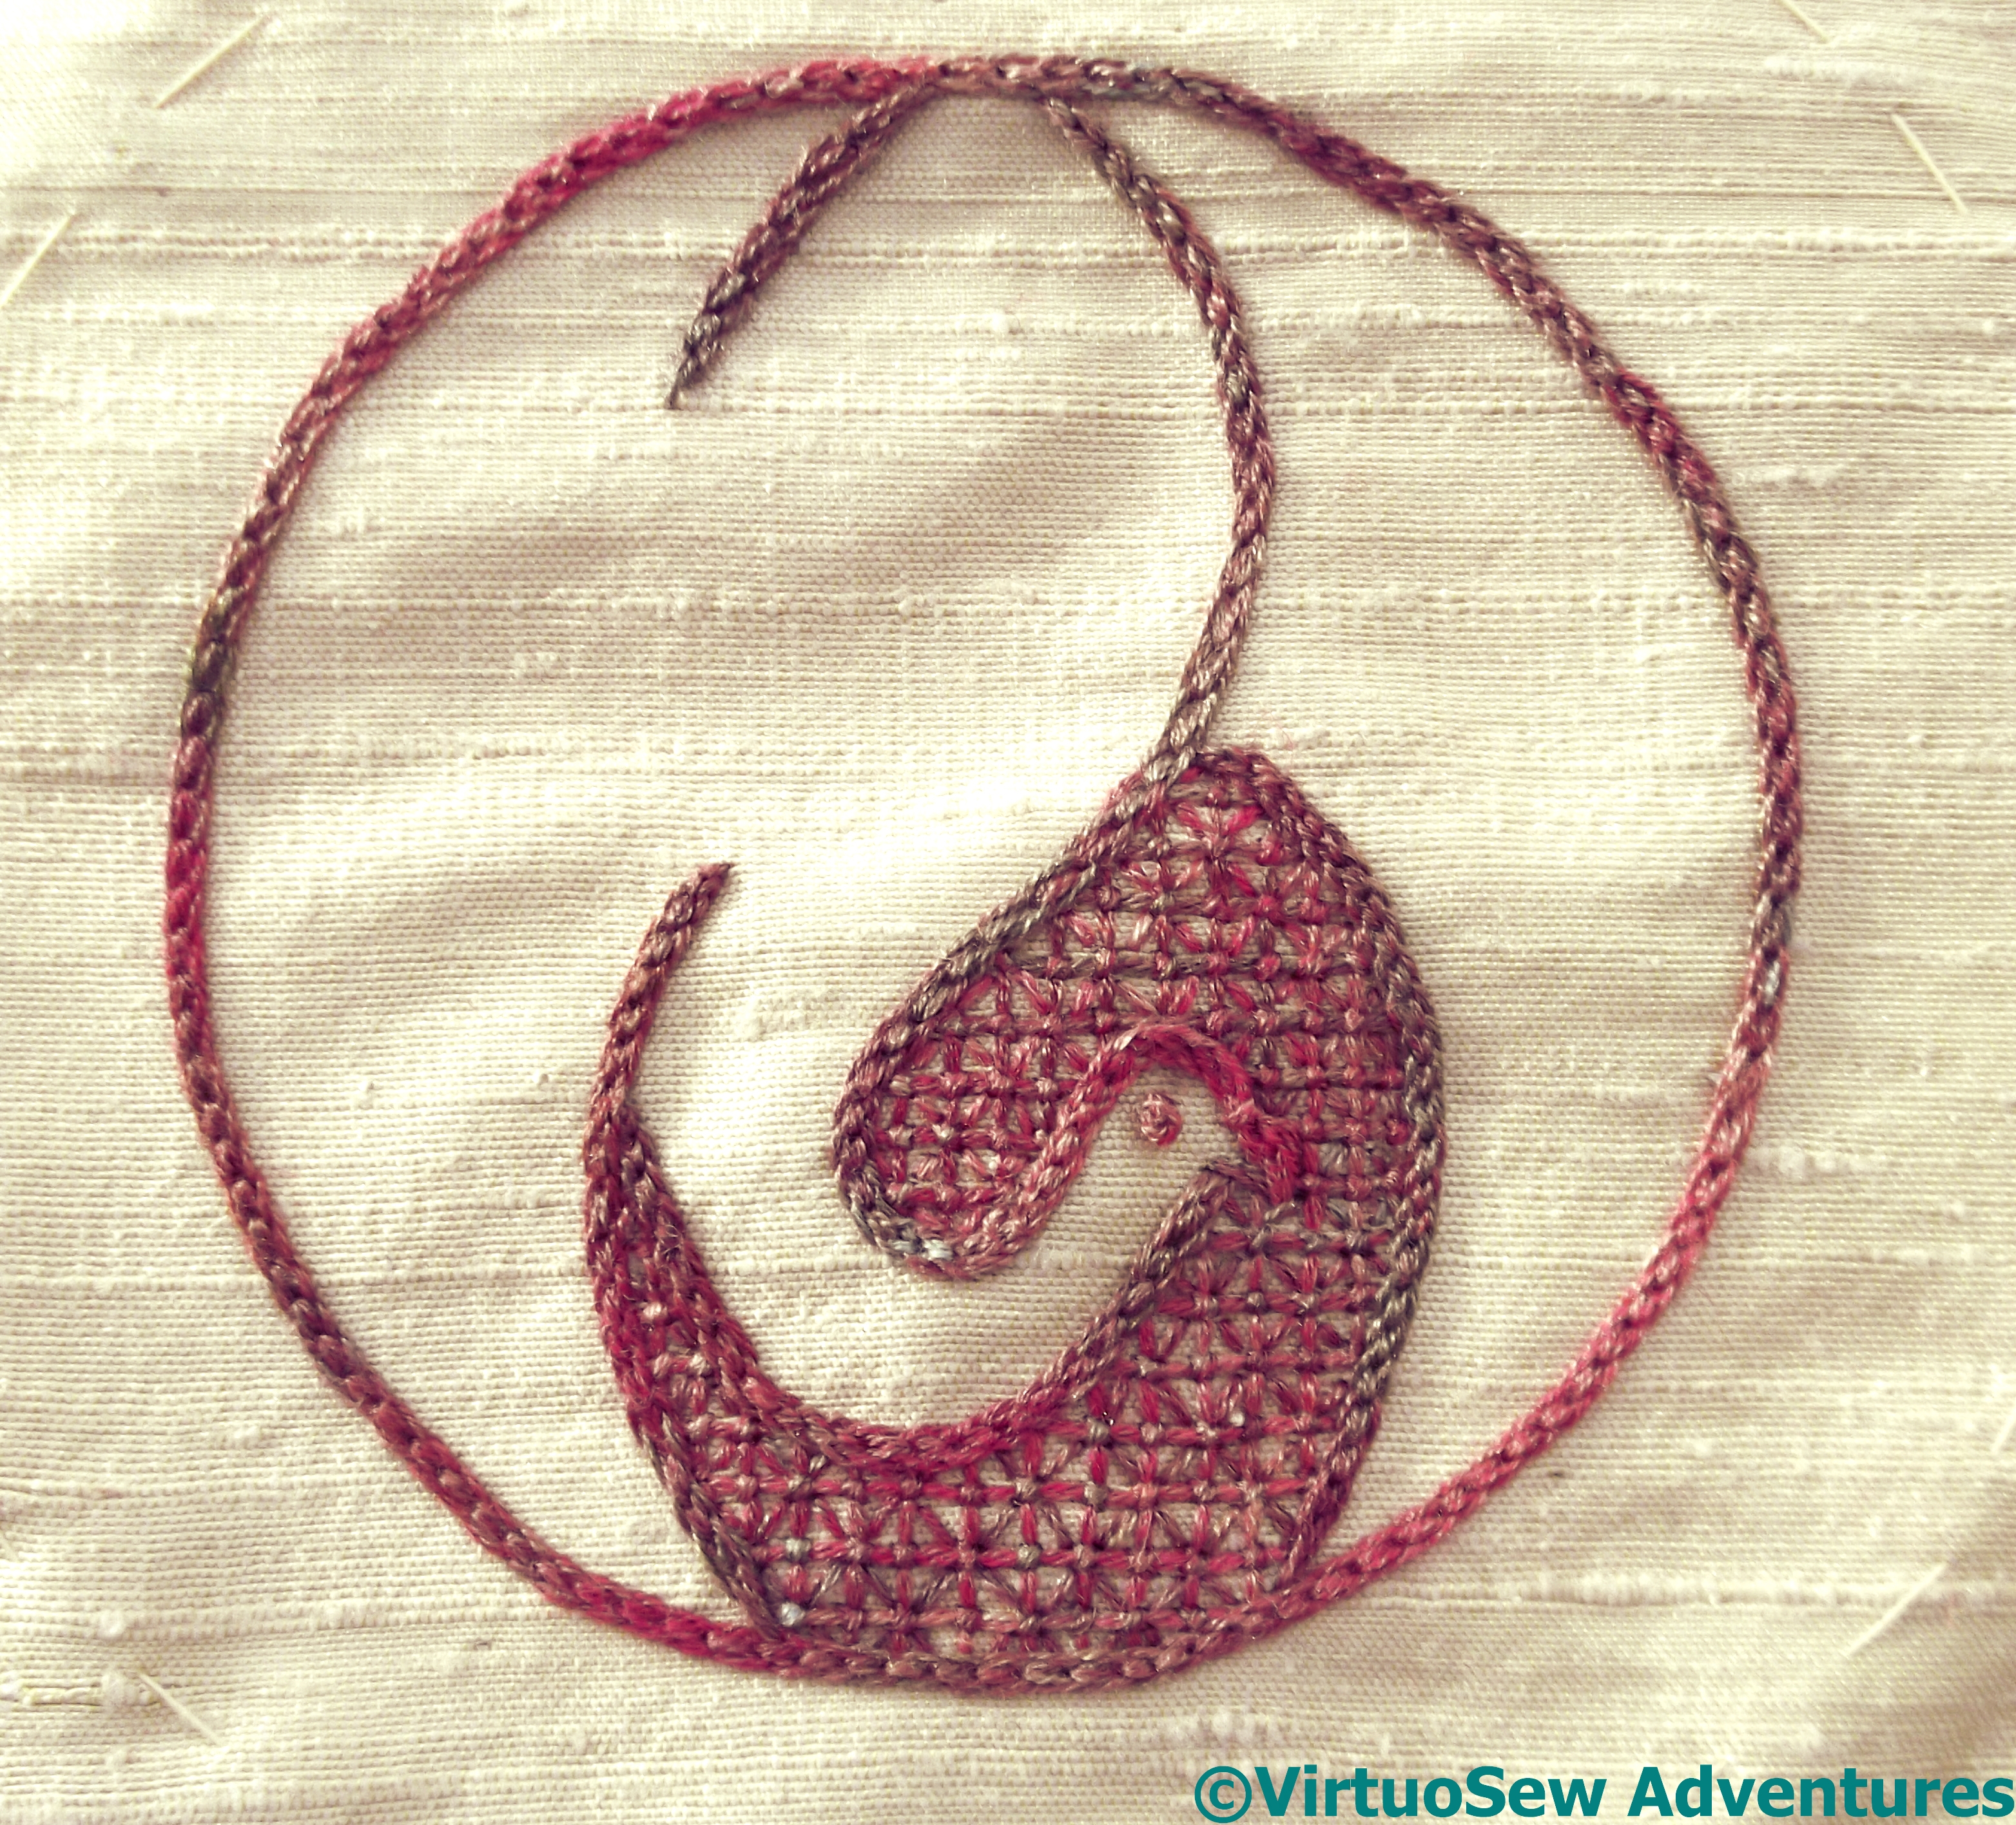
Close Up Of Stitching On The Crane
The fabric I finally chose is a rough dupion from The Silk Route, in a golden cream colour which is extraordinarily difficult to photograph, and I picked a slightly different silk thread, more restricted in colour range. Using four strands of thread produced a lovely cable-like appearance, which you will see if you open the photo at full size.
The dark section of the design, behind the bird’s head, I worked in a dense version of trellis stitch, with horizontal, vertical, and diagonal lies all tied down with tiny cross stitches. Even working in a hoop or frame, trellis stitch cane be a bit of a challenge to stitch, but I made it in the end!
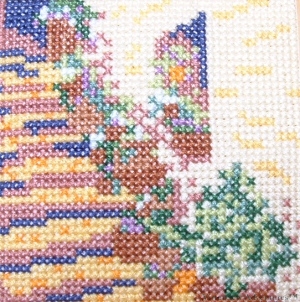
Steps in the Sun
Some years ago, I was asked by a magazine to design “my interpretation of buildings” in counted work. I produced three versions of the same thing – a set of steps in a Tuscan village, with plants in pots on the steps and a window looking over them. Then the magazine didn’t use them. Any of them. Sigh.
Never mind, I enjoyed doing them, and it was a very interesting exercise.
Steps in the Sun using various threads in counted cross stitch
The colours are inspired by Monet’s Rouen Cathedral series – strong, bright colours with purples and blues as the shadows. They are like impressionist oil paintings in another way, too – it’s not always entirely clear quite what the shapes are until you have looked for a while.
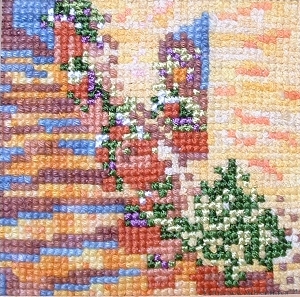
For Version One I used counted cross stitch in space dyed and other threads. The walls were worked using a cotton bouclé, and the steps in a range of soft unmercerised cottons. The terracotta plant pots were worked in stranded cottons (solid colour), and the plants themselves were worked in rayon, also in solid colours. The threads were rather heavier than stranded cottons, so I used 22 count linen and stitched over two threads. The bouclé battled every stitch of the way!
Steps in the Sun - Stranded Cotton counted cross stitch
For Version Two I used plain counted cross stitch in stranded cotton, chosen to reflect the colours of the overdyed cotton as well as I could manage. It is strange to see that the photograph gives the impression of the aida fabric showing through, which isn’t so obvious to the naked eye. This version actually is more successful in some ways than the first one, although I have them all three on the wall and I actually prefer Version One! Version Two is not so hectic, but still, it doesn’t “read” as clearly as I might like. Or at least, not to everyone. I see the steps in all three, but I know people who don’t.
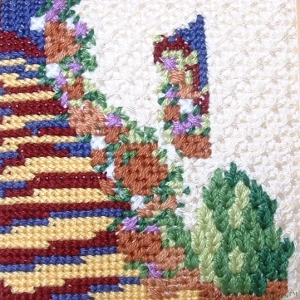
Steps in the Sun using canvaswork stitches in stranded cotton
In Version Three I became even more experimental – I knew the magazine wouldn’t go for this one, but thought it would make an intriguing exercise. The base fabric is ordinary aida, but I chose to use canvaswork stitches in stranded cotton. The bush in the bottom planter is worked in Leaf Stitch – oh, look, Leaf Stitch again! – and the steps are long-legged cross stitch. The wall is Double Straight Cross Stitch. I enjoyed this one the most, but at the scale of the piece (it is less than four inches square) there really is not enough space for most of the stitches to do their work properly.
An interesting exercise, all the same..
More details about the Piano Shawl
Since I had some requests for more details about the Piano Shawl, I rummaged around in my photographs to try to come up with pictures that might explain a little more of what I did and how I approached it.
I knew that I would be using some variegated threads and some plain ones, so the first decision I made was that I would use each in particular places. In that way there would be a scheme of sorts that would guide me.
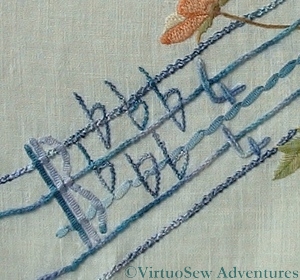
Five Flats on the Piano Shawl
First of all, the ribbon stave was definitely going to be variegated. It would help to create a ripple of life around the design, and incidentally, since it felt like miles of stitching, I would be able to feel the progress I had made in an afternoon in the colour changes. Then I felt that the colour alone did not provide sufficient structure, so I developed the scheme further – the chainette ribbon was couched down as the middle line on the stave, and also used for bar lines and clefs. The next two lines of the stave (one on each side of the central one) were worked using pearl cotton, in Portuguese Knotted Stem Stitch, which is a favourite of mine. I used it elsewhere for some of the stems, in a very fine silk thread which produced a very different effect. The two outer lines of the stave were stitched in ordinary chain stitch using a rayon bouclé which was serious trial to stitch with, but which looks really effective.
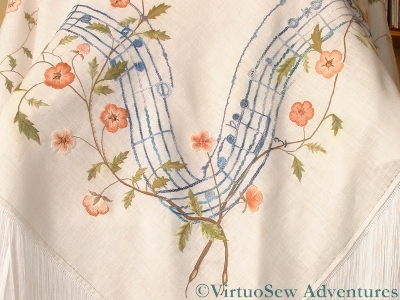
Melodic Corner on the Piano Shawl
The flowers themselves I worked in ordinary stranded cotton, using about six different shades of browny-pink, and creating an entirely un-naturalistic variety of light edges and dark edges, strong and weak colour variations. There was the risk of producing something too stately if I tried too hard, and since the Shawl was destined for a grand piano, the surroundings were going to be pretty stately already. A grand piano is a pretty dignified and imposing piece of furniture!
The Knitting and Stitching Show, Harrogate
Stef Francis Threads For Amarna Project
Since I don’t have a convenient, well-stocked local embroidery shop, and have discovered over the years that colours often don’t display well on screen, leading me to spend lots of money on the wrong thread, I now concentrate almost all my embroidery shopping around one event: The Knitting And Stitching Show in Harrogate. I had a wonderful weekend there last week, and even managed to take tea at Betty’s Tearooms, and to visit the Royal Pump Room Museum which had few items from Amarna, as well as a rather fabulous painted and embroidered screen from the early 1900’s.
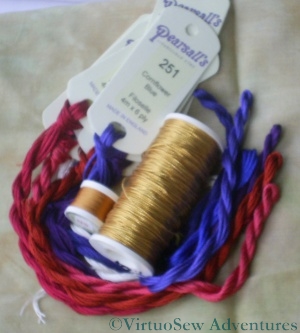
Pearsalls Silk and Gold Jap For Christus Natus Est
Pearsalls Silk and Silver Jap For Hittite Amulet
It’s particularly useful when I am planning to branch out into a form of embroidery I’ve not tried before. There are always stallholders with a deep knowledge of the particular technique I have in mind, and they are always willing to talk, and share tips and ideas.
This time I am planning two or nué pieces, so my first stop (after buying some merino/possum blend wristwarmers from Jamie Possum) was to visit The Golden Hinde. I described what I had in mind, and soon had a spool of gold and a spool of silver to use for those pieces. Then on to the Pearsall’s Embroidery stand to buy the silk to couch it down with. I’m not sure how much I will need, so I bought one skein of each colour. Since these are single colour threads, I can re-order if I need to.
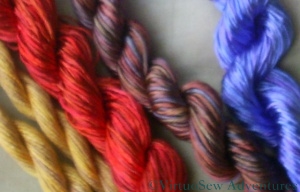
Oliver Twist Threads for Amarna Projects
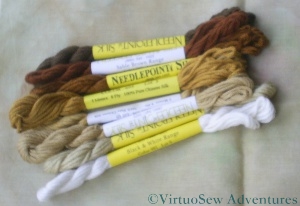
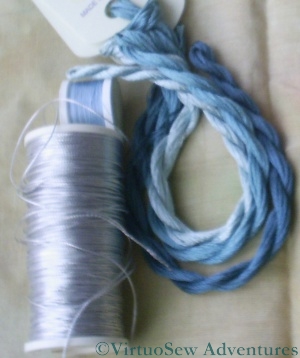
Silk Threads For The Second Dig House
I also bought some more turban cotton and faience-coloured threads from Stef Francis and from Oliver Twist, and some silk threads to make another attempt at the Dig House. I’ve been looking for threads that resemble some of the other colours I will need for the Dreams of Amarna panels – the carnelian and jasper and other semi precious stones the Egyptians used, but some of those aren’t so easy to find. I am going to need to do some more reading in my references to get a clear idea of some of the colours I will need.
I’ve found I’ve bought more silk threads than cotton, this time around. All this work using silk for the Floral Glove Needlecase Course and the Tudor and Stuart Goldwork Masterclass is changing my habits!
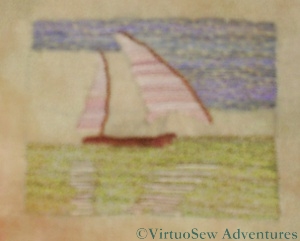
The Felucca Is Finished

The Felucca
I have finished the first trial of the Felucca design. As I always say of these design fragments, I do not yet know whether they will make it to the final piece.
You can barely see the stitching on the coastline – I used a fine thread and spaced the stitches far apart. For the cargo, I crammed the stitches as close to one another as I could. The sails are worked in Satin Stitches rather than darning, and the spars in Stem Stitches. I’ve decided I am happy with the pinkish tinge on the sails, and the greenish Nile is just as I imagined it would be.
I think it has worked. The reflections of the sails bring the whole piece to life, and I added some small stitches to provide an impression of a reflection of the spars.
The Felucca – Second Stage
The Felucca - the Second Stage
I’m afraid that this photo isn’t as good as I hoped it would be, but it does show the progress I am making on the Felucca.
I realised that not only did I need to have the sails completed before I put all of the sky in, but I needed to put the Nile in before I put in the reflections.
So I’ve done the Nile – nearly. If you look carefully you will see that there is a small section of Nile behind the Felucca which hasn’t been finished yet. I’ve used the same irregular darning stitch as I used for the sky, and run in the reflections using long straight stitches in the spaces between the rows of green. I need to put a few more stitches in yet, but I’ve run up against rather a headache which I need to resolve.
I need to do the land behind the Felucca. I was intending to use a paler version of the reddish-brown thread I’m using for the hull and the spars. However, when I put it in, it really didn’t work. No, I mean it. Not At All. I’ve since tried a couple of other threads with no marked success, so I need to spend some time finding a suitable thread.
If you look at the photo on the original post, the tones of the sky, the Nile and the elements of the felucca are not quite correctly reproduced in my embroidered piece. Part of this is because the base fabric isn’t white so everything is turning out a little darker than I expected. I think it will work in spite of the changed tones, but I am anticipating working the design again in a different form or scale, maybe using different threads, so if in the end I don’t like it I will still feel I have learnt something useful!
Beginning the Felucca

The Felucca On Turban Cotton
I’ve begun to work on the Felucca design I have already described. As I am not at all sure about the colours or the stitching that I will want on the final panels (remember this is to be a design element for the edging panels I described a little while ago), or even the scale, I am thinking of working this design several times on different fabrics, with different threads and at different scales, to see which one I like best. I’m sure I will find something to do with any leftover pieces of embroidery!
This version is about two and a half inches by one and a half inches, and it is worked on turban cotton, just like the fabric I used for my earlier experiment with the Dig House. I’m using similar stiff overdyed linen threads as well, but this time I have learnt from the trouble I had with the Dig House. The fabric has been hooped up over a piece of calico, and although it is slightly irritating to have two layers to stitch through, it has a lot more body and is much easier to stitch.
I’ve put the design onto the fabric using a transfer pencil and began with the sky, using a sort of irregular darning stitch. Then I realised that if I were to work the sails first it might be easier to fill in the sky afterwards. I’m not entirely sure about the thread I am using for the sails – it may be a little too pink – but I think it will be hard to be sure before I have finished. I have a dark blue-green thread that will do the Nile perfectly (I hope), and I will be able to run lines of stitching in the hull and sail colours into the water section to make reflections.
This might become my evening stitching until I have finished it. Although it is small, the colours are distinct from one another, and the stitches don’t have to be as precise as they would if it were a counted piece.
EDIT: spelling improved!
Stripes!
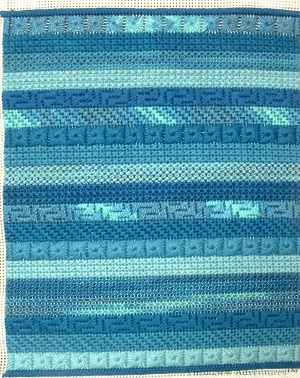
Stripes in canvaswork
This panel of canvaswork was originally intended to make a case for my husband’s beloved Psion palmtop computer. Alas, by the time I finished it, the Psion was no longer working.
The starting point was a wonderful Watercolours thread, graduated in shades of blue (not blue for a boy, blue for a redhead!), to which I added toning shades in soft embroidery cotton. It seems that this thread is not made any more, which I think is a pity. It used to provide a good alternative to tapestry wool, especially for those who don’t like working with wool in the summer, and – provided the right base fabric is chosen – a reasonable heavy but matte thread for surface embroidery. Almost all the threads now available are mercerised, and thus have a slight shine – but sometimes we don’t want any sheen on our stitches at all!
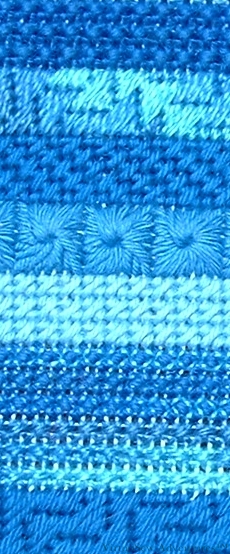
Stripes - Detail
I rotated through several different stitches, as well as the different colours, and made sure that the second layer in the fine Wildflower thread overlaid a different base colour each time. There were five threads (Watercolours plus four soft cotton) and six stitches, which ensured that they cycled round. The stitches I chose were Milanese, Diagonal Mosaic, Eye (not pulled), Mosaic, Rice (using the Wildflowers thread for the second layer of stitches) and Double Cross Stitch.
The full size piece shows how the position of the colour changes is different in each stitch, as well as showing the veiled effect of different colours each overlaid by the variegated thread in the different panels of Rice Stitch. For that reason it is a very interesting needlepoint panel, but I still have a completely finished and neatly-worked canvaswork sampler looking for an occupation!
The Faience Hippo Finished
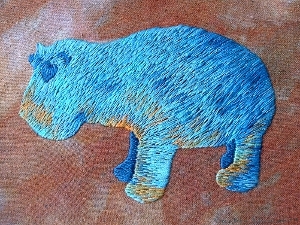
The Faience Hippo Finished
So here is the Faience Hippopotamus finished. That is, unless I decide to go over him with another layer of long and short stitch to break up some of the patterning even further…
I’m reasonably pleased with him, as a matter of fact. The loose weave of the base fabric was sometimes challenging to work on, and it isn’t at all a hardwearing piece – some of the stitches are half an inch long, which would be bound to catch on something – but as it will be part of a carefully protected wall panel if it makes the final piece, this is not going to be a problem.
I enjoyed doing it, as well. It was fascinating to see the colours change more subtly when I started using the thread turned end-for-end, and this vibrant turquoise/teal colour is one of my favourites.
And, yes, I did manage to work an entire piece in long and short stitch. It is fair to say, I think, that it will never be my favourite stitch, but it does have its place, and I am certainly happier to use it now I have had Tricia’s instructions on the Floral Glove Needlecase Course.