
Tag: circle skirt
The Circle Skirt Finished – Maybe!

The Finished Circle Skirt – Perhaps!
This seems a good enough point at which to say the Circle Skirt is finished, although I may tweak and titivate further next winter.
Click on the picture to zoom in..
Some of the circles have been needlefelted, to greater and lesser extents, to help them to stay in place. Now I have my embellisher, I think that the next time I try this sort of thing, I will needlefelt very thoroughly, to try to help blend in the edges a little more. Once I have tried both ways I will feel that I am beginning to gain an understanding of how the embellisher affects the handle of the the fabric. I already know that it does, of course, but now I need to learn how to predict the effect and allow for it.
The skirt is now much more useful and wearable than it was. Unembellished, it was a strange light greyish colour that seemed just slightly “off” with everything I owned. Now, however, the burgundies, reds and greens tie in nicely with an assortment of tops, and the way the embellishment shrinks around the sides to the back helps to emphasize the kick-flare at the back.
In the right company, it’s a fabulous conversation starter, and it’s a wearable sampler as well. I’m rather looking forward to wearing it at the Knitting and Stitching Show in Harrogate in November!
Embellishing the Circles Skirt – Part Six
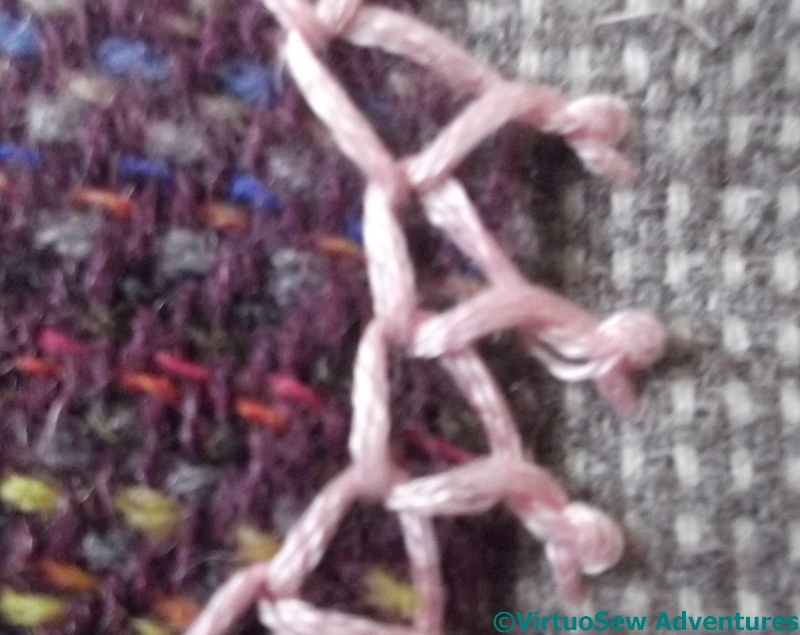
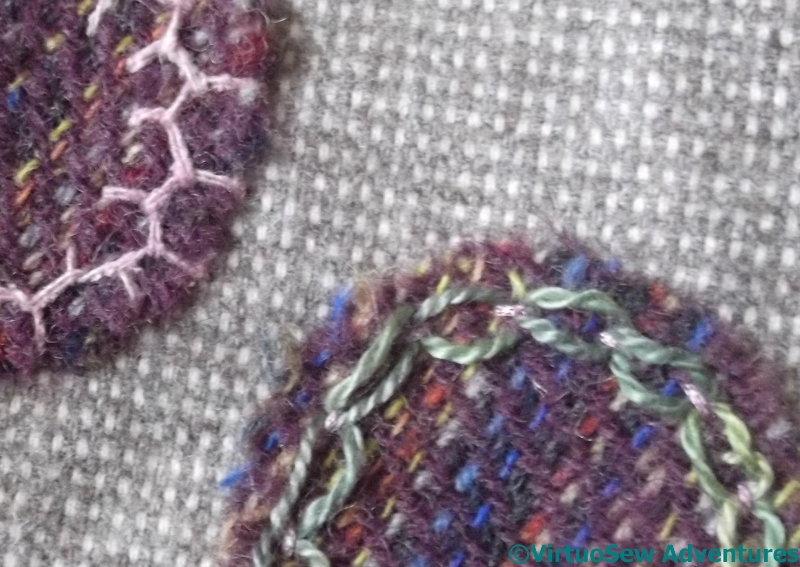
Crested Chain Stitch
I managed some really close close-ups here! This is the Crested Chain Stitch on one of the small circles on the back of the skirt, on the flaring panels.
The thread is a very ordinary stranded cotton, used straight off the skein – although as you can see, a couple of strands are making a bid for freedom, even so!
This picture also gives you a sight of the rainbow of colours involved in the tweed fabric I used for this particular circle – isn’t it lovely to see!
Trailing Spiral
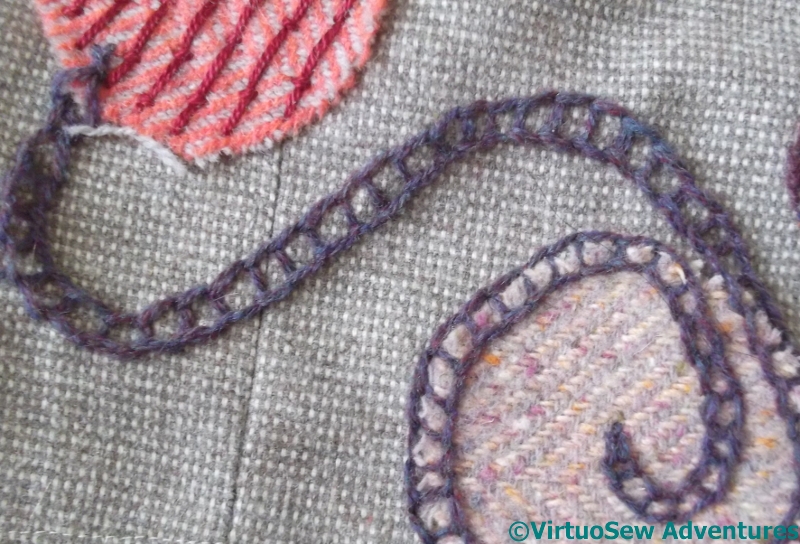
The trailing spiral is high up on the front of the skirt, off to one side, and it was – in spite of the order of its appearance – one of the earliest elements which trailed off the circle and onto the fabric. I thought this would turn out to be quite important, to help link the various materials and create a cohesive whole. I had to work the spiral twice because the first time it barely showed at all. I’m all for the painter’s technique of “lost and found edges”, but there has to be something to find!
The purple chain stitch is there purely to make sure of the edges. If I had already bought the embellisher, I might have simply used that, very heavily, first.
Chainette Spiral
I love using rayon chainettes in this sort of experimental embellishment. As a one-time specialist in the industrial production of “novelty” yarns, I have a sentimental attachment to chainettes, chenilles, and eyelash yarns.
This particular chainette was striped, which echoed the twill weave of the tweed very nicely. It was also a real trial to stitch with – hence the simple running stitch. I simply didn’t have the energy for anything else..
Embellishing The Circles Skirt – Part Five

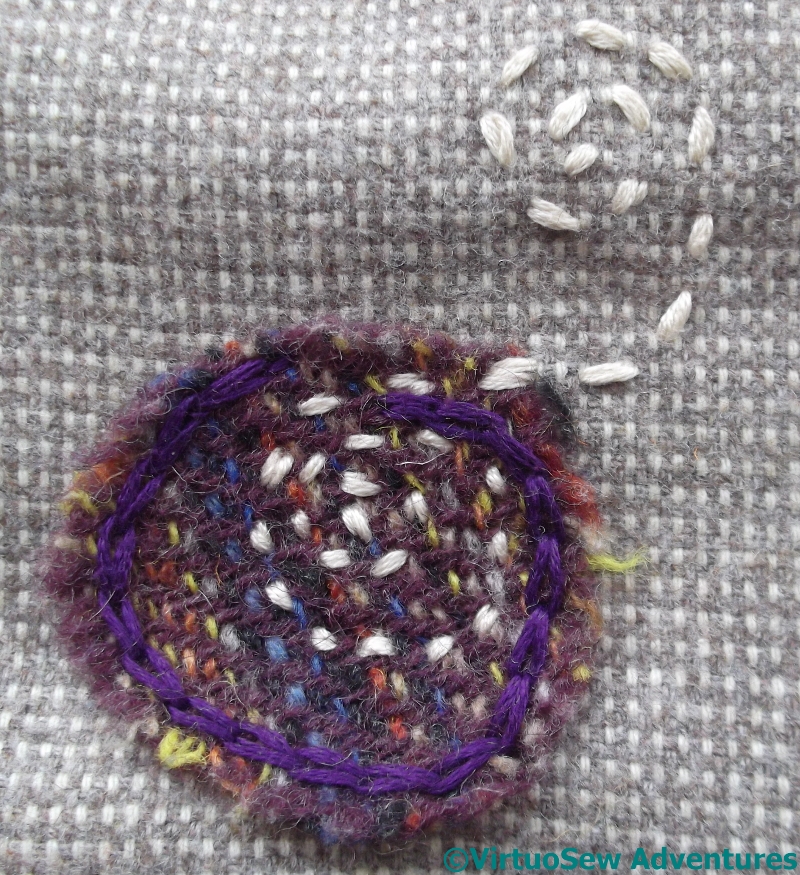
Blanket Stitch Wheel
I’ve recently bought myself an embellisher, and this is one of the circles I’ve used it on. The stitching is a simple blanket stitch wheel, which some small straight stitches between the spokes and French knots on the skirt fabric. The thread is wool, so I thought this one might be a good candidate. It has had the effect of making the stitches seem much more part of the tweed circle – almost drawn or painted on. In turn, that helps the French knots to seem a little more textural.

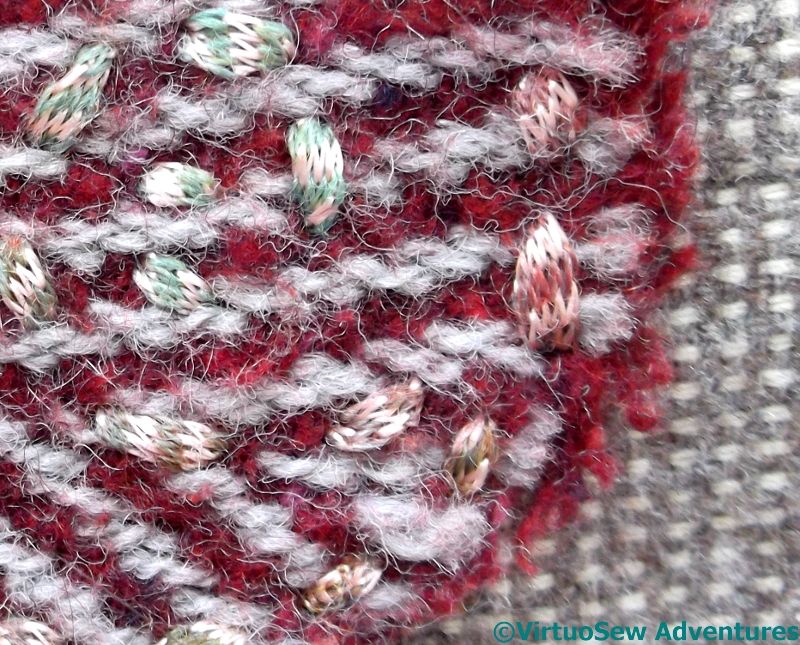
Change In Texture
Learning to use the embellisher – and in particular, how soon to stop! – is going to prove interesting. Here you can see that there is a less fuzzy texture at the centre of this tweed circle. That section has been more heavily treated with the embellisher. This was quite deliberate, because the very free ornamentation on this skirt allows me to experiment, and one thing I would like to know is – will this change in texture be permanent, or will this fabric become fuzzy again as the skirt is worn?

Couched Bouclé
In this case, I’m not sure I can even distinguish the effects of the embellisher! I couched a bouclé thread over the top of the tweed in this case, then ran the embellisher over the tweed and bouclé at random. There is extensive scope for investigation and experimentation here..
Incidentally, for those who’ve not heard of one before – an embellisher is something like a sewing machine, but it replaces the needle and thread with an assembly of barbed needle-felting needles. The barbs entangle the fibres of the fabric, creating new textures and joining the fabrics without stitching. So far I’ve only had a chance to experiment a little, but I think it might be a very useful tool when I start work on the Vision of Placidus!
Embellishing the Circles Skirt – Part Four

Shell Chain

Wavy Chain
Some of the suggested stitch variations in Edith John’s books have worked very well for the Circles Skirt, others rather less so. I think these two samples might help to show why.
Shell Chain Stitch worked beautifully. In the pearl cotton thread I used, there’s a nice, crisp sense of the stitch pattern, but the stitch is still flexible enough to curve around the circular shape I wanted it to, whereas Wavy Chain stitch, a variation upon it, is a very “stiff” stitch. It is wide, but each group of stitches stems from the same point, and even using a much finer thread and shortening the stitches really doesn’t make it any more flexible.
Shell Chain On Tweed
So here is Shell Chain on the skirt. It runs neatly around the edge of one of the checked circles, and although now I have worked the sample as well I might have preferred to shorten the stitches, it was fun to do, and easy to alter to match the curve.
I tried Wavy Chain several times in various places without managing to make it follow even the gentlest of curves, and eventually decided to give up until I’d thought it out some more, and maybe even done some practice.
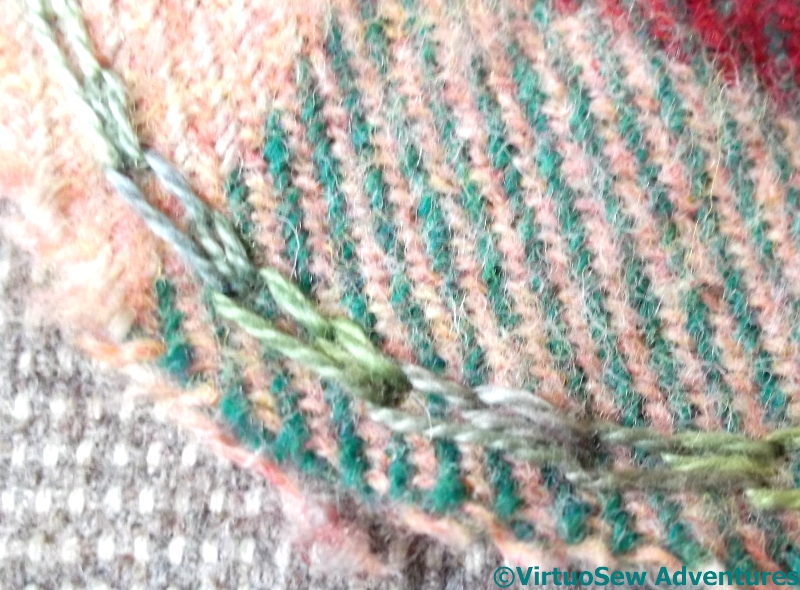
Wheatear Spiral
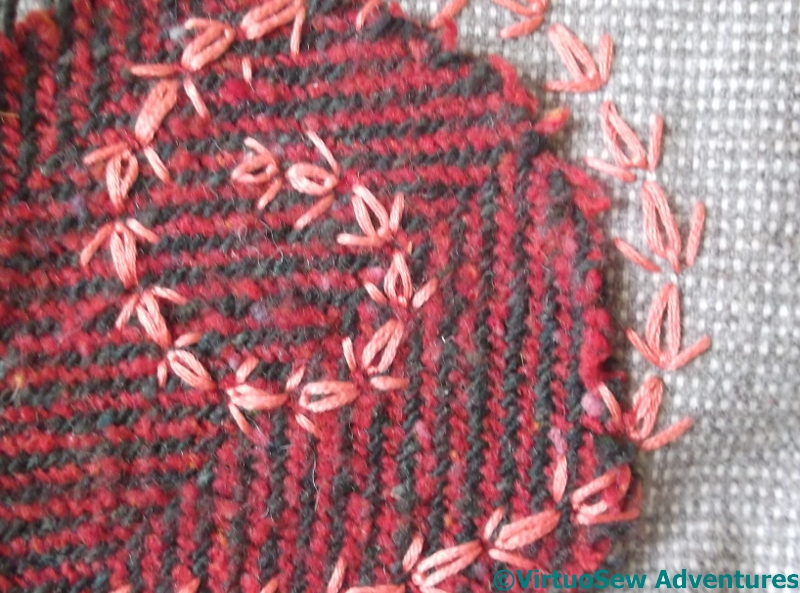
The Wheatear Spiral more than made up for my frustration.
It was a joy to do – the stitch itself is easy and effective, and the coral thread sings against the red and green tweed. Offsetting the spiral in comparison with the tweed also makes the whole thing more interesting, helping to connect the ground fabric and the embellishment. Maybe I should have swung the spiral further out over the base fabric, but this is what my needle wanted to do!
Embellishing The Circles Skirt – Part Three

Spanish Knotted Feather Stitch
Naturally some of the threads I chose to use were from my extensive stash of variegated and over-dyed yarns. The Spanish knotted feather stitch running around the edge here is stitched using one of Stef Francis’s pearl cotton type yarns. This one has very little sheen, unlike the more standard pearl cottons, but the colour change brings up the texture of the stitch beautifully. I think this is the first time I’ve ever used that stitch, and I really enjoyed it.
Spiral Of Ladder Chain
I realised that I had fallen somewhat into the trap of stitching around the edges of the circles, and wanted to create some sort of variation, so when it came to the pinky circle, I added a layer of widely-spaced burden stitch to alter the colour and effect a little. Then I used ladder chain stitch to join that circle to another.
I continued the Ladder Chain across the skirt fabric and around the rim of another circle, spiralling around it and then into the centre.
Glove Stitch And Daisies
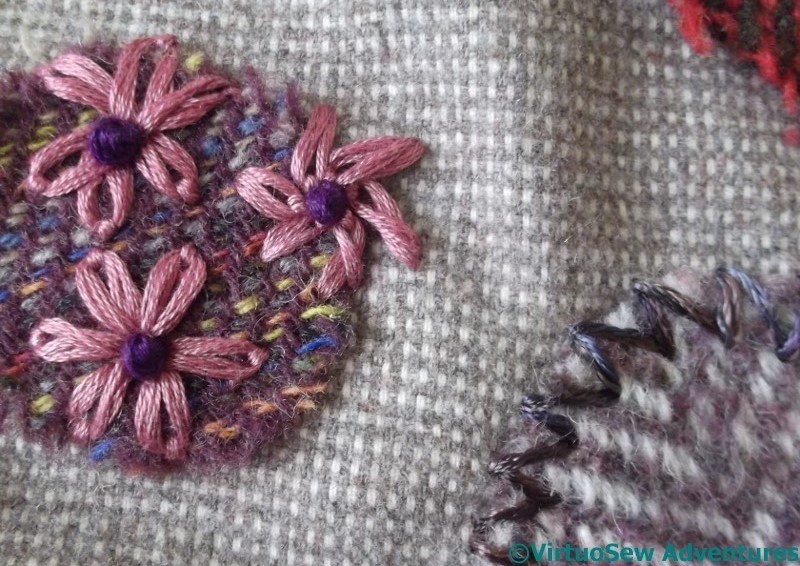
More daisies, this time on one of the smallest circles. I may add to the grouping in due course, but for now, there are just the three pinkish ones with dark centres, one of them falling off the edge of the circle.
The shiny rayon in stormy colours around the edge of the other circle is glove stitch. It was surprisingly hard to bend the stitch around the circle. I expected it would be easier, since with a name like “Glove Stitch” you would expect the stitch to be intended to run around fingertips, which are much more tightly curved than this circle!
Embellishing the Circles Skirt – Part Two
There are a lot of circles to embroider, and since even though I’ve done a lot, I’m not sure I’ve finished, it will be some time before I show you the skirt complete. In the meantime, though, I’ll continue to describe some of the circles and the embroidered embellishment as it has developed.
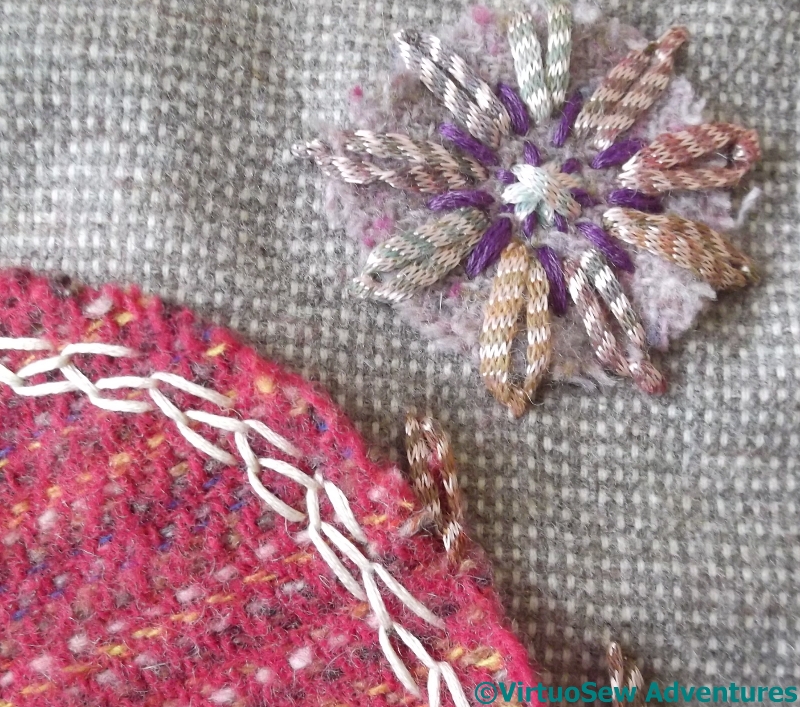
Three More Circles
The light chain stitch around the edge of the darkest tweed circle looks a little stark, and I may have to do something else to break it up a little. Edith John’s various suggestions may help there!
The stranded cotton I used for the blocks of straight stitch on the pinkish tweed is actually too close in weight to the threads in the tweed, and at some angles in relation to the weave, it sinks in a little too much. I like the effect of the sheen of the cotton against the matte wool, but another time I might choose to separate and recombine the strands.
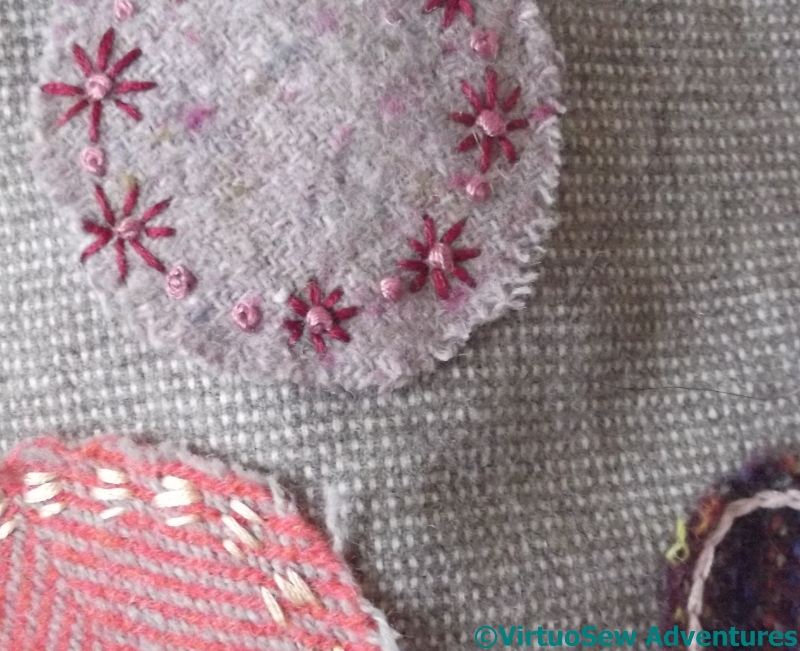
The lilac tweed shows what happens when you improvise. I started with a ring of French knots about half a centimetre in from the edge, decided it wasn’t enough, and turned alternate French knots into flowers with a ring of straight stitches. It turned out that I was one French knot short of a complete ring!
Cretan and Interlaced Running Stitch
The small, dark tweed circles are predominantly at the back of the skirt, on the sections that flare out slightly. By and large, I’ve not done anything too dramatic in embellishing them, either. I want the patterning to reach all around the skirt, but it doesn’t have to be equally heavy or equally detailed at every point.
The cretan stitch is worked in a fine but quite rough silk thread. I liked the combination before I stitched it, but the silk thread wasn’t easy to work through the tweed fabrics, so I was very glad it was only a small circle!
The second circle is ringed with double interlaced running stitch using a medium weight pearl cotton. The pearl cotton sits up above the tweed, and the shine contrasts nicely with the matte silk thread on the other circle.
Embellishing the Circles Skirt – Part One
I have two books by Edith John, “Creative Stitches” and “New Stitches for Needlecraft”, and in the latter, she in turn quotes from another book “Needlework through the Ages” by Mary Symonds and Louisa Preece, who say
“It should be remembered that it is not the stitch itself, but the manner of its use which constitutes the art of embroidery”.
I’m going to have to think about that. I think – I would like to think – that in my embroidery the “manner of use” of a stitch is an important element of my approach, but I want to think a little bit more about the How and the Why of some of my stitch choices. It might involve a little more practice stitching, but since it’s the process of stitching that appeals to me as much as the finished result, that probably won’t be a problem!
Much of Edith John’s introductory text is concerned with encouraging experimentation – not something I need much encouragement in! – but one thing she does emphasize is the delight that can be gained purely from stitchery. The whole idea of this skirt is that it should look as though I had fun with it. This is probably not a project in which the answer to Why is likely to be anything other than Because.
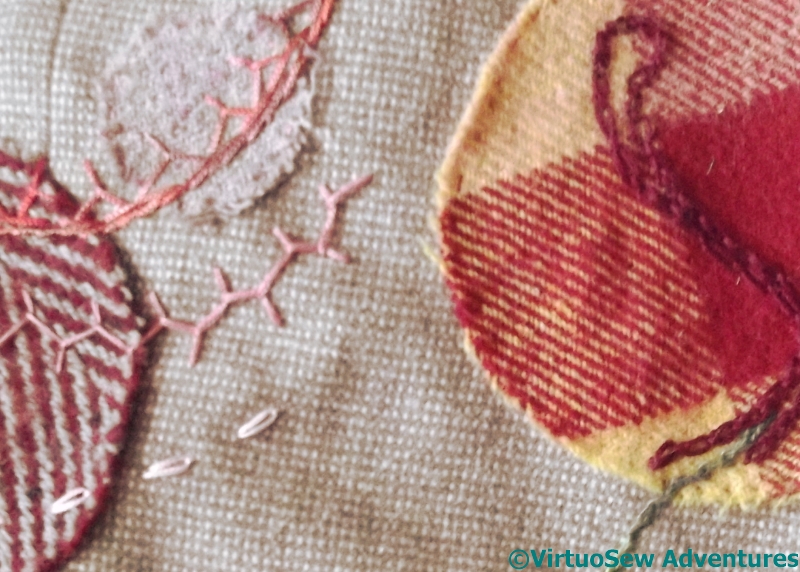
Ghost Circles
Some of the circles will be embroidered within their edges, some will have embroidered elements that extend beyond there edges, and some are ghost circles, linking several of the tweed circles together. In the top left corner of this first picture, you can see part of a series of concentric ghost circles, using solitary chain stitches, cretan stitch, stem stitch and half-chevron stitch.
The large checked circle is joined to a nearby one using some cable chain and twisted chain stitches, set out to suggest that the stitching is itself a stitch, running underneath the main fabric and onto the tweed.
Feather And Lazy Daisy
One of the smaller circles acquired a Lazy Daisy in chainette ribbon, with a couple of falling petals on the main fabric. I’ve emphasized the centre – a circular boss using the same chainette in star stitch – using a darker stranded cotton.
I’ve learnt over the past few years that sometimes a design is best created using layers of detail. The darker stranded cotton was added after I’d done a few other circles. I came back to it, and wanted to point up the petals a little. Since the tones are all very similar, the darker thread helps. I may yet come back and add some more.
The large crimson circle is very simple at present, with a single row of closed feather stitch around the edge. That may yet change…
The Circles Skirt

Layout For The Skirt
You may recall that I bought some rather gorgeous Donegal tweed at the Harrogate Knitting And Stitching Show, with the intention of embellishing a skirt. I decided that this time I would use simple circles, and cut some paper patterns in circles of different sizes, to decide on placement. Here is the result. Most of the drama is at the front, where the skirt is a simple A-line shape. The back of the skirt flares out a little in the centre, so the patterning tails out there, but the pattern is asymmetrical, which is why I’ve chosen to show you a sort of all-round view.

Skirt Partly Arranged
It seemed to me that the easiest way to decide what went where was to sneak up on it. I stared at the layout for a while, picked a fabric for a particular placement, cut it out, pinned it on in place of the paper circle, and then stared again. Repeat…

Skirt Layout completed
I’ve needlefelted the circles to the fabric – that seemed the best way to attach them more or less permanently so I won’t be stabbed with pins when I’m adding the embroidery. Now there will be a lot more cycles of staring at it and doing something, staring at it and doing some more.
And since the circles are firmly attached, I can in fact wear it now if I decide to!