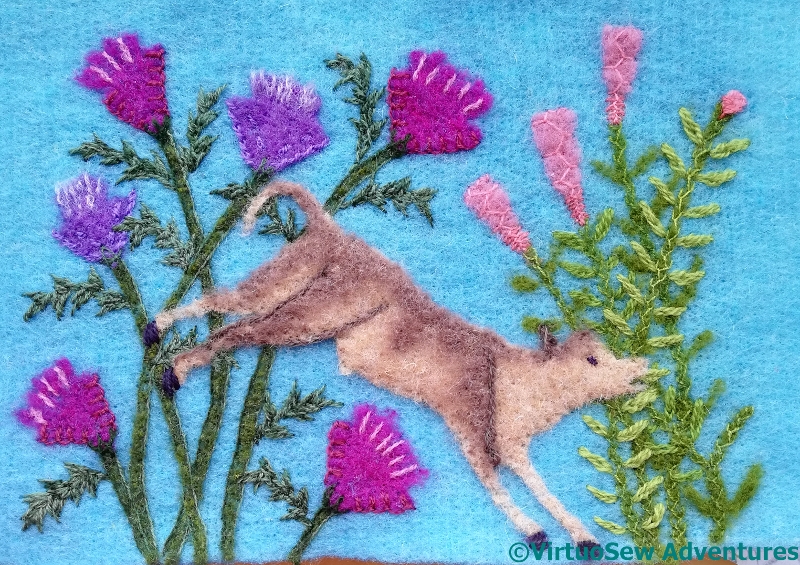
I ran the embellisher over the whole thing, to knock back the colours and the stitches a little, and tugged at the fabric to even it out. Then it was on to the calf, cut out separately and given darker patches on his back and legs. I’ve attached him using single-needle needlefelting, by hand. His ear is sharpened with a twisted chain stitch, his eye is a tiny chain stitch and his hooves are straight stitches.
Finished Frolic
I intend to cut an irregular shape and attach it to a padded wool felt background stretched over a frame, as I did with the Two Princesses. I mustn’t forget to sign it at that point!
That transfer I’ve been working on wants to be finished, and I’m pretty much at the stage of thinking about the leaves, so just so we all know where it’s up to, I’m doing a State of the Tablecloth post.
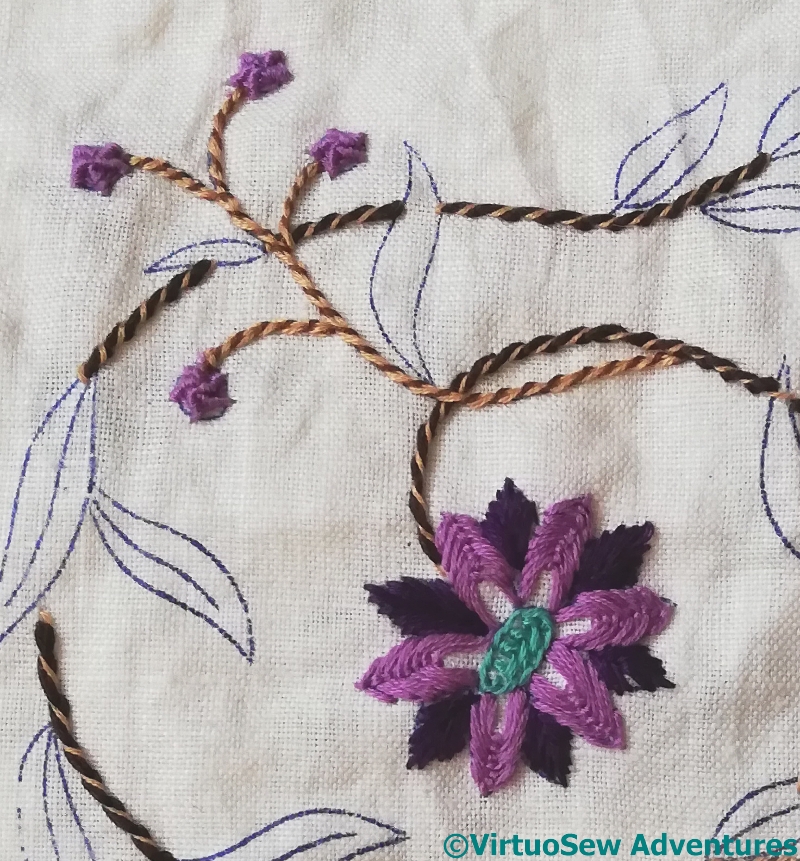
So the petals of the purple flower are in nested fly stitches, the centre is a sort of looping interlace, and the little buds are spider’s wheels. I packed the spider’s wheels quite tightly, to raise them up and increase the texture – I know that raised elements on a tablecloth can be a problem, but it’s no problem on the falling part!
Buttonhole Fans
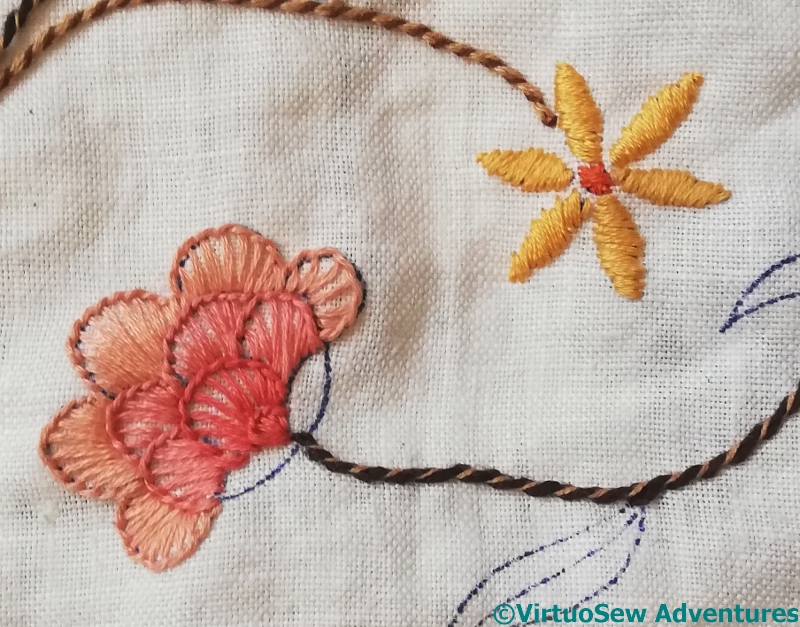
The small starflower is the only element that I’ve done as the instructions that came with the tablecloth suggested – satin stitch.
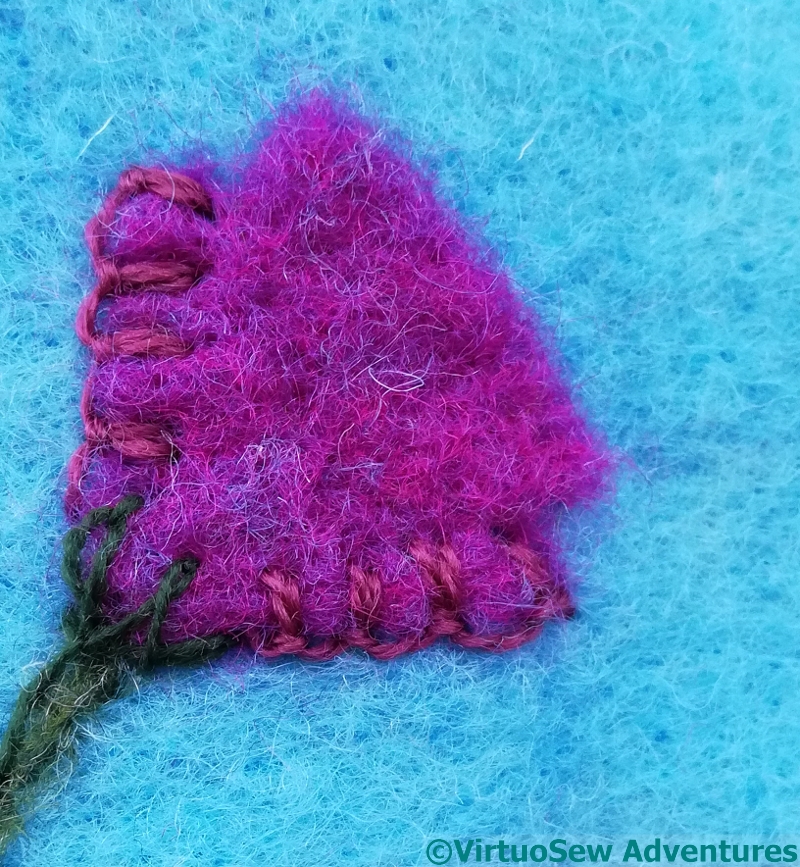
The ruffly flower – do you think it might be a crysanthemum? – seemed a perfect opportunity for buttonhole stitch fans. I might decide to whip the edges to pull out the colour progression a bit more, but we’ll see what the flower wants when the leaves are on.
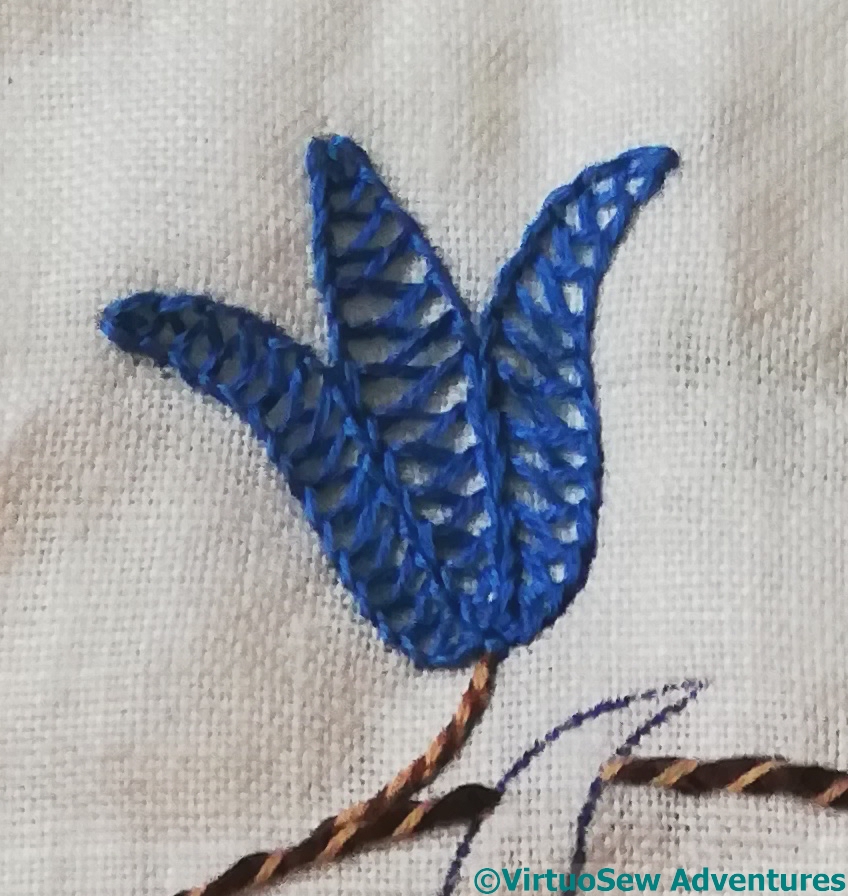
Double Chain Stitch
Double chain stitch is easily confused with closed feather stitch, and in this case I complicated my life considerably because I changed the breadth of the stitch to match the petals of the flower. I rather like the effect, and although I said it was a complication, the actual stitching flowed quite nicely.
And rather than give you a Long Read, look out for episode 2…
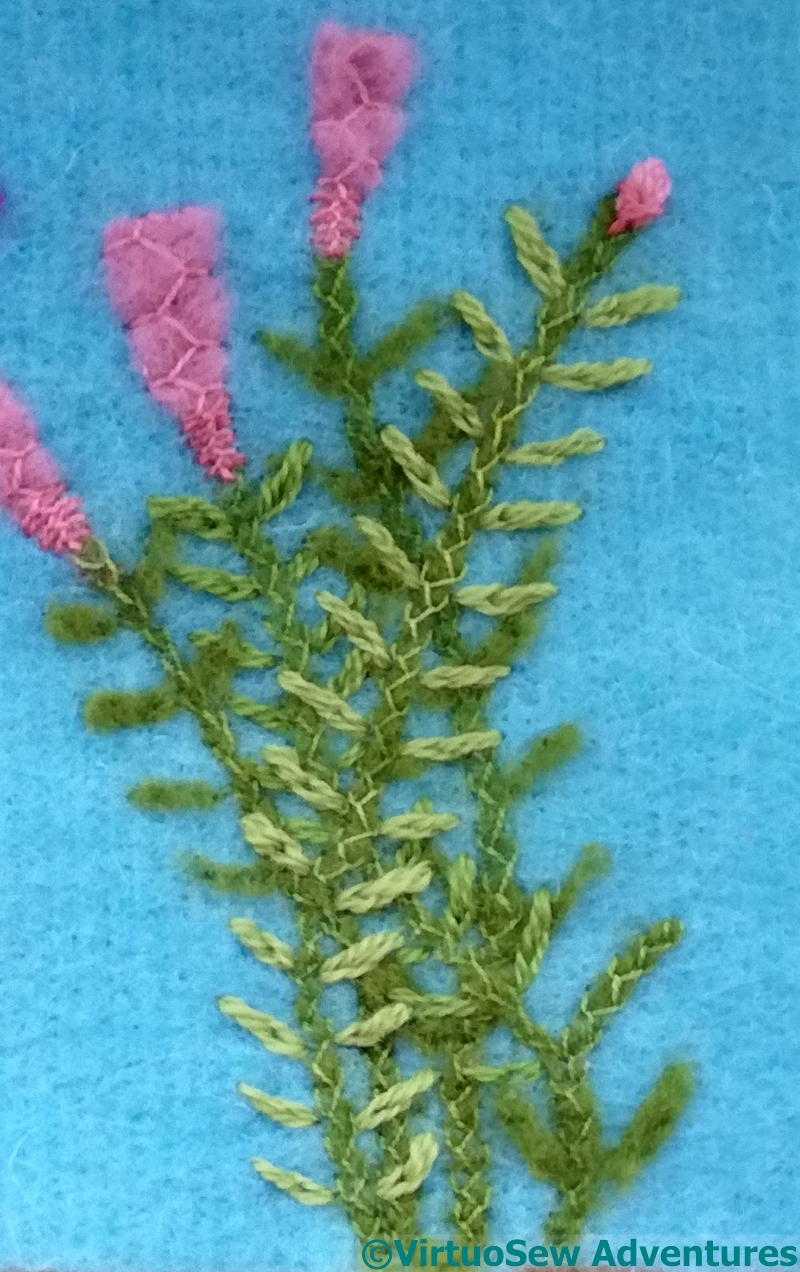
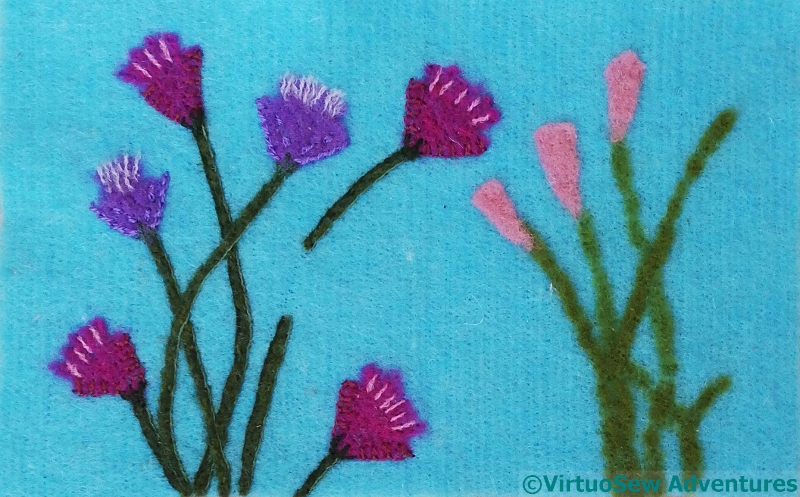
In the case of these plants, instead of stem stitch on either side of the stems, I narrowed and neatened them with a single felting needle, and then added feather stitch over the top, using another of those lovely Gumnut Yarns. The flowers have a flourish of Cretan Stitch, with two colours at the base.
Then I started to think about the leaves. At first, I was going to add fragments of felt for all of them – the original fresco looks as though they are in a single colour – but then I reminded myself that I’m an embroiderer, and after all, texture is one of the reasons why.
The back couple of stems have felt leaves, but then I used loose, large split stitches in Persian Yarn. This maybe looks a little more dense and “jungle-y” than the original fresco, but the Nile valley is famously fertile, after all…
Running Stitches to guide leaf placement
The sharp, curved leaves on the other side were a little harder to deal with.
In the end I decided to make life easier for myself by putting in running stitch curves to help me place them. I’ve spaced them out a little more than in the fresco itself, because the variegated wool thread has created a lot more activity in the embroidered leaves than the frescoed ones.
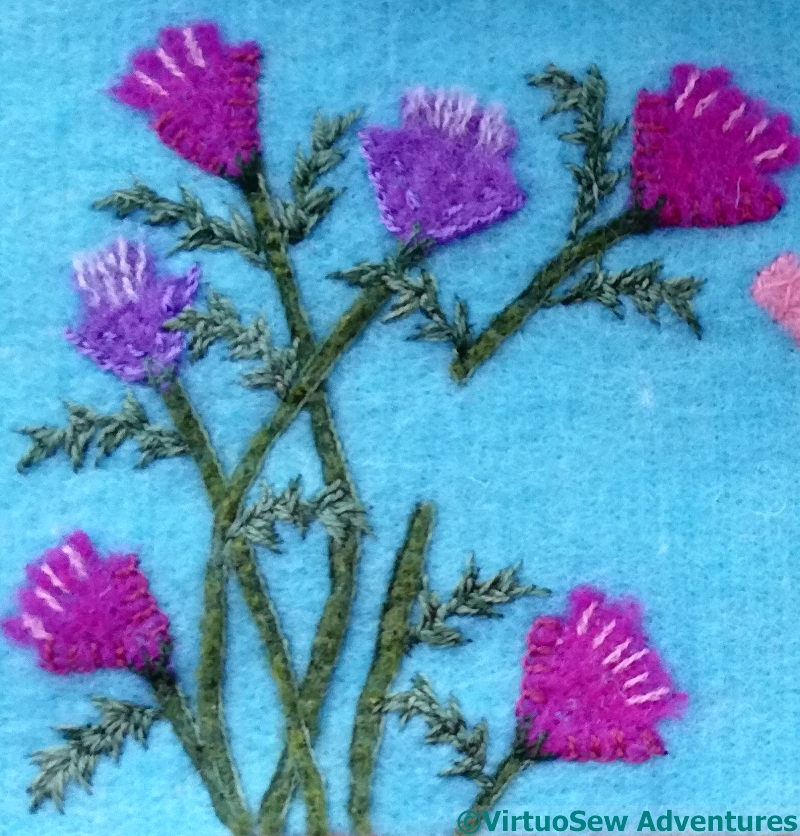
Sharp Leaf Plants
I think that’s clear in this photo of this section. The sharp, curving shapes, the variegated thread and the varying stitch direction all create a rather busy effect, and I’m even thinking of removing the lighter pink stitches in the flowers. That decision can wait until everything is in place.
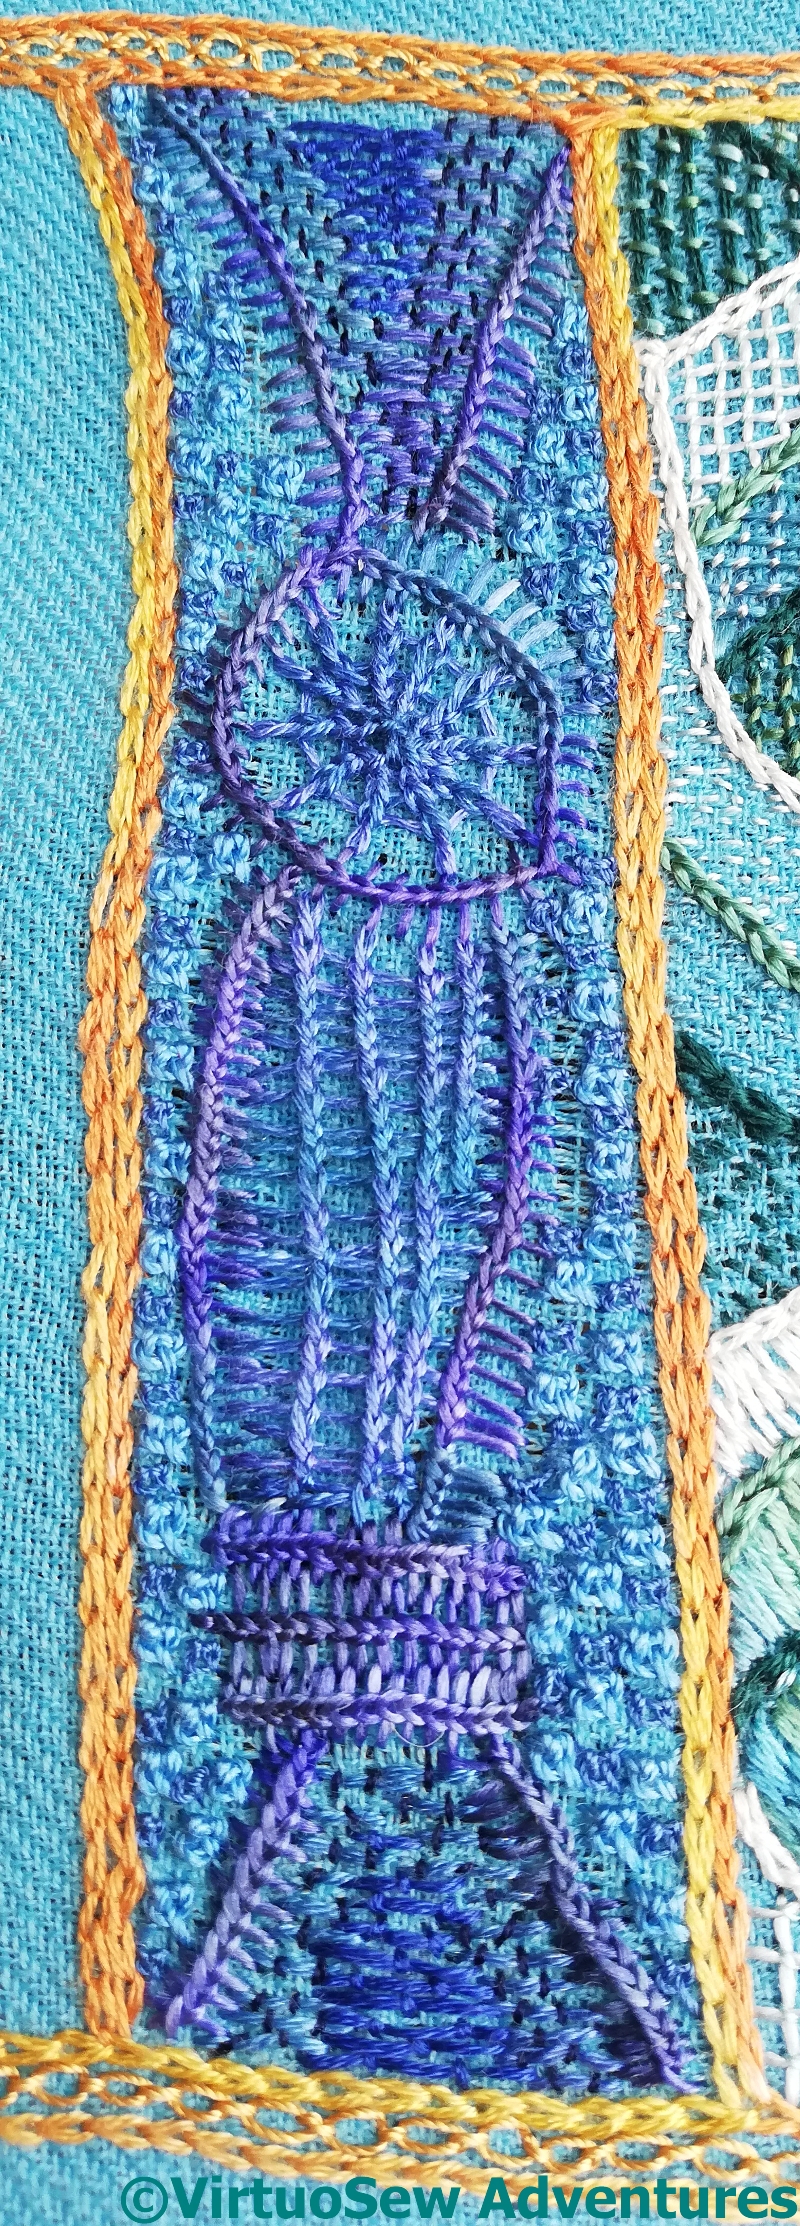
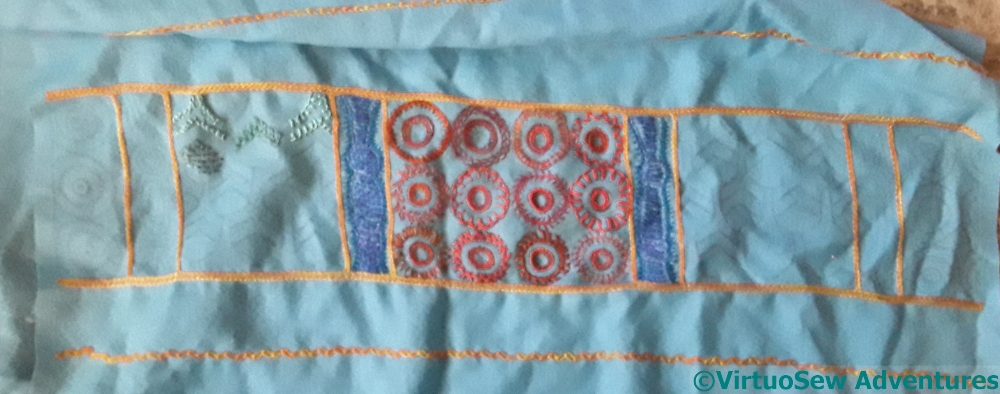
You may recall that I wasn’t entirely happy with the the first two blue panels. I’m still not entirely sure why, but I decided that I would work the second pair rather differently.
The outline of the pillar like shape, this time, was in Vandyke stitch using a Stef Francis variegated silk. Tricky, on such a mobile fabric, but I liked it enough to keep going, and moved on to a background using Sorbello Stitch. I rather like Sorbello Stitch – I used it for the villages on the Map of Amarna – and because I was working it at a tiny scale, the mobility of the fabric wasn’t a huge problem.
On to the internals of the pillar like shape, and I started with a Ceylon stitch wheel. This is a needlelace stitch, and even with the fabric in a hoop, tension was an interesting challenge…
I’ve also made the background a chequerboard of Sorbello Stitches in two shades of blue. I must have really enjoyed myself!
Finally, I filled the rest of the body of the pillar with Ceylon Stitch. Tension was even more of a problem here, and I may have to come back to this and tweak it, restitch it, or even change my mind again. We’ll see!
In the meantime, however, I have to do another one on the other side of the panel.
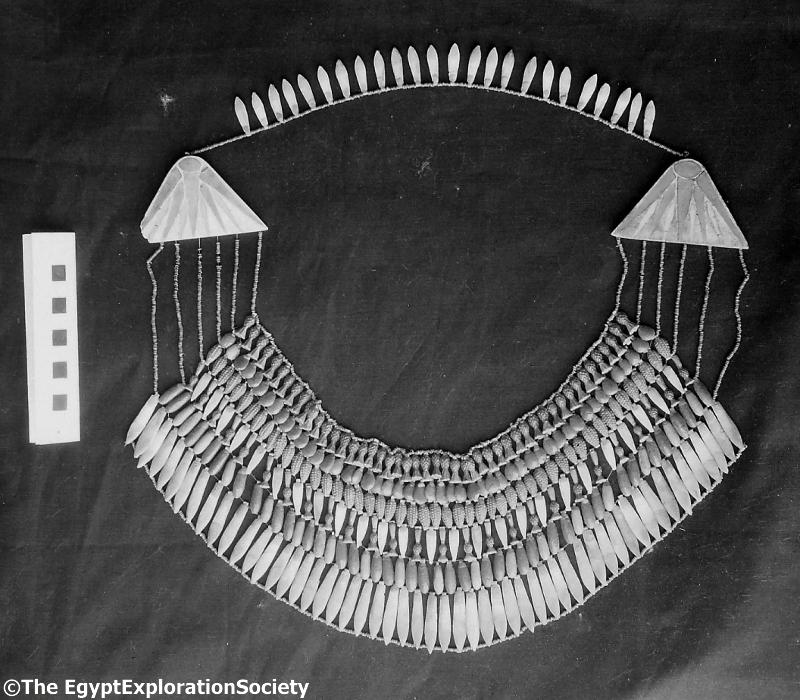
Faience Necklace
(Copyright The Egypt Exploration Society)
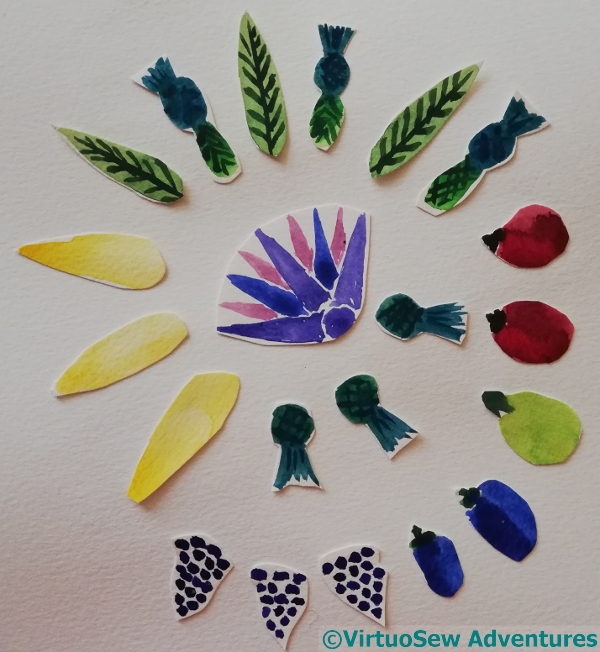
After her discovery of the piece of tile that started it all, the first find that Mary Chubb describes is a faience necklace, discovered by the team then in Egypt, and written up in the Director’s Report which she has to disentangle and re-type legibly (remember, in the 1920s, typing wasn’t a skill that everyone had had to develop). It sounds completely enchanting, and yet I’m struggling to bring it to life.
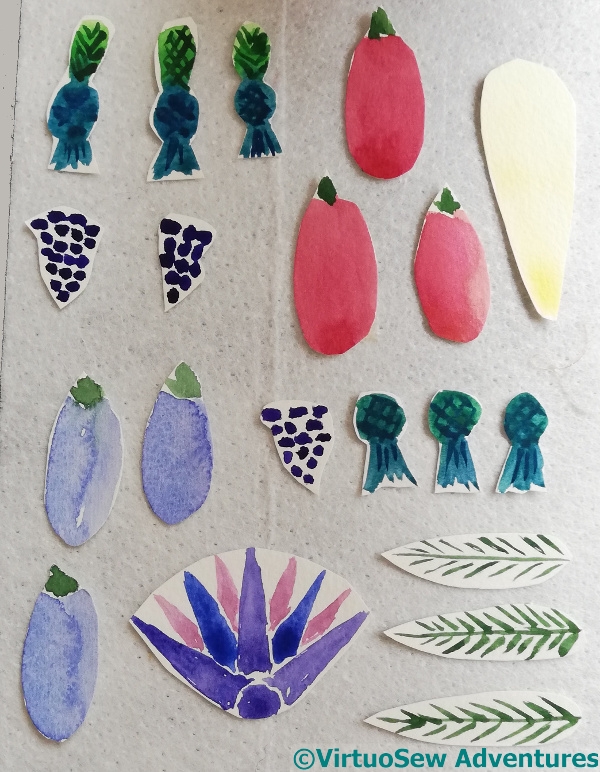
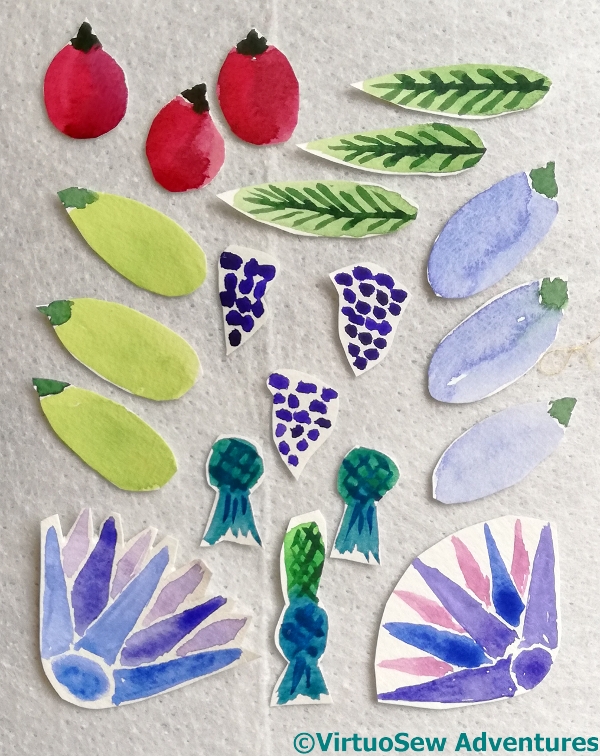
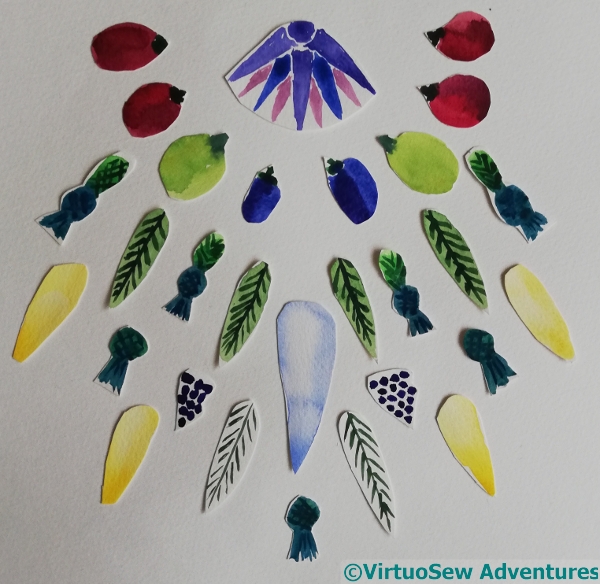
In fact I last wrote about it in 2015, and I’m still wrestling with ways to represent it! I’ve already abandoned any idea of working a portrait of it (as it were). As you can see from the black and white photo, it’s crammed with faience beads, and it’s hard to imagine making a good stitchable design of it. So I’ve cut out some watercoloured beads, and pushed them around, taking photos as I go. Back to primary school!
1
2
3
4
5
6
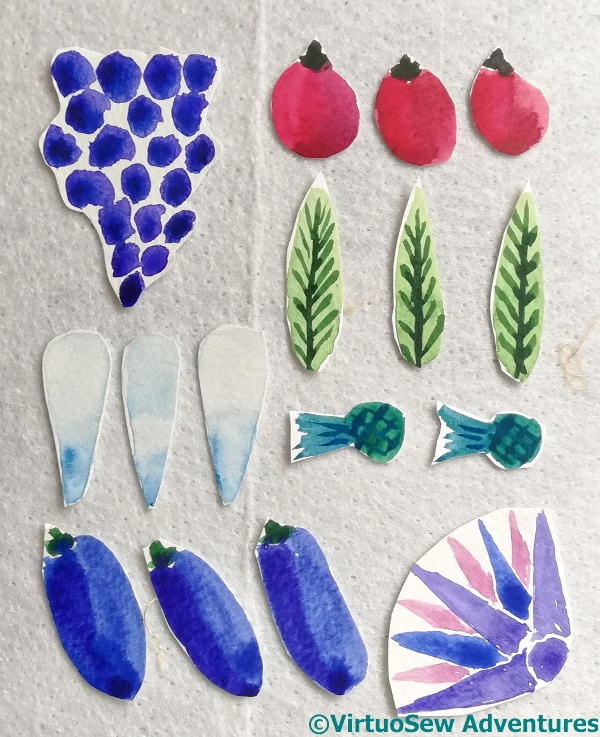
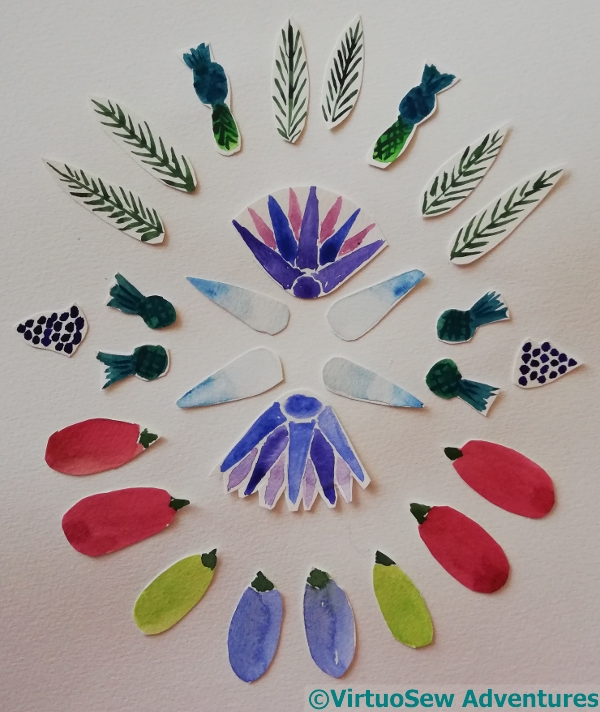
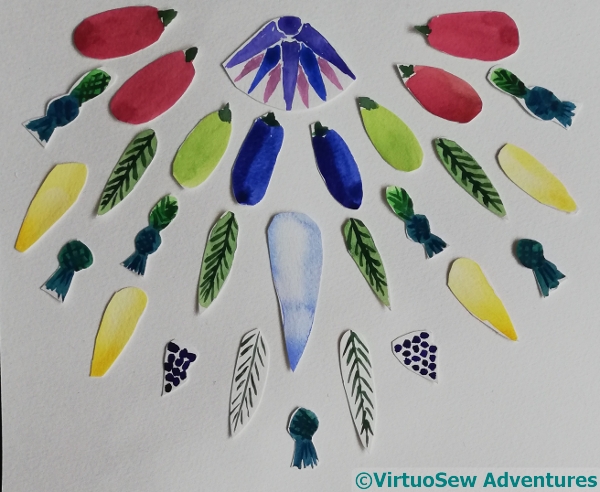
Then another suggestion came in (thank you @IndiaGraceDsgns ), to think about mandalas…
7
8
9
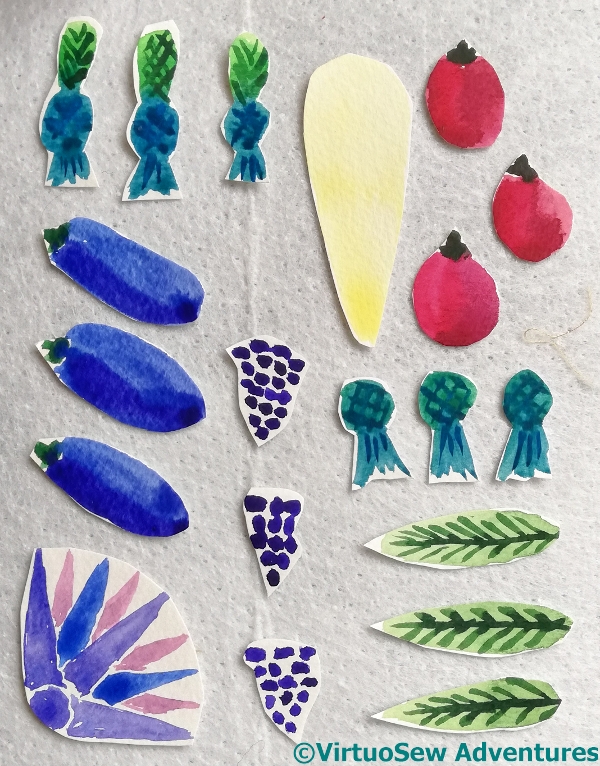
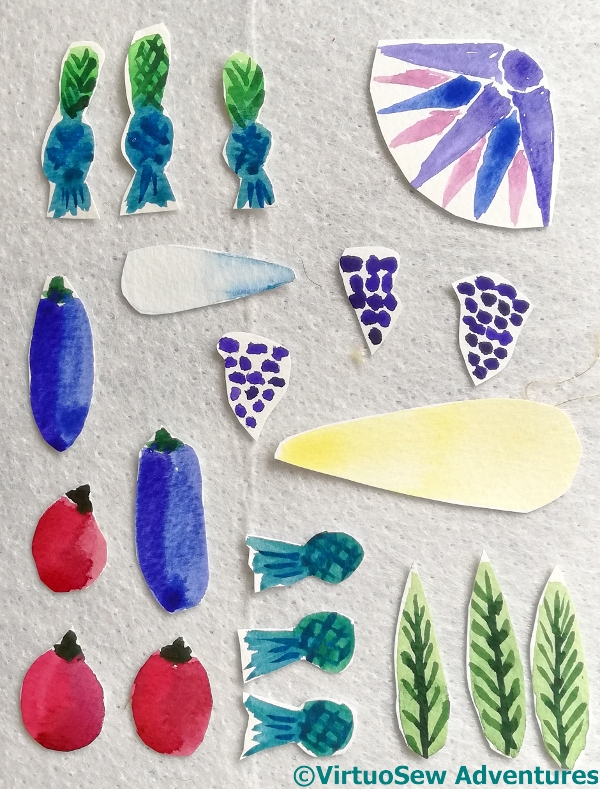
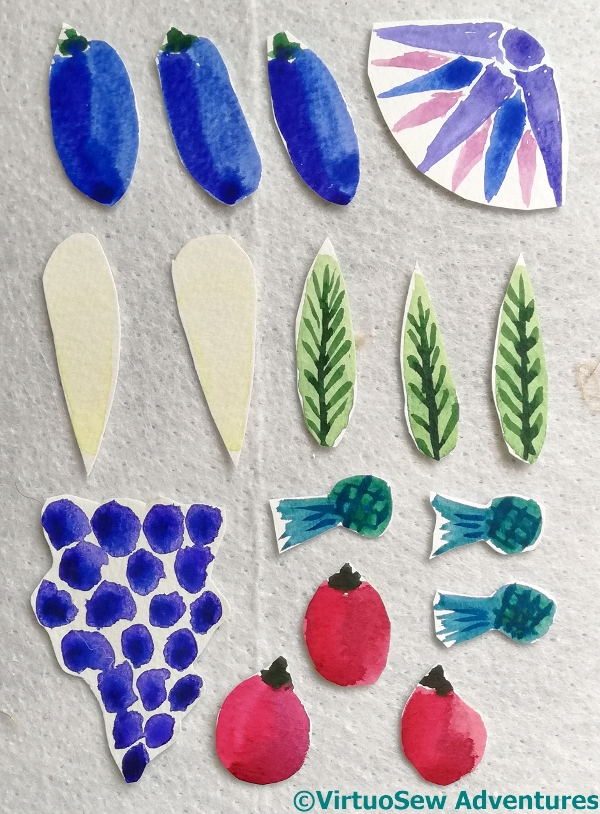
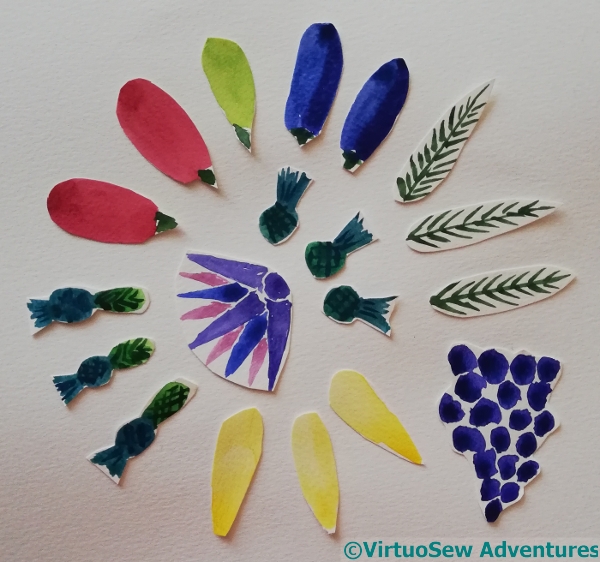
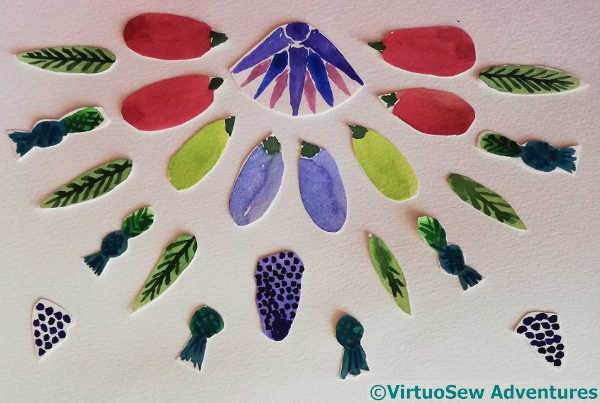
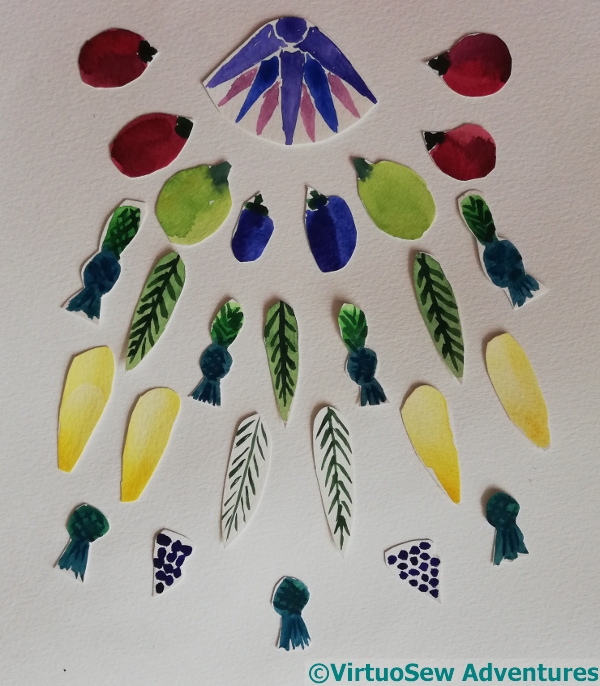
And now I’m thinking about “samplers” of beads which still recall the way these broad collars and necklaces are sometimes displayed in museums.
10
11
12
13
I’m planning on using flat silks, when I finally pick one (comments, anyone?), and of course, the next question will be: what colour fabric I will be stitching it on?
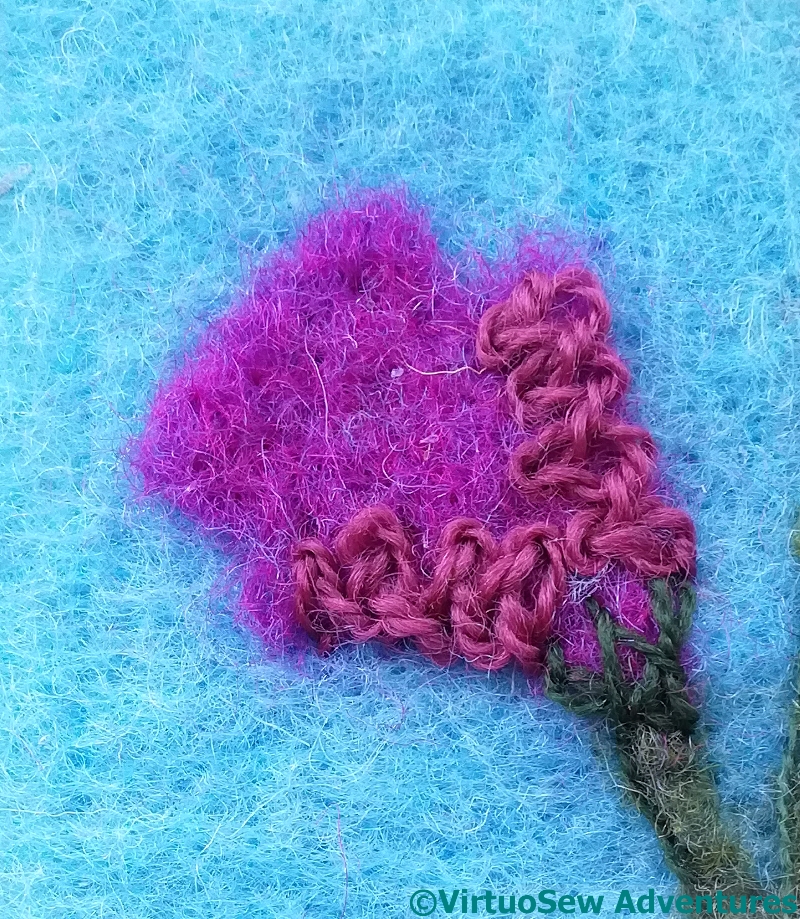
I wanted to do something slightly different with the pink flowers, but still modify the colour with stitching. The braid stitch made the shape too angular, and emphasized the edges too much; up-and-down buttonhole stitch, a favourite from the Jacobean Coat, might do a better job. Certainly, it provides a delicate edge that doesn’t impose itself too much.
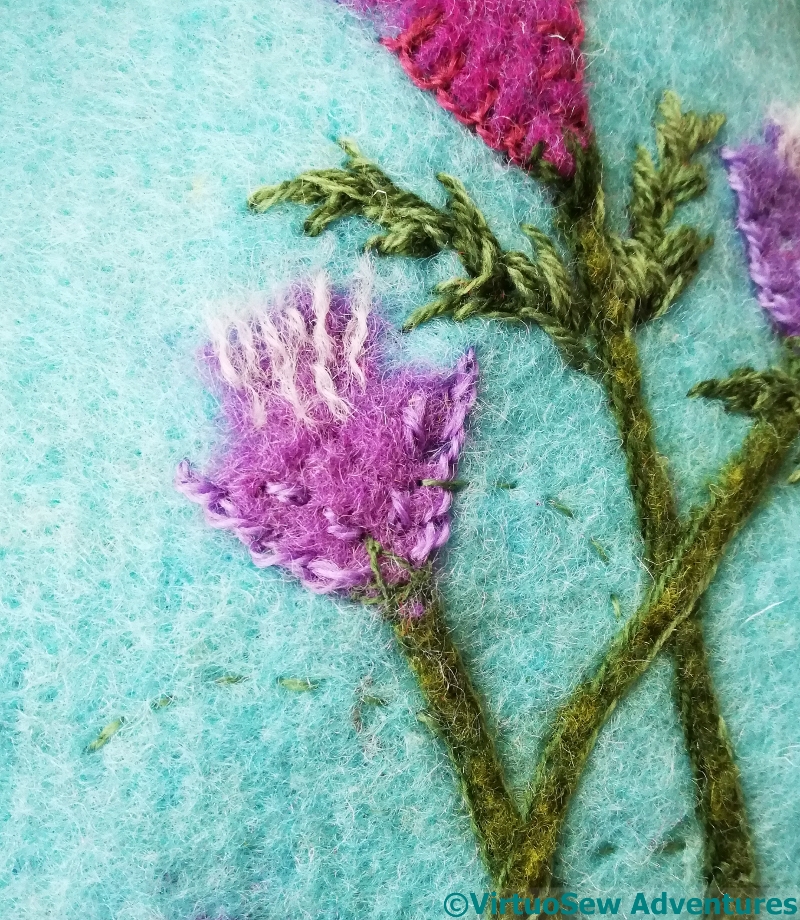
Half Done, Half Not
You will see that the left-hand side looks sharper than the right hand side. There is stitching and there has been extra needlefelting on the stems and flowers, while the right-hand side still looks rough, like a quick, splodgy sketch. I found I rather enjoyed narrowing the stems and rounding them off – by hand, with a single needle, not the embellisher, of course. There’s a gap in one of the stems because the calf will go over the top!
I may not have managed quite enough curve and flow in the lighter stems, but we will see how I manage to develop them later. They will have leaves added, and that will change the effect and the emphasis…
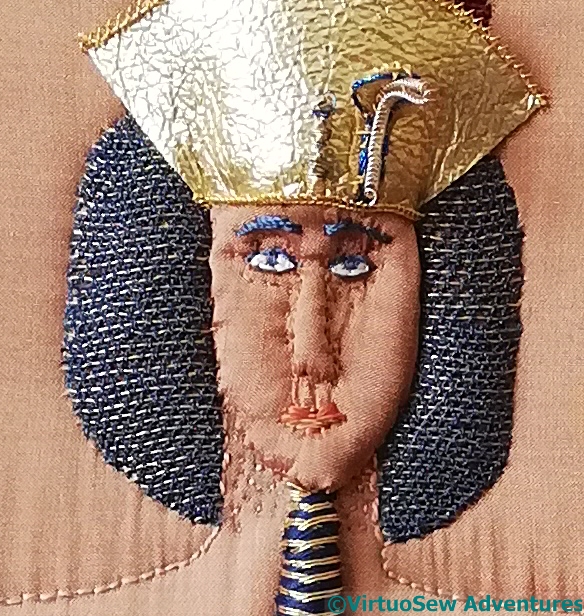
I added a few extra details, to sculpt the face a bit more – tiny stitches in silk, broadening and deepening the eye sockets, altering the shape around the nose, adding more stitches attaching the face.
In fact, to make sure the silk was fine enough, I twisted it myself from a spool of Japanese silk bought for the purpose. I think I ended up with three twisted threads from one length.
The gold kid of the headdress now has an upper edge trim as well. That would have been much easier to do if I could have done it before attaching the kid to the head!
Akhenaten’s hands
As I was looking over the whole thing, it occurred to me that Akhenaten’s hands weren’t convincingly grasping his crook and flail. Fixing that wasn’t hard in theory – new hands cut from the edge of the silk, padded with padding from the edge of the piece, and attached with more hand-twisted silk thread.
In practice, it took several attempts before I was at all happy with the result, and I could be seen contemplating my own closed fist thoughtfully at various points in the process. Which doesn’t always help as much as you might think, when the aim is something slightly different to a realistic representation….!
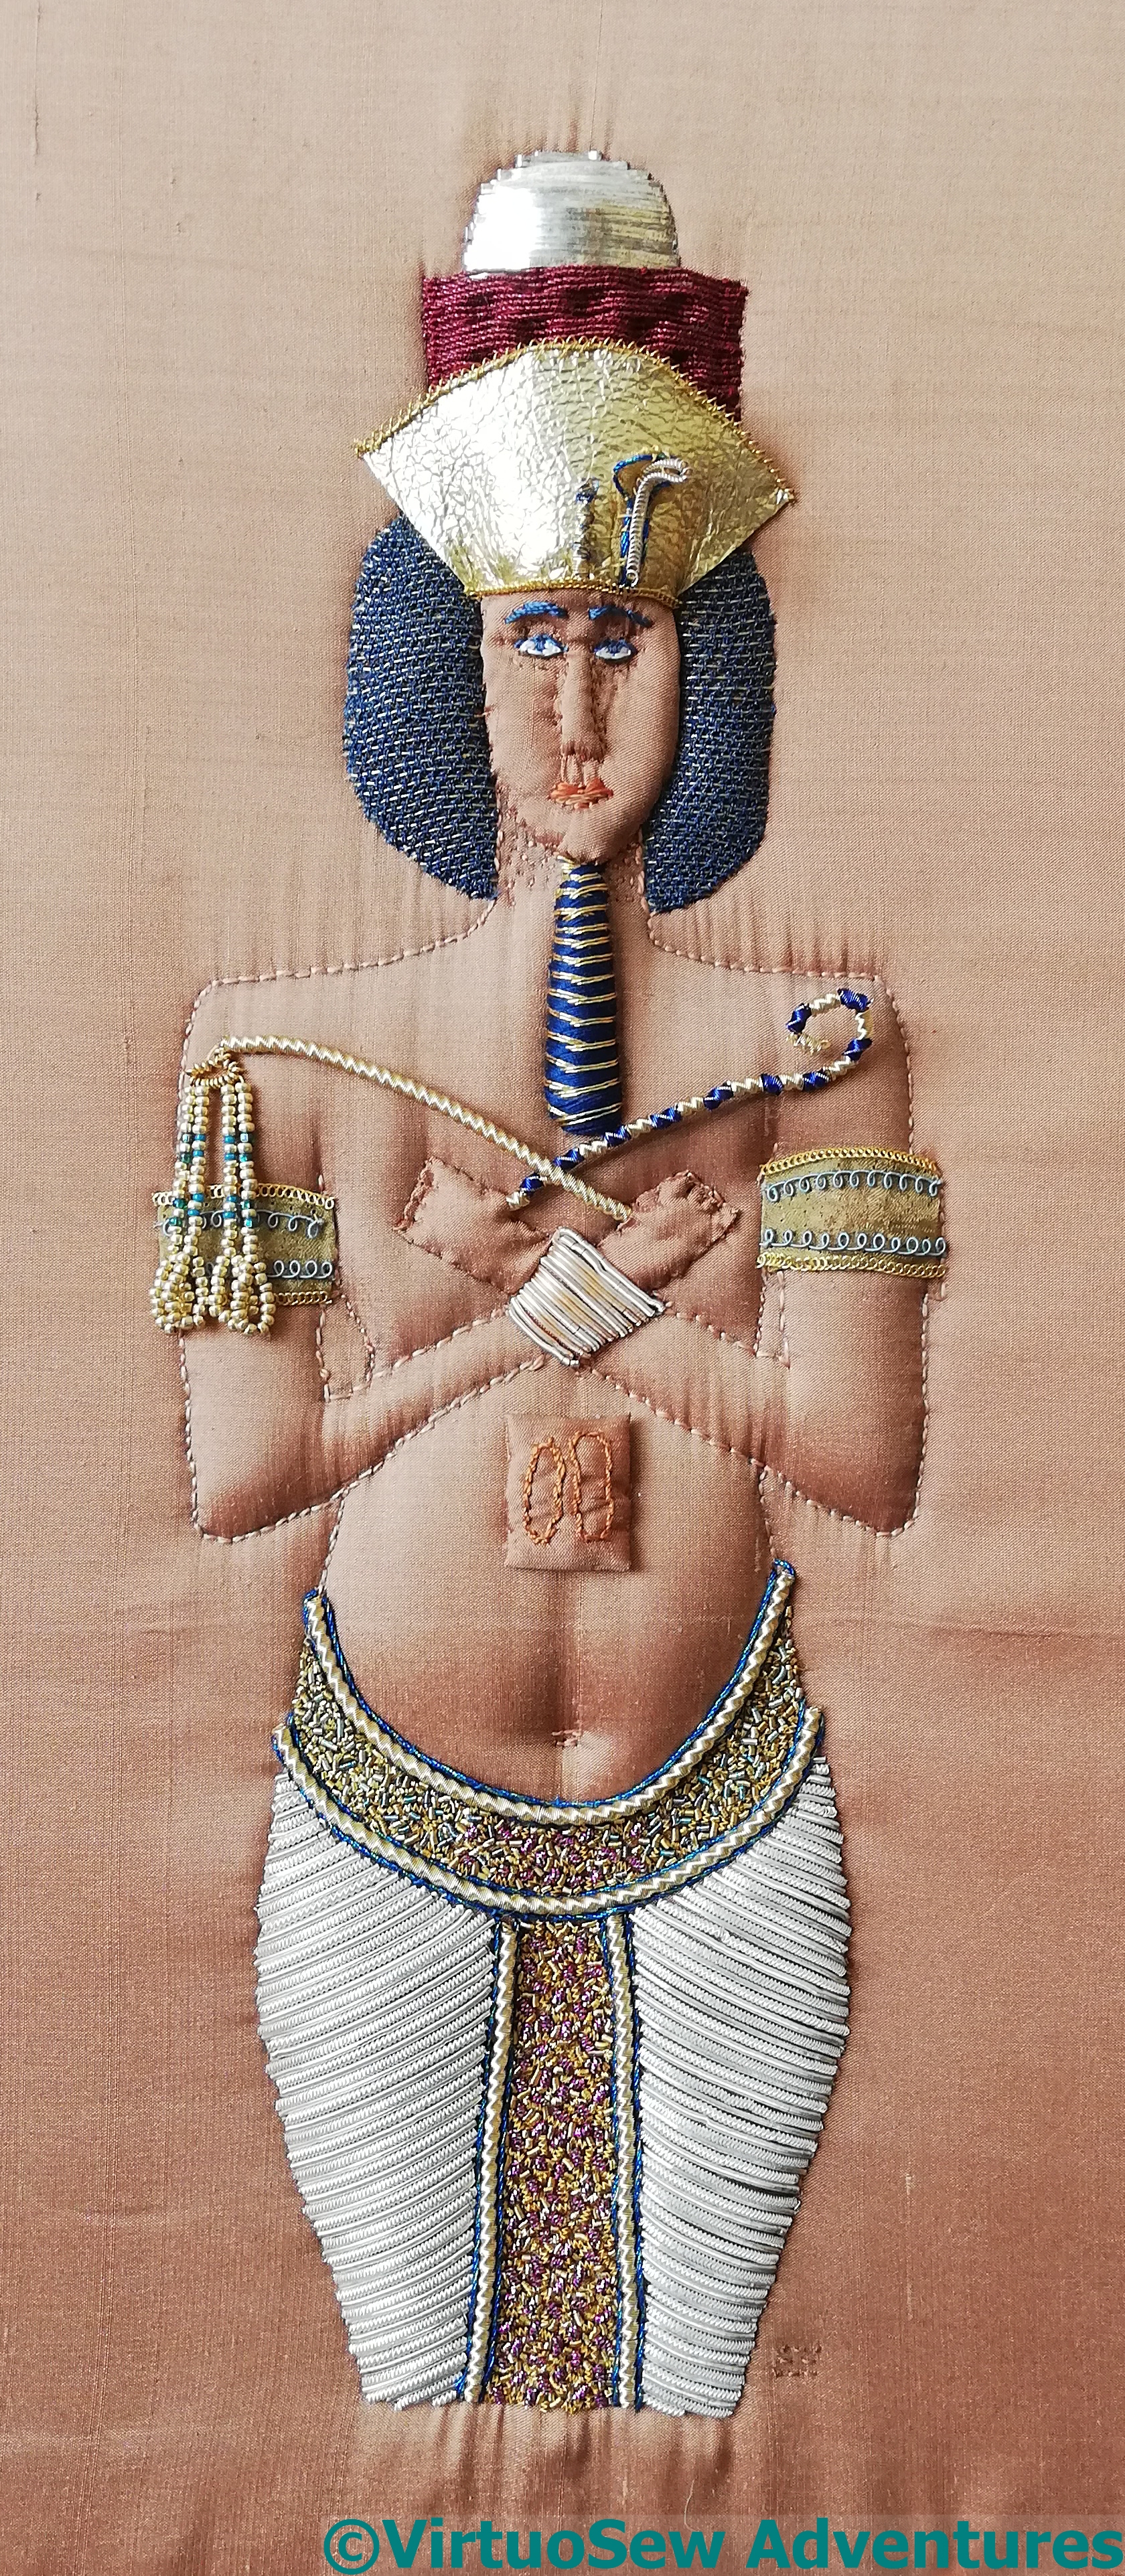
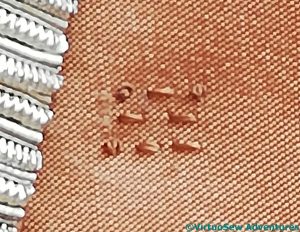
Signature on Akhenaten
However, I now think he’s probably as finished as I can make him. As I wrote to a friend: I may have doubts about detail, but I think Akhenaten is now as good as my current level of skill will allow. I hope someone will take him off my hands before I get good enough to shudder every time I look at him!
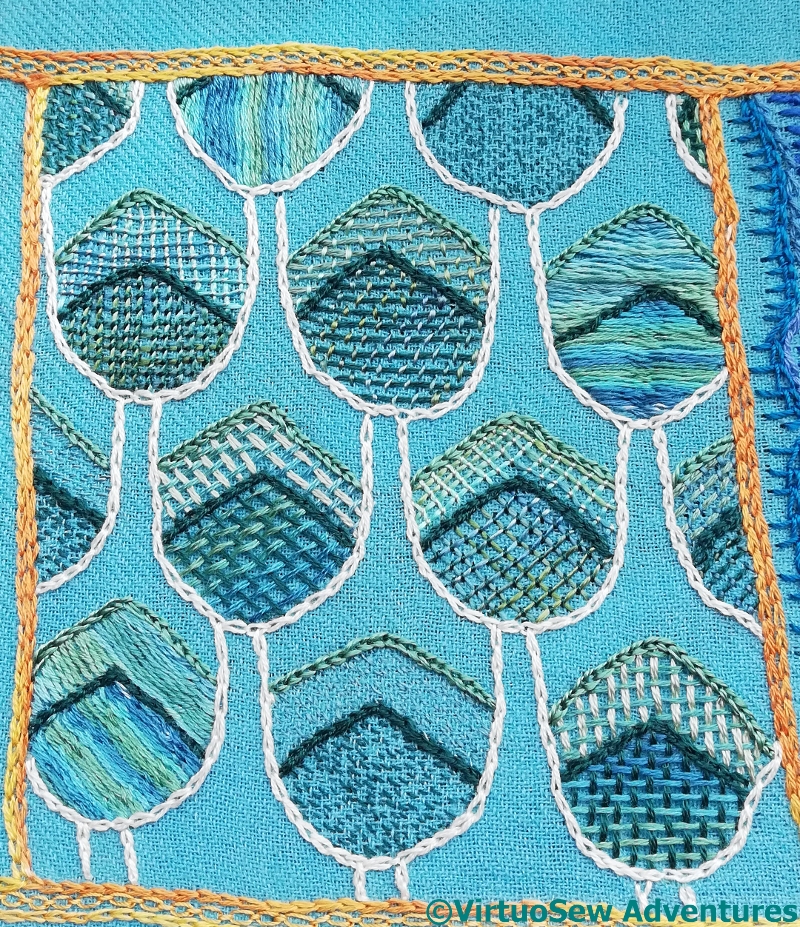
The Nefertiti Shawl started with great enthusiasm, but I ran into a few hitches. I’m not at all confident of the blue panels, and my first couple of efforts on the green ones took me nowhere at all.
Chain Stitch outlines, green section
Finally, I came up with a possible way forward. The scale pattern is taken from one of the Tutankhamen coffin panels, among other places, and each scale is outlined in gold, but the coloured fill is in progressively darker colours, not edged.
I’ve edged the scales with a very pale shade, and outlined the colour progressions in darker shades. The fabric is very mobile, so a little more definition may help..
Dark and mid shades, green section
I’ve picked several filling stitches, and I’m working them in various orientations, and several different combinations of solid and overdyed colours in stranded silk and silk floss.
That paragraph glosses over some considerable confusion and head scratching. Being so closely involved, I lost track of the sequence of patterns, and had to call for the assistance of The Australian’s mathematical and analytical eye!
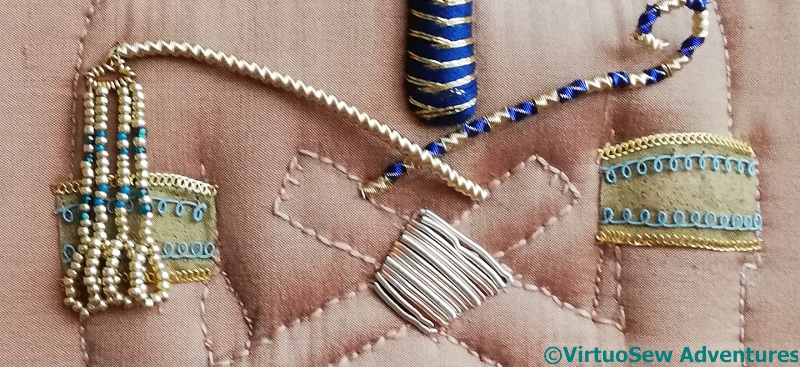
I feel as though I’ve spent as much time on Akhenaten’s accessories as I did on the silver purl loincloth, and tied myself in as many knots as I did when I was doing his wig!
Flail, unsatisfactory
I do hope he starts to approve of my efforts again soon…
When last seen, I was content with the crook, done in alternating blue and gold wire rope, strung on a former made of fuse wire, but I was expressing doubt about the flail.
The gold purl and silk wrapped purl was too frail, and this version, using gold wire rope, was visually too heavy, and much too springy. So I knew that something else would have to be devised, and racked my brains repeatedly for ideas.
The ideas finally came late one night, and – too drowsy to wake up properly and write notes – I fell asleep hoping I wouldn’t have forgotten in the morning.
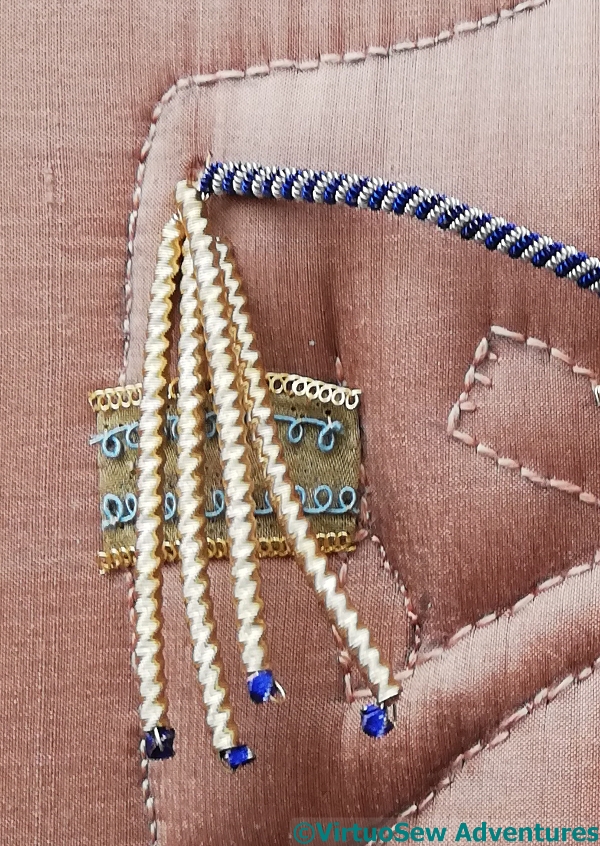
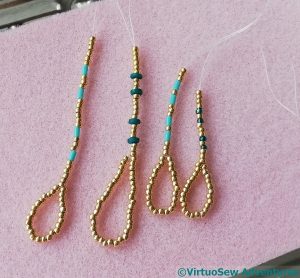
Beadwork Swipples
Fortunately, I hadn’t!
I’m assured that the word for the parts of a flail that flail is “swipple”, which sounds too outrageously appropriate not to make use of.
The various turquoise beads came from a friend on Instagram, who saw my wrestlings with the armlets and offered some treasures from her stash to assist. After several trials, I settled on a combination of gold and coloured beads, and a particular length of loop.
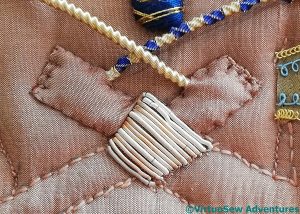
Crook, Flail And Wristlet
The finished flail has a handle of gold wire rope, a head of gold pearl purl, and four strung bead swipples. In fact, the inner two swipples have different coloured beads to the outer two. This is part of the layering of detail I’m trying to develop with Akhenaten, to help with the impression of rich gorgeousness I want to convey. It might be barely noticeable (although more so in real life), but it will break up what might otherwise look a bit monolithic.
I’ve taken the same approach with the wristlet, which uses silver rough purl (leftover from the loincloth) in combination with a pale pinkish rough purl. Anything single-coloured was too obvious and argumentative, especially as it’s placed right in the centre of his chest, but when I left it out entirely, that looked worse!