
Tag: The Robin
More on the Robin’s Backing
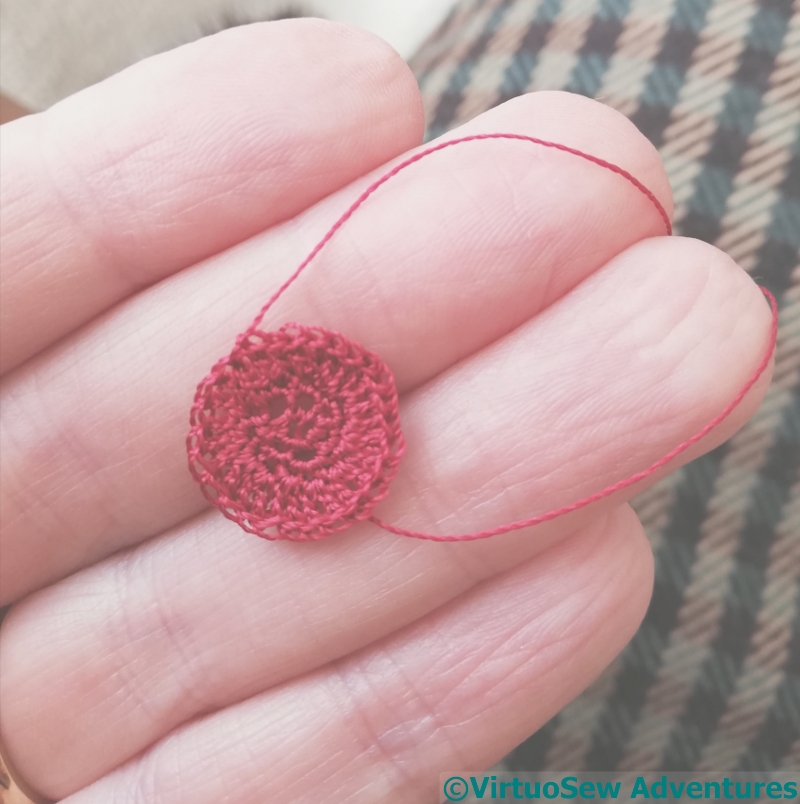
The point at which the four seam treatments joined looked a little untidy, so I decided to cover it with Something.
After some thought, and given that I don’t have a box of ready-to-go trims and buttons for the purpose, that Something turned out to be a disc crocheted using Soie Gobelins, a fine steel hook, and my magnifier.
I felt a little cross-eyed when I’d finished, in spite of the magnifier, but satisfied with it, all the same!
Then I only had to attach my little disc over the centre point to camouflage the meeting point of the seam treatments.
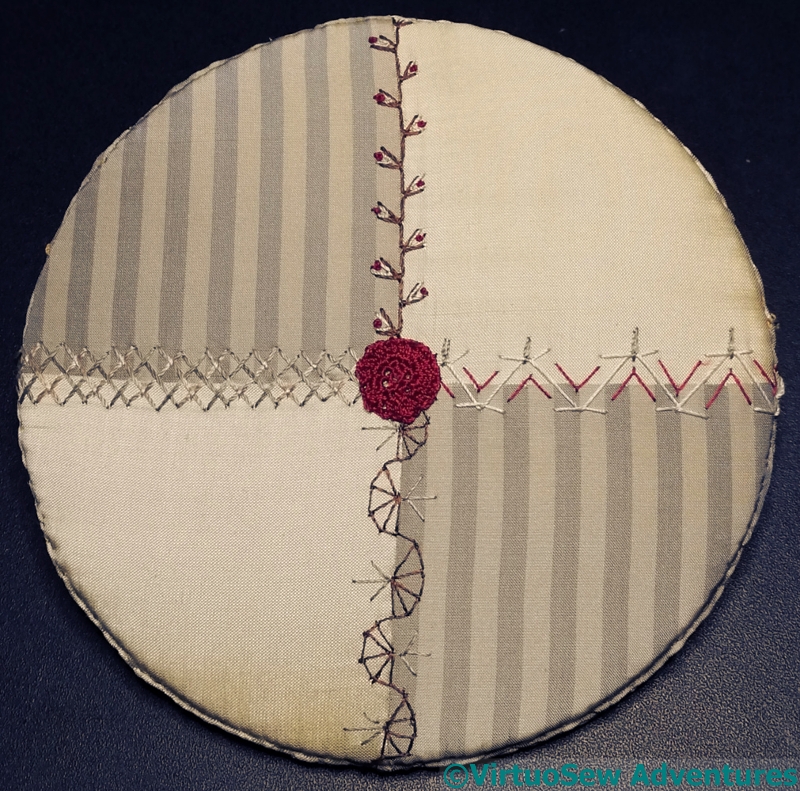
Once the Tame Crazy Patchwork was completed, I gathered it over the padded disc of card that matches the one the Robin was stretched over, and ladderstitched the two discs firmly together.
Using silk sewing thread. My, how my attitudes have changed since I’ve done all those Historical Embroidery projects!
I need to provide a hanging loop and cover the edge with cord, and then the Robin will be properly finished at last!
A backing for the Robin (in progress!)
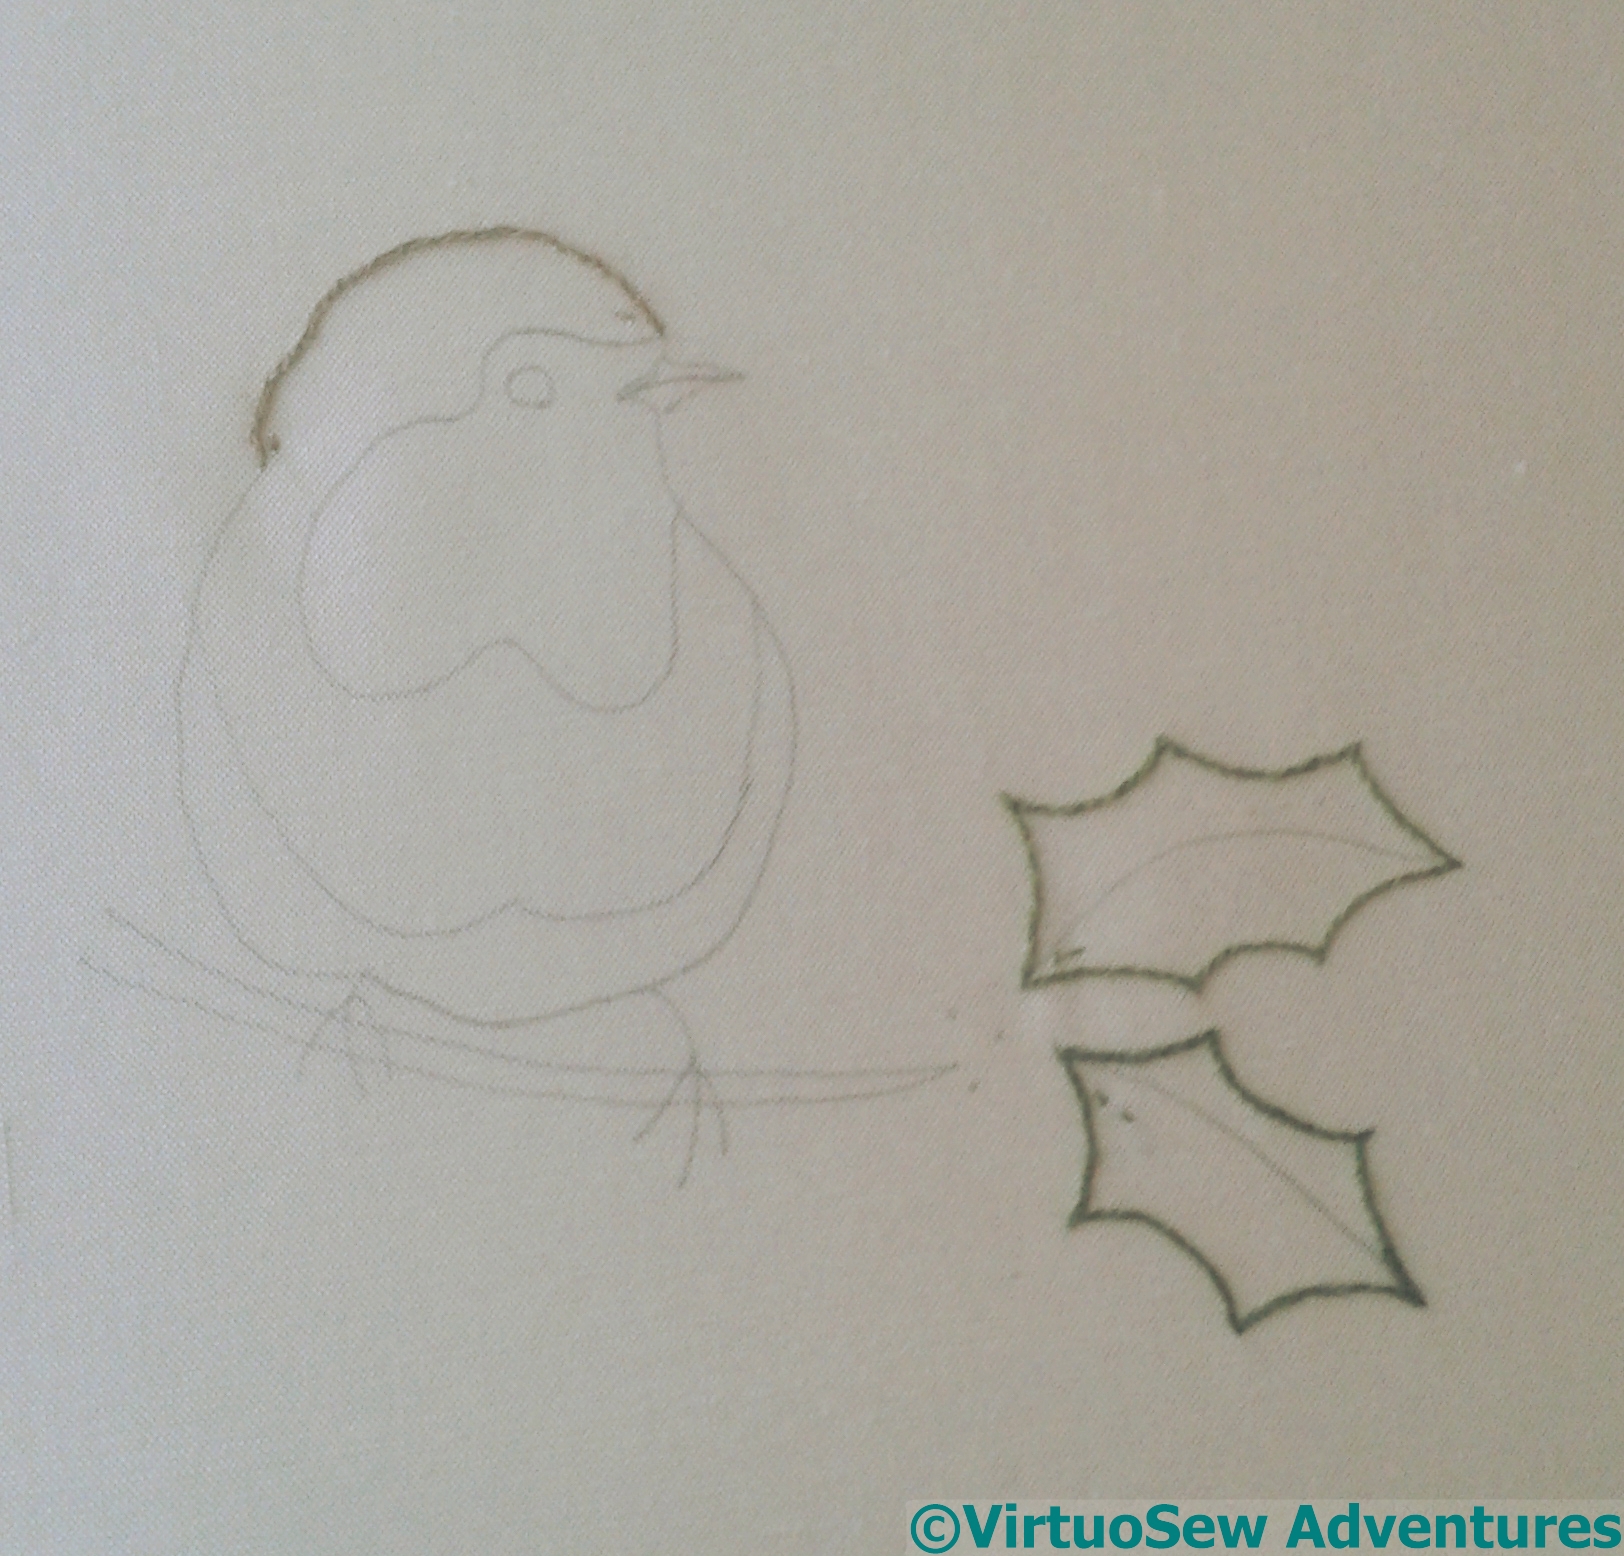
You may vaguely recall the little robin with stumpwork holly that I worked a couple of years ago. I mounted him on a circle of card and then didn’t make any more progress..
But I have now!
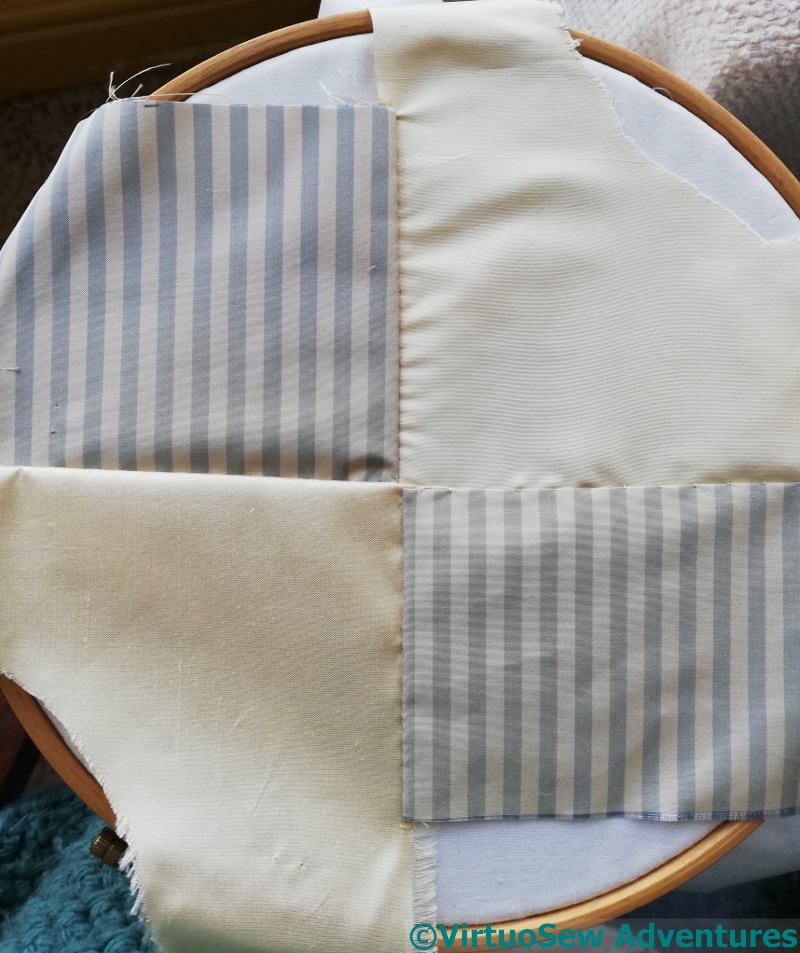
I’m using leftover fragments of silk from various Thistle Threads courses to do a rather tame crazy patchwork circle to cover the padding for the back, and then he can hang or be propped in a corner somewhere, looking cheery. I’ve settled on a simple quadrant arrangement, so I have four seams to deal with.
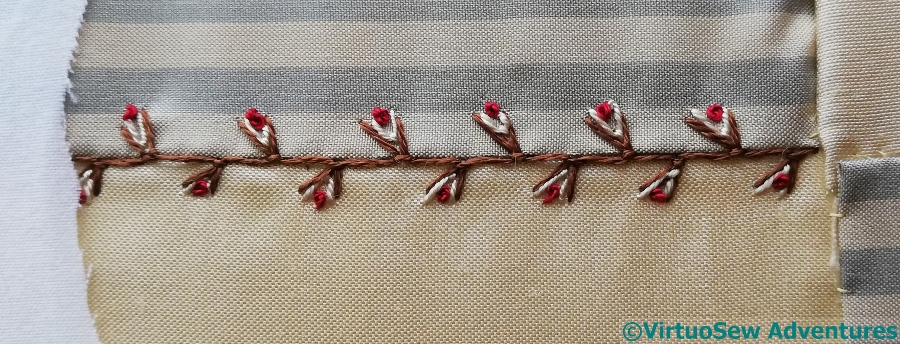
I said, when I found “Floral Feather Stitch” that I’d be using it again, and here it is, tweaked and embellished with a Fly stitch and a French Knot to emphasize the “floral” element. I really like this stitch – a simple, but extremely effective variation. Or maybe a stitcher’s “mash-up”!
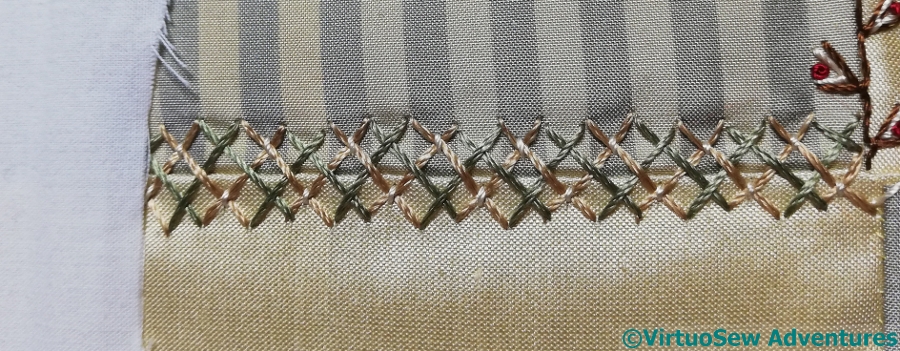
The second uses Interlaced Herringbone Stitch, with the second pass interwoven with the first and then tied down with short straight stitches. This one is maybe a little monolithic, but the first one is so simple, I didn’t want to unbalance the appearance with anything broader.
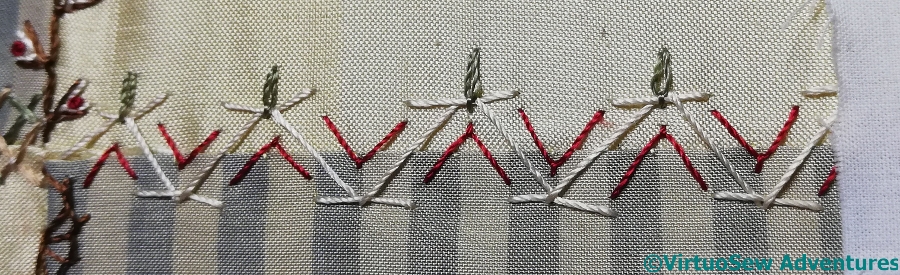
The third is Chevron Stitch, embellished with alternating Fly Stitches and Detached Chain Stitches on the “top” edge. This one went a little ragged, but I still think it works.
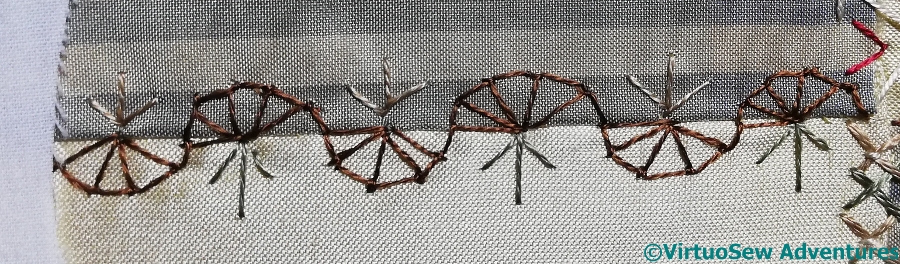
The final one has alternating Half Buttonhole Wheels with Straight Stitches filling the gaps. Again, this could have been expanded and extended, but I thought there was quite enough for the purpose!
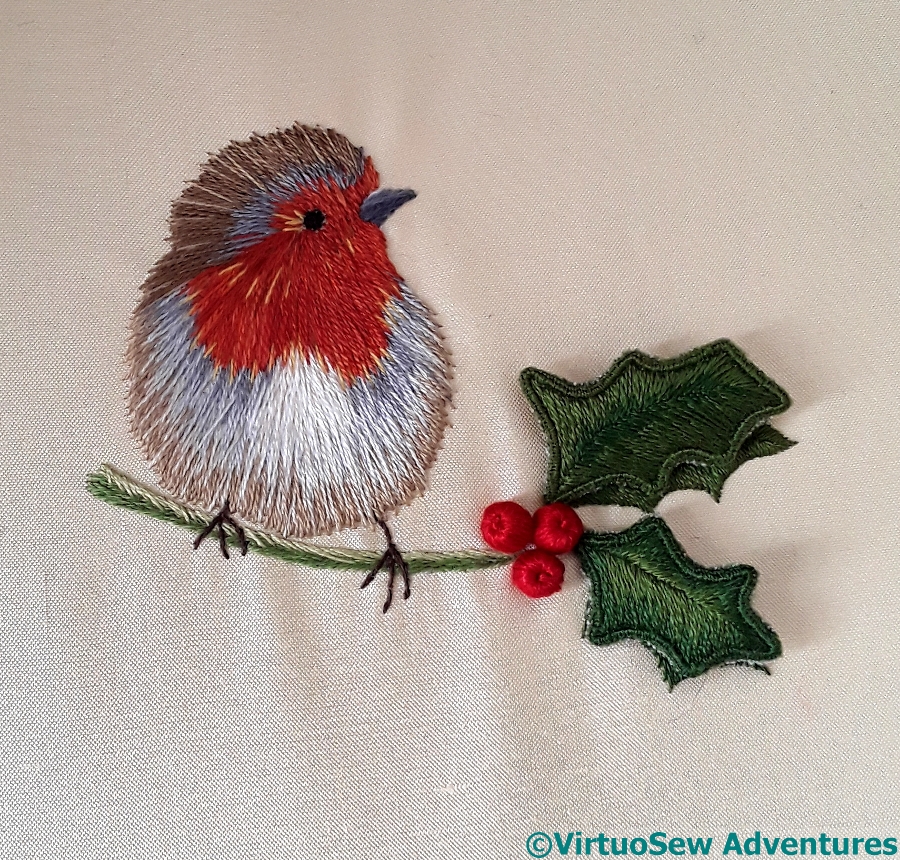
The Little Robin finished!
Working On The Robin
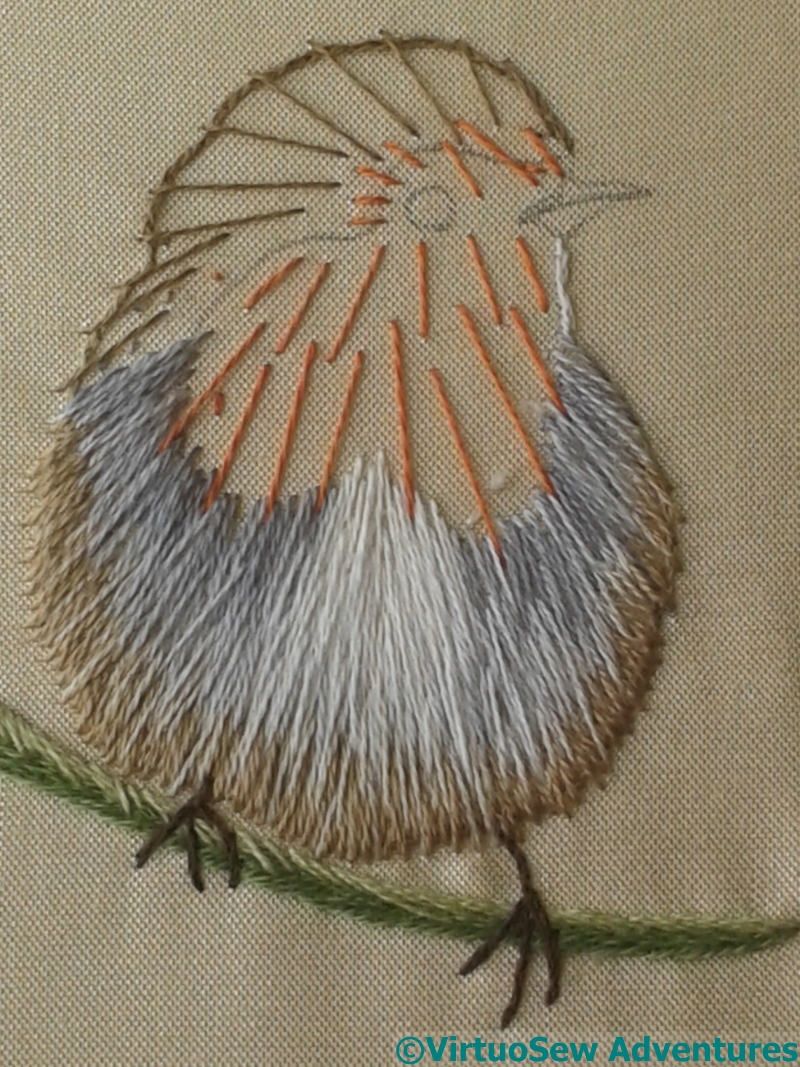
I have to admit that I have enjoyed the little Robin. Here is a halfway point, showing that while many suggest drawing direction lines for their stitches, I chose to draw with my needle instead. I found that the more helpful because it gave me a chance to gauge the overlap of each section with the next.
I’ve gathered that some tutors suggest working small sections to completion, and others in colour layers. I took the latter approach with the (I’m sure not original) refinement that sometimes I went back and did another layer in a colour I’d already done.
Stumpwork Bits
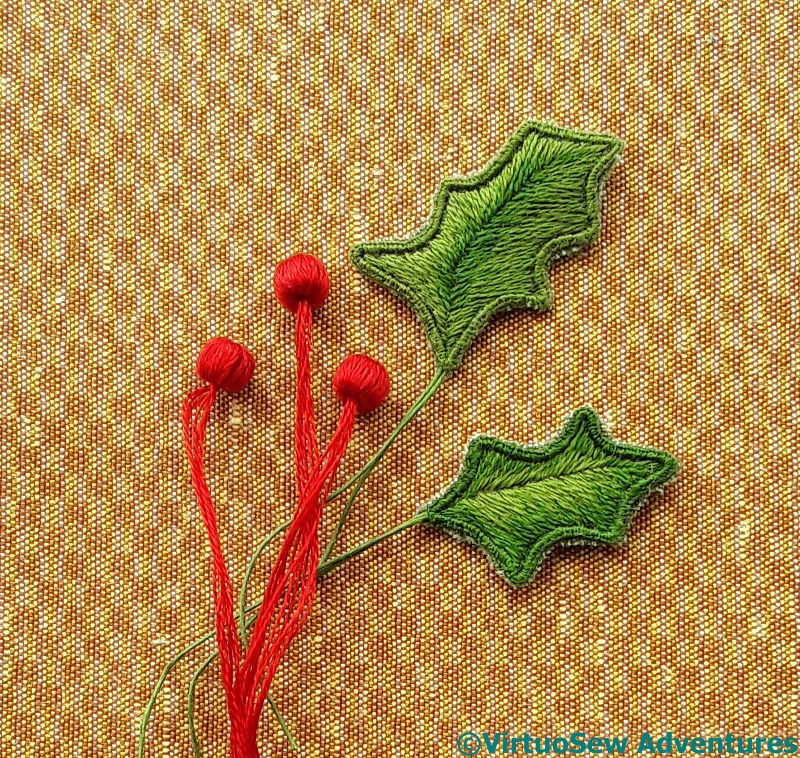
I also had fun with the stumpwork elements: two simple wired leaves (nothing terrifying about that, after working on the Stumpwork Violets for Dreams of Amarna!) and three berries made of beads wrapped with thread. I’ve not wrapped beads before, but as it turned out, this, too, turned out to be fairly straightforward.
And fortunately, my wandering applique scissors returned to the fold in time to be of use…
The Robin Completed
So here he is.
As you can see, even though I worked him in a hoop, and regularly made sure the fabric tension was maintained, there is a little bit of puckering. That may reflect, as much as anything else, a certain anxiety on my part. I think I will mount him on a round card and add him to the winter decoration corner when I set it up, and I should be able to ease some of the puckering then.
And – for those enquiring minds that wish to know – while I can’t say I’ve fallen in love with silk shading, we are definitely on better terms than we were!
A Learning Opportunity
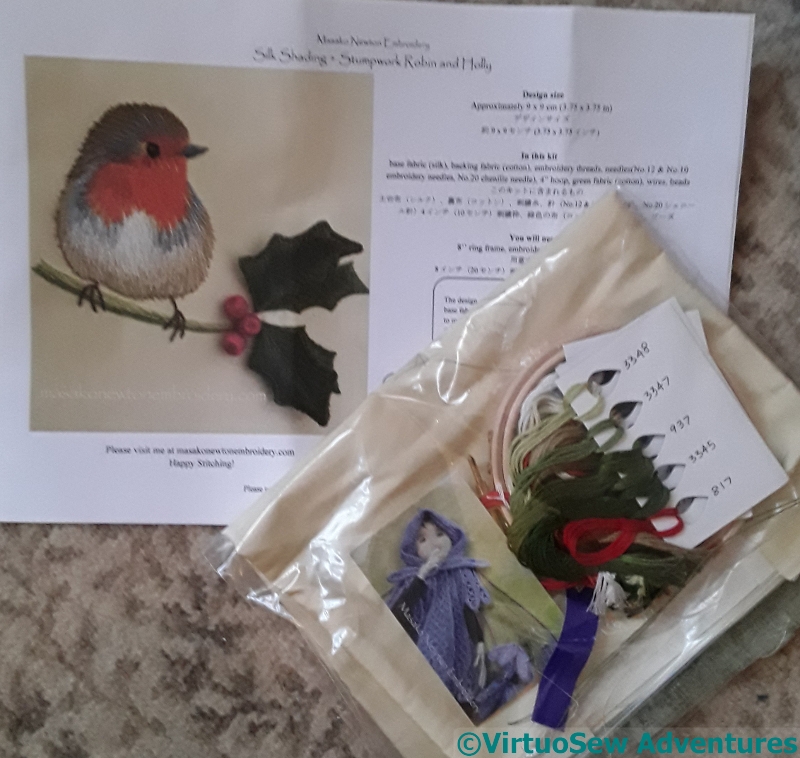
Robin Stumpwork Kit
I’m a very lucky woman. Sometimes, as in this case, I have to say so through slightly gritted teeth…
In this case, I am expressing my good fortune in having a family that takes my embroidery as seriously as I do – and the gritted teeth are because my parents elected to give me a learning opportunity for Christmas.
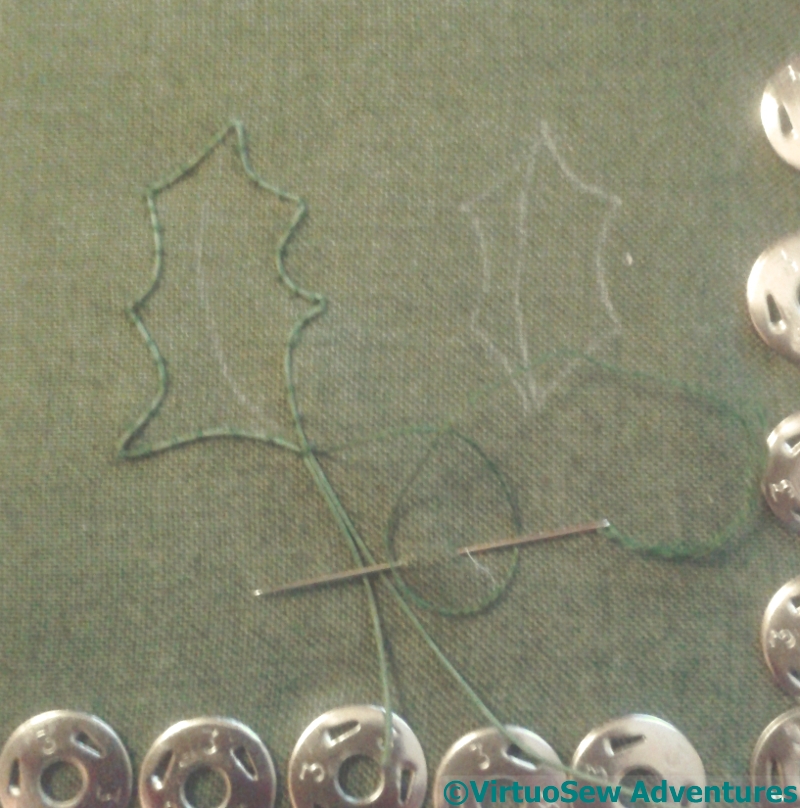
Starting The Wired Leaves
Silk shading is something I know I should work at, but would be most unlikely to choose to do, because the naturalistic representation it tends to be used for is not really my forte.
All the more reason, of course, to make an attempt, at least, to get to grips with it, but I haven’t been able to convince myself to do so!
Beginning The Split Stitch
That said, Masako Newton‘s Silk Shading and Stumpwork Robin and Holly is really very sweet indeed, and I am sure I will enjoy working it.
Furthermore, unlike the Jane Rainbow kit my parents gave me for Christmas twenty years ago, there’s no chance of this one being finished quickly.
I will certainly learn a great deal from doing the Robin, and he is going to be classed as one of my New projects for 6 and 6 in 2018.