Since I’ve always been interested in heraldry, and deeply distrust online search results, which so often depend on something unexpected in the search terms, one of my bits of research involved an email to the College of Heralds, asking about William’s coat of arms. I received a commendably prompt and completely unperturbed reply from the Officer-in-Waiting, Rouge Dragon Poursuivant, telling me that:
“The left-hand side of the shield, from the viewer’s point of view, should be Or, meaning gold (or yellow). The right-hand side should be Vert, meaning green. The lion should be Gules, meaning red, and it should be rampant, meaning it is upight and standing on its left foot with its right foot slightly raised off the ground.”
You’d think embroiderers emailed for advice every day of the week! Maybe they do, of course…
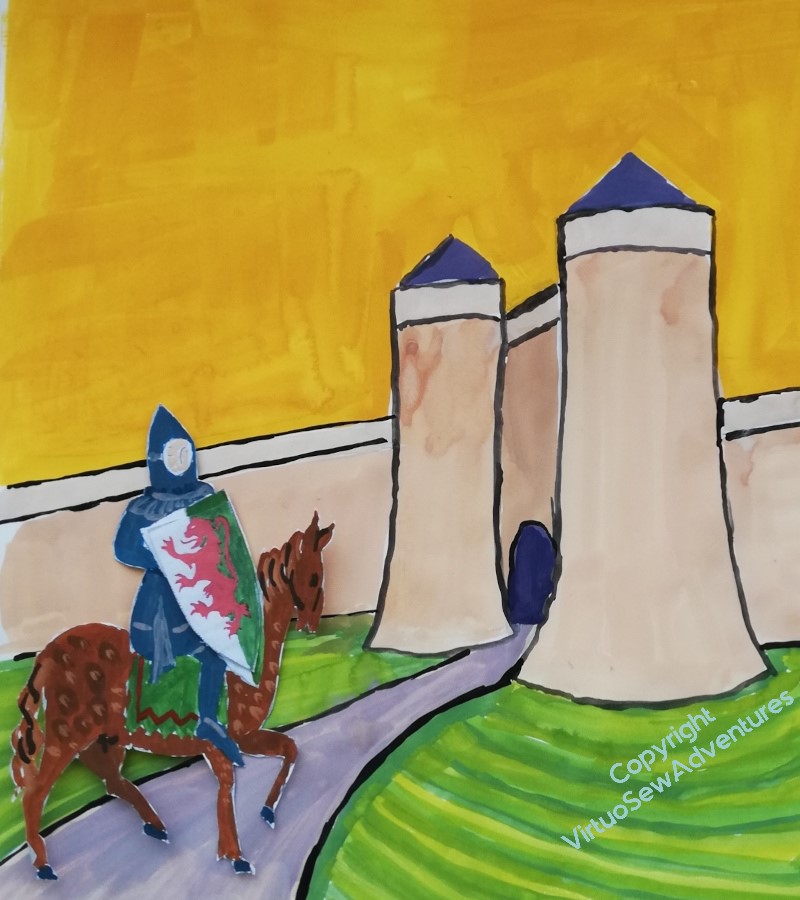
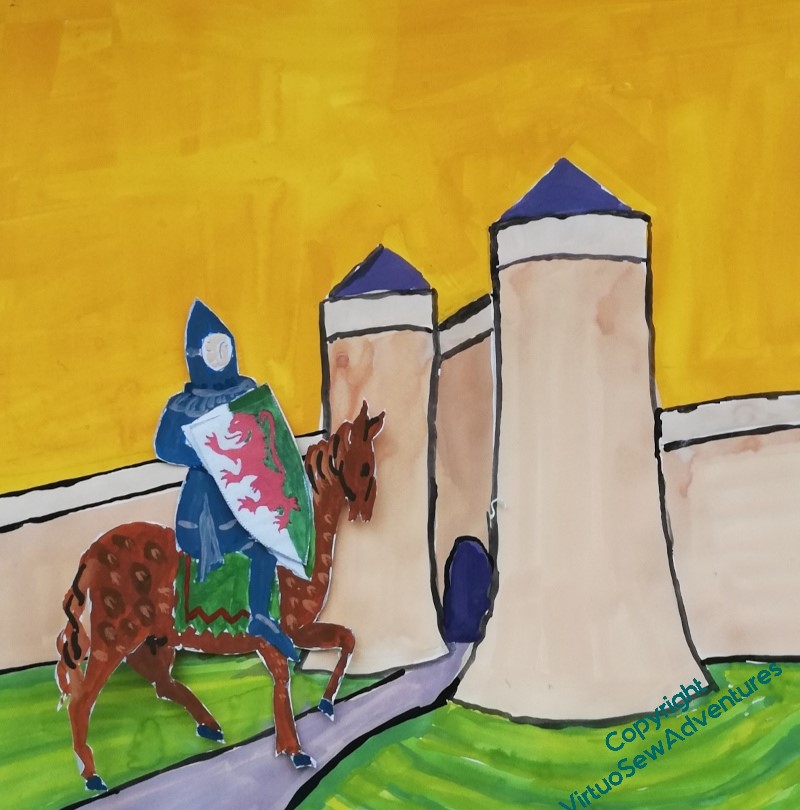
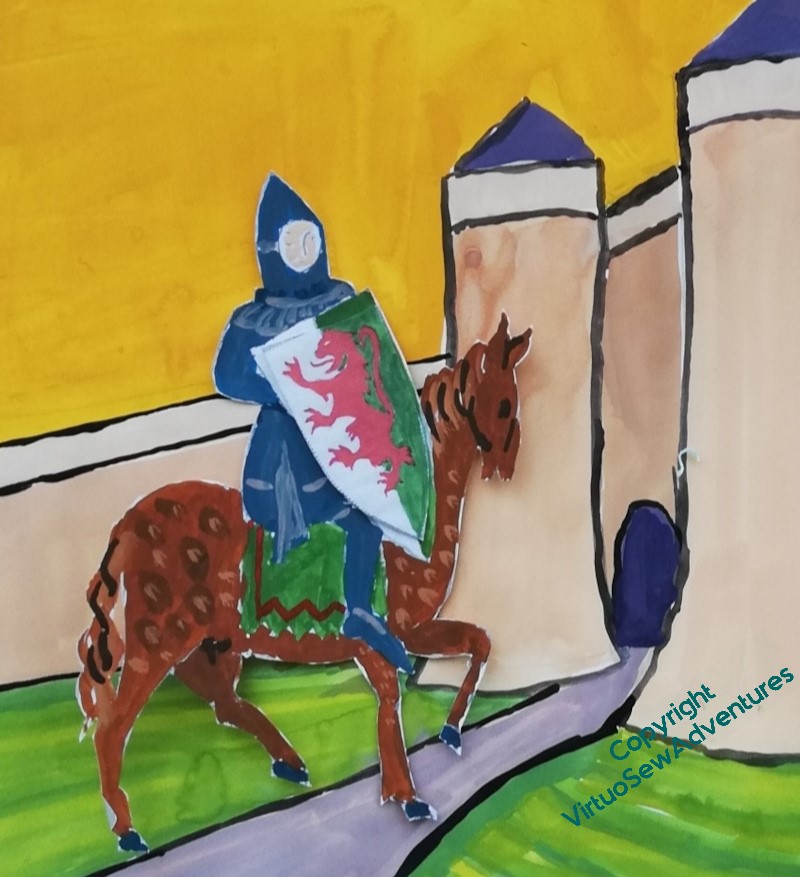
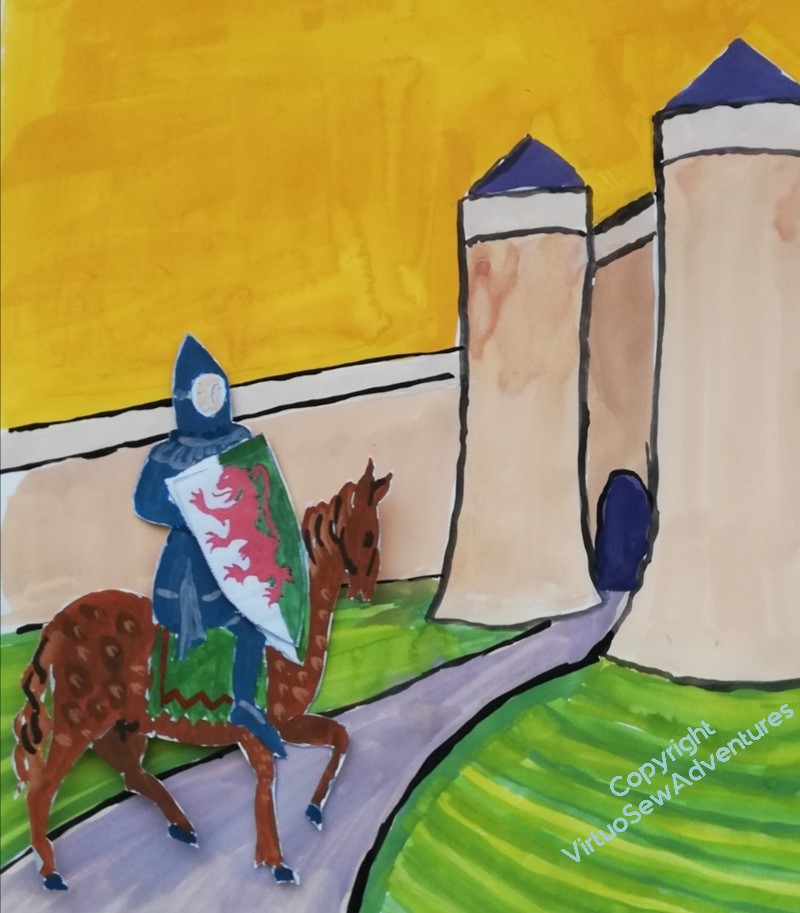
I had painted a whole series of variants on the design, and then had another thought, namely – maybe I wasn’t exploring all the variations possible. I attempted to do the exploration on my computer, but went to bed that evening with a ligament in my arm squealing. Back to the paintbox!
So I fished out one of my largest blocks of paper, and painted the chateau with a bit more wall on either side, and an actual path, and then painted a separate William, so that I could move him around on the background and experiment with cropping.
I’ve left his shield as white and green in the design for now. I intend to use underside couching for the “sky”, but I’ve not yet decided whether to use couched gold or silk thread on the shield, and making sure the colours are different in the design will help me to remember I have a decision to make.
I’m still havering, but encouraged by Tanya Bentham, who wrote the book that started me on this, I’m thinking about the third of the four options in this post. As Tanya pointed out on Instagram, in the medieval period people messed around with scale and perspective quite cheerfully, so I have no need to make sure my knight will fit through the gate!
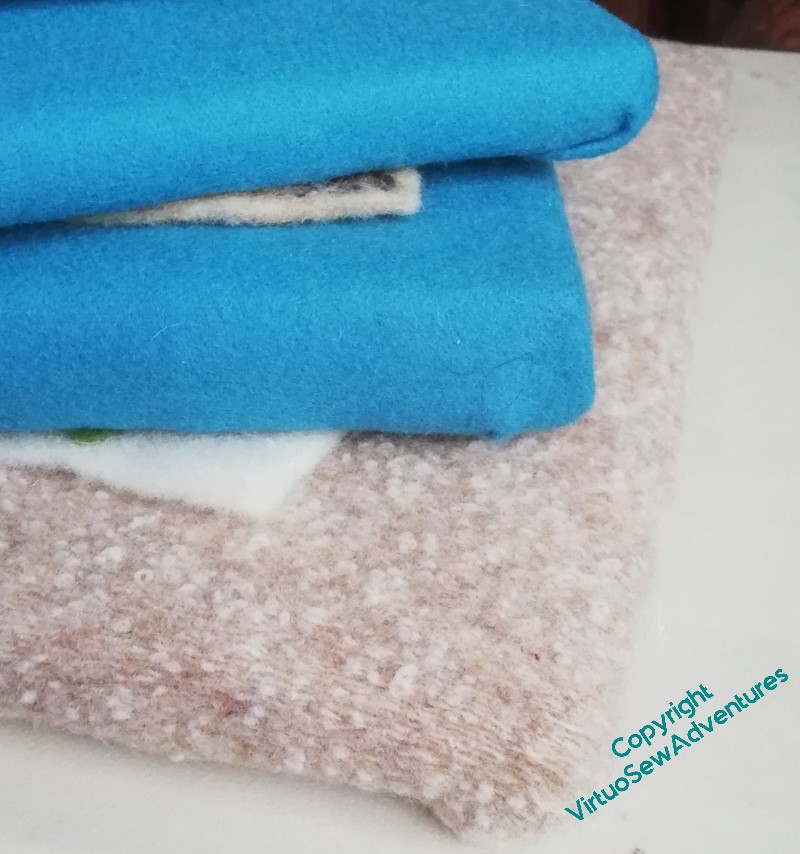
It occurred to me recently that if I were to find somewhere to exhibit the Dreams of Amarna, I might find myself with a lot of assembly to do, rather more rapidly than is entirely comfortable. Pieces mounted for display take up a lot more space than most of us can easily spare, so I’ve been extremely reluctant to start the mounting process – until terrorised by the idea of morning, noon, and night, squinting over some hard-to-light and extremely delicate fragment!
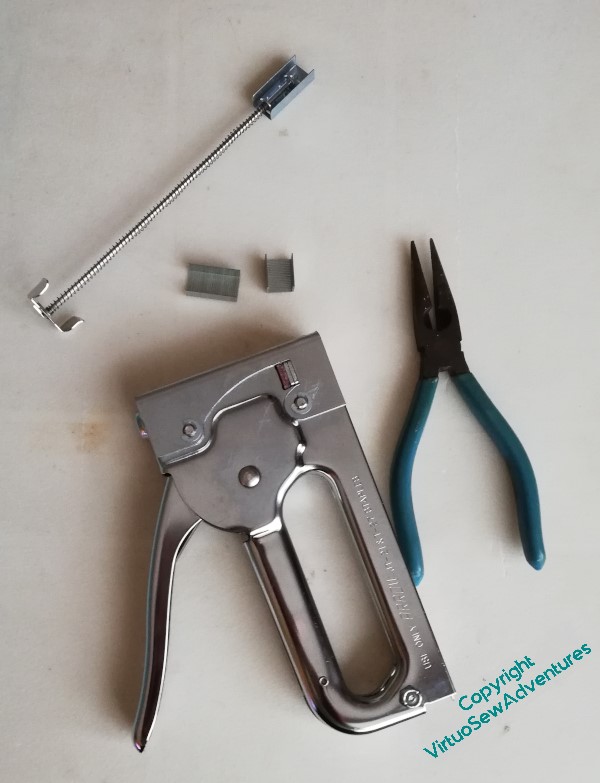
I’m starting with the felt pieces, which aren’t going to be huge, and for which I have a scheme already in my head, and at least some of the materials to hand. Unfortunately my tools have been a bit fractious…
After a day of wrestling with my equipment, and sourcing more staples, which turned out to be what The Australian would term “non-trivial” (would you believe, one of the shops I went to sells staple guns, but not the staples?!), I have finally reached the pleasing situation of having three supports ready to have their finished pieces mounted on them. My ears rang from the ker-KLUNK of the staple gun, and my hand ached, but it is a very satisfying sight, all the same!
After a few days of recovery, I went on to get started on the attachment of one of the pieces, and given the times in which we still live, I’m going to record my witterings as I go. So, herewith the return of Slow TV Stitchery, continuing the sequence from last year with Episode 74.
In which we discuss the assembly of the “fresco” pieces, tackle the first of them, and consider the distant possibility of my embarking on mixed media textile projects, one of these days.
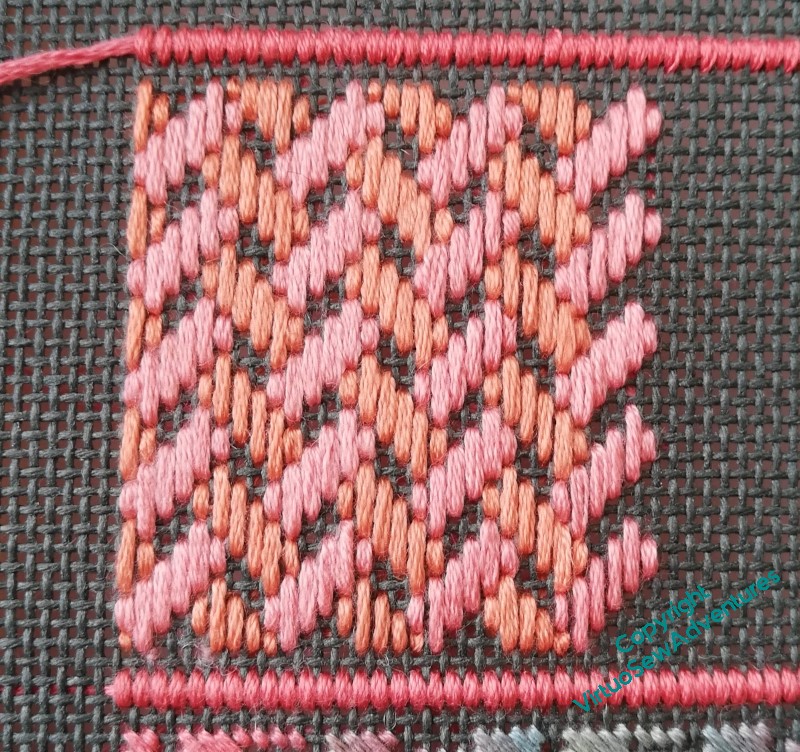
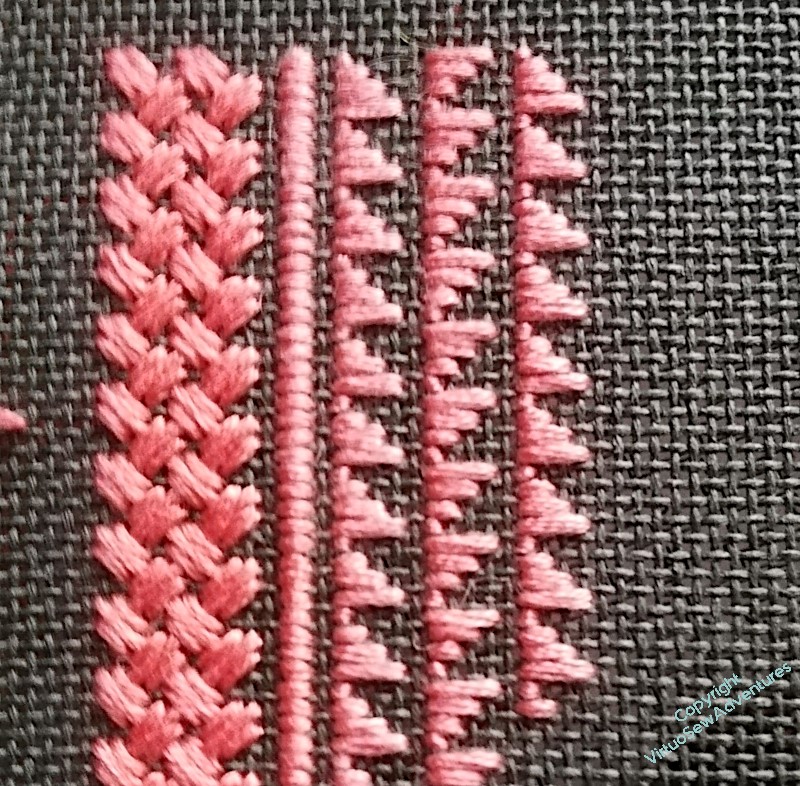
The next panel, I decided, needed a little more variation in colour. The thread is a 12-strand overdyed stranded cotton from Stef Francis, and I’ve had it for so long (like the canvas) that I don’t know when I got it or what I had in mind for it at the time!
The stitch is Moorish Stitch, and again it is voided, leaving unstitched the row of tent stitches that alternate with the larger stitches under normal stitches.
I went back to Jo Ippolito Christensen for the next stitch, Medieval Mosaic Stitch, and with the alterations I made it looks most unexpected. As diagrammed, it is almost a variation on Florentine stitch, with a thick-and-thin ribbon of stitches running across the piece. In choosing the section to void, I picked the two small stitches that form the “thin” part, and as a result, that element has been completely obscured, and it looks like a classical woven pattern. That effect is enhanced by the fact that I picked two shades of coral to use up, hoping that they’d last to the end if they shared the burden. They did!
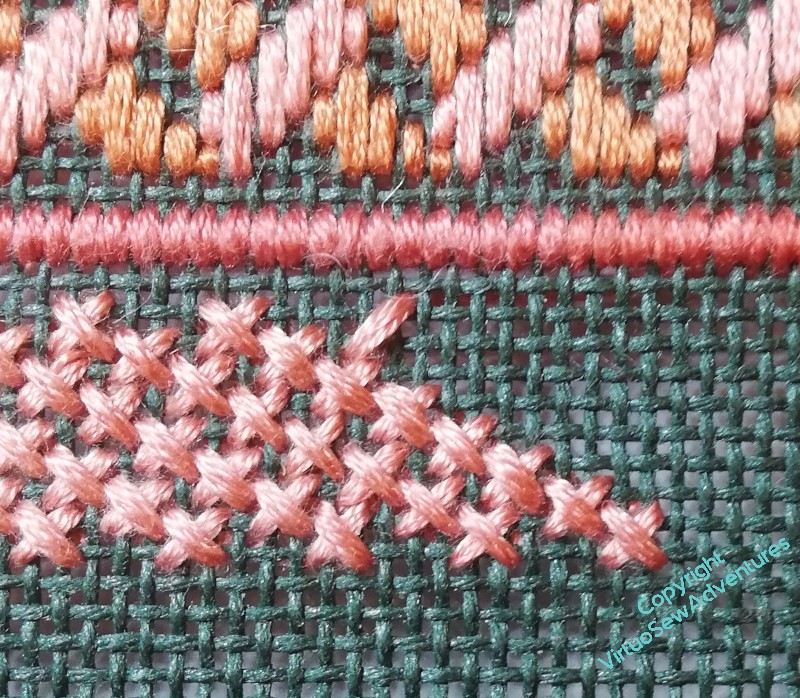
At this point, I think I have nearly enough stitched to make the sunglasses case I hope for, so I have mirrored the first section with another that leaves only one crossing-point voided. This is Staggered Crosses, and under normal circumstances there would be two different sizes of cross stitch contrasting with one another. I rather like this version, though!
Now I need to work out what form the glasses case will take, and what colour I’m going to back the canvas with, since it’s going to show…
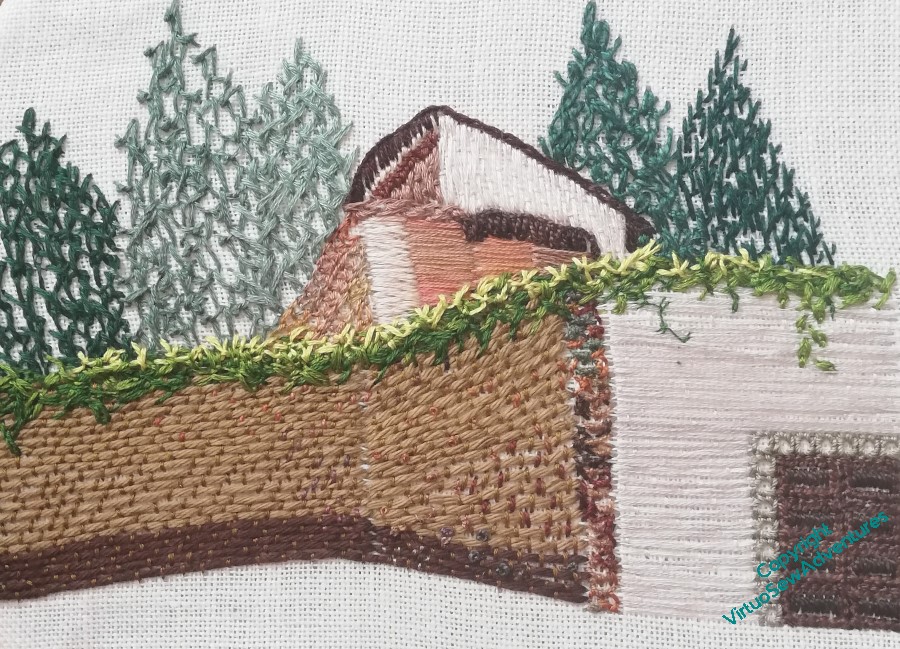
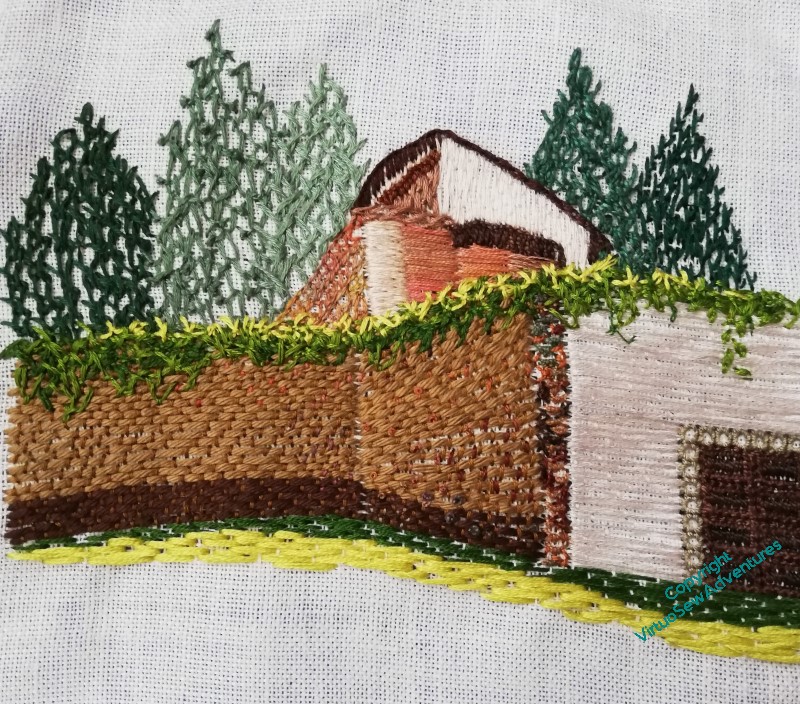
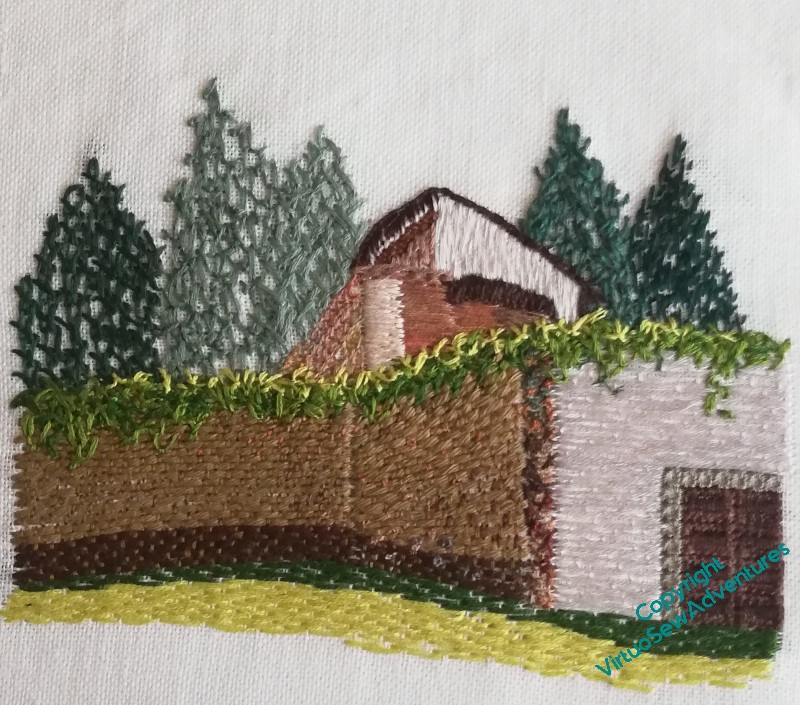
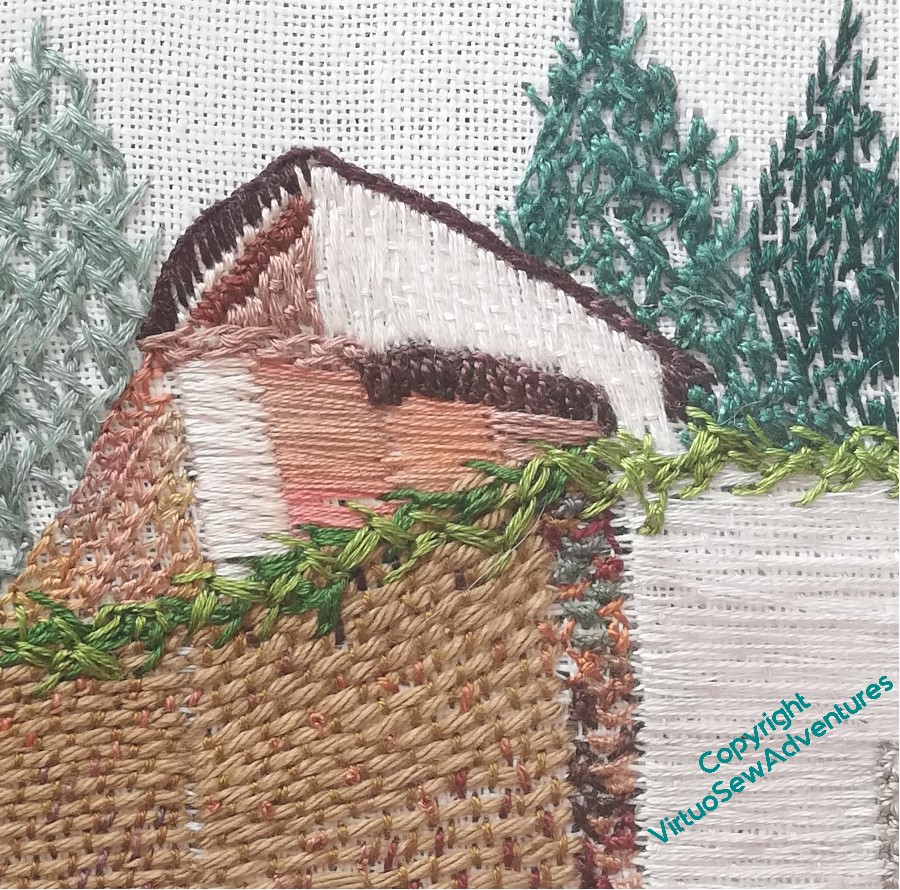
Once the walls were in place, I worked on the creepers.
As you can see here, this involved not just more of the same, but a few extra tendrils, and some mixing of the number of strands and stitches used to create the right tangled effect. Feather stitch, floral feather stitch, feathered chain stitch, all layered up in a variety of shades, to increase the tangle almost to “Sleeping Beauty” proportions.
Yes, good so far.
Then I decided that it really needed the grass at the front to pull the golden green forward, as it was in my memory.
Not like this, however. I think the choice of irregular running stitch is right, but although I chose to use six strands for the lighter colour to help pull it forward and push the building back – which is a good, rational, thought-through reason – it hasn’t worked as I envisaged. Cue some muttering and unpicking!
But I got there in the end…
In fact I’m very pleased with how this turned out. It allows me to demonstrate how to create different textural effects, even with a fairly restricted choice of thread – nothing exotic here, pearl cotton, soft cotton and stranded cotton.
I could add more details – roughen the stone further, add windows and doors to the walls in the shade – but I don’t think that the picture would be materially enhanced. And almost the whole trick with representative embroidery is the same as it is with painting: the finished piece is a new creation, not a copy of the thing it represents, so it is more important to end with a pleasing piece than an accurate report.
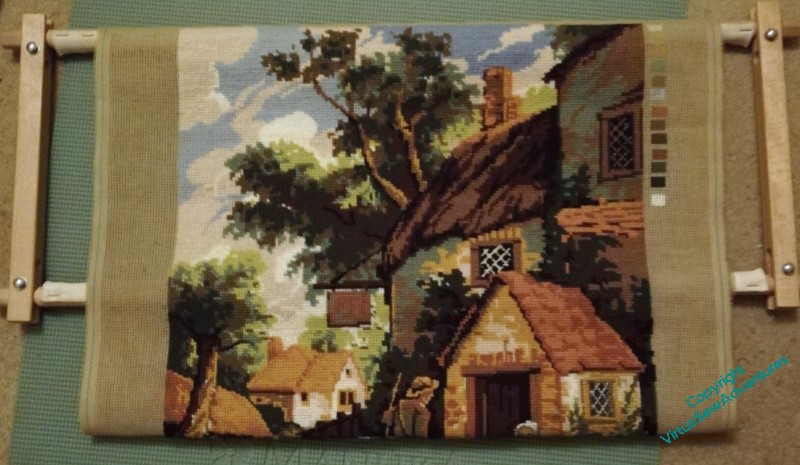
Being known as a stitcher leaves one heir to everything stitch related that someone, far or near, may be at a loss to deal with. Sometimes this is a thrill, sometimes it’s a chore, sometimes a bewilderment.
I’m not sure what I’m going to do with this, passed on to me by a friend of a friend. Almost all you can see below is already finished, and I’m certainly not going to undo it.
But what follows isn’t finished, and I don’t have the threads that came with the canvas.
First thoughts are to unpick anything of the people and animals that’s been stitched, and restitch it with stranded cottons, maybe slightly more highly coloured. Then perhaps do the ground in a mixture of soft cottons and tapestry wool, although those muted, sludgy colours may be a little hard to find in my stash.
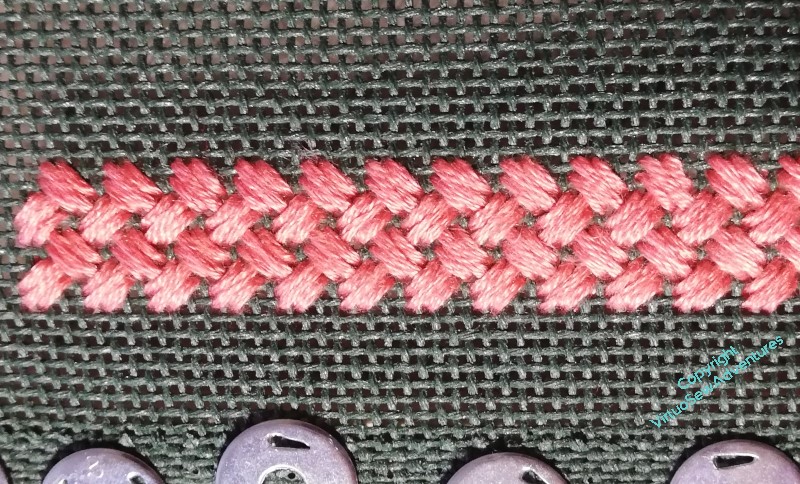
I’ve had this piece of forest green canvas for so long, I can’t remember where it came from, and since my instinct with canvas is always to cover it completely, I’ve been at rather a loss as to what to do with it. Then I realised that a rather nice pair of sunglasses lack a case, and decided to Explore.
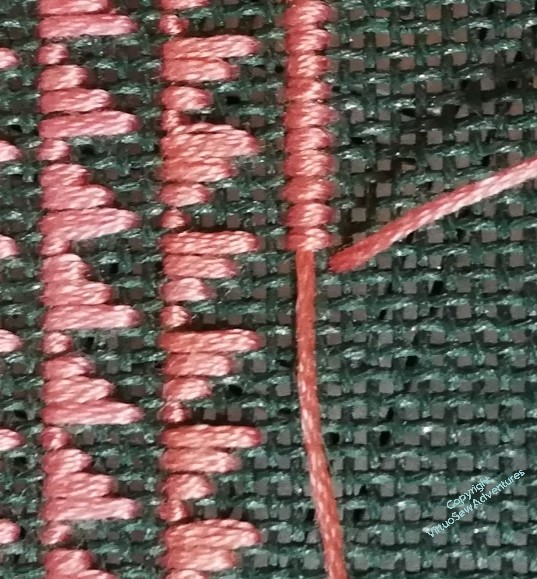
The recent ebay purchase of the much-recommended “The Needlepoint Book” by Jo Ipplolito Christensen (which gave me the river below Tynemouth Priory) has given me a starting point. This is Criss Cross Hungarian Stitch, and the single crossing thread is intentionally left unstitched, which has given me my next theme: each section will involve leaving void some portion of the pattern. After all, that dark green makes a lovely foil for all the coral, doesn’t it!
The second block is named “Wild Goose Chase”, and there are a variety of ways I could have chosen to alternate stitching and voiding on this one. I think the one I chose in the end allows for a slightly smaller pattern block, and that, in turn, should protect the canvas. I am assuming that the stitch is named for, and inspired by, a quilting pattern.
I’m using a variety of elderly stranded cotton which came from a great aunt, so although I am going to try to keep to one shade per section, I’m not going to lose sleep over it if it becomes a bit of a hotchpotch!
Which is just as well, because the very next row ended up in a slightly darker shade of coral than the previous one!
I’m also separating each band of stitching with a row of satin stitch, but an effort to even out the different coverage of the various threads, it is satin stitch padded with an unseparated stranded cotton.
There’s something very pleasing about the coral against the green. I’m enjoying this!
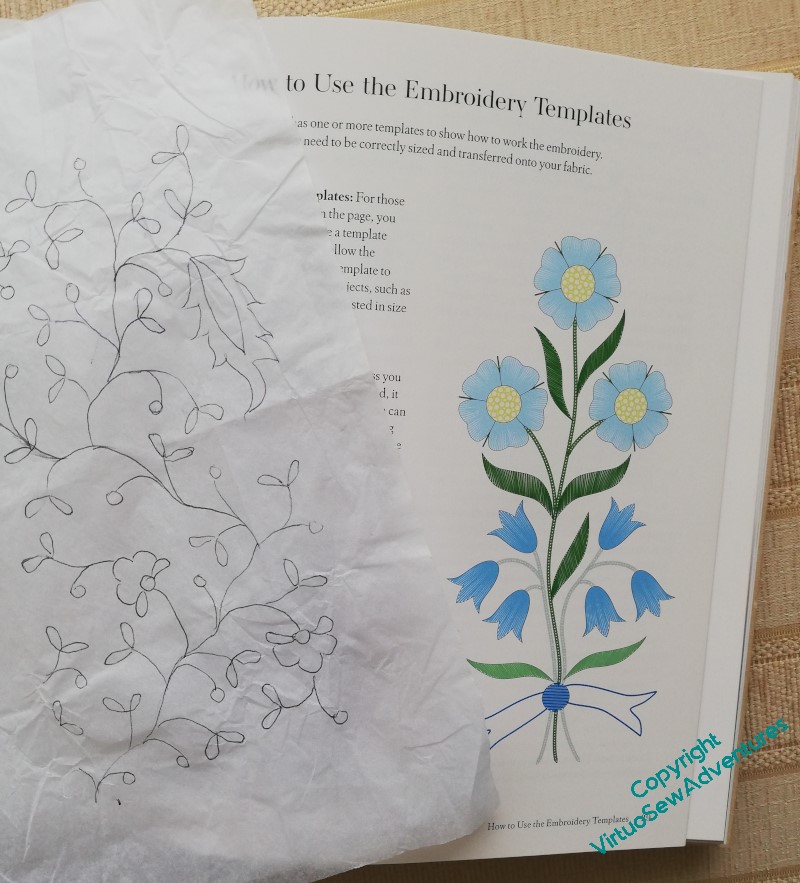
My first outing with my lorgnettes told me that the canvaswork case was wonderfully protective, but not terribly practical for those occasions when I wanted to fish them out and put them back, so I am trying again. This time I’m aiming for a little drawstring bag. When I was casting around for an idea for the design, among other things I leafed through my copy of “Jane Austen Embroidery”. I traced one of the more complicated designs, and then realised that I wanted to use that for something else, and thought again.
I went back to some of the thoughts I had when we were doing the Great Lady’s Magazine StitchOff, and decided that since it is a small and limited project, it seemed to me that freestyling the embroidery would be fairly low risk.
I tacked out the outlines of the bag, weighted the book open so I could see the drawing of one of the sprig patterns, and went rummaging among my threads.
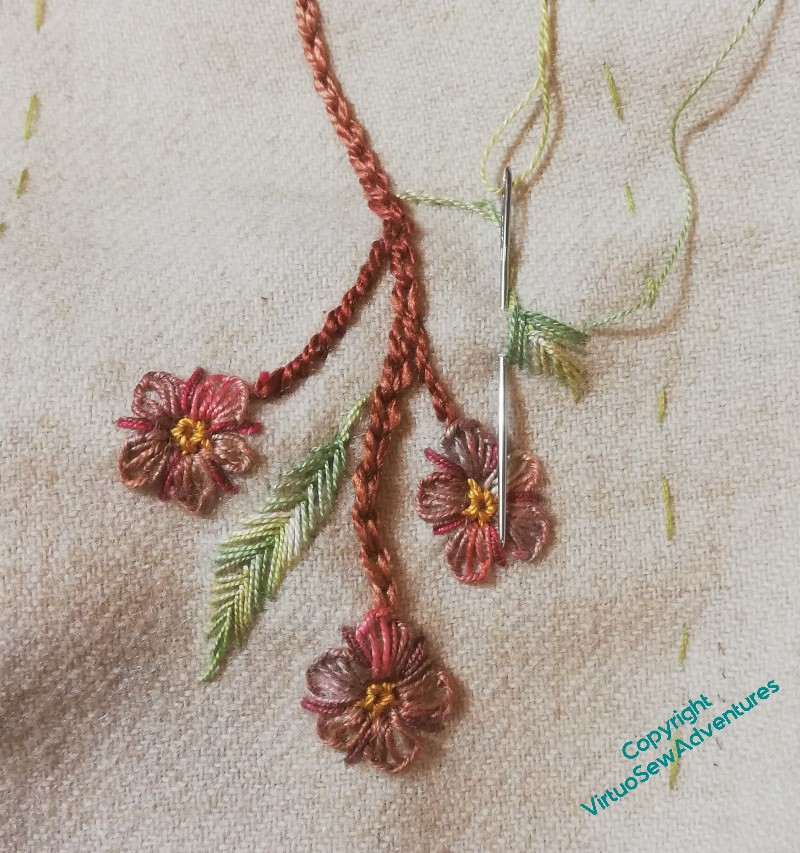
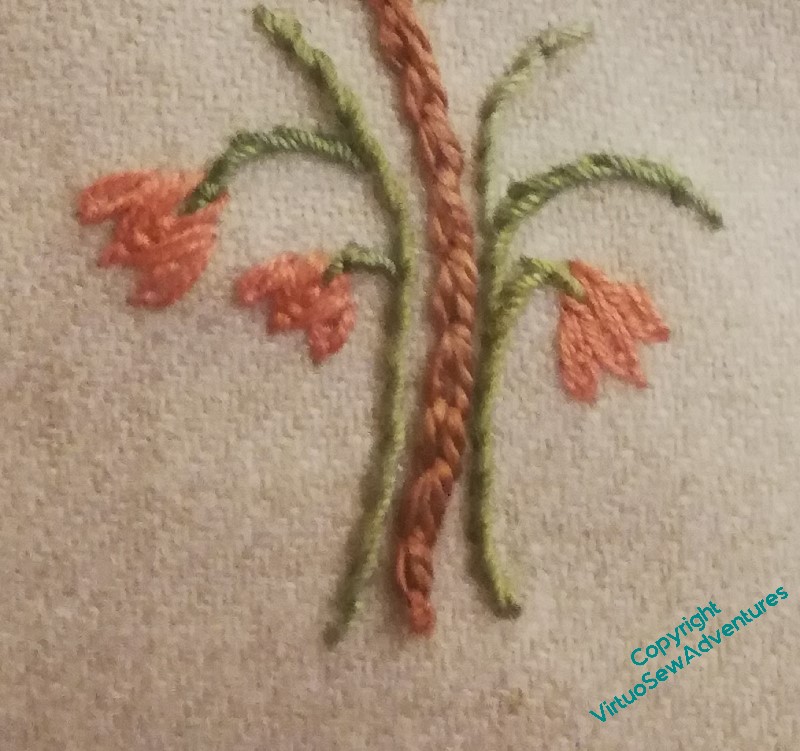
I’ve made use of some linen threads from Stef Francis, and some silk threads from I-know-not-where, and the stitches are mostly very simple: chain stitch, stem stitch, fishbone stitch.
When it came to the bell-shaped flowers at the bottom, I didn’t want to use satin stitch, and I spent some time racking my brains to come up with an alternative. Finally, inspiration came from two long-ago projects, Kai Lung and the Persian Fantasy Screen, and it occurred to me to use nested fly stitches. Then I only had to decide whether to use a double thread or a single thread, but as soon as I tried one of each, it became pretty clear which to choose!
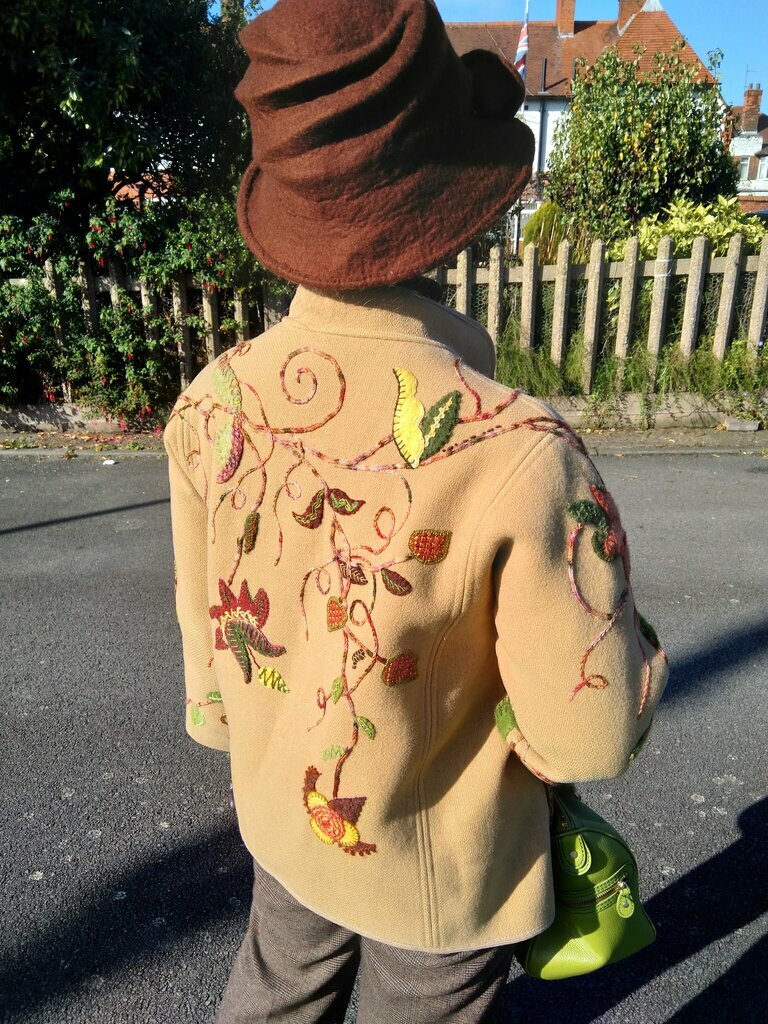
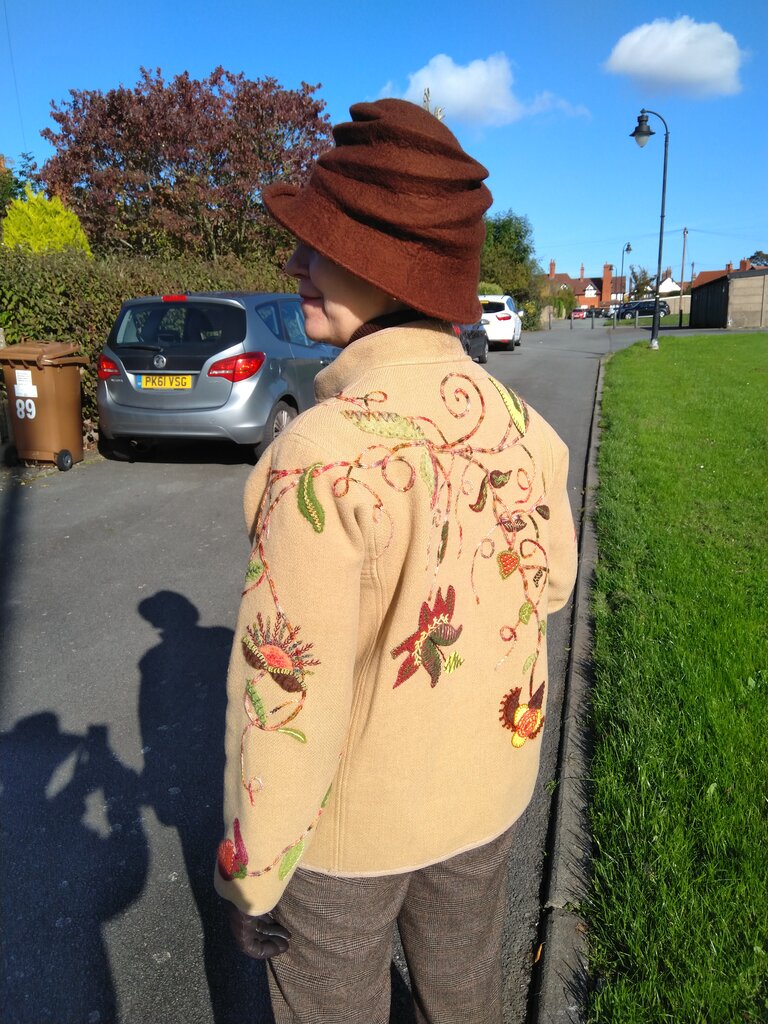
I promised pictures of the jacket being worn, so here they are!
We had some nice weather, and the Jacket smiles in nice weather. The hat is by Felt by Bridget, bought some years ago at the Harrogate Knitting and Stitching Show.
The necklace came from Harrogate too – a stone pendant, with a cord I made myself in kumihimo. It’s the green and orange one on this page.
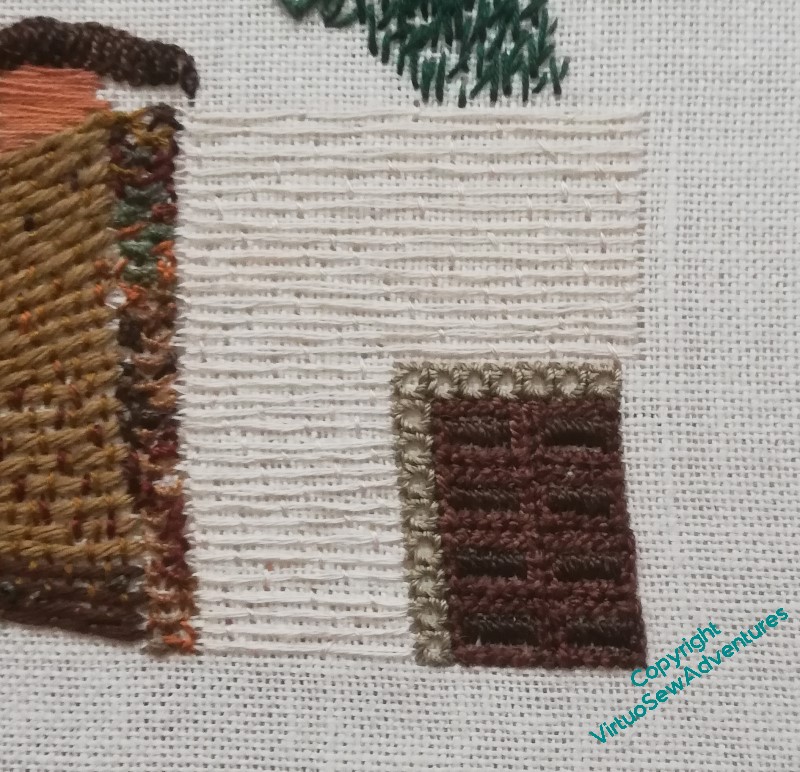
I finally had a couple of inspirations for the rendered wall and the door. I used two shades of brown pearl cotton for the panels on the door, outlining them using long legged cross stitch, and filling in the panels with satin stitch. While I was doing that, it occurred to me that this was a good opportunity to demonstrate, again, just how different a stitch can look if you use different threads to stitch it with. So the render is rendered (sorry!) in Burden stitch, using two strands of light coloured stranded cotton, and already you can see how very different it looks in comparison with the soft cotton. It’s very satisfying when something works that well!
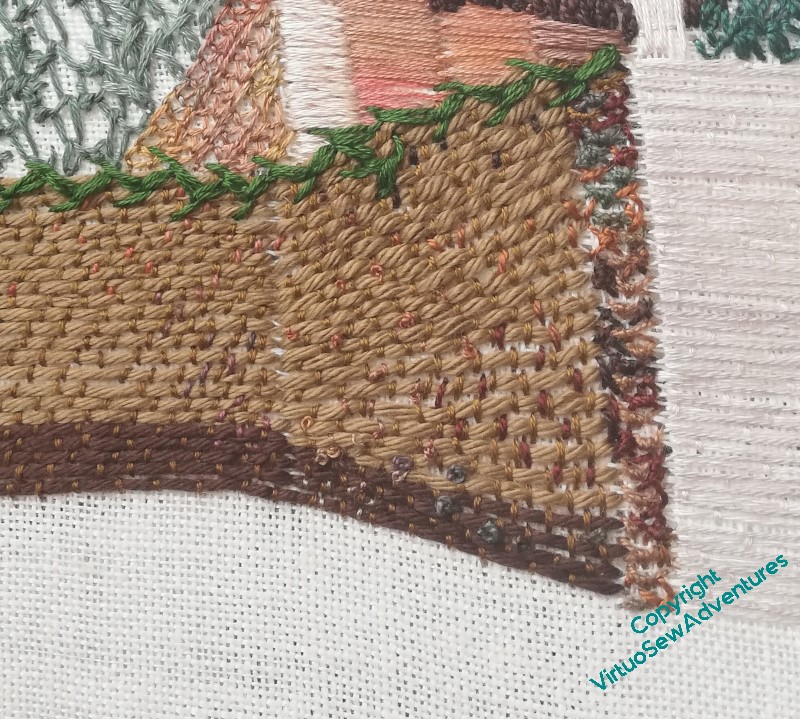
It was the golden light on the creeper that originally attracted me to this scene, so I need next to work out how to represent the creeper. I’m starting with feathered zig zag chain stitch, and I’ll use several colours of thread to create the variation of colour in the foliage.
I’ve added a few French Knots to the rough stone wall, to roughen it up a bit, and tweak the colour balance.
You can see here the start of the middle shade for the creeper, again using feathered zigzag chain stitch, and trying to zigzag the zigzags to vary how much of each colour shows.
You can also see that the facing light rendered wall is now done, and I have simply turned the Burden Stitch through ninety degrees. I think I may be beginning to be pleased with it!