
Search Results for: winter decoration corner
A tree for the trinkets..
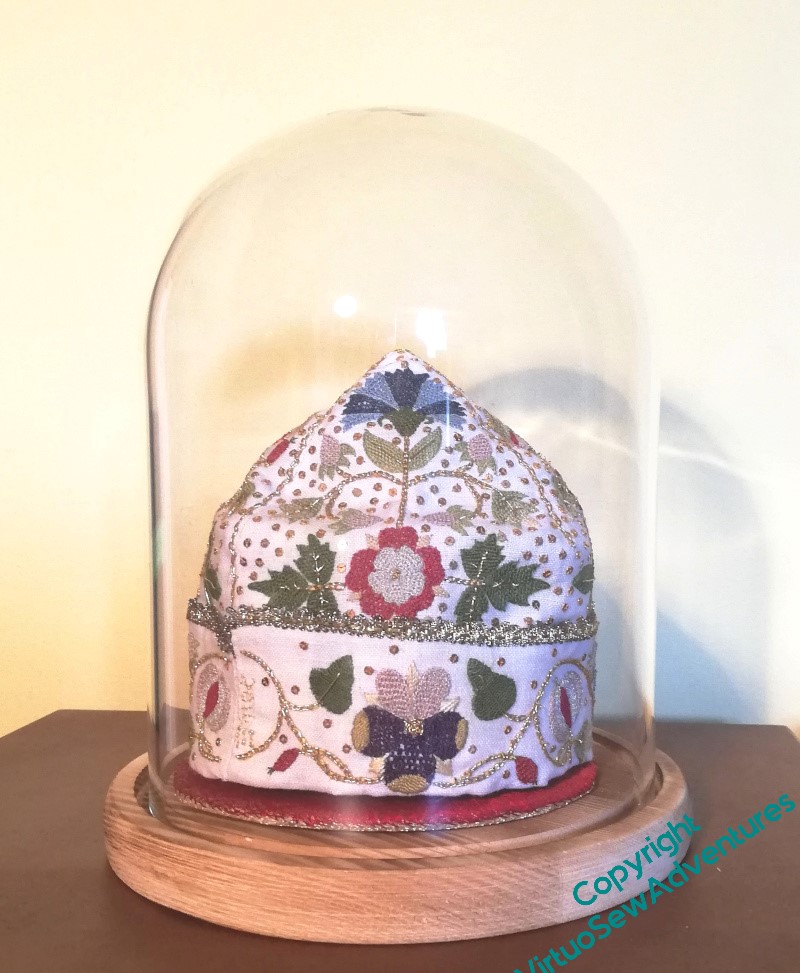
When I had the idea about using a parlour dome for the Violets and for the necklace, I realised that I would need to play with how I displayed them, trialled the Tudor Nightcap in the dome and realised that I could now put it on display.
So what about all the other Thistle Threads pieces?
Well, it turns out you can get parlour domes that aren’t round, so I got the largest I could bring myself to buy and then stopped to think…
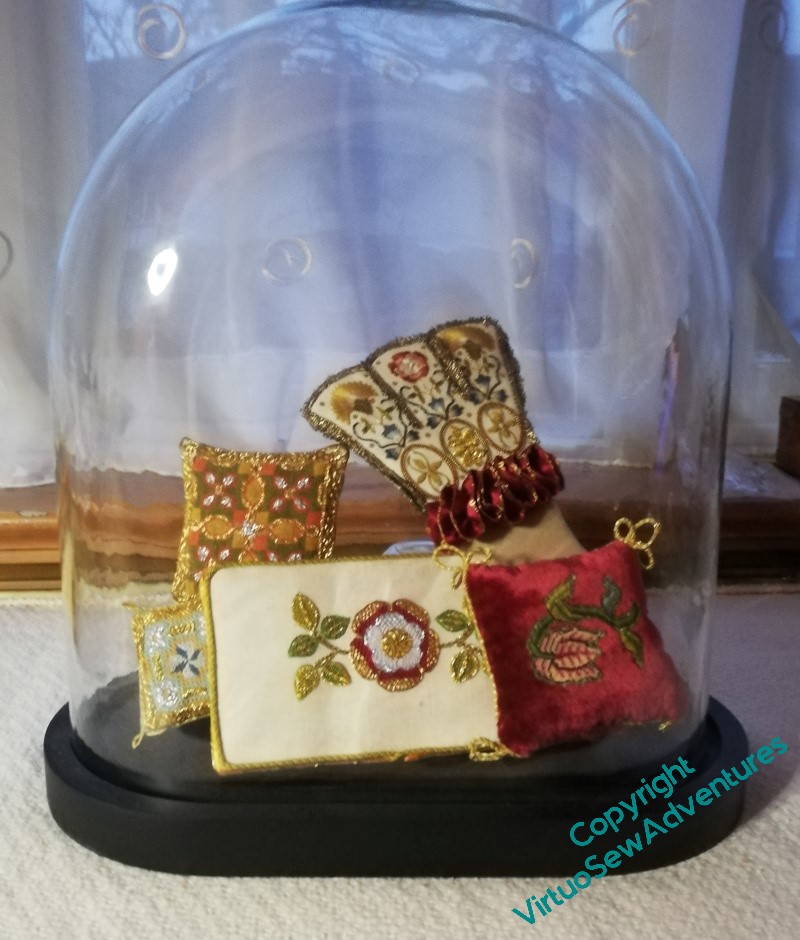
I started by playing around with propping the various pieces I’ve been planning for that Winter Decoration Corner against one another within the dome. It’s a flattened oval, and quite high, but anything I could improvise seemed not to have the height I wanted without taking up all the display space.
I think this shows the idea will work, but it doesn’t really have the presence that the pieces deserve.
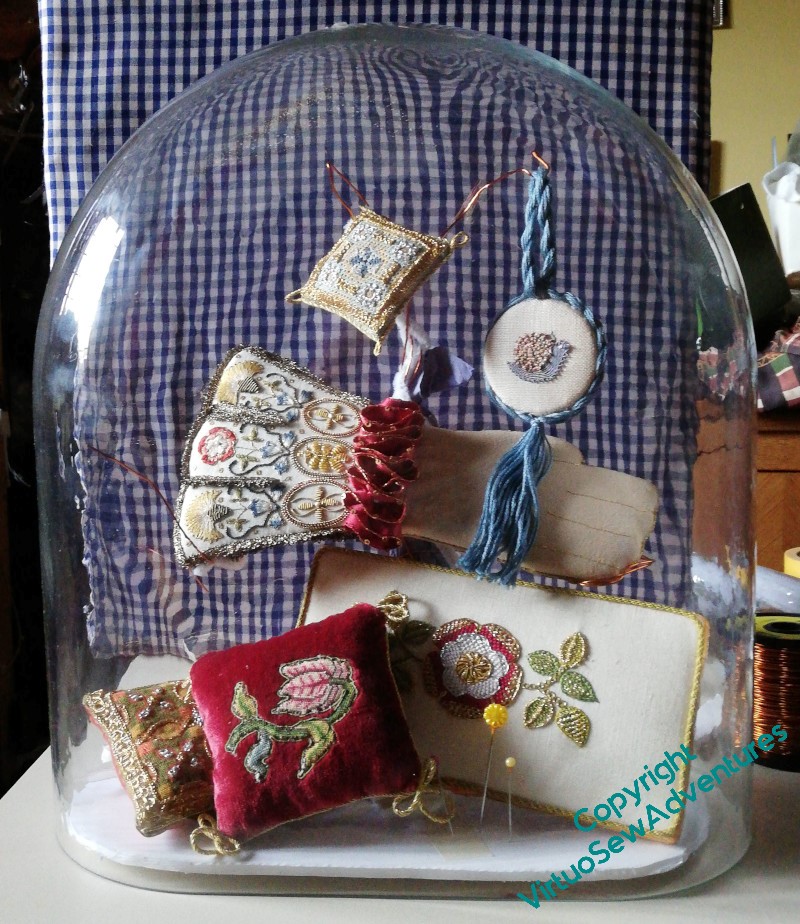
This is better. I’ve used offcuts of the foamcore that I bought to help me with Nefertiti and Akhenaten to create the base that will sit inside the glass, sandwiching the beginnings of the wires forming the tree between two layers. I’ve built up a support for the green and orange cushion at the back using smaller bits of foamcore, and wrapped pipe cleaners around the wires.
It’s not perfect, but I’ve set it up in the hall where I will pass it every day, to work out whether I like it. Then the idea is that I will have a lovely messy hour or so covering the wire with papier mache, allow it to dry, and paint the whole thing gold.
The Tudors were as fond of bling as the ancient Egyptians, after all!
The Little Robin finished!
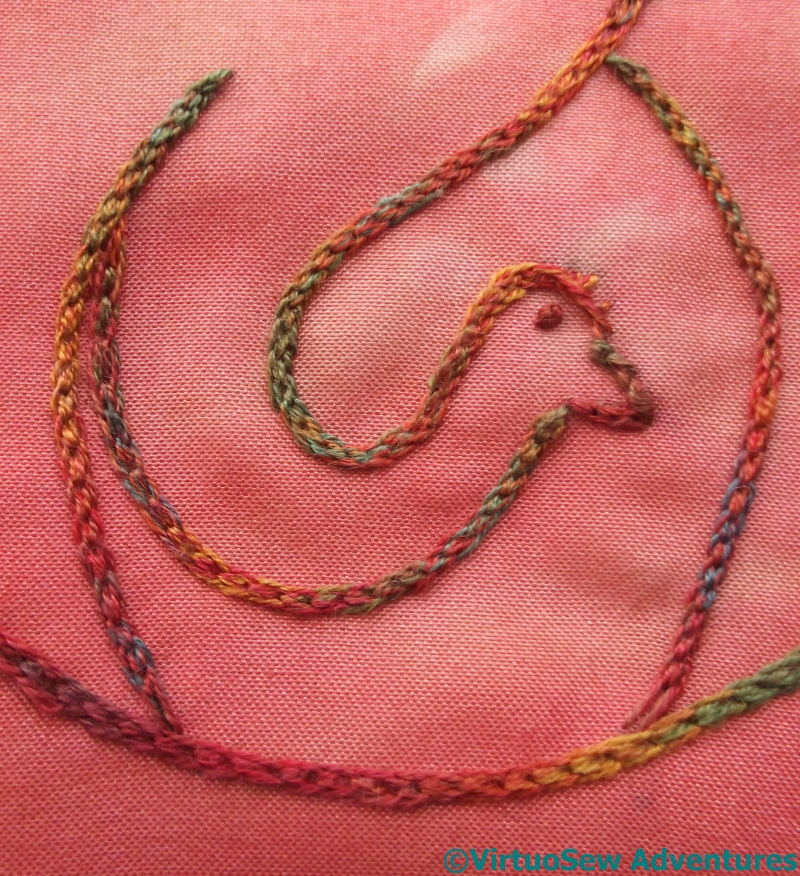
Working On The Robin
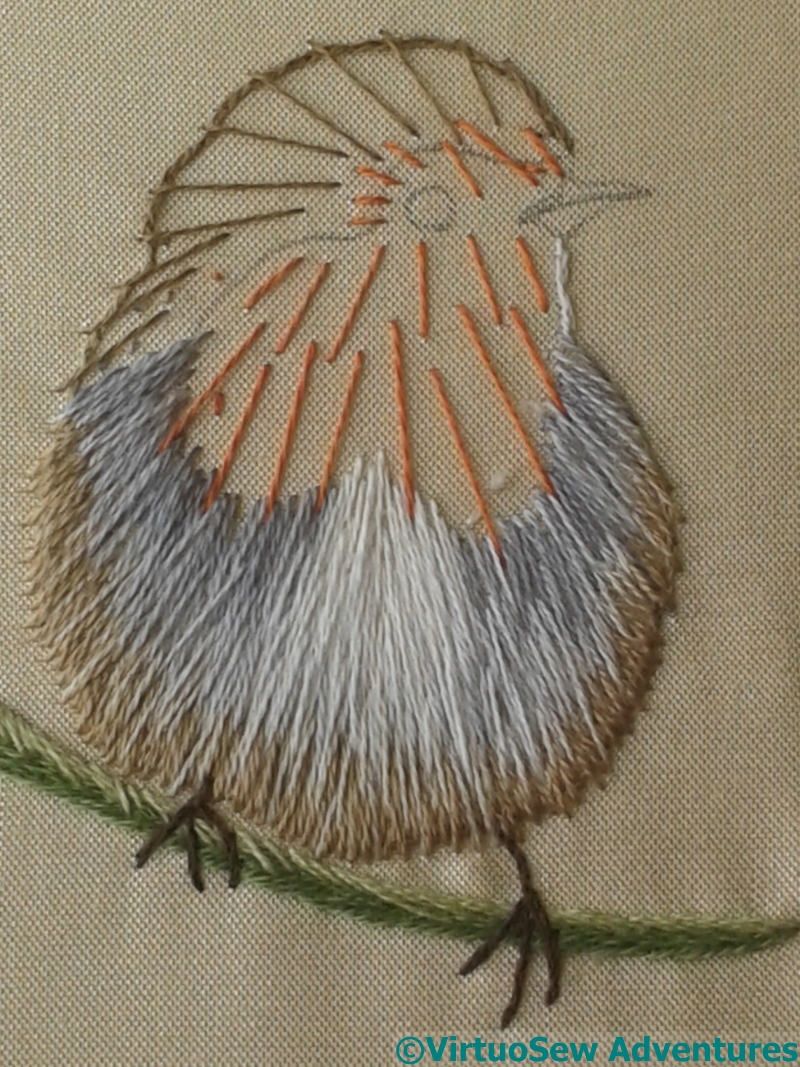
I have to admit that I have enjoyed the little Robin. Here is a halfway point, showing that while many suggest drawing direction lines for their stitches, I chose to draw with my needle instead. I found that the more helpful because it gave me a chance to gauge the overlap of each section with the next.
I’ve gathered that some tutors suggest working small sections to completion, and others in colour layers. I took the latter approach with the (I’m sure not original) refinement that sometimes I went back and did another layer in a colour I’d already done.
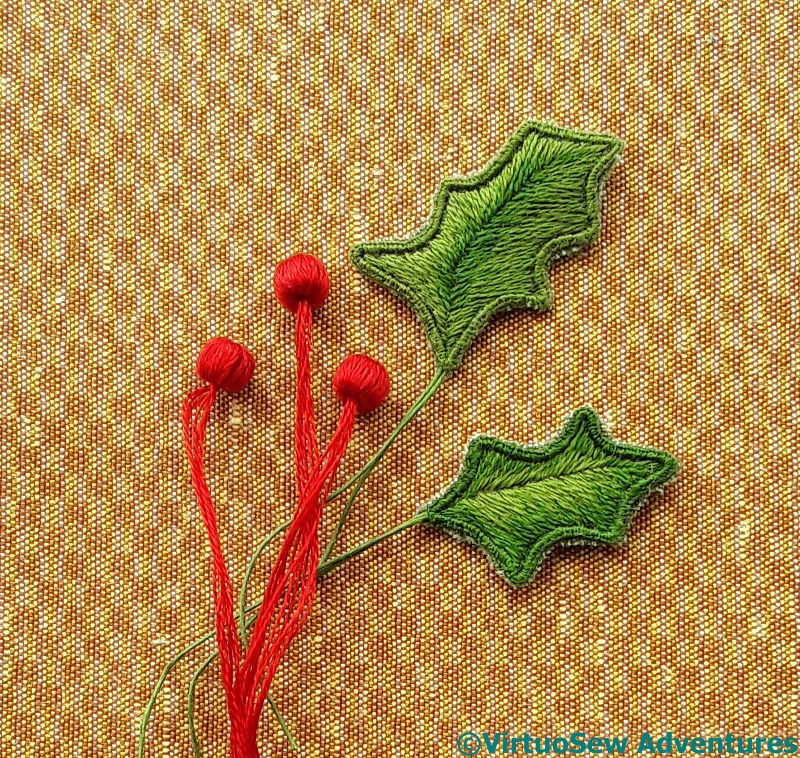
Stumpwork Bits
I also had fun with the stumpwork elements: two simple wired leaves (nothing terrifying about that, after working on the Stumpwork Violets for Dreams of Amarna!) and three berries made of beads wrapped with thread. I’ve not wrapped beads before, but as it turned out, this, too, turned out to be fairly straightforward.
And fortunately, my wandering applique scissors returned to the fold in time to be of use…
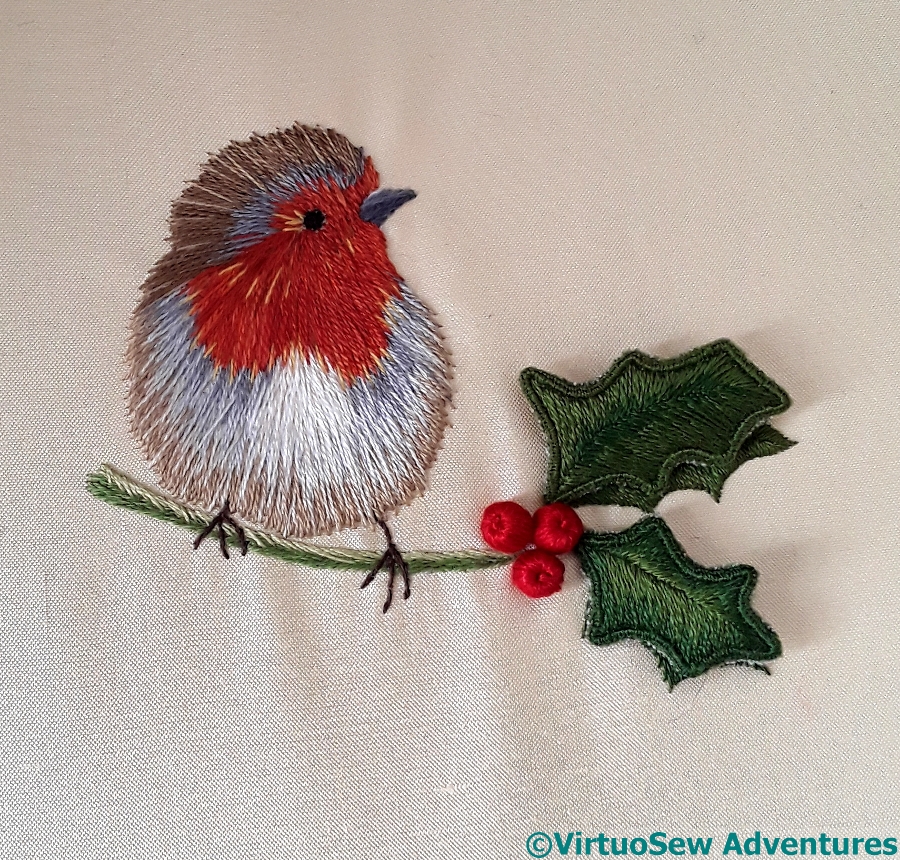
The Robin Completed
So here he is.
As you can see, even though I worked him in a hoop, and regularly made sure the fabric tension was maintained, there is a little bit of puckering. That may reflect, as much as anything else, a certain anxiety on my part. I think I will mount him on a round card and add him to the winter decoration corner when I set it up, and I should be able to ease some of the puckering then.
And – for those enquiring minds that wish to know – while I can’t say I’ve fallen in love with silk shading, we are definitely on better terms than we were!
Finished – Tiny – Flame Stitch Pincushion
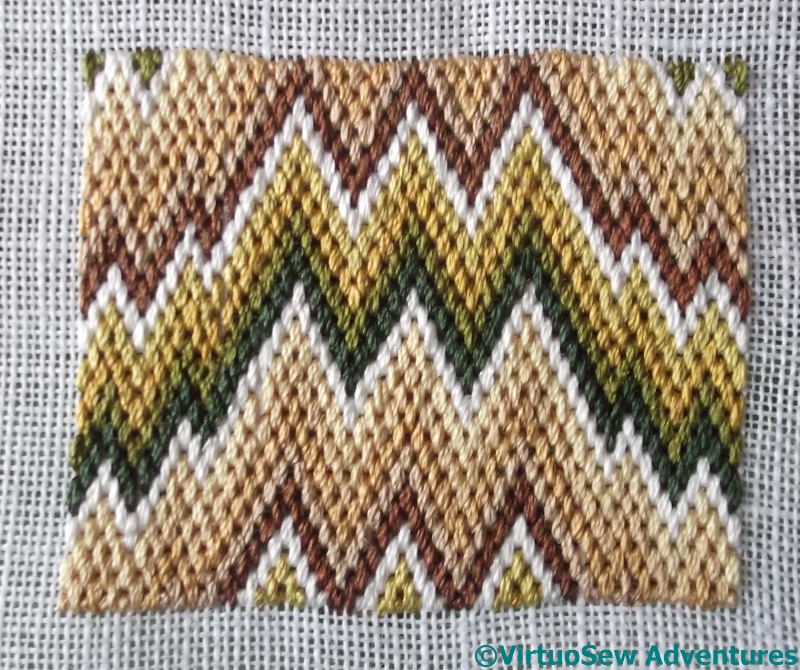
Flame Stitch Finished
There are in fact several errors in the stitching here. However, since I kept losing them and finding them and losing them again, I decided to let them stand. If even I can’t keep them in sight, no-one else will find them…
I enjoyed using the silk thread for the stitching – but then I keep saying that, don’t I? Silk seems alive somehow, in a way that cotton, linen, and even wool, don’t.
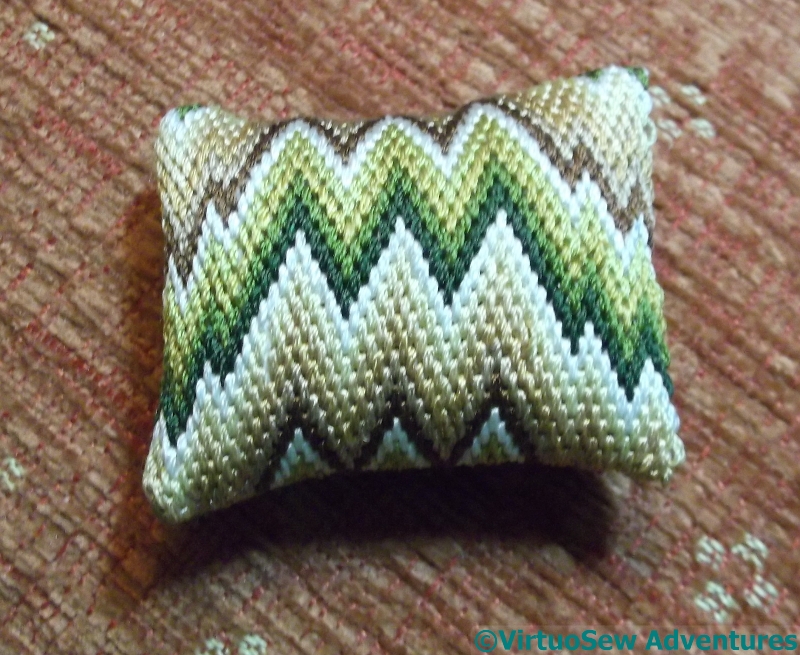
Finished Flame Stitch Pincushion
What really surprised me was just how small the pincushion was when I finished it, using a spare fragment of silk fabric for the back. It was really quite astonishingly fiddly when it came to turning it inside out and especially when it came to the corners.
Still, here it is, done, and stuffed, and the final side closed up neatly..

Isn’t It Tiny!
And then I put it in the palm of my hand and finally realised just how small it really is…
Another one for that eventual Winter Decoration Corner, I think – in my chaotic workspace, a pincushion this size would sink without trace!
Long Time No See
I’ve been hit by a fit of the tidy-ups and spent a couple of days rifling through some shelves to try to make more sense of them, and I’ve found a couple of things I’ve not seen in years…
Cornucopia Of Flowers
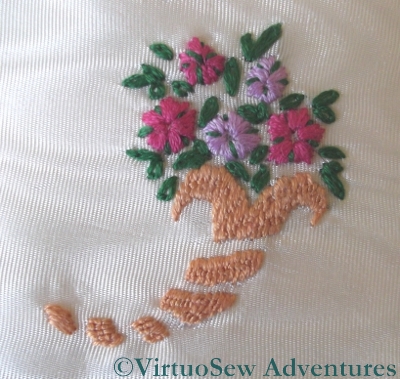
This little cornucopia of flowers is rather cute. I found it in a nineteen seventies book about needlecrafts, which is rather a surprise because I don’t think it is a very nineteen-seventies sort of design – and some of the others really were! I’ll try to find the book to tell you what it was called. It’s the same book that I found the girl and her doll described in this post about another forgotten project.
In a fit of masochism (I can’t think of any other reason!) I worked it on watered silk, which is very closely woven and was a severe trial. I had to use sharps rather than my usual embroidery needles! The flowers are satin stitch (I was gradually getting over my aversion!), the leaves lazy daisy, and the sections of the cornucopia itself are in Roumanian stitch, which creates just enough roughness of texture to be interesting.
I think that now I have found it again I shall mount it on a round or oval card (like the Glittering Snail) and add it to the winter decoration corner.
Finished Woolwork
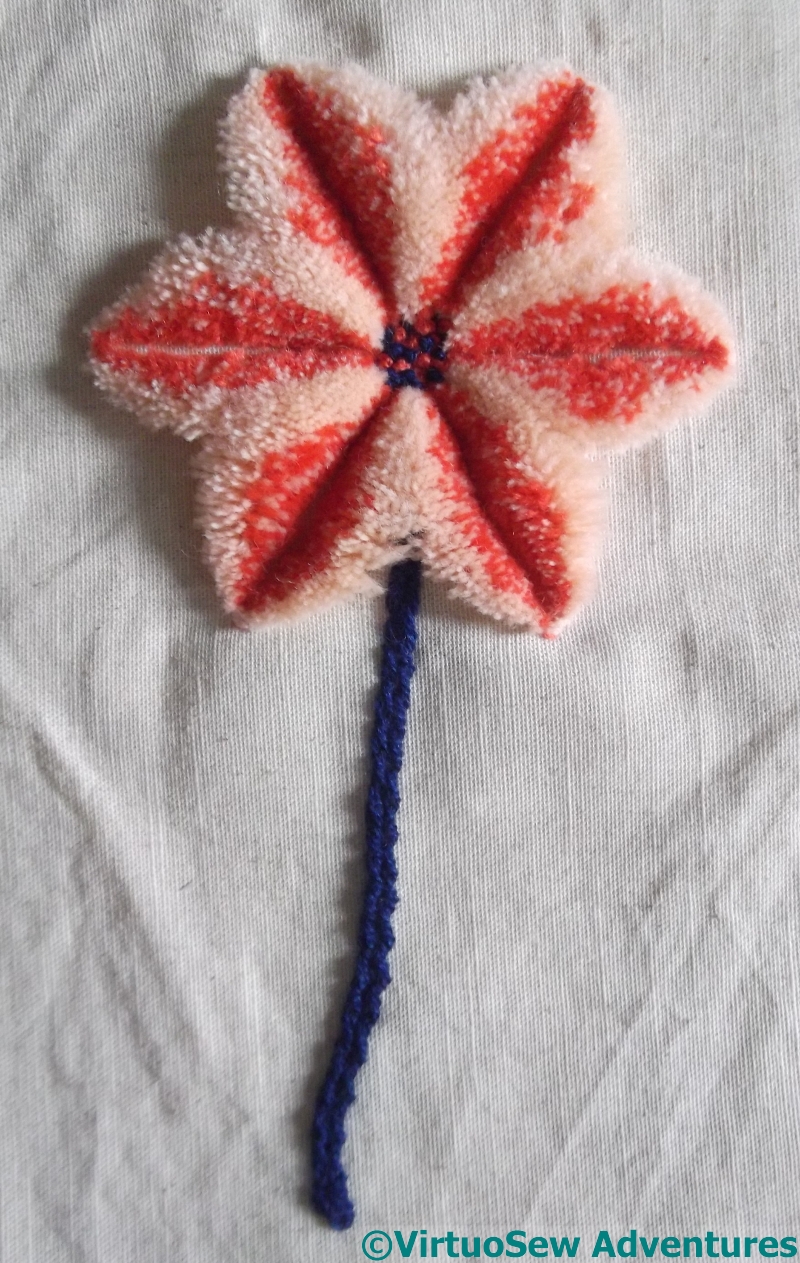
I wrote about this woolwork experiment in 2011, and the last time you saw it, the metal template was still in place. I found it in a box of fabrics that might make good backgrounds, but clearly all I had done was to fill in the centre, add a desultory stem, and sit back and stare at it. Unfortunately, I’m none the wiser as to what to do with the completed piece, or what I might do with the technique…
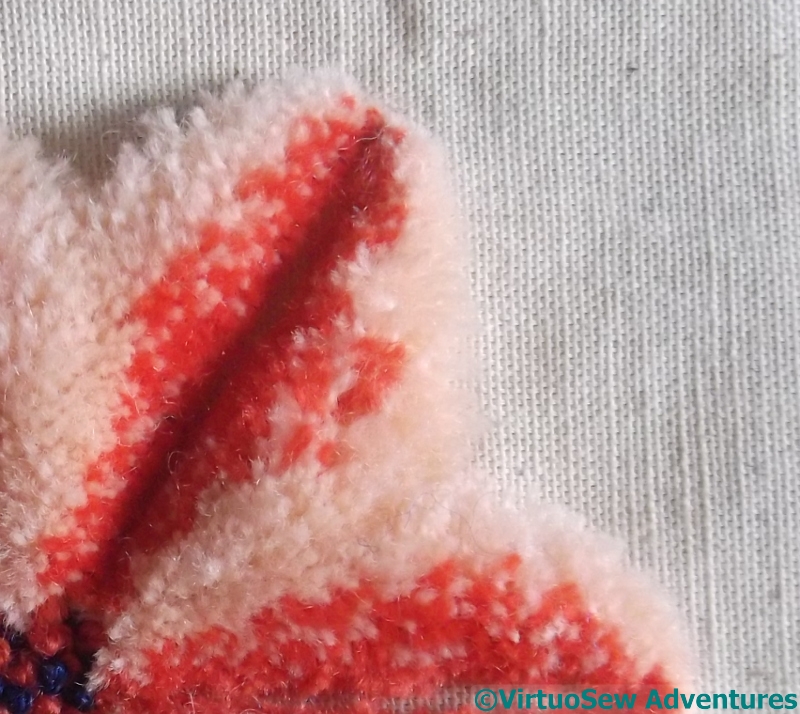
Close Up Of Woolwork
Doesn’t it look wonderfully woolly, though!
More Unfinished Objects
Tent Stitch Flowers
I keep on finding things that I’ve not quite finished, don’t I – and in some cases I had completely forgotten about them.
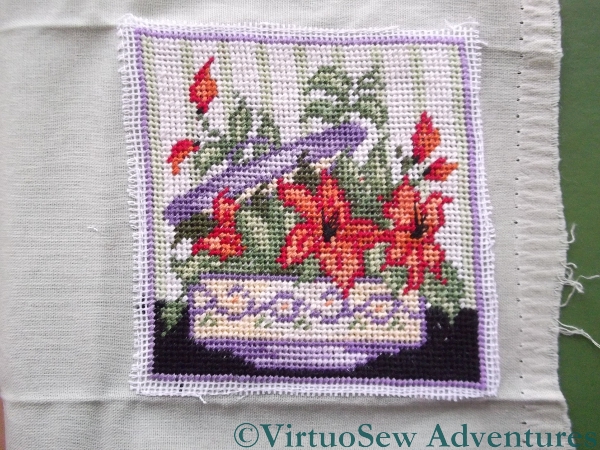
Like this one. I know it was a kit – stranded cotton worked in half-cross stitch on canvas, – but I don’t know why I bought it.
And I clearly had something in mind for it, because I have attached it to a cotton furnishing fabric. Equally clearly, it wasn’t going to be a cushion centre, or I would have centred it on the fabric. It is only about three inches square, so I suspect I had in mind making it into a needlecase.
But before I do anything else with it, I have to find some way of covering those raw edges of canvas with something that looks deliberate!
Any suggestions?
Coloured Crane
In other news, though – I’ve finished the second Crane!
Actually, you may recall that it was the first, but I decided it looked too overheated in the pot it was destined for, and set it aside for another version.
I found in when I was looking for something else, and finished it. At least, the embroidery…
I will probably mount it on a circle of card, and put in that famed Winter Decoration corner.
At least I know what I’m going to do with this one!
Tudor Rose Turned Into a Panel

Tudor Rose (Finally) Finished
At long last I got a chance to finish up and turn the Tudor Rose into a little mounted panel. I got a local framing shop to cut me two pieces of acid free mount board, and mounted it over one of them, with a little padding to bring it to life. Then I covered the other (also with wadding) with some upholstery fabric that happened to be to hand, and overstitched the two boards together.
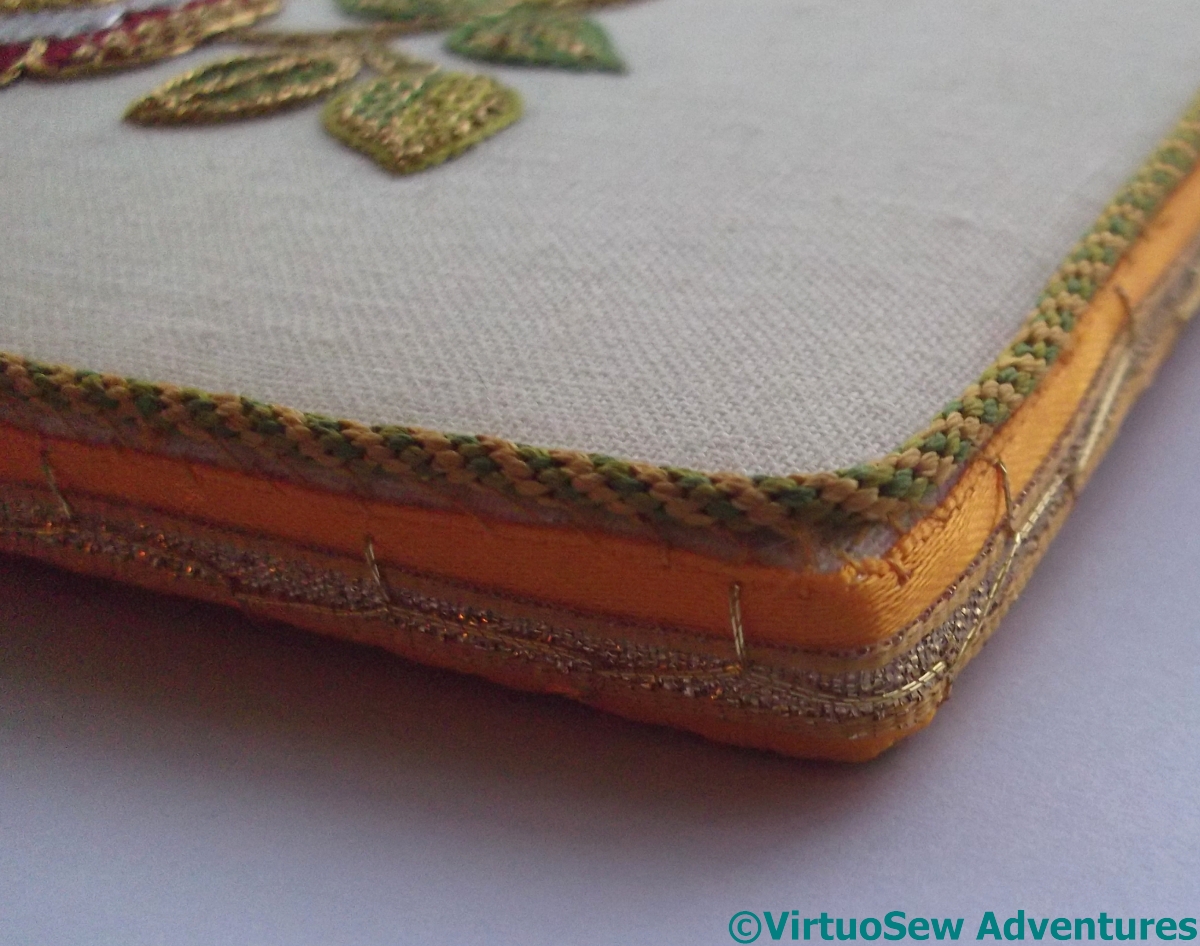
View Of Edges
I covered the overstitching with a ribbon trim left over from when I finally mounted Christus Natus Est (whoo-hoo, some stash busting achieved!) and then, at some length and not without difficulty, attached a fine kumihimo cord around the front edge of the panel to frame it nicely.
It will go in that famed (and so far, still mythological) Winter Decoration Corner that I keep on talking about – when I finally create it.
Dealing with the Golden Acorn
Silver Braid Stitch
You last saw the Golden Acorn in July, when I was thoroughly fed up with it.
Since I’d got so engrossed in stitching that I’d neglected to pay attention to the details and had to unpick the lot, when I came to re-stitch I decided to put in the braid stitch in silver first.
I found the silver to be a more temperamental thread than the gold, although structurally it was exactly the same. However, these threads are all made more or less by hand, and must be hugely susceptible to temperature and humidity.
I know from my textile technology studies that natural fibres – such as cotton, wool, and silk – are susceptible to environmental conditions, because the basis for the success of the Lancashire cotton industry was due in no small part to the fact that ideal conditions for growing cotton are far from ideal for turning the cotton into cloth. In fact, nowadays, textile factories are built with climate control, because the speed of modern production demands that all possible variables be thoroughly ironed out.
In the same way, if you visit a woollen mill, you will see piles of wool at various stages of production, just sitting there. If you are a time-and-motion person you’ll get very uptight about this, and talk about “Just In Time” manufacturing – only to be told, in no uncertain terms, that if you want to pay for all the failed batches that will result from not allowing the wool to relax (technical term – yes, honestly) between processes, you’re welcome, but the manager won’t let it out of the factory with their name on it.
The silver and gold threads we are using have natural fibre cores, so sensitivity to climate is only to be expected!
Second Time Lucky
I found both of the two main stitches in the strapwork, Ceylon stitch and Braid Stitch, rather troublesome in metal thread, although Braid Stitch in pearl cotton is one of my favourites. There’s no denying that they produce a rich and exotic effect once they are in place, though!
I became slightly fed up with tent stitch – there was such a lot of it! – while I was working this, so I’ve been giving myself some time away from it. I’ll get started on the next one of these when I feel ready for fine tent stitch again.
I’m also waiting until all three are stitched before I decide which to finish to create which stitching accessory. If I recall correctly, there’s a scissors keep, a needlecase, and a pincushion. I suspect they’ll end up in that famous Winter Decoration Corner I keep threatening to do!
Tudor and Stuart Goldwork Masterclass – Bonus Instructions
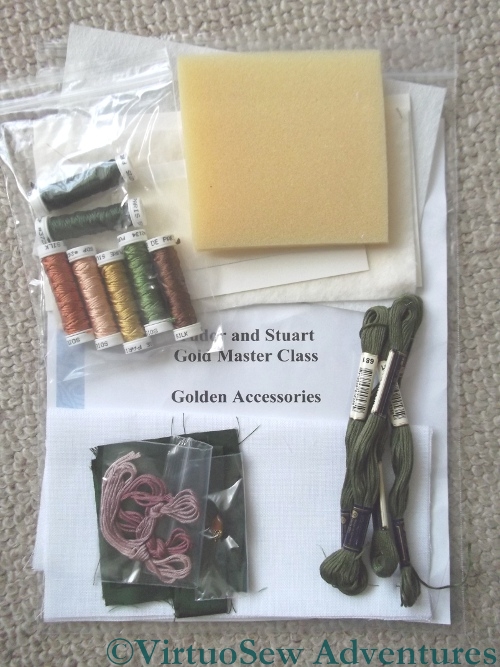
Golden Accessories Kit
There was a set of Bonus Instructions in the instructions for Month Fifteen, from a teaching project that Tricia had retired from use. She was asked whether she’d produce kits of the materials for those of us who don’t have easy (or even difficult!) access to a really good needlework shop. Yet again, apparently, demand outstripped her expectations (a good problem to have!), and here is my kit.
It includes finishing materials for the various accessories, as well as the fabric and the silk thread, but not the metal thread, since all of us already have large spools of that from doing the main Spot Sampler.
My intention is to finish these to add to that planned “winter decoration corner” I’ve mentioned a couple of times. I’ve found some masks which I’m going to decorate in silver and gold, and I will use some metallic gauze or something similar for the background. Already the two Needlework Nibbles, the Floral Glove Needlecase and the Tudor Pincushion look like they will create some wonderful reflective textures for a dark corner…
The Tulip Slip Pincushion is Finished
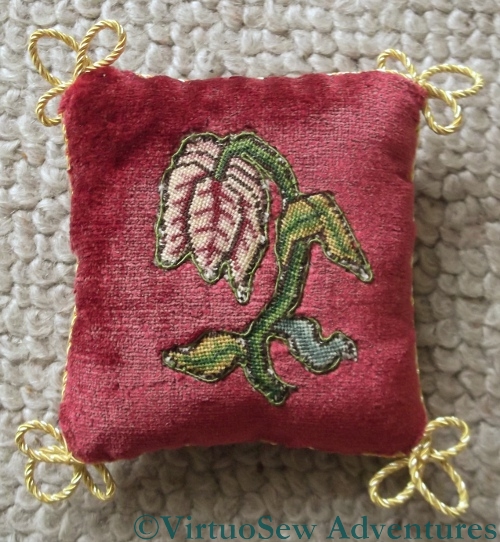
The Tulip Slip Pincushion Completed
I have finished the Tulip Slip Needlework Nibble. I used a sewing machine to attach the silk brocade backing to the silk velvet front, because my fingers were still shredded from finishing the Floral Glove Needlecase, and the velvet was very hard to stitch.
The amount of stuffing needed for even quite small items never ceases to astonish me. By the time I finally managed to finish stuffing this one I was wondering whether it opened into the Fourth Dimension!
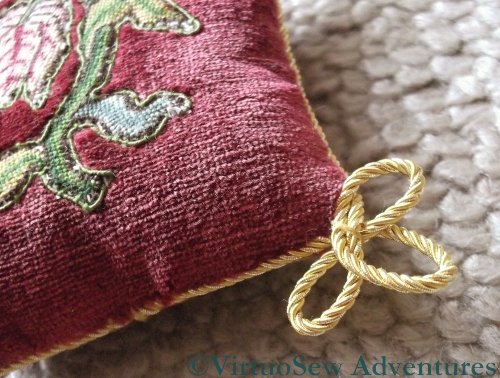
The Tulip Slip Pincushion - Corner Detail
The corner detail shows the trefoil shapes in gold cord used to finish the piece. Those, too, were rather a challenge. I was rather wishing for a third hand to help me hold the loops in place while I attached them, and as you can tell from looking at the whole thing, some of the loops are loopier than others.
The corner detail also shows more clearly the effect of the silk gimp outline which creates a crisp edge for the shape, and helps to keep the pile of the velvet from encroaching on the tent stitched Tulip.
This was rather fun to do, and it will make a great addition to my planned “winter decoration corner” of historical needlework projects…
Tudor and Stuart Goldwork Masterclass – Update on the Tudor Pincushion
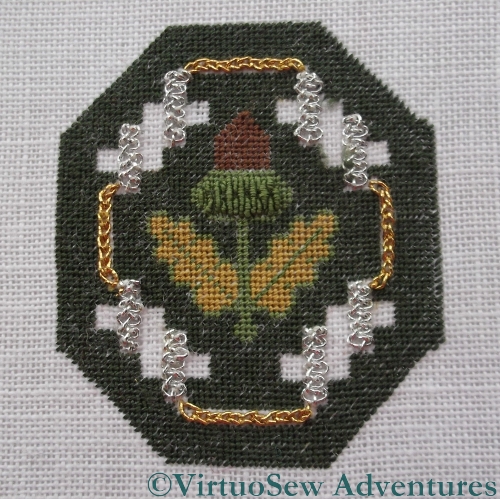
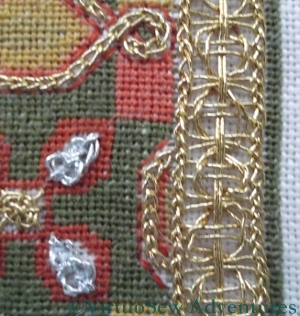
First Stage Of Border
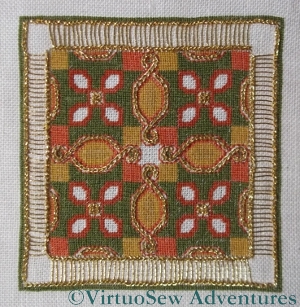
I’m making reasonably good progress with the Tudor Pincushion which is part of the Tudor and Stuart Goldwork Masterclass. The silkwork was finished a while ago, and now there are several different isolated stitches, and a continuous border.
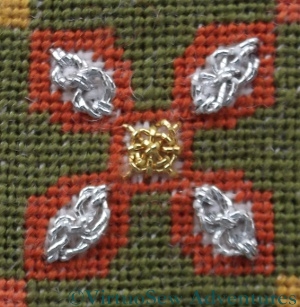
Silver Guilloche Close Up
I’m not using the real metal thread for this. I rather like the rich, vibrant colour of this thread, wrapped around a cotton core, and as I am planning to create a sort of winter “corner decoration” using all of my historical embroidery pieces, there is something positive to be said for the idea of using as many different shades of gold and silver as I can to create a really rich, varied impression.
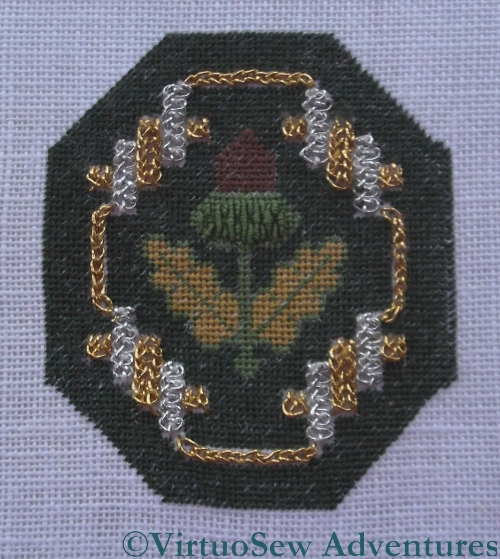
Border Close Up
The small sections of silver Guilloche Stitch have worked well, although I still have reservations about my gold Spider’s Web stitches, especially when I look at close-up photos of them!
The border is a Guilloche Stitch variation worked on a Ladder Stitch base. As it turned out, I didn’t get quite the right number of rungs on the ladders, so rather than being a neat continuation of the Guilloche Stitch, the corner elements are rather improvisatory.
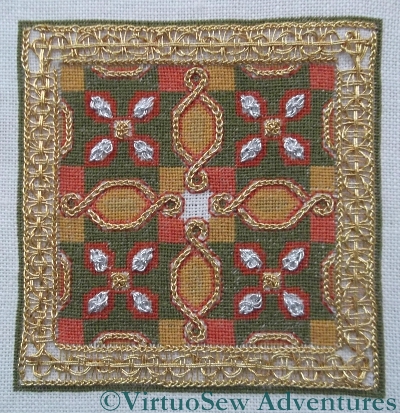
Tudor Pincushion - Almost Finished
This doesn’t worry me. At the moment, I am still waiting for the instructions for the central ornamental stitch, and if, by the time I have that stitch, I’ve decided that I really must redo it, I will do so then. By that time I will be still more practised at working with metal threads, and it should go more swiftly and easily.
In the meantime, I can go on to play with more new stitches, and even, perhaps, start work on the real metal threads to add them to the Spot Sampler!