
Tag: Glittering Snail
A tree for the trinkets..
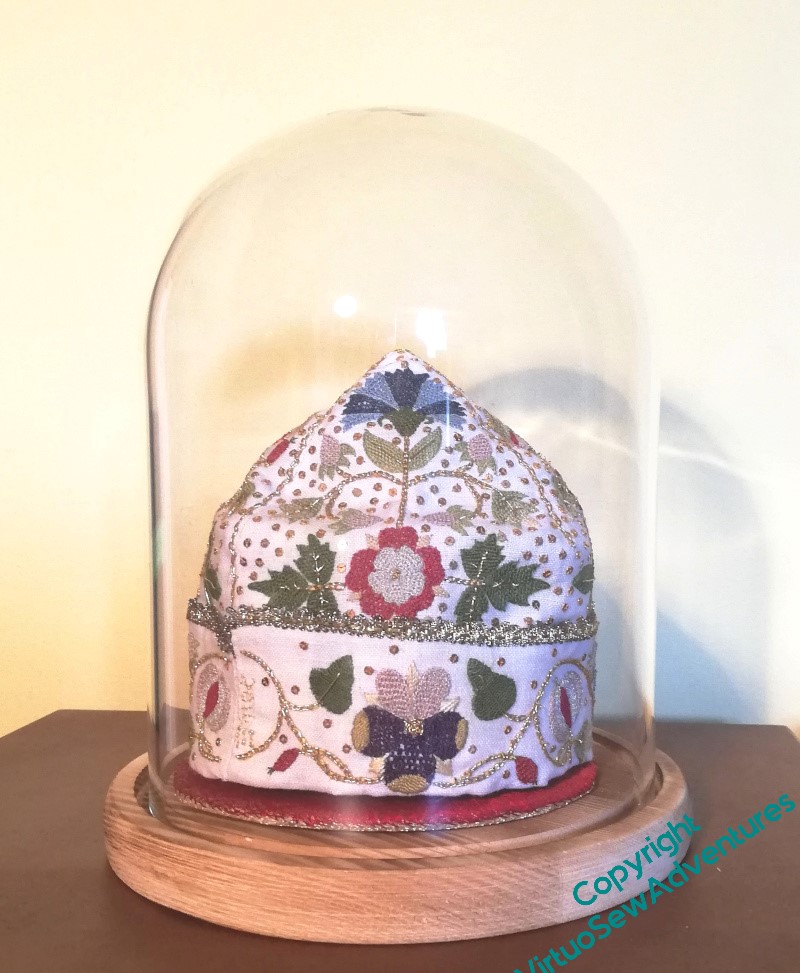
When I had the idea about using a parlour dome for the Violets and for the necklace, I realised that I would need to play with how I displayed them, trialled the Tudor Nightcap in the dome and realised that I could now put it on display.
So what about all the other Thistle Threads pieces?
Well, it turns out you can get parlour domes that aren’t round, so I got the largest I could bring myself to buy and then stopped to think…
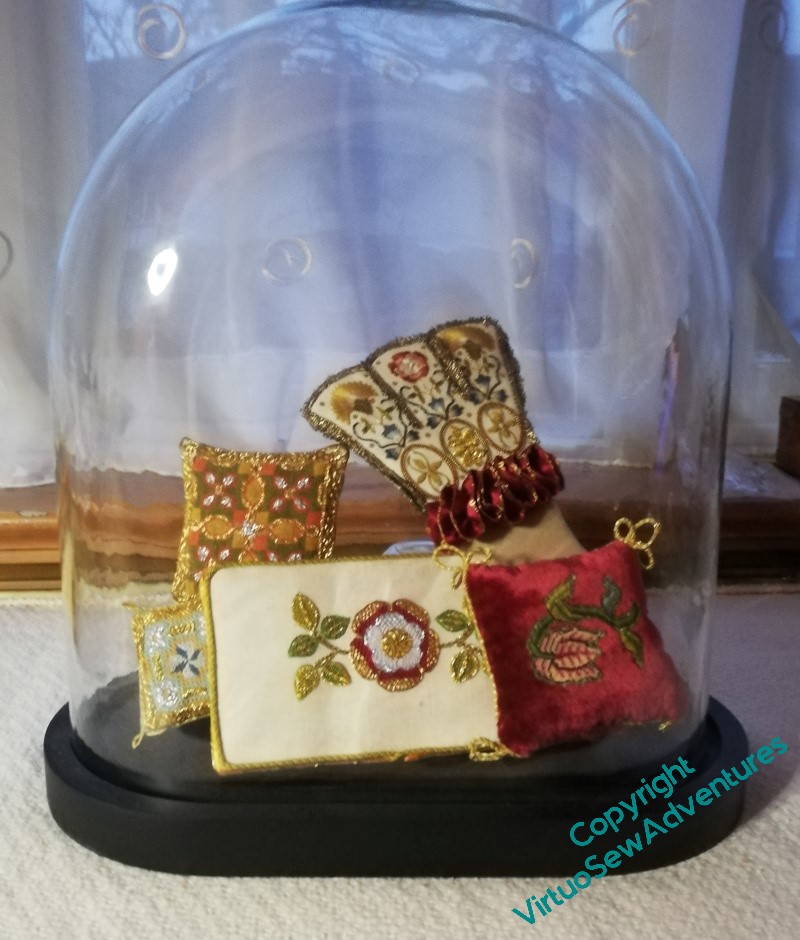
I started by playing around with propping the various pieces I’ve been planning for that Winter Decoration Corner against one another within the dome. It’s a flattened oval, and quite high, but anything I could improvise seemed not to have the height I wanted without taking up all the display space.
I think this shows the idea will work, but it doesn’t really have the presence that the pieces deserve.
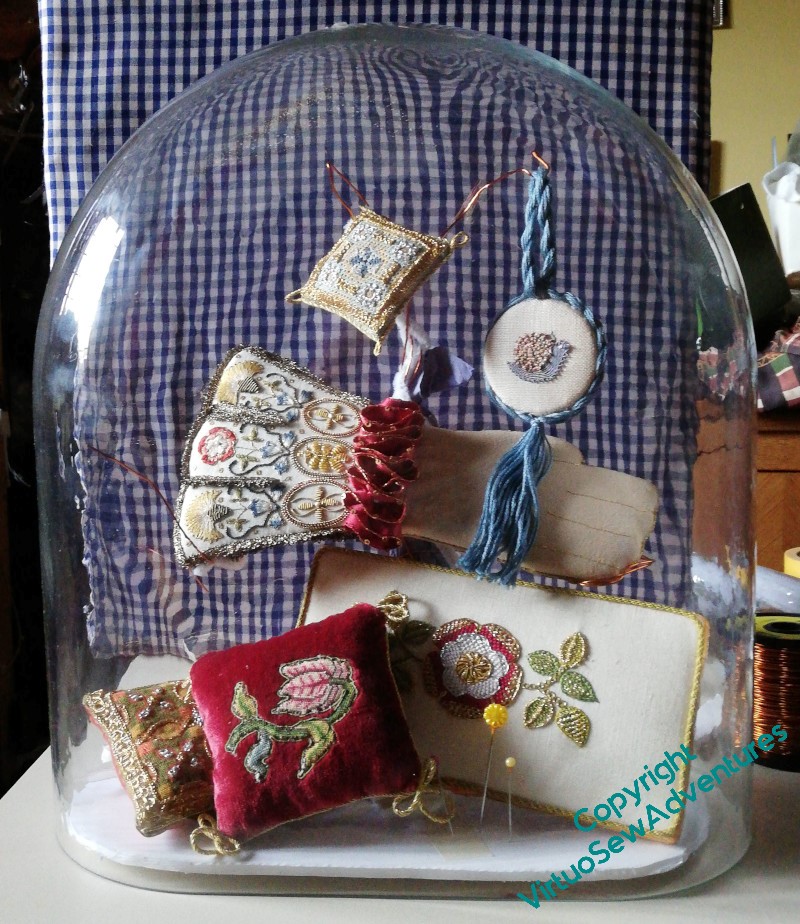
This is better. I’ve used offcuts of the foamcore that I bought to help me with Nefertiti and Akhenaten to create the base that will sit inside the glass, sandwiching the beginnings of the wires forming the tree between two layers. I’ve built up a support for the green and orange cushion at the back using smaller bits of foamcore, and wrapped pipe cleaners around the wires.
It’s not perfect, but I’ve set it up in the hall where I will pass it every day, to work out whether I like it. Then the idea is that I will have a lovely messy hour or so covering the wire with papier mache, allow it to dry, and paint the whole thing gold.
The Tudors were as fond of bling as the ancient Egyptians, after all!
The Glittering Snail Finished!

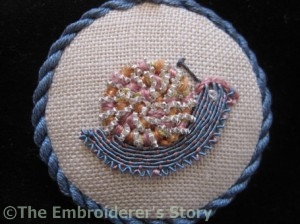
Glittering Snail Ornament
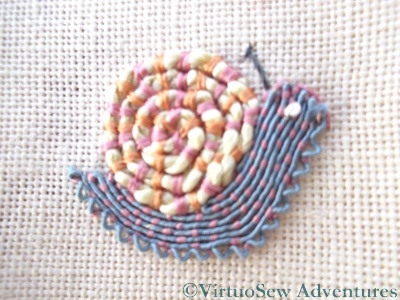
The Glittering Snail Ornament from Stitching A Snail For Storage is Finished!
He was a lot of fun to stitch. I was introduced to silk gimp and silk purl (as I’ve already said, I don’t know what I will use them for, but I’m sure I’ll find something!). I don’t think I’ve ever stitched anything quite so small, either.
Tricia provided the blue silk thread to make the cord, and a silk fabric to back the ornament, although I think I need more practice at making cord, since mine ended up a bit floppy! However, it has now ended up with the whole thing, from hanging loop to tassel, made from a single length of cord, and I am hanging it up in my living room to keep it from getting crushed.
My local art shop sells cutouts of mount-card, presumably for people to do papercrafts with, but I find they make perfect mounts for this sort of ornament. I used one card for the front and one for the back, lightly glued fine wadding to the card and then stretched the fabric over the top (using glue or thread to secure it, depending upon which seems most appropriate). Front and back are then held together and overstitched, and the stitching can be covered with cord.
I used almost exactly the same technique – on a larger scale – when I was mounting “Starbright” a couple of years ago.
The Glittering Snail – part two
The Snail In Silk
So, bright-eyed, bushy-tailed, and full of enthusiasm, I sat down with my Glittering Snail Kit and got started. And, in fact, the silk gimp and silk-wrapped purl are not the only threads new to me, so it was great fun.
The pink and orange threads are both silk floss rather than spun silk. Occasionally I snagged the floss on the screw on the hoop, or a fingernail, or even on another bit of thread (how? don’t ask!), but I really enjoyed it, all the same.
The snail’s body is worked using the silk gimp and stretched silk-wrapped purl, couched with the pink floss. They were easy to work with – they felt gorgeous! – and I have a tiny bit left to play with a little while I think about how I might use them in my own embroidery. At the moment, nothing is really springing to mind, but I’m pretty sure that somewhere along the line some silk-wrapped purl will appear..
The Glittering Snail – part one
The Snail Kit Has Arrived In The Post
You may recall that in December I wrote about the Thistle Threads project to Stitch A Snail For Storage. We’ve been away for a while, but came back to find a huge pile of post which included a jiffy bag from Thistle Threads.
Since I’ve already printed out the instructions (as soon as I ordered the kit!), I can start just as soon as I’ve gathered my wits and drawn the design on the linen. Even though the basic concept of the design is simple, it will be complicated and probably a little tricky to do, because the snail is only about an inch from nose to tail!
Tricia had two reasons for developing the kit – one was to sell something in aid of the Fashion Museum in Bath, but the other was to introduce some new threads to us. So of course, the first thing I did was to rummage through to look at the the new threads, the silk gimp and silk wrapped purl. They look highly intriguing, and I am looking forward to playing with them…
Stitching a Snail for Storage
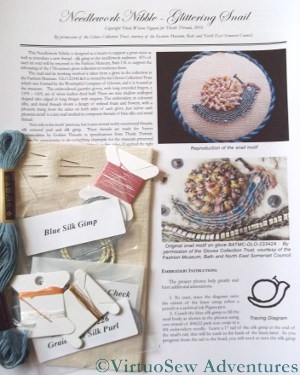
Stitch a Snail for Storage Needlework Nibble
Since I am following the Tudor and Stuart Goldwork Masterclass, I receive Tricia’s Newletter, and a recent one described a plan she has to raise money for storage and display of gloves in the Museum of Costume in Bath, which she’s calling “Stitch a Snail for Storage“. It looks fascinating, so I’ve ordered one of the kits, and downloaded the instructions and printed them out.
The fundraising is about two thirds of the way to the total needed by the Bath “Museum of Costume” to rehouse the collection of embroidered gloves and gauntlets in such a way as to make it possible for embroiderers and other people interested in embellishment techniques to examine them without touching them and rishing damage to them.
Tricia’s “Needlework Nibble” will be a great way to support this while being introduced to some of the interesting threads she has developed following her research. Why don’t you give it a try?