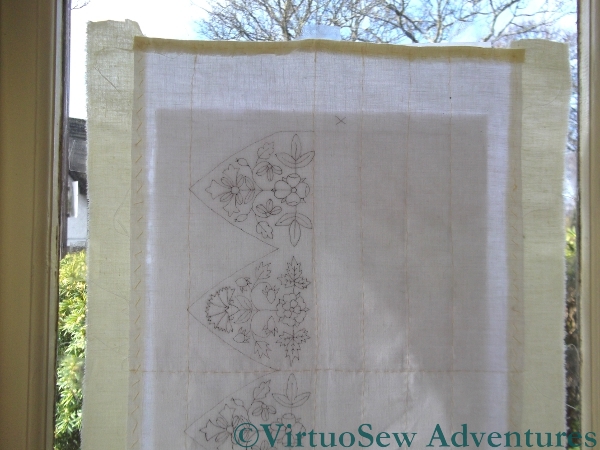
Transferring The Design
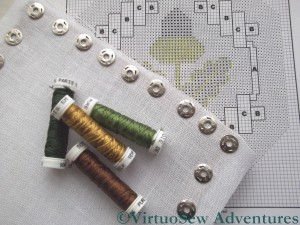
I’ve been looking at the kit of materials for the Glittering Gentleman’s Nightcap Course for quite some time, but since I received the finishing kit I’ve finally decided to get going.
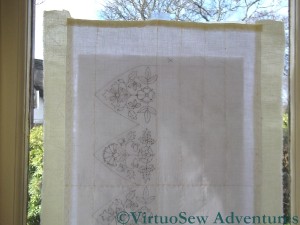
There was quite a bit of preparation to do. There are lines of basting to help with finishing the piece when the stitching is done, and I’ve added fabric at the top and bottom, and bound the sides, to make framing up a bit easier. I invested in a Millenium frame for this project, and I wanted to be sure that I would have enough fabric at the top and bottom to work with the attachment system.
I don’t have anything that resembles a light-table, so I had to improvise. The tracing and the fabric have both been taped to a pane of the only unleaded window in the house, and I spent a careful hour or so using the Pigma pen included in the kit to trace over the pattern onto the fabric. Bear in mind, if you find yourselves applying this method – it’s a most unnatural position to be drawing in, and you will find your arm aching and your hand cramping, if you aren’t careful.

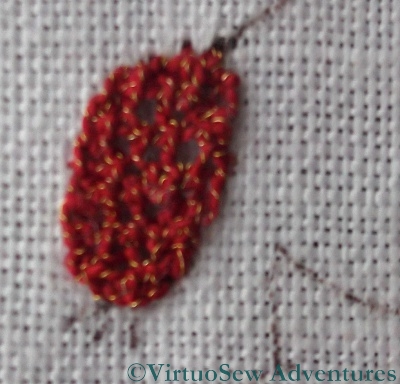
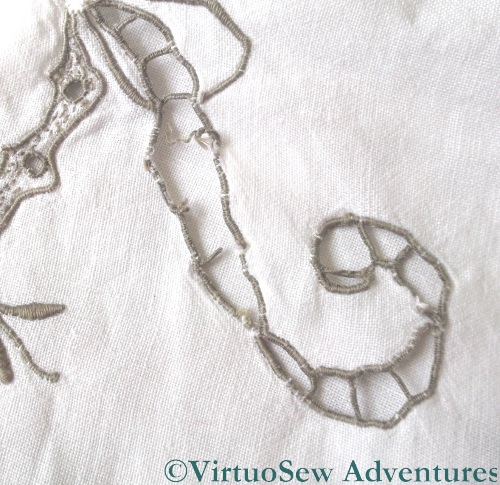
First Bud
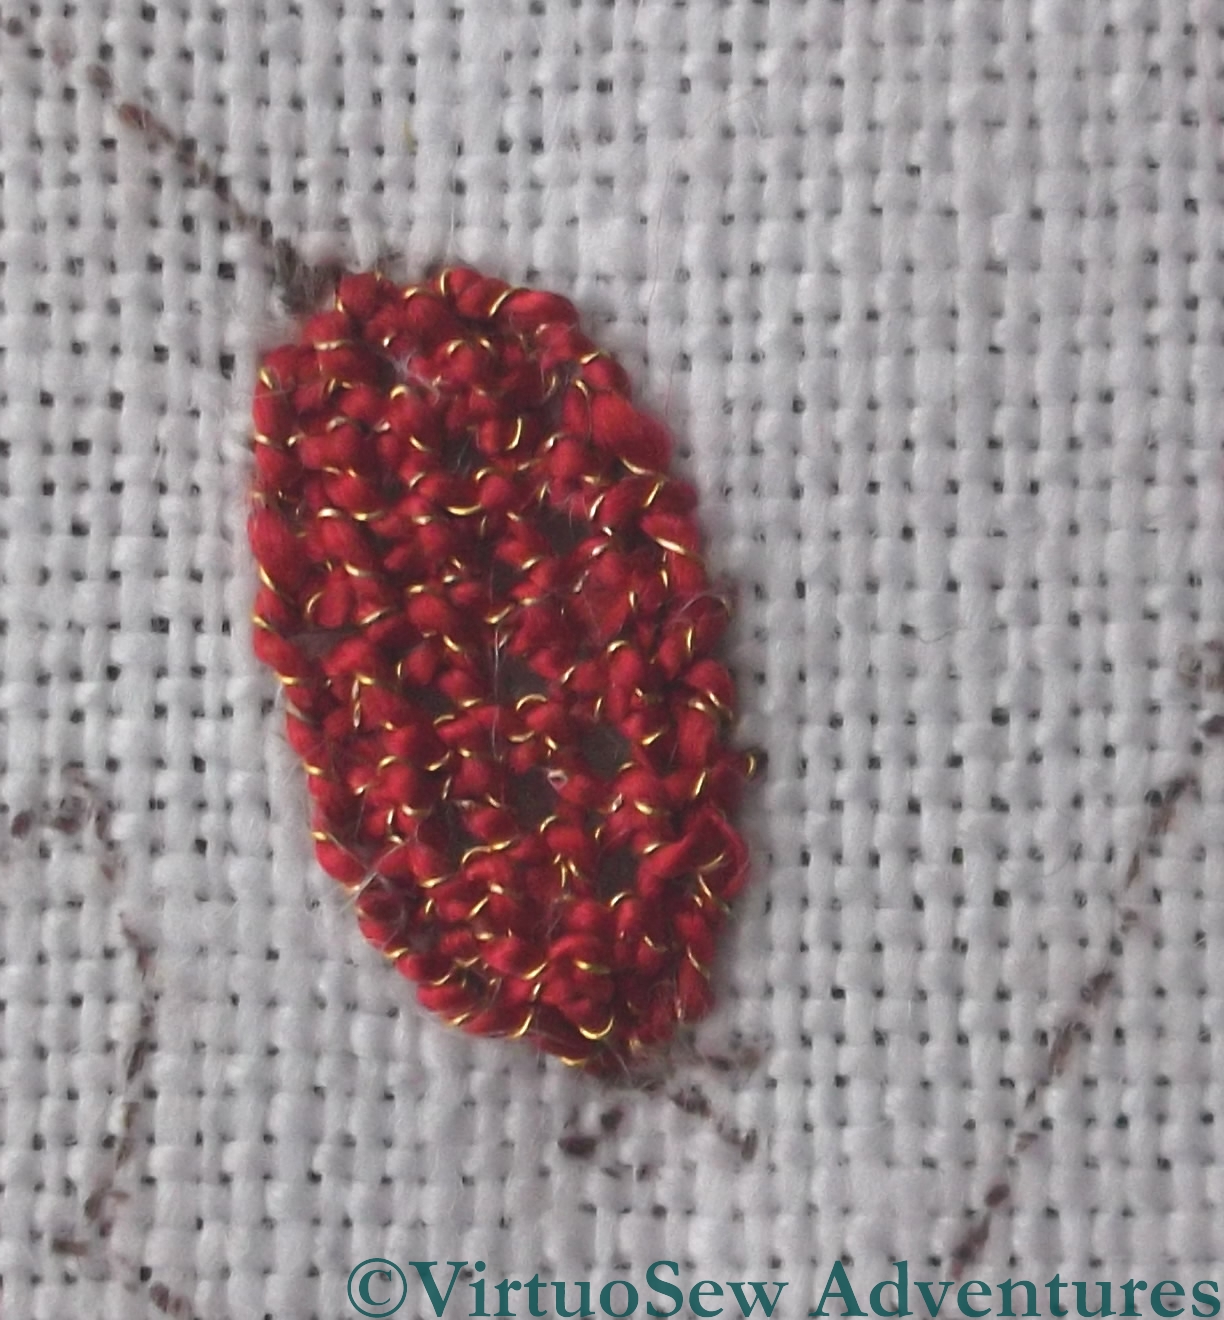
Second Bud
I also did some stitching. These are my first two attempts at Detached Buttonhole Stitch using the Gilt Sylke Twist.
Which is just as hair-raising as anything you might have read will have lead you to expect. It’s very lively and springy, and the gold spiral does sometimes break or scrunch up along the silk.
All that said, perhaps because I was prepared for it, I did not find it as troublesome as I feared, and the second bud is a marked improvement on the first, so I think I can be very pleased!
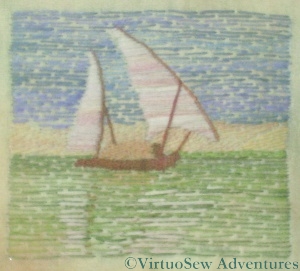
The Felucca
I did say, when I first began working on the “Dreams of Amarna” panels, that I did not intend to become an Egyptologist. I still don’t, but at the same time, my interest in the Egyptology of the thirties, and in what Mary Chubb might have known or had access to, has extended somewhat as I have discovered more.
Recently BBC4 showed a documentary called The Man Who Discovered Egypt, so of course I pricked up my ears. When I realised that the presenter was the current director of the Egypt Exploration Society, Dr Chris Naunton (@chrisnaunton for the Twitterers among you), and his subject was Flinders Petrie, I made absolutely sure to record the programme so I could watch at my leisure. It was fascinating, and I may very well get further ideas for scenes on my edge panels from looking at it again.
For those in the UK that missed it and are interested, the programme is being rebroadcast on Tues 15 May at 10pm, on BBC4.
As it happens, Chris Naunton was the first person I spoke to at the EES when I started my research, so I emailed to say how much I’d enjoyed the programme. He replied, and added that the digitisation of the archive (which gave me the original picture for the Felucca, above) has been continuing apace. The EES now has its own YouTube channel:
http://www.youtube.com/playlist?list=PL85556374907053C0&feature=plcp
Furthermore, some of the film shows JDS Pendlebury, the Director of Excavations in Mary Chubb’s time, not just working, but playing – organising a sports day for the worker’s children, having a spoof argument with colleagues – and, very importantly for me, there is film of an incident which is described in the book, of bringing back a heavily carved and coloured door-lintel from the site to the Expedition House. Whether I will be able to create a feasible embroidery design from that welter of imagery remains to be seen – but it will be really worth a try, won’t it!
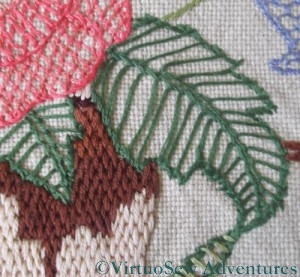
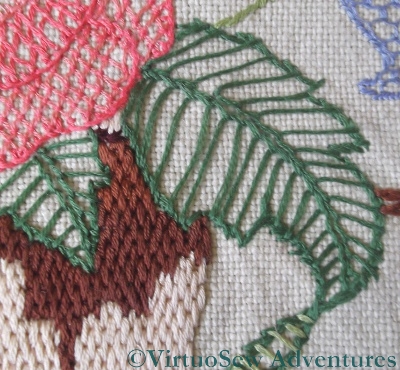
Blanket Stitch Leaf
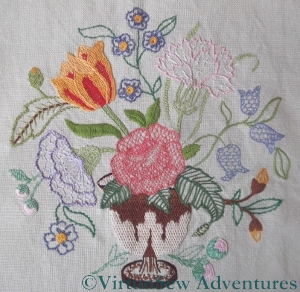
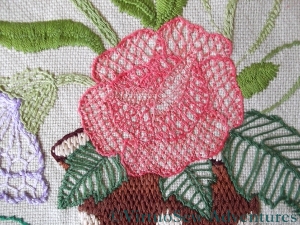
The leaves that went with the Rose were worked in Blanket Stitch, set back to back down the central vein of the leaf, and outlined in Stem Stitch. In fact, if you look closely at the photo it seems that I worked the outline first and then the blanket stitch, stitching right over the outline. The leaf is really rather too large and the stitches ended up a little floppy. I think that now I would work the blanket stitch more closely, but keep it shorter, leaving unstitched fabric between it and the outline.
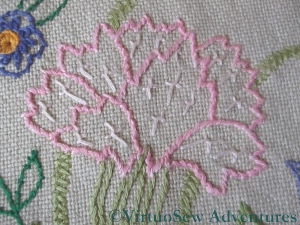
Sword Stitch Chrysanthemum
I’m calling this a chrysanthemum, but heaven knows what it was intended to be! The outline is in Whipped Stem Stitch, using two different, but very close shades of pink. The petals contain scatters of Sword Stitches. I think I would now make the sword stitches much smaller, if I were going to use them, and maybe vary the colours as well. The long skinny leaves that run behind the flower are worked in Closed Herringbone Stitch – strange to see that one popping up when I’ve used it so much in reverse on the Map of Amarna! The calyx is worked using several rows of stem stitch – I’d work these much more closely now, and maybe even use two different colours.
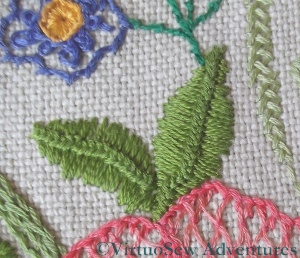
Vankdyke Stitch Leaf
I’ve used Vandyke Stitch for leaves on other occasions as well. It creates a slightly unnatural leaf, because the central vein is raised rather than indented, but it creates a variety of texture that can be very useful.
It can be a slightly tricky stitch to get right, since if the tension is wrong (and it goes wrong very easily!) the central braided spine becomes decidedly wriggly. It’s easier in a round yarn rather than a stranded one, so as I look at these two leaves, I’m really quite impressed with Teenage Me!

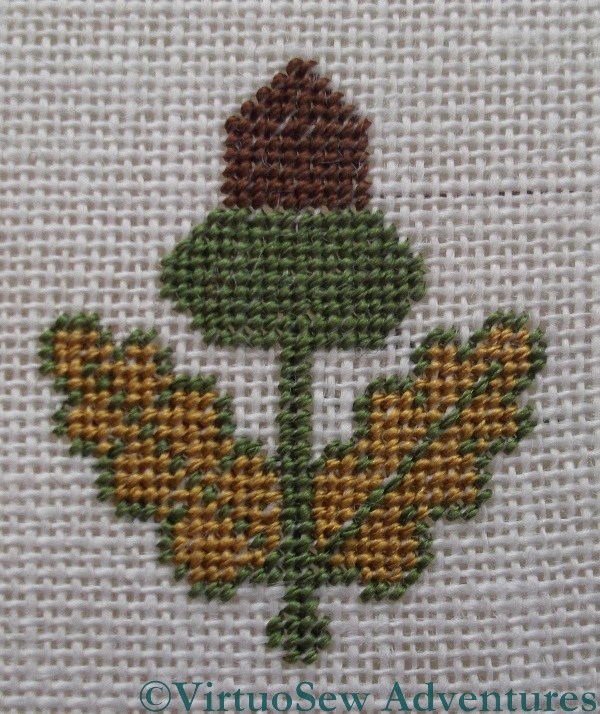
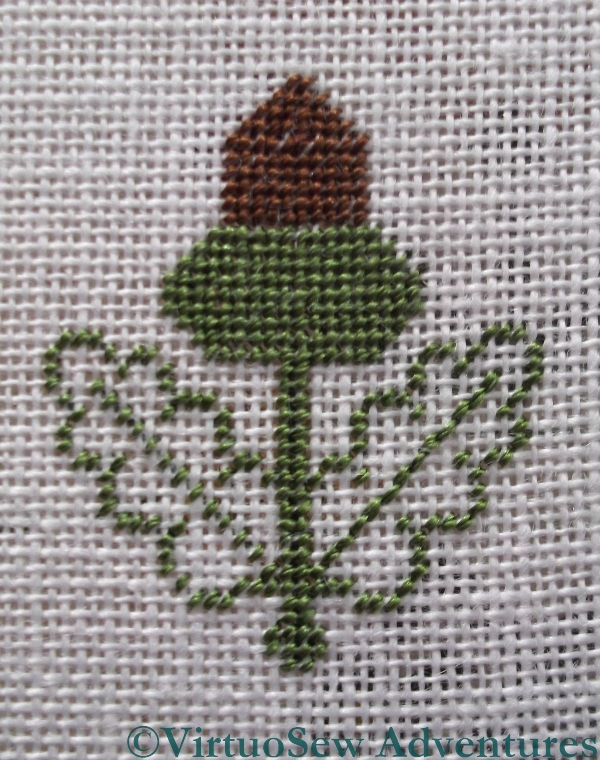
The Acorn Complete
The Acorn itself was finished rapidly, and looks pretty good. For some reason I found it easier, with the second leaf, to work by reference to the first leaf, rather than the chart. You would expect that that would lead to the result being asymmetrical, but I think removing the extra step of checking with the chart was a good idea!
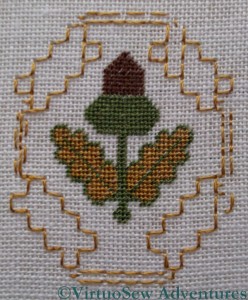
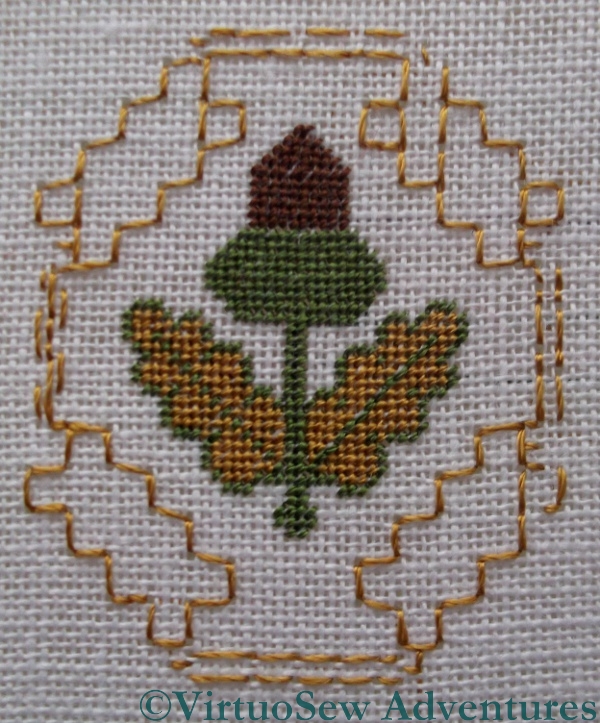
Space For The Gold
The next stage is to work the background, leaving space for the goldwork stitches that will embellish it. I really do not want to have to refer to the chart with every line of tent stitch, so I’ve taken some time to outline the placement of the goldwork stitches in back stitch. Doing this has nearly driven me absolutely mad, but it will means that I will be able to count the background from the edge of the goldwork rather than from the acorn, which will be ever so much easier.
The background is dark green tent stitch, and I will next post about this when I’ve finished it, and started the goldwork stitches. It will take a while. There is only so much dark green I can cope with at any one time!
First Solo
For all that I have shown you a variety of pieces of needlework from when I was Very Young, this atrocious farrago, worked in my mid-teens, is actually the real start of my embroidery career. I found the transfer and fabric in a suitcase of cloth one afternoon when I was looking for something to do as a change from schoolwork. My other hobbies – playing in orchestras, singing in choirs, and dancing lessons – all involved my parents in ferrying me around, and I wanted something I could just pick up and put down again. I doubt that any of us had any idea what was about to begin!
It gives very clear evidence that skill in stitching and in colour don’t always come naturally – although in fairness to myself, I simply pulled threads from my Grandmama’s stash, because I wasn’t yet sure enough that I enjoyed embroidery to spend money on it!
Trellis Rose
I remember that I’d already discovered (I can’t remember how!) that Long and Short Stitch, and Satin Stitch, while simple in concept, are utterly infuriating to stitch, especially if you are learning from a book, so there’s not a scrap of either stitch in the whole thing. I had a great time leafing through Barbara Snook’s “Embroidery Stitches“, which Grandmama had given my mother, and picking stitches to try.
I started bang in the middle with the Rose, outlined in blanket stitch and with the petals filled in with Jacobean Couching. At the combination of scale of the petals and the stitch it looks much too busy, as it turns out, and it would have looked better if I had outlined the petals in a much darker colour to help differentiate them. Lesson learned!
I will write more about this, because although the thing as a whole is rather horrifying, as I look at it I think some of the stitch choices are interesting, but sometimes not quite taken far enough. Besides, it’s extremely gratifying to see that my work has improved very considerably!
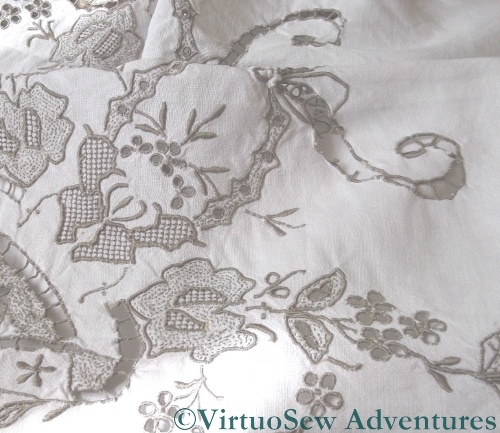
A Cutwork Tablecloth in need of some loving attention
One of the advantages of a family obsession with textiles is that no-one looks at me strangely when I get excited about a fabric, a thread, or a stitch.
One of the disadvantages is that between us we have a good many pieces stitched (probably) by an aunt, great-aunt or grandmother, which have been in constant use for years. Furthermore, as table-linen, if they get dirty, they just go in the washing machine. Usually this simply results in a cleaner cloth, but sometimes forty years of machine washing will catch up with us.

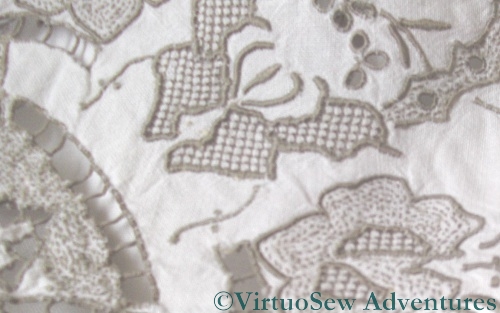
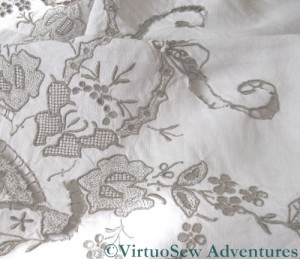
More detail of the Cutwork Tablecloth
We don’t know who stitched this, or even whether it was bought by some ancestress of mine who wanted to rescue it from a jumble sale!
It seems to be a combination of cutwork and pulled work, with some elements I have yet to identify (fortunately I have a whole bookshelf of books to help!), and sadly, it needs mending.

Needs Mending!
As you see! There are buttonhole bars (or are they overcast bars?) which have actually broken, and in order to repair them I will need to reinstate some of the edgings as well.
Then there are other elements of the embroidery that I will need to identify and and replace. As far as I can tell, everything is worked with a single strand of stranded cotton, and would you believe, in spite of a considerable stash, I had to go out and buy some thread to match the existing one!

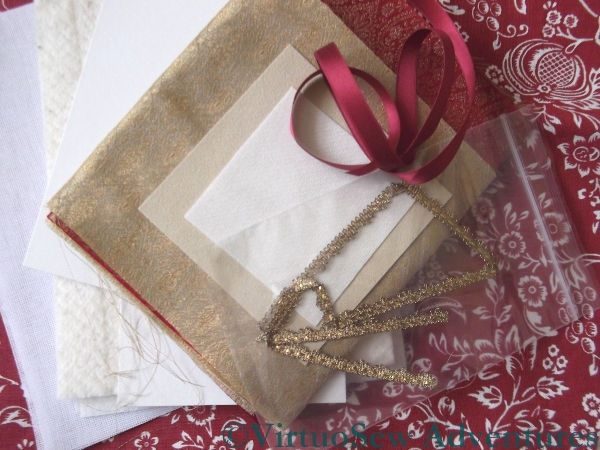
NightCap Finishing Kit
I’m really not keeping up at all, am I?
I’ve not even started on the Glittering Gentleman’s Nightcap course from Thistle Threads, and then the finishing kit drops through the letterbox, rather rubbing my nose in the fact.
However – now I’ve finished the Masterclass, I can get started – only about four months late!
The package contained more mouthwatering silk brocades (one creamy-beige, one burgundy), more of that lovely silk ribbon (like the ribbon on the Floral Glove Needlecase) and gold lace (ditto), together with assorted pieces of stiffening and padding, and – a sort of bonus – a canvas shopping bag printed with a suitably period pattern.
Time I got started on the embroidery, then…
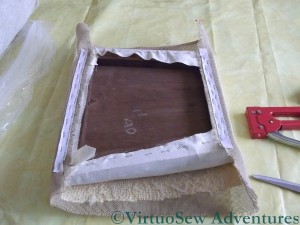
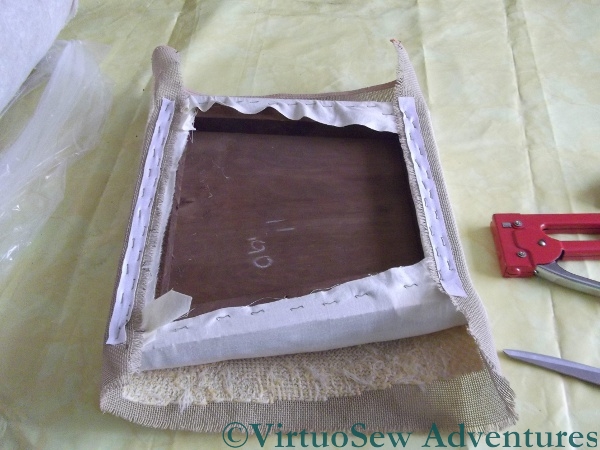
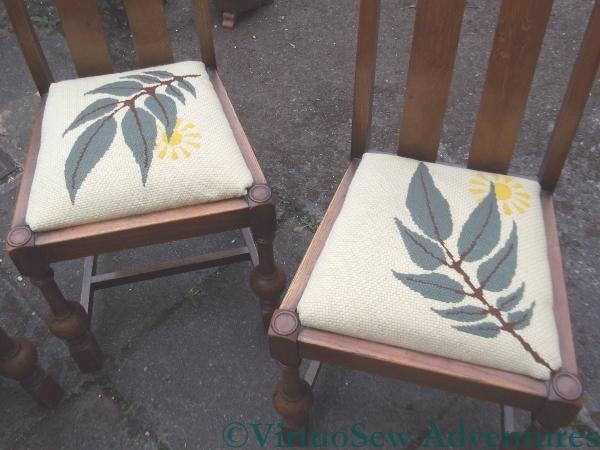
Using The Staple Gun
You may recall that I decided to finish off the canvaswork seat covers for the dining room. That entailed, removing the existing corded velvet covers, so I decided to increase the padding on the seats while I was at it. So I added a couple of thick layers of cotton linterfelt, and covered it with calico.
I’ve had some real upholstery done recently, and the upholsterer told me that staple guns cause less damage to the wood than nails (obvious, when you think about it), so that’s what I used.
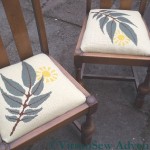
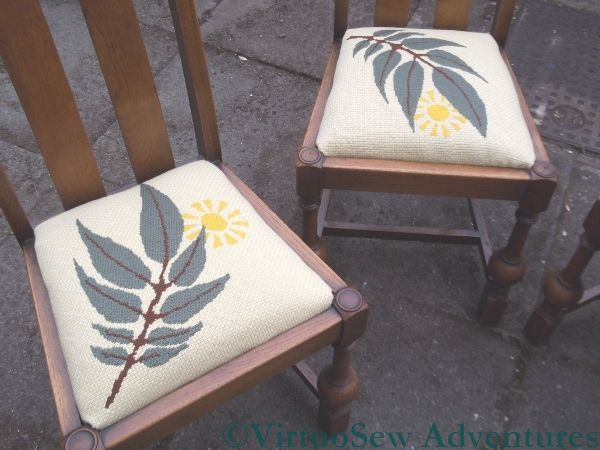
First Pair
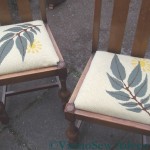
Second Pair
The staplegun has a kick like a mule, so the job had to be spread out over a couple of days. Getting the tacks out of the last set of covers took a day all by itself, so I have stapled it through some cotton tape, to prevent whatever I may use in the future catching on the threads of the canvas.
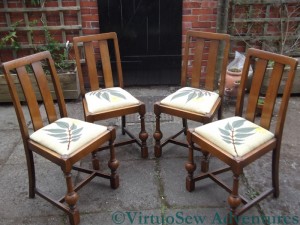
Finished Chairs
The Acorn Begins
The Golden Accessories is a set of bonus instructions for three needlework accessories which was supplied with the Tudor and Stuart Masterclass, and now that the Petite Pincushion is finished, I’m starting on the first of them.
The silk work seems to be entirely in tent stitch, so, although the fabric is very fine, it will be simple enough to work. The cold snap at the beginning of the year has roughened my hands, so the silk sometimes catches a little – but in fact, surprisingly little, and at least the wristwarmers make stitching possible at all!

Acorn - First Stitches
I’ve been fortunate, since the weather has been kind, giving me good light to stitch by. So good, in fact, that the first two colours seemed to be stitched in no time at all, leaving me positively flabberghasted by my progress. Strange to say, although tent stitch has never been a favourite of mine, I’ve thoroughly enjoyed starting work on the Acorn – I think it is something to do with the silk thread, which is just gorgeous to work with!
Pyjama Case
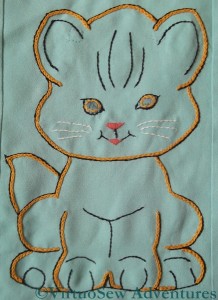
Grandmama must have worked embroideries galore for her assorted grandchildren. This pyjama case with a chubby kitten on the front was worked for me – I think as a birthday present – when I was about nine, and I’ve rediscovered it among a host of other reminiscences of childhood.
You can see the lingering “Make Do And Mend” ethos of the wartime years when she was bringing up her own family in looking at the whole thing, which is actually pieced together to create the final, full size of the pyjama case. It’s worked on a synthetic crepe, too, which many embroiderers today would tend to despise.
However, if you zoom in on the picture, you will be able to see the legacy of her teacher Miss Hunter in the beautifully even stitches of the embroidery (nothing complex – chain stitch, stem stitch, and satin stitch). That legacy is also apparent in the care that Grandmama took in lining it just as beautifully. She’s even sewn tapes to the inside of the case so that the strain on the press studs is reduced.
I’d almost forgotten about this piece and I was thrilled to find it again!
As from today I am going down to just one post per week. I’m planning a lot of work on the house, and I don’t want to be resenting lost embroidery time. Not least, the ultimate goal is to have a studio, or at least a studio corner, so eventually the work should result in a better life for my embroidery. I will still be embroidering, and still writing posts (I’ve found more of Grandmama’s bits and pieces, too!), but I hope at a slightly more relaxed pace.