
Tag: sword stitch
First Voluntary Project – Second Installment
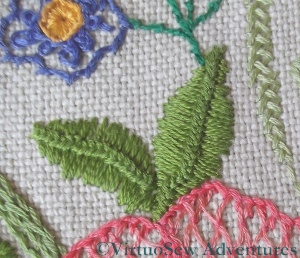
Blanket Stitch Leaf
The leaves that went with the Rose were worked in Blanket Stitch, set back to back down the central vein of the leaf, and outlined in Stem Stitch. In fact, if you look closely at the photo it seems that I worked the outline first and then the blanket stitch, stitching right over the outline. The leaf is really rather too large and the stitches ended up a little floppy. I think that now I would work the blanket stitch more closely, but keep it shorter, leaving unstitched fabric between it and the outline.
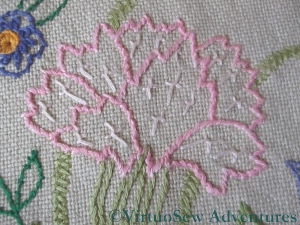
Sword Stitch Chrysanthemum
I’m calling this a chrysanthemum, but heaven knows what it was intended to be! The outline is in Whipped Stem Stitch, using two different, but very close shades of pink. The petals contain scatters of Sword Stitches. I think I would now make the sword stitches much smaller, if I were going to use them, and maybe vary the colours as well. The long skinny leaves that run behind the flower are worked in Closed Herringbone Stitch – strange to see that one popping up when I’ve used it so much in reverse on the Map of Amarna! The calyx is worked using several rows of stem stitch – I’d work these much more closely now, and maybe even use two different colours.
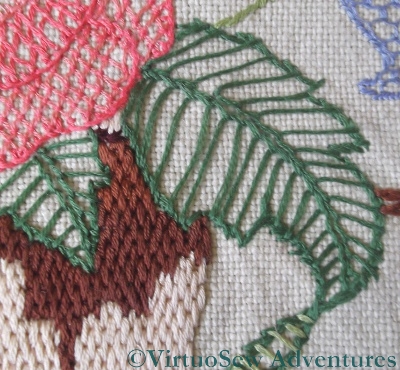
Vankdyke Stitch Leaf
I’ve used Vandyke Stitch for leaves on other occasions as well. It creates a slightly unnatural leaf, because the central vein is raised rather than indented, but it creates a variety of texture that can be very useful.
It can be a slightly tricky stitch to get right, since if the tension is wrong (and it goes wrong very easily!) the central braided spine becomes decidedly wriggly. It’s easier in a round yarn rather than a stranded one, so as I look at these two leaves, I’m really quite impressed with Teenage Me!
Stitching the Persian Fantasy – Four
There was so much going on that I consciously reused yarns, colours or stitches across the four panels in order to maintain some semblance of order. In fact as I moved on to each panel I would lay the completed ones side by side on the living room floor and scramble around putting piles of coloured threads on them. It must have looked highly comical, but my parents (I was still living with them when I embroidered these panels) were kind enough not to laugh. Besides, as long as it works…!
Crags worked in Caron Collection "Storm" (I think!)
I chose to use one of the Caron Collection threads for the basic outlines of the closer landscape, using Up and Down Blanket Stitch, my favourite blanket stitch variation. I’ve done a bit of hunting because it’s one of the more obscure variations and finally found it at the bottom of Sharon B’s Stitch Dictionary page on blanket stitch variations. For the further landscape or clouds (I never did quite work out what they were), I used a different colour range but the same stitch.
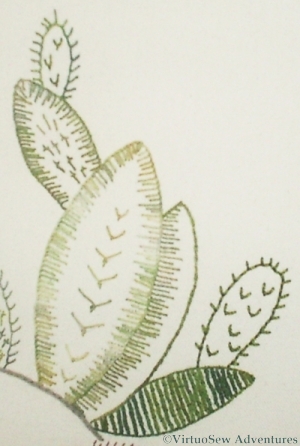
Some of the Cactus Plants
The cacti were worked in a variety of stitches, partly based on the lines of the original transfer, but then extrapolated as the stitches and threads suggested themselves. Although I did use several variegated threads in the flowers and the cacti, most of them are pearl-cotton types, and there is a certain unity provided by the use of the same set of threads wherever those forms appear. There are fly stitches, feather stitches, blanket stitches and sword stitches in this small section. I’ve diagrammed Sword Stitch at the end of this post.
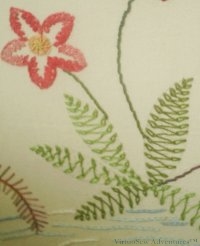
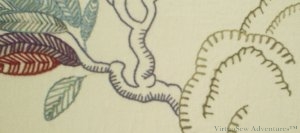
Large flowers with leaves worked in Chained Feather Stitch
The leaves for the largest flowers were worked using chained feather stitch – I had never worked it before and thought it looked fun. I caught down the long connecting stitches with a single strand of cotton, and was delighted to realise that that gave me the effect of a shadowy vein – one of those serendipitous effects that one cannot foresee, but only rejoice in.
The large flowers had centres of Whipped Spiders Web stitch and the outlines were worked in Rosette Chain stitch. The stems were simply a very heavy rayon cord, couched in place. They may well have been the most straightforward element of the entire four panels!

Sword Edging, or Sword Stitch
I couldn’t find a diagram of Sword Stitch on the internet anywhere so I spent a bit of time with a vector drawing package and Barbara Snook’s “Embroidery Stitches”, published by Batsford in 1963. I’ve redrawn the diagrams, changing them slightly where I thought the original used a strange order. When working a row, she seems to recommend working from right to left. The only other advice she gives is that the longest arm should point downwards – clearly that is the blade of the sword.