
Tag: Dreams of Amarna
Overlay experiments
You may recall that I spent some extra time trialling other methods for creating the overlays. My original screenprint idea had long since been abandoned, partly because the past five years when I’ve been painting as well has given me much more confidence in myself, and partly because finding somewhere to make such big silk screens – as a one-off, what’s more! – was proving impossible.
When I’d looked again at the first overlays I used in the first photoshoot, it was clear that they wouldn’t survive much longer, so I thought I would try with my acrylic inks. I cut stensils and dabbed, I used brushes and painted, I played with pre-wetted fabrics and with spraying the fabric with water afterwards.
In fact, I had several wonderful messy days.
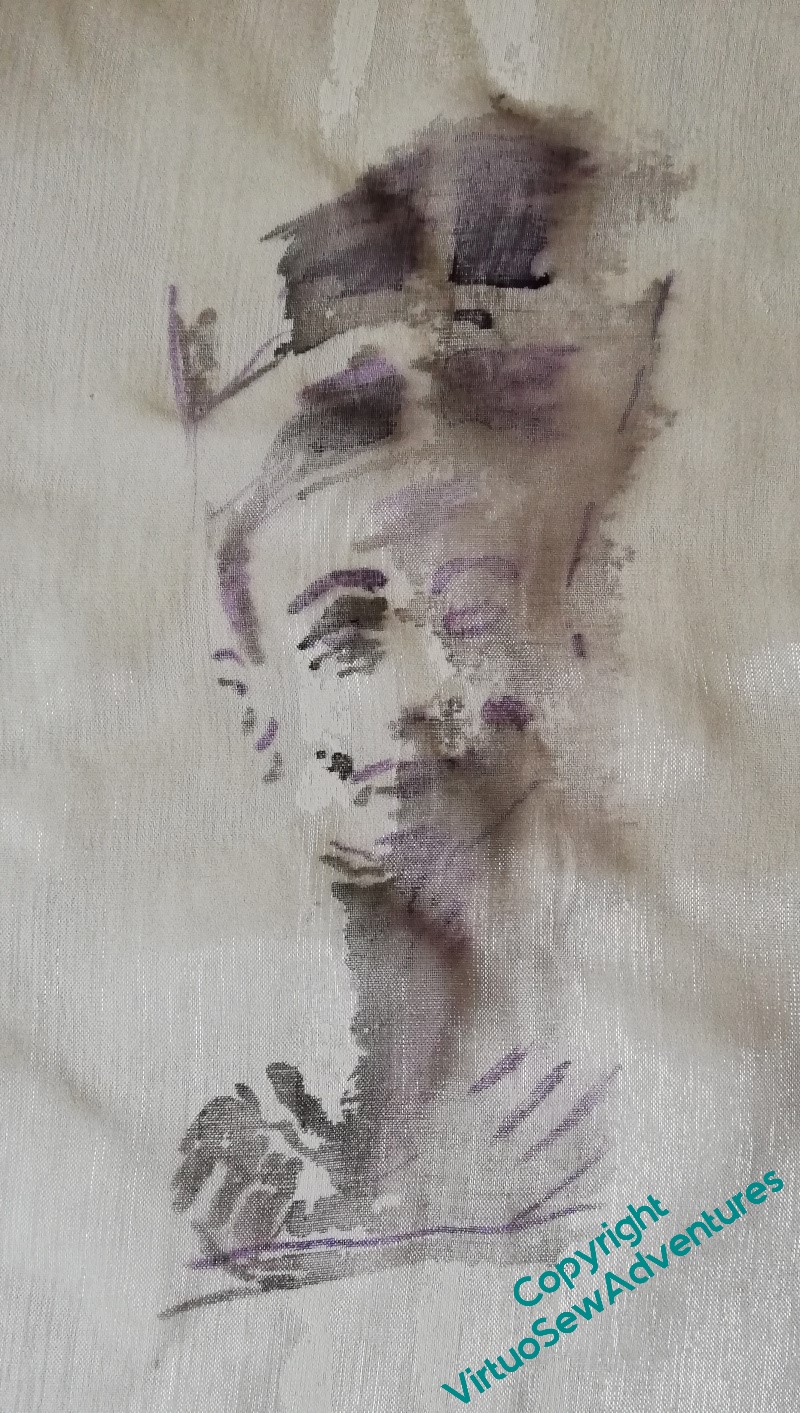
And as you can see, some of them were really striking, and wonderfully vague, and set against a plain background the washed out and tendrilly ones do create the appearance of decay and dissolution which is appropriate. The Amarna period was washed out of history in ancient times, and while Akhenaten has had the last laugh, for centuries his name and that of his Great Royal Wife were never spoken.
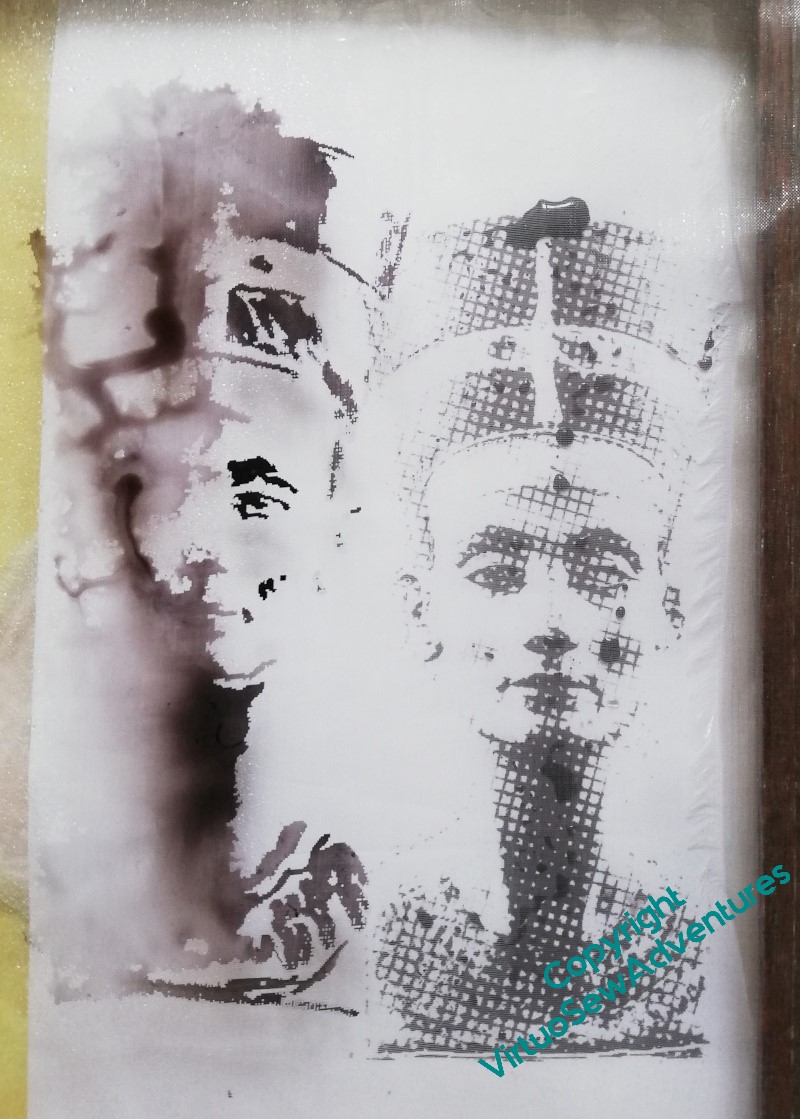
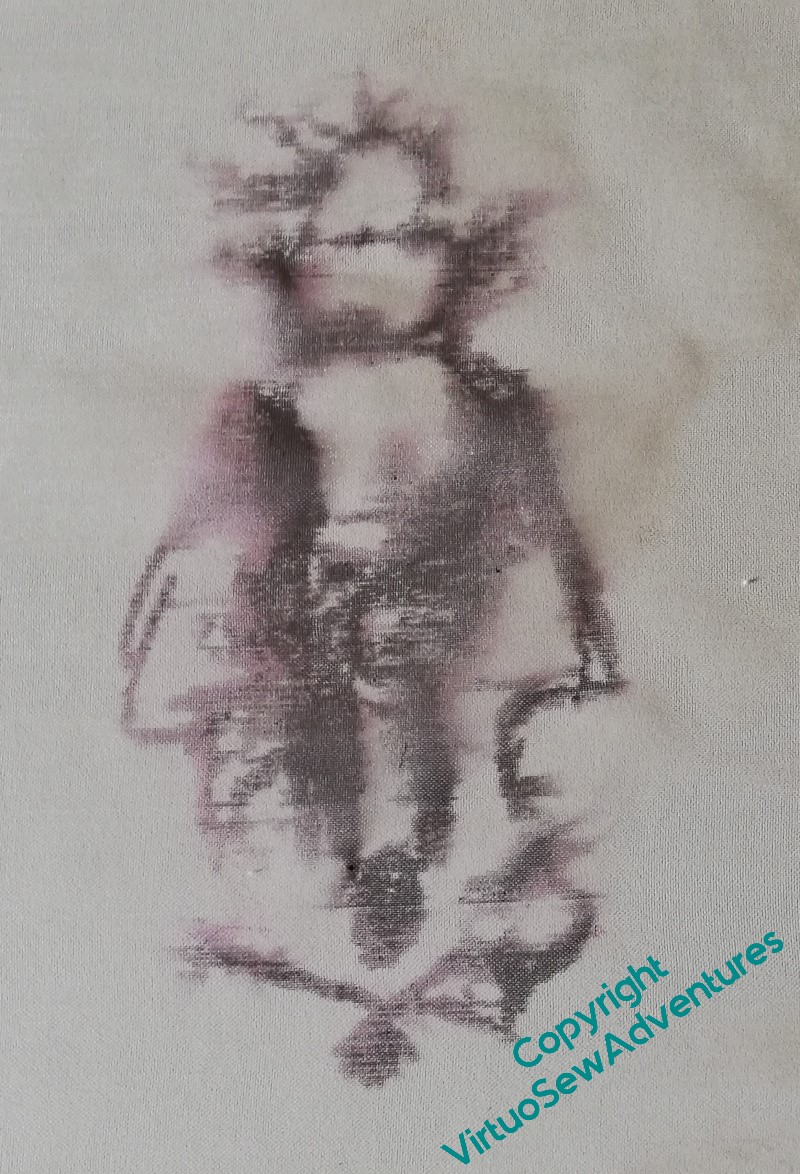
However, set in front of the embroidery, they confused the eye too much. The one on the left is too detailed, the middle one is seeping away before our eyes, and the one on the left has acquired spotches I never intended.
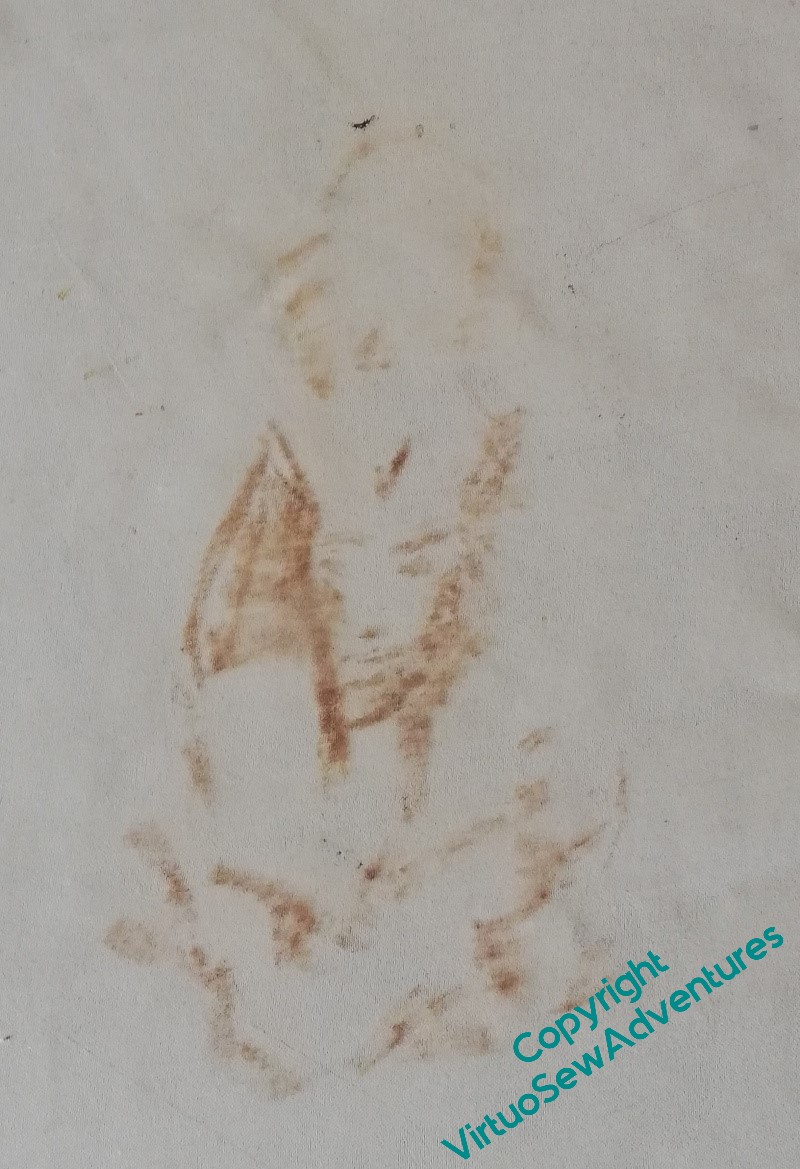
And then there was this one. I had thought that using a brown or sandy colour would aid the “there and not there” appearance.
It certainly nailed “Not there” – it didn’t really show at all!
So in the end, as I described, I went back to the inktense blocks, but with the added support of some pastel fixative. Since I’ve used the fixative, and the overlays are now stretched over frames and not subject to abrasion in storage, I hope very much that I did indeed find the best solution.
But if anyone tries to tell you that artists and designers get it right first time – don’t believe them!
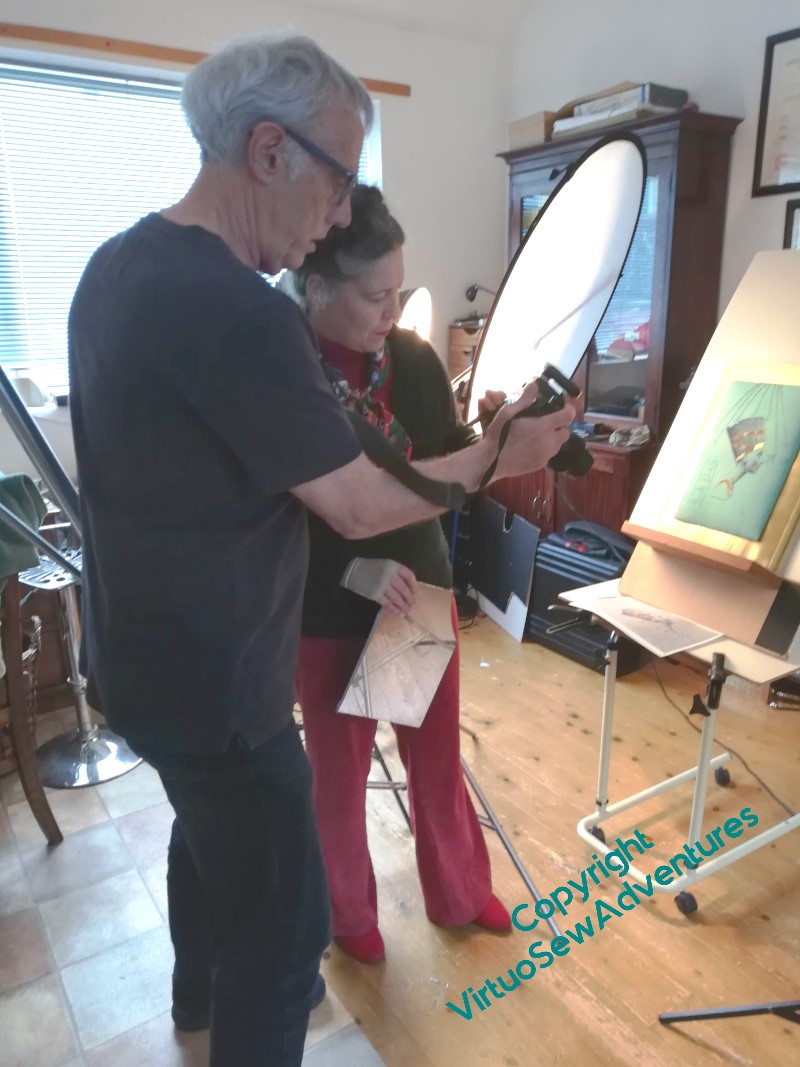
Another day of photography (second helping)
The complication of the overlays against the panels is introduced by the facts that the overlays are slightly bigger than the panels, they are transparent, and the overlays themselves are heavy. In any final display, the overlays will be screwed to the wall, but we couldn’t do that in Bernard’s studio!
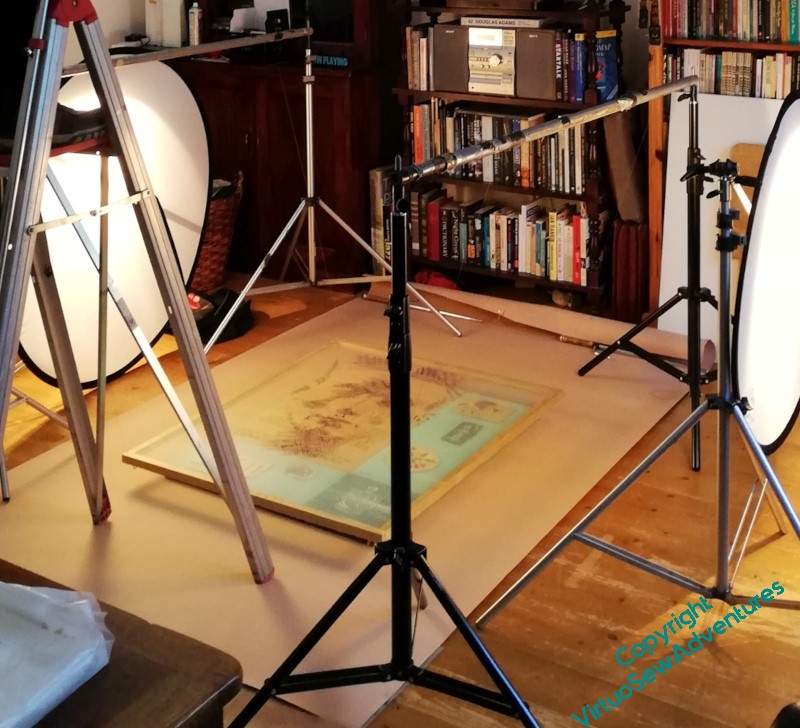
When we took the original photos, the panels were put on the very edge of a table, tied using fishing line through that convenient gap between the lower panels and the higher ones to an extremely heavy tool box, and with the background hanging behind. Since I wanted to include the frame of the overlays, that wouldn’t do.
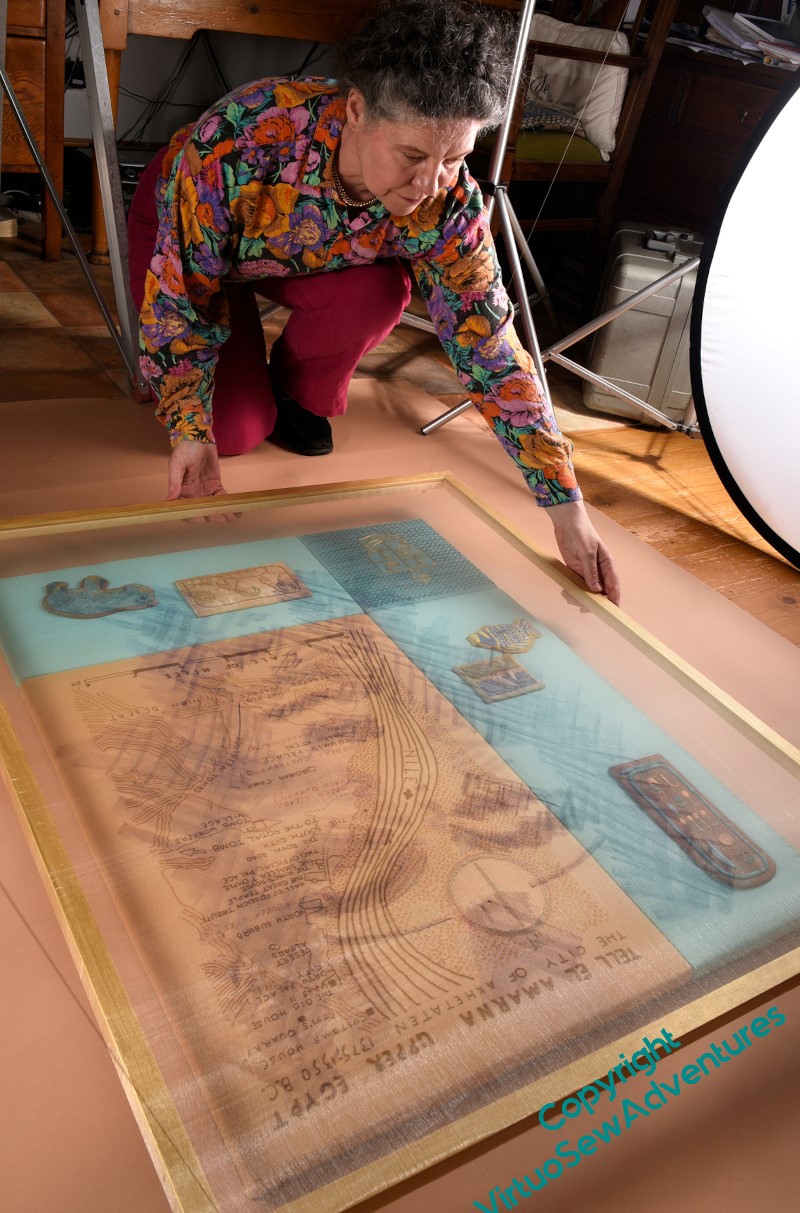
So here is what we ended up with! A section of background is laid on the floor, with the panel laid on it. Then we set up a set of tripods on either side, poles between them, and ran a length of fishing line from pole to through eyelets in the back of the frame. We get the shadow that reveals the overlay to be a separate thing, and several ways to adjust the whole thing until it works.
It did rather turn the studio into a low-budget version of that scene from the film Entrapment where the cat burgler is practicing avoiding a mesh of lasers with a mesh of strings with bells on, but that just meant a certain hilarity entered the proceedings!
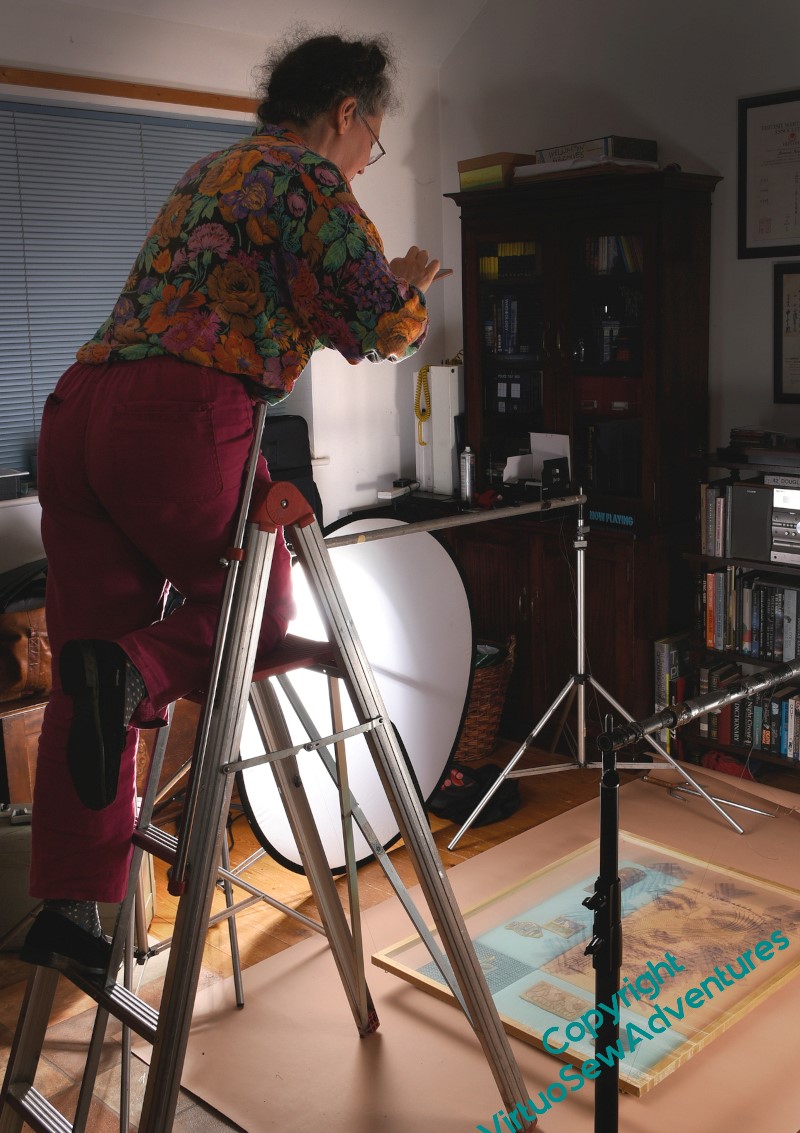
It also meant the deployment of a ladder for the viewpoint to be high enough. It’s a proper ladder for the purpose, and it was sturdy enough – Bernard was happily standing on the platform at the top to take the final shots, which I wasn’t quite up for, as you see.
I do think the set up will produce the right photos for the purpose, but my goodness, photography really isn’t “Just Point And Shoot”. Bernard also tweaks the raw files to make sure that they bring out what he saw when he took the photos, which means that we have something really good to start from. Technology has improved immeasurably since Mary Chubb’s time, but even so, there are losses in quality as you add processes, and to have something decent at the end of a sequence of design, layout, and printing processes, you have to start with something really excellent.
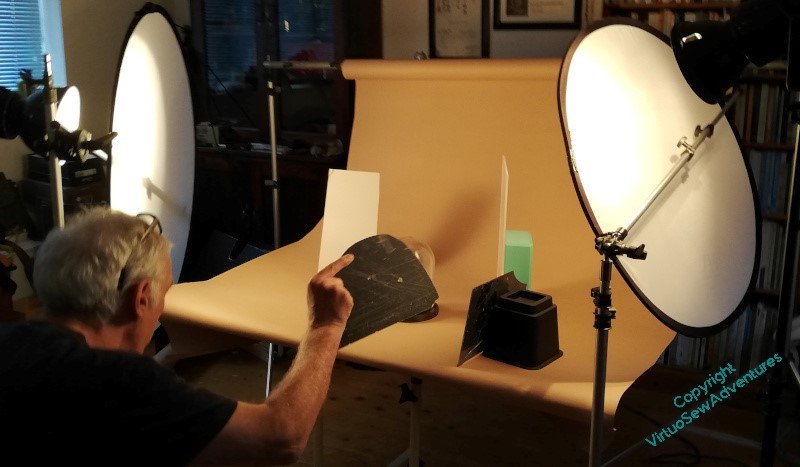
Another day of photography (first helping)
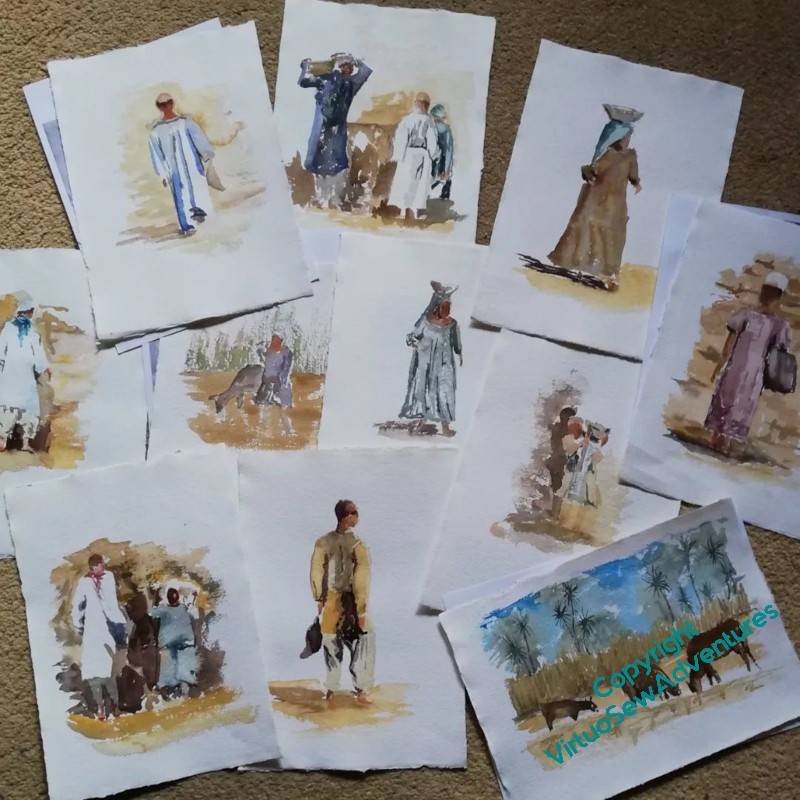
I’ve been working hard on the manuscript of the book I’ve written around the Dreams of Amarna, and one of the things I want to do is stitch the story together with pictures of the ordinary Egyptians working on the dig. They are honoured in the stitchery (View of the Excavation and Loading The Felucca), but that didn’t seem quite enough.

So I’ve been doing lots of little watercolours of labourers, basket carriers, and fragments of the dig and the scenery, and now I’ve sorted out the overlays (there will be more about my experiments with ink and inktense later), I bundled up the whole kit and caboodle and took it across to Bernard Rose Photography to see what he could do.
We rattled through the watercolours in fine style, as apart from occasionally flattening a piece of paper (I tend to paint a bit sloshy…!) there was little adjustment needed.
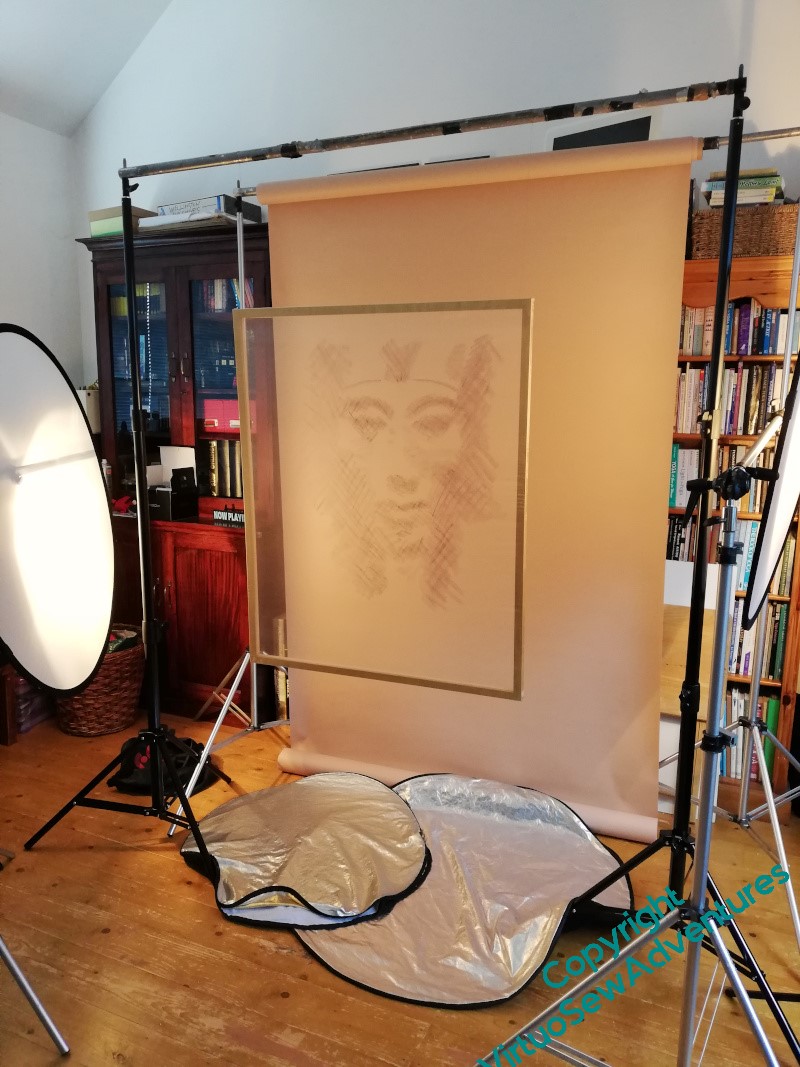
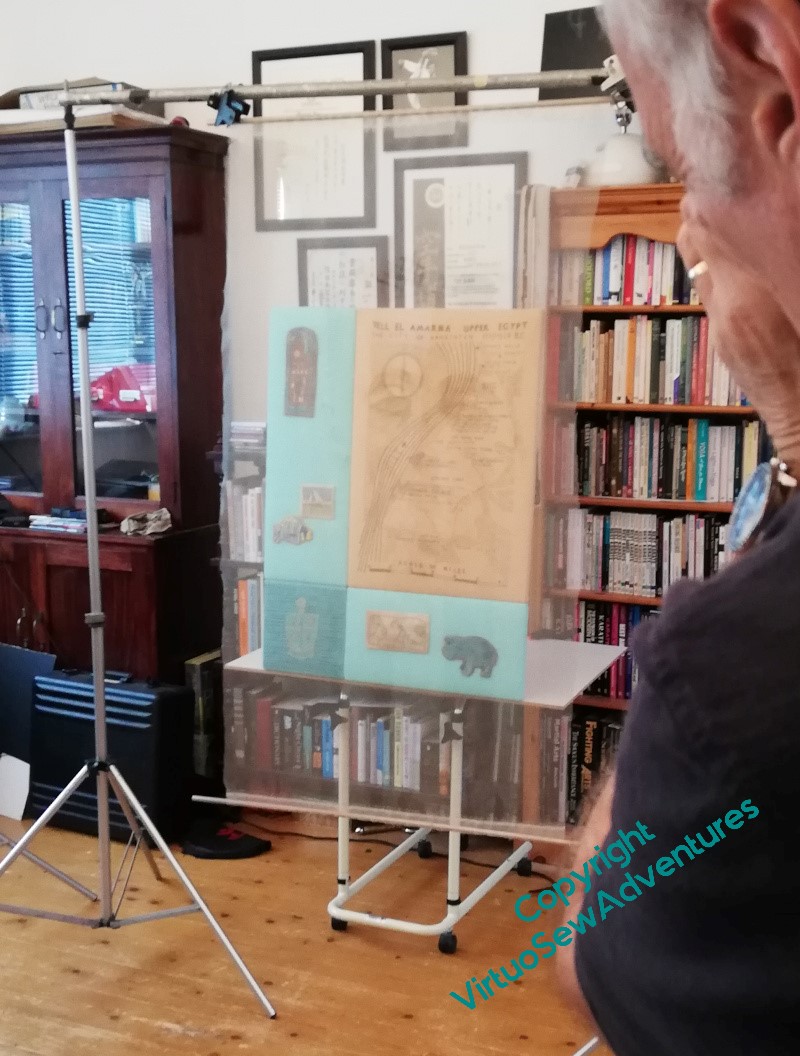
Then, however, matters became more complicated… The overlays are big, and the fabric is slightly shiny, and I hadn’t worked out how to hang them. So we started with the easy bit – overlays on their own, in front of a background. You get a hint here of the reflectors spaced all around, and just the general sense of engineering involved. There are two pairs of tripods with poles between them, one with the background, the other supporting the overlay, suspended on fishing line through eyelets. Then there are the tripods with the diffusers on, and out of shot, there’s the tripod with Bernard’s camera in place.
Design placement for the overlays
So, we left the overlays mounted, but determining placement wasn’t entirely straightforward.
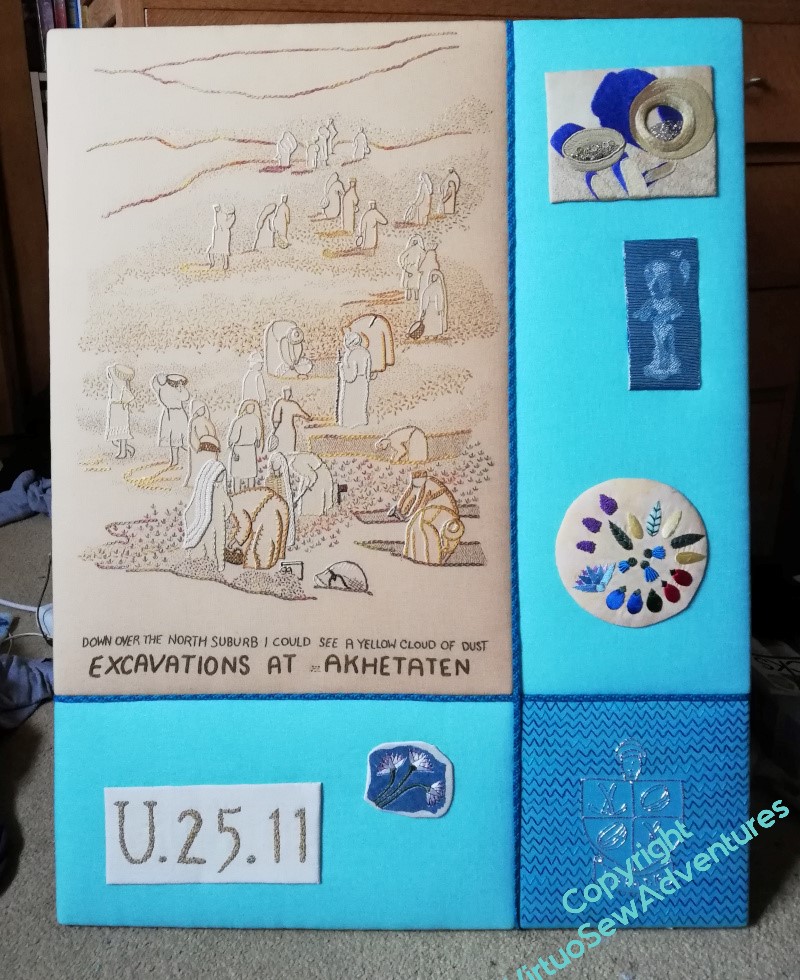
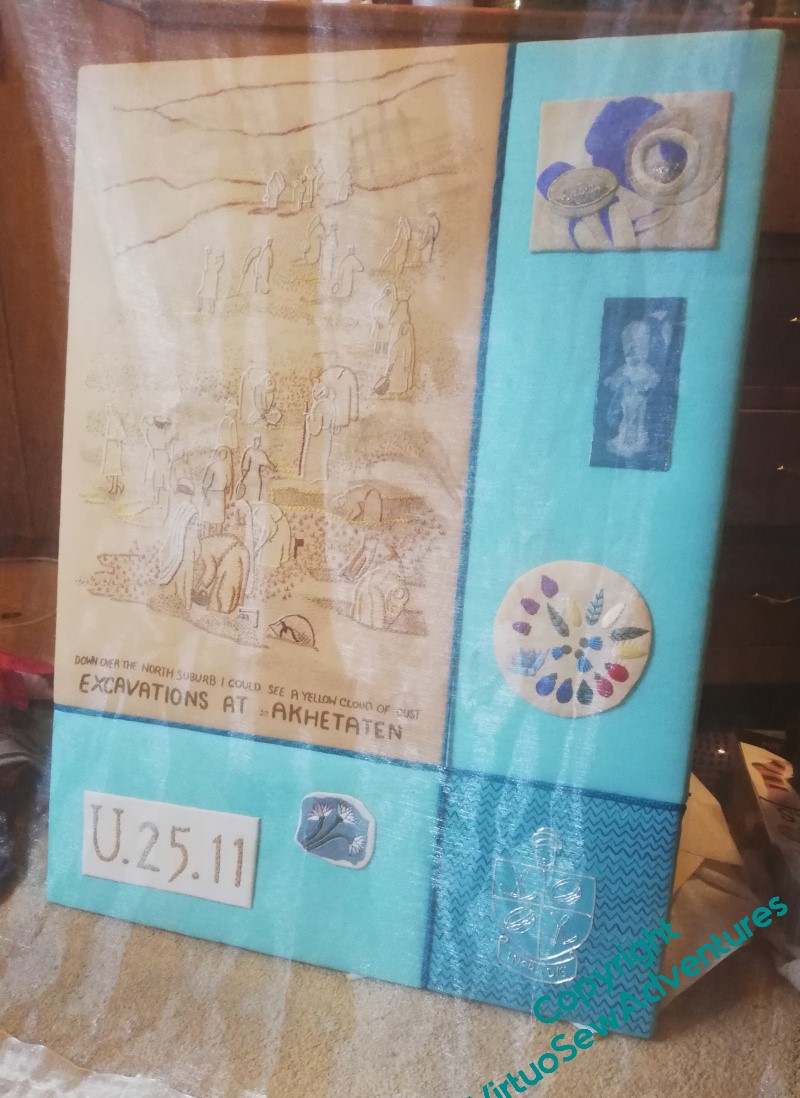
I didn’t want the images of Akhenaten and Nefertiti over the whole panel, just over the sandy part of it..
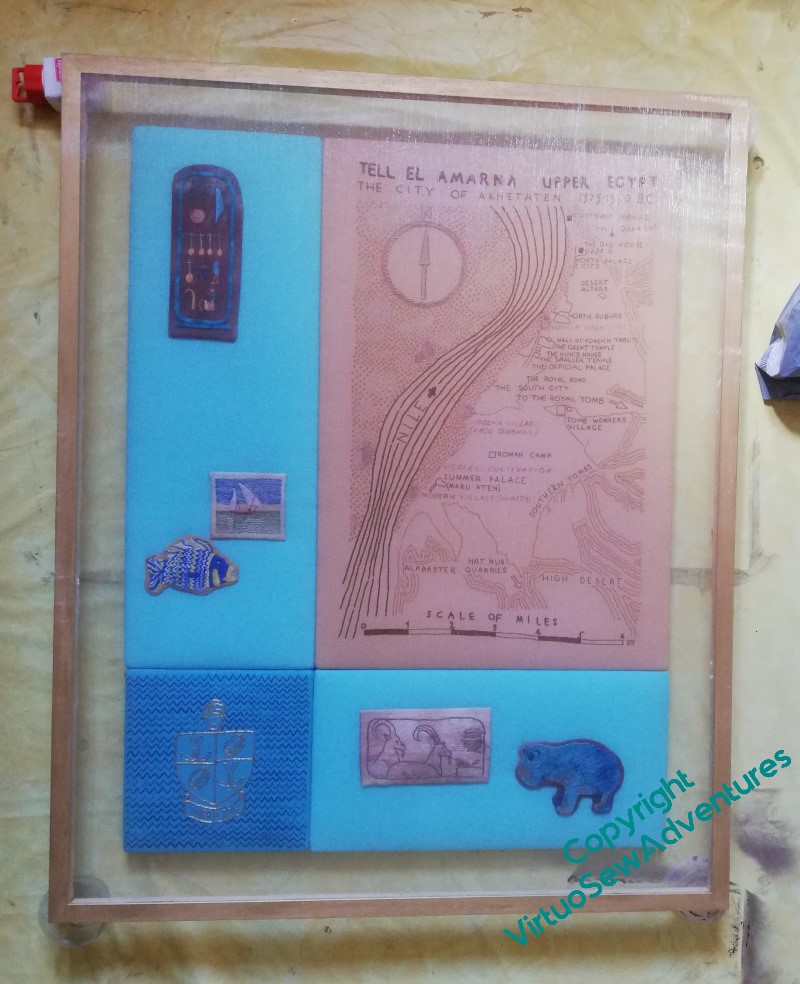
So once I was happy with the mounted gauzes, the glue was dry, and the glue pot firmly shut, I got the panels out, laid them on the floor and found some little pots to hold them up at the corners.
You can see from this photo that the gauze is fine enough that it is not going to interfere with the view of the panels – except for those who want to examine very closely, and I think we are going to be able to come up with something for them!
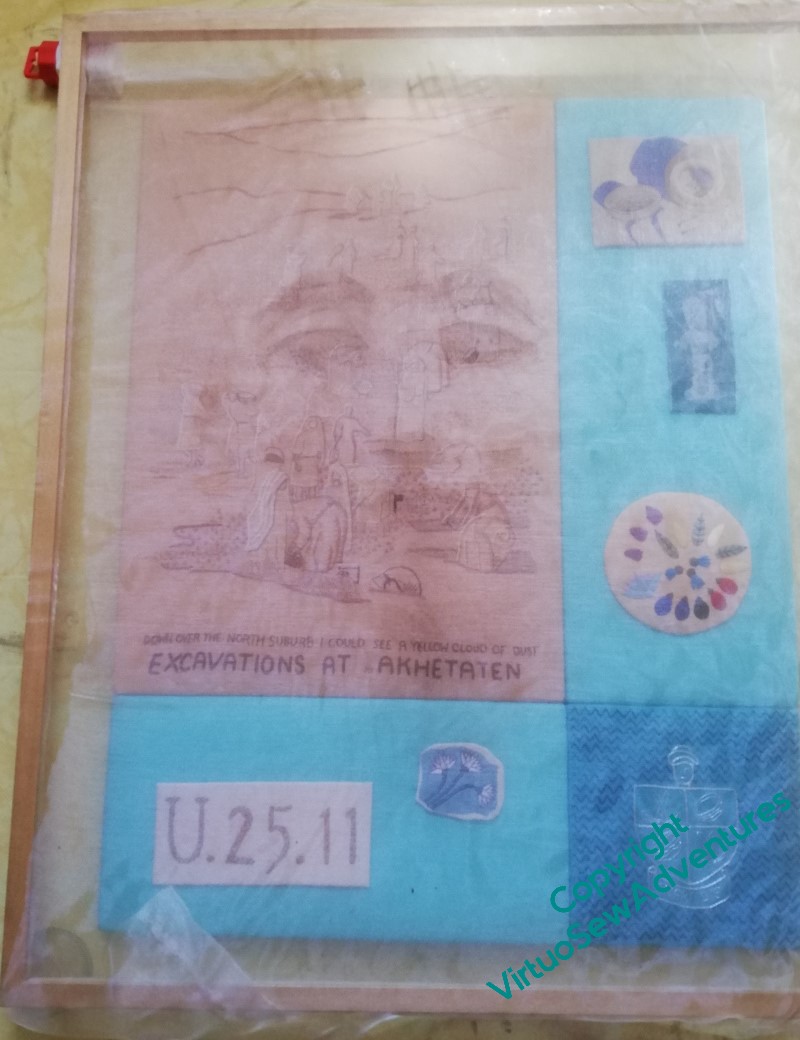
The mounted gauzes are bigger than the panels, deliberately, so I had to take that into account as well. You can see that I’ve not got Nefertiti quite right here – I was using the old overlay to work out placement – she’s too close to the centre.
Once I’d worked out where they were to be placed, I took copious notes. I had to work on the images from the back, because of the size of my padded mat, so I not only had to make sure I had the right placement – I had a story in my head for who would be in front of each panel, and they weren’t interchangeable!
A closer look at the overlays
It occurred to me that I rather skipped over quite a few elements of the rather haphazard development of the overlays, and a slightly closer view of the way the overlays have been managed might be rather interesting, at least for some of you, so here we are.
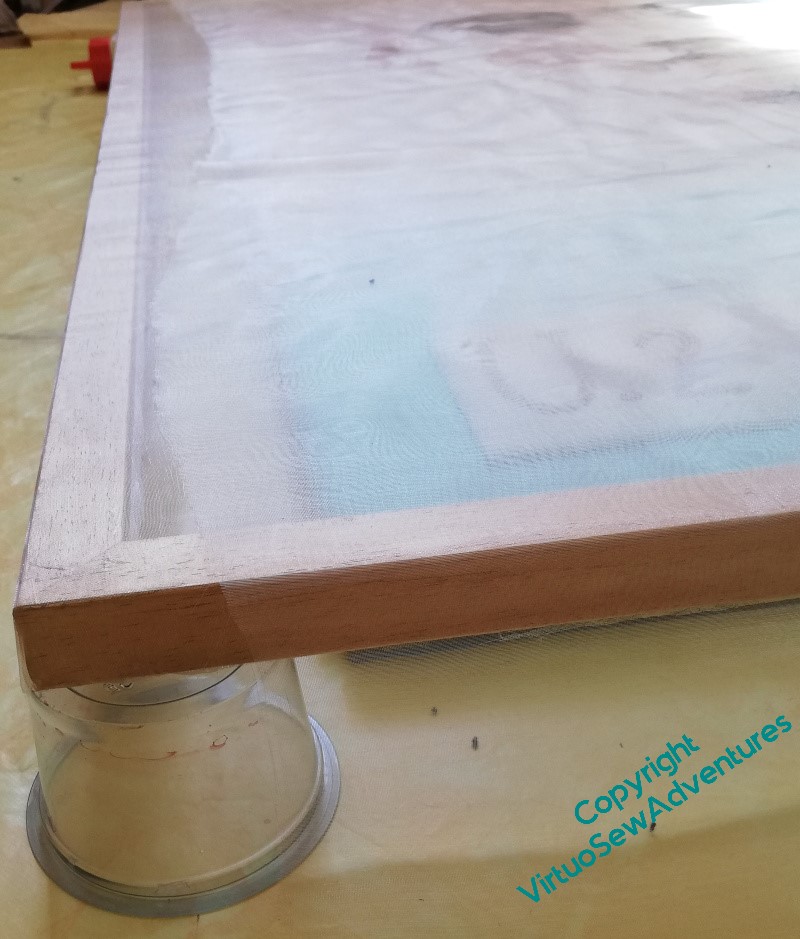
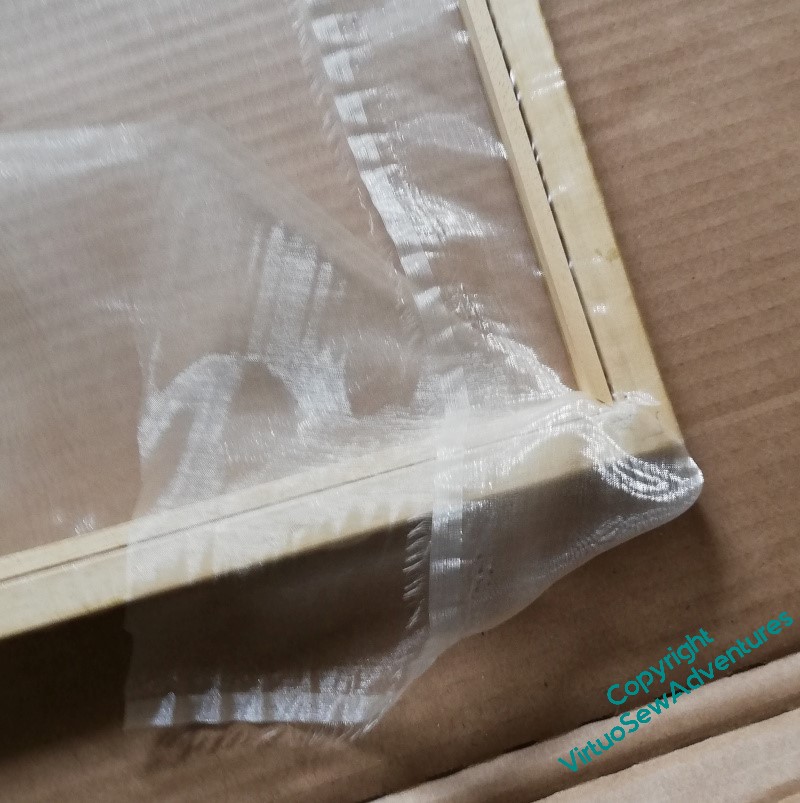
In fact I got the framer to make two frames, one the frame that will be seen, which is what I painted gold, and the other a fillet, very fine “infill”, in effect, that will not be visible, but will be part of what keeps the gauze tensioned and in place.
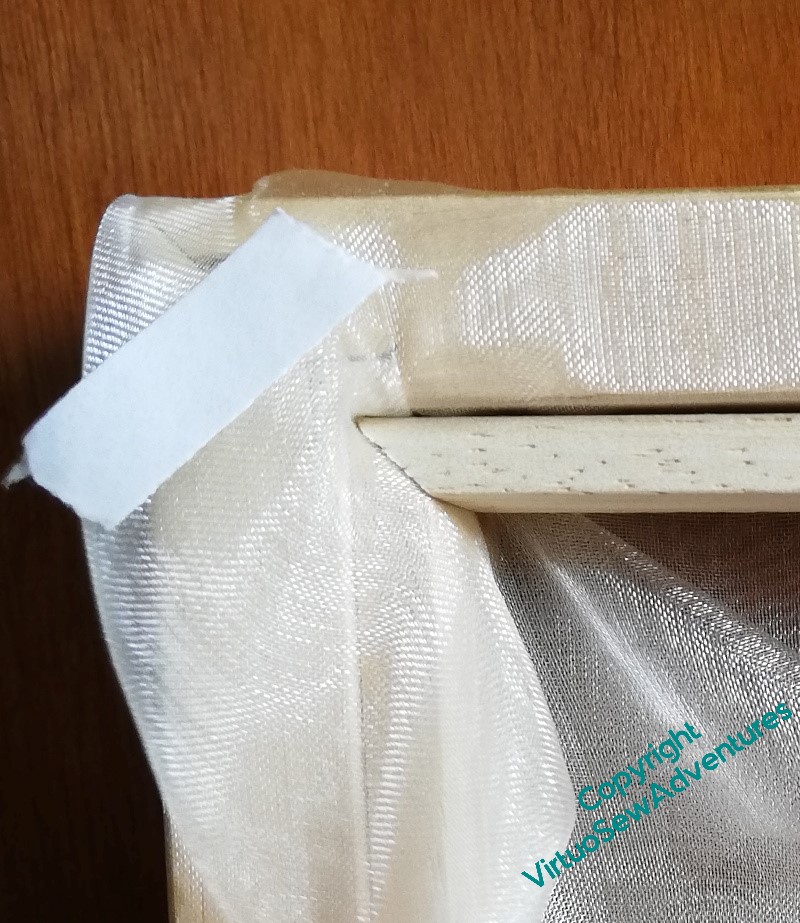
Here is a close view of the corner. This is the point where I had quite a bit of wrangling to do. The gauze stretches over the front of the frame, and around the back, and is then caught into the ledge that would normally hold the glass. There is double sided table on the frame, and double sided tape on the fillet, and in effect I used it to tack the gauze in place.
So I worked from front to back, and around the frames, to make sure that the gauze was taut, and on the straight grain. Then we (at this point, The Australian was acting as Studio Assistant!) hammered nails through the fillets and the gauze and into the frame. And then turned it over, all panicky in case something had sagged.
Which, fortunately, it hadn’t. So then I spent a bit more time wrangling the gauze, gluing and trimming it in place. In fact as long as the glue holds long enough to keep the gauze held back until it doesn’t want to straighten into odd directions, that will do me, but the other advantage of copiously gluing the gauze (me and glue – aren’t I being brave!!) is that it now won’t fray.
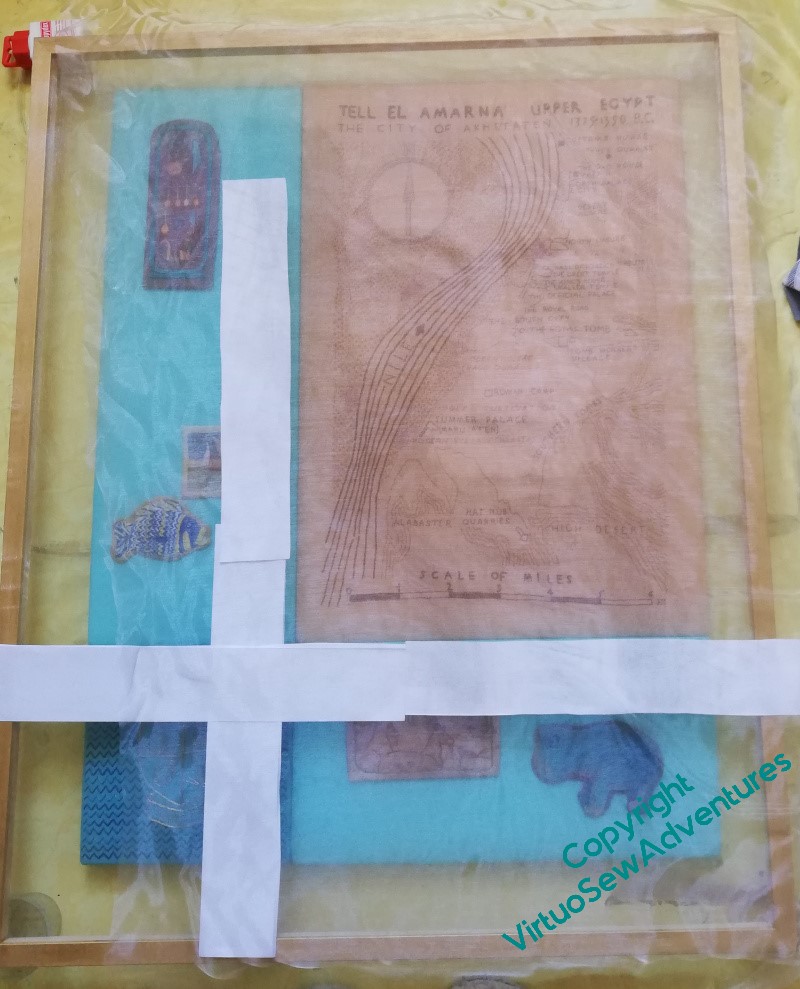
The next complication is that I need to work out how to get the design element in the right place, given I don’t want it bang in the middle…
So it turned out I hadn’t finished…
I took out the finished Amarna panels to measure them recently, and found the overlays looking faded and muddy, so I need to do something different…
Cue much experimentation and puzzlement. It came in two parts. The first was, can I use different media to create the image in a way that will be more stable? The second, can I make the overlays less susceptible to damage?
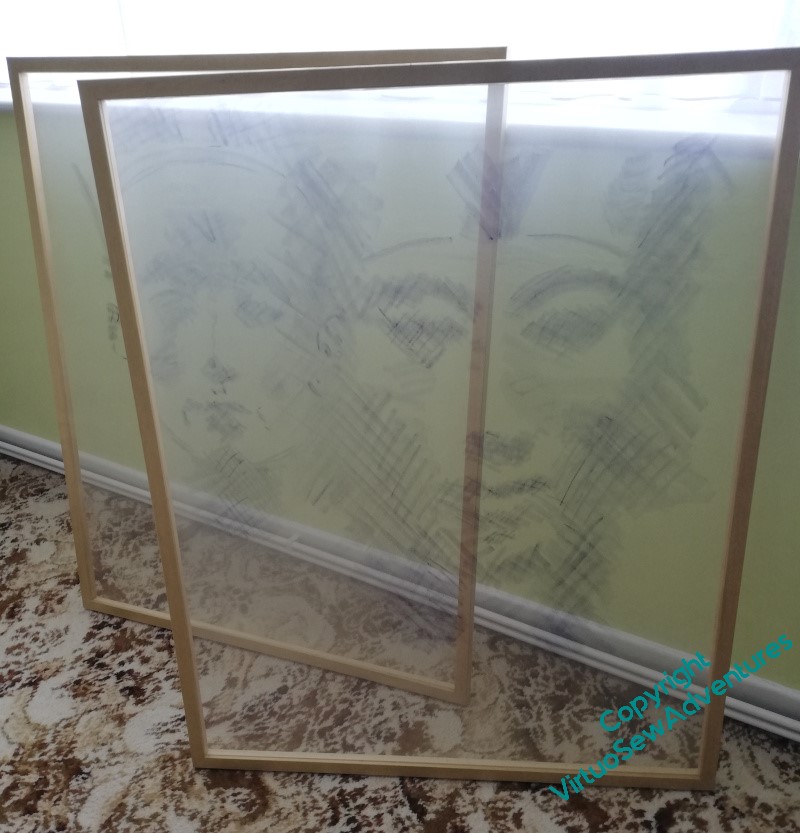
That second part was easily answered – I have always expected that the overlays should be properly framed, so I just (a word to beware of!) have to work out how to do so. I had concerns about tension and keeping everything square, but when I talked to my fabulous framer, she seemed much less worried than I, so I commissioned her to make some large frames in plain wood that I could paint with gold.
Yes, I know one can buy mouldings which are already gold – they’re all much too bright. I don’t want the frames drawing the eye, I want you to look through and past them, into the main panels.
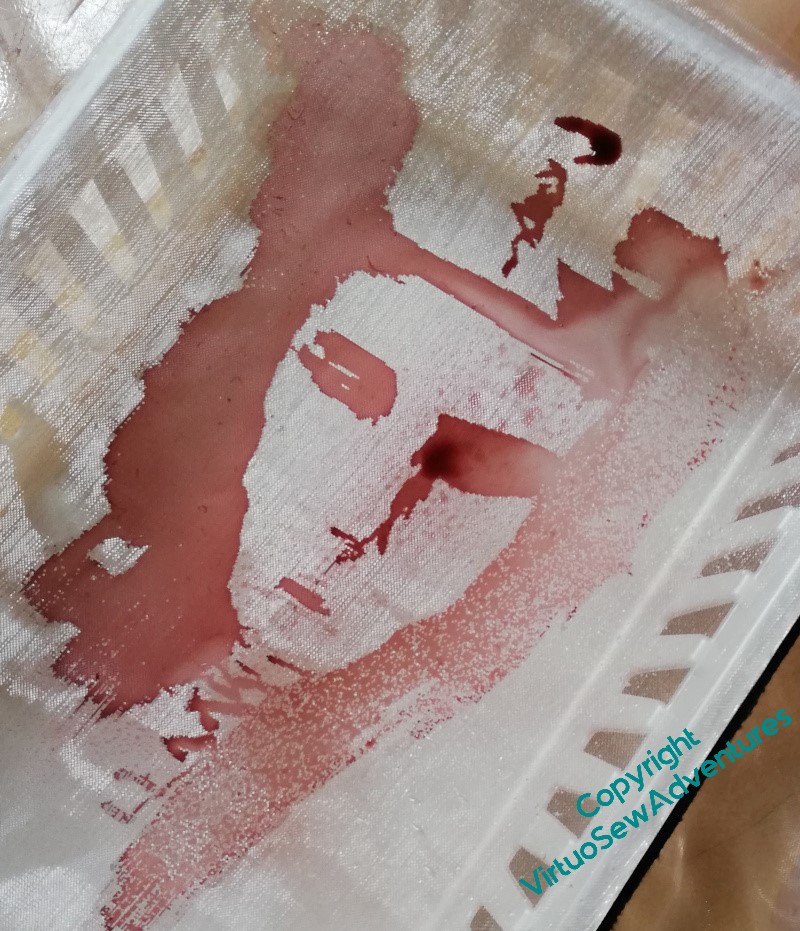
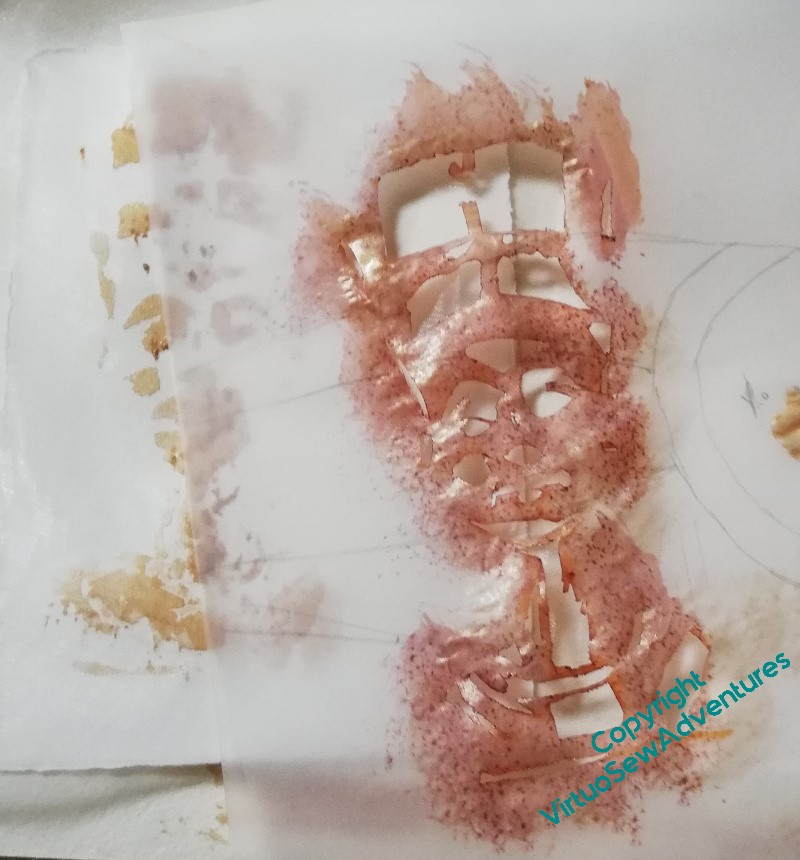
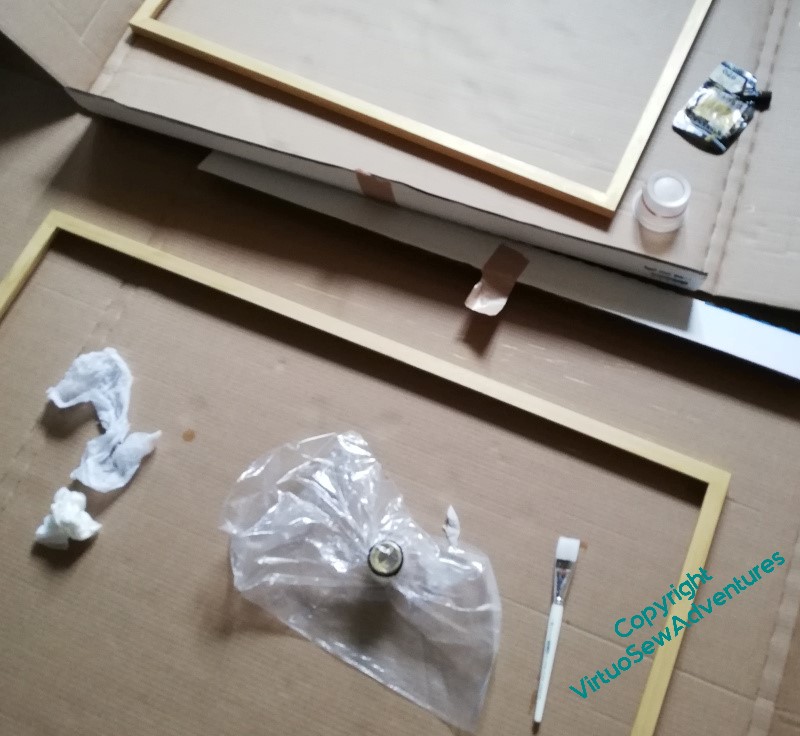
Then I did some experiments to see whether I could find new ways to put the faces on the gauze, less prone to disintegration. I had a lot of fun playing with acrylic inks on small offcuts stretched over embroidery frames, picture frames, anything to hand. I sprayed water on the gauze before, or after, painting on the images. I tried thickening the ink with pva glue or aloe vera gel. I tried ordinary acrylic fabric paint. I stencilled. I dabbed with a sponge. I tried all sorts of experiments!
And once the ink was dry, even black ink seemed to vanish. The fabric paint filled up the weave too much, and created a rather clumpy effect.
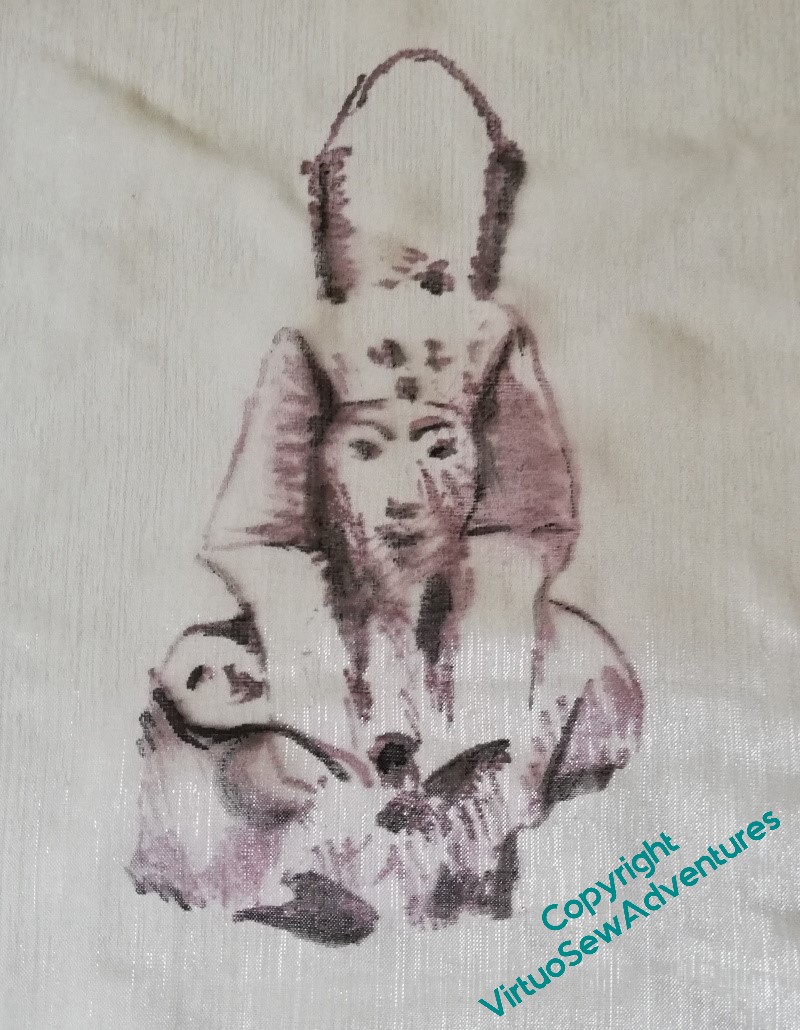
So in the end I went back to the inktense blocks (in purple, not that you can tell!), put my newsprint style guides under the gauze, and put them in, quickly and vigorously. Then I sprayed the gauze lightly with the sort of fixative pastellists use for soft pastels. I have no idea at all whether this will work in the long run, but it seems to me it has a reasonably good chance…
Overlays Are Tricky!
A further episode in the Difficulties of Assembly…
I spent hours – literally – making some kumihimo braid to trim the main Amarna panels, and finally finished the second three metre length during the MathsJam weekend in November. Rejoicing at this success, I pinned the braid in place over the interections in a panel, sat back, and was rather pleased. I thought it looked crisp and added a lovely finishing touch. WooHoo!
Then I put an overlay over the top and I was Most Disappointed. Rather than adding a neat little finishing touch, the braid seemed to shout over the embroidery, breaking up the panel into the constituent parts, rather than stitching it together.
That’s very odd. I’m not sure that the photograph really conveys the impression, but it was very striking in real life, and when I checked my perception by showing the piece to my mother, she agreed. She’s not been living with the project as I have, so I can trust her not to be jaded and seeing difficulties where none exist!

So that braid may need to find another home.
As you can see, the Trickiness of The Overlays continued into the photoshoot. It’s as well that the braid was not included in the end – there’s a length of fishing line in the horizontal gap, tieing the panel to a very solid weight to keep it upright. And the framework from which the gauze is hanging was macgyvered on the spot. See what I mean about the photoshoot turning into a creative collaboration?
What It Takes..
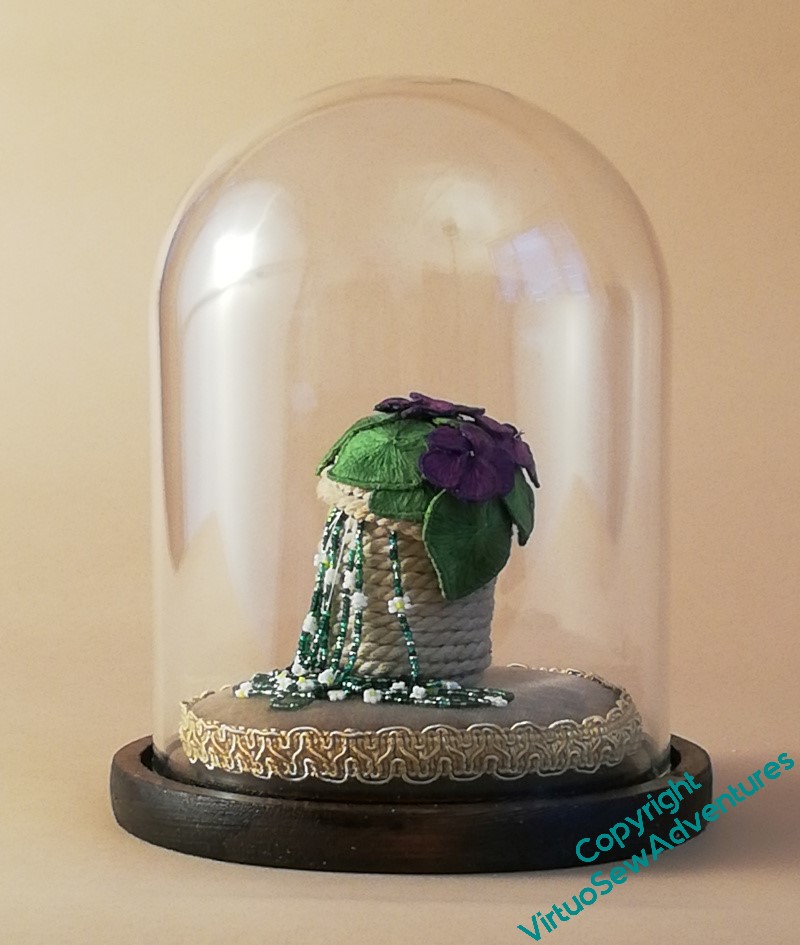
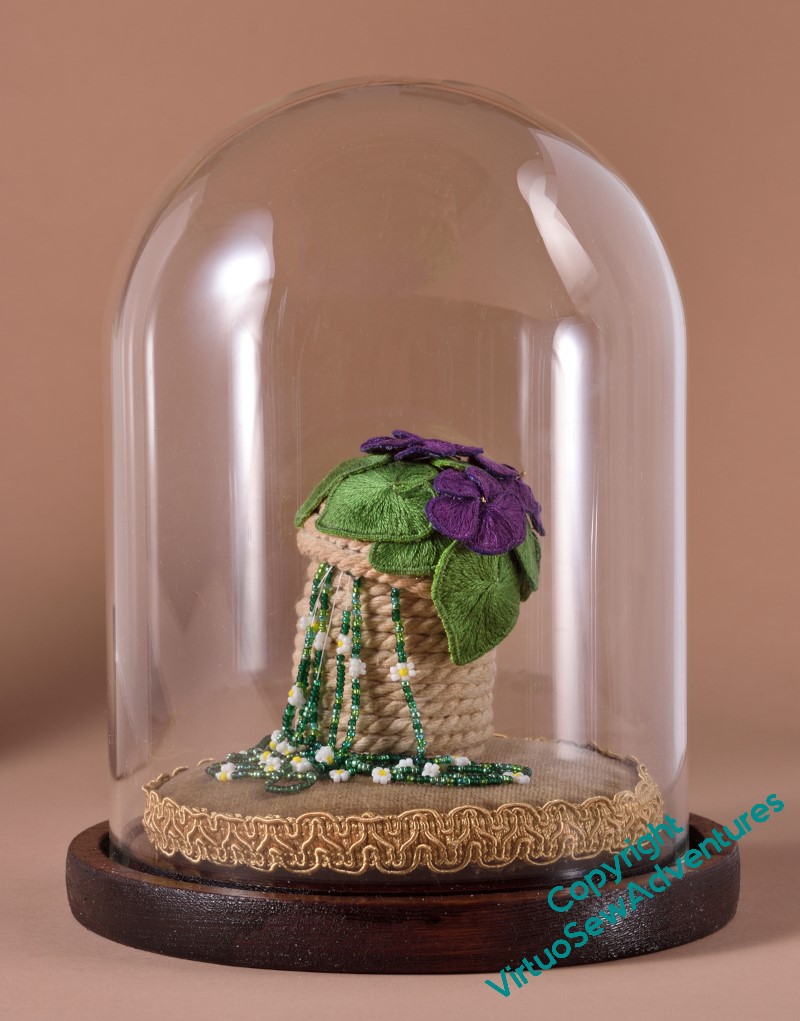
On the left, my photo. Granted, with my mobile phone, but it’s the best I have available to me. It’s in the same place, and against the same background, and with nearly the same lighting, as the one on the right, taken by Bernard.
In Bernard’s version, the colours are brighter, warmer, the crevices and shadows are reduced or enhanced in different places to bring out the details in the various elements, and the placement of the highlights on the glass was carefully tweaked and managed to ensure that the shape of the dome was brought out without any odd little bright spots in the wrong place. The highlights even bracket the embroidery, framing and presenting it.
And now you see what it took. Lighting and diffusers, and then a whole slew of little improvised mirrors and reflectors, including one held in Bernard’s hand while he operates the camera with the other one.
We all say that embroidery is hard to photograph, but in truth, until you’ve seen the effort that an experienced professional photographer will put in to get a good shot, you have no idea just how hard!
And all this tells me something else – part of the trick is that, with a lifetime of doing this behind him, Bernard can look through a view finder and think, no, we can do better. I would be impressed from the start, and give up too early, not because I don’t want to achieve a good result, but because I’ve no idea just how good a Good Result can be, and still less of an idea of how to attain it.
But incidentally – I’m so glad I tinted the base of the dome. That dark, vaguely walnut shade works much better than the plain pine!
More Delegation
Before Christmas, but still, thanks to an arm injury earlier in the year, very much later than I had hoped (remember the original report, on the first photography session, was in April!), I took the remaining Amarna pieces to the wonderful Bernard Rose for their portraits to be taken.
In fact, we had a great time, because although it’s fair to say I was delegating everything about the photography to Bernard, he took a very collaborative attitude. He was interested in the stories I was trying to tell, and the impressions I was trying to convey, and that meant that, rather than just going “point and shoot” (albeit with better equipment and lighting!), he put great effort into bringing the best out of the various pieces.
Although, halfway through the morning, as he tried to develop a structure from which we could hang one of the overlays, he did comment on the level of puzzle-solving being demanded of him, which is apparently not entirely usual with other clients!
It’s a good thing that my arm injury is reduced to a mere occasional twinge, though – there was quite a lot of heaving things around, and the two main panels, now consisting in each case of four wooden frames screwed to a half centimetre or more of MDF, are really quite heavy and awkward.
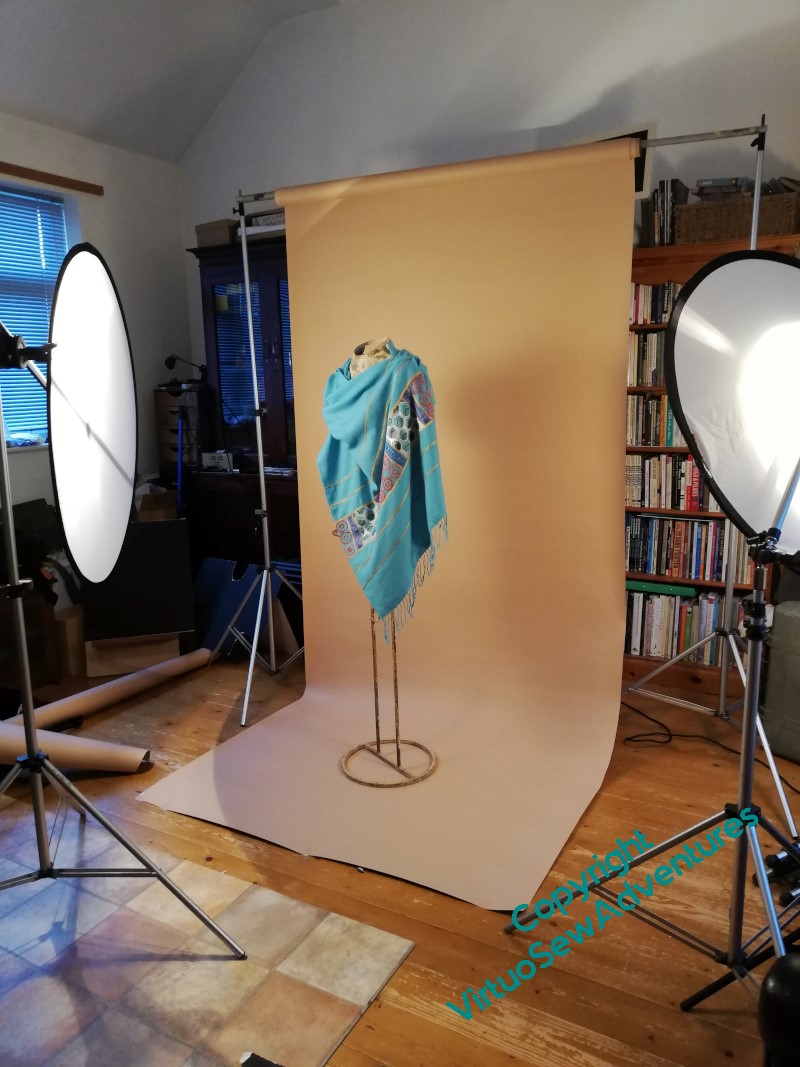
The mannequin belonged to him, too. The battered paintwork helped to bring out the idea of something inspired by archaeological discoveries. And the fabric drapes beautifully, in spite of the heavy embroidery, and the additional layer of the lining.
So I think all the photography is now done – although I will be writing a bit more about what I observed and learned during the two sessions.
That’s a relief!
More work on the assembly
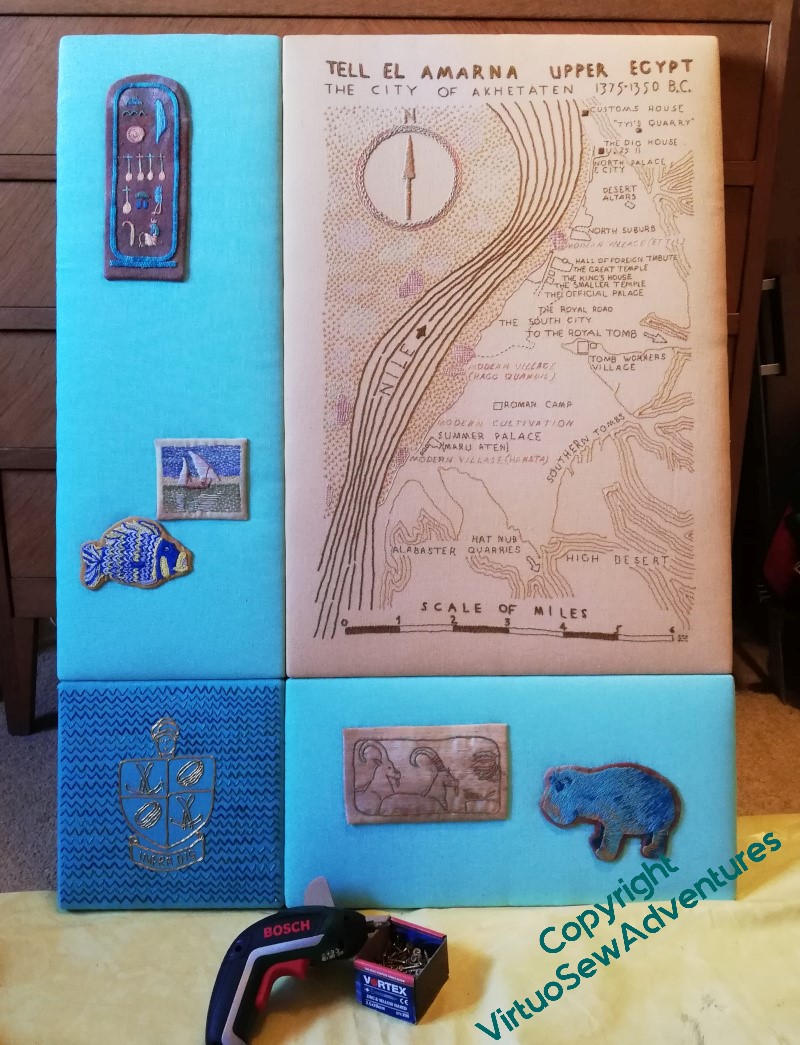
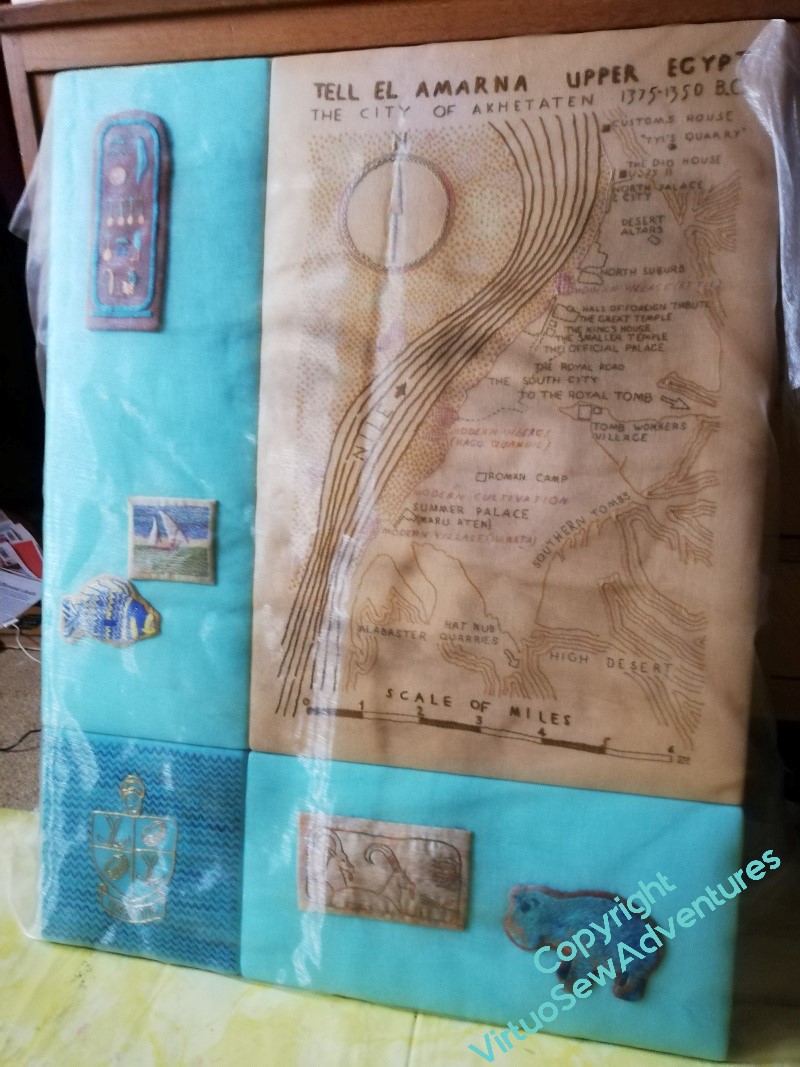
Once the backing boards had been drilled and painted, the pieces could be properly assembled.
And oh, what a world of pain those words conceal!
Never mind, moving on…
I like the look of this – it is the first time I got to look at the panels upright, and it’s astonishing what a difference it makes. I’ve been through the entire process a prey to Doubts, and they are beginning to dissipate at last.
So the next thing was to make it possible to hang the overlays in front. I don’t want to have the gauze touching the embroidery, permanently in place, in fact ideally I would like to be able to remove them more or less at will when the pieces are exhibited, so I’m still working out how to achieve that. In the meantime, I decided to put channels top and bottom of the gauzes, so I have an interim solution. That will mean that, for example, I can start to think about booking the second photography session.
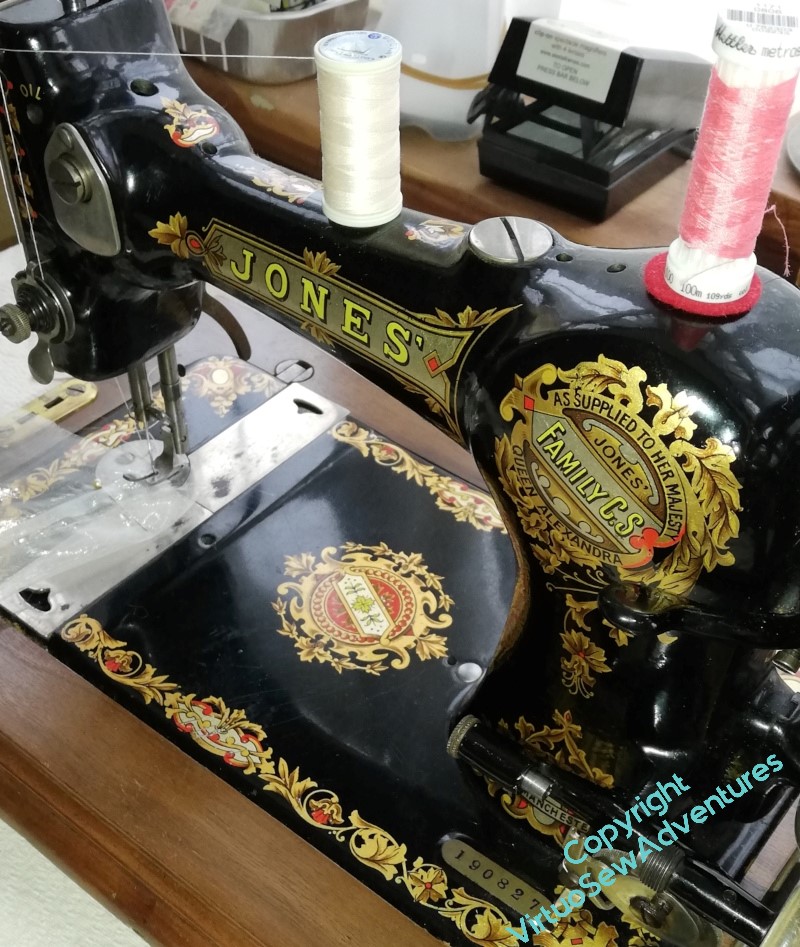
Deciding on that interim solution, however, meant fishing out my old friend Jones. Jones was given to me when I was eight, and I did a fair bit of dressmaking with him, until I was deemed old enough not to do myself a mischief using my mother’s Bernina. He weighs rather a lot so with years of a bad back, I’ve not used him for years and years, so I was rather pleased that, first, he worked, second, that when it came to it, I also remembered how to wind the bobbin, and third, getting him out didn’t make my back go “spoing!”…! As you see, the bobbin is not quite the same as modern ones, not least in that it is long and thin, and the bobbin carrier (not on display) looks more like an asymmetric torpedo, with a very sharp point.
Now I’ve draped the gauze over the top of the panel it is clear that I need to be absolutely on top of the ironing, since crumples in the fabric interfere with the face showing. It has also shown, however, that the effect that I was reaching for can be achieved.
Next steps – decide whether I need to cover the places where the panels butt together, and (definitely!) iron the gauzes.
But for now, I’m pleased with progress!