
The Map of Amarna is Finished – Part Two
Continuing my look back over the Map of Amarna now I’ve finished it…
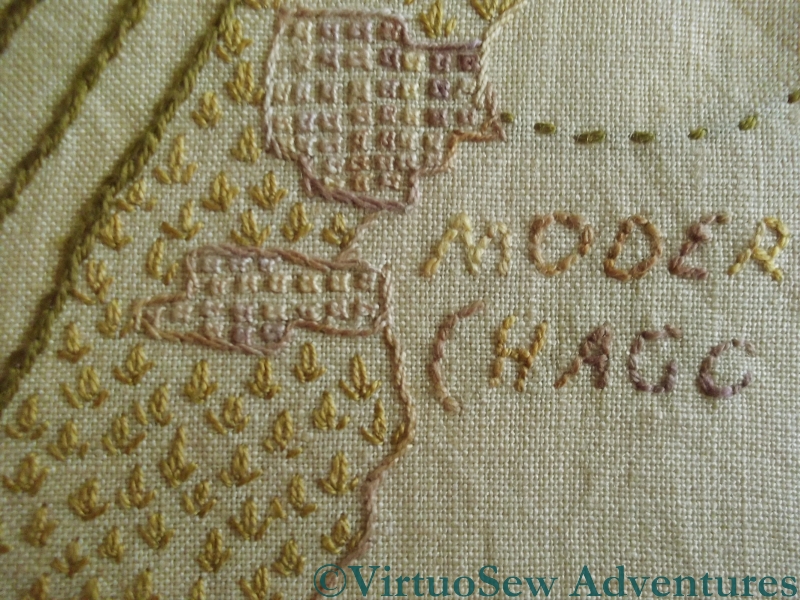
Detail Of Villages And Cultivation
Regular readers will recall that I spent a long time thinking about the stitch I intended to use for the cultivation, and not just that, but selecting the appropriate thread or threads to use for it. In the end I chose tête de boeuf stitch for the cultivation (upside down in relation to the diagram on the page I’ve linked to, making it look more plant-like) , and although you can’t see it in this photo (zoom in on the main photo on the first post on the completed map instead), I used four different fine silk threads to create changes of colour and effect, reminiscent of different crops.
For the modern villages, I used a variegated silk thread, which I used for the text relating to those villages as well, and chose Sorbello stitch, stitched very small, and very regularly spaced. It’s unlikely in the extreme that any rural village, anywhere in the world, would be laid out in a grid pattern, but again the intention is to create a marked textural contrast between the cultivation and the settlement.
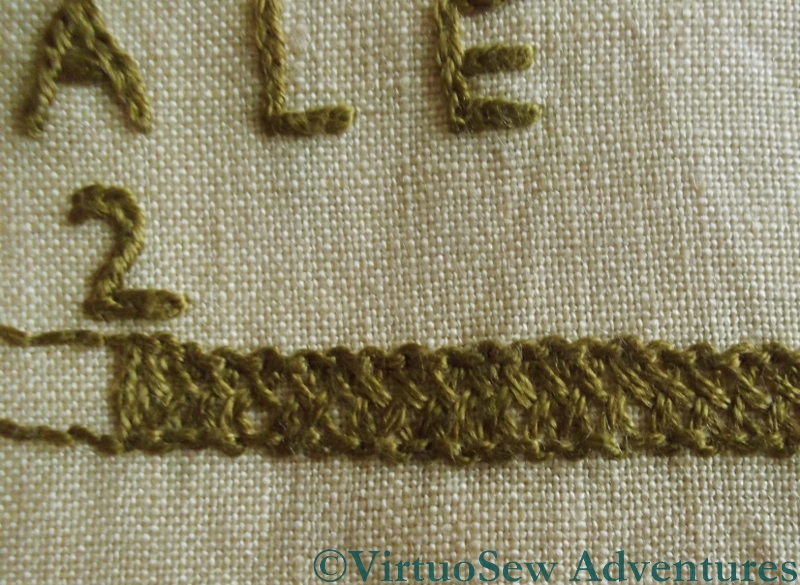
Detail Of Scale
Working the scale for the map gave me some trouble. For the text, again I used split stitch, as I had on the second level title, and eventually I chose to use an interlaced stitch for the dark sections of the scale.
This stitch echoes the reverse herringbone stitch I used for the contour lines. I know that most of the people who see this when I eventually finish it won’t appreciate that sort of detail, but there will be some who will!
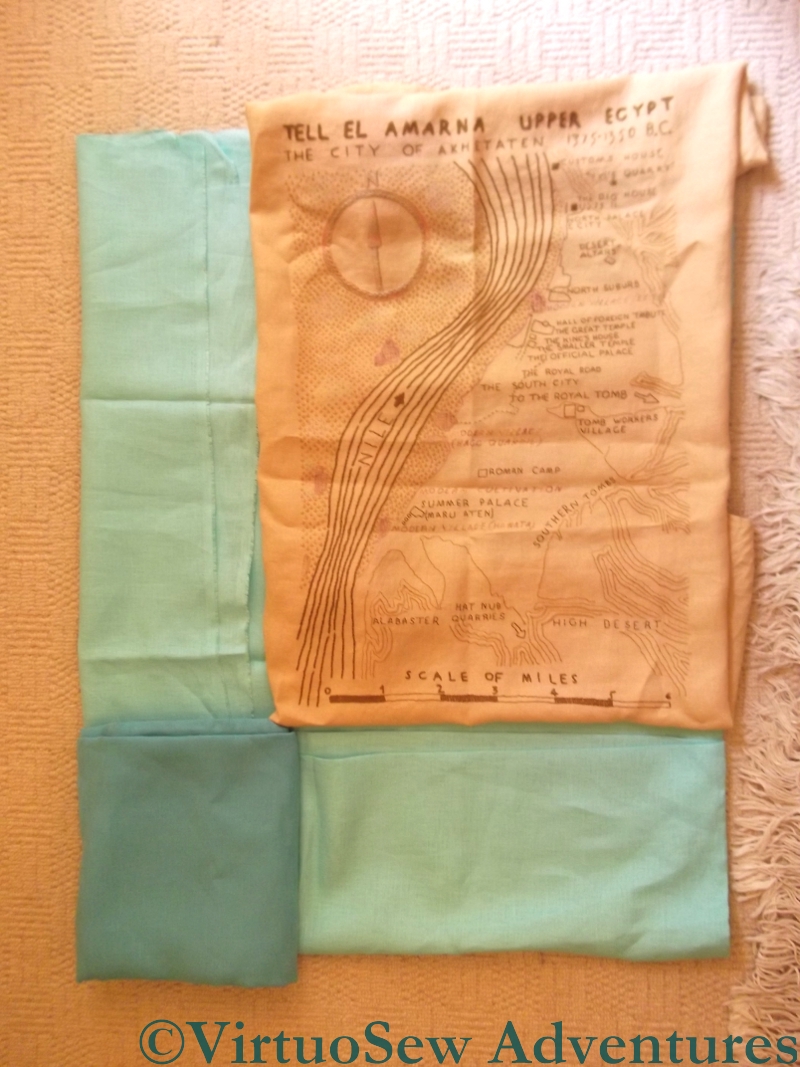
Map With Edges
This was the point at which I laid out my finished map on the floor with the other fabrics which I intend to use for the borders, and gave myself a serious fright.
Remember these diagrams in my post in August 2010? These borders are where the “patches”, like the Felucca and the Faience Hippopotamus, will go. Of course this is very approximate – I don’t intend to cut into these fabrics until I’m much more sure of how I’m going to put the pieces together than I am at present – but these borders are about the right proportions, and as it stands they aren’t going to leave much space for the patches.
I may have to edit my patches and fragments very much more ruthlessly than I had intended.
In rereading your August 10th post I noticed you ended it with “we all like a challenge don’t we?” — tee hee! I now crown you the “Challenge Queen”. Everything your hands touch turns to beauty. And where your crown proudly!
Hello, I have just found your blog via Emma at Silverpebble and am I glad that I did! Your work is beautiful and I hope that it will inspire me to pick up my embroidery frame again.
I have added your blog to my Google Reader and look forward to getting to know you.
Looking at it from a quilter’s point of view, I would put an inner border round the map, which would then give more space for the pieces you want to include – it would also frame the map.
You certainly stepped up to this challenge. The selection of stitches has been quite inspired.
The more I read your posts the more I hope to incoporate my wool felt with stitches and embroidery. I’m no good in making knots, stitches (oh, I even don’t know the descriptions of stitches), found your blog inspiring. Thanks for stopping by.
you certainly have a cast knowledge of embroidery stitches. Your brain must be just about full now!!
I meant VAST
I love this project of yours,lots of details, interesting choice of stitches and threads, you’ve done a great job,well done! Looking forward to see more of this. To look back what is achieved and to record all the details is good, isn’t it? Thanks for all the inspirations and sharing this map with us.
How wonderful!
I second Frayed at the Edge – or, since it looks like you have a fair amount of margin in the sand-colored linen, you could cut that wider on the sides that will have the turquioise borders, for some of your patches and/or the things you want in the borders.
This is a magnificent project, and so different from most of what I see being designed now; I’m already very impressed!
Who ‘are the peope who are going to eventually see it’?
It’s great to see the finished Map laid out against the full sized background. I hope that you inspired to do lots more panels now. And please say Hello to the Hippo for me- I love that Hippo.
An embroidered map- I love it! (Can’t wait to see the finished article!)
It was this project that brought you to my attention. I loved hearing about the excavation and the history you’ve shared with us. This is looking fantastic! I can’t wait to see more of what you have planned for it.
I love your ideas of the depth of detail available to people who have the knowledge and understanding but not detracting if you don’t. Hidden treasures in the embroidery echoing the hidden treasures in the sands…
[…] I may decide that this is too large and I need to work a smaller version – since I had that fright in looking at the borders, I’m acutely aware that some of the pieces I work will be classed as […]