
Tag: Thistle Threads
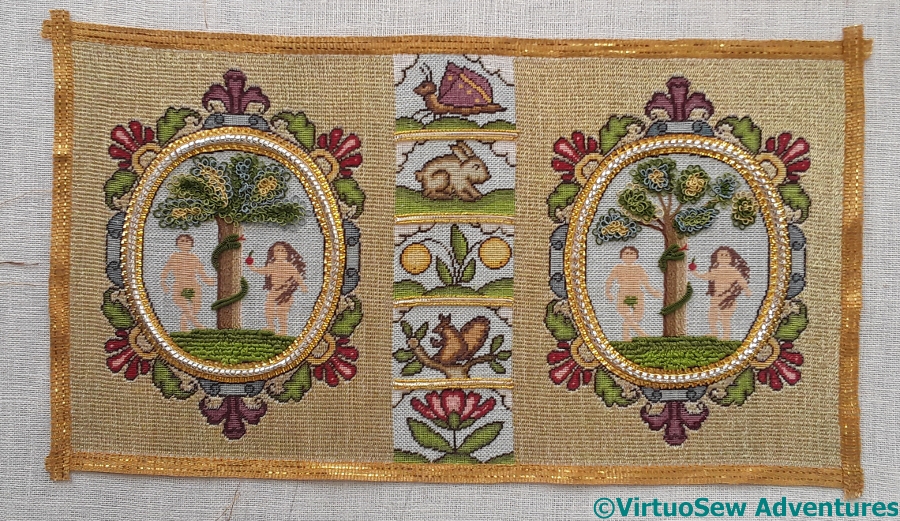
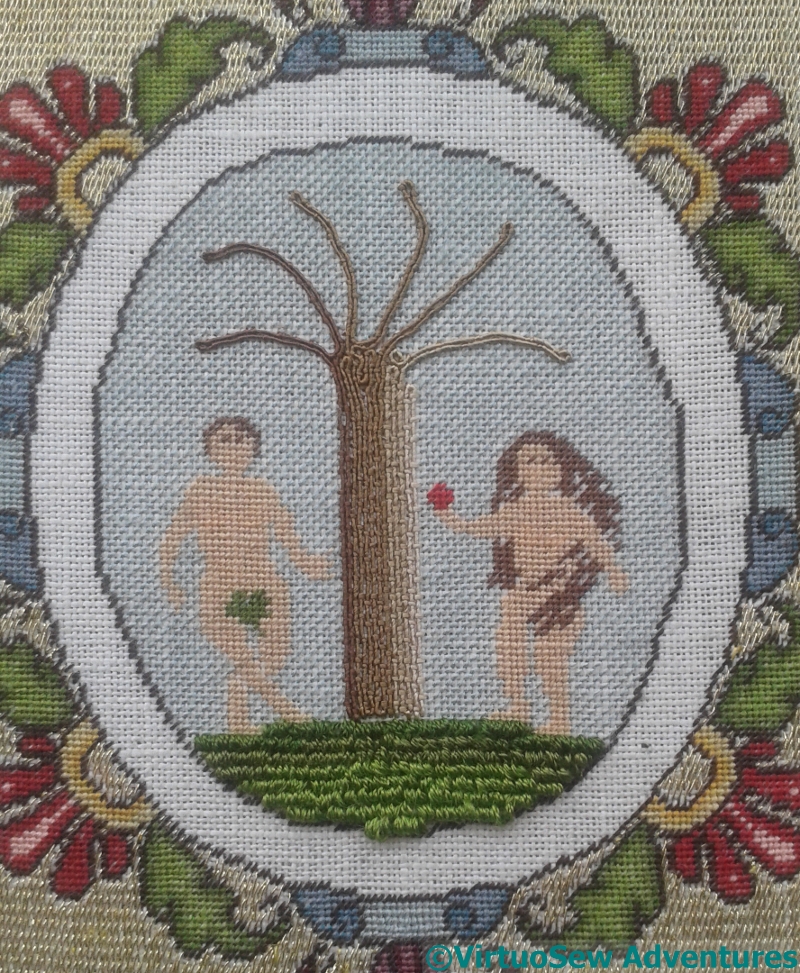
Finally Finished Eve In The Garden Of Eden
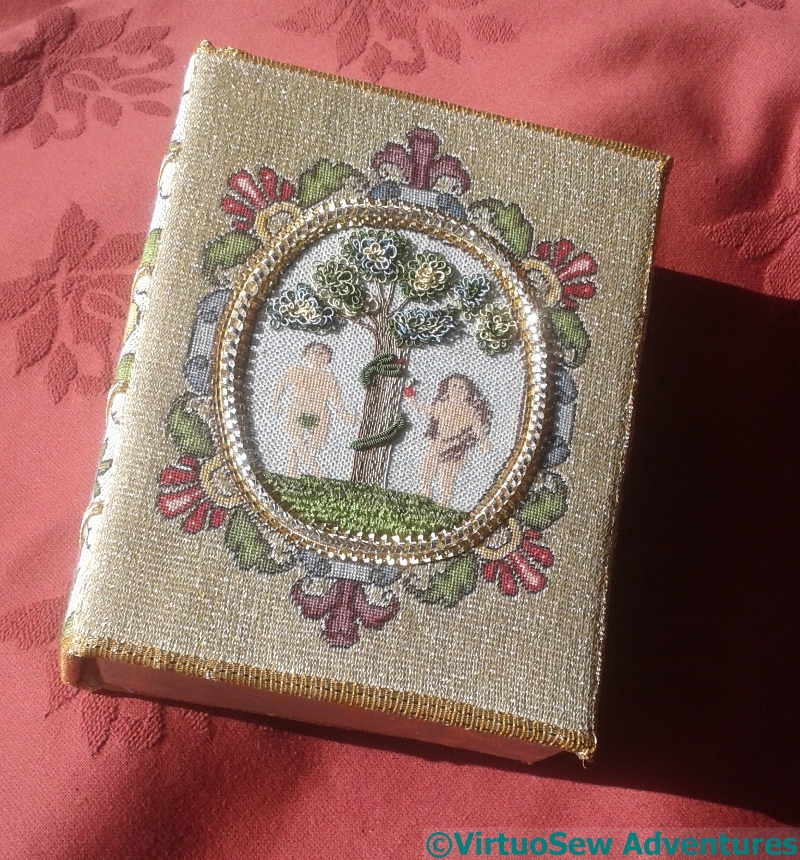
Eve In The Garden Of Eden Finished
Well, at last!
My word, it’s taken a long time! I started it in November 2015, and it took nearly a year just to finish the tent stitch, and then about eight months to do the gold Elizabethan Ground Stitch.
Progress wasn’t helped, of course, by the fact that counted work is something I can only do in short spurts. Or by the number of times I got distracted by wonderful new ideas I simply had to bring to life!
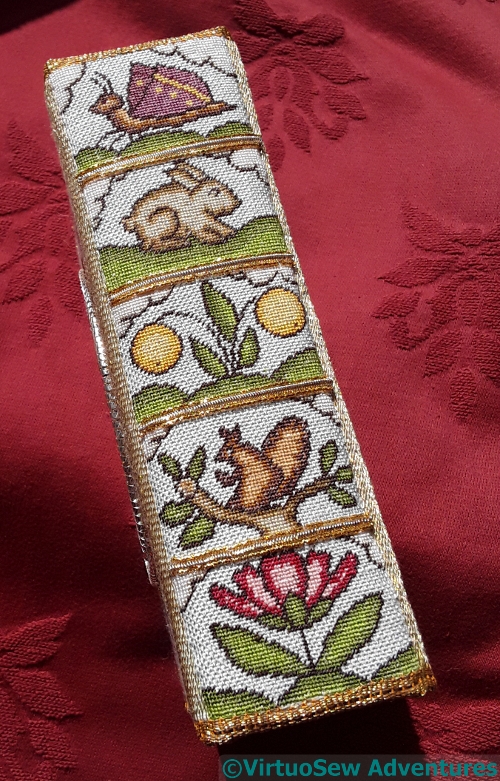
Spine Of Box
However, once I had got to the end of the stitching, and then the goldwork (isn’t it gorgeous, by the way – do click to zoom in on the photos!), there was a whole new level of puzzling to do, cutting out and assembling the lining for the box and then the box itself.
What with layers of padding and card, and the lining (silk, of course!) and the (silk) brocade covers for the outside of the box, there was a lot of pre-assembly to do, since the padding and lining, and the padding and external cover all had to be sewn together before the final assembly.
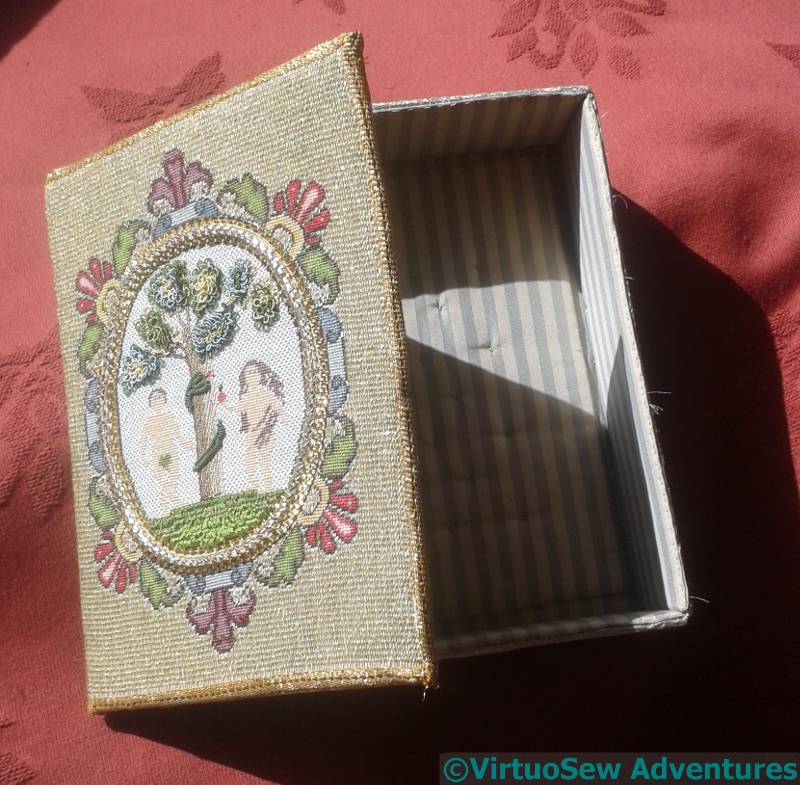
Silk Lined Box
That final assembly was fiddly in the extreme, but is now finally complete.
I’m going to wrap it up and hide it for a few weeks until the pain is merely a memory, and then find somewhere to put it and gloat, because I am very pleased with it. Just a bit sore from wrestling with sharp needles and too many layers!
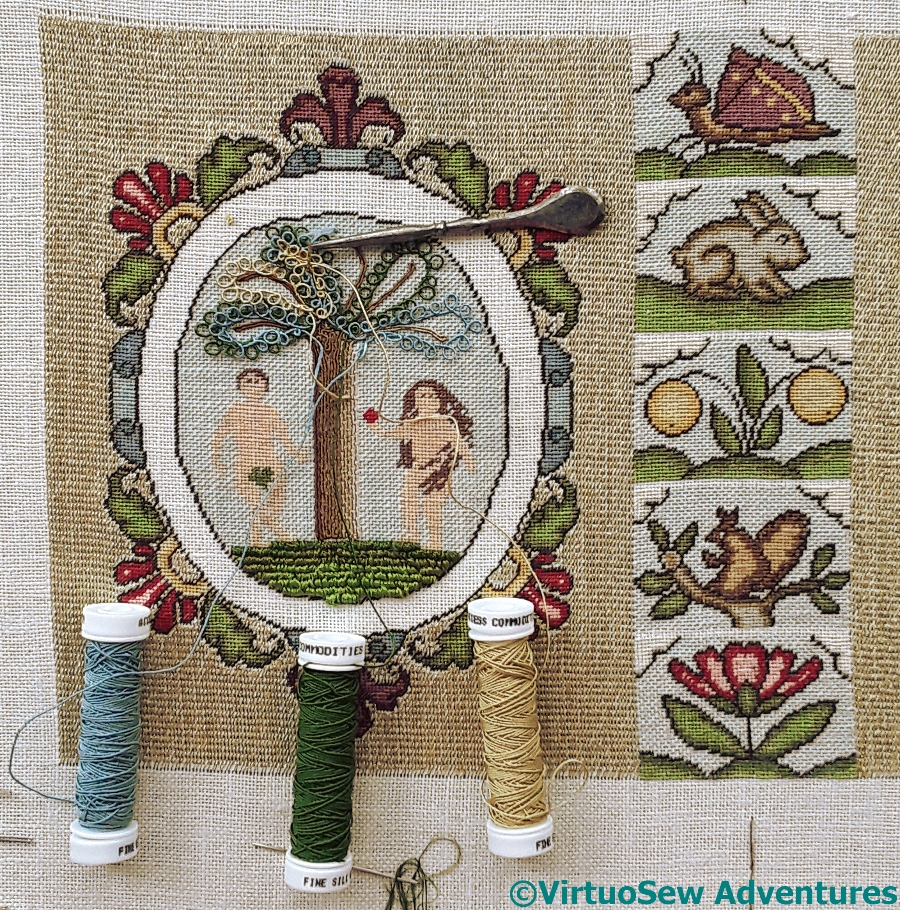
Finally Finishing The Embroidery on Eve In The Garden of Eden
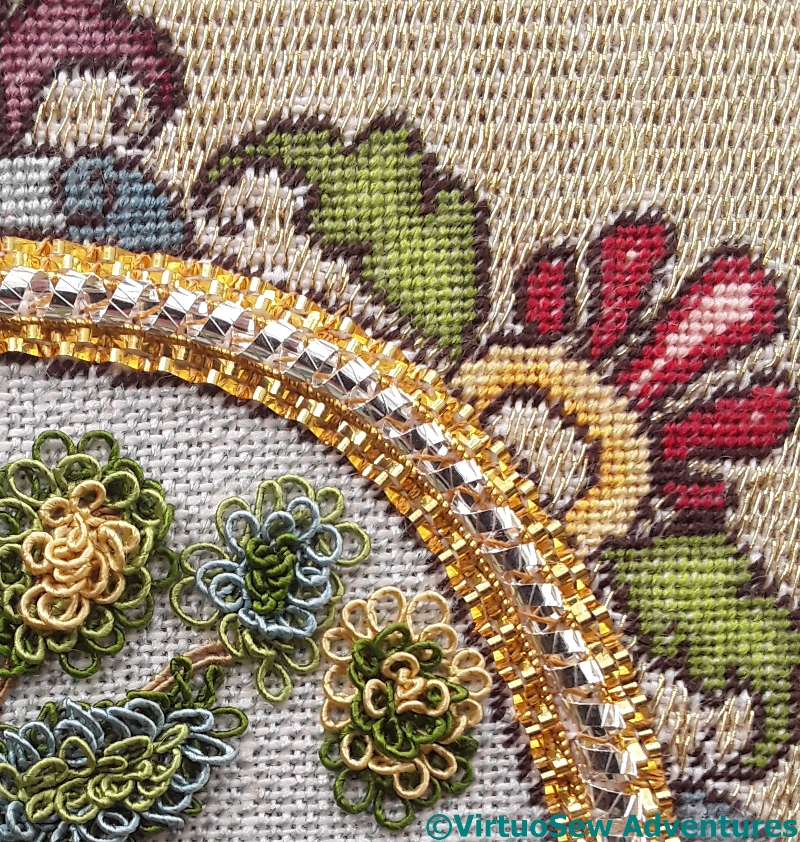
Coiled Silver Wrapped Strip Added
The Coiled Wrapped Silver Strip finishes off the metal thread frame for the cartouches beautifully. It fits between the rows of crinkle strip and pearl purl, and almost balances on top of the pearl purl, so it’s raised quite high.
And once the first cartouche frame is finished, there’s the second one to do!
Webgimpe Added
Then, finally, the last stage before the adventure of turning it into a box is to add the gold webgimpe, which is a rather stiff woven ribbon.
I know it looks a bit twisted, but the next stage is to block it. Then I have to tackle the question of glue again. It will be a while before I tackle that challenge!
More Goldwork for Eve In The Garden Of Eden
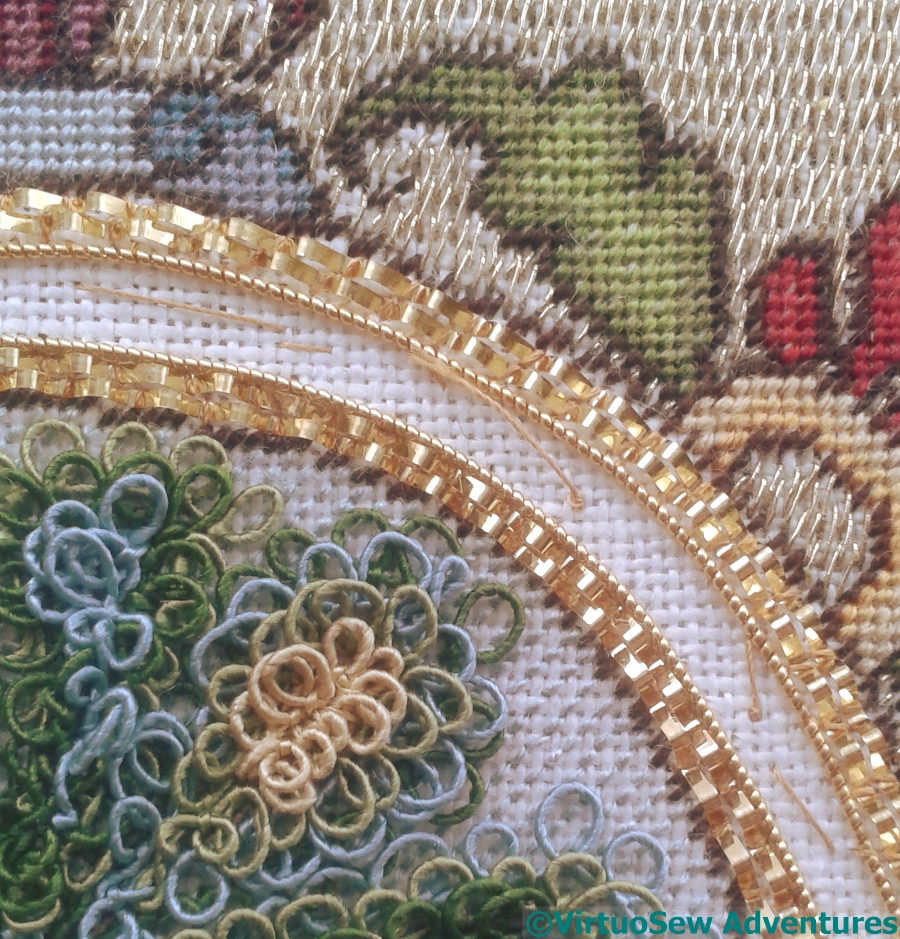
Very Fine Pearl Purl Added
The next stage in the goldwork cartouche frames for Eve in the Garden of Eden was to add a row of very fine gold pearl purl inside each double row of the crinkle strip. Now, this doesn’t need a stitch in every gap – it’s more like a very fine, very tight spring, and follows curves quite well – but it is quite fiddly and concentrated, and there’s rather a lot of it. Fortunately I did each cartouche individually, so I had a rest from pearl purl while I tackled the next stage….
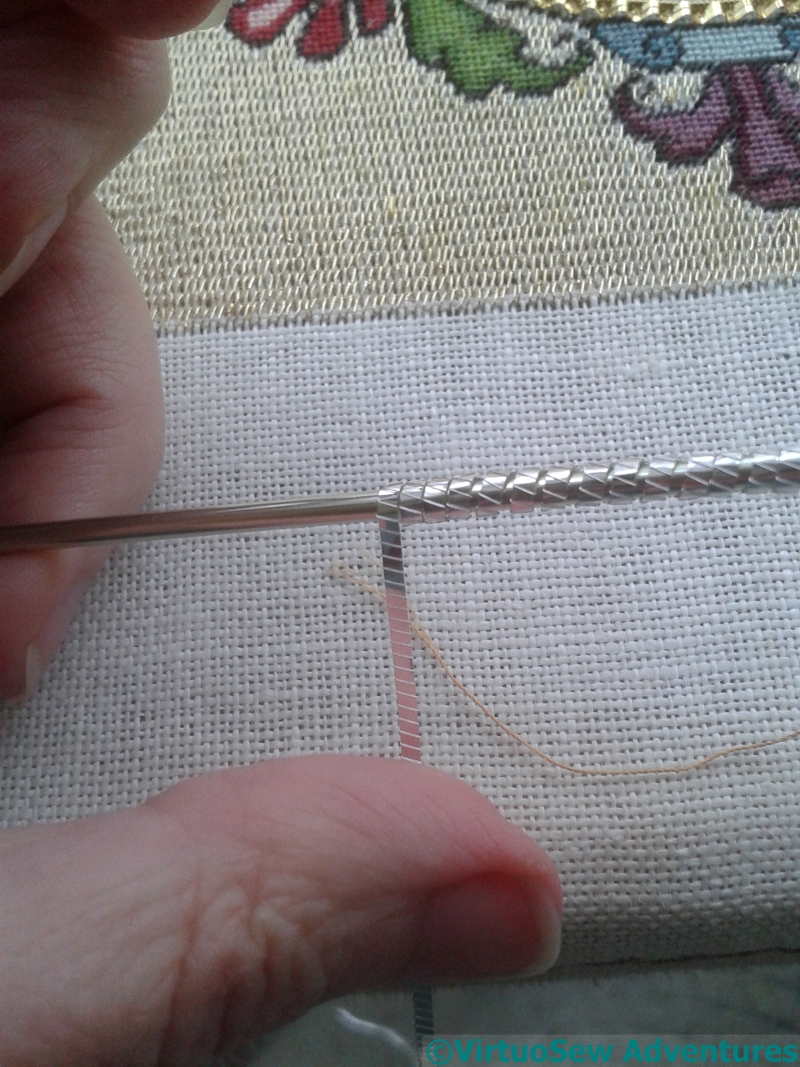
Twisting Silver Strip
Which was this!
The Silver Strip which was to be the central row of the cartouche frame arrived flat – or at least, loosely coiled in its box. In order to spring to life and create a gorgeous, opulent central row for the cartouche frame, it had to be coiled into a spiral around the second of the knitting needles that arrived with the kit.
One of the things I enjoy about Tricia’s courses is that sometimes our materials require further elaboration before we use them…
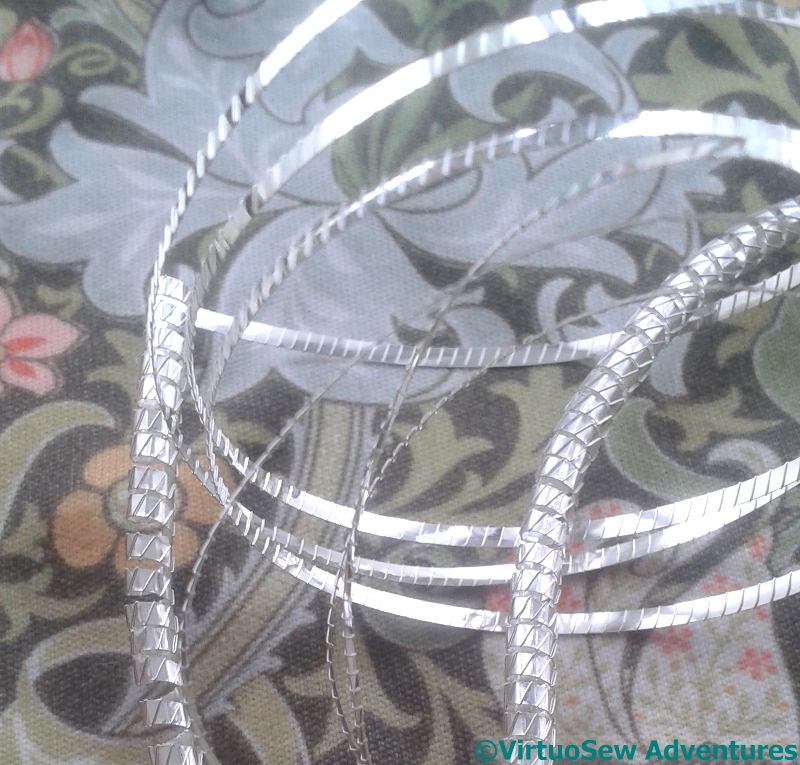
Half Twisted
Here you can see the texture of the Wrapped Silver Strip. I think it is engraved or embossed, rather than actually wrapped, but it does add to the general variety of response to light, and that, after all, is part of the reason for having metal threads on an embroidered piece….
You can also see how the effect is enhanced by twisting the strip into a spiral!
Adding Goldwork to Eve in the Garden of Eden
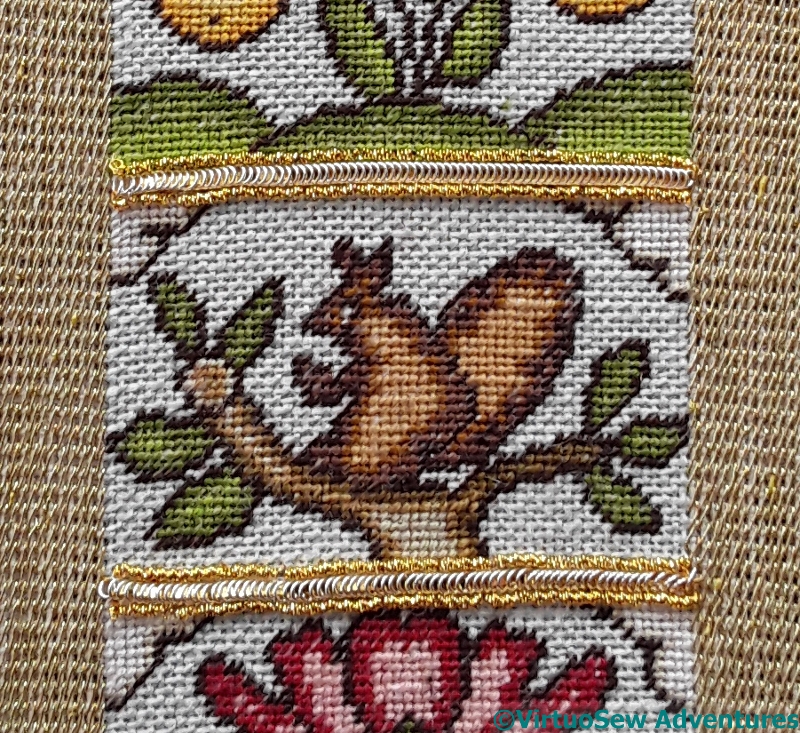
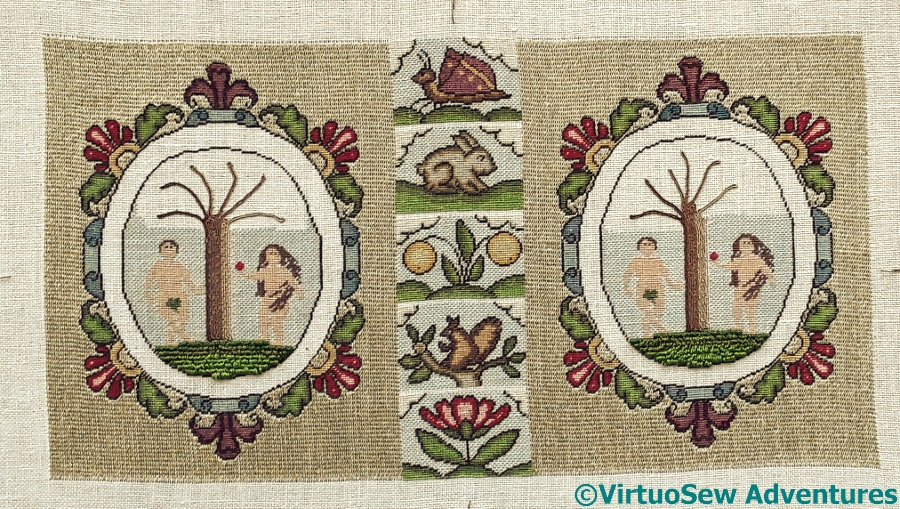
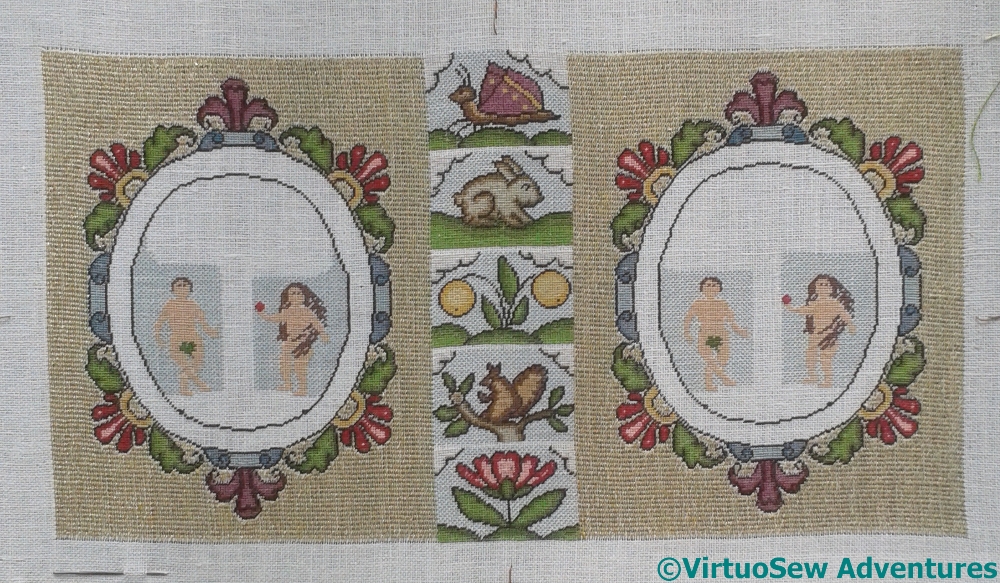
Spine Embellishment
Once the foliage and the snake were done, I could start on the goldwork.
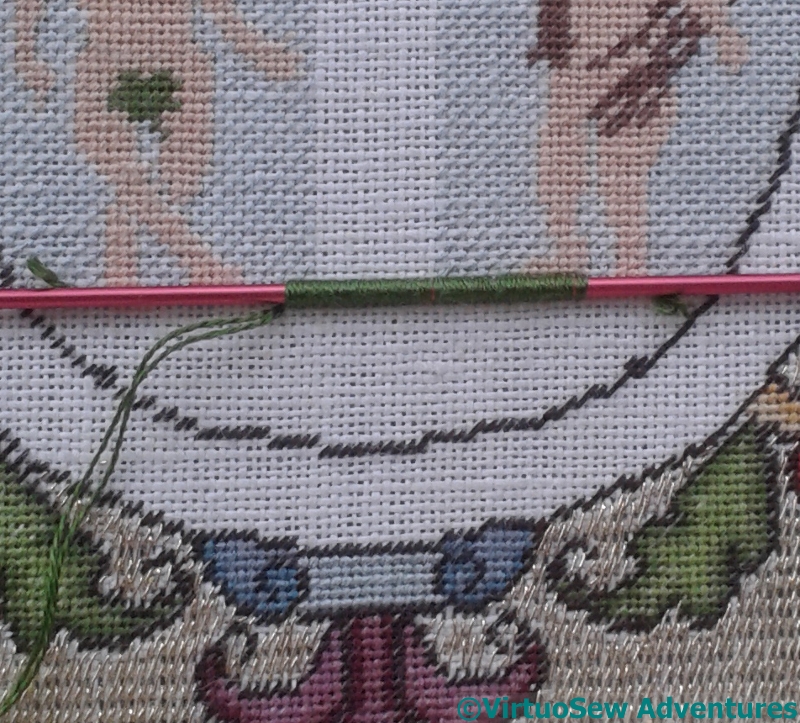
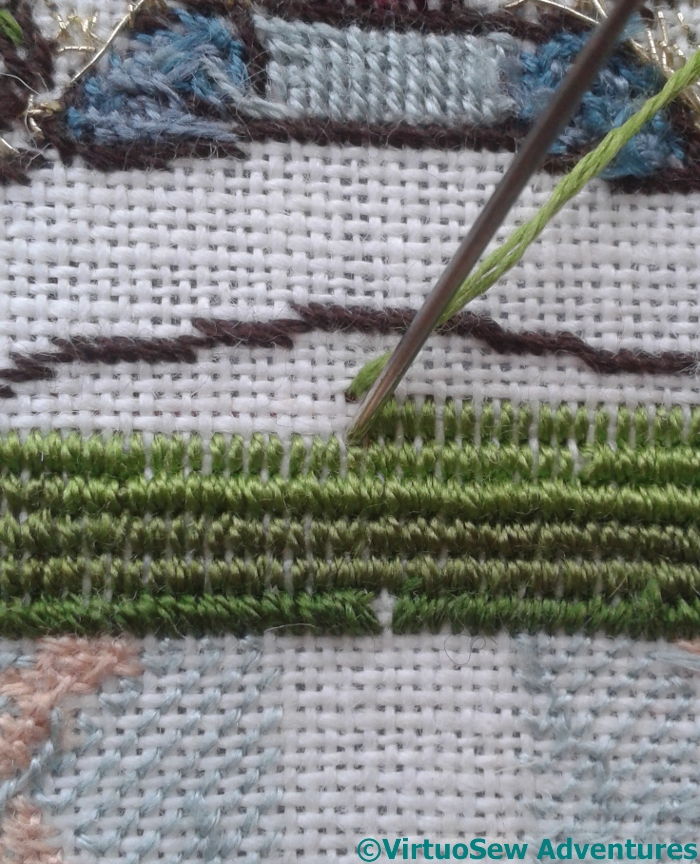
First, the spine. Each gap between the polychrome panels was filled with three rows of metal threads. The middle one was silver wrapped around a gilt strip, and the two outer ones in each case were of a very fine check purl. This last was very fragile, and if I had realised in advance just how fragile, and how inclined to catch on cuffs, sleeves, and threads, I think I might have worked the spine last.
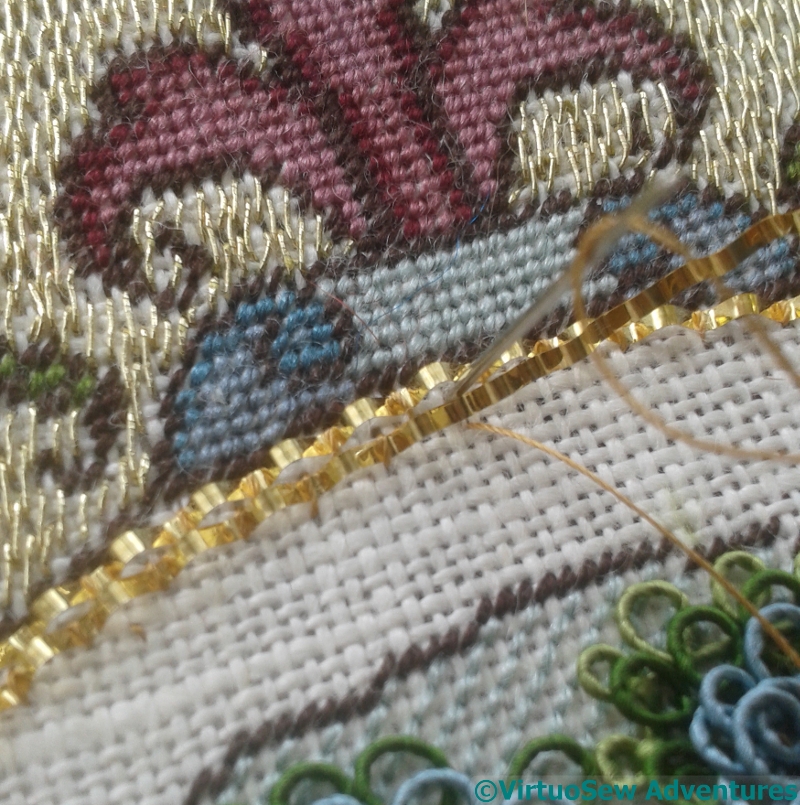
Gilt Crinkle Strip
The goldwork around the cartouches began with four rows of Gilt Crinkle Strip, two couched around the outside of the frame, and two around the inside.
The instructions said to place a couching stitch in every valley of the crinkle, which was certainly necessary – it doesn’t willingly follow curves when it is couched flat – but I might not have thought to do without instruction. It makes for a wonderful effect, if rather visually confusing when you’re working it, because the hills and valleys of the crinkle strip bounce light every which way, in a rather delightfully dazzling fashion…
You might think, by the way, that this is fairly straightforward and done in no time at all. You’d be wrong! That Gilt Crinkle Strip looks lovely, but my word, it has a mind of its own, and being very springy and having lots of little corners to catch, it makes a spirited attempt to tie itself in knots. A third – and even fourth – hand might have helped!
Overcoming the difficulty

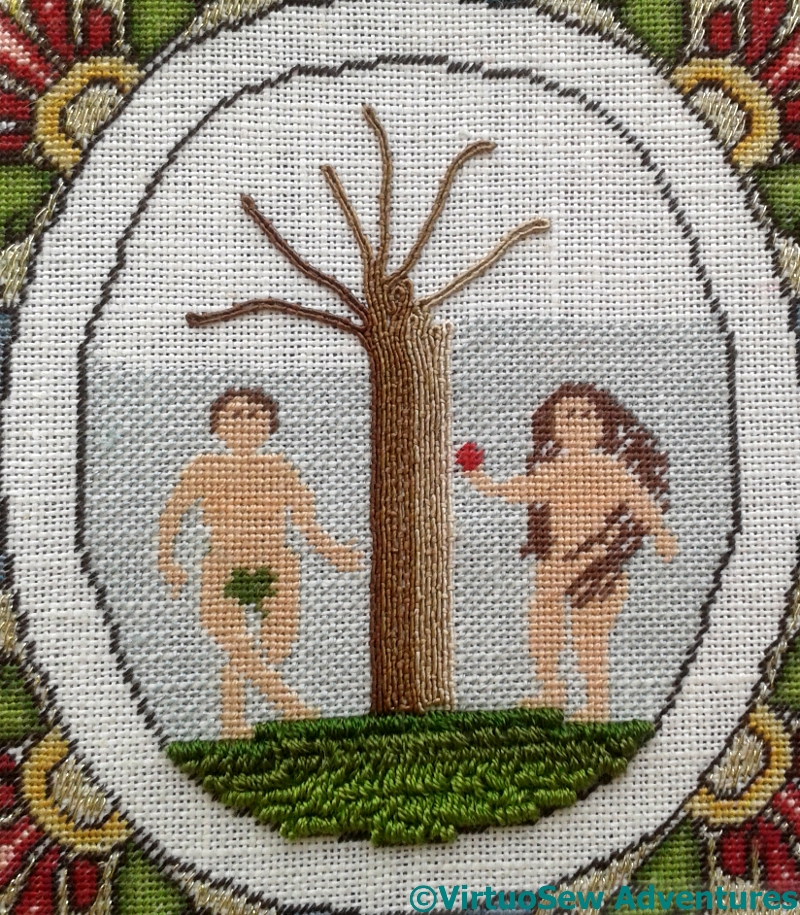
Second Tree Done
It took me quite some time – several weeks, in fact, before I got myself over my frustration with “Eve”, gathered up my patience and my courage, and had a go at the second lot of foliage.
The curls of gimp are a bit tighter, and more closely packed than in the first one, and the bunches of foliage are spaced out a bit to allow the branches to show through. There was a great deal of muttering, and I spread out the frustration by doing one clump at a time, then getting up and doing something else instead.
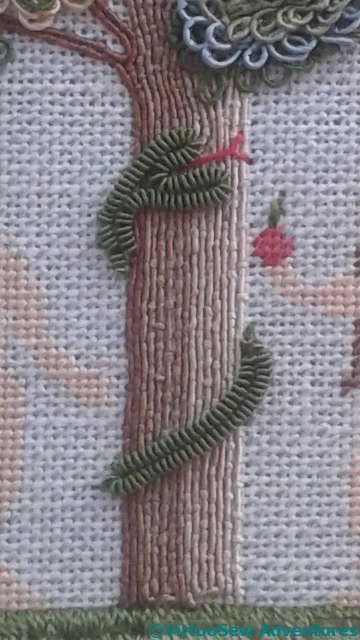
Snake In Silk Purl
Naturally no garden of Eden can be complete without a Snake. In this case, using green silk pearl purl, carefully couched down in two sections to create the head (with flickering red silk forked tongue) and then the tail, to give the impression that the snake has wound itself around the tree.
I rather enjoyed the Snake (both of them!), because I only seemed to need the two hands I already have, rather than the three extra that seemed to be needed for the foliage! The silk thread used to couch the pearl purl also made a leaf for the apple.
And now I’m ready for the next stage…

Both Snakes Added
Foliage for Eve In the Garden of Eden
I Decided To Do The Sky
I really should pay more attention to myself. I have said before that trying to work around edges is work for fools, and that often it is worth doing more stitching than is going to show. In the end I decided to listen to myself and do the whole sky.
If I’d done that before putting the trees in, however, the stitching would have been less fiddly and the experience, less frustrating!
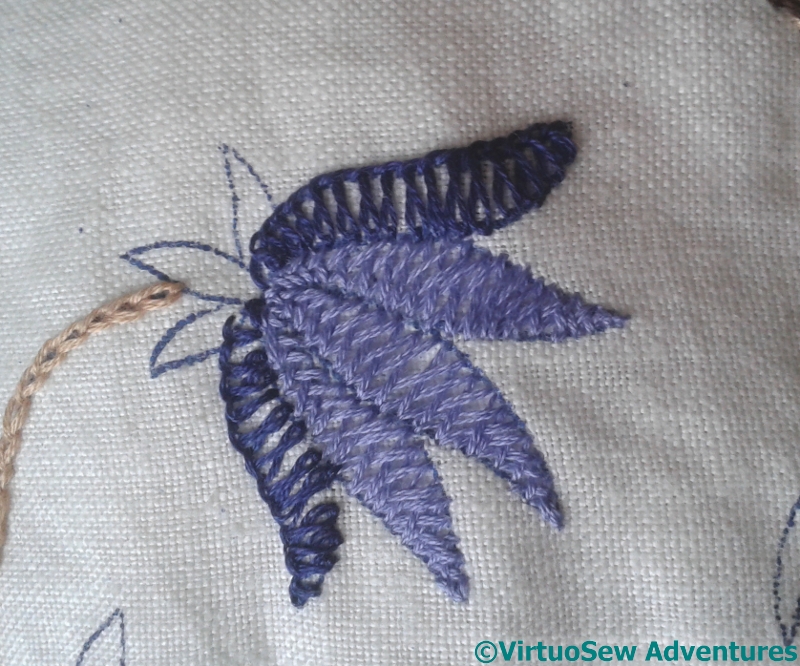
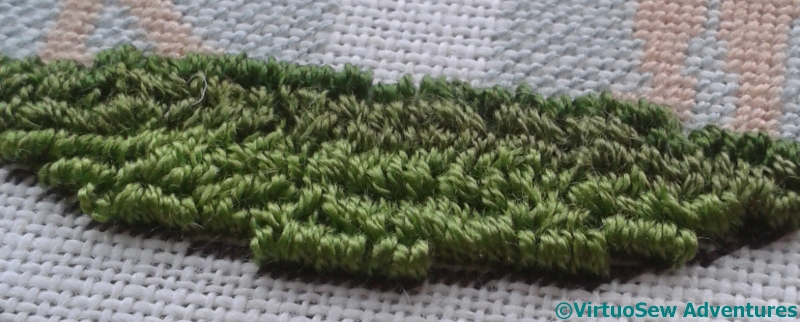
Making The Foliage
The next stage is to add the foliage, more silk gimp couched with Soie Ovale, but this time couched in little curls.
I had been looking forward to this, as it looked rather entertaining in the photos, but thus far I haven’t enjoyed it at all. I’ve got myself tied in some terrible knots, and I’ve ended up cutting the gimp more often than I like.
I need to rethink how I tackle this, look again at the photos and instructions, and try to work out why I’ve ended up with something that looks congested and floppy, both at the same time. I also need to work out, if possible, how to hop from section to section, rather than cutting the gimp.
17 UFOs in 2017 – August
More Progress On Eve
Now I’ve got Eve out again, it’s fairly romping away, which means I genuinely have progress to show for Meredithe’s “17 UFOs in 2017“. At least, it is romping away when you consider that everything has to be done twice…! The second hillock took a couple of afternoons (I try not to work at the frame for too long at a time, in case it makes the shoulder worse again!), and then I got started on the trees and their branches.
Trunk And Branches
The trunk and branches are of couched silk gimp. The kit included four different colours of gimp, with the accompanying Soie Ovale, for couching, and each colour is couched as a single length. It’s expensive stuff, and you end up using three or four inches at each end for plunging and finishing off. Most of the branches will be covered by the foliage, also in couched gimp, but I’m pausing for a moment to consider whether I want to fill in more of the sky.
Pashmina
Lilac Flower
And as if that weren’t enough, I’ve also finished the gold border on the Nefertiti Shawl, and made a start on the four lilac flowers for the travelling project!
More Progress – at long last
Gold Stitching Done
Those of you who follow me on Twitter or Instagram will have seen some rejoicings over the weekend. I have been working on the gold stitched background for the polychrome tent stitch for what seems like forever, but in fact it is less than a year – I began the Elizabethan Ground Stitch in October of last year. A serious shoulder problem interfered with my work at my floor frame at one stage, and then I was all taken with with my ideas for the Head of Nefertiti, so it was only recently that I got back to it. And now I have finished that laborious stage, and I can move on to the more complex and intriguing techniques which were the whole reason for taking the course.
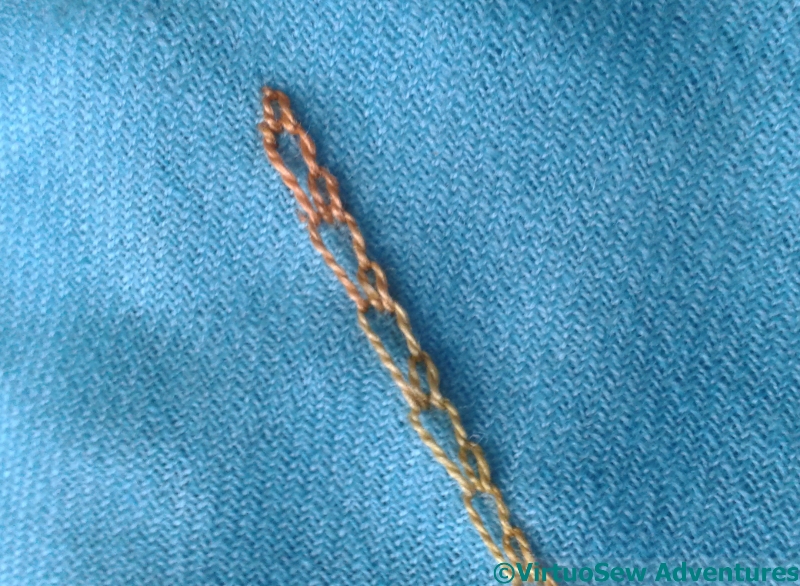
Starting The Hillocks
For instance, this one. Tricia describes this as a variation on Velvet Stitch, worked in silk thread over what I presume is a fine double ended knitting needle. It makes a perfect spacer for the pile of the stitch, anyway, and arrived with all the other bits and pieces.
Better Worked From The Back
Tricia tells us to come up through the already occupied hole, to avoid pulling the thread through to the back and reducing the pile. I went a step further and worked it from the back, ensuring that I kept the stitch neat and the stitching going up through the right holes!
I must admit I enjoyed this, simple, and straightforward, but with just enough challenge to keep me awake and alert.
A Sideways View
And here is the first hillock, finished and fluffy. It looks as though it would be beautifully soft underfoot, doesn’t it!
The Head of Nefertiti, Embellished with Silk and Gold
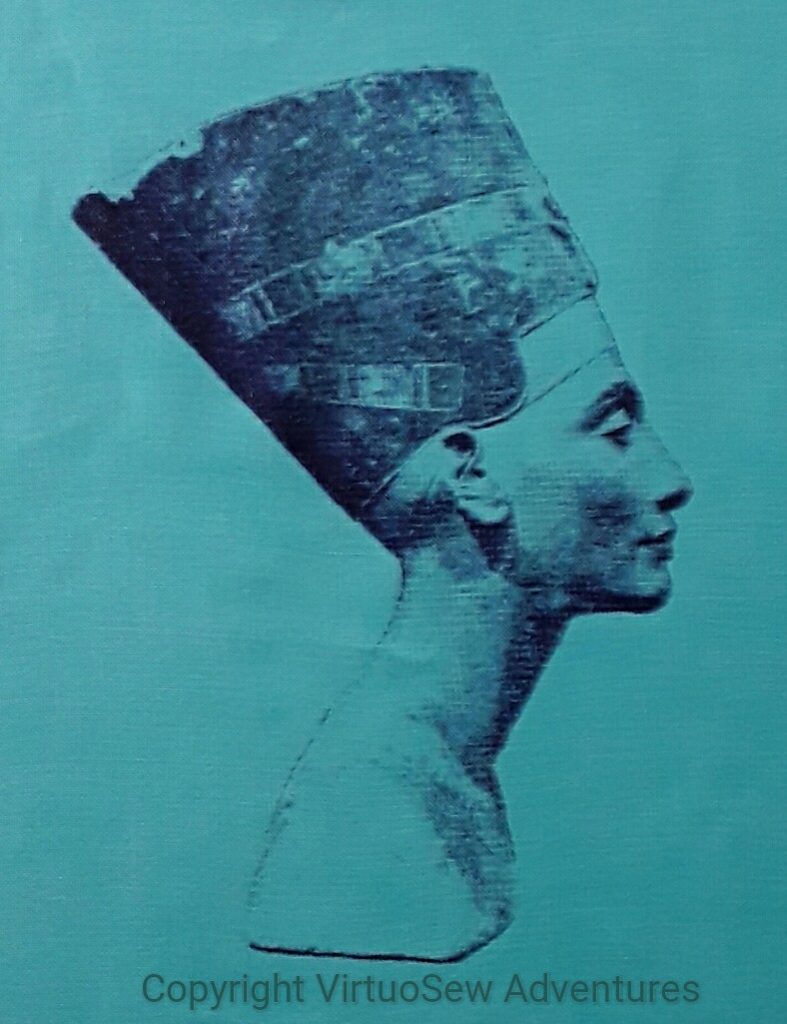
Screenprint of the Head of Nefertiti
This is much the best print I’ve managed of Nefertiti, pressure, speed and amount of ink all working nicely, and very few really dark sections. What I want to do now is to highlight the coloured elements of the crown she wears – unique to her, apparently, no-one else in ancient Egypt has ever been depicted wearing it. I’ve got some gorgeous silk threads from Mulberry Silks which should do the job perfectly, but first they need a skeleton of gold. I had a lovely rummage in among the assorted wonders I’ve received from Thistle Threads (they have their own special box, of course), and after staring critically at the linen fabric, picked out the Special Tambour, and made a start.
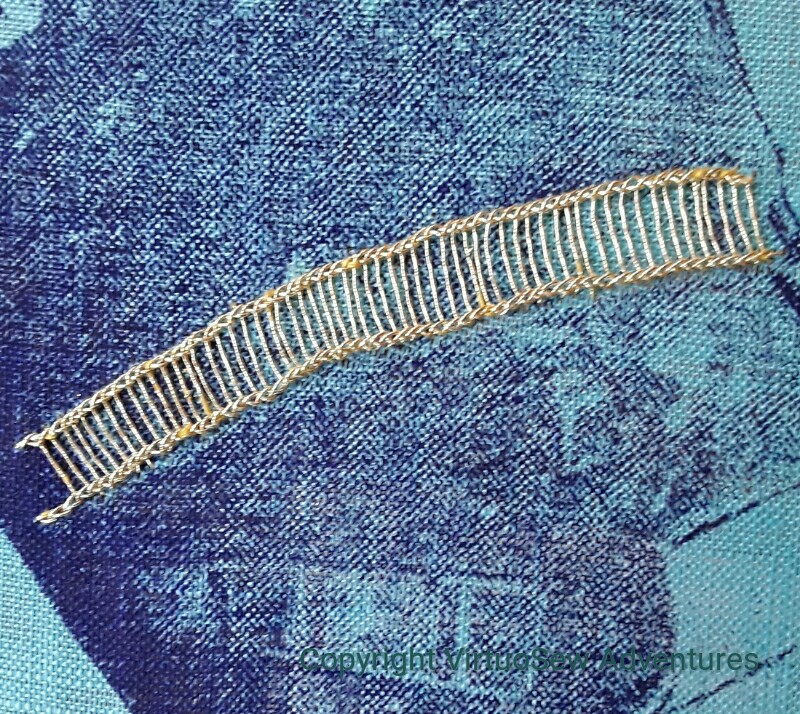 My idea is to create a framework of Ladder Stitch, and then add colour – as in the Tudor Rose project – using silk threads. Long term readers may recall that during the Tudor and Stuart Goldwork Masterclass, I had some trouble with Ladder stitch, so although I was fairly sure the idea would work, I sat down with some trepidation.
To be very pleasantly surprised. Something has happened in the intervening few years, and my ladder stitch wasn’t as trying as I expected, and moved fairly swiftly, too. I may yet decide to redo the stitches, because I re-tightened the fabric in the frame about halfway across, but that will depend upon how much better the second section looks when I have done it.
That’s a good start to a new project, isn’t it!
Finished – Tiny – Flame Stitch Pincushion
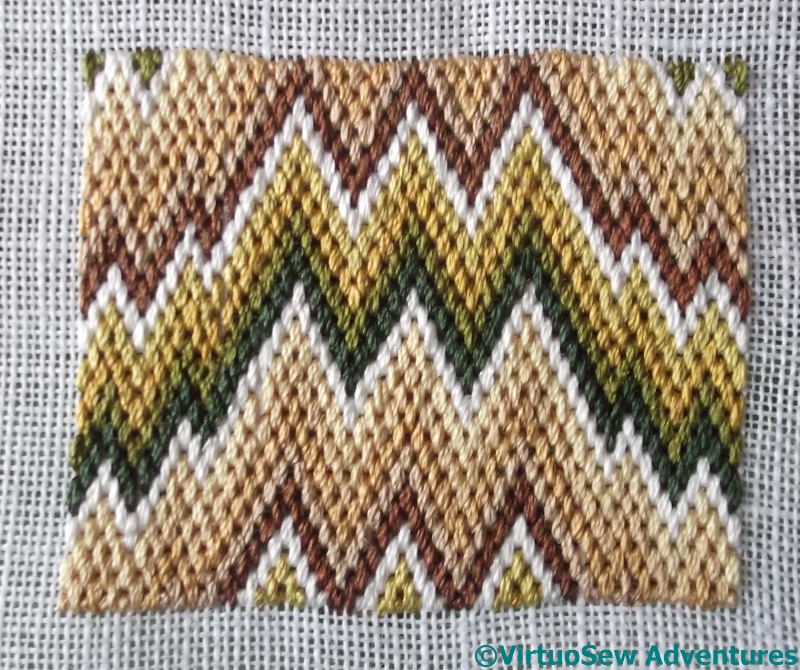
Flame Stitch Finished
There are in fact several errors in the stitching here. However, since I kept losing them and finding them and losing them again, I decided to let them stand. If even I can’t keep them in sight, no-one else will find them…
I enjoyed using the silk thread for the stitching – but then I keep saying that, don’t I? Silk seems alive somehow, in a way that cotton, linen, and even wool, don’t.
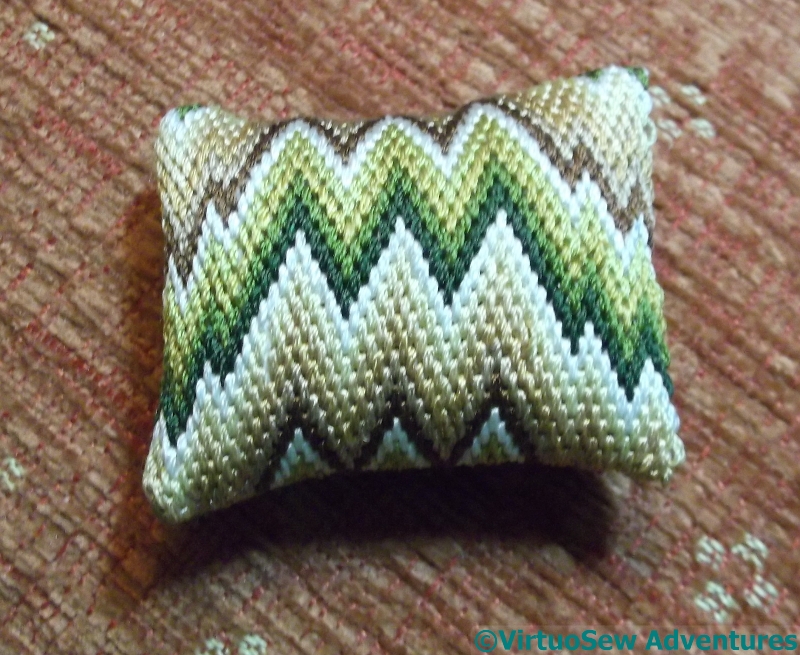
Finished Flame Stitch Pincushion
What really surprised me was just how small the pincushion was when I finished it, using a spare fragment of silk fabric for the back. It was really quite astonishingly fiddly when it came to turning it inside out and especially when it came to the corners.
Still, here it is, done, and stuffed, and the final side closed up neatly..

Isn’t It Tiny!
And then I put it in the palm of my hand and finally realised just how small it really is…
Another one for that eventual Winter Decoration Corner, I think – in my chaotic workspace, a pincushion this size would sink without trace!