
Tag: Frolicking Calf
Finishing the Frolicking Calf

I ran the embellisher over the whole thing, to knock back the colours and the stitches a little, and tugged at the fabric to even it out. Then it was on to the calf, cut out separately and given darker patches on his back and legs. I’ve attached him using single-needle needlefelting, by hand. His ear is sharpened with a twisted chain stitch, his eye is a tiny chain stitch and his hooves are straight stitches.
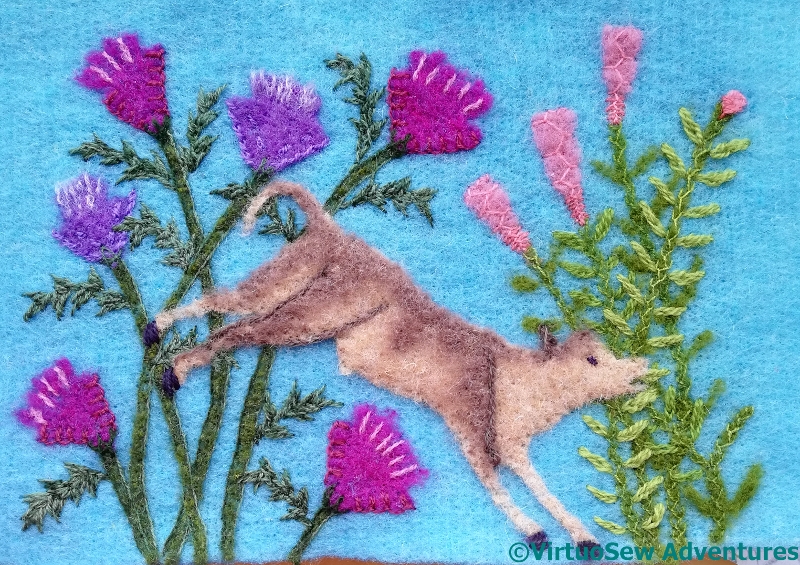
I intend to cut an irregular shape and attach it to a padded wool felt background stretched over a frame, as I did with the Two Princesses. I mustn’t forget to sign it at that point!
Adding details to the Frolicking Calf Fresco
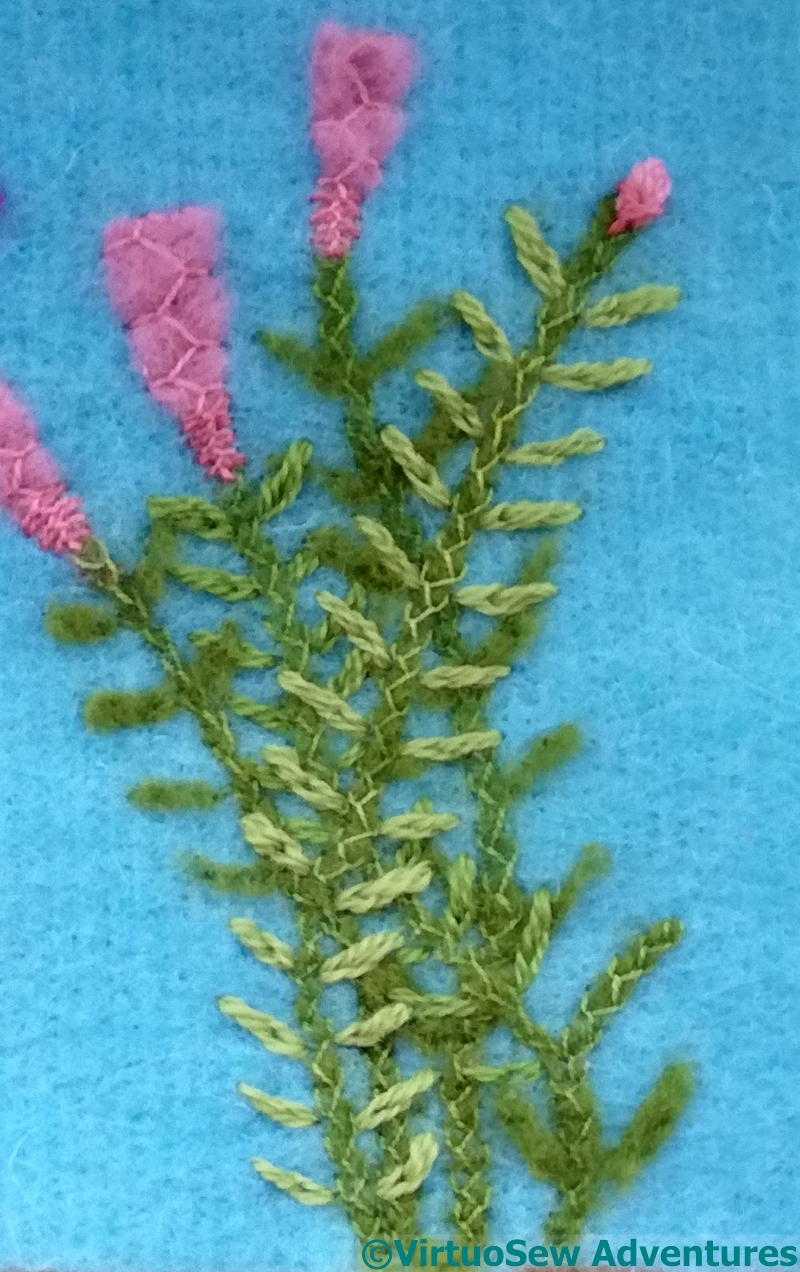
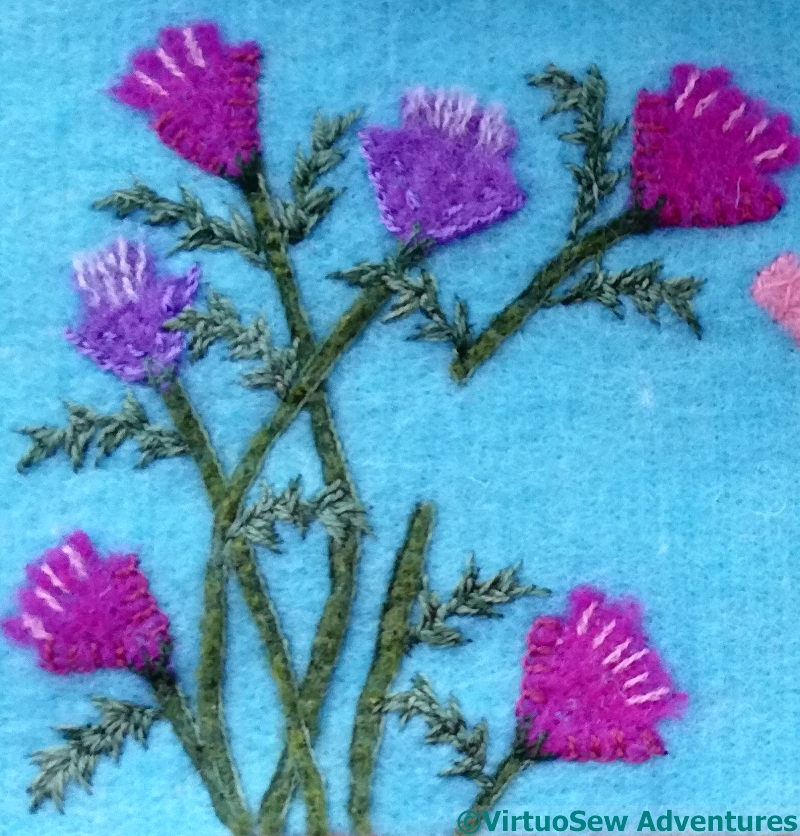
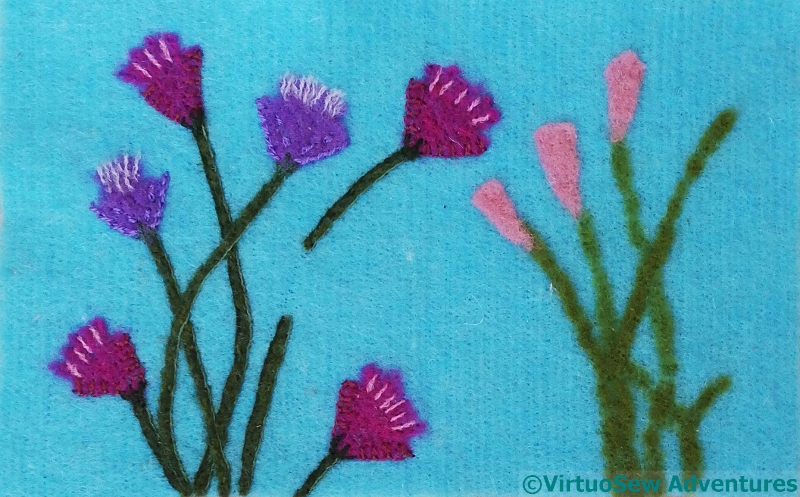
In the case of these plants, instead of stem stitch on either side of the stems, I narrowed and neatened them with a single felting needle, and then added feather stitch over the top, using another of those lovely Gumnut Yarns. The flowers have a flourish of Cretan Stitch, with two colours at the base.
Then I started to think about the leaves. At first, I was going to add fragments of felt for all of them – the original fresco looks as though they are in a single colour – but then I reminded myself that I’m an embroiderer, and after all, texture is one of the reasons why.
The back couple of stems have felt leaves, but then I used loose, large split stitches in Persian Yarn. This maybe looks a little more dense and “jungle-y” than the original fresco, but the Nile valley is famously fertile, after all…
The sharp, curved leaves on the other side were a little harder to deal with.
In the end I decided to make life easier for myself by putting in running stitch curves to help me place them. I’ve spaced them out a little more than in the fresco itself, because the variegated wool thread has created a lot more activity in the embroidered leaves than the frescoed ones.
I think that’s clear in this photo of this section. The sharp, curving shapes, the variegated thread and the varying stitch direction all create a rather busy effect, and I’m even thinking of removing the lighter pink stitches in the flowers. That decision can wait until everything is in place.
So I have a little more thinking to do.
More floral details for the Frolicking Calf
False Start 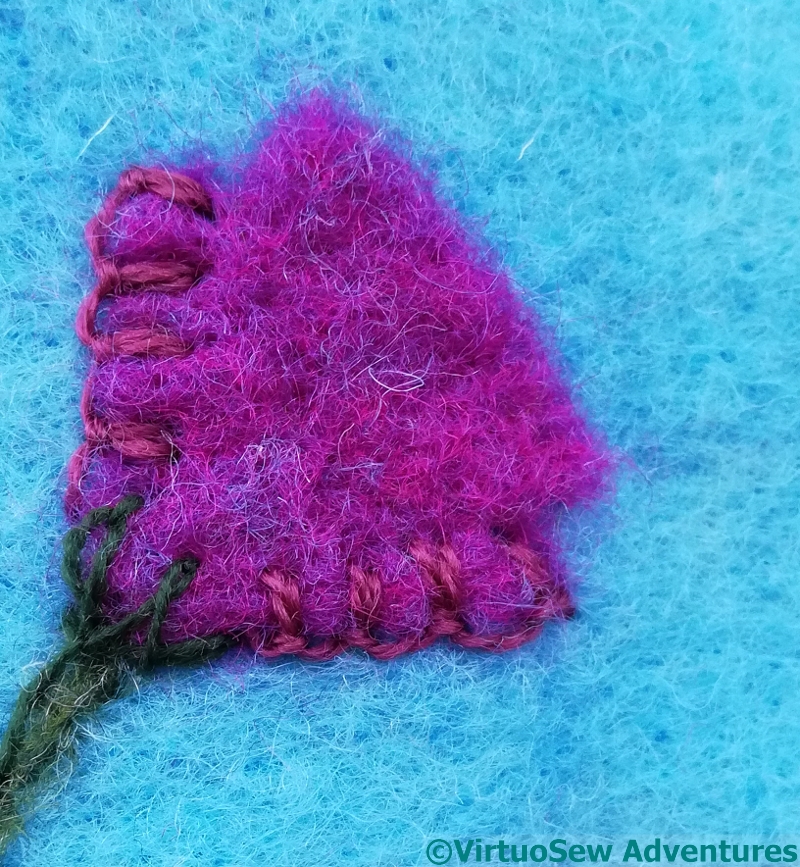
A Better Start
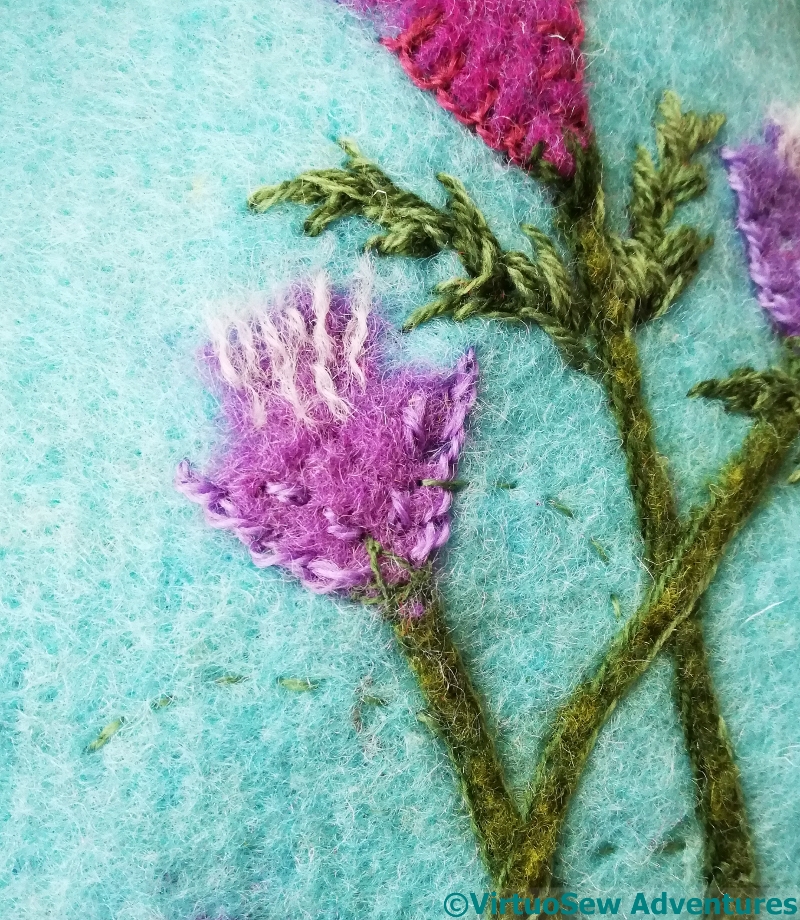
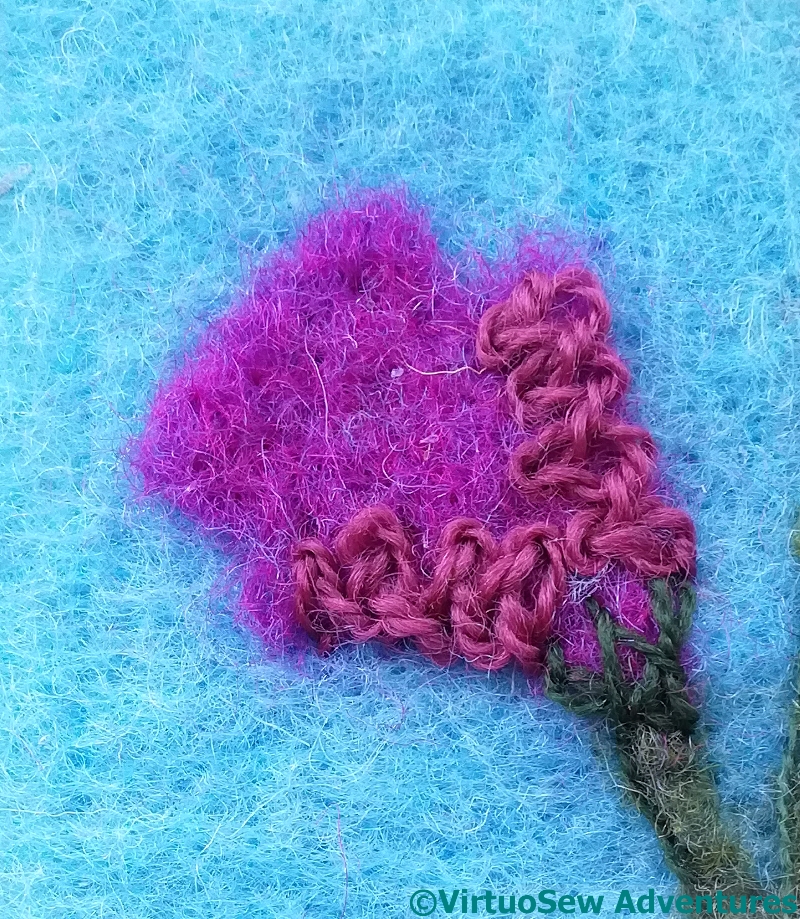
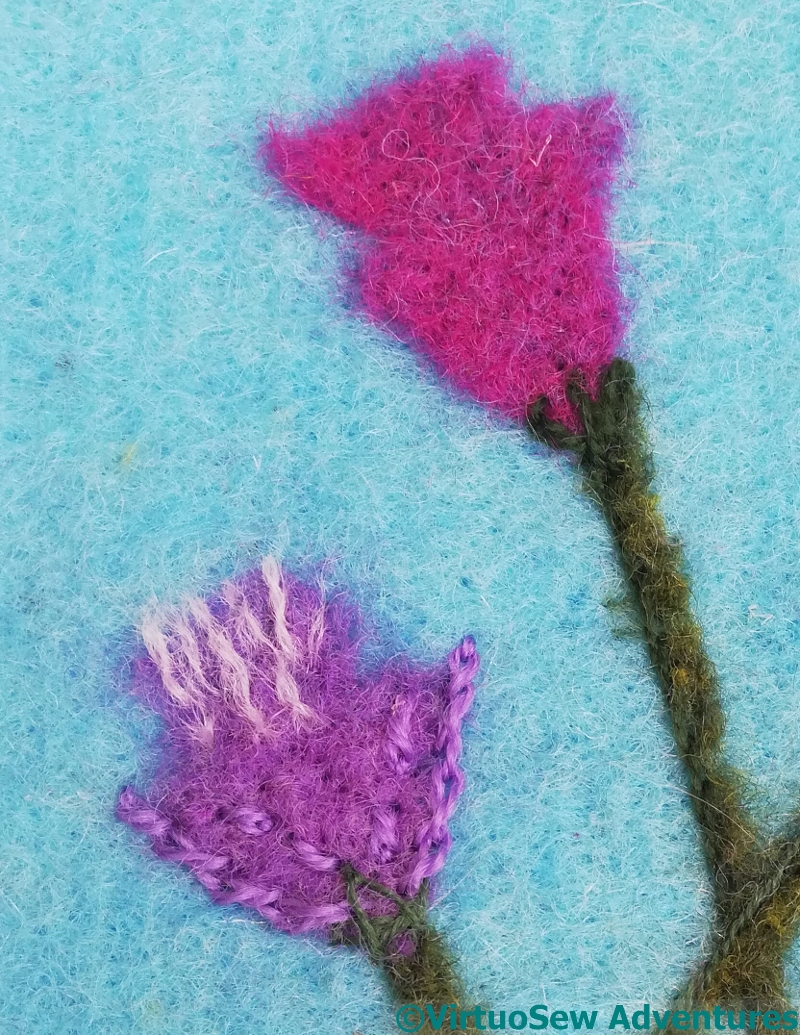
I wanted to do something slightly different with the pink flowers, but still modify the colour with stitching. The braid stitch made the shape too angular, and emphasized the edges too much; up-and-down buttonhole stitch, a favourite from the Jacobean Coat, might do a better job. Certainly, it provides a delicate edge that doesn’t impose itself too much.
You will see that the left-hand side looks sharper than the right hand side. There is stitching and there has been extra needlefelting on the stems and flowers, while the right-hand side still looks rough, like a quick, splodgy sketch. I found I rather enjoyed narrowing the stems and rounding them off – by hand, with a single needle, not the embellisher, of course. There’s a gap in one of the stems because the calf will go over the top!
I may not have managed quite enough curve and flow in the lighter stems, but we will see how I manage to develop them later. They will have leaves added, and that will change the effect and the emphasis…
The Frolicking Calf Fresco Fragment
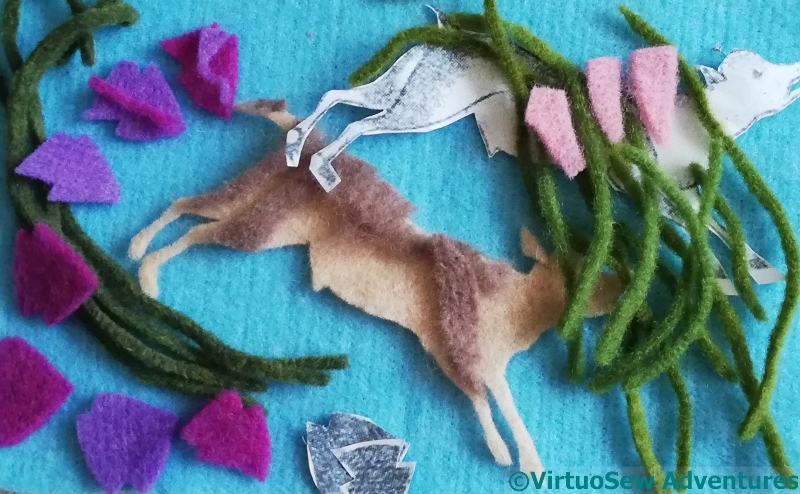
In among my image sources, I found a really joyful image of a calf bounding through vegetation, kicking up its heels. I decided it would be fun to do another felted piece. Like the Two Princesses, there will be stitchery, too, but it’s a change of pace and scale compared to Akhenaten, and I try to have more than one project on the go so that I can think about tricky bits of one while doing easy bits of another…
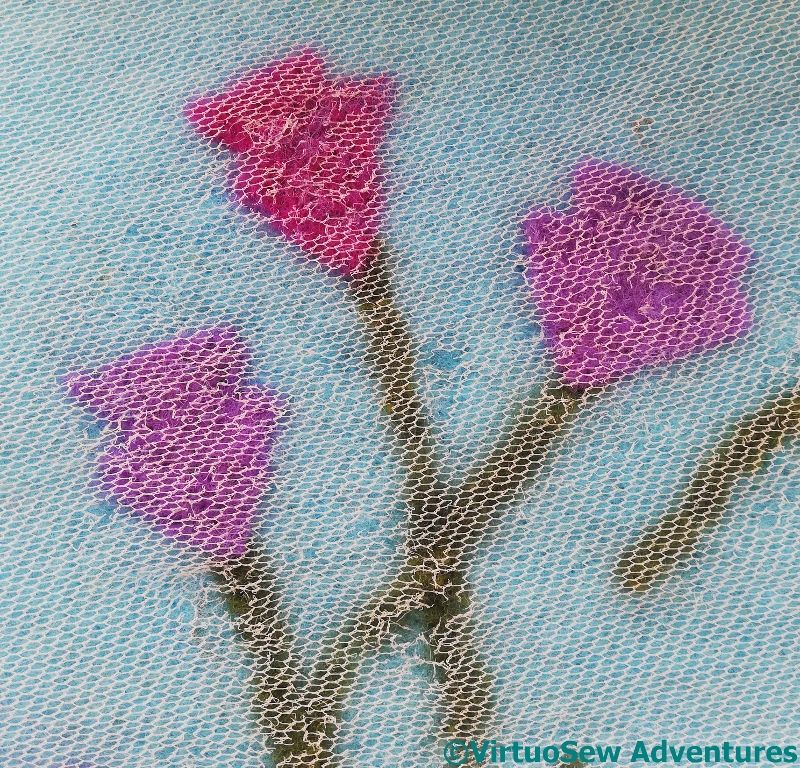
When I first bought my embellisher, the lady demonstrating them told me about using hexagonal net to control pieces of felt and wool while running them under the embellisher. So I bought several yards of cheap hexagonal net, and I’ve found it very useful indeed. It doesn’t get felted in, or at least, not to the extent it can’t be picked out with tweezers, and you can see through it to what you’re working on. So I begin by laying out the pieces I want, hand-needlefelt it roughly in place, and then lay the net over the top and run the embellisher in little moving circles to attach the layers properly.
Once the initial felting has been done, I can start adding stitchery. In this case, I’ve stitched a dark line down one side of each of the stems, and twisted chain down the edges of the lilac flower. I wanted a slightly ruffled effect to the mouth of the flower, so I’ve hand-needlefelted some detwisted yarn into place. I’m not quite sure that I’m pleased with it as it stands. Still, more to do!
The pink flower is still entirely un-detailled. I don’t want to use the same stitches and processes for those, so there’s more thinking to come…