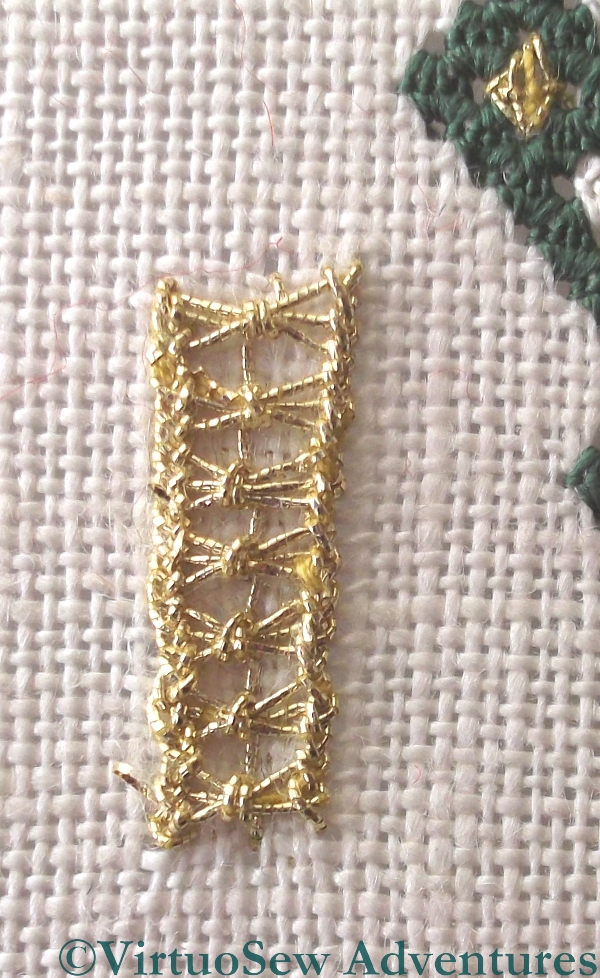
Wheatsheaf On Ladder Stitch
We’ve had a sudden spurt of good weather and good light recently, so I’ve been making hay while the sun shone (literally!). I’ve also been making an effort to use all of the different gold threads that Tricia provided in the kit, some of them real metal threads, some of them imitation, some thick and some thin.

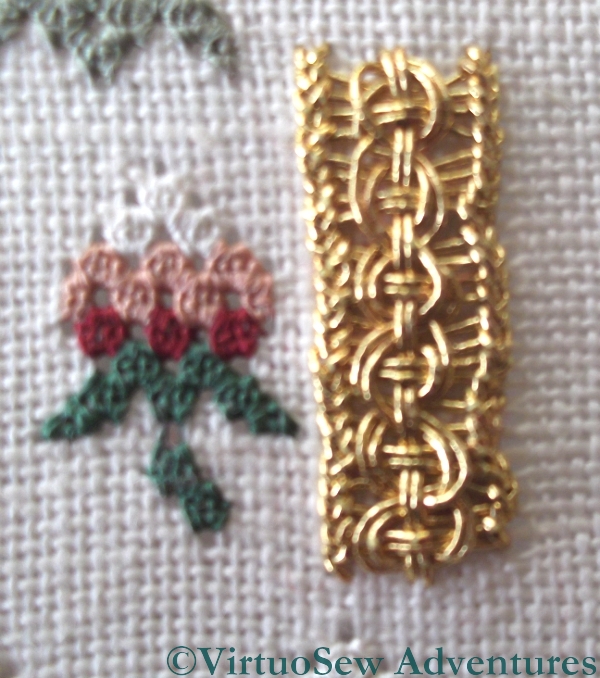
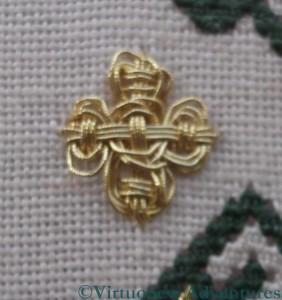
Guilloche On Ladder Stitch
The Wheatsheaf on Ladder Stitch and the Guilloche on Ladder Stitch are in different shades of gold and even different types of thread. There is even a Queen Stitch in a very fine gold thread in the top corner of the picture showing the Wheatsheaf on Ladder Stitch. The one I used for the Guilloche variation is the one I used for most of the practice cloth. It’s surprisingly floppy for a metal thread, which helps with some of the stitches, but not all. In this particular case, at least there were no breaks in the metal, unlike in the Wheatsheaf stitch!

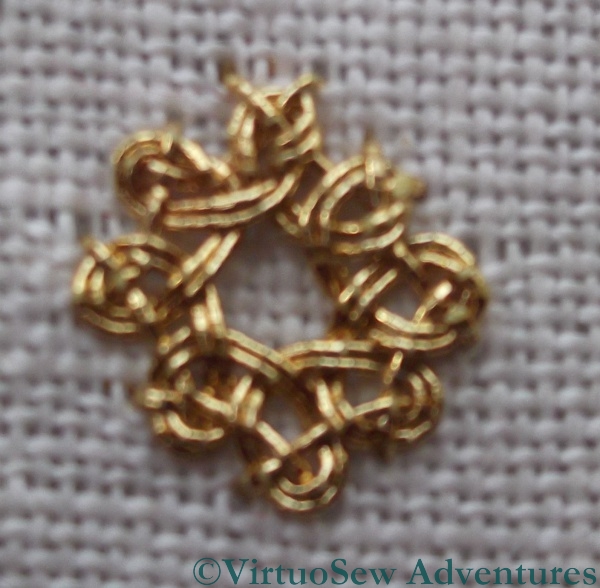
Eight Sided Interlacing Stitch
The Eight Sided Interlacing Stitch was an absolute treat to do. It’s important to count the foundation correctly, but from then it was simply a matter of repeating the same set of actions. I’m rather pleased that, by and large, the threads have stayed neatly side-by-side!
Cross Variation Guilloche
The Cross Variation Guilloche Stitch makes a great contrast with Eight Sided Interlacing – not only yet another different thread, this one a little stiffer, and a slightly different shade of gold, but also an upright, angular form, rather than the almost circular appearance of Eight Sided Interlacing.

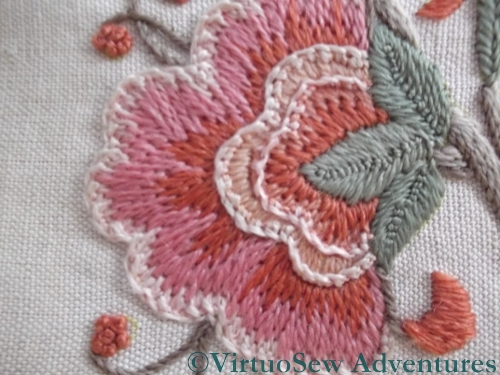
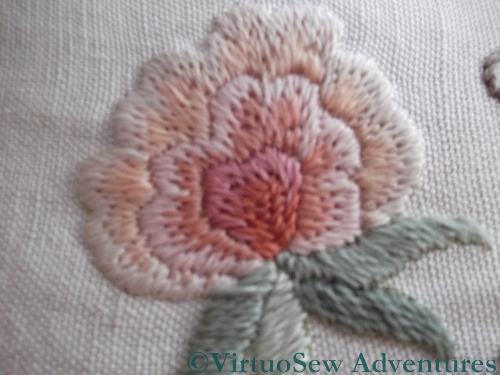
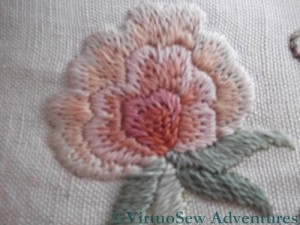
Flower 1 on the Jane Rainbow Kit
The raised edges of the petals of this flower are produced by working one row of blanket stitch along the edge and then working detached buttonhole stitch into that. It creates a fairly subtle effect in real life, and it’s always satisfying to see small details like this appearing in kits.
You can also see in this close up that although I was beginning to get to grips with satin stitch, my Long and Short Stitch wasn’t very good.
Flower 2 on the Jane Rainbow Kit
Really not very good, in fact! The stitching on the second flower looks more like brick stitch. I think this is the only bit of the design I didn’t enjoy doing, and that’s entirely because I simply could not get to grips with Long and Short Stitch. No-one had told me to think “Long and Longer”, which is what has cracked it for me since then. Besides, working a colour change into such narrow rows is not the easiest way to tackle Long and Short stitch!

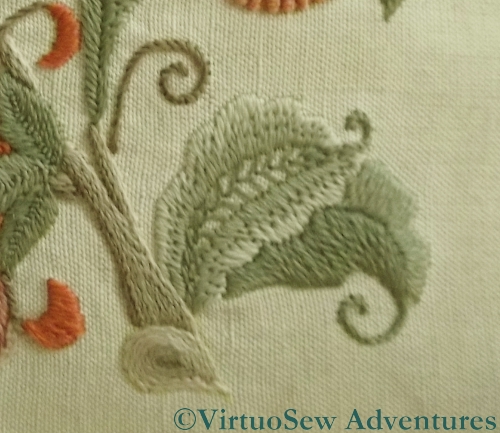
Leaves and stems on the Jane Rainbow Kit
I did like the rows of stem stitch shading from dark to light that were used for the stems – in fact I used the same technique in the stems on the Piano Shawl. The detail of the end of the stem – concentric rows of stem stitch – was particularly charming.
The leaves in the bottom corner worked well, too. The openwork at the centre of the upper leaf makes a nice contrast with the rest of the design which is very densely stitched.
I did enjoy working this – even if it was finished at the speed of lightening!

Starting The Necklace
My brain really wasn’t working very well just before Christmas, and I found it hard to settle to some of my more challenging projects, like the Masterclass. Add to that, the fact that everything had to be cleared away before Christmas because my window for embroidering is also the window for the Christmas Tree, and you won’t be surprised that I found myself with fingers itching to do something, and no idea what to do.
Fortunately, I saw an idea (before I went to the Knitting And Stitching Show in Harrogate) in the magazine “Mollie Makes” for a beaded necklace of outsize sew-on gems attached to felt, and so having bought some materials there, I was ready prepared for the situation.
In the magazine the sew-on gems were black and white, which is all very classic and Chanel, but not my style – I like real colours in my clothes as well as my embroidery! I planned to wear the necklace with a rather difficult purple-pink dress, and since I knew that I wouldn’t be able to match the purple I got sew-on gems in gold, teal and white. I used a grey pre-felt for the basis and then needlefelted onto it a layer of silk throwster’s waste in purple, teal and blue. It looks more purple and less blue in real life.
When I was trying to plan the arrangement of the beads and gems, I found myself over-thinking everything, so in the end I forced myself to make lots of arrangements very quickly and then photograph them. This meant that I could look over the photos, scrolling from one to another until I settled on an arrangement that was fairly pleasing and furthermore, I had the photograph to refer to when I started stitching. We’ve all become so accustomed to digital cameras now that it is hard to think how I would have tackled that before – I certainly wouldn’t have used a film camera because first, I am simply not a good enough photographer, and second, it would have meant waiting for the film to be developed.
I know a design tutor who says that the student who draws flowers from life will create a better design than the student who develops their designs from photographs, and I am inclined to agree – it is certainly the case that when I was designing counted cross stitch the designs I drew were better than the designs from photographs I scanned. However, in this case I was was using the camera as a sketchbook, and I think that that worked really well.

First Stained Glass Window
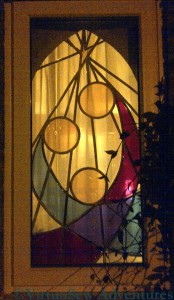
Second Version of the Stained Glass Window
I promised a look at the development of the “Christus Natus Est” design, so here is the very first version, much more traditionally representative in style, made by my mother when I was a little girl, for the window over the stairs in the first house I remember.
When we moved house, there was no window that the first version could fill, so she designed another, this time to fit in a living room window. It is much simpler and more stylised, but I think you can see that in both versions the primary impression is one of the protecting care of the Holy Family.

Christus Natus Est, by Steve Williamson
Then, about four years ago, she did a version in oils, for an exhibition at a local gallery that had the theme “Memorable Dates”. Somehow the design came into vivid life in the painting – she says it came together much more easily than many of her paintings do, but in this version, the Christ Child needs no protection, instead the Light of the World blazes fiercely, incandescent with power and authority.

The Saviour Is Born!
I expect it is a surprise to none of you, having seen that progression, that I decided I wanted to do my own interpretation. As I’ve said before, I think my version is quieter and more subdued. It has a sense of stillness and purpose, perhaps, the outstretched arms of the Christ Child already prefiguring the Crucifixion, with none of the exaltation of the heavenly choirs.
If, unlike me, you believe that an artist’s work reflects their state of mind, you might be worried about that. Don’t be. Beethoven wrote some of his most joyous music when he was already profoundly deaf and acutely depressed, and while I would not in any other way expect to be bracketed with the great man, my embroidery never has anything to do with my emotional state!
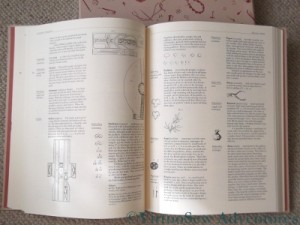
St Aubin - Glossary in "The Art of the Embroiderer"
Charles Germain de St Aubin was designer to Louis XV of France, and he wrote a famous work entitled “The Art of the Embroiderer”, which is much referenced among scholars of textiles of the period, but has proven tricky to track down. Not to mention, my grasp of seventeenth century technical French really isn’t up to scratch.
Now, however, I’ve got hold of a recent translation. The Los Angeles County Museum of Art commissioned a translation, and produced the resulting book splendidly, with colour plates of interesting relevant textiles from their collection (annotated by the curator) and a facsimile of the original work, all on good paper and properly bound and presented in a slipcase. I gloat quietly to myself every time I look at it!

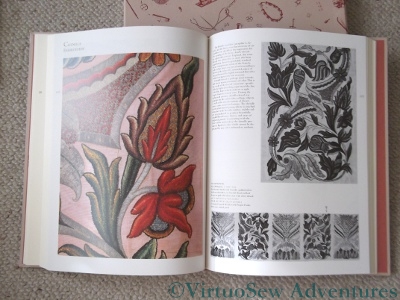
St Aubin - Colour Plate in "The Art of the Embroiderer"
The book is of interest to me because he talks of chenille embroidery, and implies that there are two known methods for making a chenille yarn, one of markedly poorer quality than the other. This is very strange, because until some time in the seventies you would have been told that there was only one way to make a chenille, and that the method St Aubin dismisses as being of poor quality. As far as I am aware no one has yet worked out quite what St Aubin meant, or what other technique he was referring to.
Wouldn’t it be wonderful to find out!
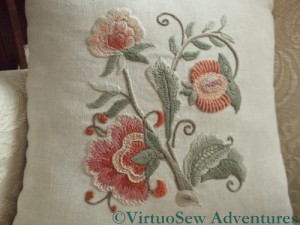
Jane Rainbow Kit
This crewelwork cushion came from a Jane Rainbow kit, which my parents gave me for Christmas about fifteen years ago. It’s the last kit that anyone’s ever bought for me, because I finished it in short order – it was done by Twelfth Night – and the family felt that it hadn’t kept me out of mischief for long enough! I’ve looked on a couple of needlework shop websites, and it seems that this design is no longer available, which I think is a pity. It was fun to do, and I learnt a couple of variations I’d not come across before.
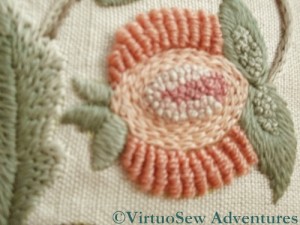
Pomegranate
The pomegranate shows a great variation in height and texture of stitches. I like the way the French knots used in the centre are also used for textured patches on the leaves, although I think I would be inclined, were I to work this today, to use a darker colour in the centre of the pomegranate. The ribbed pattern around isn’t made up of exceptionally long bullion knots, as you might expect, but instead is a sort of opened-out ribbed spiders web stitch. The instructions here said to pack in the stitches as much as possible to get a nicely raised effect. It worked really well – it almost looks padded!
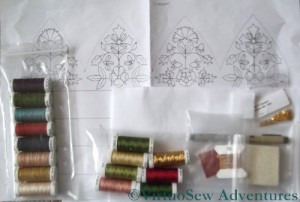
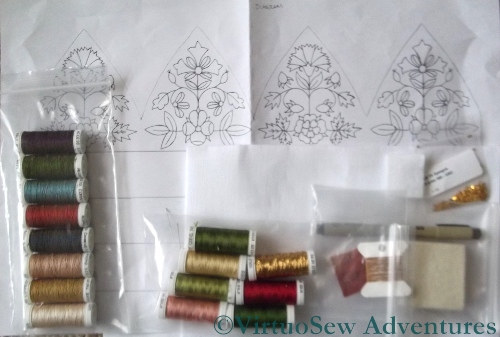
Glittering Nightcap Materials
Although I am very tempted by Tricia Nguyen-Wilson’s Cabinet of Curiosties Casket Course (who wouldn’t be?) I decided that I really shouldn’t take on a multi-year project such as that would certainly turn out to be, not least because I really want to do more on the Dreams of Amarna Panels.
I couldn’t quite do without an Online University course, though, so I have signed up to the Glittering Nightcap Course, and the materials arrived just before Christmas. Eight colours of Gilt Sylke Twist, as well as all the other silk thread, real spangles (tiny ones), a Japanese needle, and even a Pigma pen (for which I am devoutly grateful, because my local – usually very good – artists’ suppliers was completely non-plussed when I asked about them. I suppose it’s an American brand.
I shan’t be able to start before the middle of January or maybe even later, but I’m really looking forward to it. It will be interesting to get to grips with Gilt Sylke Twist, having heard so much about it!
The Saviour Is Born!
A Happy Christmas to you all!

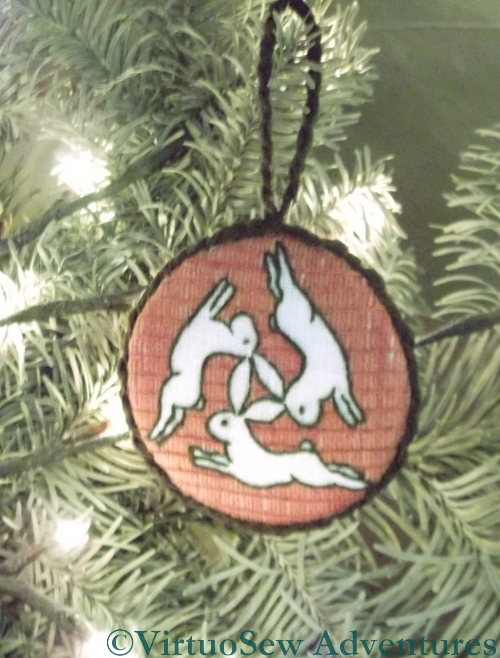
Three Hares Decoration
When I wrote about the Three Hares design I created for Handmade Living magazine, I mentioned that I was rather taken with the design as a framework for experimentation. I have an idea in my head for quite a big project based on the design, but while that’s simmering away and developing in my head, I have gone in the other direction.
This is a much smaller and much more complex version, but maintaining the historical connection, I chose to use Bayeux Stitch (there is a diagram in this Embroiderer’s Guild pdf) for the background. The stitching uses fine woollen threads on a linen ground, and naturally I followed my usual habit of increasing the complexity of my adventures in stitchery.

Decoration Closeup
Bayeux Stitch is worked in two phases, of which the first is surface satin stitch. I chose to alternate two shades of rust for the surface satin stitch, and then the couching stitches went over the top using the darker shade. It doesn’t really show in the photographs, which were taken in rather dismal lighting conditions, but it does show in real life, and it makes the background shimmer slightly – which is a good trick when there’s no metallic thread involved!

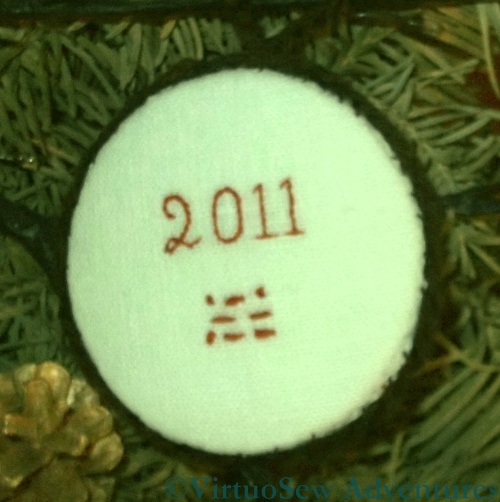
Decoration - Back
Whereas in the first variant, created for Handmade Living magazine, I simply outlined the design, gaining all of the interest from the contrast of fabric and thread, in this case I outlined the motif (in back stitch), then covered the background completely with stitching.
Finally, I turned the embroidery into a hanging decoration by the same method used for the Glittering Snail, but before I covered the back with fabric, I added the year and then my initials in Morse Code.
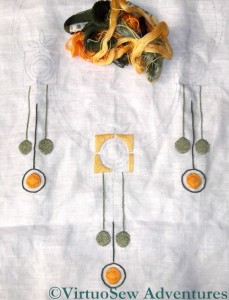
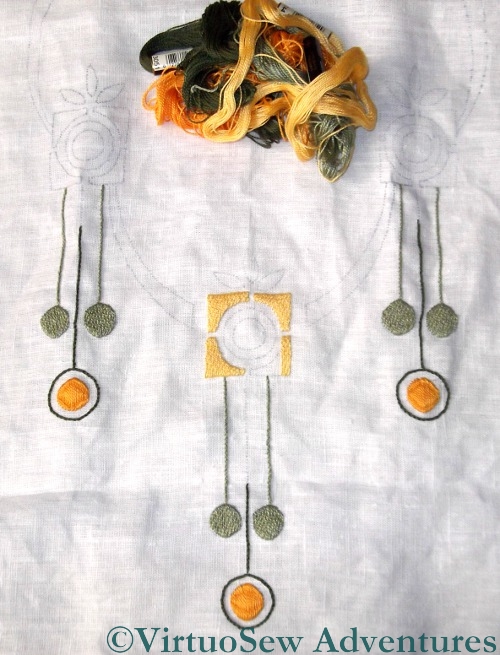
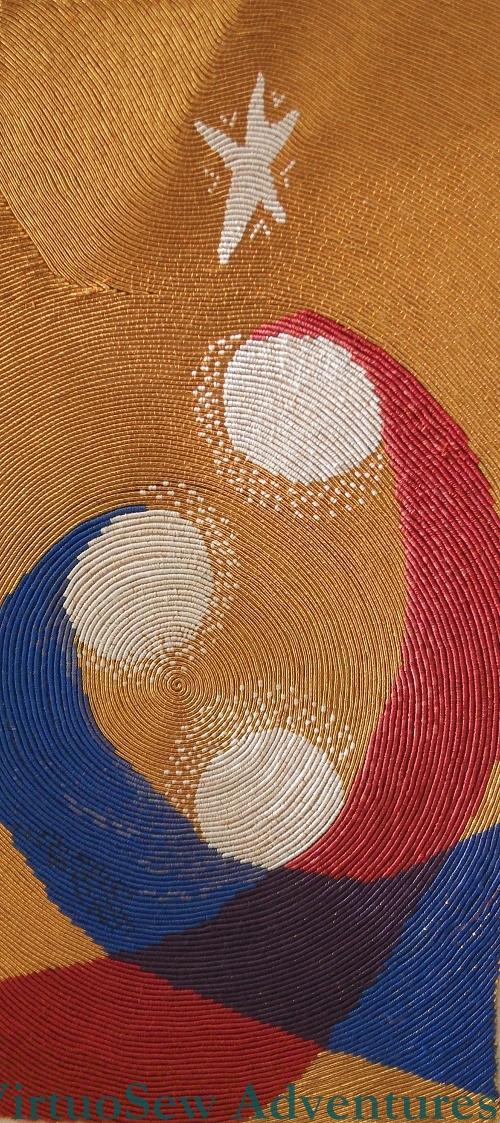
Finnish Embroidery - Progress
I managed to get started on my Finnish embroidery project at last. It’s going to be a table runner for our dining room, which is golden-yellow and decorated in a slightly Arts and Crafts fashion, so the design has been traced twice, back to back, to create a long design, and without the lettering shown in the photograph that accompanied the linen (see my first post about this project).
Following the model I saw in the shop, I’m using Bokhara Couching for all the solid shapes, laying the couching stitches in a sort of brickwork pattern to create texture. The deep golden circles will echo the sunburst in the eucalyptus frieze in the dining room, and the two greyish greens are close to the other colours in the frieze.
All the lines are going to be in stem stitch. I’m working this quite slowly and carefully to keep the stem stitch twisting neatly in the same direction and the stitch length more or less the same.
It’s some time off yet, but I’m planning to hand-hemstitch the edge of the runner. I take a slightly unexpected pleasure from hand-hemstitching, and even the six metres of hemstitching on the Piano Shawl haven’t put me off. There’ll be about three metres of hemstitching on this, and I’m rather looking forward to it!