
Tag: Barbaric Necklace
A Very Frivolous Project – Third Stage
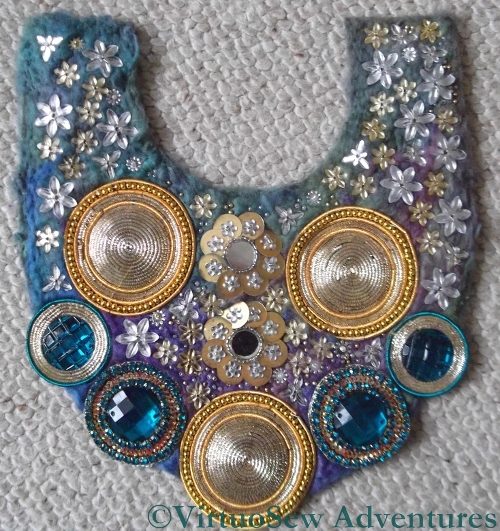
Embellished Necklace - intermediate stage
When I’d finished putting the large elements on to the backing felt, I laid it on the floor and scattered the small elements over it.
Although the basic shape is symmetrical and the basic layout of the design is too, I’ve not attempted to create absolute precision in the execution of the design. The backing has some “give” in it anyway, and besides I felt that if the piece were precisely symmetrical it would produce a rather stiff and lifeless effect, not at all the exuberant effect I was seeking.
So one side has more of the pale yellow flower gems, and indeed is more densely packed all together, while the other side is lighter and shows more of the background fabric. Remember that the point of the layer of throwster’s waste was to tie in the necklace to a dress, so I had to leave some of it showing!
At about this stage I realised that the next day was the day before Christmas Eve, so I attached some double-faced satin ribbons and decided to wear it as it was a couple of times before deciding whether it needed any more embellishment. It was a great success – it works well with the dress I intended it for, and really beautifully with a teal cashmere sweater I bought in the autumn.
I’ll let you know if I add any more beads!
A Very Frivolous Project – Second Stage
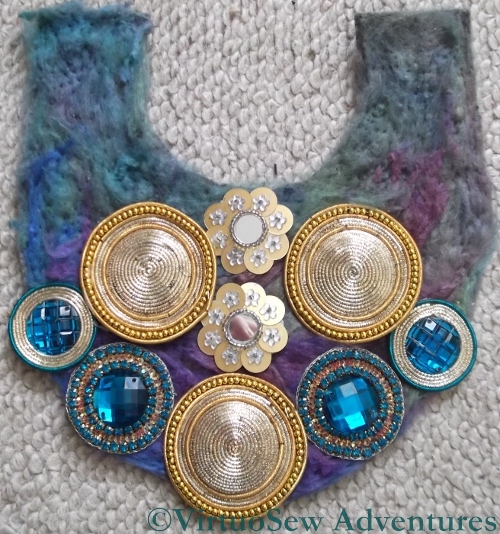
Laying Out The Large Elements
Once I had decided which of the score or so of arrangements I was going to create, I laid out the large elements on the needlefelted felt and tweaked the design a little more.
The gaps will be filled in with little flower gems and seed beads, so I ended up spacing out the large elements a little more. Then I had to work out how to sew them on. You see, unlike the original design in the magazine which had used oversized sew-on gems with no settings, I had ended up buying a selection of bead-and-purl assemblages from Aarti J’s and Bombay Fabrics. They weren’t quite as straightforward to sew on, and they certainly couldn’t be temporarily attached with safety pins, lest I break or crack some of the check purl.
Sewing on the large gems was several evenings’ work, as it turned out, using a fine but sturdy needle and being careful where I placed it. Still, each assemblage is backed with stiffened muslin, so in some cases it was relatively easy to stitch through the muslin and avoid the beads. In other cases the thread snagged on the front of one gem while I was working on another!
A Very Frivolous Project – First Stage

Starting The Necklace
My brain really wasn’t working very well just before Christmas, and I found it hard to settle to some of my more challenging projects, like the Masterclass. Add to that, the fact that everything had to be cleared away before Christmas because my window for embroidering is also the window for the Christmas Tree, and you won’t be surprised that I found myself with fingers itching to do something, and no idea what to do.
Fortunately, I saw an idea (before I went to the Knitting And Stitching Show in Harrogate) in the magazine “Mollie Makes” for a beaded necklace of outsize sew-on gems attached to felt, and so having bought some materials there, I was ready prepared for the situation.
In the magazine the sew-on gems were black and white, which is all very classic and Chanel, but not my style – I like real colours in my clothes as well as my embroidery! I planned to wear the necklace with a rather difficult purple-pink dress, and since I knew that I wouldn’t be able to match the purple I got sew-on gems in gold, teal and white. I used a grey pre-felt for the basis and then needlefelted onto it a layer of silk throwster’s waste in purple, teal and blue. It looks more purple and less blue in real life.
When I was trying to plan the arrangement of the beads and gems, I found myself over-thinking everything, so in the end I forced myself to make lots of arrangements very quickly and then photograph them. This meant that I could look over the photos, scrolling from one to another until I settled on an arrangement that was fairly pleasing and furthermore, I had the photograph to refer to when I started stitching. We’ve all become so accustomed to digital cameras now that it is hard to think how I would have tackled that before – I certainly wouldn’t have used a film camera because first, I am simply not a good enough photographer, and second, it would have meant waiting for the film to be developed.
I know a design tutor who says that the student who draws flowers from life will create a better design than the student who develops their designs from photographs, and I am inclined to agree – it is certainly the case that when I was designing counted cross stitch the designs I drew were better than the designs from photographs I scanned. However, in this case I was was using the camera as a sketchbook, and I think that that worked really well.