
Category: General Embroidery
The Glittering Snail – part one
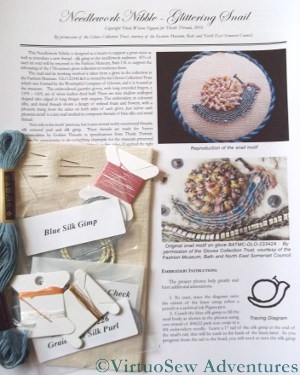
The Snail Kit Has Arrived In The Post
You may recall that in December I wrote about the Thistle Threads project to Stitch A Snail For Storage. We’ve been away for a while, but came back to find a huge pile of post which included a jiffy bag from Thistle Threads.
Since I’ve already printed out the instructions (as soon as I ordered the kit!), I can start just as soon as I’ve gathered my wits and drawn the design on the linen. Even though the basic concept of the design is simple, it will be complicated and probably a little tricky to do, because the snail is only about an inch from nose to tail!
Tricia had two reasons for developing the kit – one was to sell something in aid of the Fashion Museum in Bath, but the other was to introduce some new threads to us. So of course, the first thing I did was to rummage through to look at the the new threads, the silk gimp and silk wrapped purl. They look highly intriguing, and I am looking forward to playing with them…
Tudor and Stuart Goldwork Masterclass – More Post
More Post From Thistle Threads
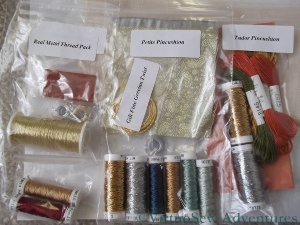
Yet more post from Thistle Threads – aren’t I a lucky girl!
This time, the post contained the real metal threads for the Spot Sampler, and the materials for two pincushions that also form part of the course. There’s a piece of silk brocade, and two pieces of linen, and even more silk threads… I’ve not caught up with printing the instructions yet, so I’m not quite sure what I’m going to be doing with them, although I have had a quick look, and there’s at least one new stitch variation in among them.
Progress So Far
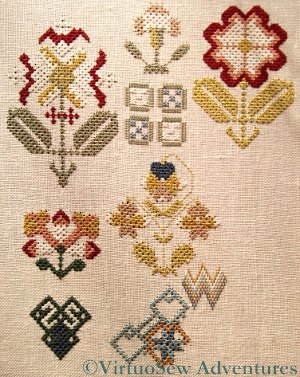
And bear in mind, I still haven’t finished the silk work on the Spot Sampler, and that there are going to be even more ornamental stitches to learn. This photo shows my progress so far. Over the last couple of days I have finished the bargello motif and made a lot of progress on the central motif at the bottom. I once reckoned it took twenty minutes to do ten Queen Stitches, and was very depressed by that discovery, but I think I’m speeding up again!
It’s intriguing to see the new fabric created by the Queen Stitches. It’s not often that the effect of stitches is quite so clear. Instead of the ordinary square-woven fabric, the closely-worked Queen Stitches create a sort of heavy openwork lattice. It has a completely different texture to the basic fabric and when I finally finish the piece, I will have to make sure I frame it or mount it in such a way as to make that quite clear.
The Camberwell Panel – Two
Fabric Choices
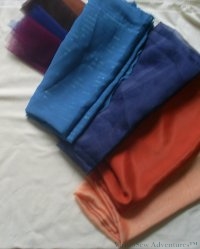
So here are the final colour choices for the Camberwell Panel, after much deliberation.
I wanted to maintain the flat expanses of colour used in the posters, together with the slightly unreal colours, but at the same time, I did not want to create a wilfully unrealistic colour scheme. So although I decided to use apricot organdie for the sky (after all, we’ve all seen strange colours of sky, haven’t we?), the fabric for the sea was a blue-green georgette, and for the hull a dark orange crepe-back satin, crepe side out. The dark orange is close to the terracotta/red lead colour often used on merchant shipping, while sitting comfortably alongside the apricot. Then I picked some fragments of net in a variety of dark colours to help with the rough textures of the quayside, and navy blue organdie to help create the shade on the hull.
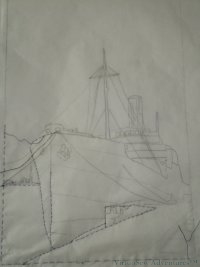
Transferring the Design
I chose a cream cotton velvet to make a solid, but pleasantly textured background, thinking it would make a pleasant surround when the panel was complete (as you will see, there were some design changes made during the process…!).
This in turn meant that transferring the design threatened to be an exercise fraught with difficulty – right up to the point where I realised that since much of the design would be applied in pieces, all I needed on the background velvet was basic clues for placement.
So I traced the design onto tissue paper, tacked it in place, put the whole thing on a slate frame and went over the main design lines in running stitch.
Easy!
Steps in the Sun
Some years ago, I was asked by a magazine to design “my interpretation of buildings” in counted work. I produced three versions of the same thing – a set of steps in a Tuscan village, with plants in pots on the steps and a window looking over them. Then the magazine didn’t use them. Any of them. Sigh.
Never mind, I enjoyed doing them, and it was a very interesting exercise.
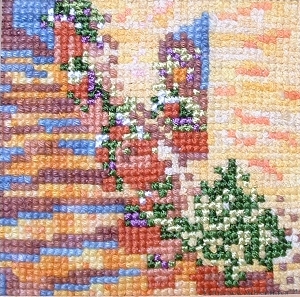
Steps in the Sun using various threads in counted cross stitch
The colours are inspired by Monet’s Rouen Cathedral series – strong, bright colours with purples and blues as the shadows. They are like impressionist oil paintings in another way, too – it’s not always entirely clear quite what the shapes are until you have looked for a while.
For Version One I used counted cross stitch in space dyed and other threads. The walls were worked using a cotton bouclé, and the steps in a range of soft unmercerised cottons. The terracotta plant pots were worked in stranded cottons (solid colour), and the plants themselves were worked in rayon, also in solid colours. The threads were rather heavier than stranded cottons, so I used 22 count linen and stitched over two threads. The bouclé battled every stitch of the way!
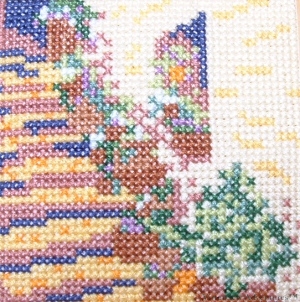
Steps in the Sun - Stranded Cotton counted cross stitch
For Version Two I used plain counted cross stitch in stranded cotton, chosen to reflect the colours of the overdyed cotton as well as I could manage. It is strange to see that the photograph gives the impression of the aida fabric showing through, which isn’t so obvious to the naked eye. This version actually is more successful in some ways than the first one, although I have them all three on the wall and I actually prefer Version One! Version Two is not so hectic, but still, it doesn’t “read” as clearly as I might like. Or at least, not to everyone. I see the steps in all three, but I know people who don’t.
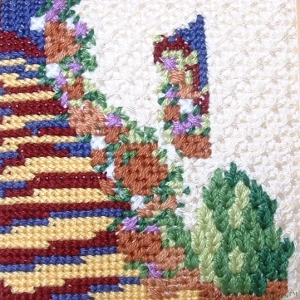
Steps in the Sun using canvaswork stitches in stranded cotton
In Version Three I became even more experimental – I knew the magazine wouldn’t go for this one, but thought it would make an intriguing exercise. The base fabric is ordinary aida, but I chose to use canvaswork stitches in stranded cotton. The bush in the bottom planter is worked in Leaf Stitch – oh, look, Leaf Stitch again! – and the steps are long-legged cross stitch. The wall is Double Straight Cross Stitch. I enjoyed this one the most, but at the scale of the piece (it is less than four inches square) there really is not enough space for most of the stitches to do their work properly.
An interesting exercise, all the same..
More Peacocks!
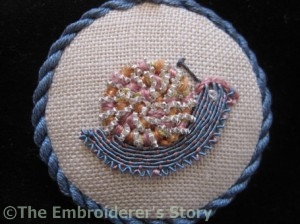
Peacock Motif
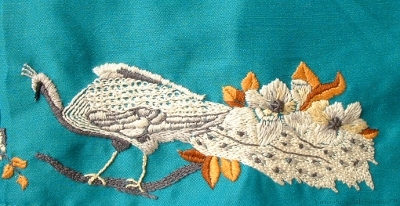
This design of peacocks and flowers was taken from a Time Life book on couture embellishments, and embroidered on a full skirt. It still attracts attention, and now full skirts are back “in”, I shall probably fish it out and start wearing it again. Although it has always been a challenge to find a suitable top!
I worked this as a teenager, and wore it at a cousin’s wedding. The design was worked at three places around the skirt, with each third showing two peacocks confronting one another across the sprig of flowers. The original design used two shades of grey-green, several shades of grey, lemon and white on a red satin background. I simply changed the two shades of grey green to a dark yellow and a chestnut brown to work on the bright turquoise/teal background.
The design attracted me because – alone of the surface embroidery patterns I had seen up to that point, it included more than the basic stem stitch, satin stitch, and long and short stitch. The peacock’s back was worked in Pekingese Stitch, deliberately worked loose and spaced so as to create a slightly mottled effect. The flower centres used a whipped spiders web wheel, worked close and tight so as to be slightly raised. The branches were worked in a combination of Coral Stitch and Scroll Stitch – neither of which I remember seeing used in a commercial design up to that point.
It was quite fun to stitch, but the deadline made life a bit exciting, and my mother had to help out with some of the embroidery so that I could get the job done!
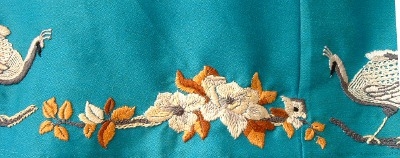
Flower Motif
Another Canvaswork Sampler
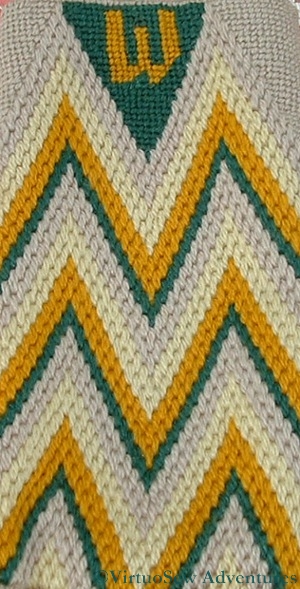
Canvaswork Spectacle Case Sampler
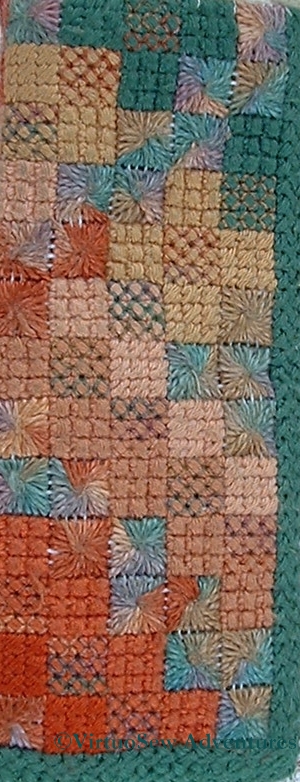
The Other Side Of The Spectacle Case Sampler
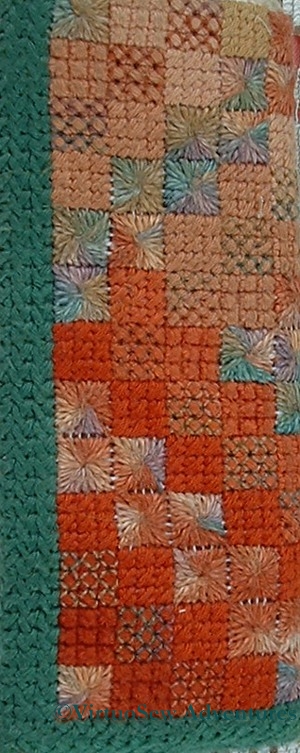
Strictly speaking, this isn’t one of mine. My mother stitched this, but she asked me to design it for her after she saw the stripy sampler.
It uses the same principle of plain soft embroidery cotton and matching Wildflowers and Watercolours threads. This time, though, instead of straight stripes, the stripes were V-shaped.
It was rather more complicated and time-consuming, but it must have been a success because it is still in use and I had to sneak it from her handbag for the photograph!
It did teach me, however, that designs should be planned with their final use in mind. This looked much better as a flat panel than it does as a spectacle case!
Tudor and Stuart Goldwork Masterclass Stitches – Month Eight
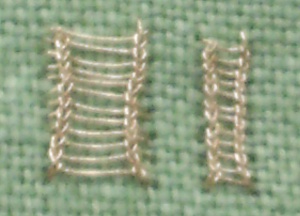
Ladder Stitch
This month Tricia’s History and Analysis section includes a description from the animator of how he approaches animating the stitches. It’s very painstaking work, and as the first thing he does is to follow the instructions just as we are, he is going to end the course with the same repertoire of exotic stitches as we have!
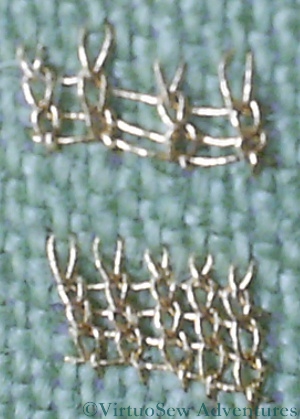
The first of this month’s stitches is Ladder stitch. Like last month’s Ceylon Stitch, this is a stitch I have worked before; in fact it’s very like Ceylon Stitch in structure as well. I can change the width of the stitch, but not the vertical scale, so my two versions here look very similar. With the rather stiff gold thread, the stitch becomes rather a trial when worked with long “rungs”, so I enjoyed it more when I worked it in a narrower space.
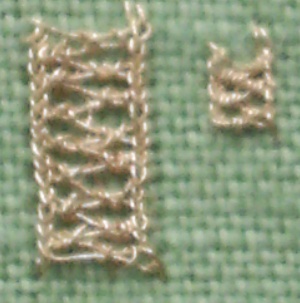
ZigZag Embellished LadderStitch
The second stitch is an embellishment of Ladder Stitch, using a ZigZag whipping. I had trouble with this stitch because I simply couldn’t bring myself to pull the whipping tight, so it tangled and tied itself up, and nearly tied me up with it. As the shorter version shows, once I sorted myself out, the stitch sorted itself out too.
My problem is that I’m very aware of the way the thread is made, and concerned that the wrapping of metallic foil will be broken if I pull too tight. It isn’t really a problem, as the overall effect of the thread usually masks any slight breaks, but try telling yourself that when you’re tangled up in an expensive thread you don’t want to waste!
Stitching a Snail for Storage
Stitch a Snail for Storage Needlework Nibble
Since I am following the Tudor and Stuart Goldwork Masterclass, I receive Tricia’s Newletter, and a recent one described a plan she has to raise money for storage and display of gloves in the Museum of Costume in Bath, which she’s calling “Stitch a Snail for Storage“. It looks fascinating, so I’ve ordered one of the kits, and downloaded the instructions and printed them out.
The fundraising is about two thirds of the way to the total needed by the Bath “Museum of Costume” to rehouse the collection of embroidered gloves and gauntlets in such a way as to make it possible for embroiderers and other people interested in embellishment techniques to examine them without touching them and rishing damage to them.
Tricia’s “Needlework Nibble” will be a great way to support this while being introduced to some of the interesting threads she has developed following her research. Why don’t you give it a try?
Grandmama’s Spectacle Case
Spectacle Case in Bargello, worked for Grandmama
When I finished the Dragon Footstool I had some wool and some canvas left, and so I made a companion piece – a spectacle case so that Grandmama would be able to find her sunglasses in her handbag. That’s why it’s in the lighter colours.
It is a simple bargello pattern – in fact the simplest, most basic Florentine Flame pattern there is, and the charted initial is very simple too.
When I consider the range of stitches in the Dragon Footstool, I can’t help but wonder why I didn’t go for a more complex pattern, but I had painted the Dragon and this was charted – in fact, in the same book (The Readers Digest Guide to Needlework). Maybe that had something to do with it. I’ve always found charted pieces somewhat problematic. I have a tendency to lose interest in counting, which is a very bad idea in a charted piece – in fact it is one of the reasons I have other projects going on while I’m working on the charted motifs for the Tudor and Stuart Goldwork Masterclass!
Grandmama was happy with it, anyway.
Tudor and Stuart Goldwork Masterclass Stitches – Month Seven
Ceylon Stitch
I’ve not been making as much progress on the silk work for the Spot Sampler as I would have liked, recently. Still, I have managed to have a go at the Month Seven stitches, Diagonal Half Guilloche Stitch and Ceylon Stitch. As always, I have done them at two different scales.
I’ve worked Ceylon Stitch before, although certainly not using a metallic thread. It produces something that looks a little like knitting. I suspect it will be easier if I use a stiletto to control the thread. I know I have one somewhere, so I’ll look it out before I try this one again. I think I used it as a needlelace stitch before, and that, of course, used a simple round cotton thread.

Diagonal Half Guilloche Stitch
I think the Diagonal Half Guilloche Stitch has possibilities for some of my other projects. It looks very like one of the braids sometimes used to edge upholstery, and might also make a good filigree necklace for the Amarna panels. It will be important to pick the right scale of thread and fabric, as you can see in the picture here, but at least when I have been working at the large scale it has been easy to see where the needle is supposed to be. This hasn’t been one of the most complex stitches, but I’m glad that I have chosen to work practice versions of all these stitches before I work them on the sampler or the pincushions!