
Category: General Embroidery
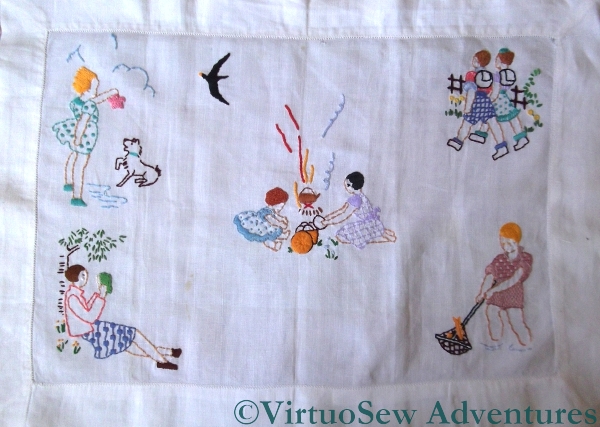
Holiday Traycloth – second installment
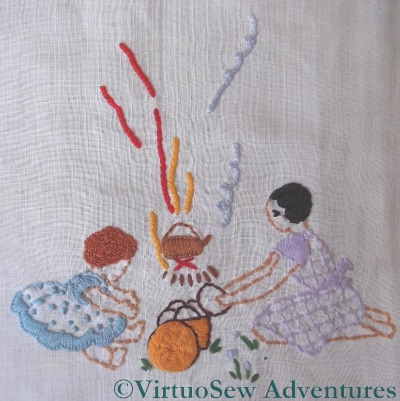
Making Tea
Now this is very “Swallows and Amazons“, isn’t it!
There’s a woven spiders web wheel for the top of the picnic basket, the little girl’s red hair is worked in coral stitch and her older sister’s is satin stitch. It’s barely visible in the photo, but the satin stitch is angled this way and that to create something that looks a little like a Marcel wave – a very grown up style on a relatively young girl!
As in the first installment, the cuffs and flounces are in blanket stitch. The spots are French knots, and the lilac dress is worked as a pattern of back stitches.
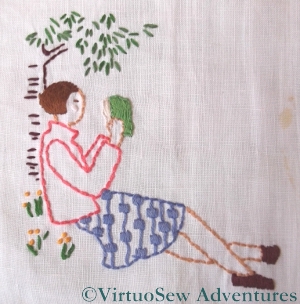
Reading
This motif, “Reading” shows particularly clearly how skilled the designer was in making the best possible use of simple shapes and simple line. Much of the design uses straight stitches – for the leaves, the bark, and the stems of the leaves.
The pattern on the skirt alternates back stitches with tiny satin stitch blocks, and the hair is stem stitch. The book and the shoes are satin stitch, the flowers are French Knots, and anything else is in back stitch.
It couldn’t be simpler to do, but doesn’t it look good!

Fishing
This is the point where – after nobly containing my experimental impulses for quite some time! – I indulged in a few wanderings from the path laid down. The shorts are actually woven! It must have been tricky to get right, but it’s worked really well – they look slightly tweedy, but in any case the sort of heavy fabric that any sensible mother would clothe her child in for scrambling around rocks and beaches.
The little gold fish is worked in Vandyke stitch, which is tricky to keep even but creates a strong line down the side of the fish to contrast with the net in the background.
Dealing with the Golden Acorn
Silver Braid Stitch
You last saw the Golden Acorn in July, when I was thoroughly fed up with it.
Since I’d got so engrossed in stitching that I’d neglected to pay attention to the details and had to unpick the lot, when I came to re-stitch I decided to put in the braid stitch in silver first.
I found the silver to be a more temperamental thread than the gold, although structurally it was exactly the same. However, these threads are all made more or less by hand, and must be hugely susceptible to temperature and humidity.
I know from my textile technology studies that natural fibres – such as cotton, wool, and silk – are susceptible to environmental conditions, because the basis for the success of the Lancashire cotton industry was due in no small part to the fact that ideal conditions for growing cotton are far from ideal for turning the cotton into cloth. In fact, nowadays, textile factories are built with climate control, because the speed of modern production demands that all possible variables be thoroughly ironed out.
In the same way, if you visit a woollen mill, you will see piles of wool at various stages of production, just sitting there. If you are a time-and-motion person you’ll get very uptight about this, and talk about “Just In Time” manufacturing – only to be told, in no uncertain terms, that if you want to pay for all the failed batches that will result from not allowing the wool to relax (technical term – yes, honestly) between processes, you’re welcome, but the manager won’t let it out of the factory with their name on it.
The silver and gold threads we are using have natural fibre cores, so sensitivity to climate is only to be expected!
Second Time Lucky
I found both of the two main stitches in the strapwork, Ceylon stitch and Braid Stitch, rather troublesome in metal thread, although Braid Stitch in pearl cotton is one of my favourites. There’s no denying that they produce a rich and exotic effect once they are in place, though!
I became slightly fed up with tent stitch – there was such a lot of it! – while I was working this, so I’ve been giving myself some time away from it. I’ll get started on the next one of these when I feel ready for fine tent stitch again.
I’m also waiting until all three are stitched before I decide which to finish to create which stitching accessory. If I recall correctly, there’s a scissors keep, a needlecase, and a pincushion. I suspect they’ll end up in that famous Winter Decoration Corner I keep threatening to do!
Holiday Traycloth – first installment
I worked this immediately after the First Voluntary Project, and my goodness, is there a difference between the two! I think I must have talked with Grandmama and looked at some of her embroidery, and it looks as though suddenly the whole idea “clicked”.
The motifs are from transfers from another of Grandmama’s Needlewoman Magazines (August 1934, if you are interested!), worked on an old piece of linen in stranded cottons. The design was suggested to be a cover for a photograph album, but since my family isn’t really photograph-conscious, I felt that such a thing would be superfluous, and finished it as a traycloth instead. We added the seagull to cover a hole in the linen, which was already quite old.
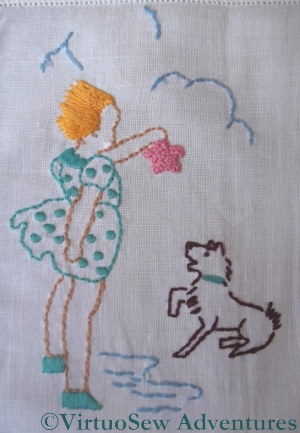
Rockpooling with Toto
The range of stitches is very limited on this piece – I must have been following the instructions in the magazine – and the whole thing is surprisingly neatly worked. I love the little girl’s spotty dress (satin stitch spots!) and windswept stem stitch hair, and the starfish is wonderfully knobbly, with closely packed French knots.
Most of the outlining across the whole piece is in back stitch, and although I didn’t count it precisely, I suspect the weave of the linen made that much easier to do than it might have been.
The designs themselves are very reminiscent of the children’s books of the period – it’s even exactly the right sort of dog, slightly scruffy, but always ready to play!
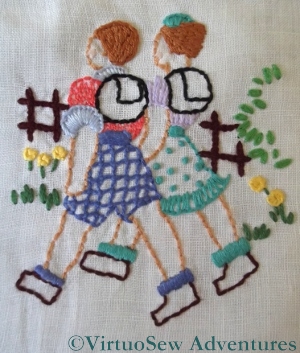
Walkers
These walkers have blanket stitch collars and cuffs, and stem stitch hair. His shorts are worked in Jacobean Couching and the spots on her skirt are French knots. The leaves on the bush in the background are detached chain, and the yellow flowers are blanket stitch wheels. Again, the hair is in stem stitch and the socks (like the little girl’s shoes) are in satin stitch.
You’ll notice that all of these stitches re-occur when I describe the other motifs, too. The designer has made absolutely first-class use of all the stitches.
First Voluntary Project – Fifth Installment
Cretan Chrysanthemum
This chrysanthemum is outlined, like the other, in Whipped Stem Stitch, but in this case the filling is Cretan Stitch, quite widely spaced. I rather like the slightly rippling effect this creates, but the stitches perhaps needed to be just a little more closely packed to make the ripple a bit stronger. The calyx is rows of coral stitch, and the stems of those strange little buds are the very first appearance in my work of one of my favourite stitches – Cable Chain Stitch.
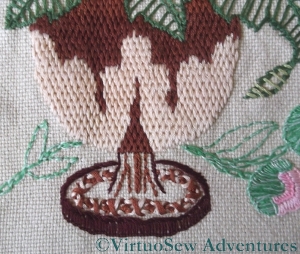
Brick Stitch Vase
The vase is worked in Brick Stitch, and since the fabric is a heavy square weave it was easy to do as a counted stitch – easier than when I worked the Prince’s Steed in the Persian Fantasy!
The foot of the vase is in closely-packed blanket stitch, and the ornamentation is Whipped Chain Stitch. I think if I were to be working it like this now, I would continue the brick stitch down the stem of the vase and leave out the whipped chain. But after all, it was my first solo project…
Naturally this won’t be going on display anywhere, but it’s been fascinating to revisit it, and try to remember what I chose and why. There wasn’t much of the why, but I’ve enjoyed looking at my experiments, anyway!
Finnish Embroidery
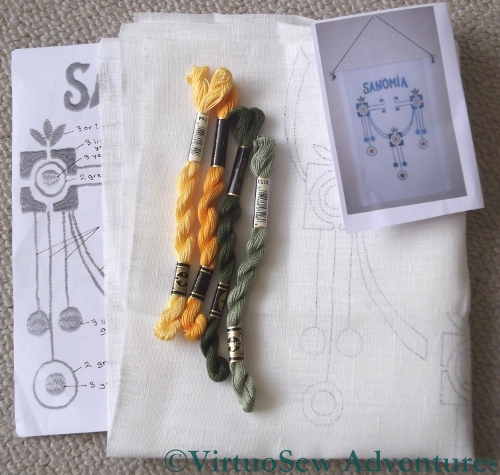
Finnish Embroidery Design
A few weeks ago, my husband the Australian was speaking at a conference in Turku, Finland, and the organisers were kind enough to allow me to go too. We had a marvellous time – the Finns are terrifyingly good linguists, so we had no language problems, and because the conference was about Science and Art, and how they feed off one another and contribute to one another, the conversations were very wide-ranging, full of sparkle and fun.
I didn’t have much time for side trips, but I did find an embroidery shop, and asked about local rural Finnish embroidery. I picked a design I liked the look of, and they agreed to prepare a tracing for me and send it on. It seems to be in a combination of stem stitch and Bokhara couching, but when I’ve had a closer look at the stitch diagrams, I will be able to tell you more.
This is what the lady in the shop told me about the design:
You also asked for some information about the pattern, we have a book that tells a brief history of where the pattern was found. Of course, the original designer of the pattern is impossible to trace.
The pattern was originally embroidered on a bag or pouch, that was hanged on the wall, where people put smaller newspapers and magazines into. That’s why the pattern is called ”Sanomia”, it means messages or news in finnish. The word was also embroidered in the bag. We copied the model ourselves to other products, such as runners.
The ”Sanomia”-newspaper bag was found in the Kankaristo house, in country village of Mynämäki.
The bag, that was found there, was sewn by the lady of the house, Helli Kankaristo, born in 1902. The story tells that she was taught to make embroideries by her very skillful teacher at school, and Helli passed her skills also to daughter Inkeri, born in 1928.
First Voluntary Project – Fourth Installment
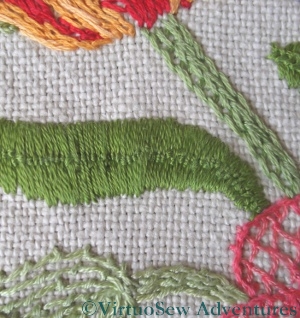
Bokhara Leaf
This long leaf is worked in Bokhara Couching. I find it strange that it did not occur to me at the time that this stitch is as near to satin stitch as makes very little difference! It isn’t particularly neat, in fact it is even rather crammed together, but it serves a purpose, and the stitch is a useful one to know.
I’ve seen diagrams that refer to this as “Roumanian couching” and “Romanian Stitch” , as well as Bokhara couching, which can make life confusing at times.
I’m now using it on the Finnish Embroidery, stitched in pearl cotton – it creates a lovely “basketlike” texture.
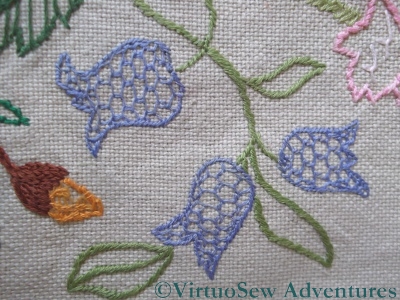
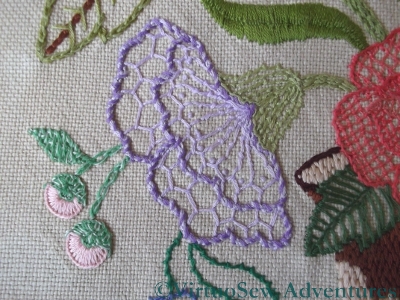
Bluebells
The bluebells are outlined in stem stitch and then filled with Cretan stitch, carefully spaced to create a sort of honeycomb effect. I rather like this, and I’m sad to say that I’ve not used it very much since. It’s good to be reminded of it, and I will try to use it again! The stems are worked in stem stitch, although angled to create a much thicker line than is normal – another effect I rather like, but rarely use.
The golden yellow bud is filled with Ceylon Stitch, which I found myself using in the Goldwork Masterclass, while the calyx is chain stitch again. The Ceylon stitch is the only one which has suffered from the passage of time, but since it was worked in a single strand, that’s scarcely surprising!
Golden Accessories – more on the Acorn
I need to learn to pay attention to the instructions.
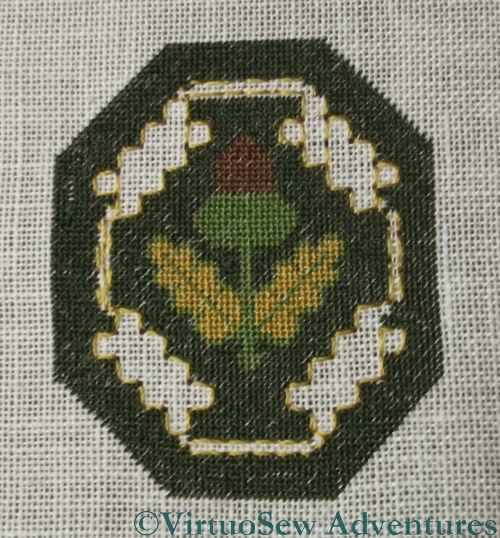
Acorn With Outline
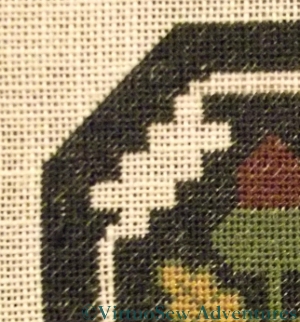
Outline Removed
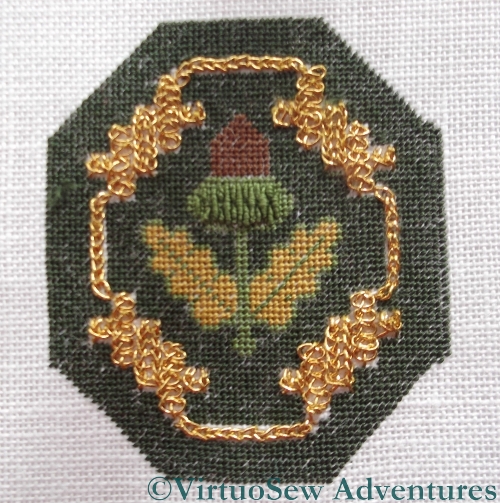
Still, before we get to that – I’ve finished the tent stitch on the Golden Acorn!
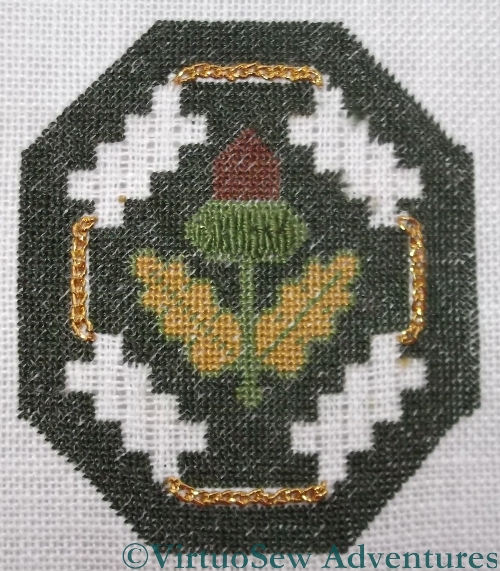
Here you see it, first with the outlining for the strapwork still in place, and then in close-up with the outlining removed. That was exciting at times – the gold thread had been caught in a few places by the green.
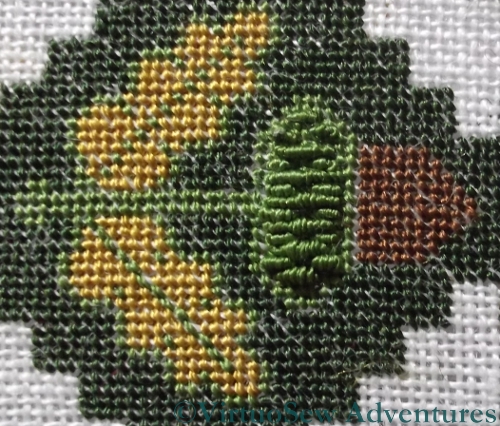
Bullion Knots
Broad Chain Stitch in Place
Next, there was a pattern of bullion knots to create an interesting effect on the cup of the acorn. Several different lengths interlock here. I’m not particularly keen on Bullion Knots, but I’m glad I included them – I think they look really good.
The beginning of the strapwork was a row of Broad Chain Stitch in each of the narrow channels left in the green background.
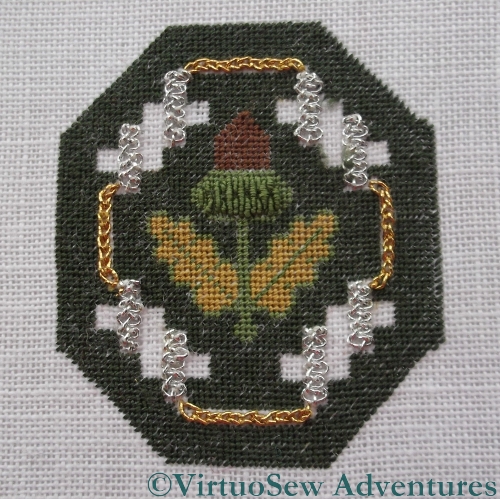
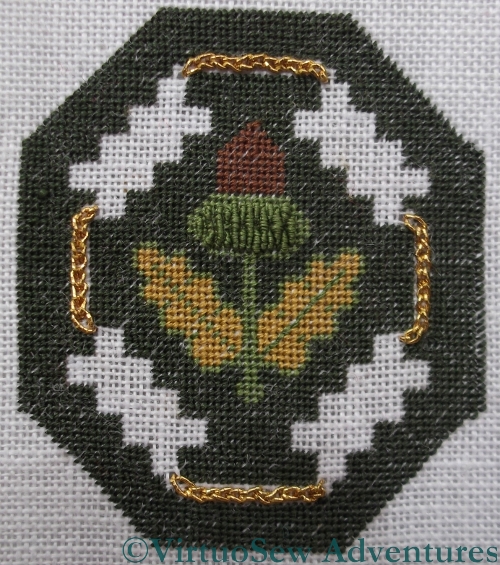
Ceylon Stitch Straps
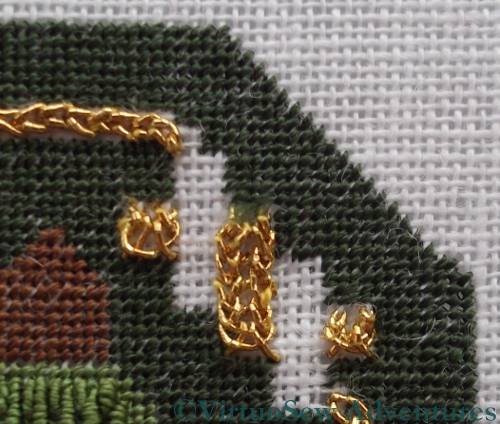
Strapwork Looking Clunky
All is still well in the first of these pictures, where I’ve put in the Ceylon Stitch strapwork in gold.
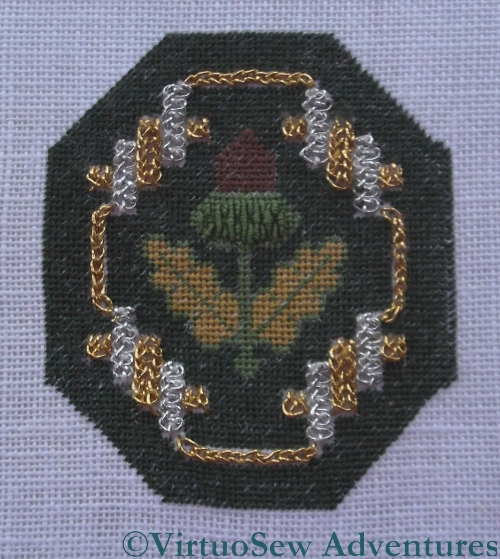
Then, concentrating painfully on my Braid Stitch I went on to add the second lot of straps, and didn’t stop to think until I had finished all four corners. At which point I looked at it and thought it looked rather clunky and that it really didn’t have the delicacy or charm I’ve come to expect from Tricia’s designs.
That’ll Larn Me!
So then (not soon enough!) I went to have a look at the instructions.
The Braid Stitch should be in silver.
Out it all came.
That’ll larn me!
(“Larn” is a dialect word, so what I mean is “That’ll teach me!”)
The Elephant Doorstop is Finished.
Finished Doorstop
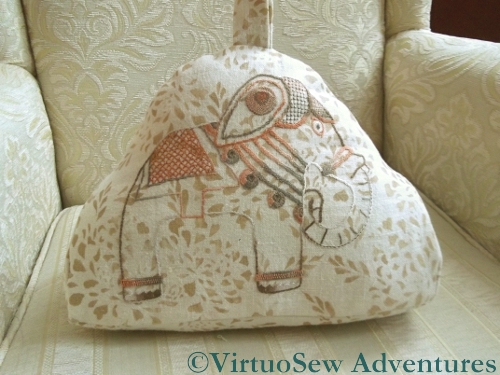
At last – after some months of puzlement, delay and confusion – and with considerable help from my mother, who was, after all the client, and knew what she wanted! – the Elephant Doorstop is finished!
We decided to make the dorstop vaguely teacosy-shaped, with a flat base, so that it wouldn’t fall over, and a loop to pick it up by so that no one is tempted to pick it up by the embroidery and abrade all that painstaking stitchery.
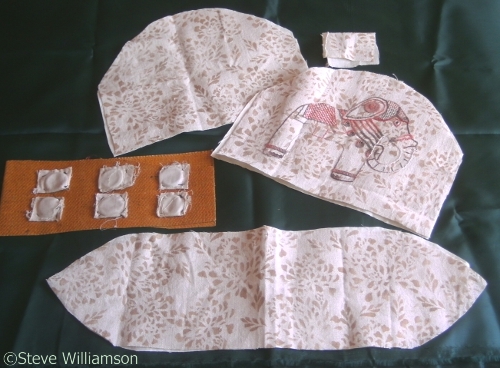
Pieces Laid Out
Once the pieces were cut out, my mother took a picture so you can see what we eventually decided upon. You will notice that there is a piece of buckram to flatten and stiffen the base, and it is being weighted with curtain-weights – small circles of lead held in their own fabric pocket. It’s easy to sew the fabric pocket into a curtain lining, or indeed, onto a piece of bukram, and it is less likely to catch and go astray than if the lead is sewn on like a button or a shisha mirror.
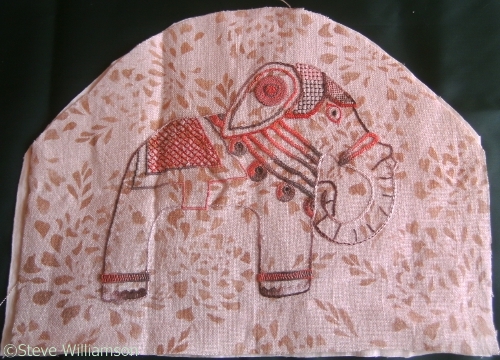
Elephant Finished
I’ve decided to call him “Kala Nag”, after the elephant in Rudyard Kiplings’s story “Toomai of the Elephants”, in “The Jungle Book”. He’s in ceremonial harness, rather than the working harness of the story, but I think he’s a very grand fellow, and I’m really very pleased with how the embroidery turned out. The variegated threads allow him to disappear slightly against the background in places, which makes for a more visually interesting piece than if he’d been stitched in the same tones throughout.
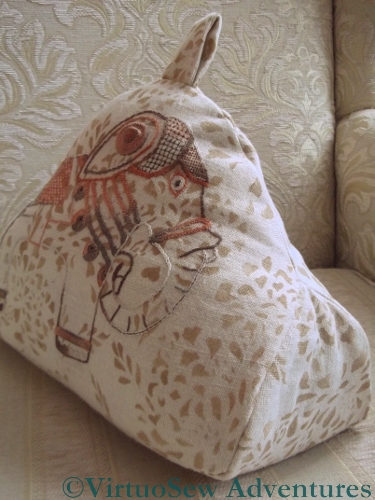
Side View
I propped the finished doorstop up on one of the living room chairs to take some more photos. This one gives you a better idea of the finished three-dimensional article, firmly stuffed with cotton linterfelt and ready to keep doors from swinging. He does a good job, too – those six small pieces of lead are just enough weight to keep him where he belongs.
And when he’s off duty, he sits on a bookshelf, conversing amicably with his older brother, The Elephant of Considerable Charm.
The Finnish Table Runner is Finished!
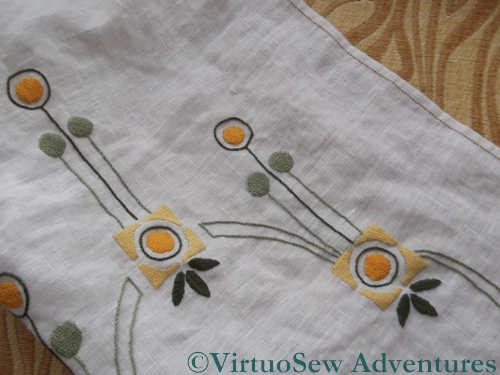
Table Runner Hemmed
At long last… I have finished the Finnish Table Runner!
The embroidery itself is very simple – Bokhara Couching and Stem Stitch, with the darkest leaves worked in nested Fly Stitches. I used two shades each of two colours – a greyish green, and a golden yellow.
The couching stitches of the Bokhara Couching are carefully arranged to create a basketweave effect, and I worked harder than usual to make the stem stitch regular with an even twist to it. Real simplicity is hard work, because the simpler the tools and effects you are using, the better-executed they have to be!
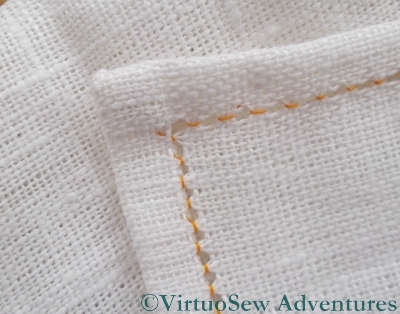
Antique Hemstitch - Corner Front
So I have taken particular care to stitch evenly. This was not entirely straightforward, in fact, as the fabric is a plain weave (one thread over and one thread under in each direction) but is not a square weave (warp and weft threads equally spaced). Since it is also a linen, and the threads are a little slubby, sometimes the effect is exaggerated. This became especially clear when I worked the hems.
Incidentally, I’ve no objections at all to the fabric not being a square weave or to the threads being slubby – these are just factors that sometimes influence how something is worked or the effects that are achievable.
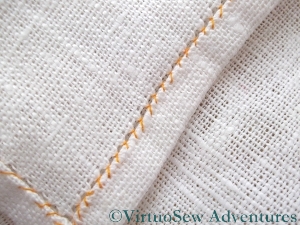
Antique Hemstitch - Corner Back
When I hemmed the piece, I chose to use Antique Hemstitch (at least, that is what it is called in Yvette Stanton’s Right Handed Embroiderer’s Companion). This leaves only a small stitch on the front of the piece. I withdrew a single thread for each hem (the instructions usually suggest at least two, but I wanted a narrow line down the edge and not the dogtooth effect of hemstith on only one side of the withdrawn threads), and then grouped four threads in each stitch. If you look hard at the photos, you will see that in one direction the stitches look longer than the other, although they group four threads in each case.
Since the table runner is about a metre and a half long, and nearly half a metre wide, that’s about four metres of hemming, which for some strange reason I enjoyed enormously, even though I’m really not good with repetition. I used ordinary sewing thread, but decided to use a golden yellow to add a bit of colour along the edges.
When my mother saw it first (half-done), she told be I was being a little show-off, but I think she meant it as a compliment!
First Voluntary Project – Third Installment
Heathered Thread
Since I was working with leftover threads from other people’s projects, I was “forced to become inventive” – as Joseph Haydn said in another context!
The leaf and bud shown here use Chain Stitch, but I combined single strands of two or three colours in the needle. This is a technique that I don’t necessarily use very often, but it is always one I consider, because heathering is such a good way to create subtle variations in colour and tone. There’s a nice example of this on The Floss Box blog, where the thread for the water is blended in the needle.
The veins are marked in Thorn Stitch, although I’ve just noticed that the central vein is in Chain Stitch!
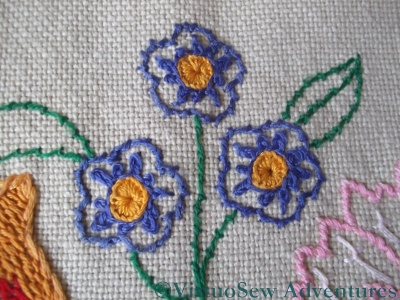
Forget-Me-Nots
The forget-me-knots and attached leaves and stems are almost a sampler all by themselves. The leaves and stems are worked in Coral Stitch, which also outlines the flowers. Inside the flowers, there are tiny circles of Rosette Chain Stitches, worked around a Buttonhole Wheel in golden yellow. Rosette chain looks better worked rather bigger than this – I’ve used it since in several projects – and those who followed my posts on the Goldwork Masterclass will know by now that I have since developed a positive obsession with stitch and fabric scale!
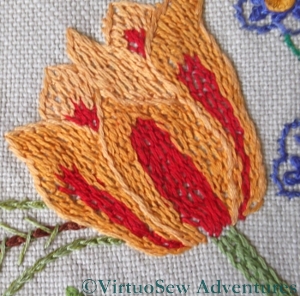
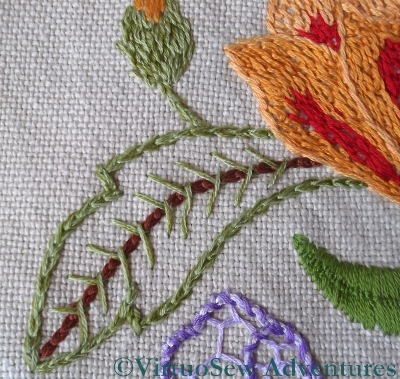
Feather Stitch Tulip
The Tulip is filled with close rows of Feather Stitch in red and golden yellow, outlined with stem stitch. It creates a slightly odd texture that I’m not entirely unhappy with, although it would balance the other flowers better if the filling were not so closely packed, and the colours were rather paler.
The stem is worked in a single row of chain stitch with a row of stem stitch on each side. I was gaining enough of a grip on embroidery by this stage that I made an effort to keep the stitch lengths comparable, which gives a nice regular rhythm to the stem.