
Category: Needlepoint
The Second Worktop Bin
Stage Four
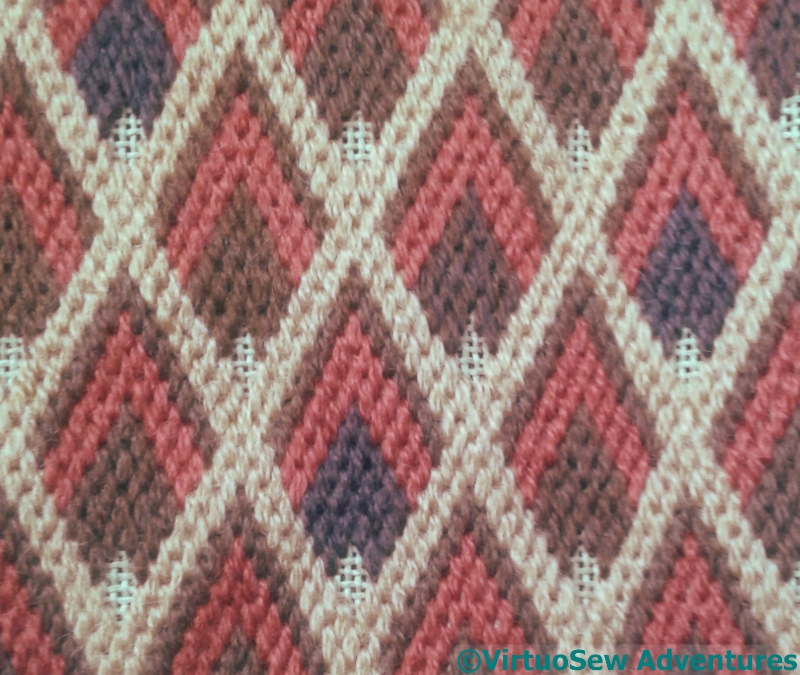
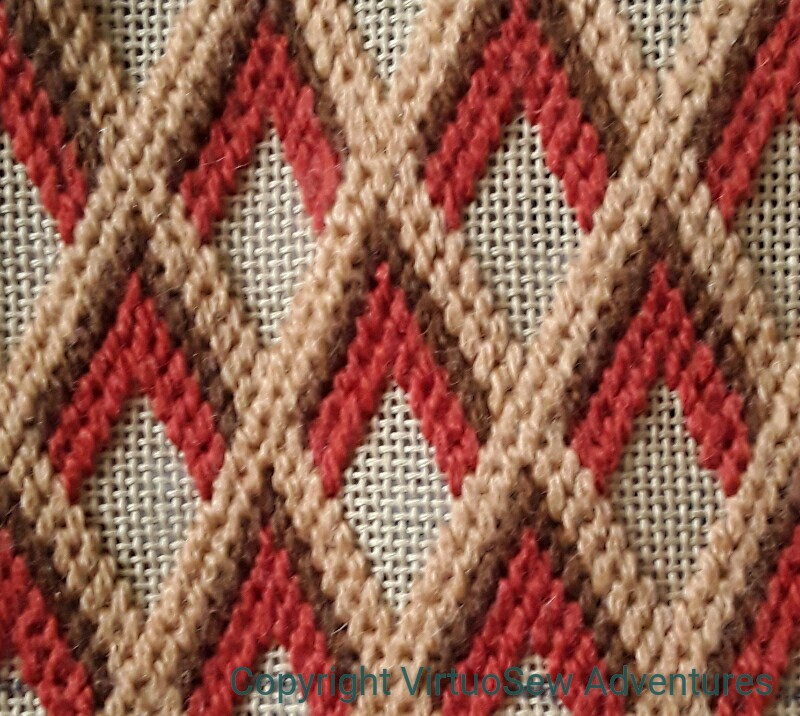
I did indeed find myself mixing and blending a lot of different browns to fill in all those brown sections.
Remember what I said about stash busting being “an inexact science”? Well, the trick about dealing with that (in this context) is to make the various infills and changes look deliberate. I scattered the different shades in a random looking pattern across all the different diamonds. There are four or five different blends, and outside the central section there are only two of each shade in any one row.
Stage Five
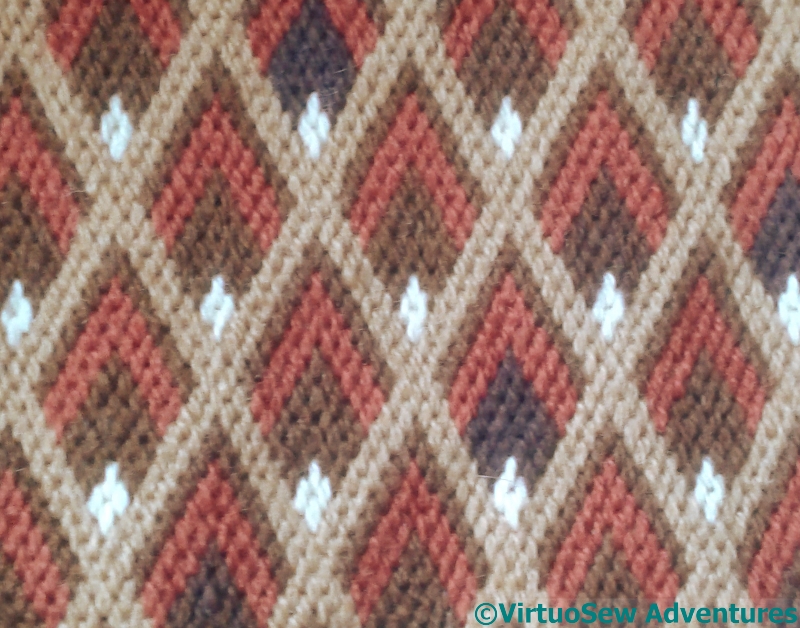
The central section has brown diamonds all the same colour because I was using the central section to help me lay out the trellis pattern, and I simply kept going. In fact as I look at the canvaswork while I write this post, the central section blends beautifully into the outer sections. It really does look deliberate.
The tiny diamonds that lift the whole effect are in a very light cream. Fortunately I didn’t need much of this one, and I had enough!
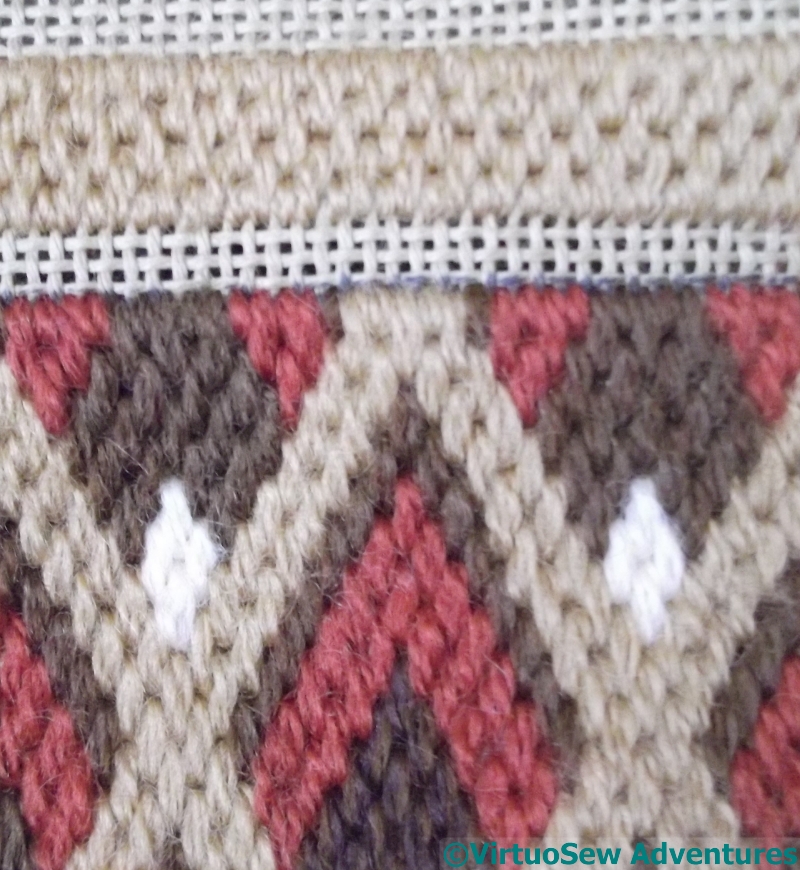
Inside Top In Place
I profited from the experience of making the first little worktop bin, and instead of stitching the inside section after I’d folded back the top and stitched the rim, I worked it while the canvas was still flat, which was altogether easier to do!
Although I confess, I was wondering whether I would have enough of this beige to complete it, or whether I would have to take it out and use a different colour entirely…
Another Worktop Bin
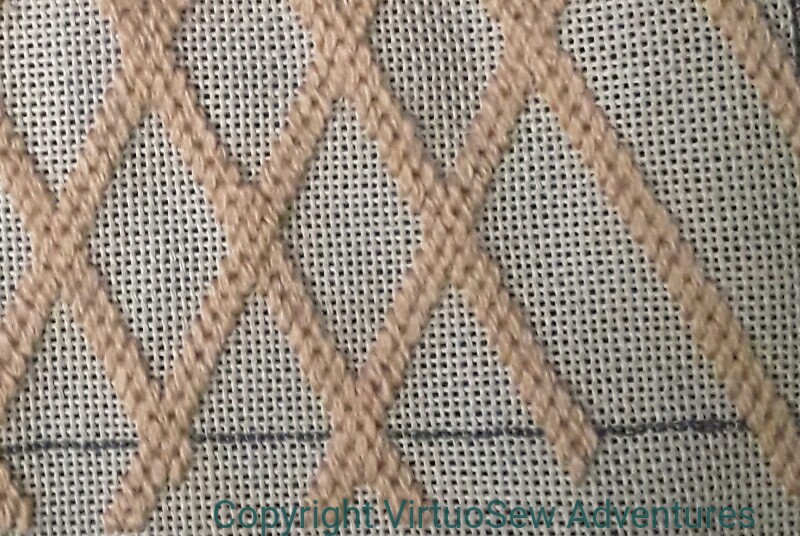
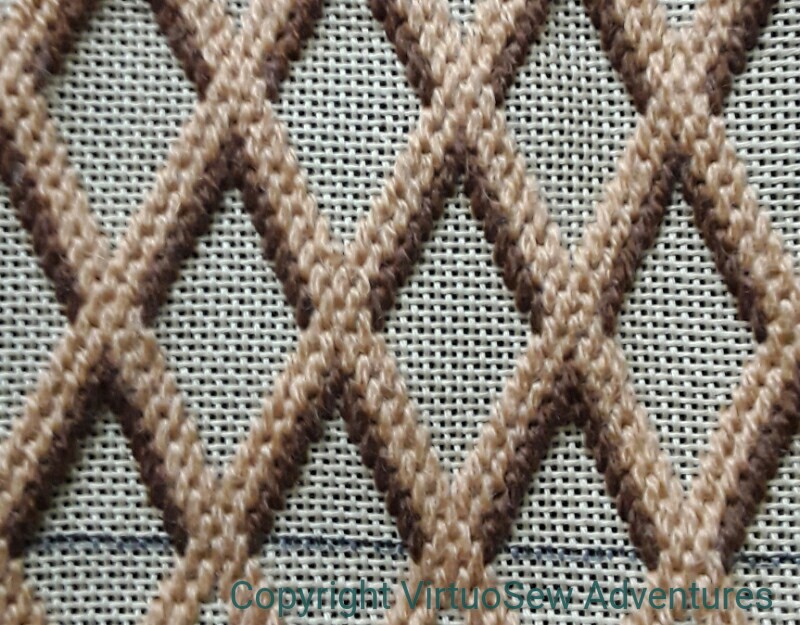
Diamond Framework
The first worktop bin was such a success that I decided to do another one.
This time the bin itself is a cardboard drum that used to contain chocolates. It’s rather bigger than my sawn-off milk bottle, and furthermore, the canvas is finer (I’m only using two strands of Paterna in the needle, not three), so the canvas is going to take a little longer to do.
Stage Two
I’m staying with browns, and with diamond patterns, and starting with this diamond lattice pattern. I’ve had enough of the creamy beige wool to work the framework, and since it is only two strands, I should have enough of it to work the edging and seam as well.
But there is a lot more dark brown to come and I may very well find myself combining threads to stretch my varieties of dark brown to fit the pattern. Never mind, I will then have made some Stashbusting Progress!
Stage Three
Has anyone else noticed what a very inexact science stashbusting is? You embark on a project, full of hope that it will consume vast stores, only to find that the Stash in question has shrunk not at all…
Right up until the project when you rely on that happening….
Finishing the Form Cushion – Stage One

Corner of the Form
When I’d finished the stitching of the canvaswork for the Form Cushion, it was a little puffy and warped, and badly in need of blocking, but being long and thin I had nothing suitable for blocking it on. Until I had an inspiration – use the form itself!
We covered the form with an old towel, and then worked on alternate sides of the form. I’ve put an old length of cotton curtain header over the canvas, so that when I come to remove the staples, it will be fairly easy to do.
In theory…
It took quite a lot of heaving and tweaking, and the combined efforts of my mother and myself (for a client, she’s having to put a lot of effort in here, isn’t she! – she’s started on renovating the form too.), but in due course we managed to get the canvas firmly attached, and stood back to look at it.
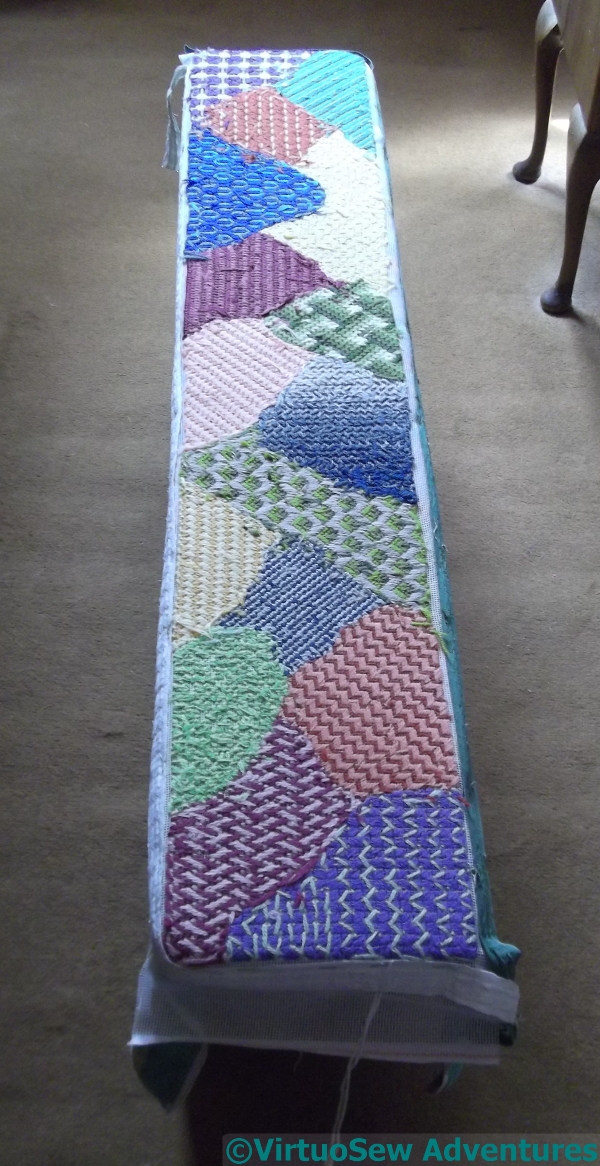
Taking The Long View
It didn’t look nice and smooth as it does here. It was bumpy and lumpy, and not very happy at all.
So I steamed it gently, using a steam iron but not letting it touch the wool. Very, very carefully, and slowly..
It started looking a great deal better (even upside-down), but then we set it aside, still stapled in place, for a few weeks. We wanted to be sure that it was very thoroughly dry before we moved on to actually making the cushion.
And besides, I’m not entirely clear on the type of cushion it will be!
The Worktop bin – finished
Edges turned in
There is always more “engineering” involved in these projects than you expect. Once I’d turned in the edges and done the herringbone stitch “piping”, I realised that the top of the bin was probably going to be on show on the inside. I found some felt to line it with, but since it was a spare offcut, I decided to run a line of straight stitches on the inside, just in case there wasn’t enough of it!
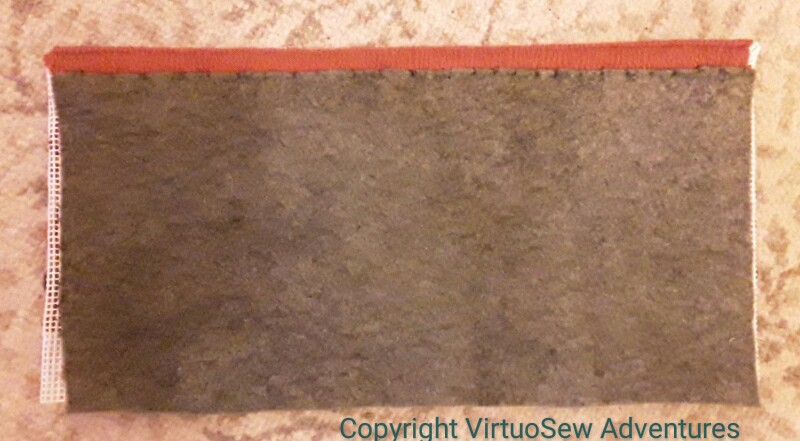
Felt lining attached
I attached the felt with small stitches, not too tightly, but just enough to make sure that it doesn’t move unless I want it too. It’s almost a pre-felt, not too dense, so it showed some adventurous tendencies. Some firm treatment, a tug or two, and it settled down nicely.
Vertical Seam
Which allowed me to consider tackling the seam turning it from a flat piece to a tube. After some of my usual thoughtful staring, it finally occurred to me that I already had the answer: Herringbone stitch, just like the edge finish at the top.
Obvious, really, isn’t it! It makes a sturdy seam which won’t permit much lateral movement, and since I’ve used it on the top edge, it doesn’t introduce yet another texture.
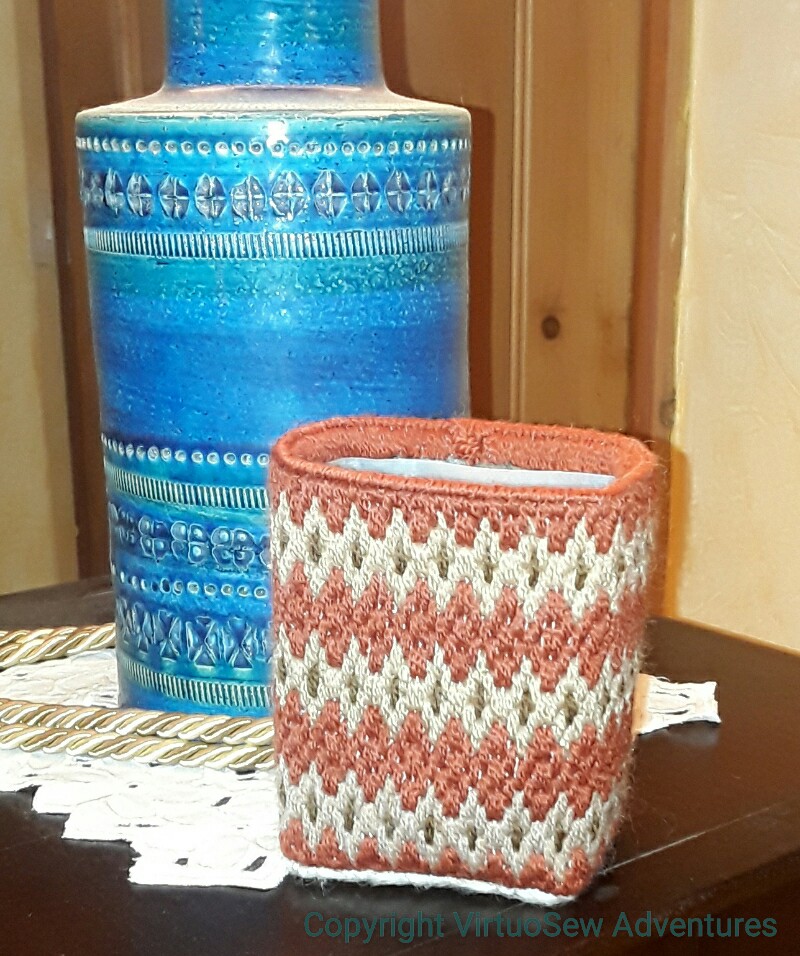
Finished and in service
When it came to sorting out the base, I put the sawn-off milk bottle inside to make sure I made everything fit, and folded in the canvas, holding it with a few rough stitches.
Finally I attached a piece of very dense felt to the bottom to hide all the canvas edges and make sure they don’t scratch any of the furniture. It is already in use, and you have to admit it’s very much better than an unclad sawn-off milk bottle would be!
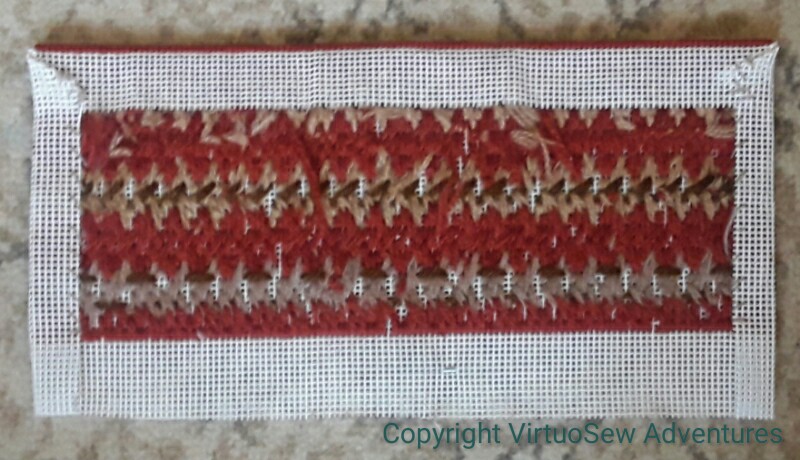
Continuing The Worktop Bin Cover
Bargello Panel
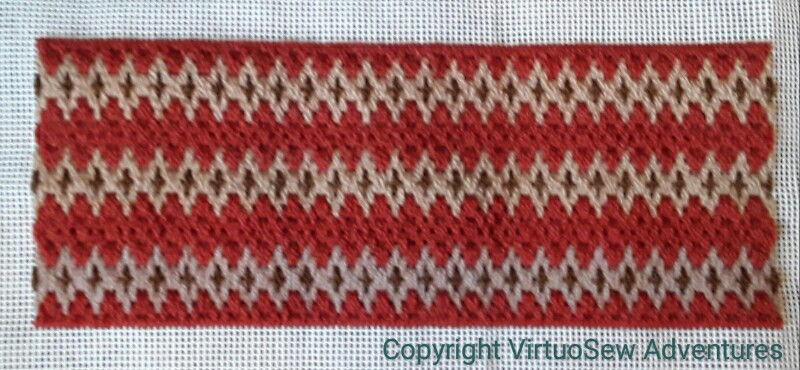
Once I’d settled on a pattern, it fairly romped along. Ten count canvas is such a lovely rest after the forty count linen of Eve In The Garden Of Eden!
As with the Crazy Canvaswork Cushion, I’m not buying extra wool for this, hence the row of light stitches which aren’t the same shade as the other two. Most of the thread is Paterna Persian Yarn, but the odd one out is Appletons. The texture and level of shine are different, but then, anything will be better than a sawn-off milk bottle!
Edges Turned In
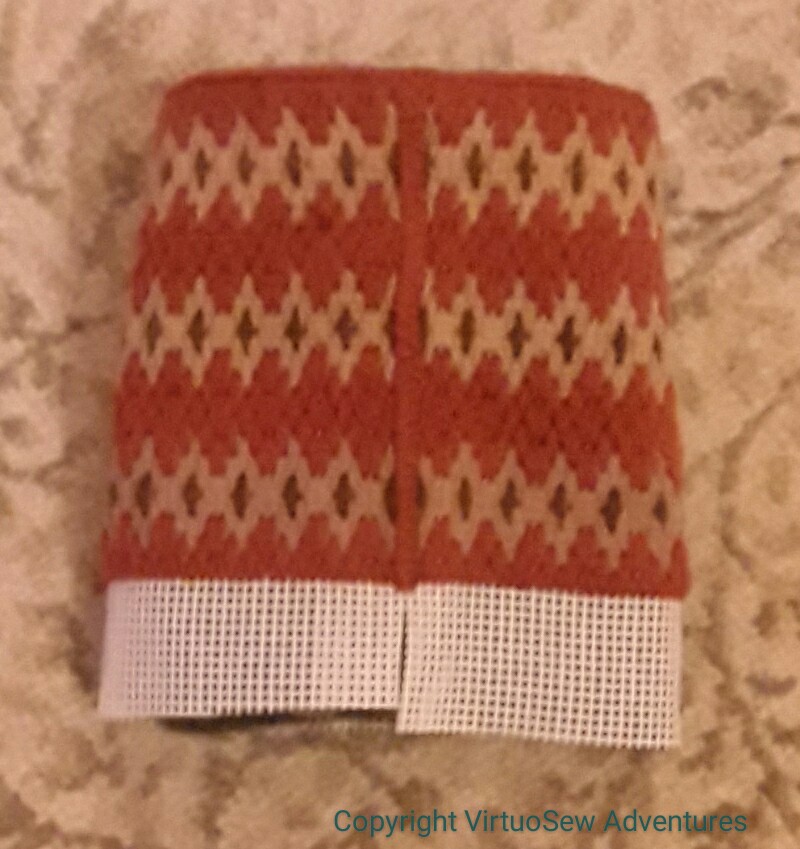
The next stage is to turn in three of the edges. I’m going to use the canvas at the bottom to help create the bottom of the bin, so I’ve left that, but the short edges will be seamed together – somehow (I’ve not solved that puzzle yet!).
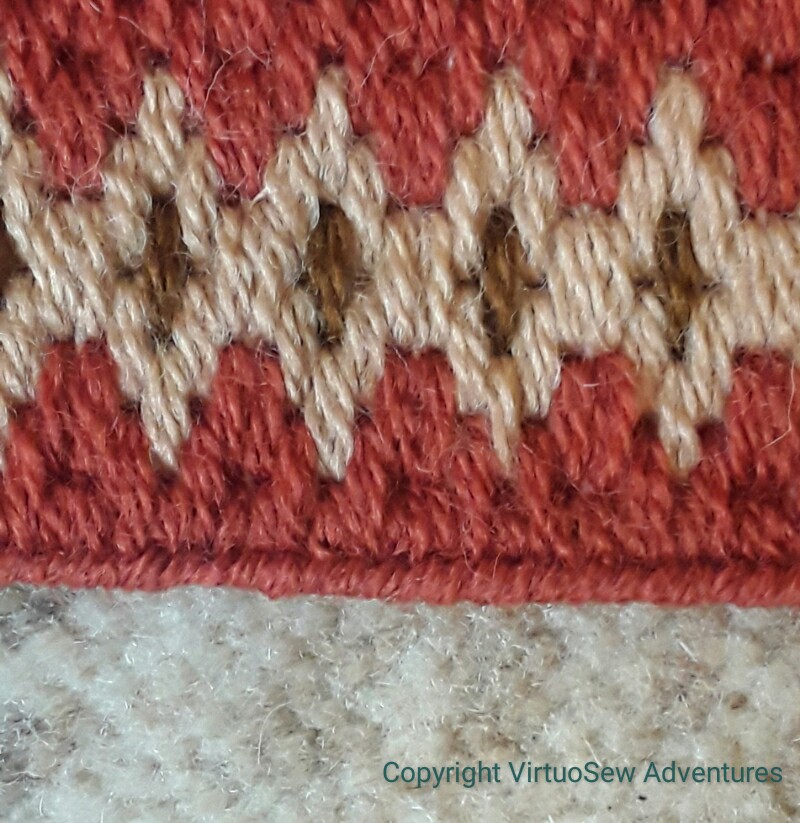
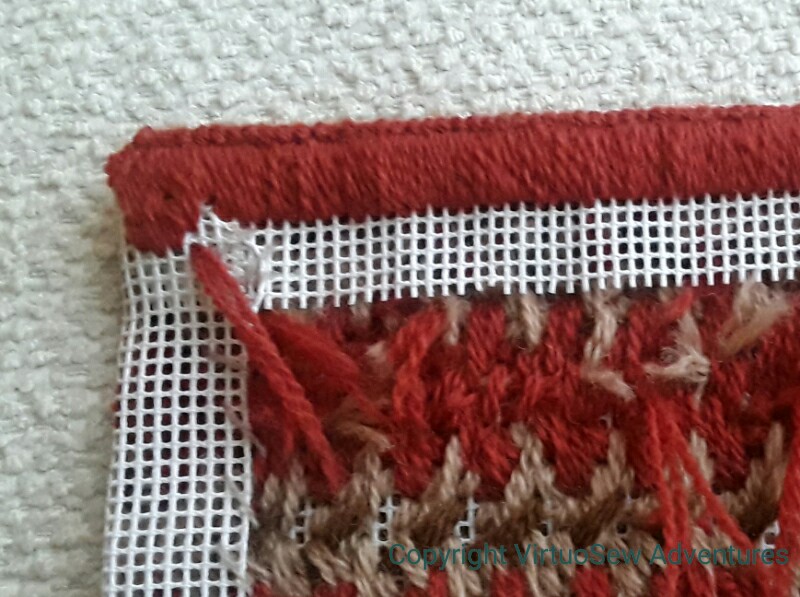
Herringbone Edge
I’ve learnt, over the years, that it is better to finish the folded edge of a piece of canvaswork than it is to try to fold the edge to be completely invisible.
So what will be the top edge of the bin has now been finished with herringbone stitch. It creates a lovely piped effect, much denser and firmer than a simple overcast stitch, and that will be very useful to help the bin stand up!
Small canvaswork worktop bin
First Trial
I have a small plastic bin – cut down from a milk carton – on the worktable beside my chair. It’s very useful for odds and ends, but it scarcely adds to the ambience.
Since all my embroidery at the moment – “Eve in the Garden of Eden”, and something I’m planning for “Dreams of Amarna, but haven’t quite got ready for stitching yet – is fine and detailed, I’ve decided to work a cover for it in bargello work.
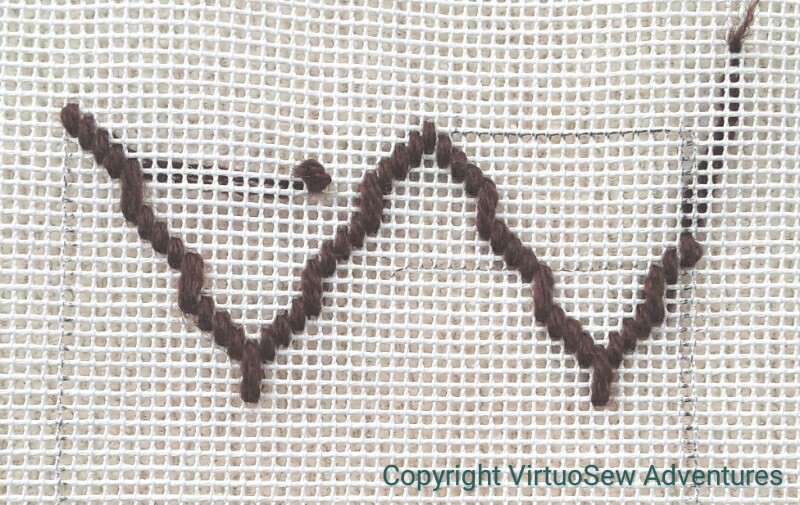
One stitched and one drawn
I’m using another of those offcuts of 10-count canvas. Ideally I would use something finer, but since I want a rest for my eyes, and in particular to use up some more of that persian yarn, I’ve been playing with various patterns in an old book. In this case, one pattern drawn on, and the other stitched, partly in wool, and partly in a fine silk, just to help me with stitch placement.

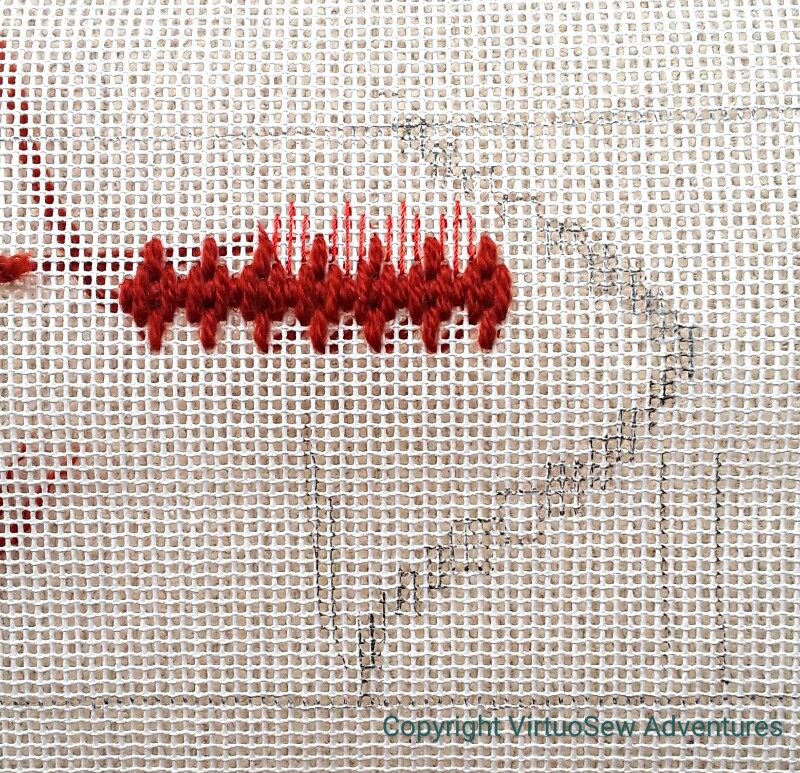
Another trial
I’ve decided to use the rusty colour, which I have rather a lot of, as the main colour, and I’m trying to find a small pattern that won’t dominate the room. I don’t think the “pomegranate” pattern qualifies…, but this one might…
Stitching the Christmas Angel
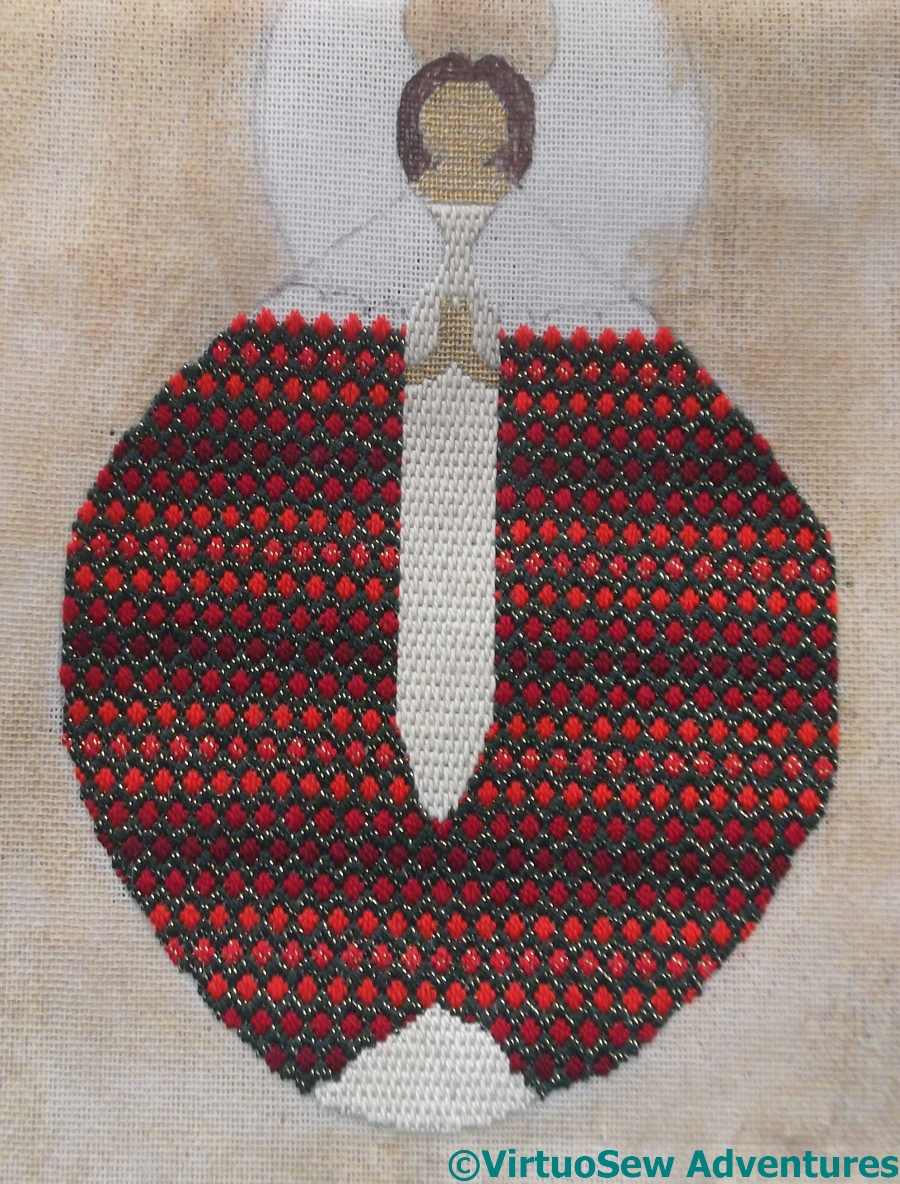
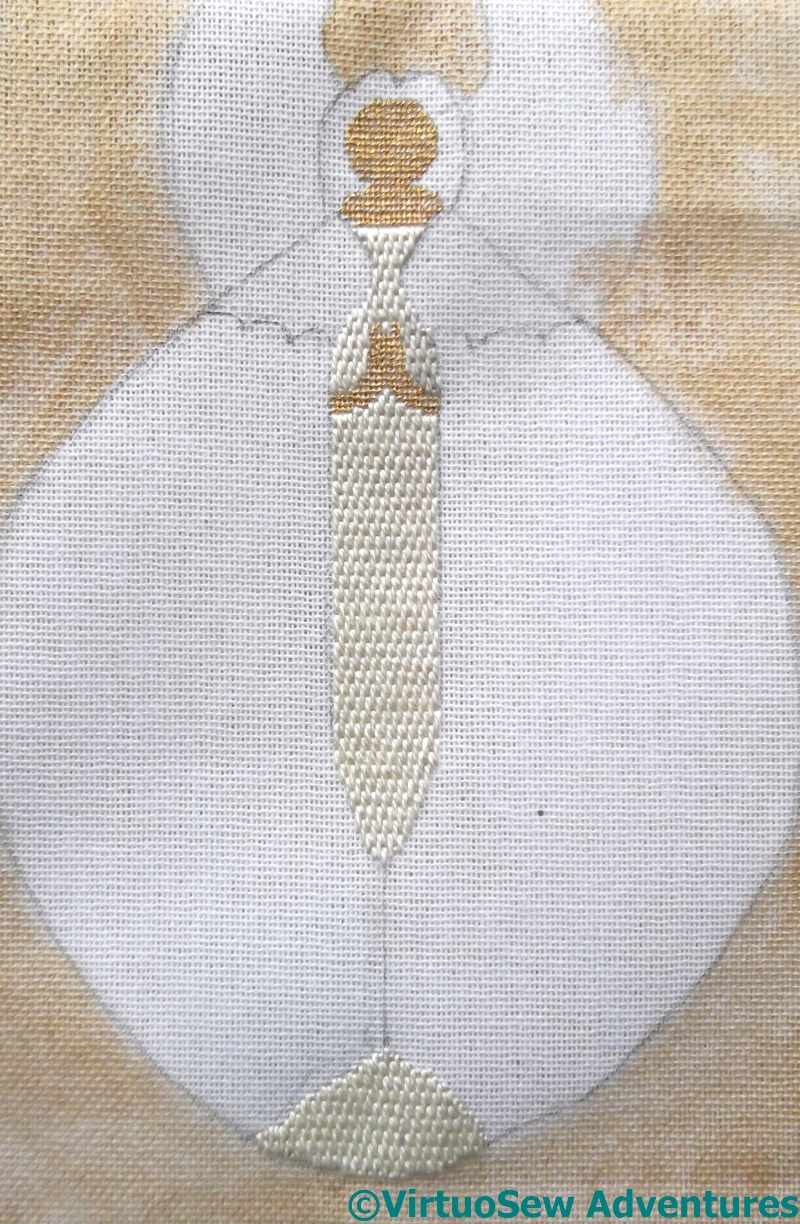
Stripy Cape
Rather than being stitched in time for Christmas, I found myself stitching the Christmas Angel over Christmas. About halfway through the stitching, I also coloured in the hair with brown pen. It helps keep the head distinct from the background and the wings, and somehow pulled the whole thing into focus.
My invented bargello pattern of various pearl cottons, including some with a metallic twist in them, has turned out fairly well, if redder than I expected.
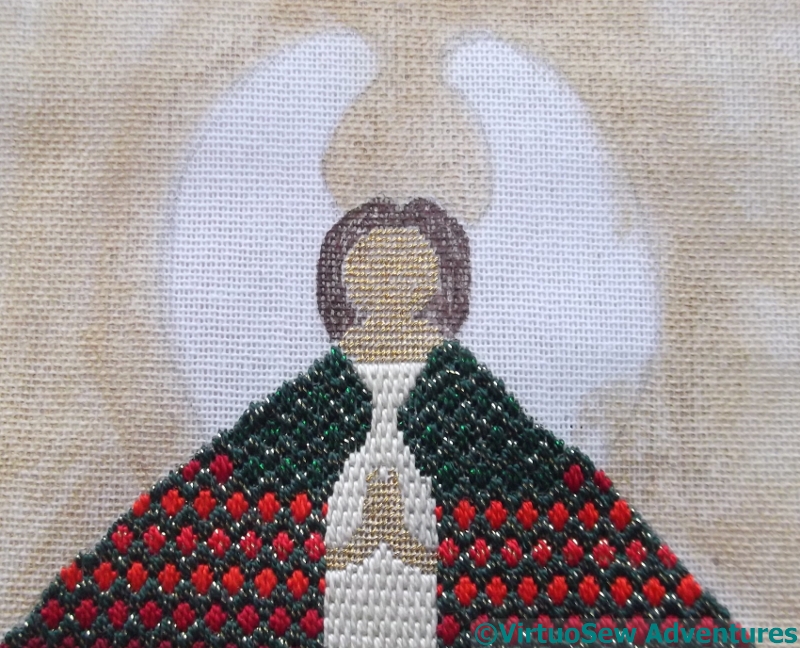
Shoulder Cape
As a result, I chose to stitch the shoulder cape in greens. There are two variants here – green with a gold thread and green with a bright green thread. I’ve been using the green and gold as the striped “framework” for the Cape, so I simply used the green and green for the spots. The shoulder cape will be outlined to allow for a bit more shaping, using couched gold thread, but that’s one of the last elements of the design.
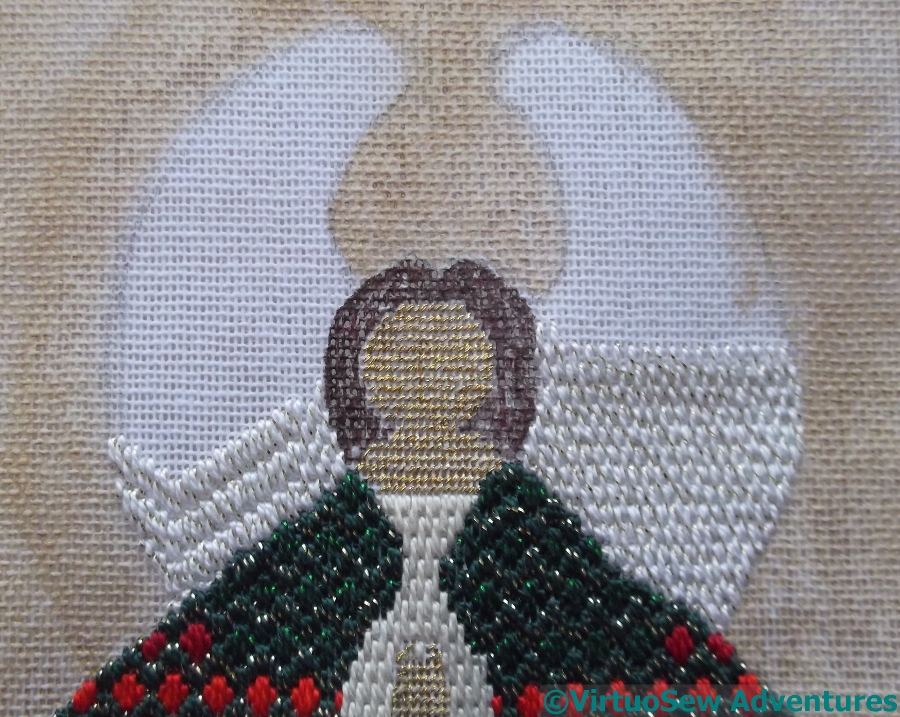
Decisions regarding the Wings
The next challenge was to decide how to work the wings. I started off wanting to create some sort of strong patterning, just with the stitches, but in the end I realised that, as the background is going to be strongly patterned, and the cape is so striking, the eye will need somewhere to rest.
So, plain brick stitch it is, although in another of those glitter-twisted pearl cottons, which are quite ridiculously tender and tricksy to stitch with, at least on this canvas. Even Gilt Sylke Twist and Gold Wyre seem robust by comparison!
A Christmas Angel
Testing Canvaswork Patterns
While I am still trying to work out how to do the Chorus of Angels, I’ve decided to work a single Angel from the Chorus in an entirely different medium – needlepoint. The original idea was to have it done by Christmas, but I’m becoming aware that that isn’t very likely now.
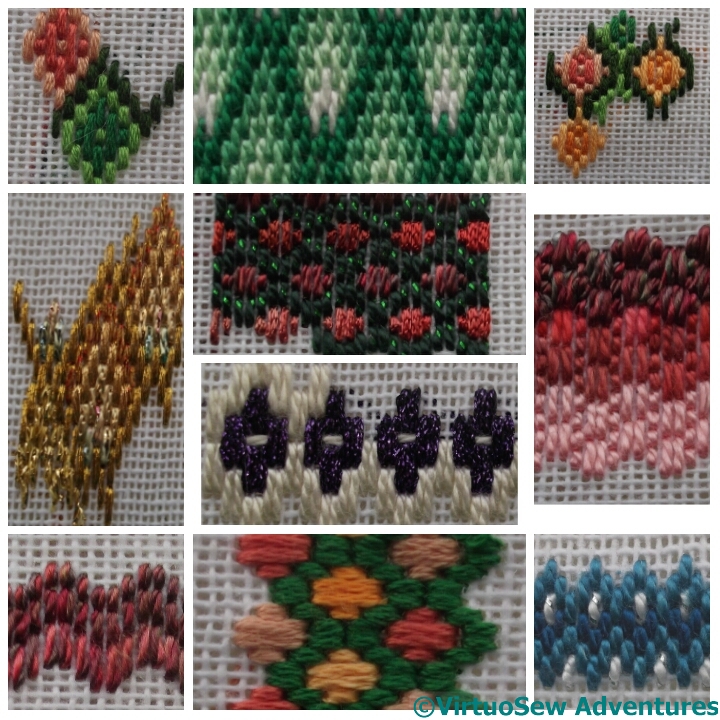
Once I’d made that decision I had a lot of fun playing with bargello patterns and trying to choose something suitable. I’m using a fine canvas – 18 count, I think, although as it came, unlabeled, in among that collection of supplies that included several frames, I’m not sure. It’s full of size and is going to be rather a trial to stitch, I fear.
Gown Done
I’ve decided to use the gold pattern on the far left (slightly altered) for the background, to give an effect a little like the patterned gold background of an icon. The lines of this panel are so simple that I can afford to use some quite complicated patterns, I think.
In the end I settled on the green and red spots in the upper middle for the cape, although choosing the colours hasn’t been quite straightforward. The wings are still puzzling me.
Since I have decided on a gold background for the angel, I decided to paint the background canvas gold as well. That will help to boost any thin coverage.
I’ve worked the gown underneath the cape very simply, in cream brick stitch, and the face and hands using gold tent stitch. None of the variants of flesh colour seemed right, and the gold does at least belong in the design.
More Unfinished Objects
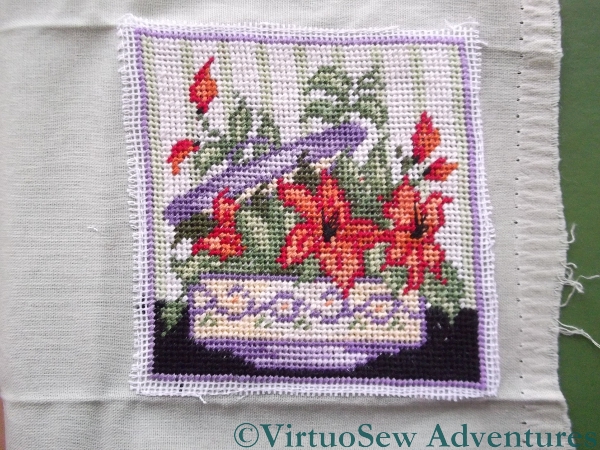
Tent Stitch Flowers
I keep on finding things that I’ve not quite finished, don’t I – and in some cases I had completely forgotten about them.
Like this one. I know it was a kit – stranded cotton worked in half-cross stitch on canvas, – but I don’t know why I bought it.
And I clearly had something in mind for it, because I have attached it to a cotton furnishing fabric. Equally clearly, it wasn’t going to be a cushion centre, or I would have centred it on the fabric. It is only about three inches square, so I suspect I had in mind making it into a needlecase.
But before I do anything else with it, I have to find some way of covering those raw edges of canvas with something that looks deliberate!
Any suggestions?
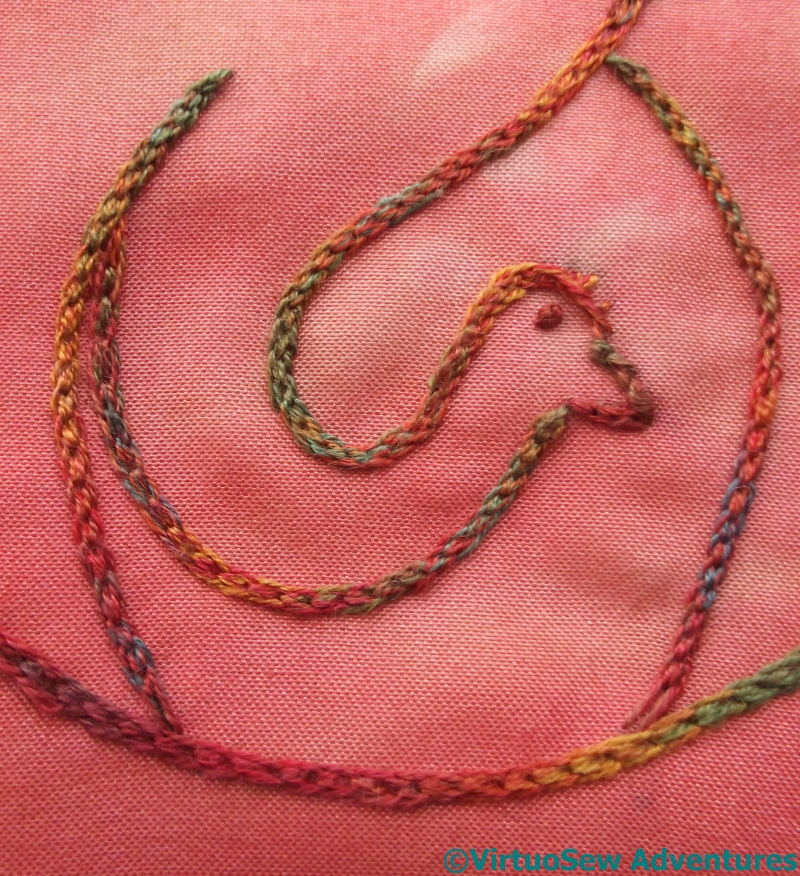
Coloured Crane
In other news, though – I’ve finished the second Crane!
Actually, you may recall that it was the first, but I decided it looked too overheated in the pot it was destined for, and set it aside for another version.
I found in when I was looking for something else, and finished it. At least, the embroidery…
I will probably mount it on a circle of card, and put in that famed Winter Decoration corner.
At least I know what I’m going to do with this one!
Crazy Canvaswork Cushion – Part 10
Section Sixteen
The last section, Section Sixteen, gave me a lot of trouble. I suppose that is partly because the end was in sight, and I wasn’t quite as focused as I could have been!
I was originally looking for a crossing stitch, but every single one I tried either looked wrong, or simply failed to cover the canvas. I sent several tweets enumerating my trials, with one or two strands being too fine, and three strands too heavy, and in the end I abandoned the crossing stitches entirely.
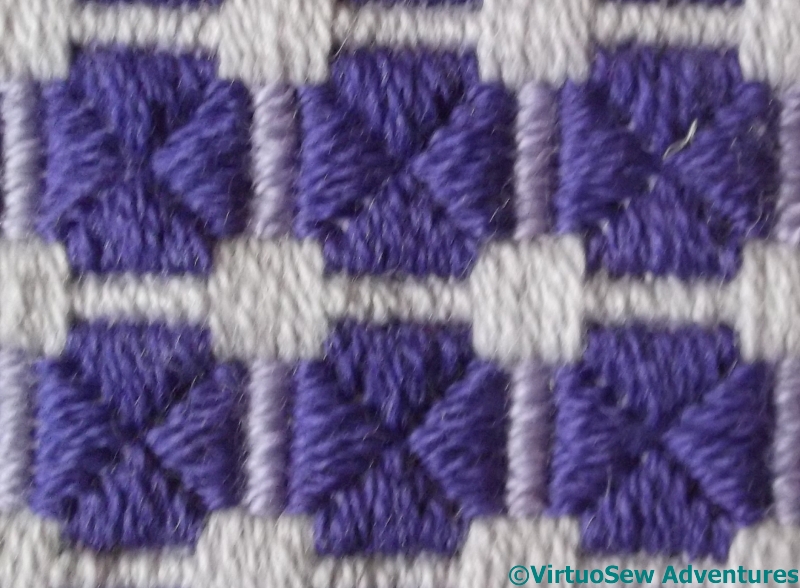
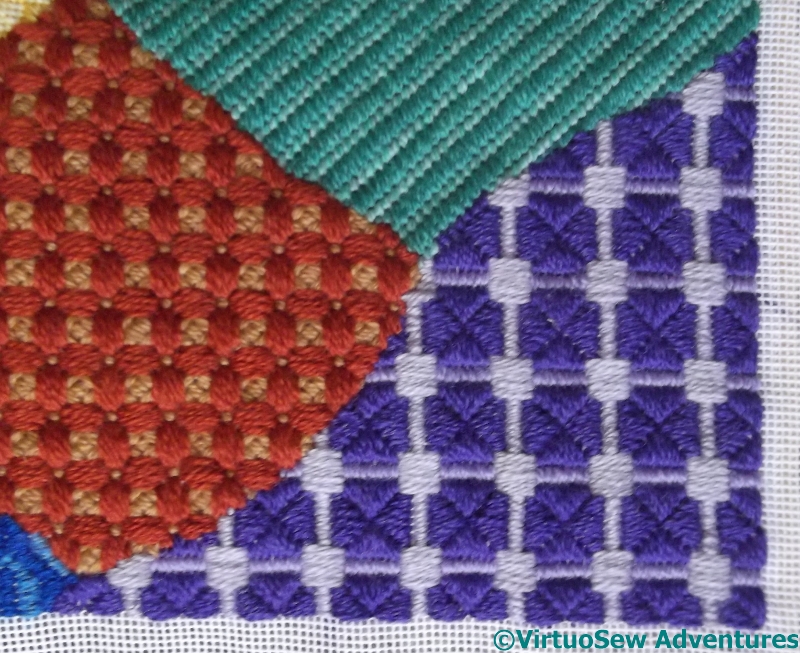
Framed Triangle Stitch
In fact I devised my own variation on Triangle Stitch, which I’ve called Framed Triangle Stitch. I rather like the way it has turned out. It is a bit of a trial to stitch economically, but since I am attempting to reduce my stash, that is scarcely a problem!
Although I like the pattern it creates, I’ve been somewhat concerned about the scale of the pattern, which is perhaps a little too similar to the blue pattern of Section Thirteen.
However, I now have the challenge of unrolling the whole piece, blocking it, and working out how to finish the cushion.
As they say – watch this space!