
Category: Needlepoint
Finishing the Stash Busting Cushion
Remember this? Remember how suprised I was at just how much I was enjoying canvaswork?
I found the last pattern in “Victorian Needlepoint” by Freda Parker, another one inherited in a bundle. I keep meaning to have a good rummage in that bookshelf, and work out what I want to keep, but as it is, it makes a good resouce when I’m looking for “something, I don’t know what, but I will know it when I see it”.
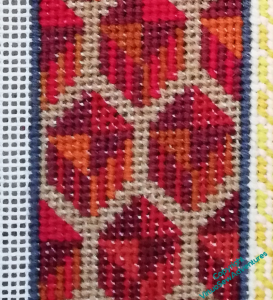
Since I’m stash busting, I used several different skein remnants for each colour on the chart, so the pattern has more variety than drawn. There are three shades in the very darkest sections, and I was surprised by how little difference two of them showed once they were stitched. You learn things at the oddest times.
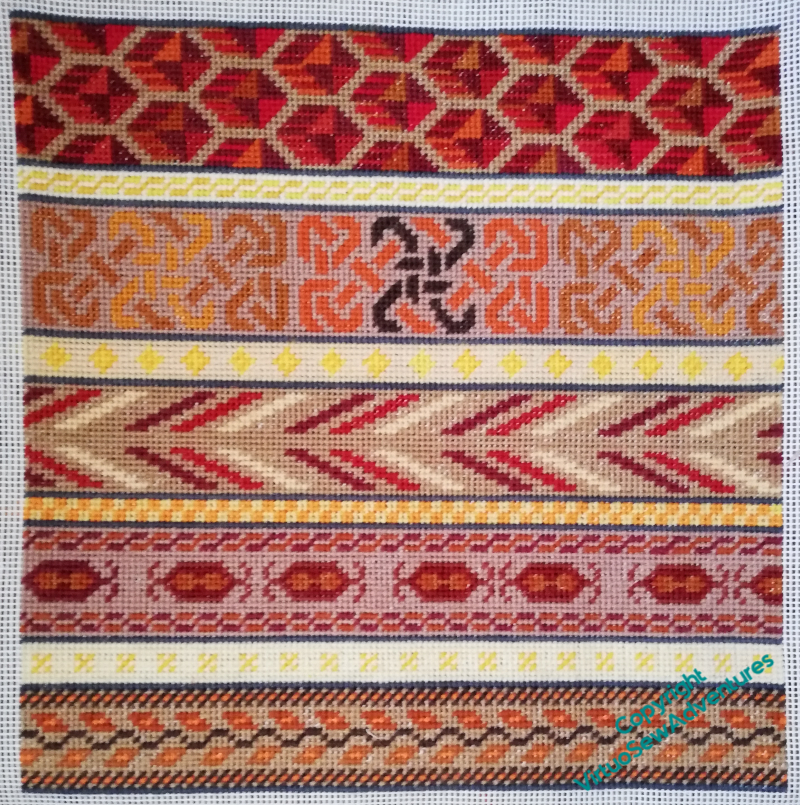
That panel is the last, by the way, because at this point I ran out of canvas!
It does, however, make a squarish, ornamental panel. If I can find some suitable fabric, I can give it a backing and turn it into a cushion.
Episode 52 of SlowTV Stitchery is now live, in which I challenge you all to name some works of fiction in which needlework has a prominent and positive role…
An experiment for Placidus
Bear with me, please!
At the moment, the idea for The Vision of Placidus is that the main picture – the encounter between Placidus and the Christ/Stag – will be framed with a depiction of denizens of the natural world – underwater creatures in the lower section, bulrushes and dragonflies in the upright sections, and birds in the upper section. I’ve been thinking of putting the symbols of the Evangelists in the corners, to obviate the necessity of dealing with getting the design around those corners.
However, what I’ve not yet sorted out is the technique I might choose to use. This is going to be an experiment to see whether using canvaswork – a sort of freeform Bargello with embellishments – will create a pleasing effect.
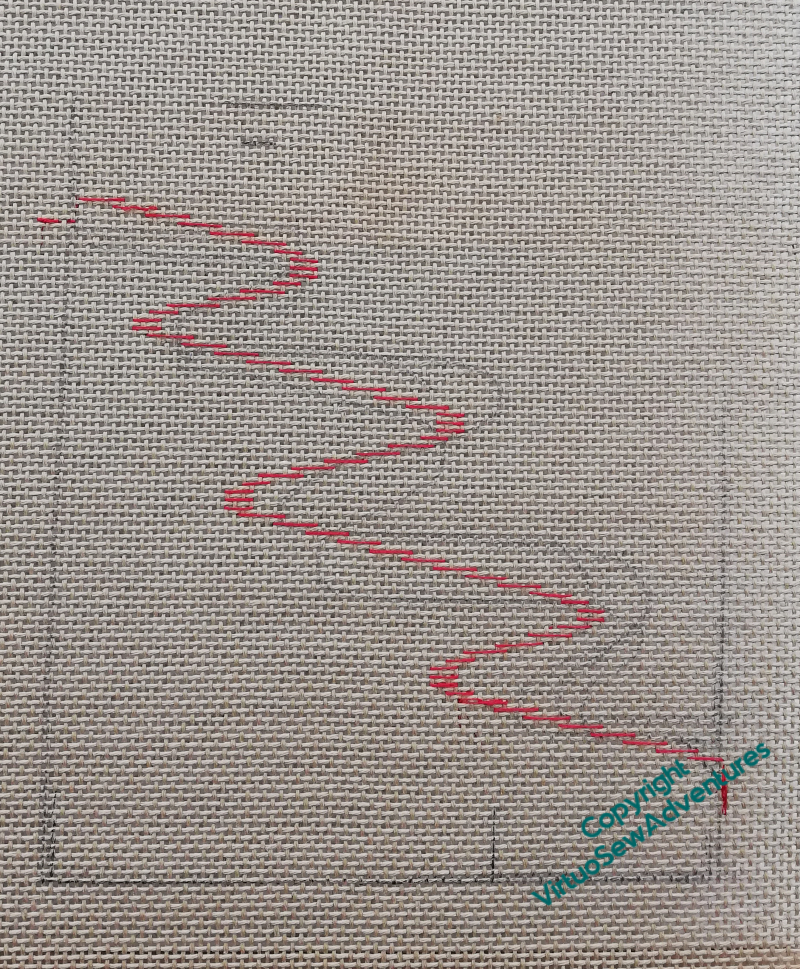
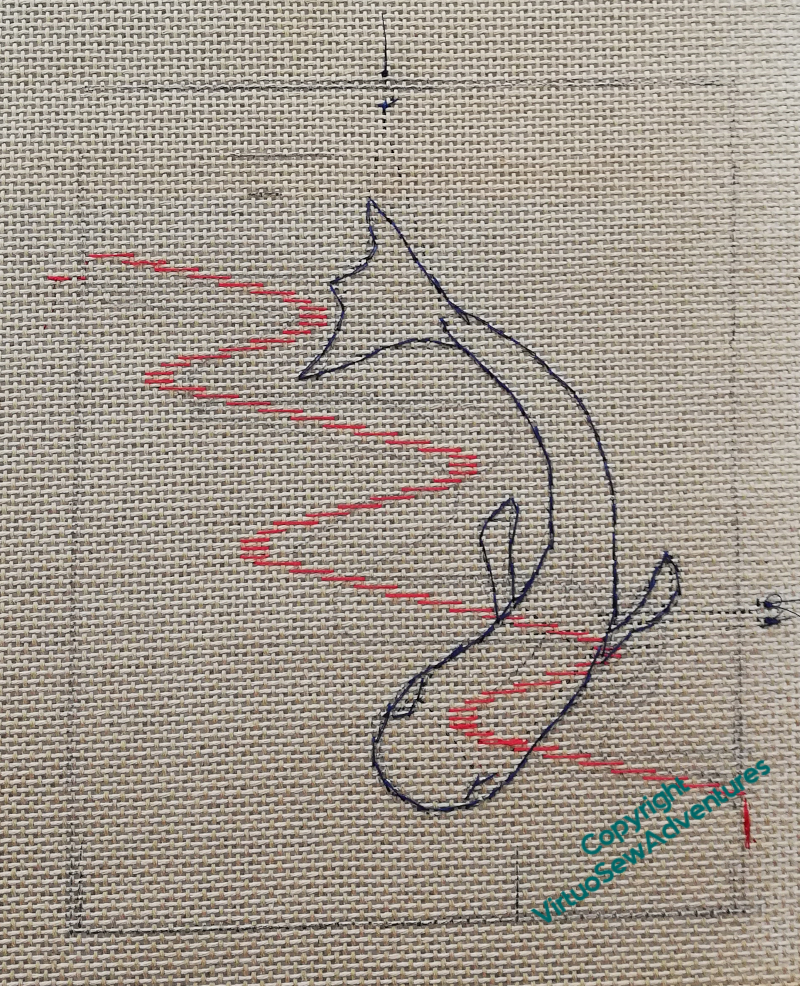
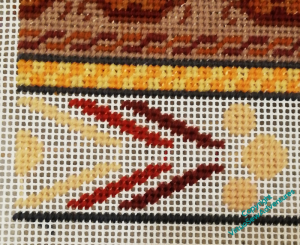
I was really very pleased with how quickly this came together when I began thinking about it. The red line is a guide for the freeform Bargello, representing the current in a stream, and the fish is simply there to help me test how to deal with the boarders between the flowing background and the motifs.
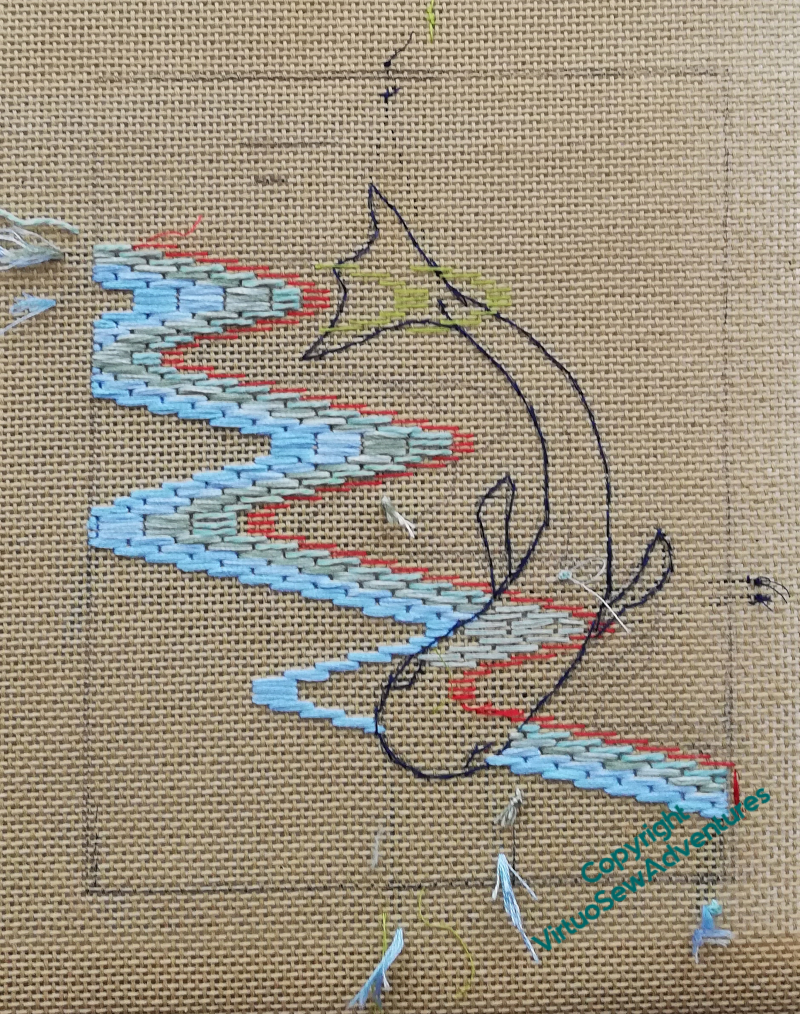
That might be easiest to achieve if I worked the fish, and then added in the background, but if I do that, I think it will be nearly impossible to place the background correctly on the far side of the fish. So this time, I’m doing the background first, putting in the stitches across the fish in sewing cotton, as a sort of “draft”.
I’m using stranded cotton, separated and combined to create blended shades. As it turns out, six strands are not quite enough for full coverage, so here I am using nine.
Episode 51 of Slow TV Stitcery is now live, including a comparision of bone and steel laying tools, consideration of two possibilities to experiment with for Placidus, and thoughts about taking sagas seriously.
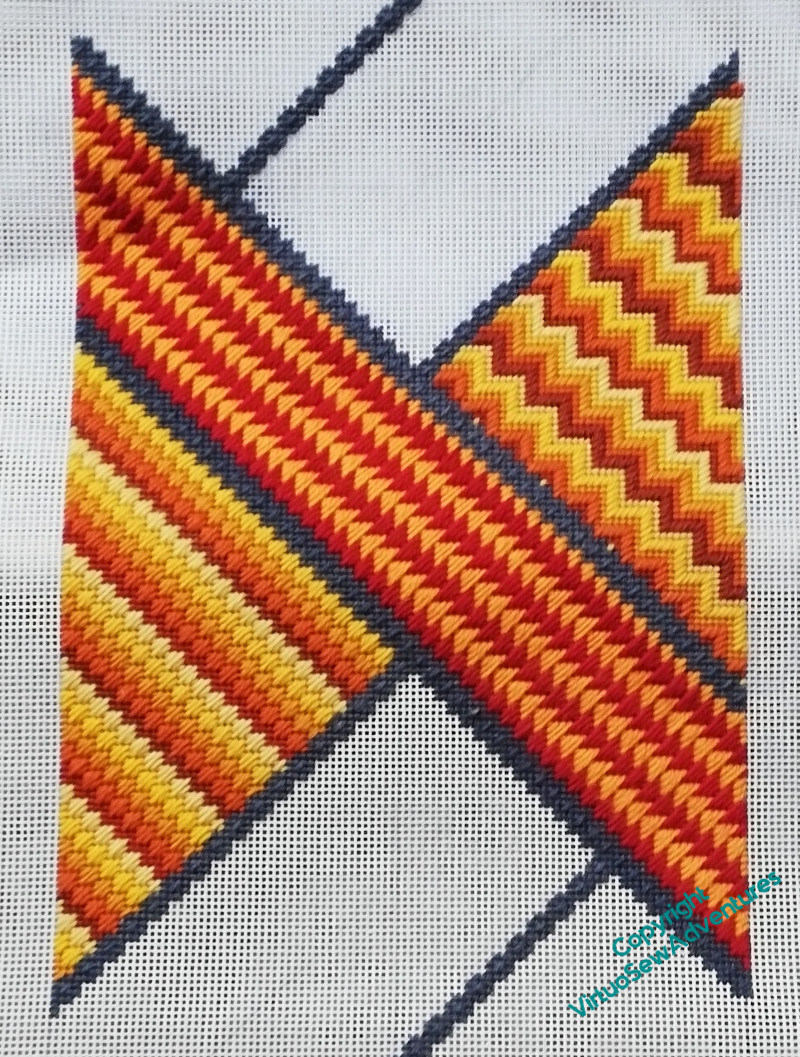
Continuing the stash busting cushion
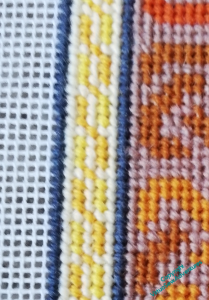
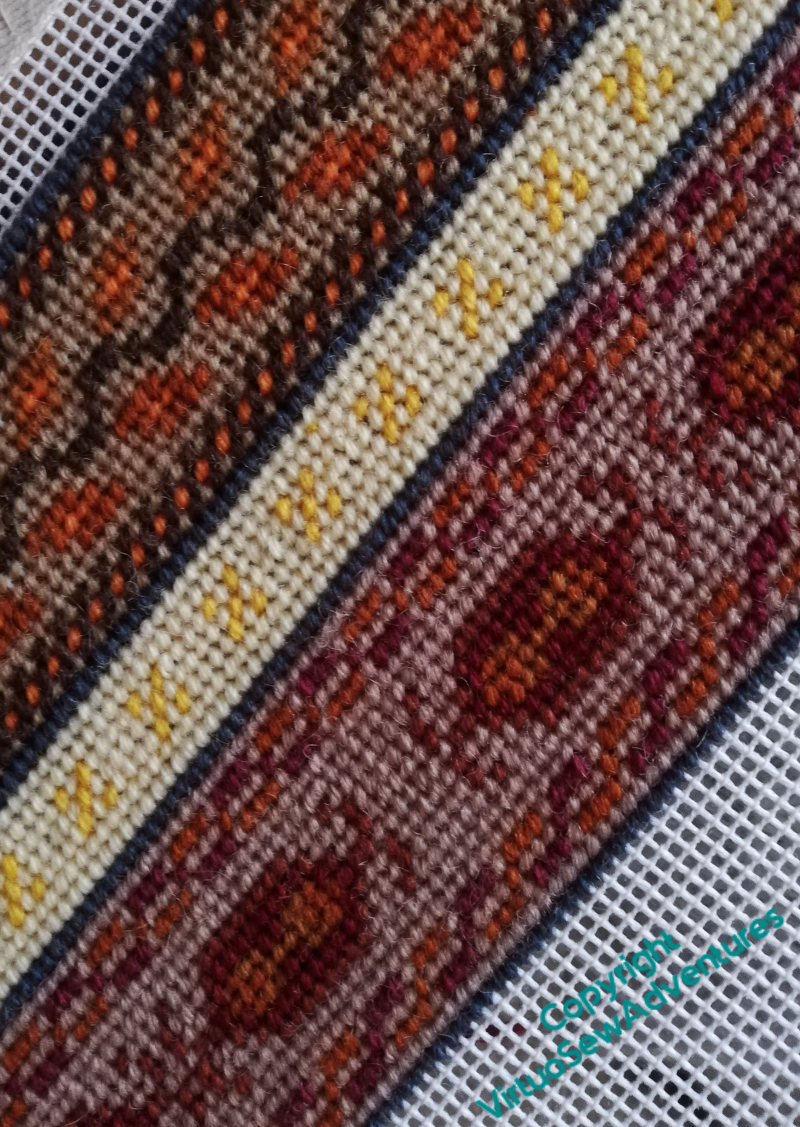
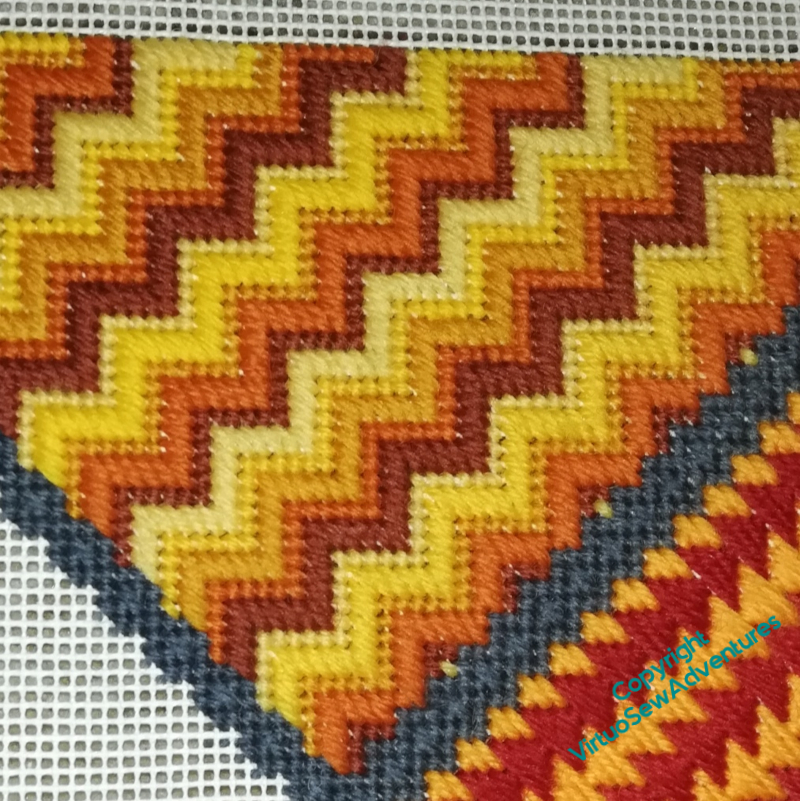
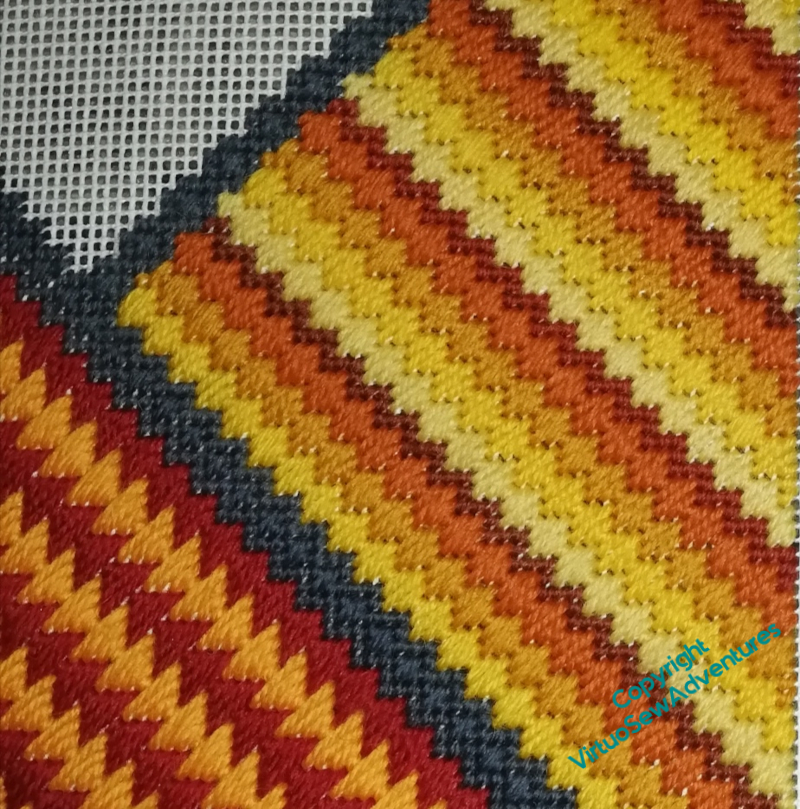
The second, simpler version of the stripes works better – much better. I like the deepening colours, and the change of spacing creates a changing rhythm.
The next band uses three different yellows to make little diamond shapes, alternating darks and lights – although as the darks and lights looked closer togther when stitched than on the hank, the alternations don’t show as much as I thought they would!
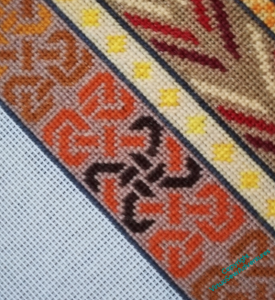
I became a little ambitious after that, and found a celtic knotwork pattern in a book (Celtic Needlepoint, by Alice Starmore) I inherited with a bundle of other things from a local lady who seems to have been as adventurous with her needle as I am, but with a greater emphasis on counted work.
I went astray a couple of times. Knotwork patterns are a little taxing!
I hadn’t quite recovered from tyeing myself in knots when I did the next narrow band. This was intended to be a chain link pattern, but I ended up with something else – what, I’m not quite sure!
The next Episode of #SlowTVStitchery is now live – remembering the agony of unpicking Akhenaten’s seat, while considering the question of the right style of detail to add to a design, with particular reference to the Christmas Angel.
More Stash Busting
In the clearest demonstration yet – at least in embroidery terms – that we are in the End Times, I have embarked on some stash busting counted tent stitch.
I rather enjoyed working on the Stash Busting Footstool, and there was a bit of canvas left on the frame when I’d made it, so I reattached the cut end, rifled through what was left of the tapestry wool, and started to play.
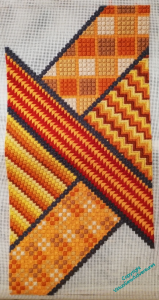
Since I don’t know how far my wools will stretch, my sole “design” is to take the idea of making a fabric from ornamental ribbons, alternating broad and narrow.
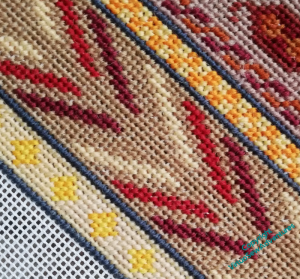
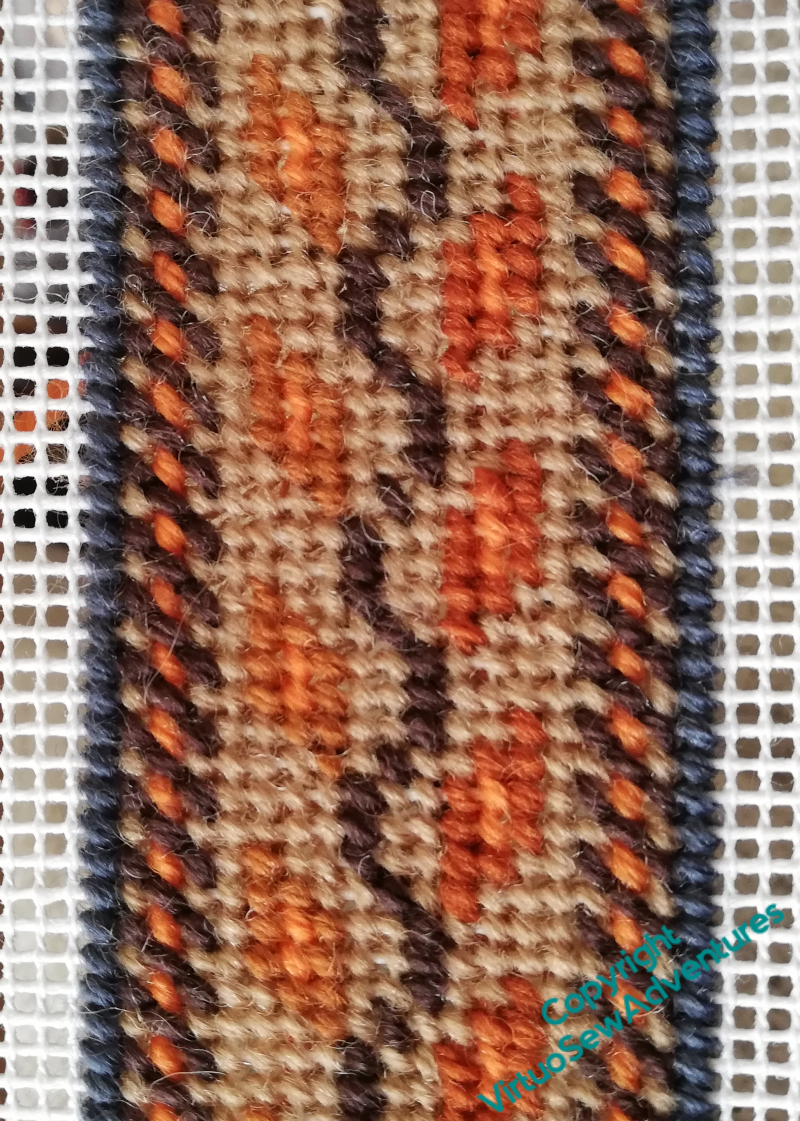
This vine pattern is based on one in “Needlepoint” from Ebury Press.
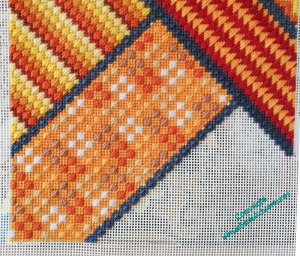
The next two “ribbons” I made up as I went along – one narrow, light pattern in two shades of yellow, and another broad one, this one distinctly made-up-as-I-went-along. It was very vaguely inspired by another in “Needlepoint”, which in turn claimed to be inspired by a Persian pattern. I have my doubts, but in any case, even when I tried to have a sensible pattern of spacing, I ended up with something of a mishmash.
You may have noticed that the “neutral” in the two broad stripes is not the same colour. I’m going to try to alternate these as backgrounds, unless and until I start to need to blend them together to fill the space.
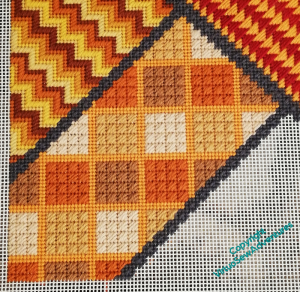
The next, narrow, band, is a chequerboard.
I like the stripe part of this next pattern, but after working the baubles, I looked again and decided that they weren’t quite working. I was trying for a mix of shapes, a bit of variety, and something to change the spacing of the stripes, but not this!
And while you assimilate the shock of me happily doing counted work – Episode 44 of Slow TV Stitchery is now live. In which we discuss the EES as an early crowd-funded organisation, my ambitions to hold a Dreams of Amarna exhibition, and whether “medieval muddle” is an idea purely from 19th Century northern Europe.
The Stash Busting Footstool, 4

After a bit of thought and discussion, my mother suggested that for the last two panels, I should consider doing the same as on the far side of the central panel, but in a different set of colours. I had wanted to lighten the colours as they came away from the central panel, so that’s the scheme I used to pick the colours.

That, and making sure that I thought I would have enough of each colour to do both panels!
I then made things slightly harder for myself by deciding to line up the stripes across the central panels, but it was definitely worth doing. As I’ve said before, when upcycling, mending, or dealing with slightly not-entirely-planned projects, the whole secret is to make it all look deliberately planned – that’s why my mending tends to be embellished in a variety of ways.

Here is the finished canvaswork.
Actually, it isn’t. When I took it off the frame and took it to meet the footstool it’s intended for, I found it was an inch too short, in spite of what I believed to have been some careful measuring.
Clearly not careful enough!
I’m going to add half an inch to each end, and then consider the next step!
In other news, Episode 42 of Slow TV Stitchery is now live. In which I think I may have got to grips with the pattern, consider the adventures of Sir John de Mandeville, and consider the question of Music To Stitch To…
Stash Busting Canvaswork Footstool – 3
The notion that was guiding me – apart from stash busting – was of the colours getting lighter as they spiral out from the central point on either side of the central bar. So I picked more colours that I had enough of (see the constant balancing act I was involved in here?), and this time, stitch patterns which were squarish, rather than stripy. This is Checquer Stitch, and somehow by the time I’d finished the alternation of the colours, I ended up with something that rather reminded me of a Welsh Tapestry blanket. I’m happy with that – I was born in Wales, after all!
The balancing panel is even squarer. I suppose it is another variant – rather as with the Moorish Stitch Variation, I’ve moved all the tent stitches to the edges to form a grid. I think it still has enough family resemblence both to the original stitch and to the “Welsh Tapestry” version to balance them.
So here is stage two completed.
I think the balance and harmony I’m trying to create really are still there, but I feel as though I’ve rather shot my bolt. I’ve mislaid my canvaswork books and I can’t think of another suitable pair of diagonal stitches to use.
However, the first thing to do is to find a suitable set of colours. Onward, ever onward!
In the meantime, Epsiode 41 of SlowTV Stitchery is now live. A fairly quiet episode, this, which nonetheless discusses musical deceleration and taking refuge in learning things, while also anticipating the enjoyment of a Holiday Project.
Stash Busting Canvaswork Footstool -2
As this is a strictly stash-busting exercise, and I wanted to balance the colours across the central bar, I started by finding the colours I had two skeins of, and putting them in order of intensity. This is Jacquard Stitch, but where the classical colour patterning is one colour for the broad stripes and another for the tent stitch, here I have simply cycled through the colours, so that each colour has a chance at both stripes.
On the other side of the central bar, the same colours, but this time in a variant of Moorish Stitch. I felt the same pattern of colours would be a bit too obvious, so this is a simple stripe, and where classically there is a row of tent stitch between each row of squares, this time I simply used a row of tent stitch in the darkest shade to “reset” the pattern.
And here is the result.
The stripes run the same way and balance each other very nicely, I think. I like the way the alternations in the Jacquard Stitch seem so very active, while the Moorish Stitch section is quieter and creates a simple shaded effect, rather like a row of cylinders side by side.
Episode 39 of SlowTV Stitchery is now live, on the delights of careering through history, the plethora of Mathildas in post-Conquest English royal circles, and giving some consideration of the eventual display of the piece.
The Stash Busting Canvaswork Footstool – Stitching Begins
Once I’d drawn out the size I thought I needed for the footstool cover, I needed to think about how to break it up and make something that looked deliberate.
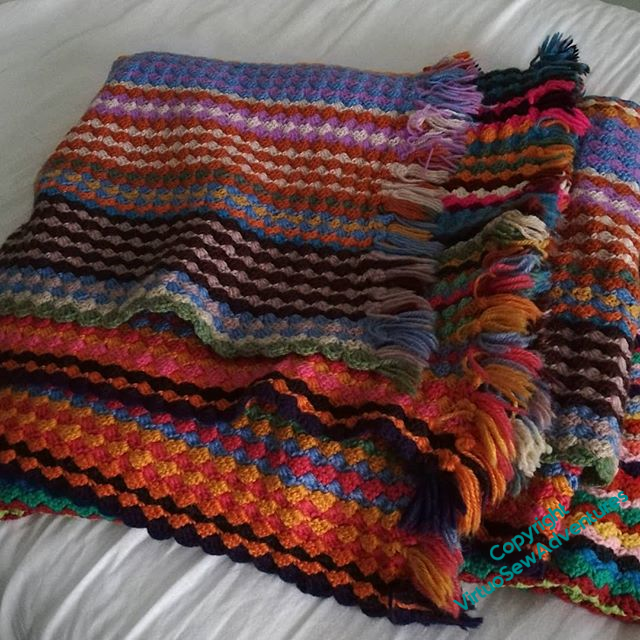
I could, of course, take inspiration from Grandmama’s everlasting crochet blankets, made, I think, purely to keep herself occupied in times of trial. But somehow, that didn’t seem quite right. Maybe the footstool area seemed too small for that to work properly.
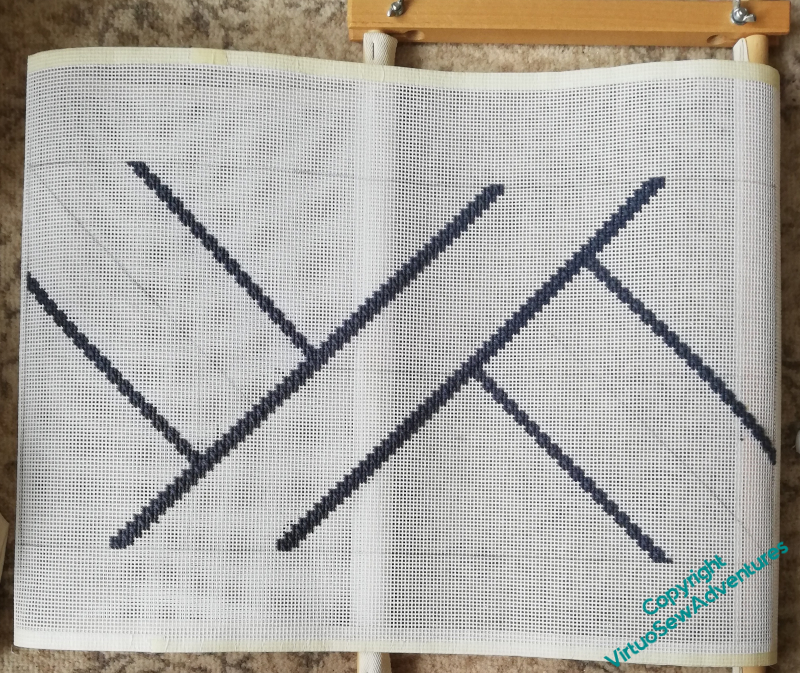
I gave some thought to how to divide up the space, but compared with the Crazy Canvaswork Cushion, the idea fell together really quite quickly.
I divided the area into seven sections, one long diagonal and three on either side, and then stitched along those lines in grey wool, using framed mosaic stitch.
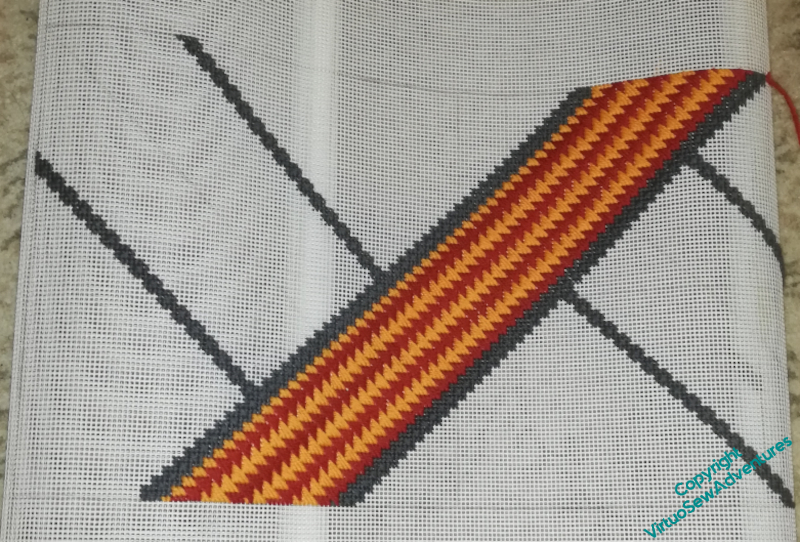
Then I started with the first section. The colour scheme was rather determined by what I felt I had a sufficient amount of thread for, and I decided after some experimentation that I was going to confine myself to diagonal stitches, and what’s more, that the diagonal stitches were all going to slant the same way. I’ve discovered that not all “Tapestry Wool” hanks are created equal, and some are distinctly thinner and sparser than others, so I really don’t need the added difficulty of making stitch directions mesh!
The next episode – Episode 37 – of SlowTVStitchery is now live. It considers the attraction of literary adventures, additional details on the Amarna Family Group, and the preferability of overcast weather for goldwork.
Canvaswork again – The Lady By The Lake
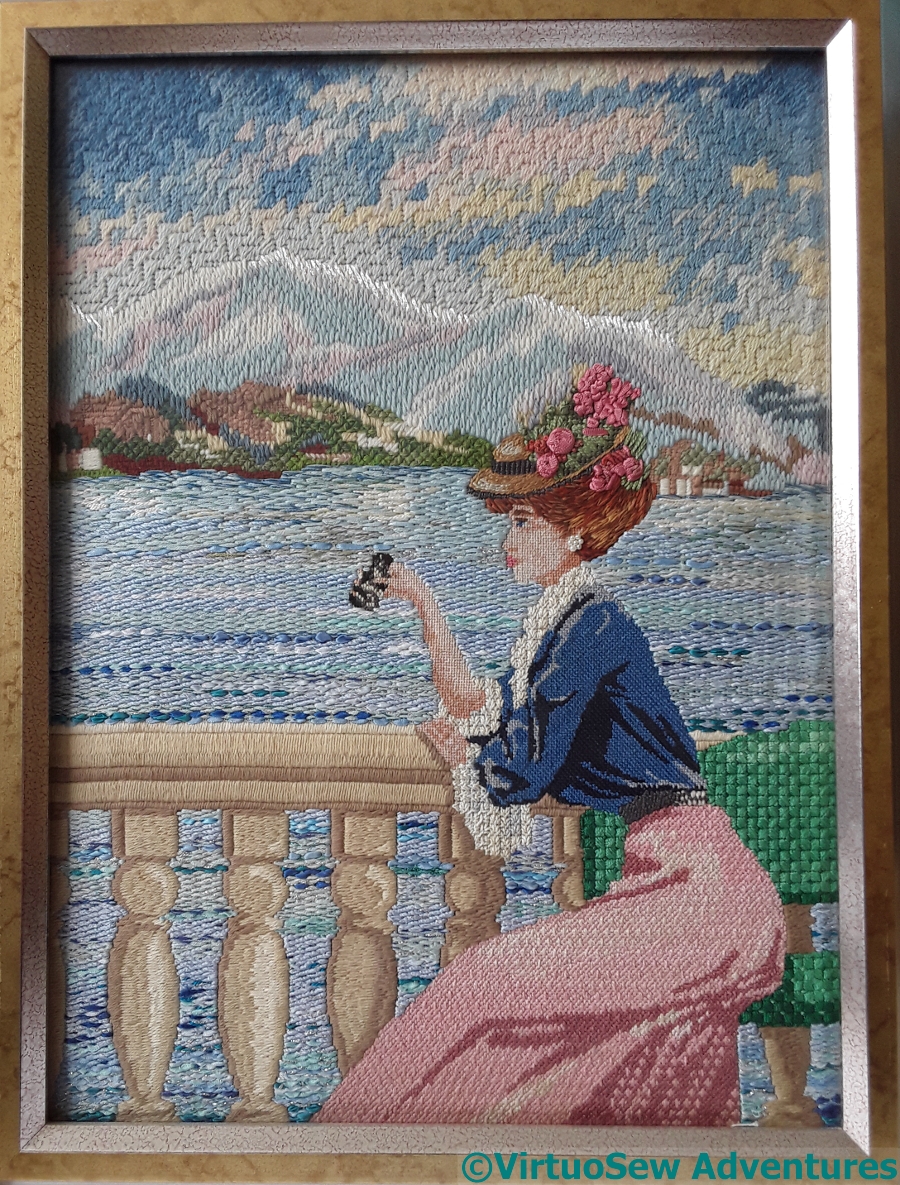
The Lady By The Lake
This is my second post of canvaswork for Catherine of Hillview Embroidery.
The Lady By The Lake has a much wider range of stitches and threads in it, including blends of stranded cottons, ribbons, and a variety of wools. The canvas is a double thread canvas which makes it possible to separate the threads and work some of the design in petit point.
I wrote a post about the Lady when I first started blogging, but I have a very much better camera now, and an incentive to take the picture down from the wall. Considering the canvas is still under glass I am very pleased with how the photographs turned out. There are enough different materials and textures in the scene to provide a good workout for thread and stitch selection muscles…
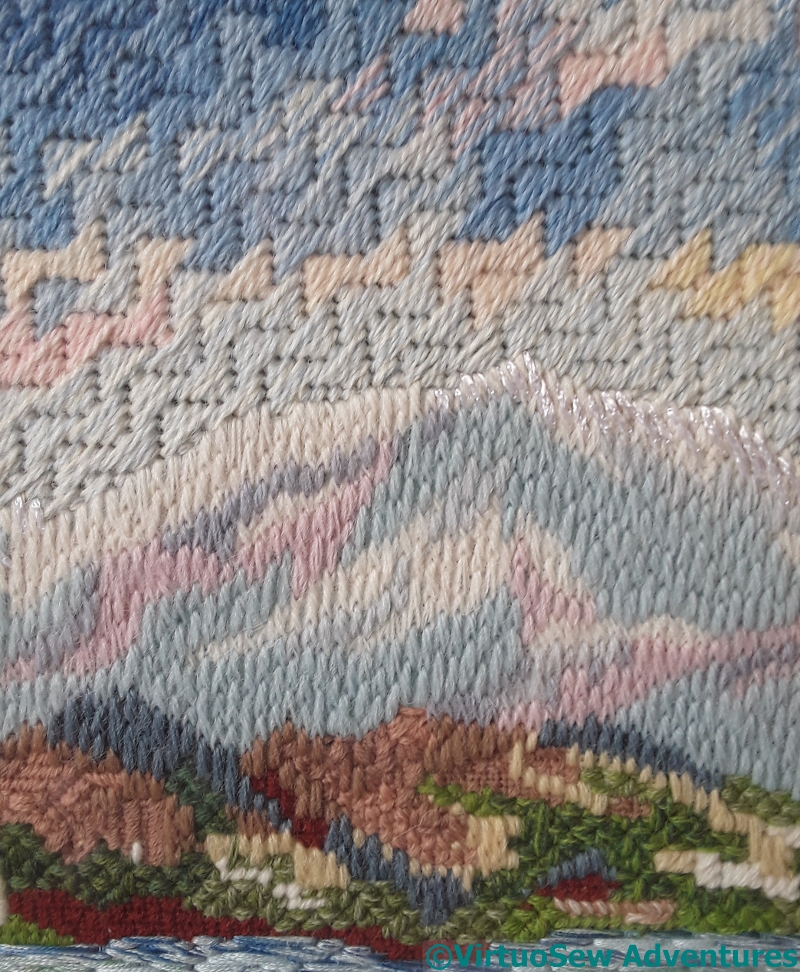
Sky And Mountains
The sky and clouds are all Milanese Stitch, worked in blended Persian yarns with three strands in the needle.
The mountains are in Gobelins Stitch in tapestry wool, and the lakeside hills with their forest and villages are a whole tangle of interesting variations of stitch and thread.
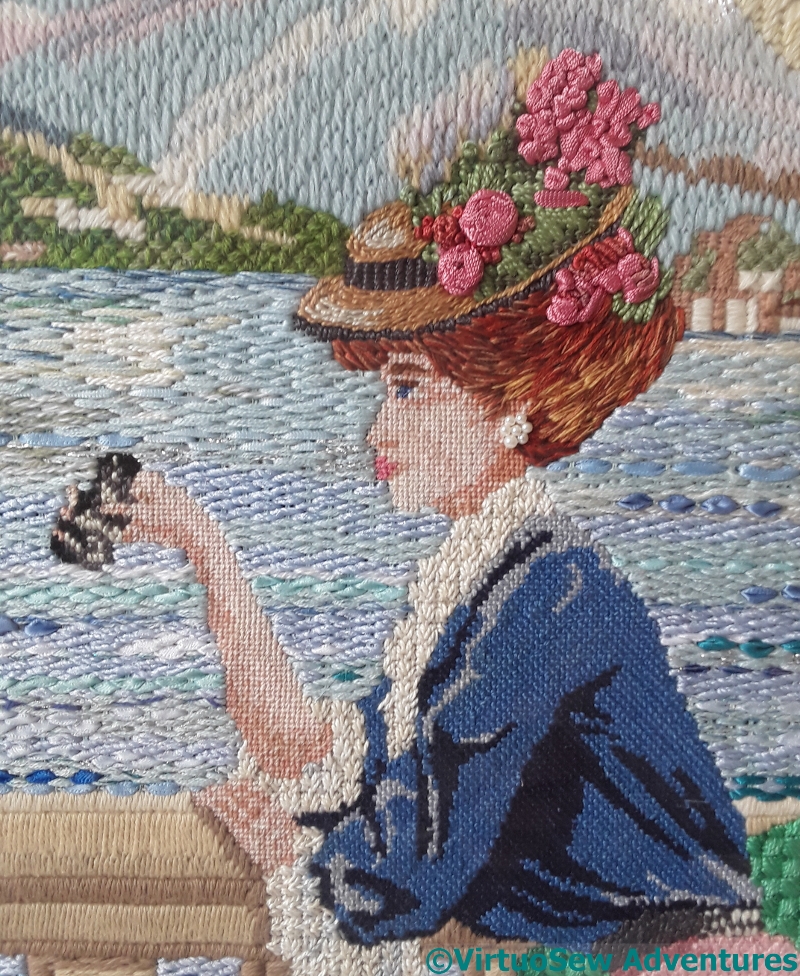
Hat, Face And Blouse
The face and arms were worked in petit point, separating the double threads to create single thread canvas, and worked in stranded cottons (blended). The hair (she didn’t have quite such glorious chestnut hair on the painted canvas itself) is also blended stranded cottons, worked in a sort of long and short stitch. The hat has spider’s web stitch roses on it, and she’s wearing large pearl bead earrings.
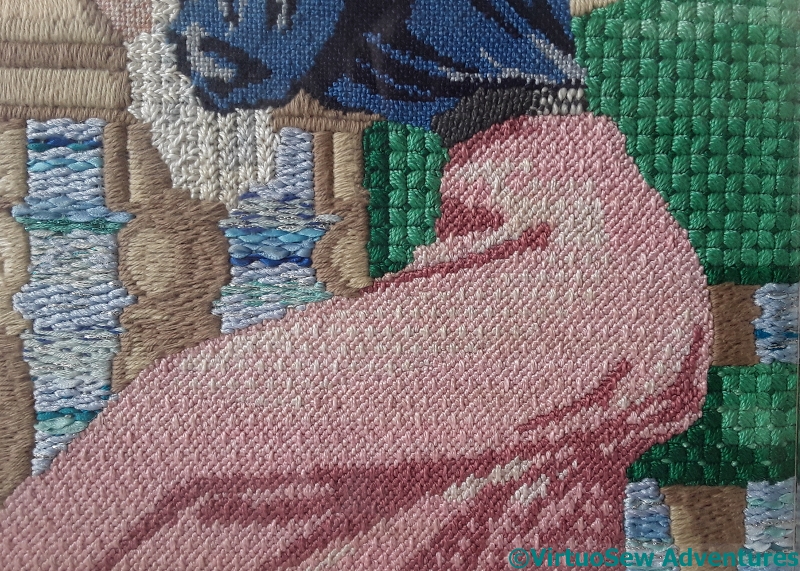
Skirt And Bench
It was the idea of experimenting with the skirt that attracted me. I used a bordered Hungarian Stitch, worked in three shades of pearl cotton and combining them to create the impression of five shades in the skirt. It worked!
The blouse is also pearl cotton, this time Linen Stitch, which is effectively the back of Basketweave Tent stitch put on the front.
I changed the wooden, slatted backed bench of the canvas into a padded one so that I could do the upholstery in Reversed Mosaic Stitch.
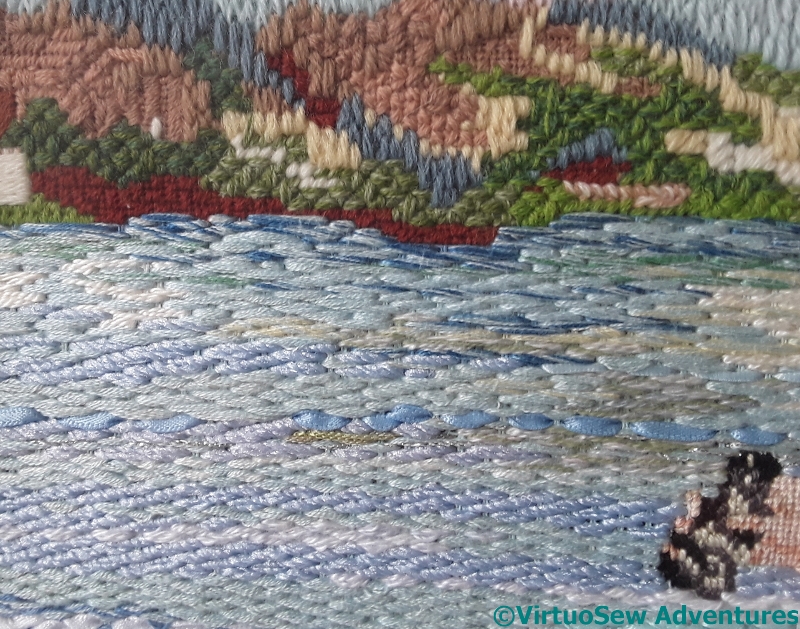
Lake And Town
The lake itself took ages to do – row after row of darning stitch using all sorts of ribbons and threads, including some truly ghastly double knitting acrylic yarn which would have made a dreadfully uncomfortable jumper, but made a very good lake surface, with that slight sparkle you get when there’s just enough breeze to move the water.
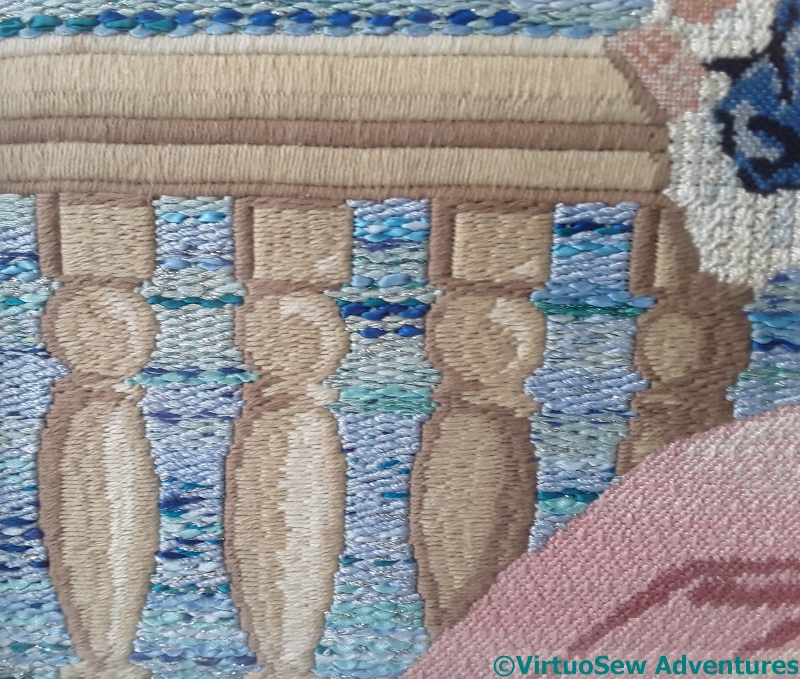
Balustrade And Lake
The balustrade was worked in Soft Embroidery Cotton. I assumed it was something like limestone, and not marble with a polished surface, so the thread needed to be dull to let other elements shine.
Again, click on the pictures to see more and have fun thinking about what I should have done differently!
Canvaswork – Sunset Study
Sunset Canvaswork
Catherine, of Hillview Embroidery, is doing an RSN canvaswork course at the moment, and commented in a recent post that the folder of photographs of the work of past students at the back of the studio has been really useful, partly for ideas, and partly just to practice analysing designs and stitches.
I have two canvaswork pieces that use ornamental stitches to represent the textures and colours they depict, both worked when I was a teenager. It’s much easier to analyse someone else’s work than your own, so Catherine, this post (and another, as yet unwritten) is for you!
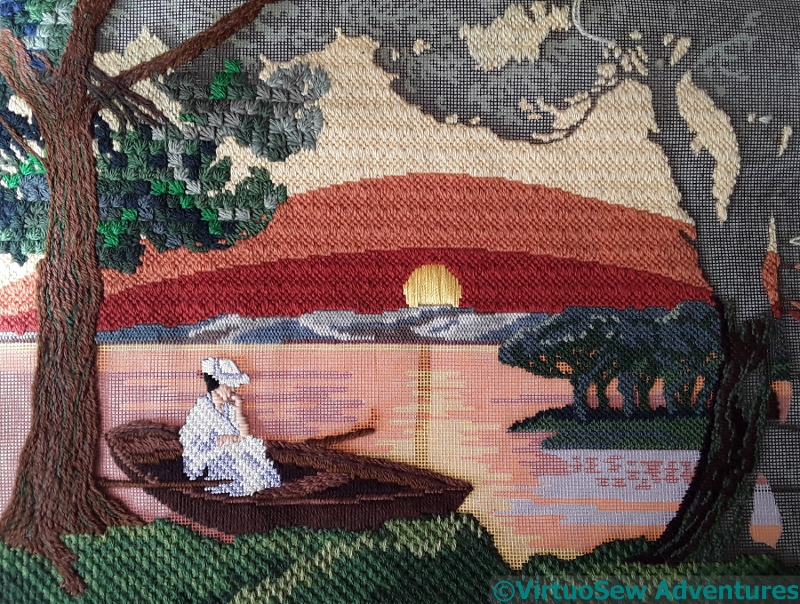
Sunset Sky
It was actually the sky that made me buy this particular painted canvas (this was long before I’d tried designing my own!). I think the stitch is Hungarian Point, and since the canvas had such a graphic feel, rather than being painterly, I was quite happy to leave the sky with those sharp colour changes. The pattern in fact runs clean through from bottom to top, but that those same colour changes mask the fact. The heather clad hills are in Plaited Stitch, worked small to help them recede. And the foliage of the tree is Ray Stitch. I do wonder whether I should have done the ray stitch facing downwards, but some of the pines have a slight upward curve, so they are staying as they are.
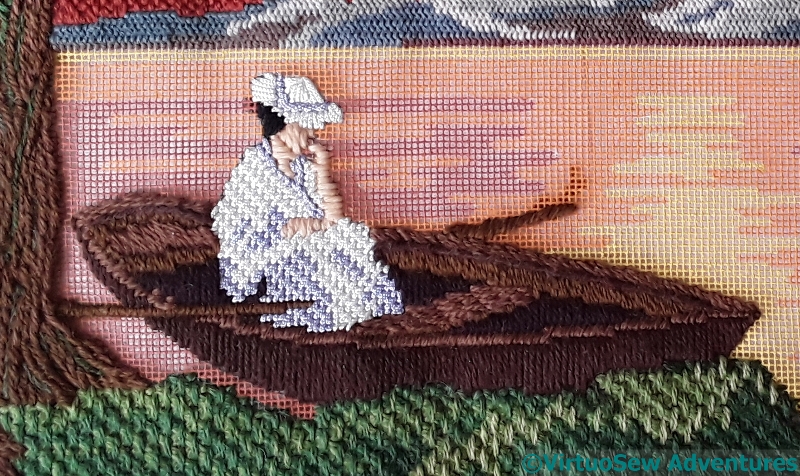
Lady In Punt
Almost all the threads in this piece were wool. It’s a fairly large gauge canvas, and again, there’s so much flat colour that blends wouldn’t really be suitable.
The lady in the the punt is Soft Embroidery Cotton for her skin and hair, and tubular synthetic for her gown and hat, and the punt is straight stitches in assorted browns. The tree trunk is effectively in stem stitch, and the bushes at the front are interlocking elongated cross stitches. They look surprisingly bushy, don’t they!
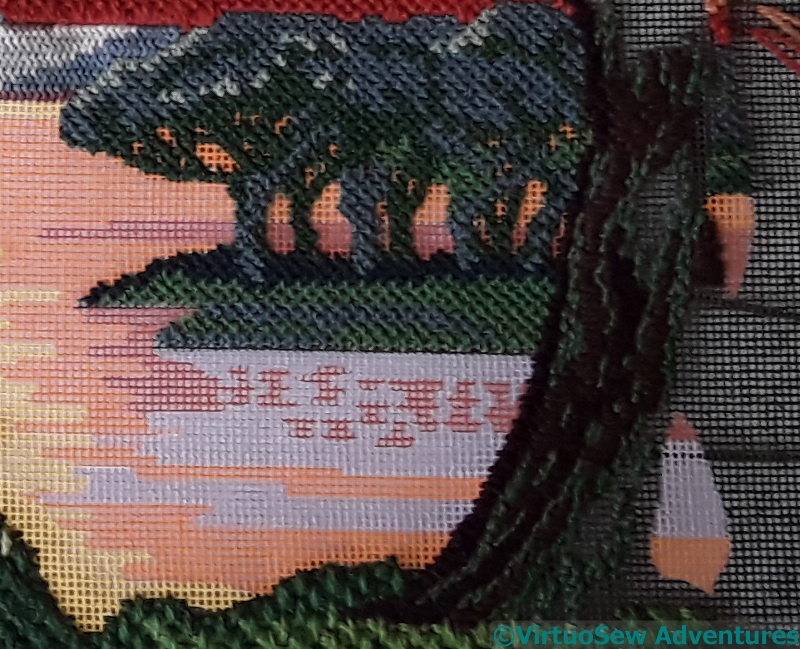
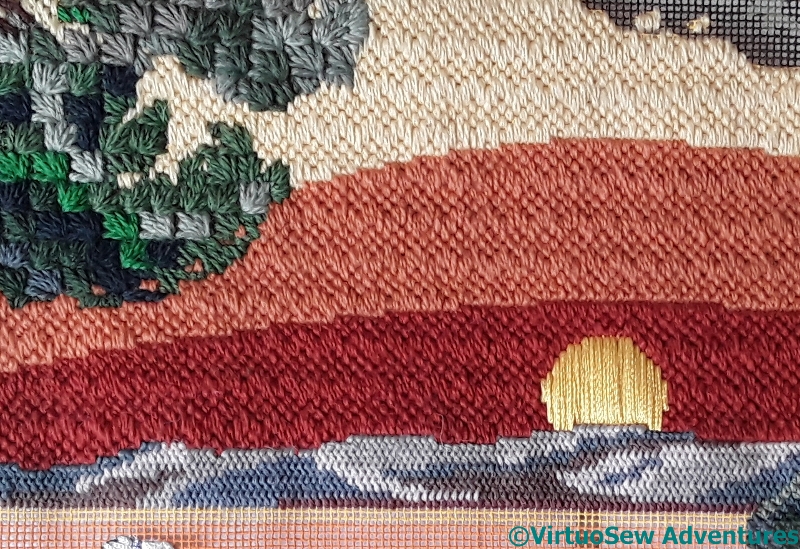
Trees And Bark
The trees in the distance are in Upright Cross Stitch, which makes a good intermediate texture between the bushes at the front and the distant hillside.
And that near tree? That’s one of the reasons I didn’t finish. I found that not only was I not enjoying the combination of stitches, I was running out of the threads and colours I was using. I threw it in the loft in frustration and disgust and only fished it out again after I’d read Catherine’s post.
The sea is another reason. I still haven’t worked out how to do it, and at the moment, I am still not at all sure I want to.
You can click on all the pictures to see them more closely, so Catherine, your homework is to look at them all, think about what you like and what you’d have done differently.
And if any of you have any suggestions for the sea – let me know!