
About Rachel
View all posts by Rachel
Another Course From Thistle Threads!
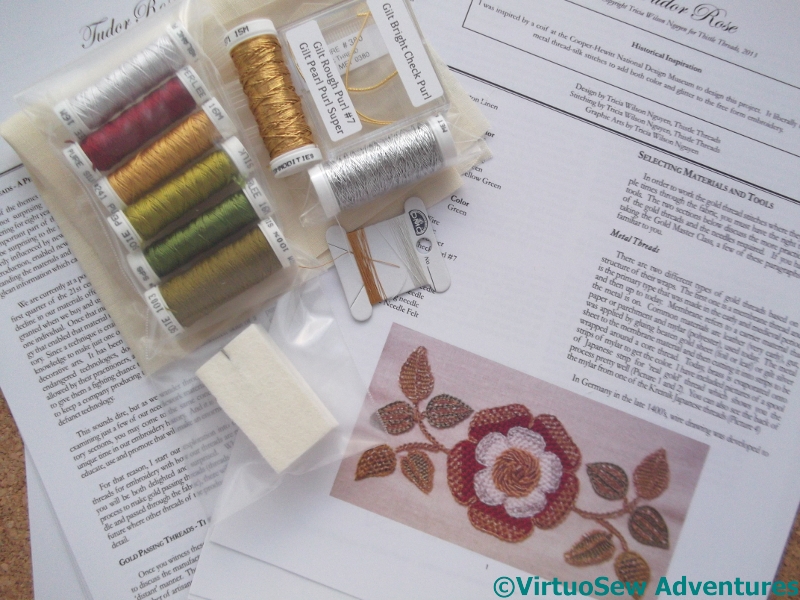
Tudor Rose Kit
There was another clatter of the letterbox and a gentle thunk on the carpet recently. It was soon followed by some excited squeaks and a dash upstairs to print out Month 1 of the History and Instructions.
This time, instead of a clear distinction between metal thread stitching and silkwork, as in the Floral Glove Needlecase, the Tudor and Stuart Goldwork Masterclass, or the Glittering Gentleman’s Nightcap, the aim of the course is to show how the metal and silk threads were combined within stitches and motifs.
I’m hoping that this will give me some new ideas and techniques to apply to my Dreams of Amarna panels. However, I intend to be a good girl. I won’t actually start this until I’ve done the Glittering Gentleman’s Nightcap, which is still “going slow” owing to a combination of end-of-year exhaustion and fugitive winter light. With a bit of luck, I may be able to get started in the spring.
Stones of Venice Footstool Finished
One Side Turned
Once I had finished the sides of the footstool, I cut out the sides and the top and turned in the edges, leaving one thread of canvas all round, to help sew them together.
The next task was to assemble the pieces to create the box shape for the top of the footstool. I used a herringbone stitch which creates a fairly strong edge, and nicely echoes the stitch I used for the sides.

Canvas Stapled
I covered the foam (freshly cut – the old foam was disintegrating as fast the old cover!) with an old teacloth, and then unpicked the lower edge of each side, and covered the combination with the canvaswork.
Next came the challenge of fastening it all down. Fortunately I had help! We turned the whole assembly upside down and leant on it, and then my mother held everything in place while I wielded the staple gun. As I’ve said before, staples don’t damage the wood as much as tacks or nails, and I think they also do a better job of holding everything in place. They are also much easier to take out !
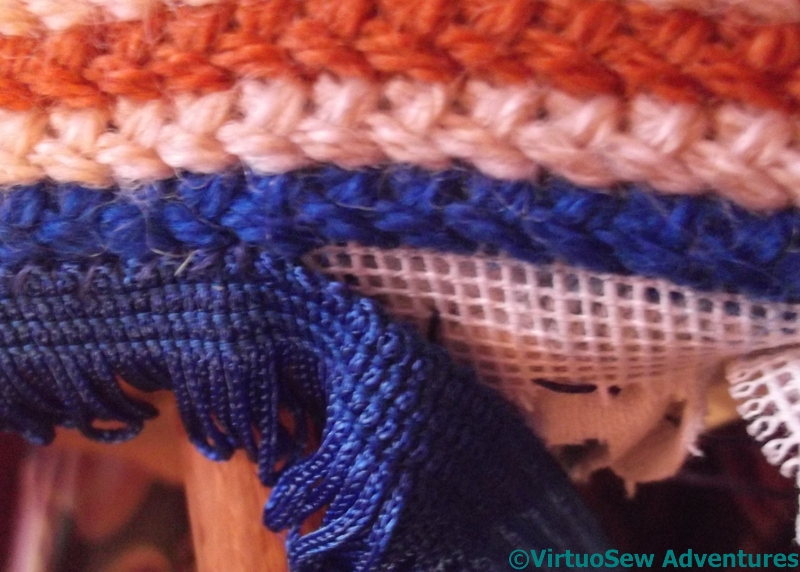
Attaching Blue Fringe
Finally, I decided to hide the edge of the canvas with fringe. I found in the end that the best way was to sit cross-legged on the floor, like a tailor, because then the legs of the footstool brought the edge I was concentrating on to a convenient distance from my eyes, so I didn’t have to bend over it and strain my back. It’s very important to find the right angle to work at, because there is no point enjoying the stitching only to find you can’t sleep for backache!

Finished Footstool
So here is the finished footstool.. It was really very lucky that I found fringing to go with the wool, and what’s more, in the little needlecrafts and notions shop in our local indoor market. The fringing isn’t long or luxuriant, but it’s just enough to hide the canvas – unless you want to lie on your tummy and examine the whole thing at close quarters, and who would do that?
Er – apart from everyone who reads this blog, and anyone I’ve taught to look at handiwork when I’ve shown it to them…
Making Progress on the Hittite Amulet

The Hittite Amulet Progressing
There was a slight, panic-stricken, pause in progress on the Hittite Amulet recently. As you can see, I’ve barely completed a third of him, and I’ve used half of my darkest silk. This is a graver situation than I anticipated, because since I bought the thread – three years ago! – the master dyer at Pearsall’s has died and they have closed the company.
I can leave to your imaginations how I felt when that realisation hit home…
Fortunately, the remaining stock was sold to Tristan Brooks Designs in America, and while it is extremely frustrating to have to have thread dyed in England shipped back to England from the States, the two skeins I bought do seem to match well enough. I’m going to alternate strands from the new skeins with strands from the old, all the same – that should help to make sure any change is gradual.
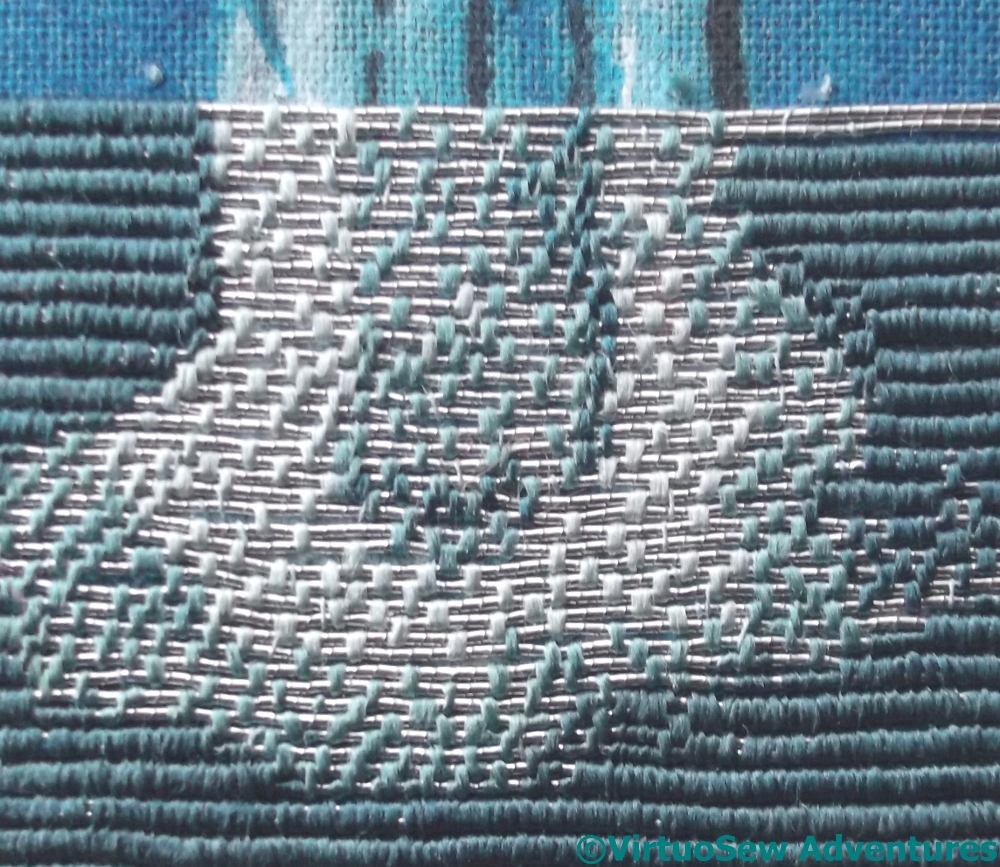
Close Up On The Amulet
When I was at the Knitting And Stitching Show in Harrogate, I bought an extra skein from Laurelin Specialist Embroidery. The colour is very slightly brighter than the darkest one I am using for the background, but I am hoping that it will help to add a bit of depth and strength to some of the shadows on the Amulet himself.
You can also see in the close-up that I’ve nearly got the rows straight again after their wanderings. Now I know I have to be careful, I hope that the problem won’t arise again.
Harrogate Knitting and Stitching Show
For The Thistle
The Knitting and Stitching Show in Harrogate is always great fun, if totally shattering – imagine what it’s like for the stallholders, who get four days of it! – but since I have no local needlework shop, it’s my one chance to stock up.
I admit that sometimes I don’t get around to all the projects I stock up for as quickly as I might like – I bought the threads for the Hittite Amulet at Harrogate in 2010! – but as we all know, sometimes a project undergoes considerable modification in the period from first concept to finished piece.
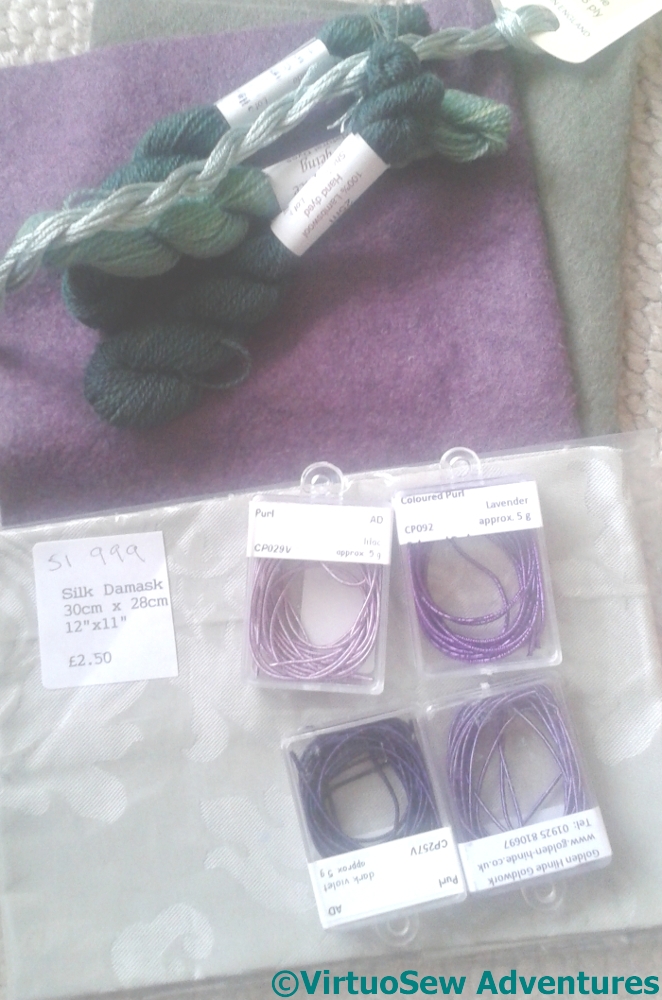
When I visited Elmsley Rose in the summer, she gave me some silk wrapped purl – three shades of purple. I’ve decided I want to work a thistle – more or less heraldic in style – so I’ve bought some wool felt, some coloured purl, and some lovely wool thread. Thank you to Lizzy Lansbury and to The Golden Hinde for comment, advice, and encouragement. The chance to talk to people with knowledge and experience is the real advantage of the Knitting and Stitching Show, after all. Even when I had a local embroidery shop, no-one who worked there had ever worked with metal threads, for instance!
Tweed For Skirt
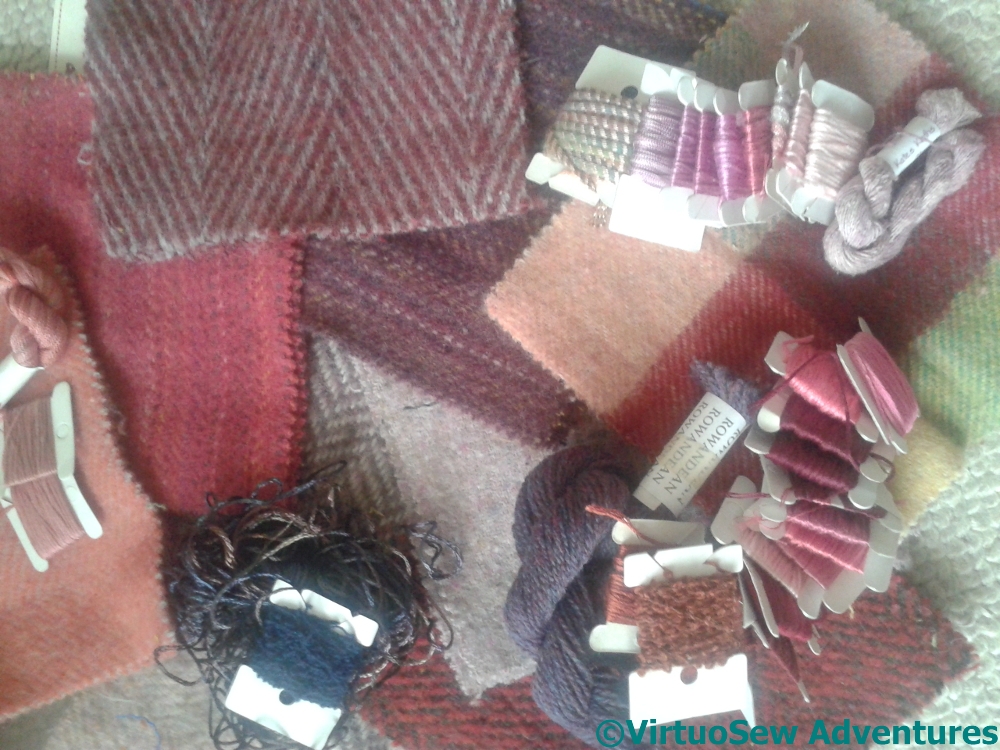
I usually wear my Autumn Leaves Skirt for the Show – what better time to wear it than among people who will enjoy it as much as I do! – but next year I may have another possibility. I’ve bought some lovely swatches of Donegal tweed to appliqué to a different skirt. The scatters of thread – wool, stranded cotton, and exotics – all come from my (extensive!) stash. My current thought is that the appliqué will be circles of different sizes. I only hope I bought enough tweed to do the job!
Stitching With Rowandean
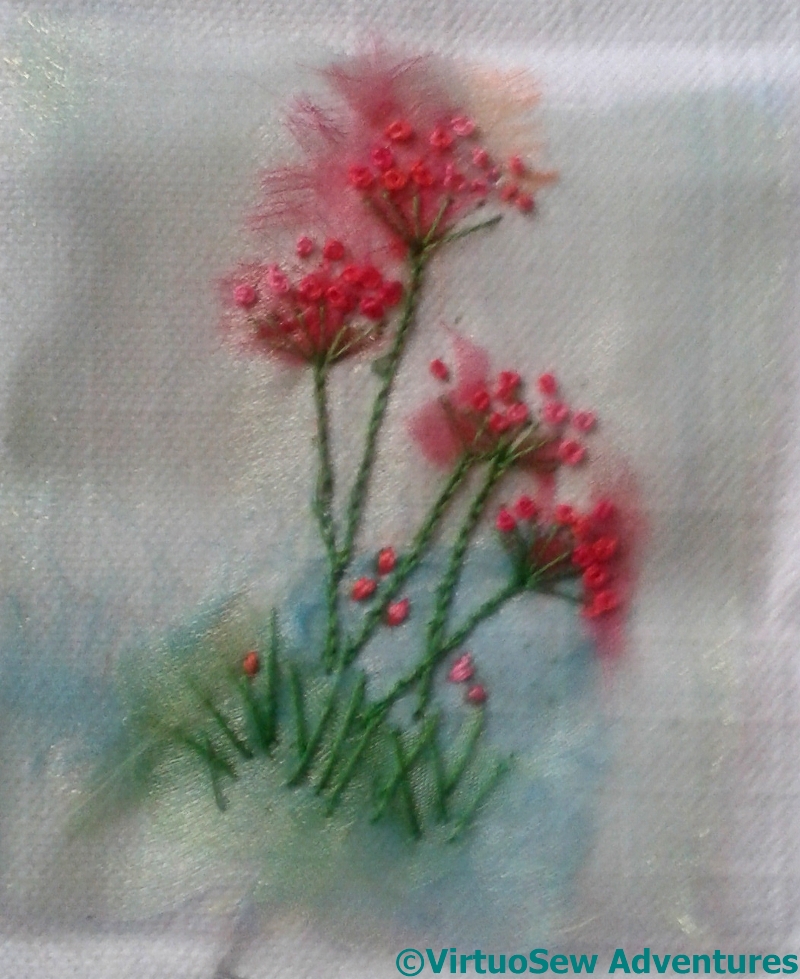
And finally… I’ve known Ted and Katrina of Rowandean Embroidery, on and off, for about twenty years, since the days when I was making counted cross stitch kits. I’ve always admired the verve and invention of Katrina’s designs, and I love talking to them. But this is the first time I’ve been able to sit down with Katrina – I joined in on a Make and Take, playing with layers of sheers and a few bits of stranded cotton. It was a lovely break in all the trotting around of the show, to be able to sit down and stitch, instead of simply taking about it.
And on top of all that, I had lunch with Elizabeth of Sew-In-Love, who is the fourth blogger I’ve met in real life this year. We had a lovely time, although, in what seems to be a pattern, I don’t think we spoke very much about embroidery!
Progress on the Azorean Cutwork
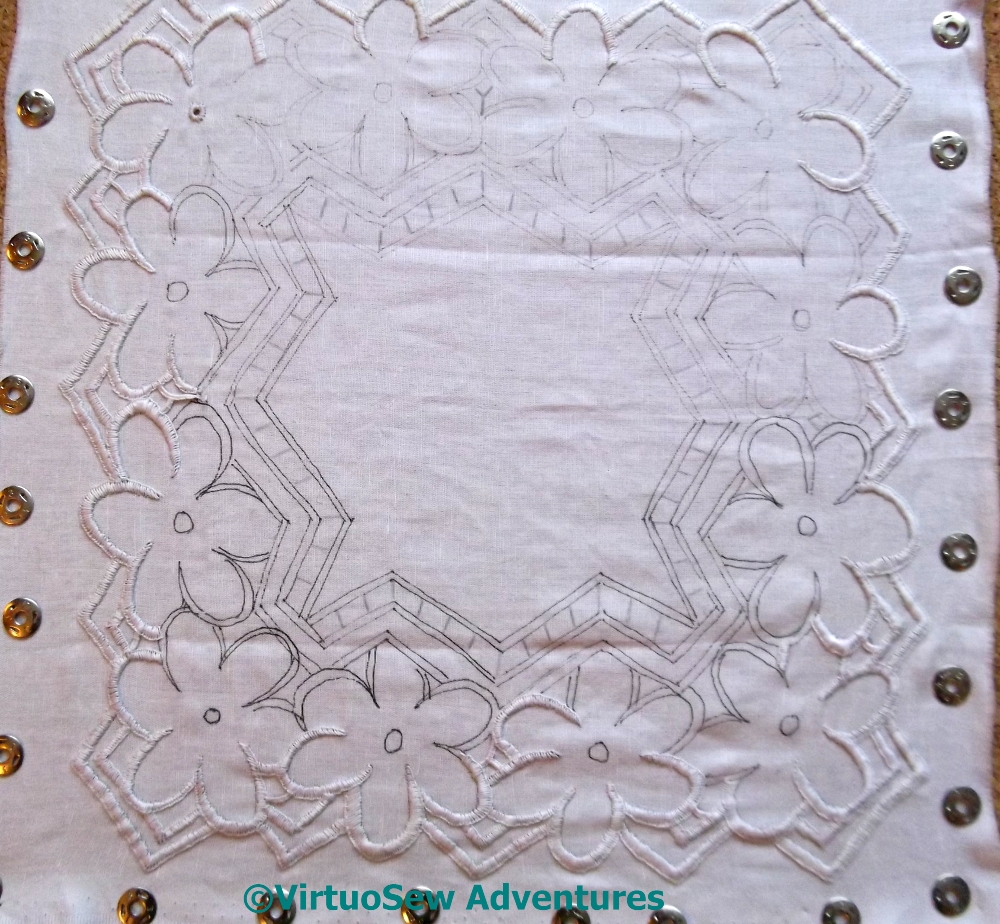
Azorean Cutwork Progress
You may recall that when we visited the Azores, I found an embroidery shop, and bought myself some fabric and thread, and a book of patterns.
I’ve now finished the outside edge of the piece, which means that I can stop worrying about the potential for the piece to fray. My buttonhole stitch isn’t entirely consistent in width, but now I’ve pinned it out to look at it, I suspect that isn’t going to matter very much when the piece is finished.
I haven’t damp-stretched it (with apologies to Karen!) because I’m not entirely confident that the drawn line will survive washing, and I really don’t want to have to draw it yet again!
I’m continuing to work around the perimeter, rather than working each flower individually. I’ve commented before that I don’t much enjoy repetition, so as I go around the perimeter I alternate between curved and straight lines, no buttonhole bars and adding buttonhole bars, which keeps me a bit more interested. Not least of the (underrated!) skills involved in embroidery is managing longer-timescale projects in order to make sure that they do in fact get finished. I’m pleased that – in spite of the fact that this is essentially my embroidery project for when I don’t have good enough light for my big projects! – I’m making slow but steady progress with it.
However, my next task is to write my shopping list for my visit to the Harrogate Knitting and Stitching Show. Over the years, I’ve often bought things with a project in mind, and then found the project changing when I come to think about it seriously, so I am trying to be a bit more organised and disciplined this time – while still leaving some leeway for the odd enthusiastic impulse purchase!
The Latest on the Glittering Nightcap

Progress Report
It’s been very difficult to get back to the Glittering Nightcap, but I must, because in December the Tudor Rose course is starting. There are, I think, four pomegranates, two carnations, and two pansies to do, as well as all the leaves.
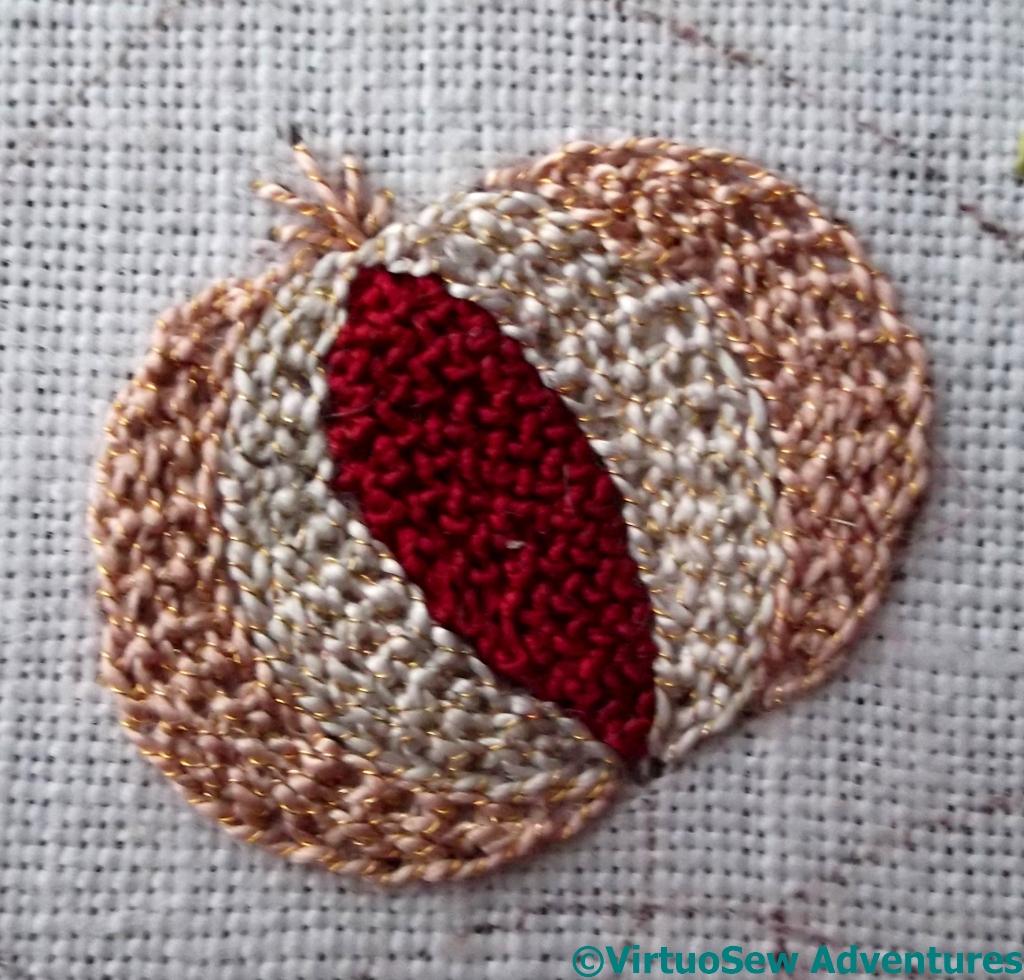
First Pomegranate On Brim
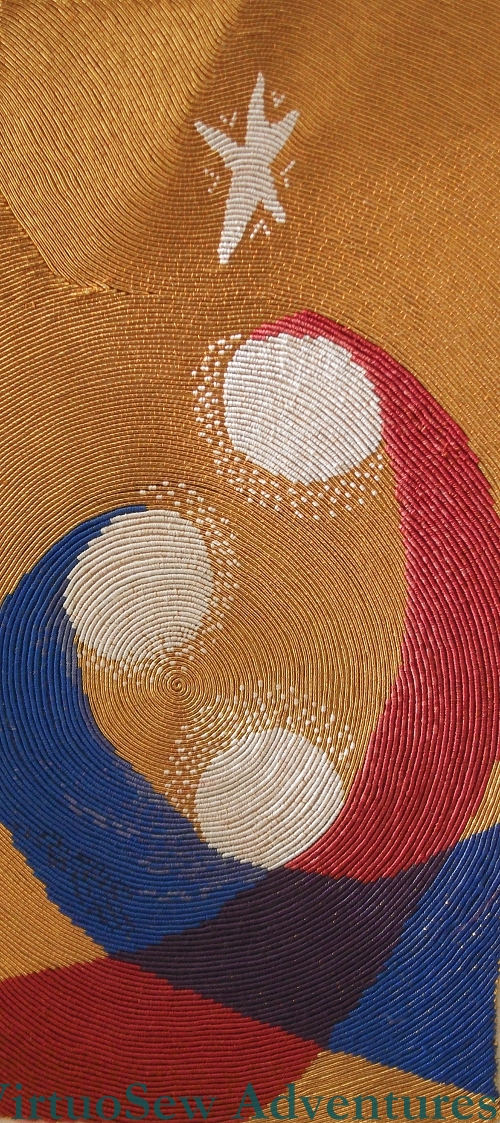
The pomegranates are going to be quite a trial. The central section is worked in Trellis Stitch, using the Soie Perlee. I seem to have begun with the one section that was easy to work, because the central section of the next pomegranate – still unfinished – took me several sessions to do, purely because of the angles at which I was attempting to work.
Of course, fugitive winter light isn’t helping, either. Sometimes I finish the other stuff I need to do, sit down at my frame, decide after about three stitches that there isn’t enough light to see what I’m doing, and get up again, muttering discontentedly!
I’ve continued to make changes in the working, as well. I’ve used the Bordered Corded Brussels stitch for both the white and pink sections of the pomegranate, and rather than working the white in a “vertical” alignment, I’ve worked it all “horizontally” – relative to the body of the motif, not to the weave of the fabric, of course.
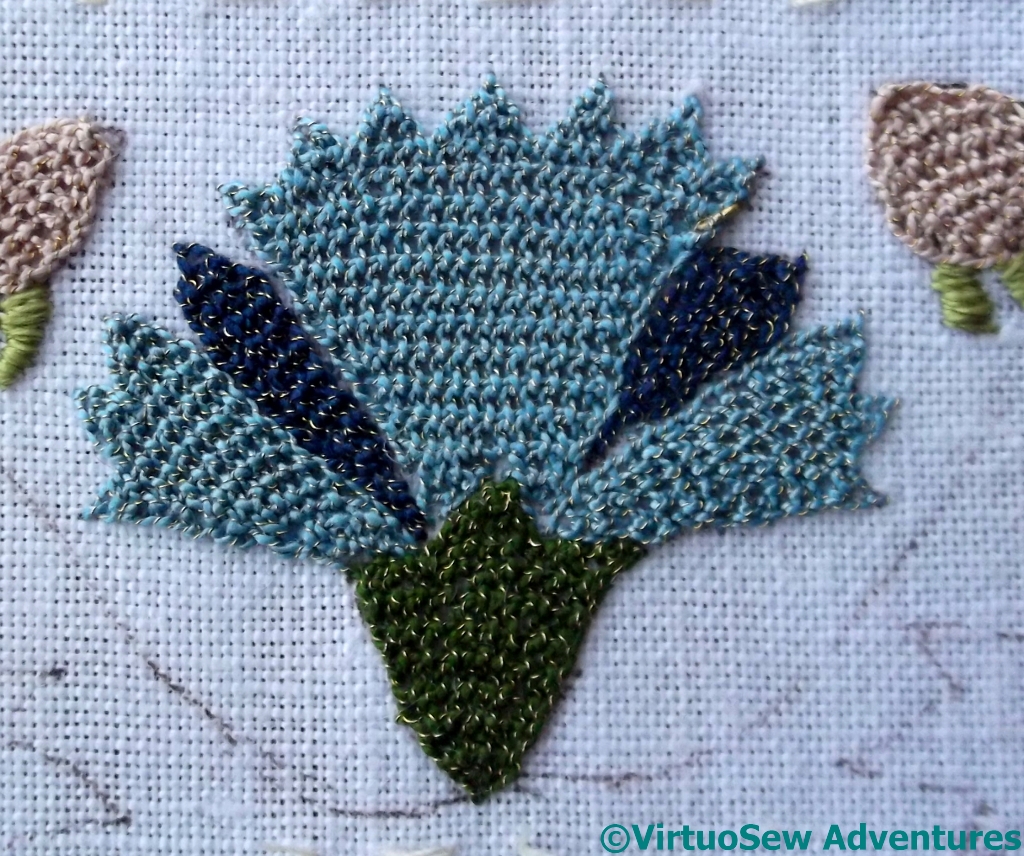
First Carnation On Brim
If you look at the top right hand corner of this carnation, you will see one of the hazards of working with Gilt Sylke Twist. The gold wire has scrunched itself up into a single length that looks almost like a bullion knot. What must have happened was that the wire snapped, and then for one reason or another caught on the right side of the fabric instead of continuing through with the needle to make the stitch.
I’ve decided that I definitely prefer Bordered Corded Brussels Stitch to working Corded Brussels stitch into a Chain Stitch border. It is much easier to work, because there’s no fighting through the stitching of the border, and it looks very clean and crisp – at least when I get it right.
I’ve done the buds, the pansies, and one carnation, so now I have three pomegranates and one carnation to do before I move on to the leaves.
Dreams of Amarna – a Crest for the dig
Mary Chubb recounts in “Nefertiti Lived Here” that on the first evening that they were at Amarna, John Pendlebury doodled a coat of arms for the dig. She tells us that he had something of an enthusiasm for the medieval period, and when I was a teenager I was rather a heraldry enthusiast myself, so that little story struck a real chord.
The key elements in a coat of arms are the shield, the crest, and the motto.
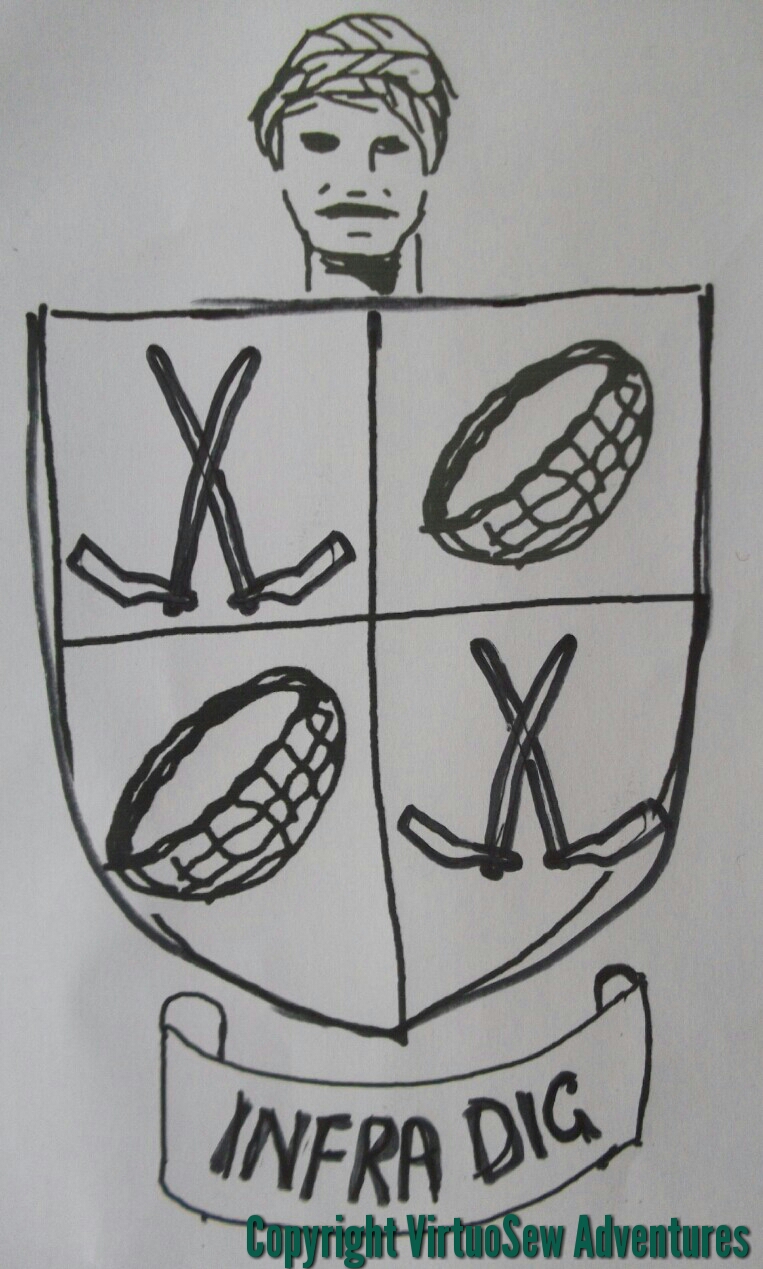
Doodled Crest
The crest was a Gufti’s head. The Guftis were expert excavators and overseers, people from a particular village, originally trained in excavation techniques by Flinders Petrie, who passed on the knowledge and the career from father to son. As I discovered in the BBC4 programme about Petrie, “The Man Who Discovered Egypt“, the Guftis are still in demand in Egyptian archaeology today, which is very good to know.
The motto – suggested by Mary herself – is “Infra Dig”, which I take as a very bad pun. They’ll be digging below the surface, of course, but the term would more usually be taken to mean something like “Beneath Our Dignity”.
On the shield, first and third quarterly, Pendlebury placed crossed touriehs. The tourieh was a sort of mattock, used to pull back the sand into a basket propped up against the digger’s legs. Second and fourth quarterly, he placed a basket.
Eventually I intend to stitch the crest design in couched gold onto one of the dark teal corner panels. As it is such a simple design it would be a good one to do while I’m planning something else, but unfortunately I’ve not quite worked out what size I want it to be!
I’ve prepared my sketch using drawing apps on my tablet, and I’m really quite pleased with the result. Although I have moments in watercolour that are really successful, I’m not as good with line as with form, and the Gufti’s head, drawn from one of the photos the Egypt Exploration Society provided, turned out much better than I expected!
.. And Treat Those Two Imposters Just the Same
Well, not quite Triumph and Disaster (apologies to Kipling!), but when I was sitting hibernating with my canvaswork at the weekend, coughing violently but still somewhat exhilarated after a great Bloggers Meet Up in Bath (arranged and blogged by Jules of Adventures In Thread), I made a Dreadful Discovery.
Top And Long Sides Finished
This is the good bit. The top and the long sides of the footstool cushion are finished, and I am very pleased with the way it is looking. Before I assemble the finished piece, I will need to block the canvaswork, and straighten it up a bit, but that’s a minor matter.
Short Sides Too Deep
This isn’t.
I’ve inadvertently made the short sides too deep, which means I have to unpick them and put them back the right size. Since I’ve already had to buy some more thread for this supposedly stash-busting project, so I was distinctly disgruntled by the prospect!
As it turns out, I think it won’t be too dreadful an experience. The unpicking I’ve done so far has gone fairly quickly, and I suppose I can at least regard it as a good thing that the project will take a little longer to complete. It will give me more time to think out the next stage!
Stones of Venice Footstool – decisions about the sides
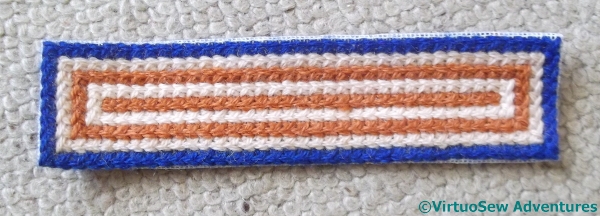
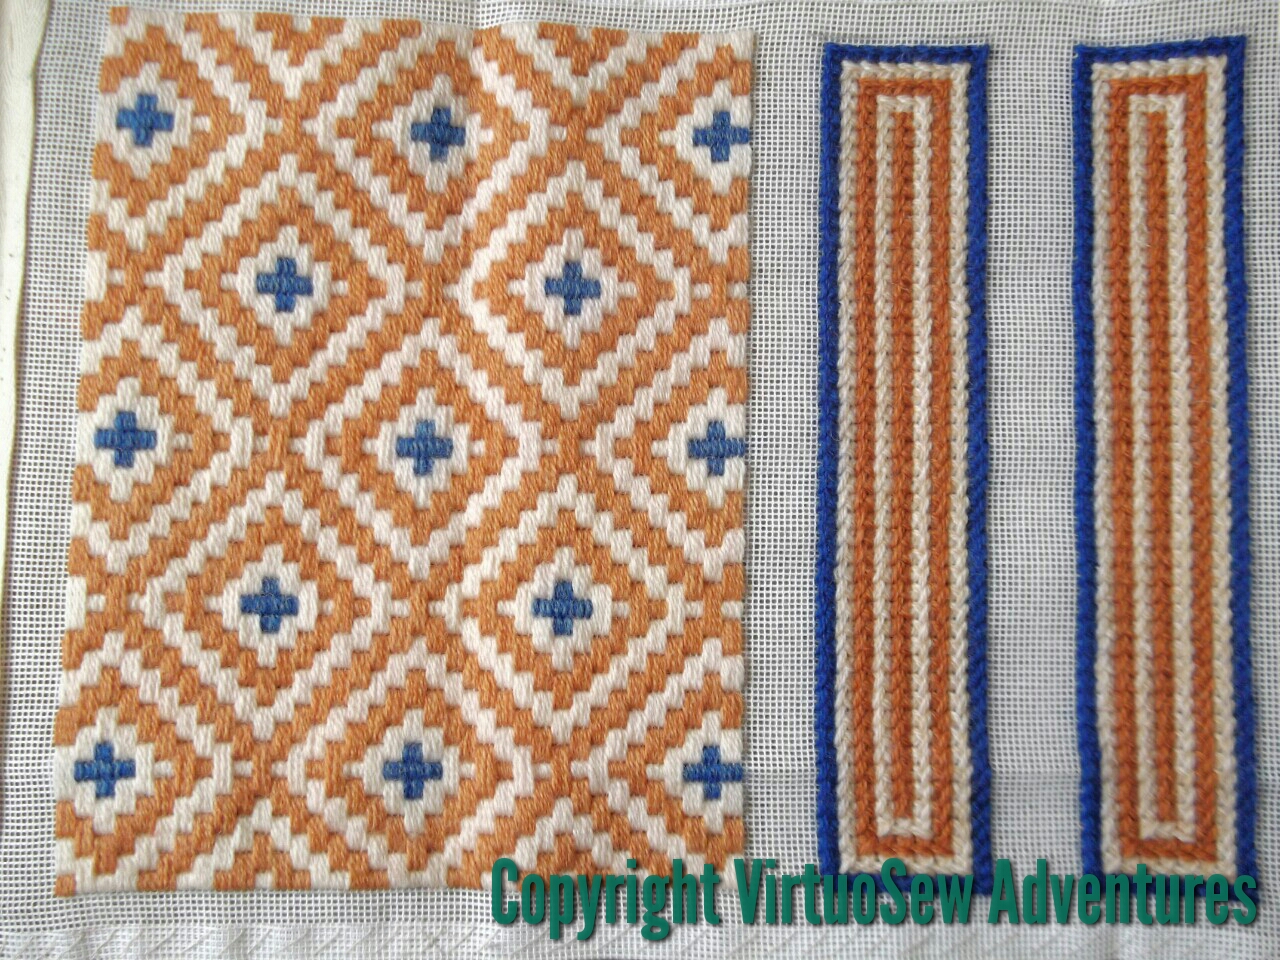
First Side Panel Completed
When last you saw the Stones of Venice Footstool, I was lamenting the speed with which I had finished the top panel, which had brought me face to face, far too soon for comfort, with the challenge of deciding what to put on the side panels.
I had originally thought to devise a smaller pattern, of some sort, borrowing from some of the ideas in the comments on the last post and from any convenient pictures of the Doge’s Palace that I could find online, but when it came to it, I felt that it might prove both difficult and unrewarding to create repeating patterns which worked well beside the larger pattern on the top.

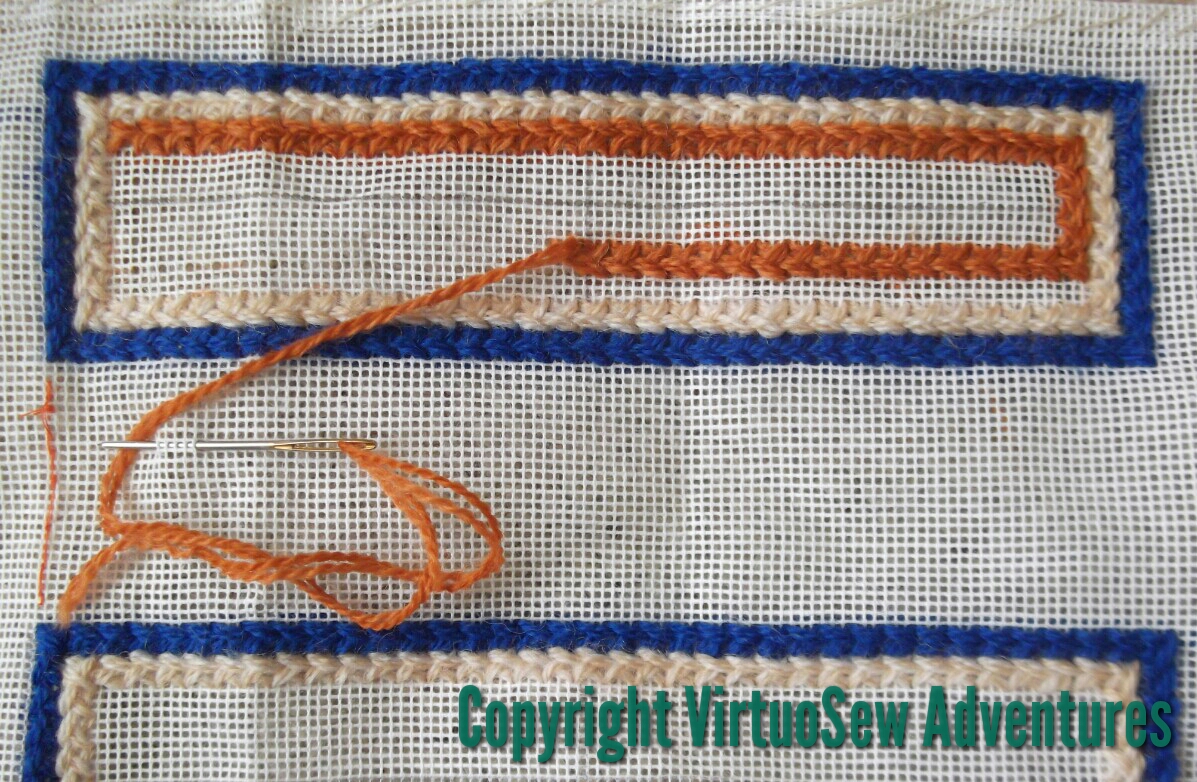
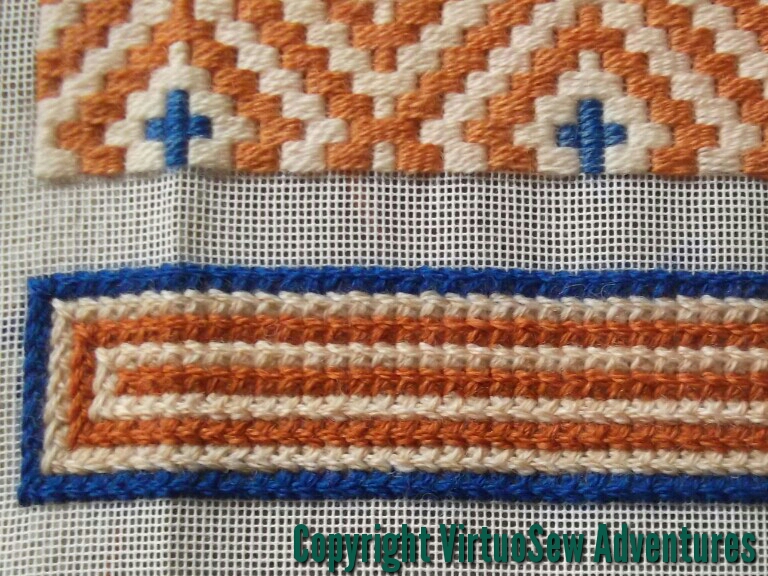
Side Panel Close Up
My first step, therefore, was to bring the blue more to the fore by creating a blue border for each panel. It seemed to me that this would help the side panels to stand away from the top and set it off nicely. After much poring over my needlepoint stitch books I settled on Greek Stitch, which is a sort of long armed cross stitch. Again, this solved the question of having the stitches running with the top on some of the sides and against on others, which had been worrying me quite a bit.
I worked out a way to turn the corners so that each side panel could be a self-contained unit, and decided to to work all four borders while I considered my next move. Which floated swiftly to the top as I stitched. The blue on the top panel was the central motif, and on the sides was forming the edge – so the obvious continuation was to reverse the order of the colours. Challenge met, I think!