
Tag: Stones of Venice
Stones of Venice Footstool Finished
One Side Turned
Once I had finished the sides of the footstool, I cut out the sides and the top and turned in the edges, leaving one thread of canvas all round, to help sew them together.
The next task was to assemble the pieces to create the box shape for the top of the footstool. I used a herringbone stitch which creates a fairly strong edge, and nicely echoes the stitch I used for the sides.

Canvas Stapled
I covered the foam (freshly cut – the old foam was disintegrating as fast the old cover!) with an old teacloth, and then unpicked the lower edge of each side, and covered the combination with the canvaswork.
Next came the challenge of fastening it all down. Fortunately I had help! We turned the whole assembly upside down and leant on it, and then my mother held everything in place while I wielded the staple gun. As I’ve said before, staples don’t damage the wood as much as tacks or nails, and I think they also do a better job of holding everything in place. They are also much easier to take out !
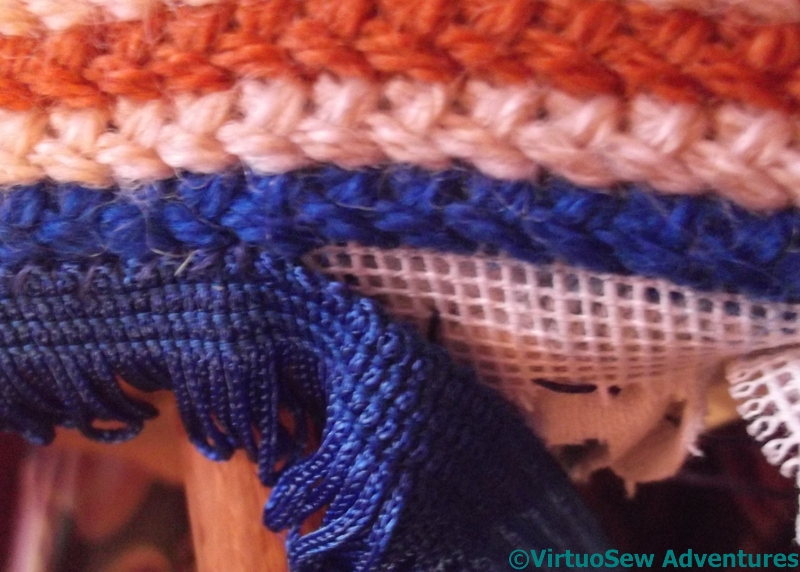
Attaching Blue Fringe
Finally, I decided to hide the edge of the canvas with fringe. I found in the end that the best way was to sit cross-legged on the floor, like a tailor, because then the legs of the footstool brought the edge I was concentrating on to a convenient distance from my eyes, so I didn’t have to bend over it and strain my back. It’s very important to find the right angle to work at, because there is no point enjoying the stitching only to find you can’t sleep for backache!

Finished Footstool
So here is the finished footstool.. It was really very lucky that I found fringing to go with the wool, and what’s more, in the little needlecrafts and notions shop in our local indoor market. The fringing isn’t long or luxuriant, but it’s just enough to hide the canvas – unless you want to lie on your tummy and examine the whole thing at close quarters, and who would do that?
Er – apart from everyone who reads this blog, and anyone I’ve taught to look at handiwork when I’ve shown it to them…
.. And Treat Those Two Imposters Just the Same
Well, not quite Triumph and Disaster (apologies to Kipling!), but when I was sitting hibernating with my canvaswork at the weekend, coughing violently but still somewhat exhilarated after a great Bloggers Meet Up in Bath (arranged and blogged by Jules of Adventures In Thread), I made a Dreadful Discovery.
Top And Long Sides Finished
This is the good bit. The top and the long sides of the footstool cushion are finished, and I am very pleased with the way it is looking. Before I assemble the finished piece, I will need to block the canvaswork, and straighten it up a bit, but that’s a minor matter.
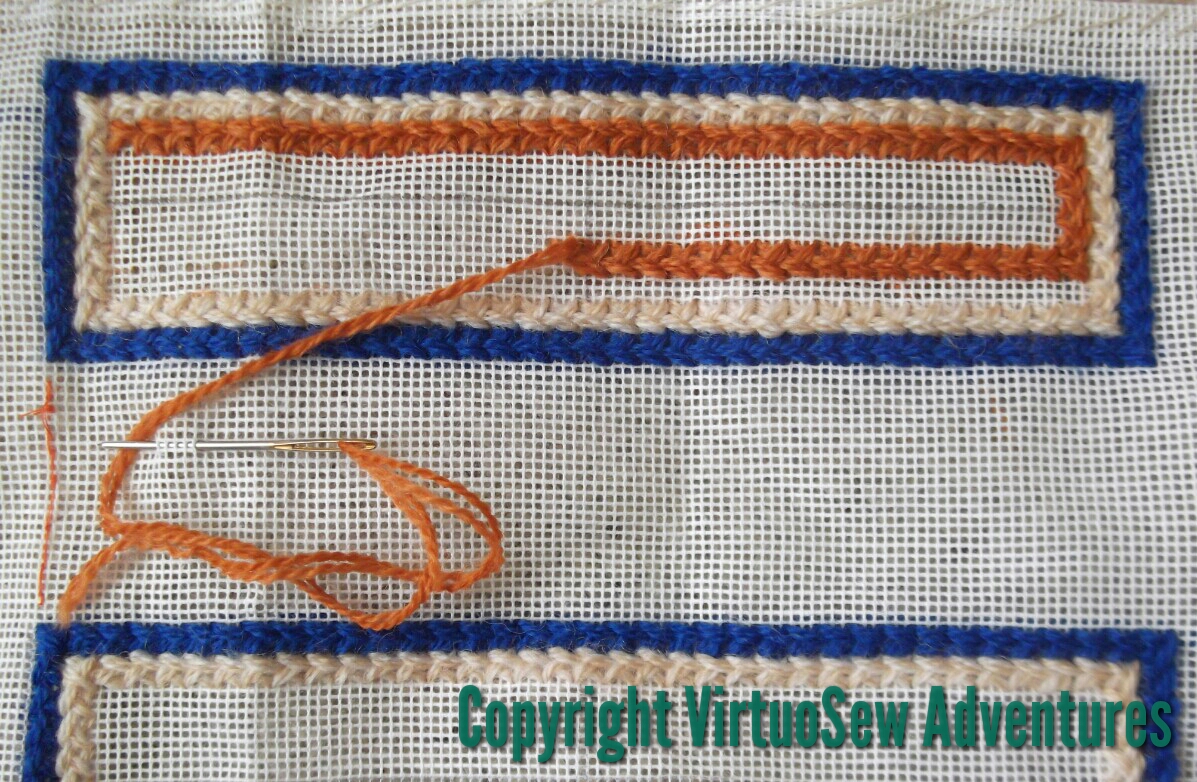
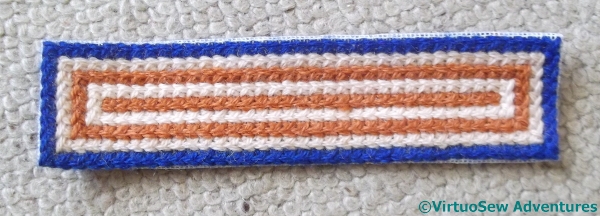
Short Sides Too Deep
This isn’t.
I’ve inadvertently made the short sides too deep, which means I have to unpick them and put them back the right size. Since I’ve already had to buy some more thread for this supposedly stash-busting project, so I was distinctly disgruntled by the prospect!
As it turns out, I think it won’t be too dreadful an experience. The unpicking I’ve done so far has gone fairly quickly, and I suppose I can at least regard it as a good thing that the project will take a little longer to complete. It will give me more time to think out the next stage!
Stones of Venice Footstool – decisions about the sides
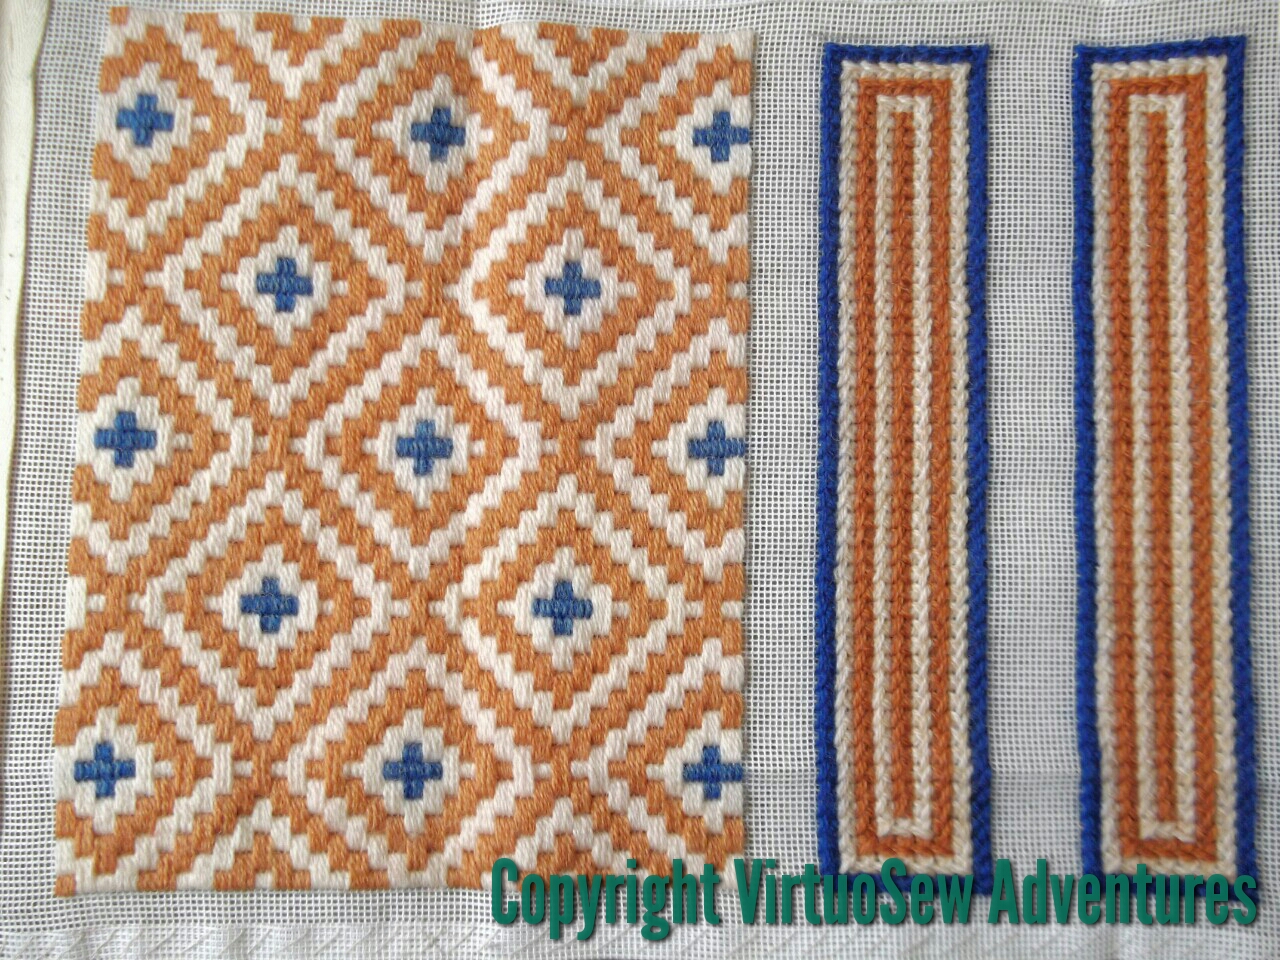
First Side Panel Completed
When last you saw the Stones of Venice Footstool, I was lamenting the speed with which I had finished the top panel, which had brought me face to face, far too soon for comfort, with the challenge of deciding what to put on the side panels.
I had originally thought to devise a smaller pattern, of some sort, borrowing from some of the ideas in the comments on the last post and from any convenient pictures of the Doge’s Palace that I could find online, but when it came to it, I felt that it might prove both difficult and unrewarding to create repeating patterns which worked well beside the larger pattern on the top.

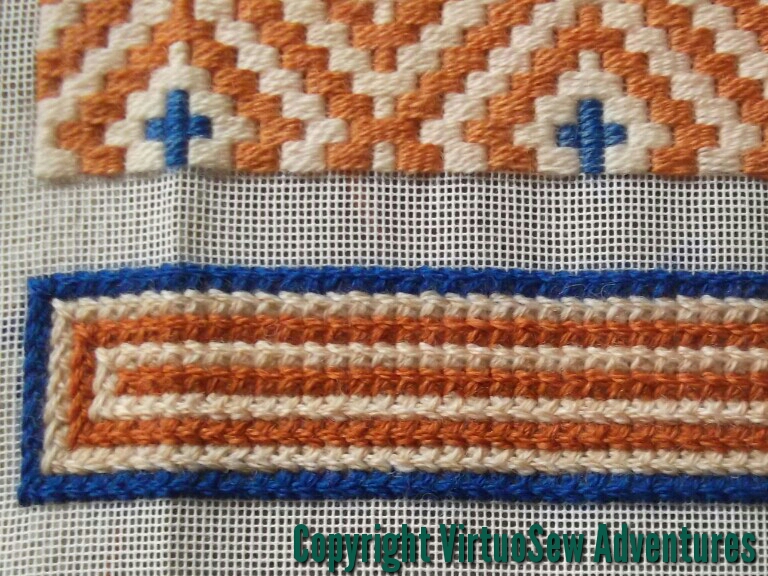
Side Panel Close Up
My first step, therefore, was to bring the blue more to the fore by creating a blue border for each panel. It seemed to me that this would help the side panels to stand away from the top and set it off nicely. After much poring over my needlepoint stitch books I settled on Greek Stitch, which is a sort of long armed cross stitch. Again, this solved the question of having the stitches running with the top on some of the sides and against on others, which had been worrying me quite a bit.
I worked out a way to turn the corners so that each side panel could be a self-contained unit, and decided to to work all four borders while I considered my next move. Which floated swiftly to the top as I stitched. The blue on the top panel was the central motif, and on the sides was forming the edge – so the obvious continuation was to reverse the order of the colours. Challenge met, I think!
Stones of Venice – moving quickly
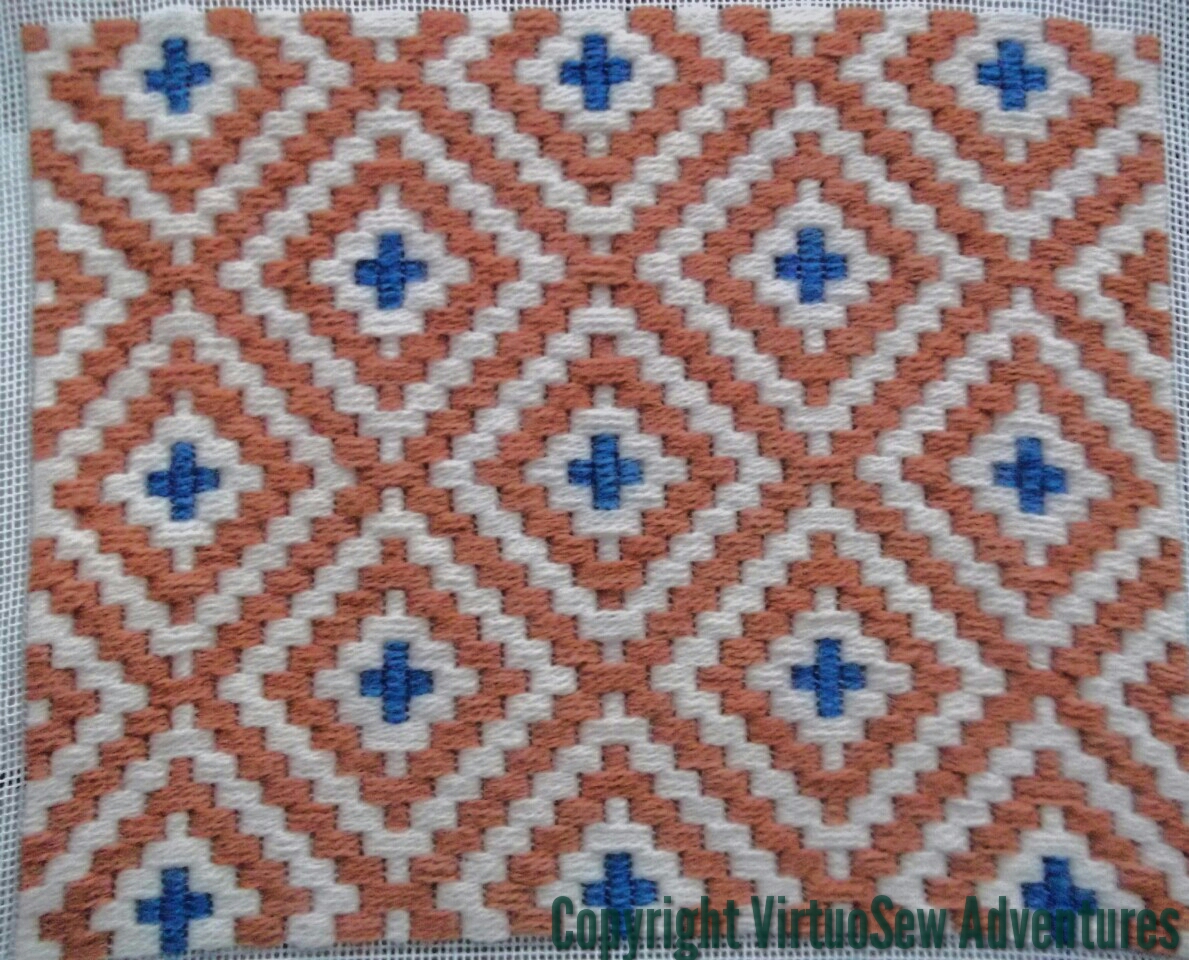
Stones Of Venice Panel
Oh dear, that didn’t take very long!
I’ve completed the top part of the footstool cushion using the Bargello pattern “Stones of Venice”. It grew very quickly, and although in the book it was described as an Advanced pattern, I found it fairly straightforward.
Each stitch goes across three, six, or nine threads, the stitches are grouped in threes, and the step between groups of three stitches is three threads. The most time consuming element, I think, was separating my wool and recombining one thread of each shade to create the heathered effect. Some of the other patterns mix up length of stitch, step between stitches, and groupings a great deal more, and must be much harder to keep track of!
However, now I need to stop and think. I need to stitch the vertical sides of the footstool cushion, and since I believe that wrapping the design around the sides will look awkward, I have decided to work each side panel separately. Now I just need a suitably Venetian border design that will work well with “Stones of Venice”.
It needs to be slightly smaller scale, I think, and I also need to allow for the fact that my stash of these colours is almost entirely depleted, and they may need to be supplemented, either by purchase or by using different shades in the borders.
Thoughts, anyone?
The Stones of Venice
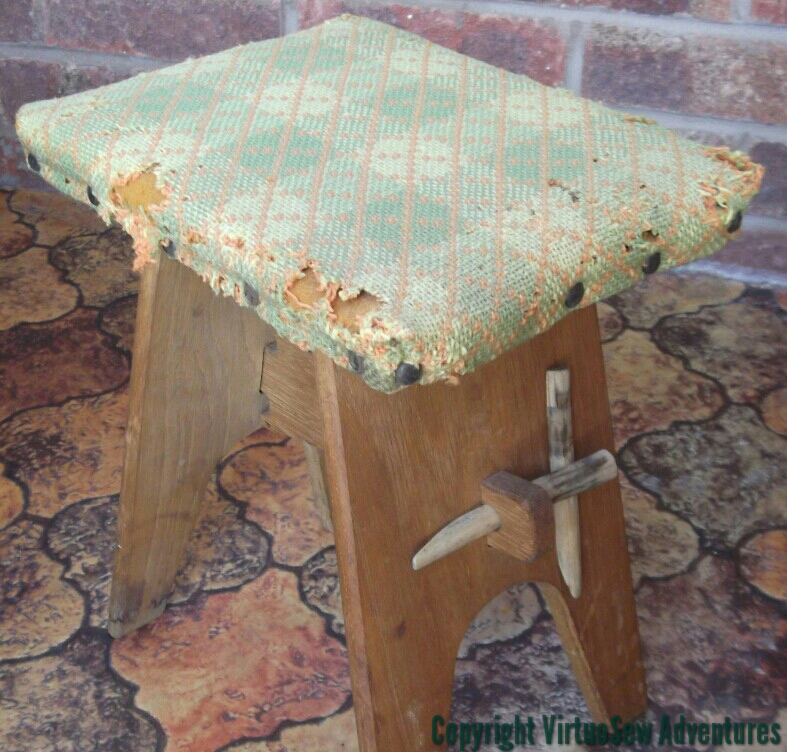
Moth Eaten Footstool
This rather sad specimen of a footstool – covered in now very moth-eaten Welsh tapestry fabric – was a constant part of my childhood. I can’t remember where it lived or what we used it for, but it’s always been somewhere around. When I realised that all my current stitching projects are very detailed and started casting around for something a bit chunkier, I thought that working a new cover for it would do nicely. Furthermore, if I chose threads I already had, it would make a good stash-buster.
Easier said than done. It took the combined efforts of my mother, my father, and myself to find a colour scheme. Even though I have a drawer full of wools, finding enough to meet the needs of the patterns we liked the look of required a great deal of swapping and changing. In the end, however, we picked a Bargello pattern shown in one of the craft books I inherited from my grandmother, “The Book of Creative Crafts”. The book was published in 1978, so the colour choices in the examples are sometimes a little unappealing to modern eyes, and there is also the fact that the top of the footstool is quite small – only 10 inches by 7.5. A couple of patterns that we liked, we felt were on rather too large a scale for the footstool.
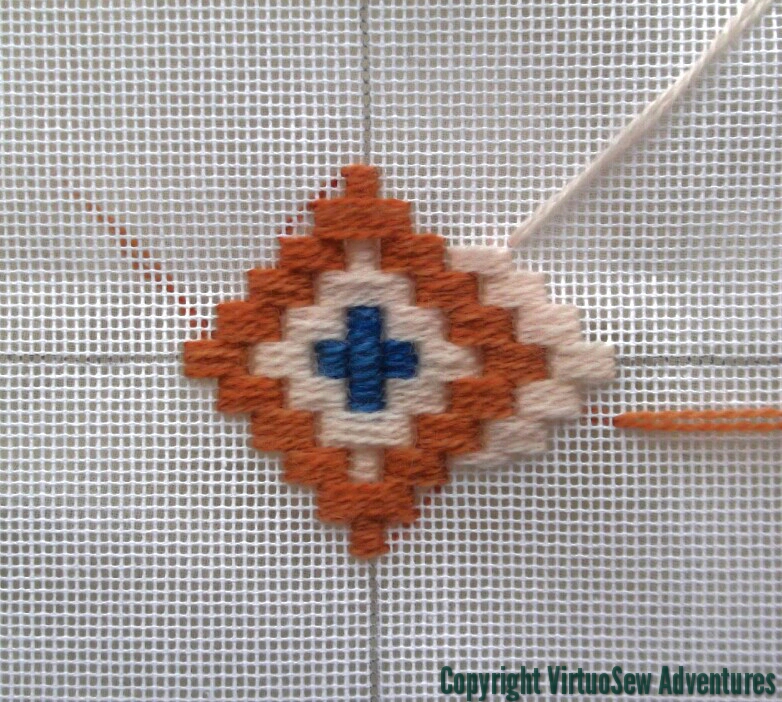
Starting Stones Of Venice
In the end, we chose a pattern called “Stones of Venice”, which is inspired by the brickwork of the Doge’s Palace. One of these days I must go to Venice, and see what I think of their version of it! Only three colours are involved, but as they are heathered, that allows me to extend my bundes of yarn, by using one strand each of two shades of each colour in my needle.
I’m using a roller frame with plastic extending sides which came to me in a bundle of stuff from a lady who was emptying her late mother’s house, and finding it a bit tricky to use. It seems to sag quite easily, and I’m unwilling to tighten the nuts any more in case they break the struts. It is the right size for the project, but other than that it is proving less than straightforward to use. Fortunately I suspect it won’t take long too work this piece!