About Rachel
View all posts by Rachel
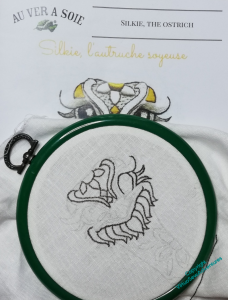
Finishing Silkie
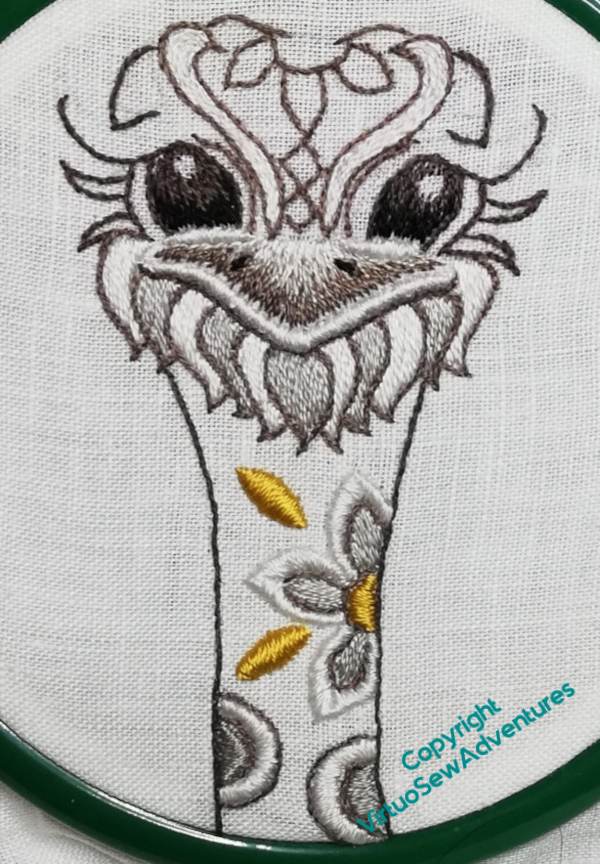
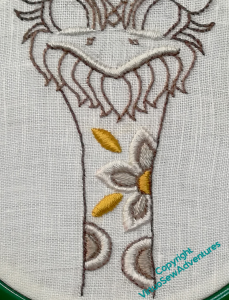
The next stage with Silkie were the main details on the head. The eyes, the beak, and the beard were all long and short stitch, which is not a favourite of mine, as long term readers are very well aware.
However, I have now grown reconciled to long and short stitch to the extent that, if I believe it to be the right choice, I will settle to it without too much grousing. Just a token mutter or two!
In truth, satin stitch isn’t a huge favourite, either, but the jewel-like golden shapes were what attracted me to Silkie when I saw the kit in the shop, and besides, silk thread is such a joy to use, and so rewarding in both satin stitch and long and short stitch.
So Silkie’s decorations, eyelashes, and bushy eyebrows all came together in something of a rush, and brought the goofy expression properly to life.
The final detail was to seed stitch the neck and the forehead. As it happened, I couldn’t find anywhere in the instructions the detail of which colours to choose, so the final detail may not be as intended.
But I like it – lighter on the forehead where the eyes, eyebrows and beak all concentrate the darker colours, and darker on the neck to bring out the flower with its un-outlined petals.
Now I need to work out where to put Silkie so I can continue to enjoy him!
Episode 49 of SlowTV Stitchery is now live. In which we tackle the Angel’s hair, remember the Great Ladys Magazine StitchOff, and consider music while we work.
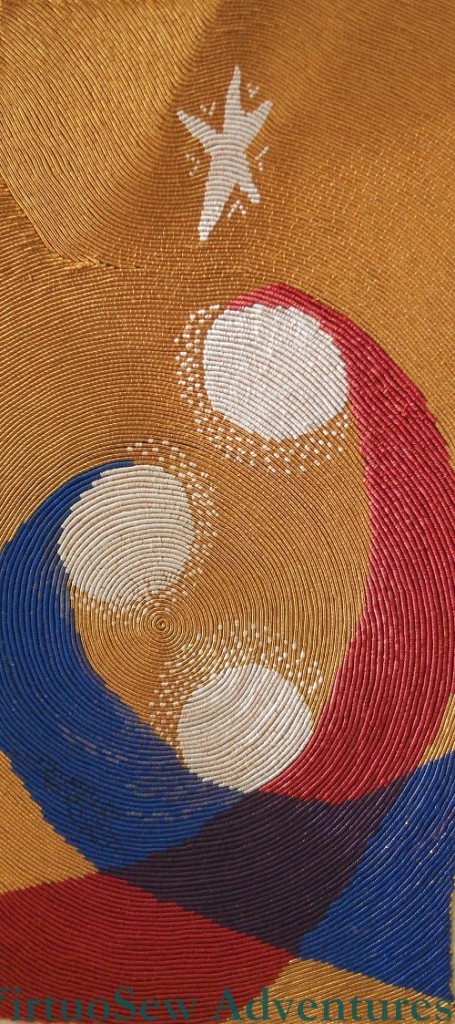
Continuing the stash busting cushion
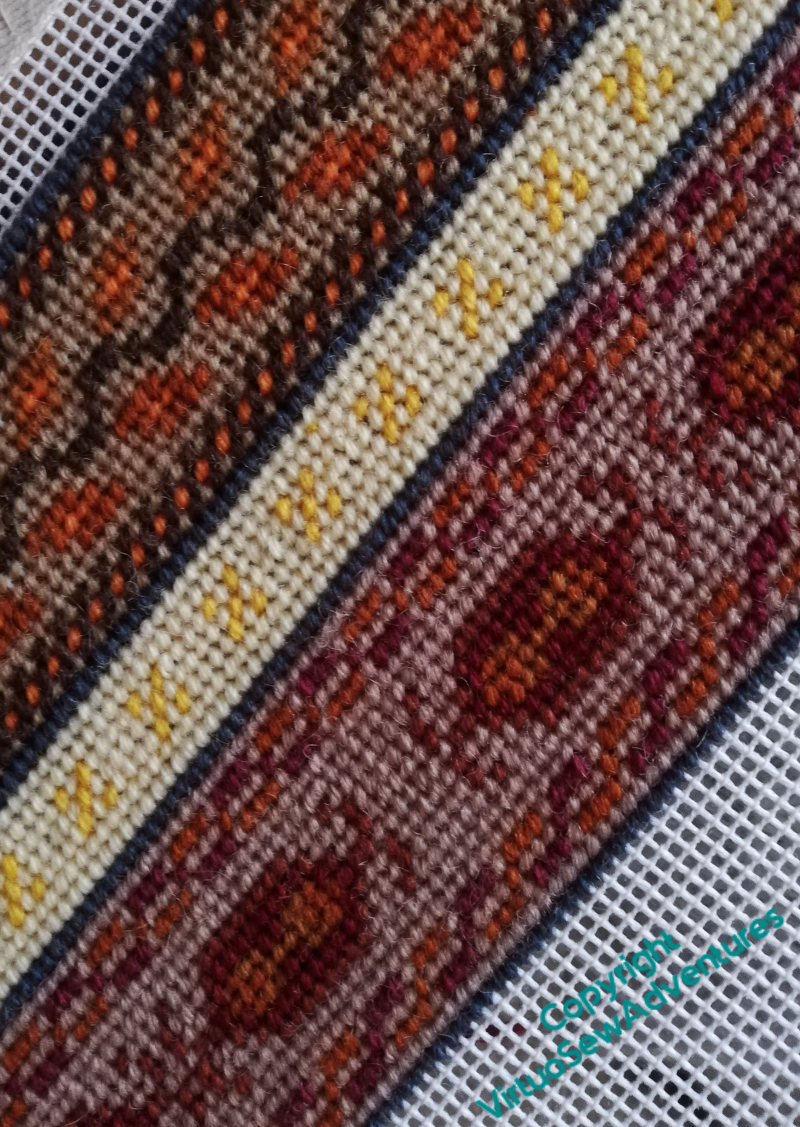
The second, simpler version of the stripes works better – much better. I like the deepening colours, and the change of spacing creates a changing rhythm.
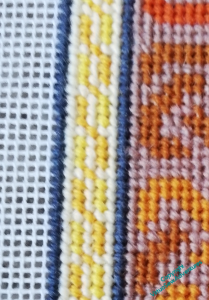
The next band uses three different yellows to make little diamond shapes, alternating darks and lights – although as the darks and lights looked closer togther when stitched than on the hank, the alternations don’t show as much as I thought they would!
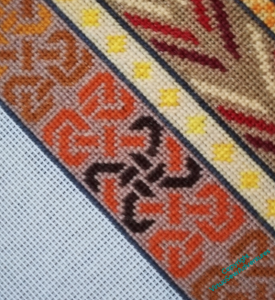
I became a little ambitious after that, and found a celtic knotwork pattern in a book (Celtic Needlepoint, by Alice Starmore) I inherited with a bundle of other things from a local lady who seems to have been as adventurous with her needle as I am, but with a greater emphasis on counted work.
I went astray a couple of times. Knotwork patterns are a little taxing!
I hadn’t quite recovered from tyeing myself in knots when I did the next narrow band. This was intended to be a chain link pattern, but I ended up with something else – what, I’m not quite sure!
The next Episode of #SlowTVStitchery is now live – remembering the agony of unpicking Akhenaten’s seat, while considering the question of the right style of detail to add to a design, with particular reference to the Christmas Angel.
Reporting on the Christmas Angel

If you have been watching the videos, you will know how the Angel has been going, but it’s sometimes helpful to see things straight-on, which my videoing set up doesn’t achieve.
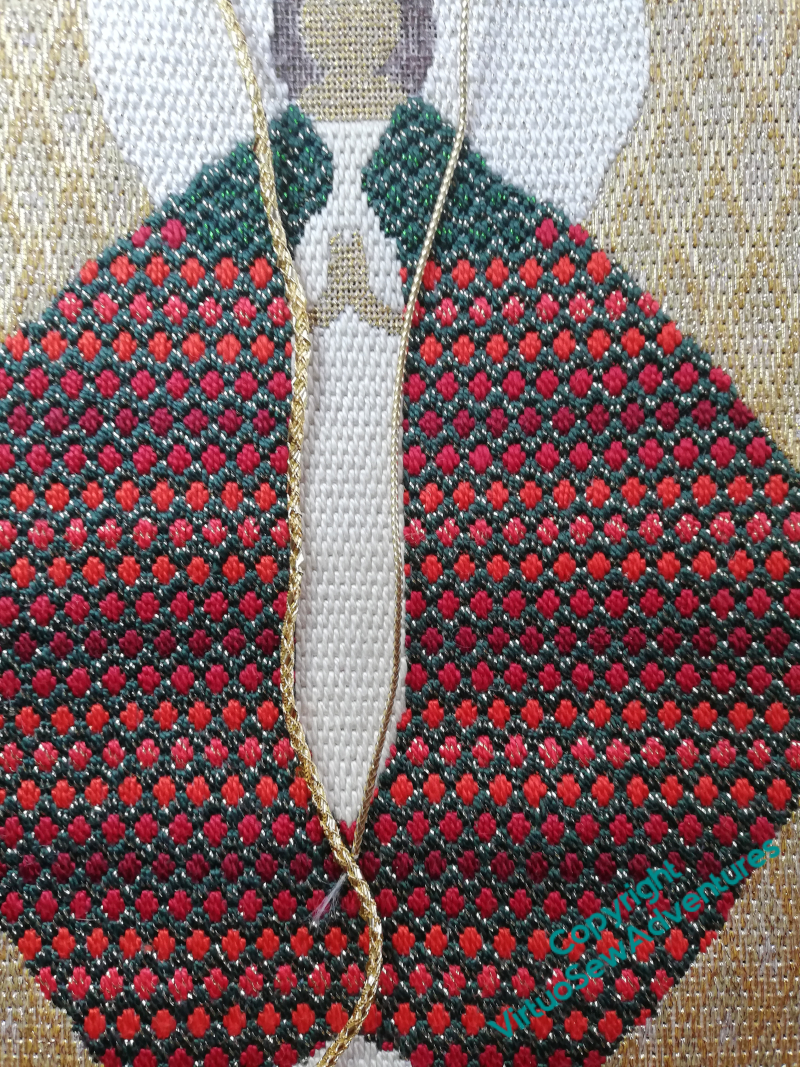
I got to the bottom edge and felt very pleased with myself – only to discover that not only was the top edge not done, but working the pattern in the other direction is slightly trickier than you might expect! It only slowed me down by a week or so, so not too serious… The next decision was about how to edge the angel, which edges, and with what. I’ve gone for a mixture of threads and cords so far, making different choices depending upon the sort of edge and how emphatic I want it to be.
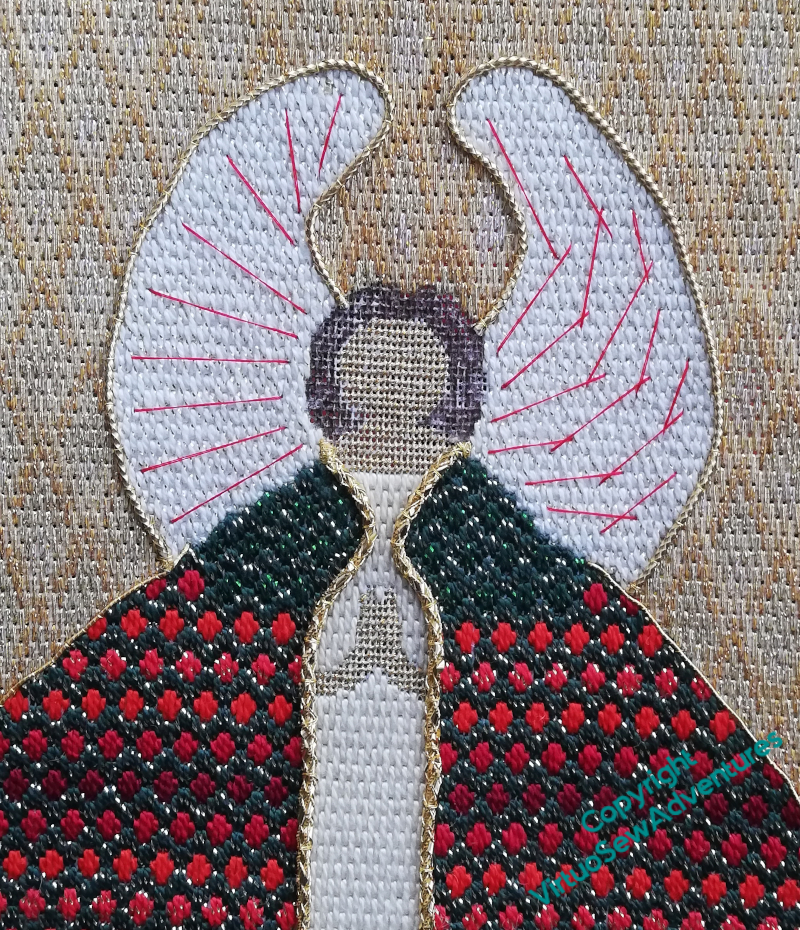
Yes, I know I haven’t done the hair yet! I’m still not sure how, and I want all the gold done first, so I know what the hair has to deal with.
At the moment I have tacking stitches in place for the wing patterns, while I stare and try to decide which I want to do.
Any suggestions?
And while we all consider that, I can report that Episode 47 of SlowTV Stitchery is now live, in which we return to the Amarna Family Group to add some details, recollect the working of the Colossus of Akhenaten, and discuss needle choice and other technical aspects of the additional details.
A Finish To Celebrate (not mine!)
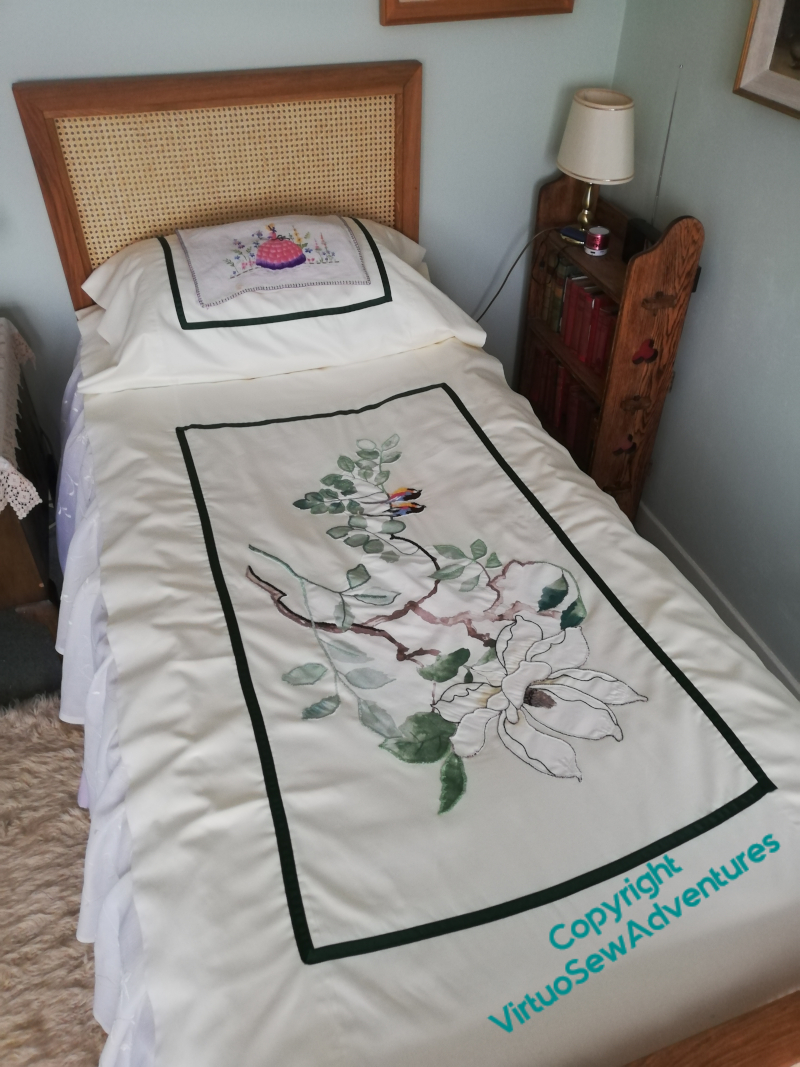
You may recall that my mother was embroidering details and edgings on an appliqu bedcover for herself.
It’s finished!
The slightly more marked colours and edgings make sense of it as a response to the curtains, rather than a random slice of curtain material, and the crisp green ribbon frame confines and sets it off rather nicely.
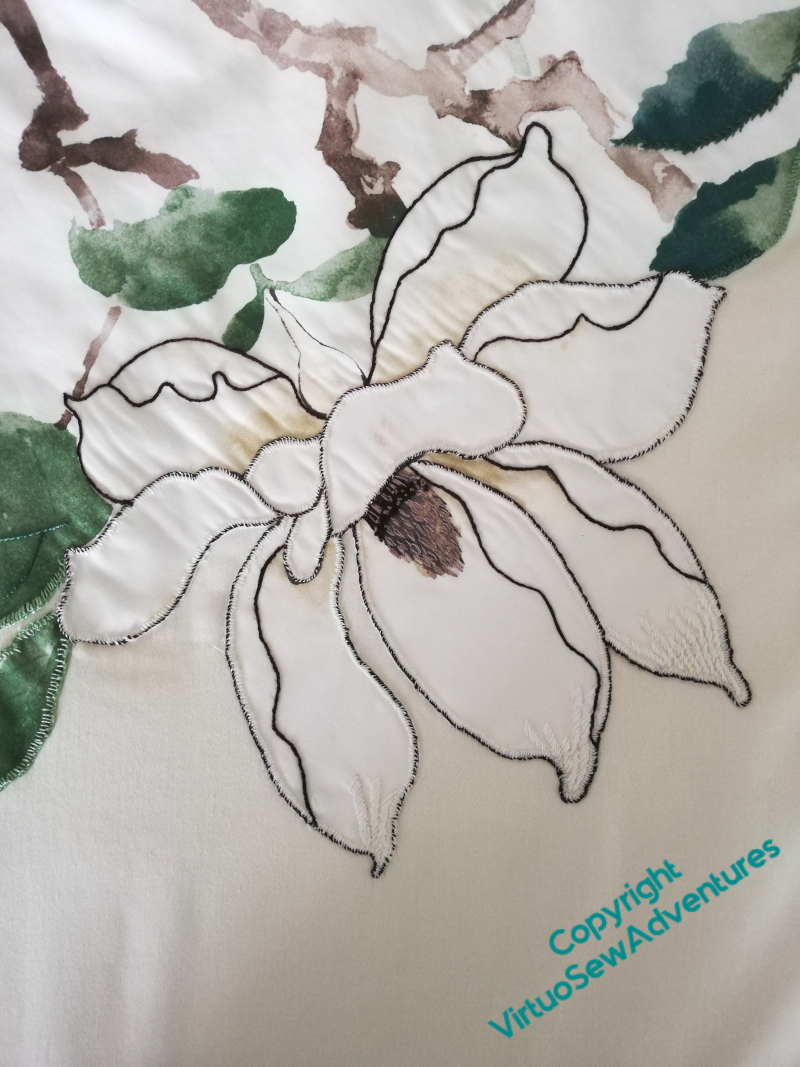
She occasionally asked for my advice, but I can’t say she needed it. This is the only point, I think, at which I made a material contribution to the finished piece. The fabric was lamentably keen to fray, so all raw edges needed covering, and this large flower would have looked very clunky with dark blanket stitch.
White blanket stitch, whipped along the outside edge, however – that worked!
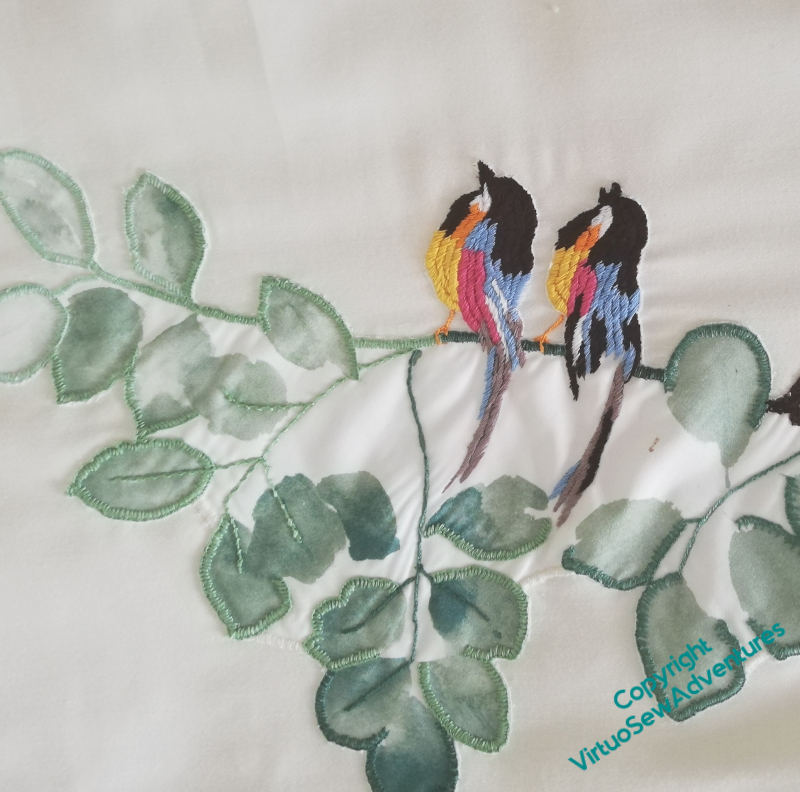
The stitching for the birds was inspired by something Grandmama did, and does look quite feathery, somehow.
It’s always satisfying when a plan comes together, even when it isn’t one of mine!
Returning to my projects, however, Episode 46 of Slow TV Stitchery is now live, in which are discussed the Delights of Stash and the Perils of OverEngineering.
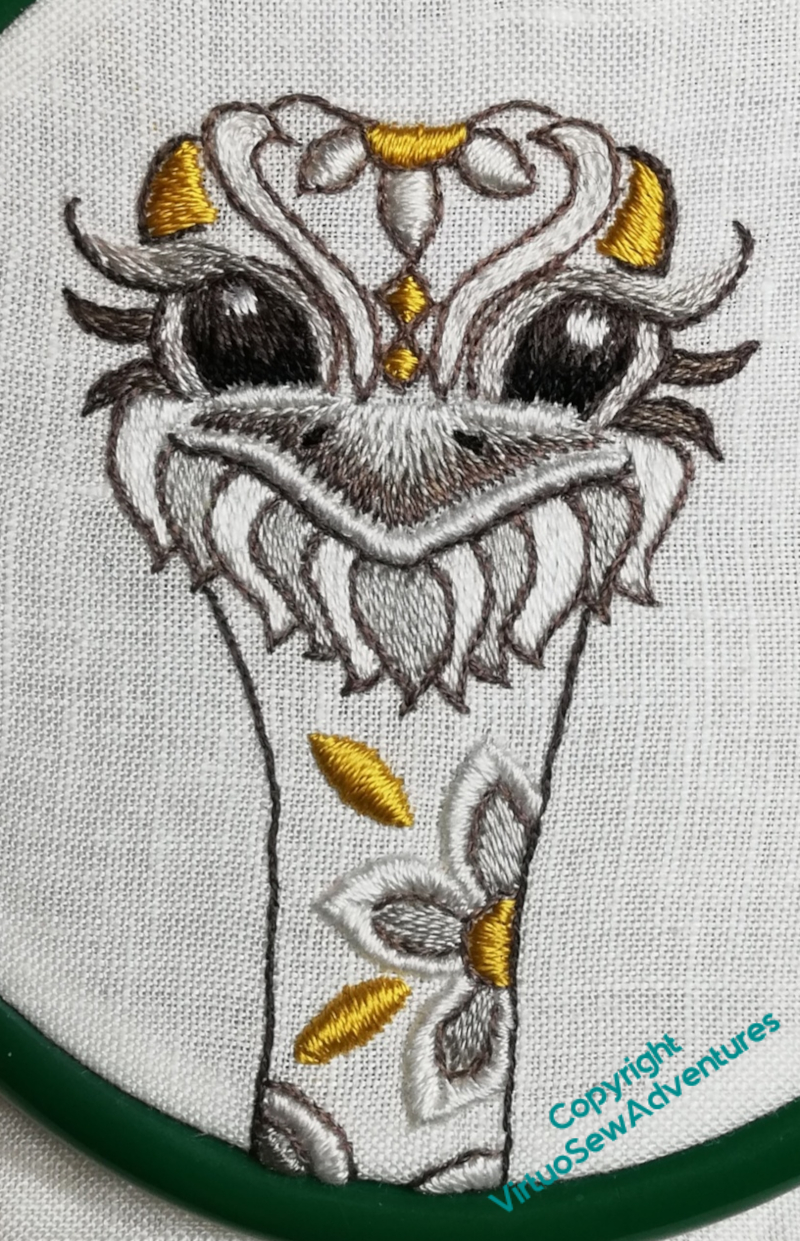
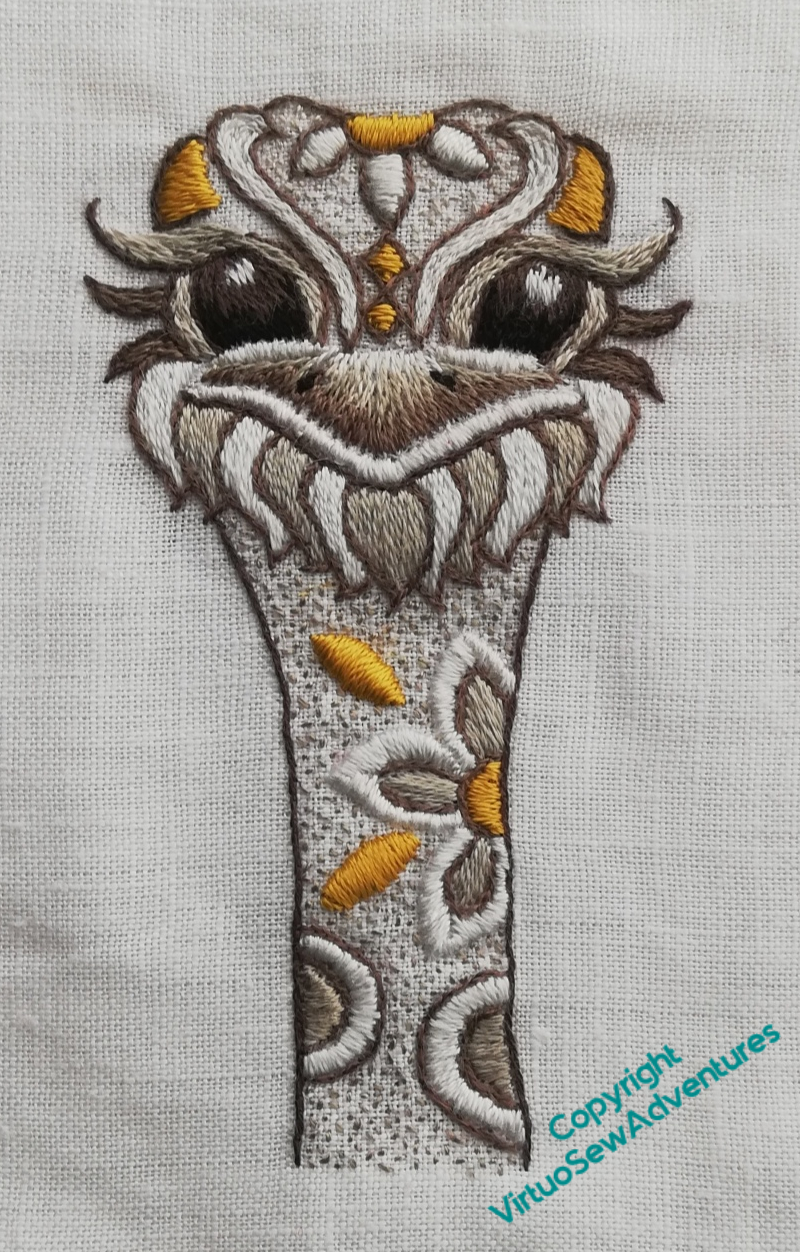
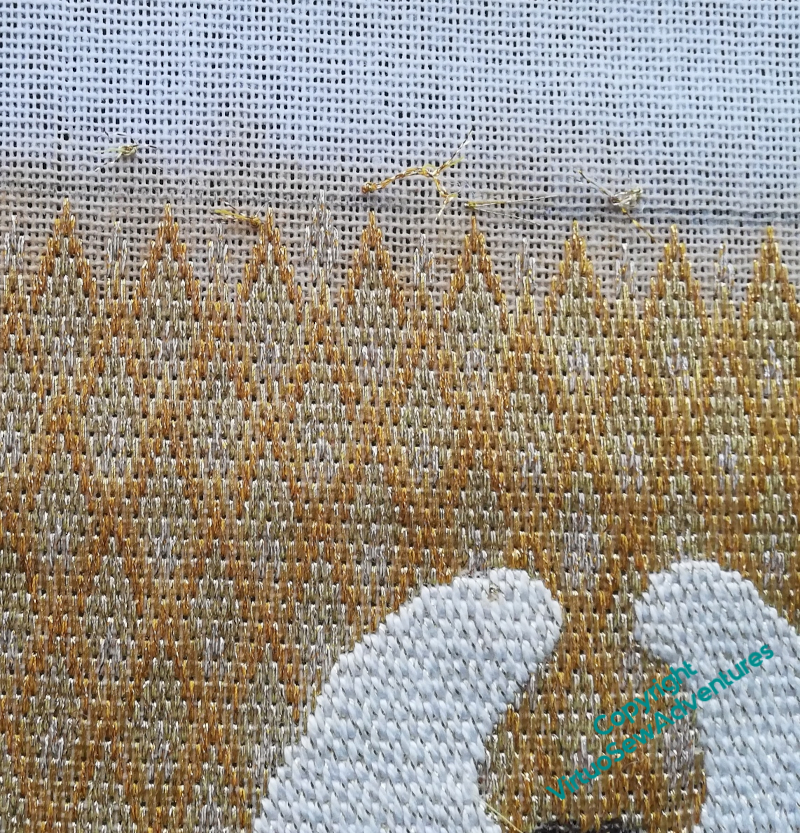
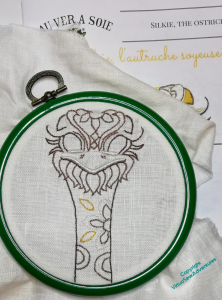
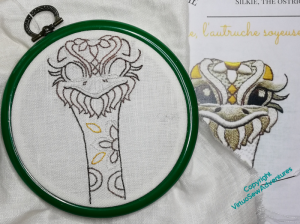
More on Silkie The Ostrich
I got started on the design by doing the split stitch, partly to cover the design lines, and partly because I find it easier to maintain interest if the design advances all over, rather than in spots. That’s why I did all the stems first when I did the Coat of Many Flowers!
The next element, with the white silk from outlining still in the needle, was to tackle the padded satin stitch around the beak and beneath the eyes.
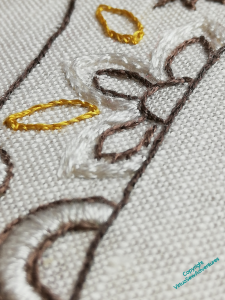
After that I moved on to the decorations on the neck. The patterns are picked out in padded satin stitch. Of course, I decided to complicate matters for myself, and I have decided to vary the levels of padding, and the placement of the padding. For example, I hope you can see here that the padding on the white petals of the flower is shifted to the outside of the petals, and has been done in a couple of layers.
When it came to the two golden leaf shapes, I combined two layers of chain stitch padding with a layer of satin stitch at right angles to the final layer.
The light grey elements are all unpadded.
I’m not sure that it shows at all well, but it does make more of a difference in person than in reproduction!
Meanwhile, Episode 45 is now live – in which I continue planning Placidus, while considering the challenges of image searches, and the occasional opacity of musical jokes.
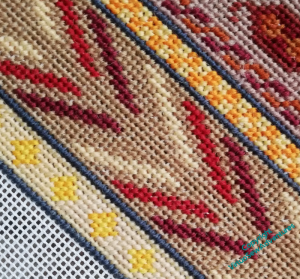
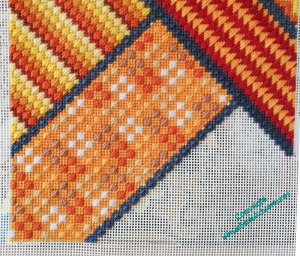
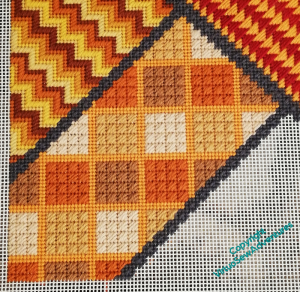
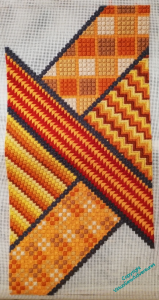
More Stash Busting
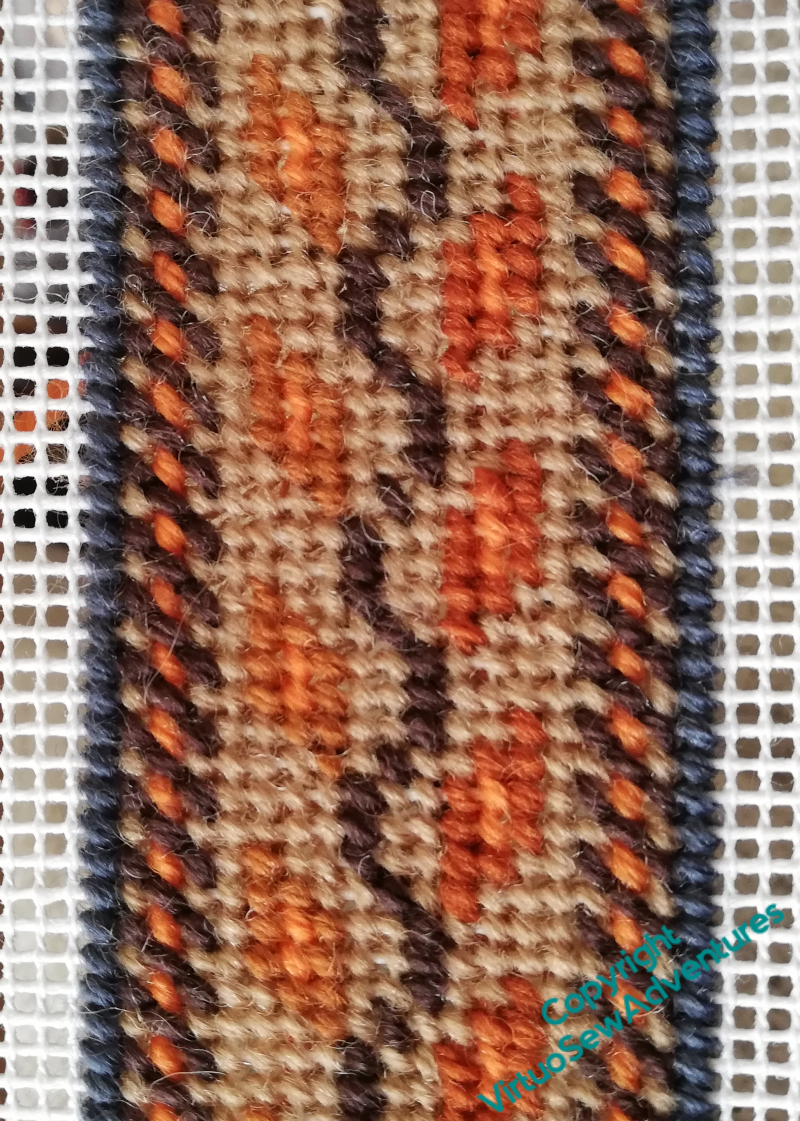
In the clearest demonstration yet – at least in embroidery terms – that we are in the End Times, I have embarked on some stash busting counted tent stitch.
I rather enjoyed working on the Stash Busting Footstool, and there was a bit of canvas left on the frame when I’d made it, so I reattached the cut end, rifled through what was left of the tapestry wool, and started to play.
Since I don’t know how far my wools will stretch, my sole “design” is to take the idea of making a fabric from ornamental ribbons, alternating broad and narrow.
This vine pattern is based on one in “Needlepoint” from Ebury Press.
The next two “ribbons” I made up as I went along – one narrow, light pattern in two shades of yellow, and another broad one, this one distinctly made-up-as-I-went-along. It was very vaguely inspired by another in “Needlepoint”, which in turn claimed to be inspired by a Persian pattern. I have my doubts, but in any case, even when I tried to have a sensible pattern of spacing, I ended up with something of a mishmash.
You may have noticed that the “neutral” in the two broad stripes is not the same colour. I’m going to try to alternate these as backgrounds, unless and until I start to need to blend them together to fill the space.
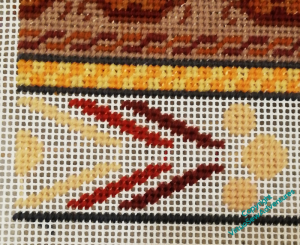
The next, narrow, band, is a chequerboard.
I like the stripe part of this next pattern, but after working the baubles, I looked again and decided that they weren’t quite working. I was trying for a mix of shapes, a bit of variety, and something to change the spacing of the stripes, but not this!
And while you assimilate the shock of me happily doing counted work – Episode 44 of Slow TV Stitchery is now live. In which we discuss the EES as an early crowd-funded organisation, my ambitions to hold a Dreams of Amarna exhibition, and whether “medieval muddle” is an idea purely from 19th Century northern Europe.
A rather belated start..
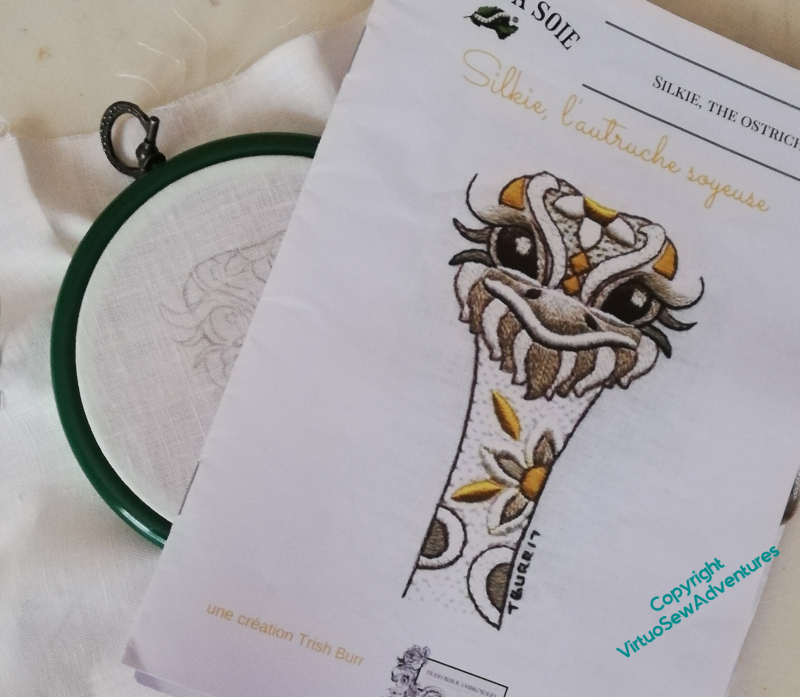
Some of you may recall that a year ago I worked Tanya Bentham‘s kit of the Hounds in the period between Christmas and New Year, as a change of scale, material, and subject while my bigger projects were tucked away to make space for decorations. You may also recall that I bought a Trish Burr design, “Silkie The Ostrich”, from Au Ver A Soie, to fill the same space in the turn of last year to this. And you may have been wondering why you hadn’t seen it yet…
Well, it took two goes to get the design transferred, for a start! When I tried at home, using the low-tech sunlight-through-the-window technique, there wasn’t enough sunlight! So I had to wash off the failed version and use my mother’s rather fabulous LED lightbox (we’re in a bubble, so no, it didn’t involve breaking lockdown rules).
The more I invent and develop my own designs, the stranger it feels to follow instructions. This is still stranger, because the instructions are in French. I do speak French, but I didn’t do any embroidery when I lived there, so I don’t have any embroidery vocabulary. Not the least of the oddities of advancing years is finding which weird thing you couldn’t possibly have second-guessed you wish past-you had done…
In this case, partly because I’m concerned about losing my design lines, I’m not following the order of working in the booklet of instructions. I’ve started by working all of the split stitch outlining. It’s all in a single strand of silk, so it’s questionable as to how much of a rest from my other projects this will give me, but I lost my heart to Silkie’s smile the moment I saw it, so I think it will be a rest in a different sense.
We have reached Episode 43 of SlowTVStitchery, a rather short episode, owing to some difficulties with camera focus. I was beginning to tackle the full width of the piece, while pondering the challenges posed by Brahms and Messien, and the lectures given for Gresham College by the late Christopher Hogwood.
The Stash Busting Footstool, 4

After a bit of thought and discussion, my mother suggested that for the last two panels, I should consider doing the same as on the far side of the central panel, but in a different set of colours. I had wanted to lighten the colours as they came away from the central panel, so that’s the scheme I used to pick the colours.

That, and making sure that I thought I would have enough of each colour to do both panels!
I then made things slightly harder for myself by deciding to line up the stripes across the central panels, but it was definitely worth doing. As I’ve said before, when upcycling, mending, or dealing with slightly not-entirely-planned projects, the whole secret is to make it all look deliberately planned – that’s why my mending tends to be embellished in a variety of ways.

Here is the finished canvaswork.
Actually, it isn’t. When I took it off the frame and took it to meet the footstool it’s intended for, I found it was an inch too short, in spite of what I believed to have been some careful measuring.
Clearly not careful enough!
I’m going to add half an inch to each end, and then consider the next step!
In other news, Episode 42 of Slow TV Stitchery is now live. In which I think I may have got to grips with the pattern, consider the adventures of Sir John de Mandeville, and consider the question of Music To Stitch To…
Stash Busting Canvaswork Footstool – 3
The notion that was guiding me – apart from stash busting – was of the colours getting lighter as they spiral out from the central point on either side of the central bar. So I picked more colours that I had enough of (see the constant balancing act I was involved in here?), and this time, stitch patterns which were squarish, rather than stripy. This is Checquer Stitch, and somehow by the time I’d finished the alternation of the colours, I ended up with something that rather reminded me of a Welsh Tapestry blanket. I’m happy with that – I was born in Wales, after all!
The balancing panel is even squarer. I suppose it is another variant – rather as with the Moorish Stitch Variation, I’ve moved all the tent stitches to the edges to form a grid. I think it still has enough family resemblence both to the original stitch and to the “Welsh Tapestry” version to balance them.
So here is stage two completed.
I think the balance and harmony I’m trying to create really are still there, but I feel as though I’ve rather shot my bolt. I’ve mislaid my canvaswork books and I can’t think of another suitable pair of diagonal stitches to use.
However, the first thing to do is to find a suitable set of colours. Onward, ever onward!
In the meantime, Epsiode 41 of SlowTV Stitchery is now live. A fairly quiet episode, this, which nonetheless discusses musical deceleration and taking refuge in learning things, while also anticipating the enjoyment of a Holiday Project.
A Happy Christmas to all!