
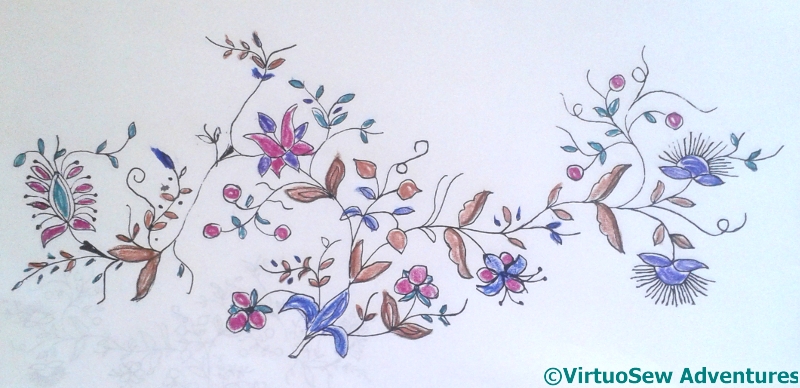
Tag: design elements
More on William Marshall
Since I’ve always been interested in heraldry, and deeply distrust online search results, which so often depend on something unexpected in the search terms, one of my bits of research involved an email to the College of Heralds, asking about William’s coat of arms. I received a commendably prompt and completely unperturbed reply from the Officer-in-Waiting, Rouge Dragon Poursuivant, telling me that:
“The left-hand side of the shield, from the viewer’s point of view, should be Or, meaning gold (or yellow). The right-hand side should be Vert, meaning green. The lion should be Gules, meaning red, and it should be rampant, meaning it is upight and standing on its left foot with its right foot slightly raised off the ground.”
You’d think embroiderers emailed for advice every day of the week! Maybe they do, of course…
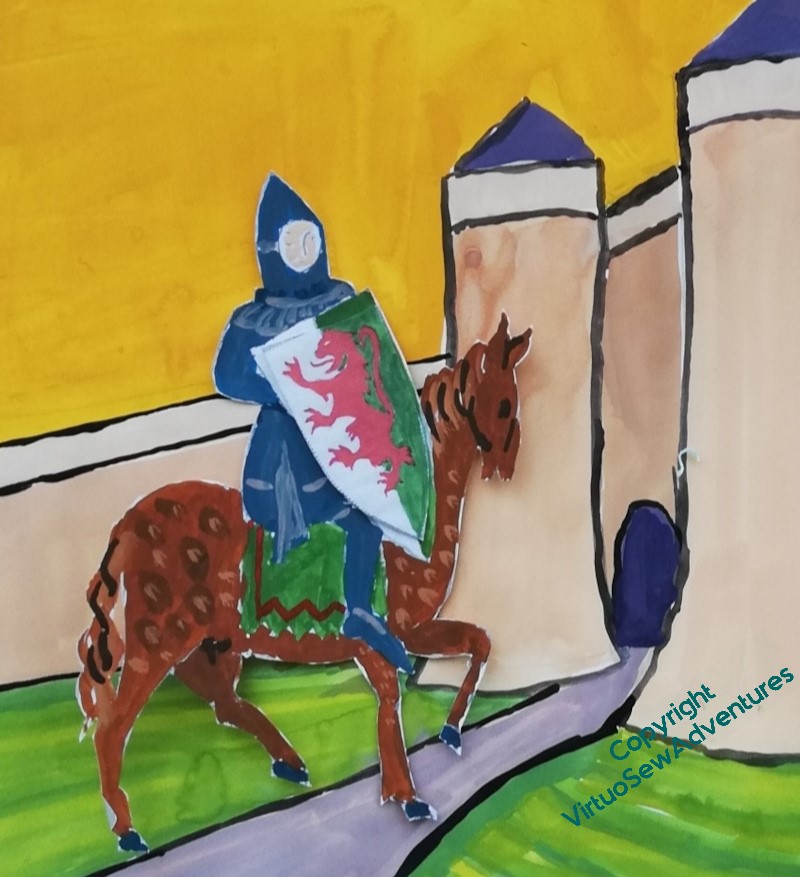
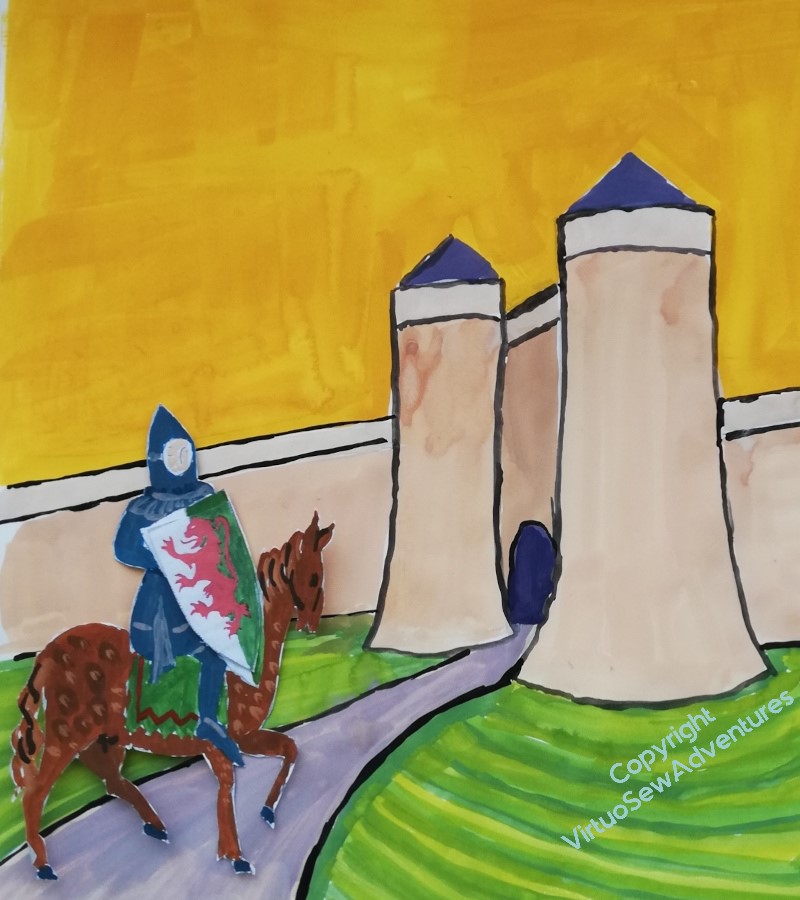
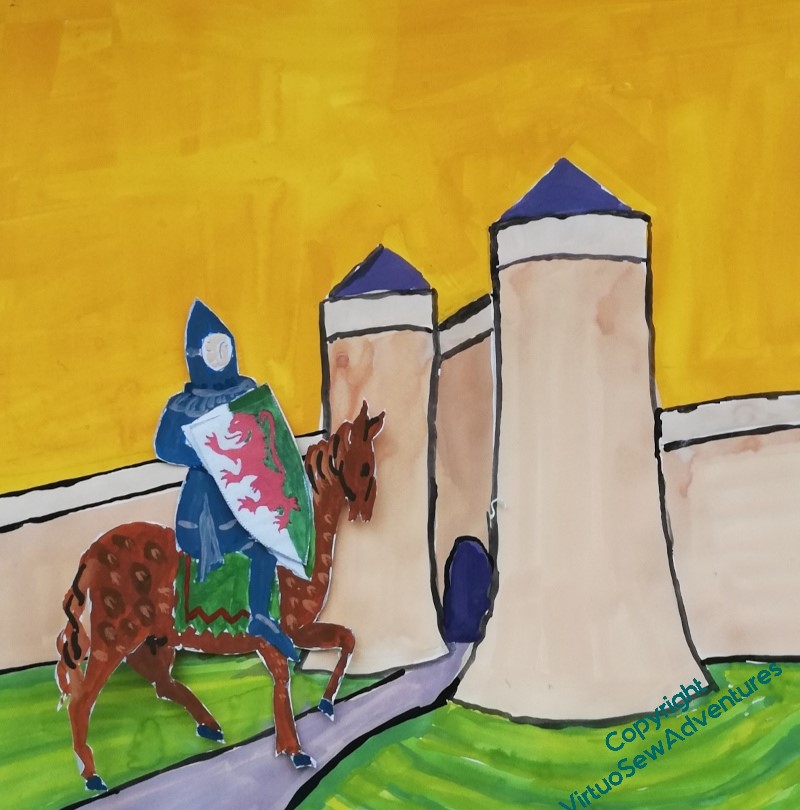
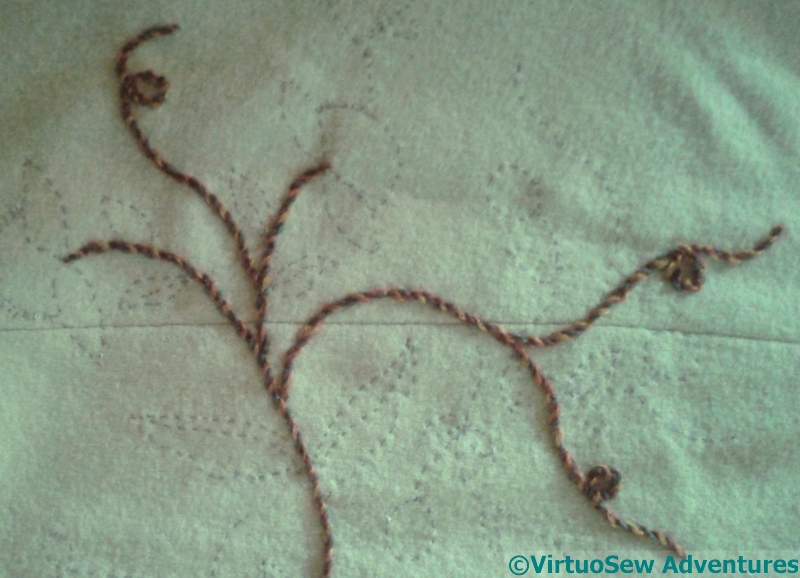
I had painted a whole series of variants on the design, and then had another thought, namely – maybe I wasn’t exploring all the variations possible. I attempted to do the exploration on my computer, but went to bed that evening with a ligament in my arm squealing. Back to the paintbox!
So I fished out one of my largest blocks of paper, and painted the chateau with a bit more wall on either side, and an actual path, and then painted a separate William, so that I could move him around on the background and experiment with cropping.
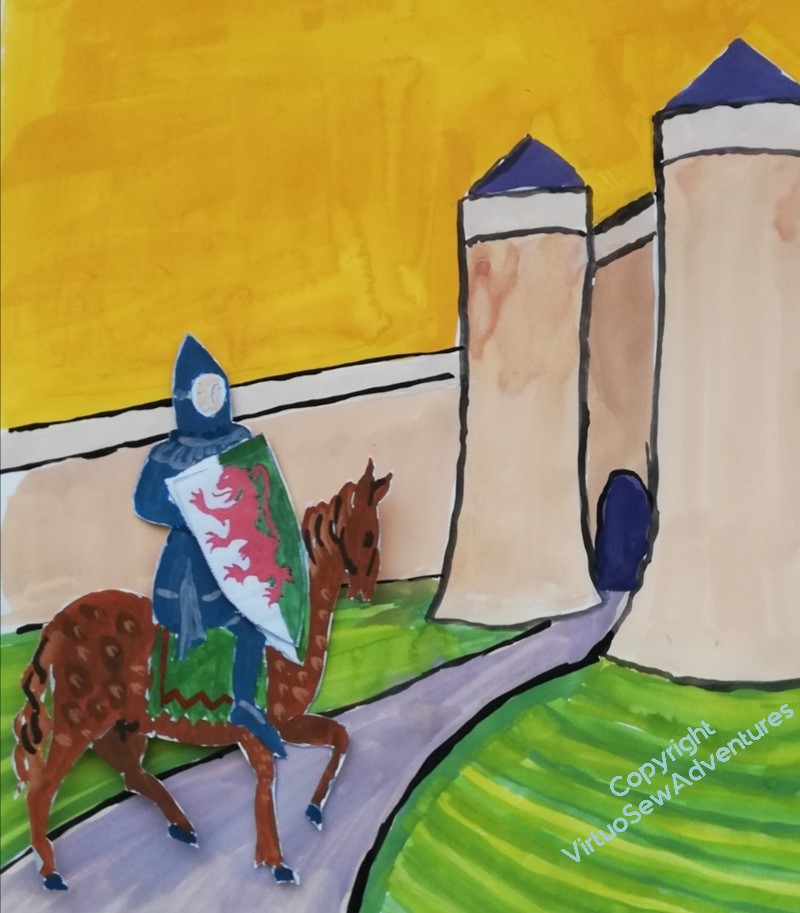
I’ve left his shield as white and green in the design for now. I intend to use underside couching for the “sky”, but I’ve not yet decided whether to use couched gold or silk thread on the shield, and making sure the colours are different in the design will help me to remember I have a decision to make.
I’m still havering, but encouraged by Tanya Bentham, who wrote the book that started me on this, I’m thinking about the third of the four options in this post. As Tanya pointed out on Instagram, in the medieval period people messed around with scale and perspective quite cheerfully, so I have no need to make sure my knight will fit through the gate!
Thoughts on the Next Big Project
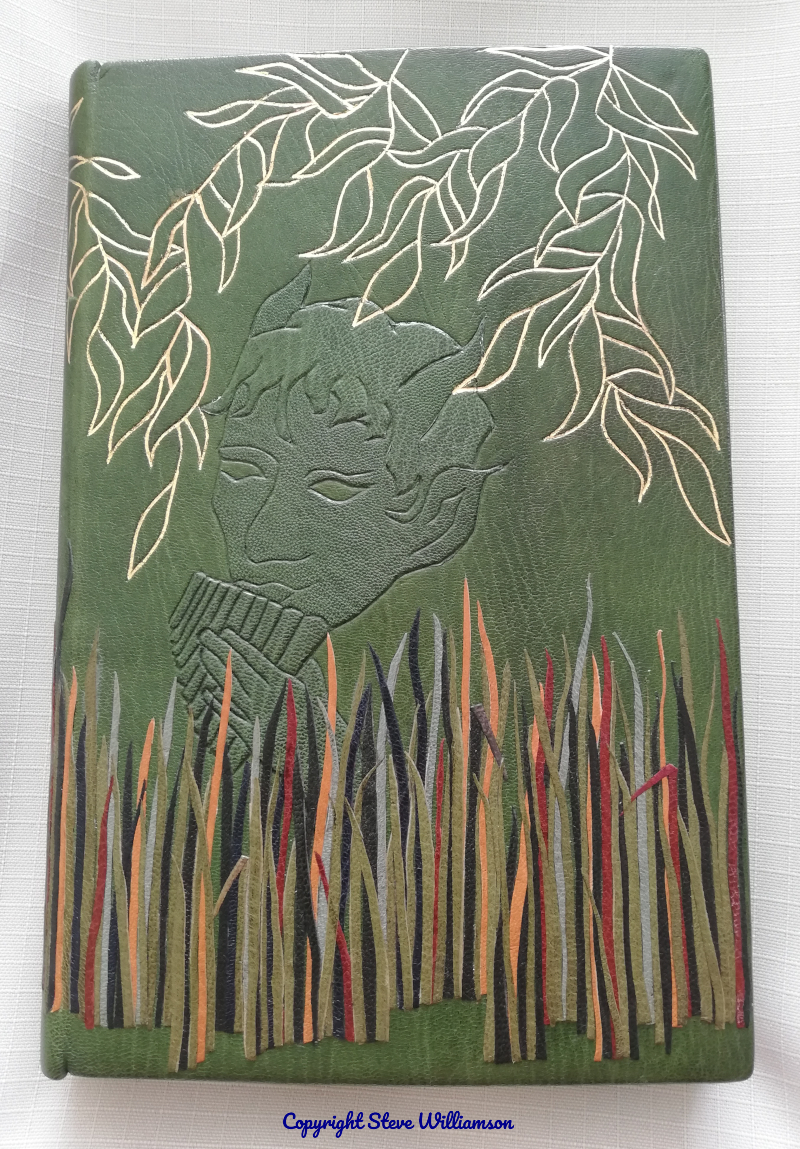
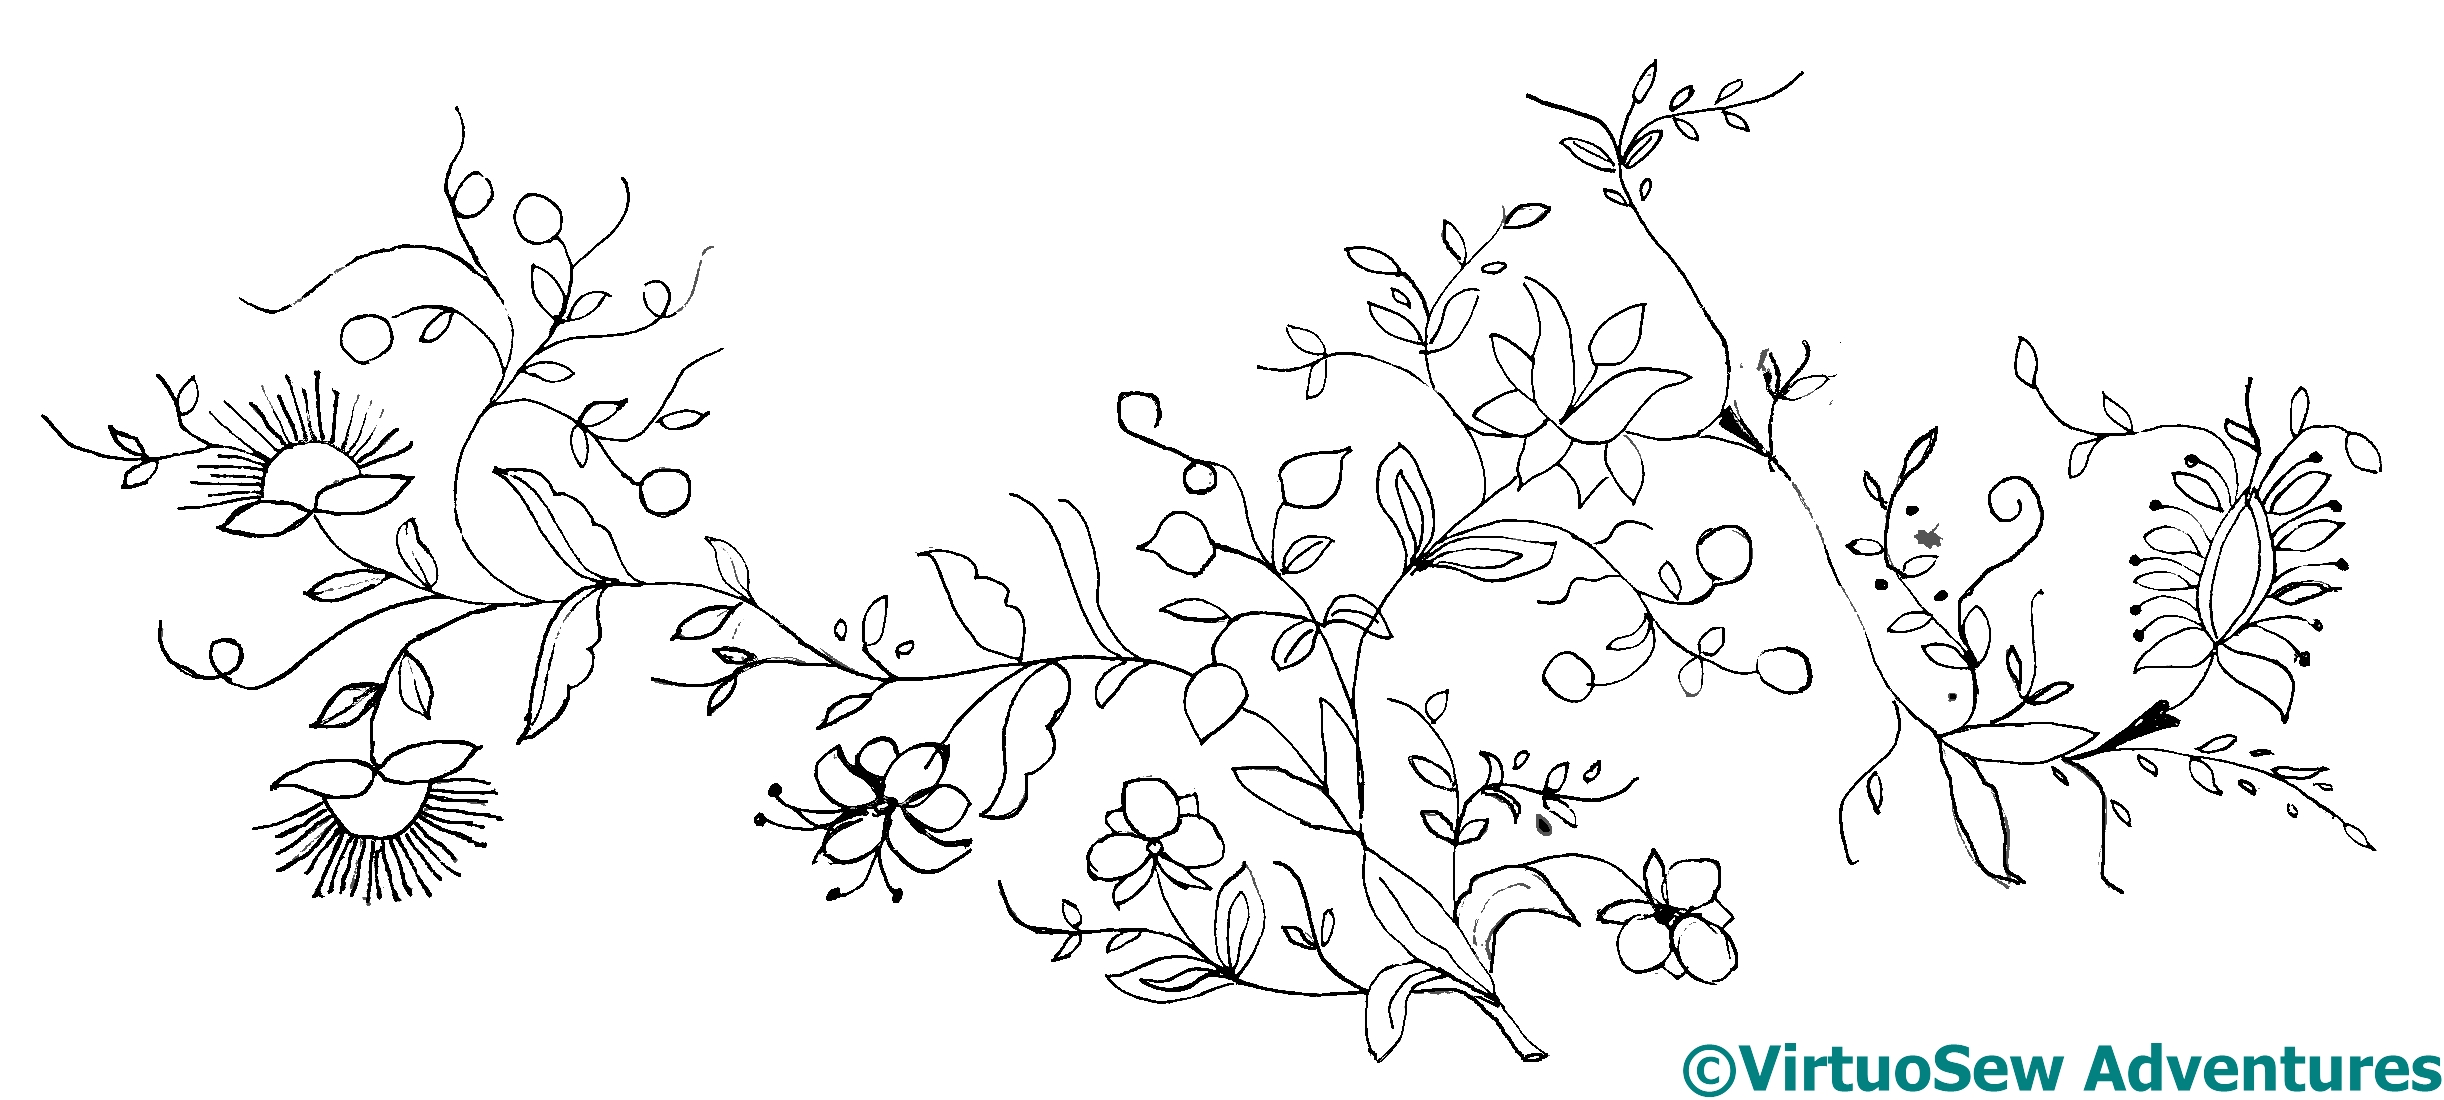
I’ve been continuing to think about The Vision of Placidus, but part of my inspiration has shifted, from the mille fleurs background of the the Unicorn Tapestry, to the edge-painting my mother did for a Fine Binding she made of The Wind In The Willows.
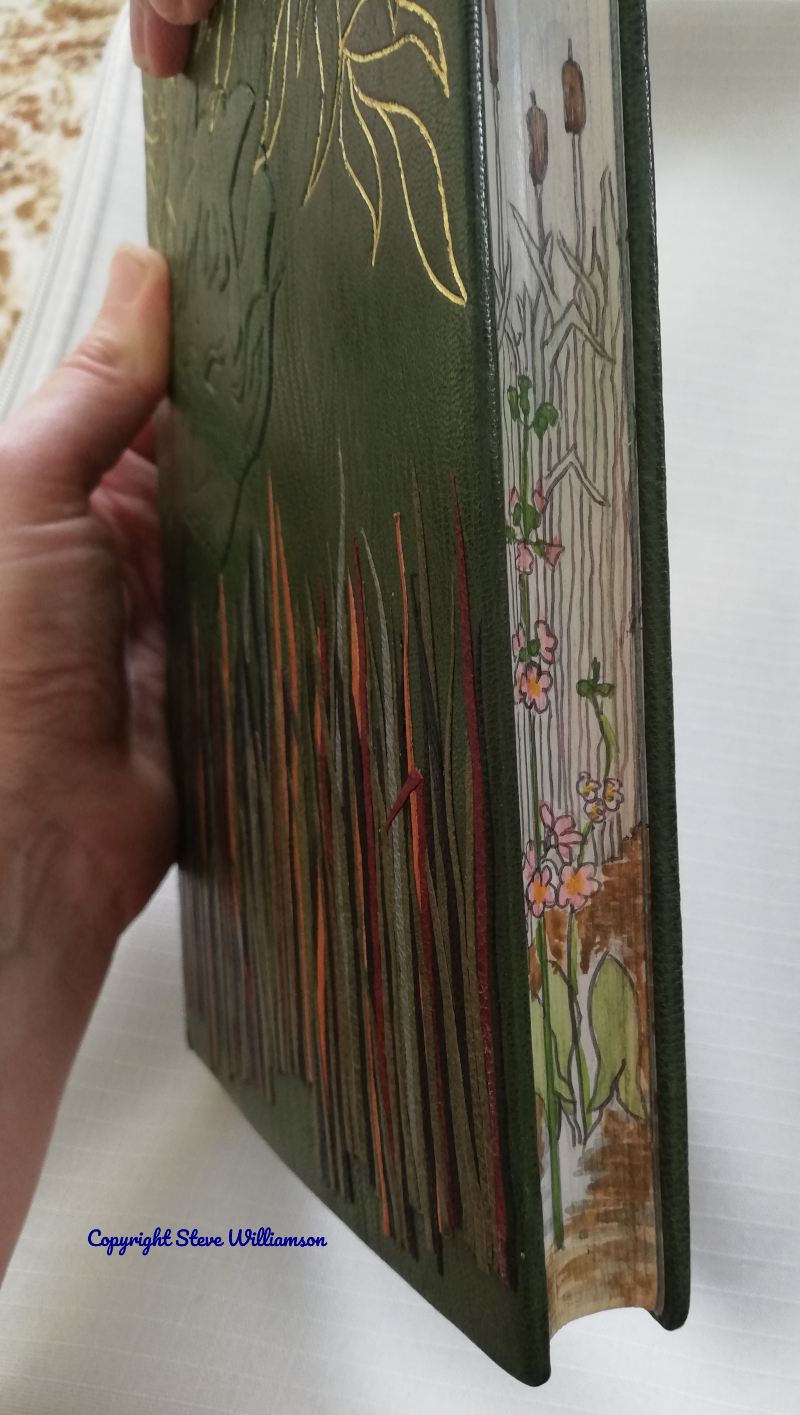
An edge painting is exactly what it says: colour added to the edge of the codex of a book, often in patterns or pictures that relate to the story or theme of the book.
So, although there may still be animals in mille fleurs fashion in odd spaces in the picture, I’m also planning to design a border. Underwater will be shown below the main image, just above the water surface on the vertical edges, and the sky on the upper border.

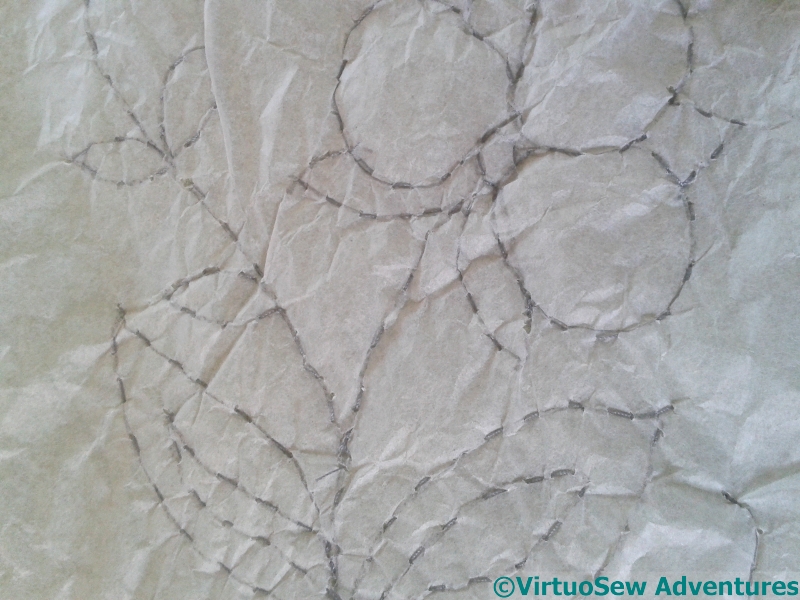
This design sheet shows the design of the edge painting for the book, to give you some idea of what I am thinking about.
There will be a pike underwater, I’m sure, and the vertical borders will be where the kingfisher, and maybe some dragonflies, can go. I might spend some time looking at the symbolism of various animals, just to make sure that the right creatures show their faces.
The corners will probably have the symbols of the Evangelists, but at the moment I’m not sure in quite what style..
In other news, Episode 40 of SlowTV Stitchery is now live, in which we move to the Christmas playlist, discuss the tension between economy and adequate coverage, and express surprise at the amount of real history one can learn from well researched fiction.
The Faience Necklace – still thinking…
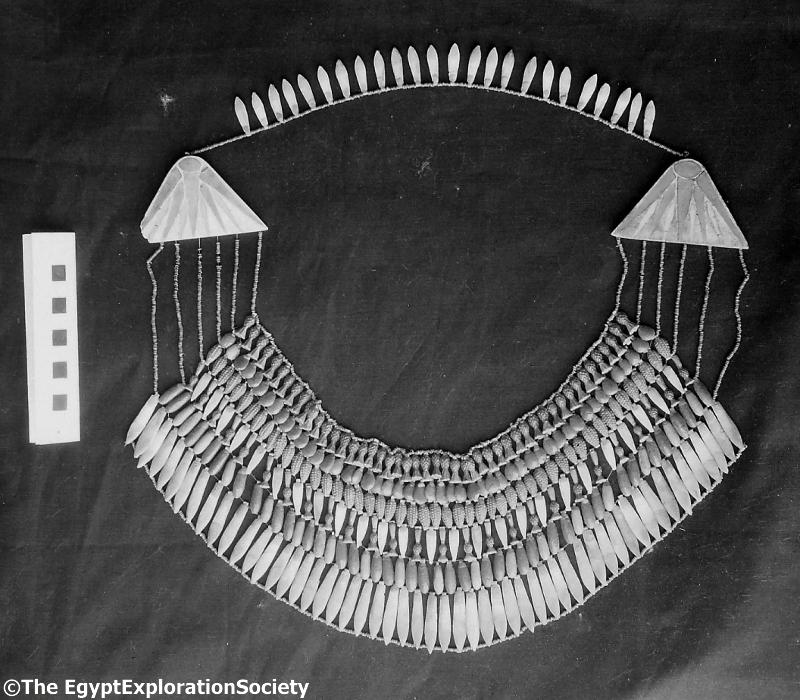
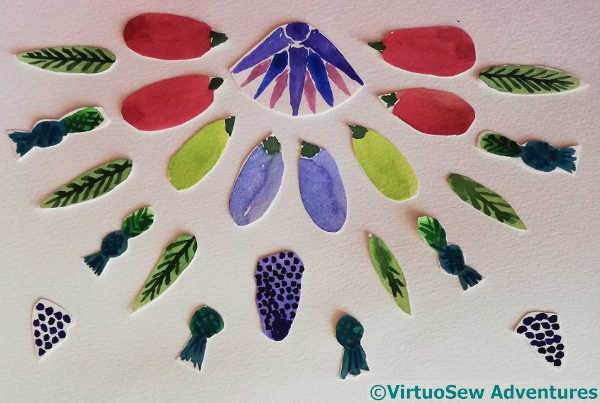
After her discovery of the piece of tile that started it all, the first find that Mary Chubb describes is a faience necklace, discovered by the team then in Egypt, and written up in the Director’s Report which she has to disentangle and re-type legibly (remember, in the 1920s, typing wasn’t a skill that everyone had had to develop). It sounds completely enchanting, and yet I’m struggling to bring it to life.
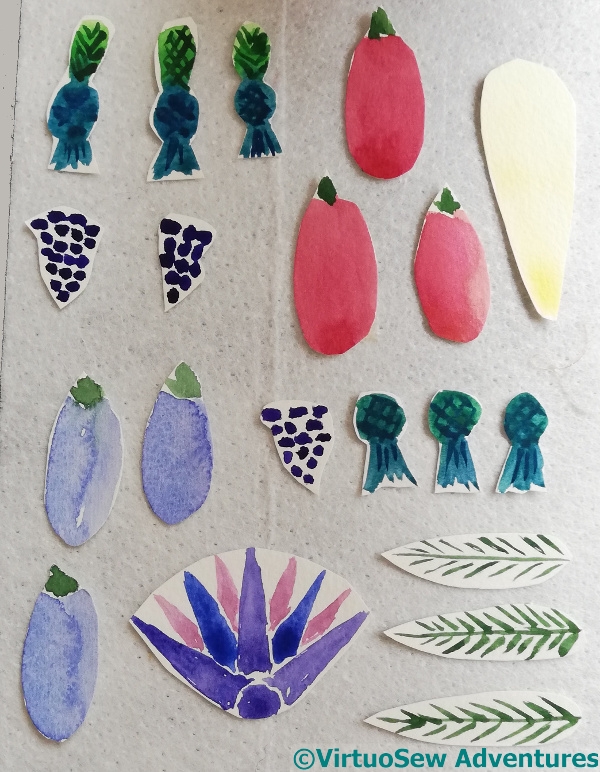
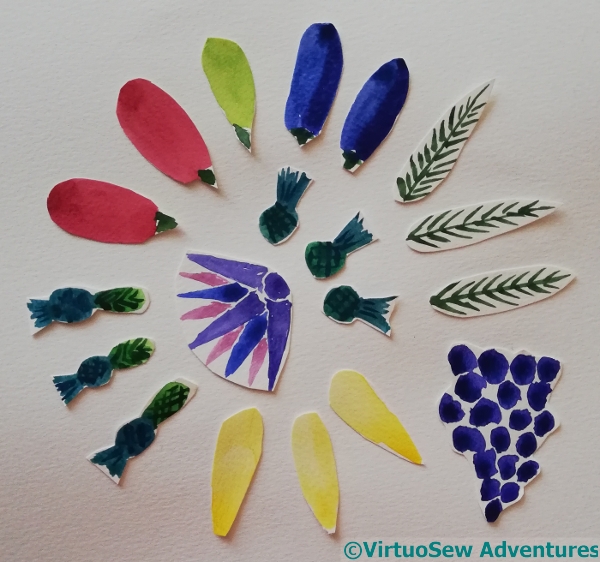
In fact I last wrote about it in 2015, and I’m still wrestling with ways to represent it! I’ve already abandoned any idea of working a portrait of it (as it were). As you can see from the black and white photo, it’s crammed with faience beads, and it’s hard to imagine making a good stitchable design of it. So I’ve cut out some watercoloured beads, and pushed them around, taking photos as I go. Back to primary school!
1 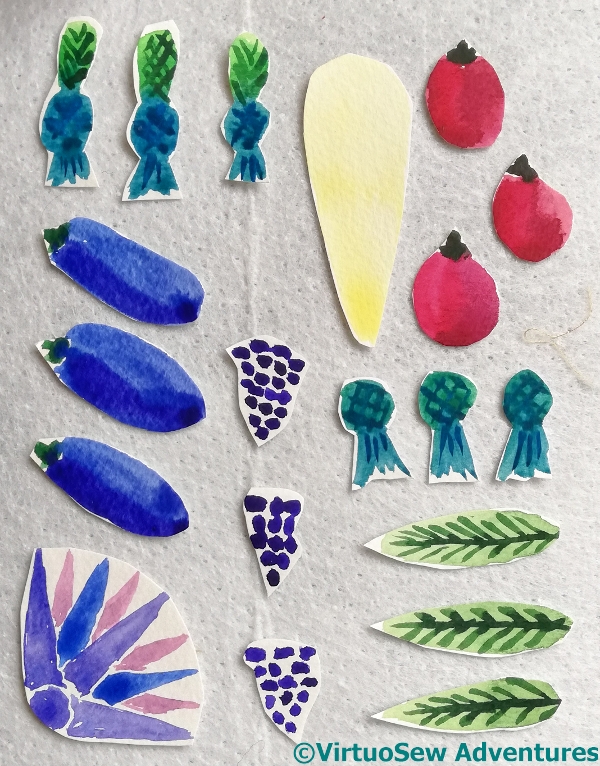
2 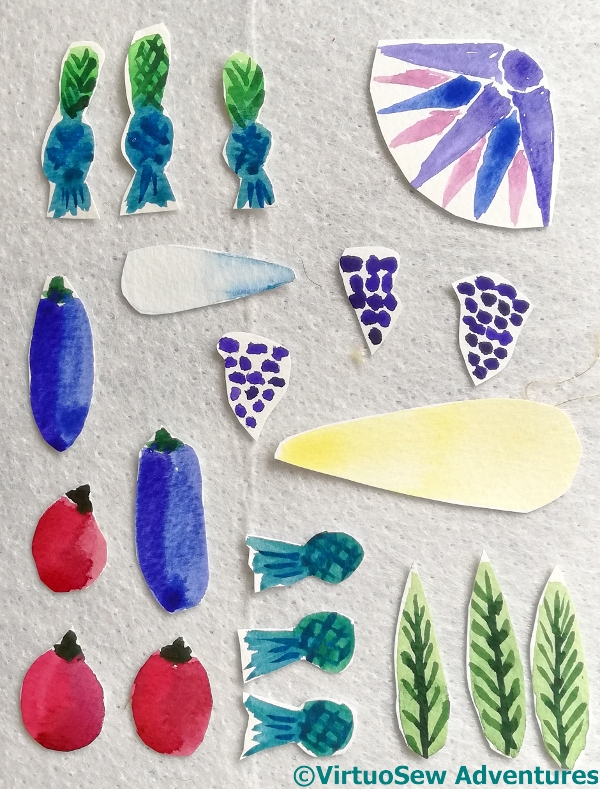
3 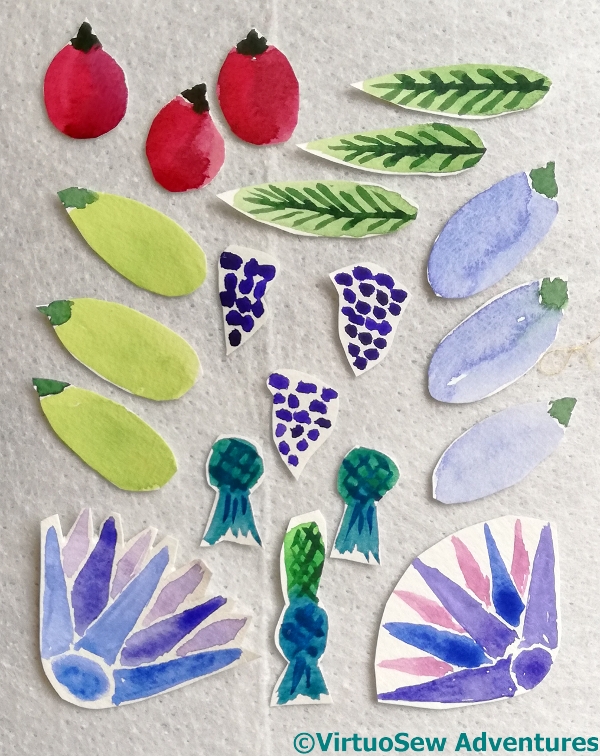
4 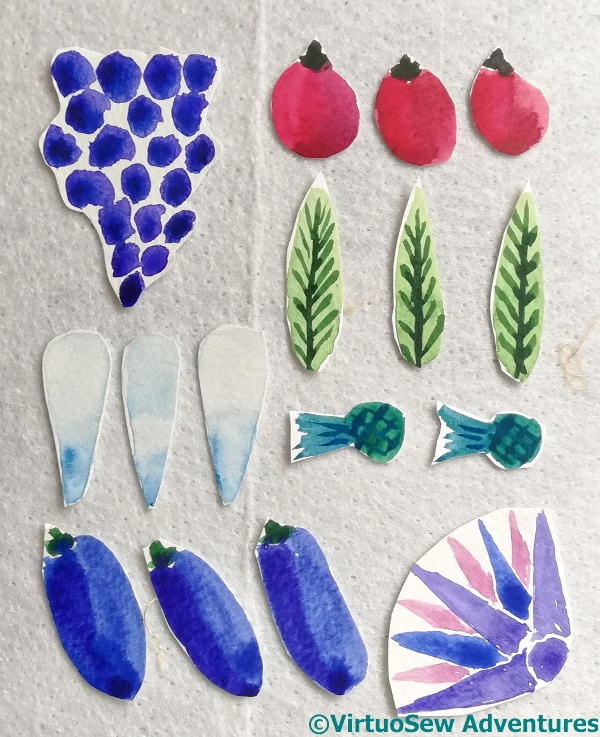
5 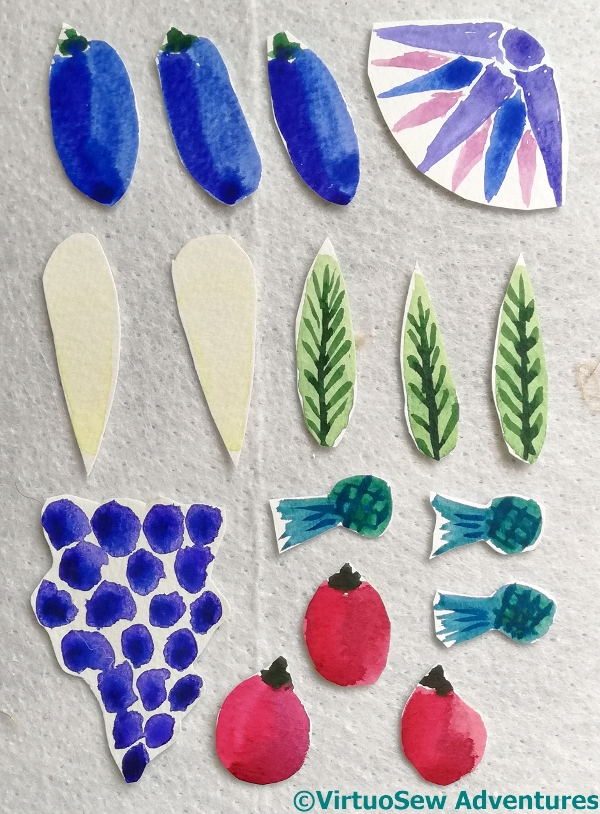
6
Then another suggestion came in (thank you @IndiaGraceDsgns ), to think about mandalas…
7 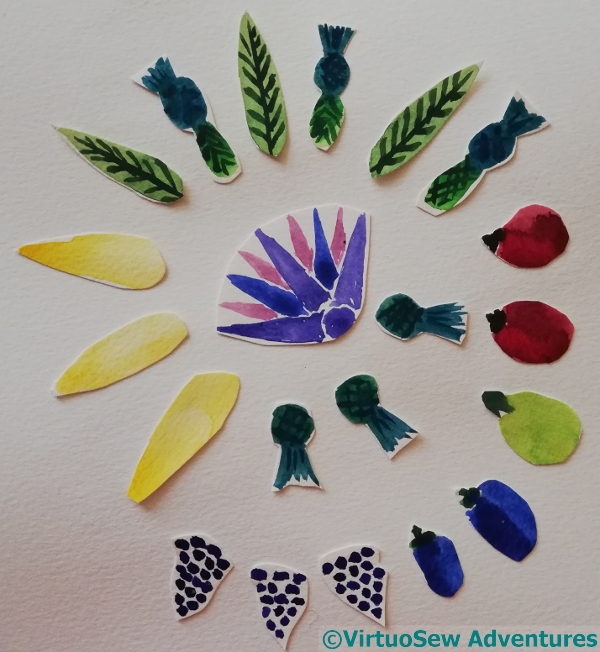
8 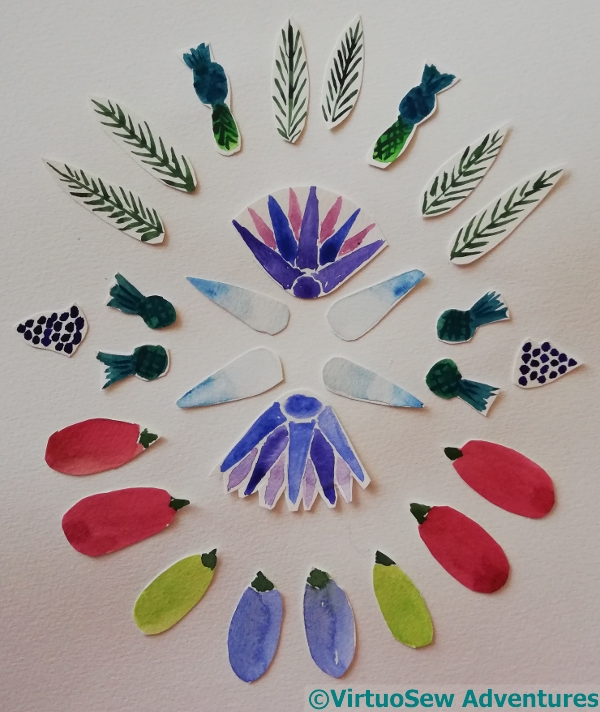
9
And now I’m thinking about “samplers” of beads which still recall the way these broad collars and necklaces are sometimes displayed in museums.
10 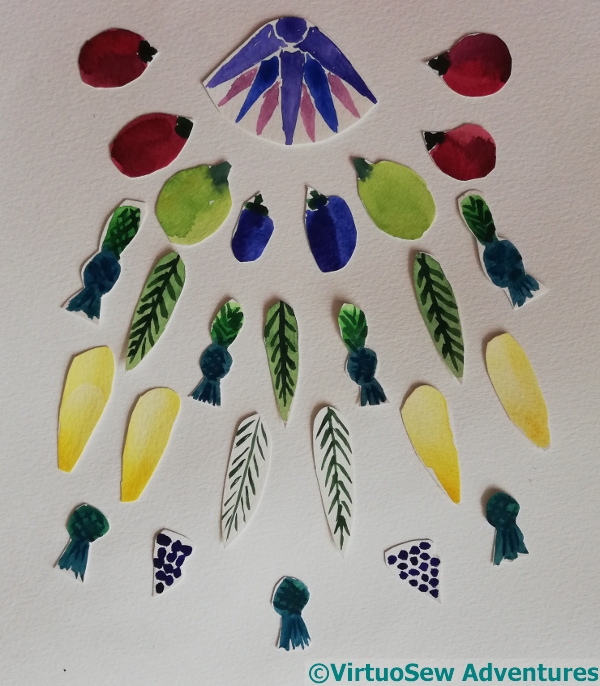
11 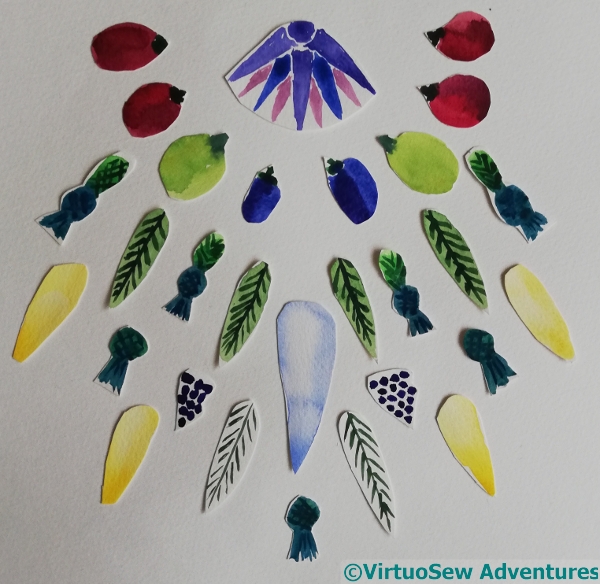
12 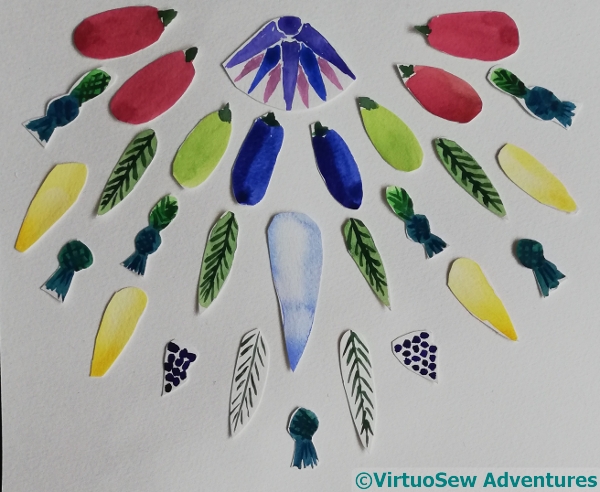
13
I’m planning on using flat silks, when I finally pick one (comments, anyone?), and of course, the next question will be: what colour fabric I will be stitching it on?
Crewelwork Designs
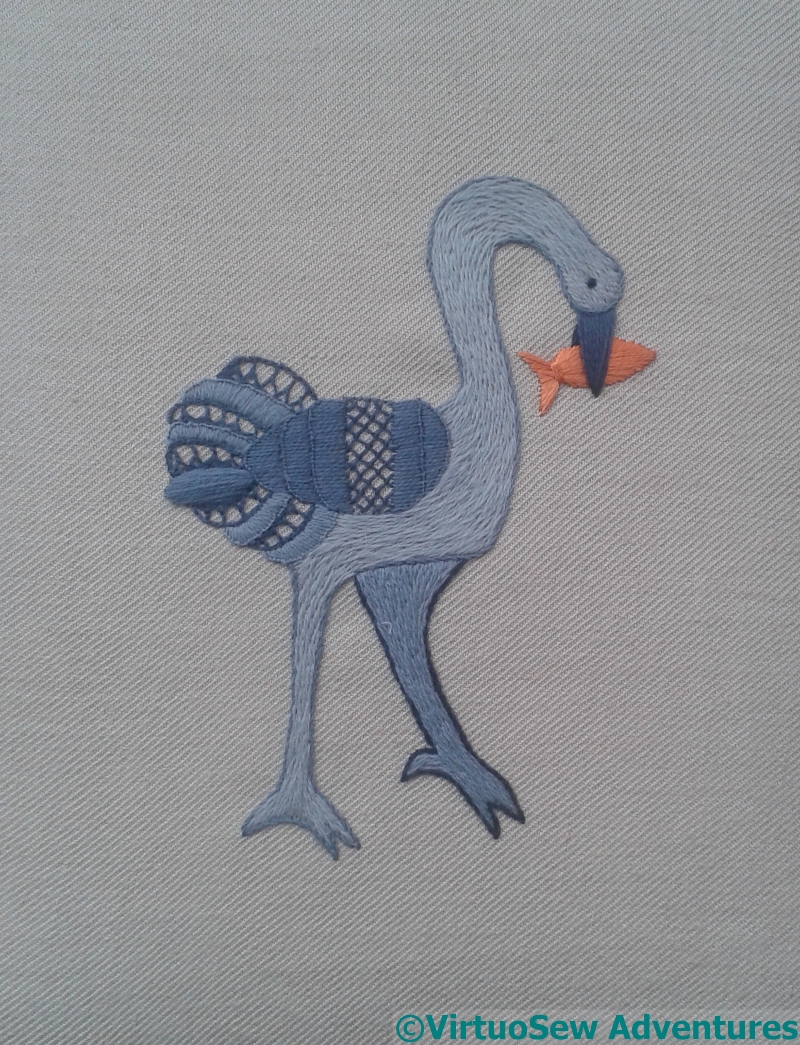
Herne The Hunter
I can’t remember where I found the basic outline of this heron. There’s something a bit late-medieval about him, and I found the various shapes a good way of playing with interesting stitches. He’s worked in crewel wool, apart from the orange-gold fish in his beak – that’s silk!
The main, flat colour sections of his body are worked in split stitch filling. This isn’t a technique I’m especially fond of, but it does fit in well with the style of the drawing, and it provides a plain filling that allows the trellis couching over his wing, and the half-chevron stitch in his tail to be the stars of the show.
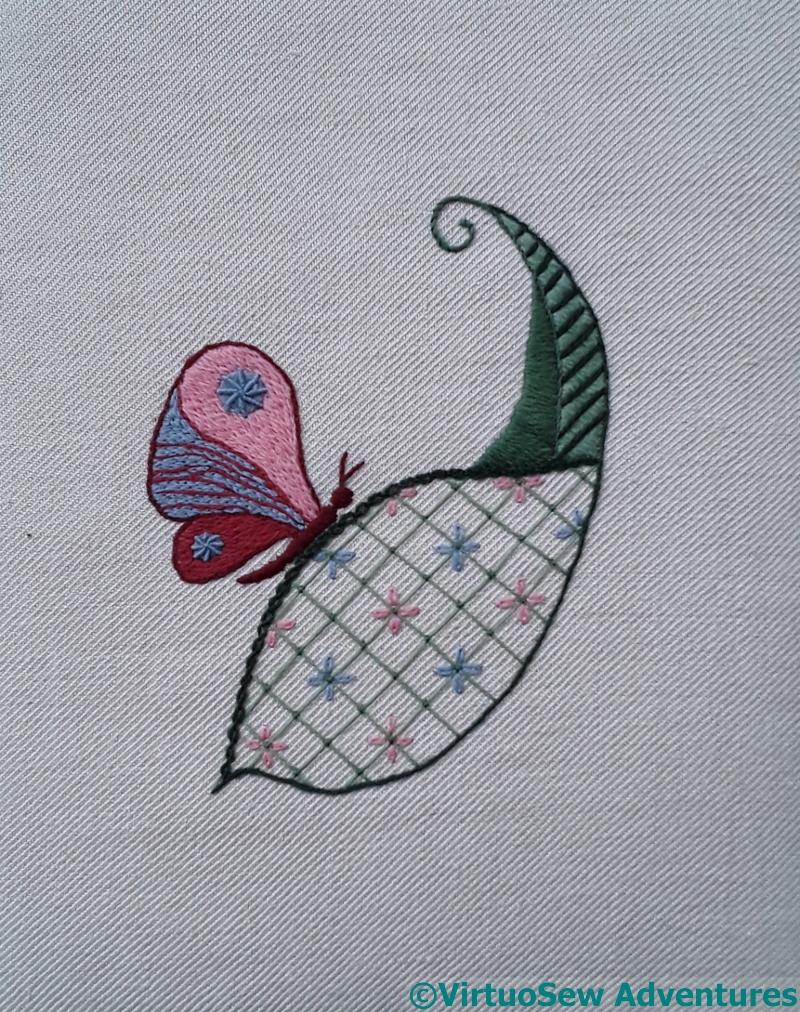
Flutterby
The butterfly settling on the huge leaf in this second panel also makes use of split stitch filling, with the roundels on the wings working in spider’s web stitch, and the antennae in a single fly stitch. However, the whole reason for creating this design was to have a large space to fill with the ornamented version of trellis couching. I believe that classically, this stitch is worked much smaller and more densely, but what I was trying to do here was to marry the old style with more modern sensibilities, and opening it out creates a crisper, lighter effect.
I’ve not been able to work out what to do with these, either. They’re mounted over board, and waiting for inspiration!
From Watercolour to Embroidery
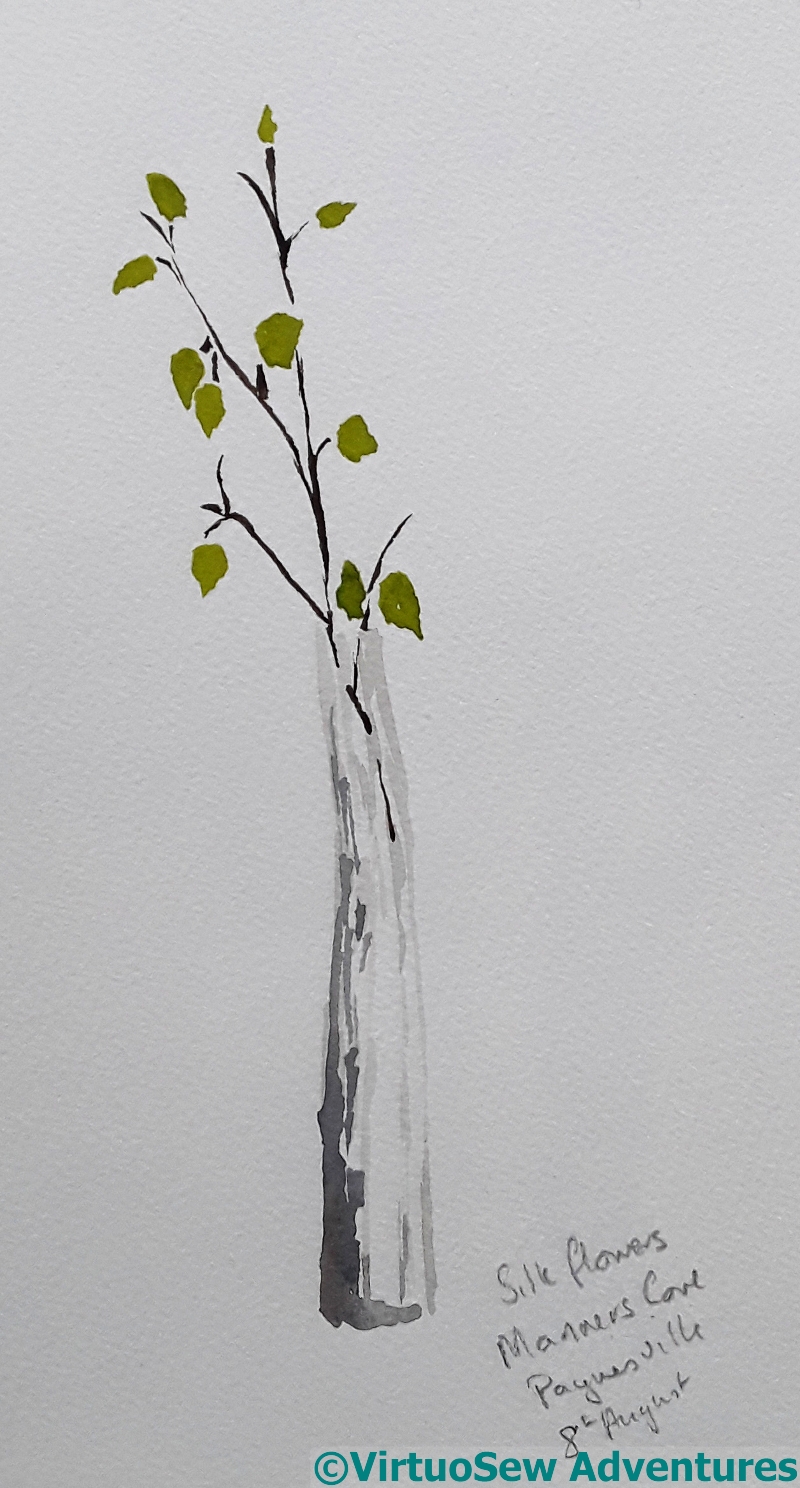
Watercolour : Silk Flowers at Paynesville
This vase of flowers was on the table in a motel room we stayed in, many years ago. For some reason they caught my eye, and for our whole stay – which was full of activity and outings – I wanted to paint them. But we were never in the room for long enough during the daytime.
Finally, on the morning we were going to leave, I got out my paints, sat down, stared very hard, and painted this. I’ve noticed that if I really want to paint something, it often works much better than paintings I’ve done because I want to practise painting.
I don’t think I even bothered to take a photograph. Everything I wanted to remember about the vase is in the painting.
When we got home, however, it seemed to me that the painting offered possibilities as the basis for a simple embroidery.
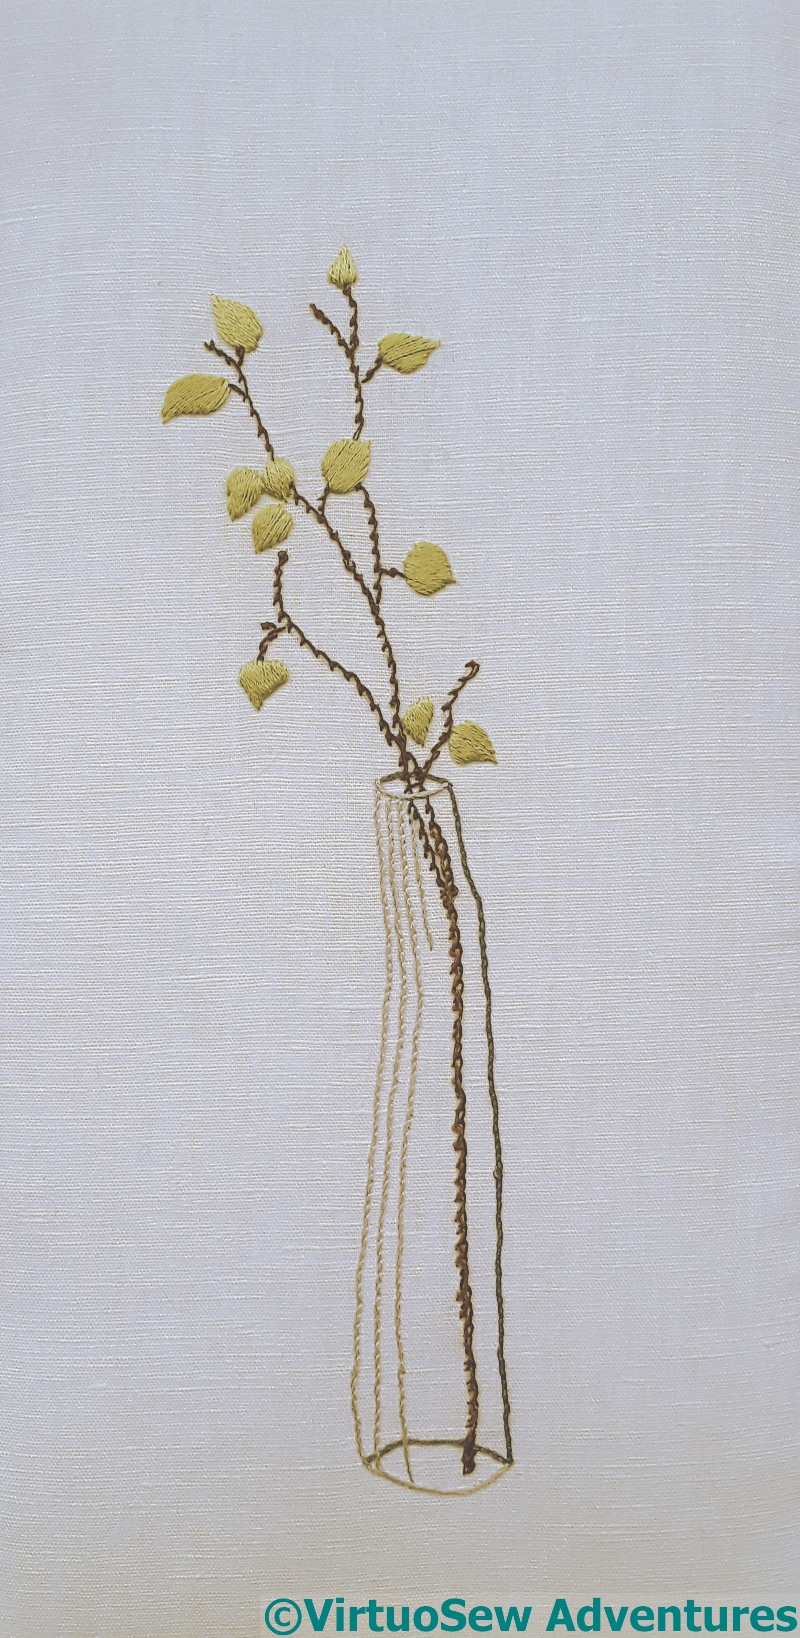
Embroidery based on the watercolour
A very simple embroidery, but, as you see, making use of a variety of stitches.
The vase was textured glass, not clear, and I represented that using lines of coral stitch among the stem stitch. I didn’t work it more densely, because I wanted it to have a certain lightness of touch.
The twigs were very rough and twiggy, so I used scroll stitch.
Finally, the simple shapes of the flowers were best represented using my neatest and most careful satin stitch. All I really wanted from them was the colour.
I haven’t the vaguest idea what to do with the embroidery, so I’ve laced it over a board to keep it tidy. But I thought you might be interested to see one of my very rarest stories – I know other designers often do detailed watercolours of their designs, but it’s not how I work. More often, I have a rough idea in my head, and work on each element while I’m planning the details of the next, waiting for the piece to tell me what it wants.
This has turned out well, but I’m still slightly bewildered that it happened at all!
More thoughts on the Jacobean Coat
Coat Design
The design wraps around the back of the coat, leaving the front mostly unadorned. There are sprigs placed on the sleeves, too, one of them above the elbow, and the one on the opposite side below it. Remember the comments I’ve made in the past, about taking inspiration from Grinling Gibbons, and aiming for balance rather than symmetry? That goes for the placement of design elements in apparel as well as anything decorative.
Starting Stems
My mother has commissioned the coat with various other garments and accessories in mind, and one of the ways we thought would help to tie the coat in with them would be to use a knitting wool which is involved in those accessories. Now, as it happens, I have experience with this sort of trailing design (remember the Piano Shawl?), and I remember that it can feel very disjointed and dispiriting as you work individual motifs, and however confident you are of the whole, it’s hard to be motivated when it keeps looking spotty and halfhearted.
However, the stems pull it together, so I thought this time I would start with the stems. It’s a big, chunky, variegated knitting yarn, so I will end up with the skeleton of the design, and all sorts of colours within it. I’m catching it in place with a fine woollen yarn, using small oblique stitches buried within the twist. They should be almost invisible.
Trialling Colours
However, that too is going to take a while, so I can trial colour placement for the motifs themselves! As you can see, we aren’t aiming for a naturalistic colour scheme. This may not be the final arrangement, and there will be tweaks along the way, but I’m happy with this as a starting point.
The Jacobean Coat – getting started
Coat Designing
This is going to be a truly multi-generational project. The design elements are stolen from a tablecloth my Grandmama did during the war, and I’m going to embroider it on a coat for my Mam (her daughter). I will write a post about Grandmama’s tablecloth one of these days, because it’s an absolute cracker, full of wonderful needlelace patterns I’ve never seen anywhere else. However, as it is stitched in white on white fabric, I will have to become a better photographer first!
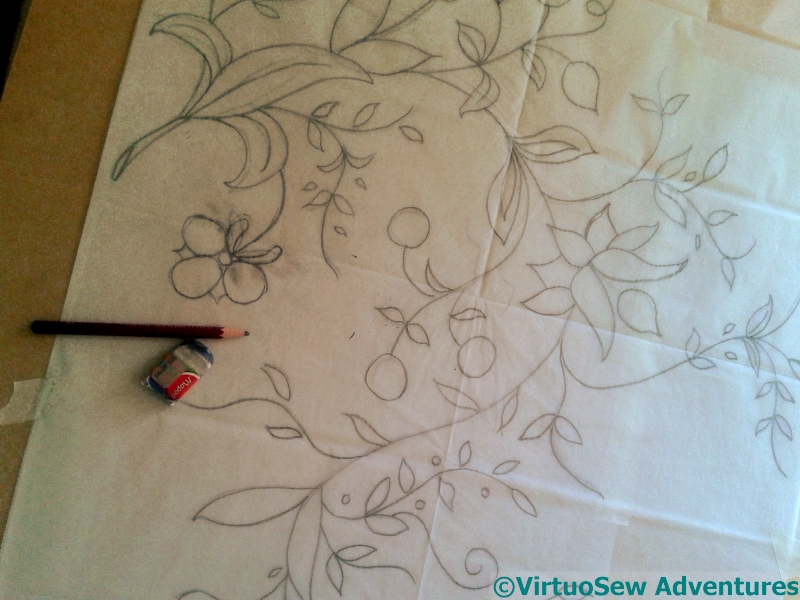
Stage One of Design Transfer
You may recall that during the Great Lady’s Magazine Stitch-Off, I wrote a post about the different methods for transferring designs, particularly concentrating on their advantages and disadvantages in different circumstances. The fabric of the coat (this will be the second incarnation of this fabric!) is a pale green boiled wool. It’s dense enough to have some structure and weight, light enough to be easy to stitch (I think). You might have thought it would accept gracefully any method I chose.
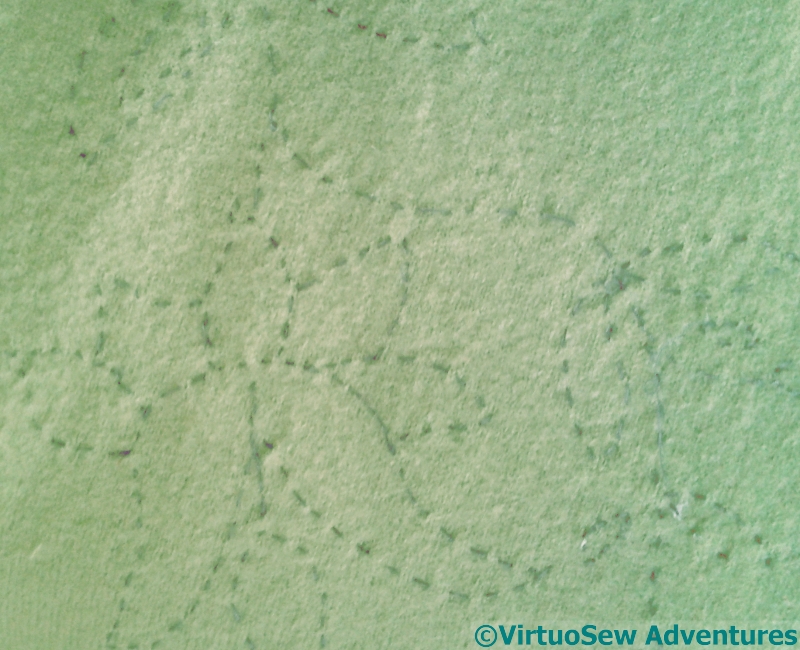
Stage Two of Design Transfer
However, when I thought about transferring the design, I found myself ending up with the most time consuming of the lot! Since the garment is unlikely to be washed, and rubbing may damage the surface, my options are somewhat limited. Transfer pencils spread, sometimes, if the ironing temperature is wrong, the chalks have a nasty habit of not always rubbing off when they’re wrong, and my quilter’s pencil doesn’t work on strongly textured fabrics.
So, running stitch through tissue it is, then. This will take a while…..
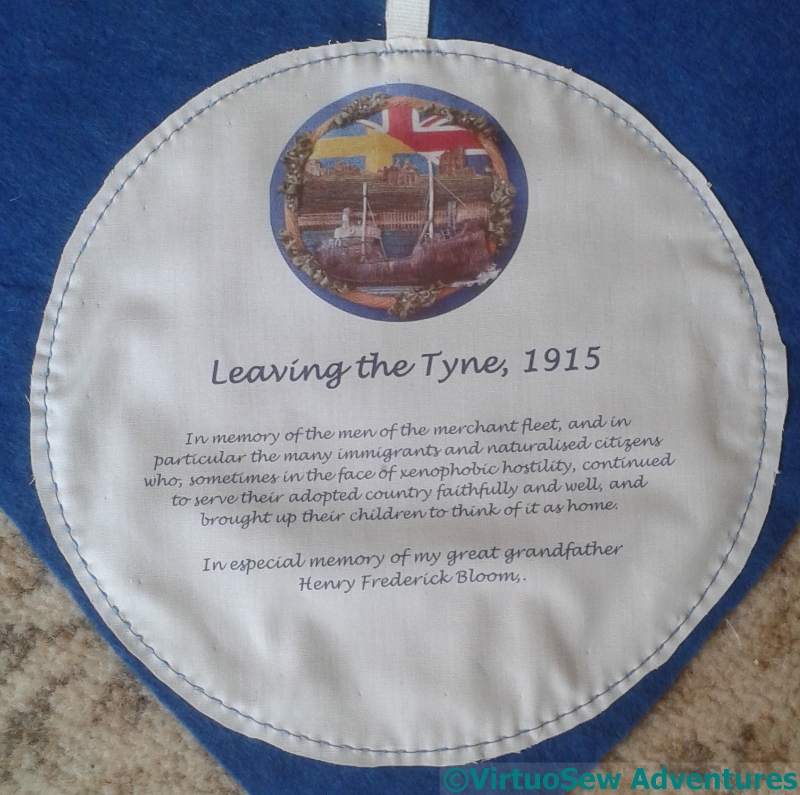
“Leaving The Tyne, 1915”

Leaving The Tyne 1915
My contribution to the Embroiderers Guild 100 Hearts Project, commemorating the end of the First World War.
Dedicated to the memory of the men of the merchant fleet, and in particular the many immigrants and naturalised citizens who, sometimes in the face of xenophobic hostility, continued to serve their adopted country faithfully and well, and brought up their children to think of it as home. But in especial memory of my great grandfather Henry Frederick Bloom, who was Swedish, naturalised shortly after my Grandmama’s birth, and himself served throughout the War in the merchant fleet.
It has been allocated to the Liverpool exhibition, at Liverpool Cathedral, from September 7 until October 10.
Assembling the Heart
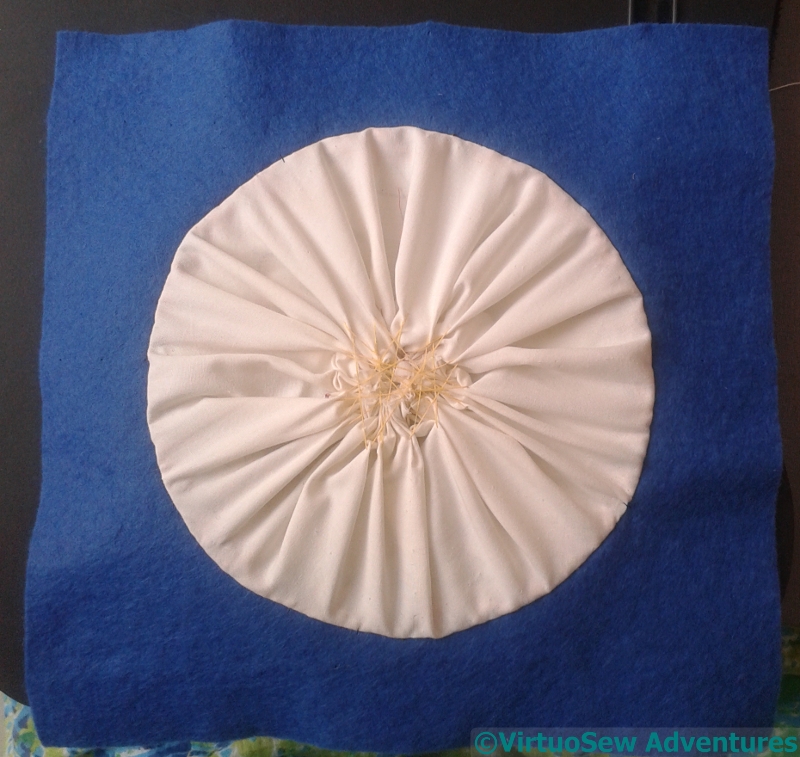
Gathering Backing Fabric
The assembly involved a lot of stages. I cut the backing fabric into a circle and gathered it up behind the design to provide an extra layer of protection against the hurly-burly of the stuffing.
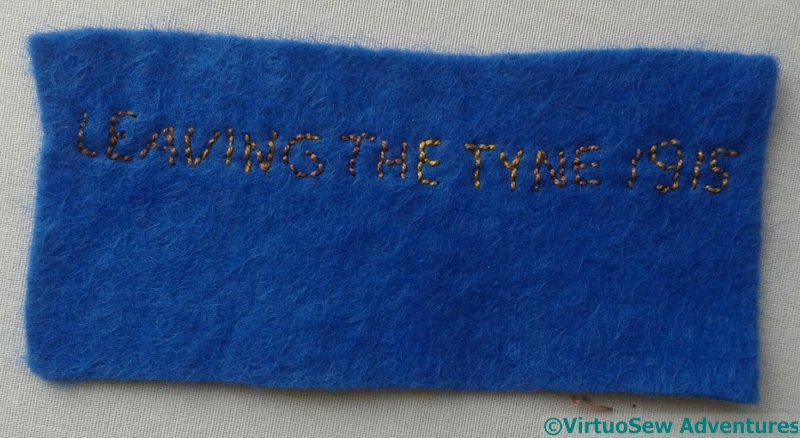
Title Label
Then I had to make a stitched title label (it also has my Guild membership number, but I forgot to take that photo!) to attach to the back. I’m really not keen on lettering in stitch…
Morse Code Label
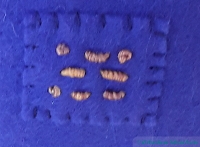
At this point, though, I thought, I simply cannot fail to have my Morse Code signature on the back too. Morse Code was a staple of communications until well after the Second World War, so it was very much in use during the First World War..
Dedication Stitched In
Having attached my title and signature labels to the back piece, I printed a photo of the finished roundel, the title and the dedication onto a piece of fine cotton, within a circle, to echo the circular shape of the roundel on the front. Then I attached the cotton circle to the inside of the back piece. When the piece is finished, a circle of backstitches on the back will be all that shows that this is there, but I will know.
And so will you!
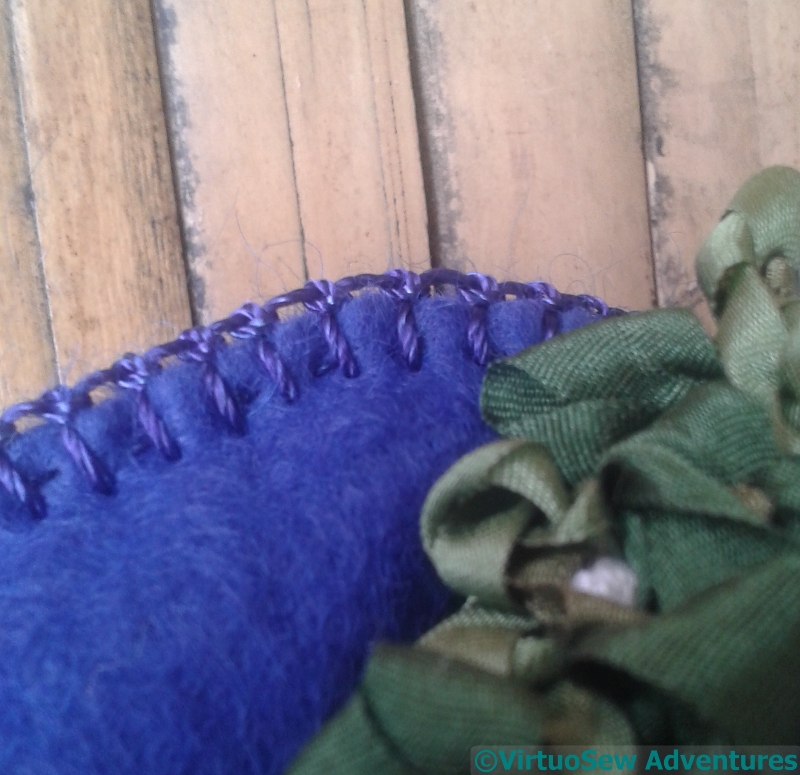
Antwerp Stitch Edging
I made assurance doubly sure of the assembly by first using running stitch to assemble the two sides of the Heart, and to close it after stuffing it. Then once the Heart was stuffed and closed, I reinforced the edge by stitching around it using Antwerp Edging Stitch, which is a knotted variation of blanket stitch.
Final reveal next week…
Final Details – I hope!
First Attempt At a Bow Wave
My first attempt to tackle the bow wave was to shred some white silk ribbon and try to attach it to the bow. That seemed a bit too white and a bit too solid.
What it did do, however, was give me an inkling as to how tricky the attachment of the bow wave was going to be. “Fiddly” doesn’t come close! And remember, there are a lot of delicate little details already assembled, so I couldn’t be too heavy handed with the attachment, either.
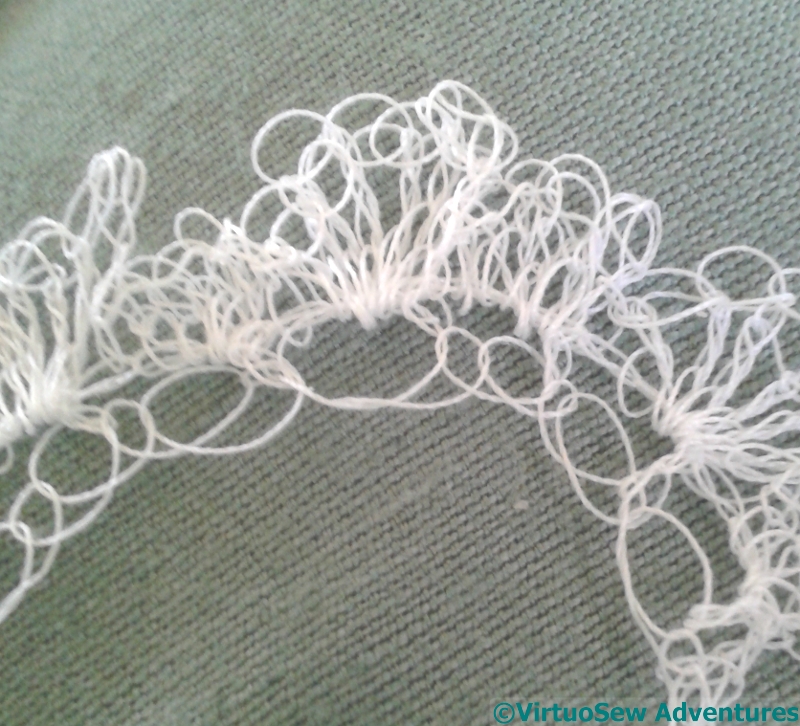
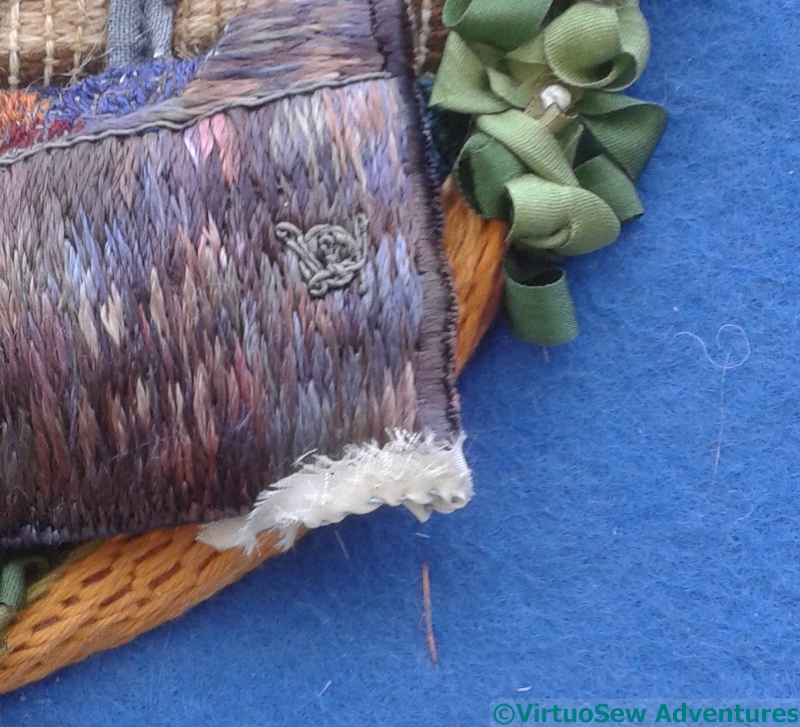
FreeForm Crochet
Having decided something lighter was needed, I tried another experiment: freeform crochet. In this case I started by using one strand of a stranded silk, decided that even that was too heavy, and moved on to sewing cotton. I’ve done a sort of shell pattern, but varied the sizes of the shells slightly to give a bit more unevenness to the whole thing. I’ve also crocheted fairly loosely to give the right frothy effect of seafoam.
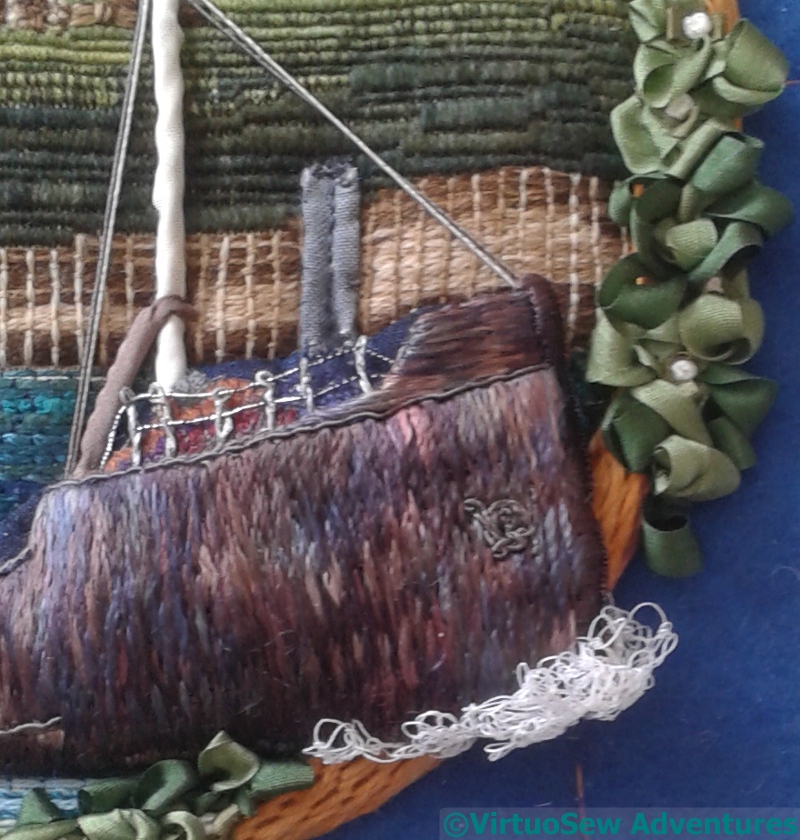
Last Few Tweaks
The last few tweaks here are: the addition of the bow wave, and then the addition of railings around the deck cargo on the bow, and finally the rigging. The railings are made using a paper covered wire painted silver and dirtied with inktense for the posts, and two lines of black and silver twist for the chains. They’ve been surprisingly effective in helping everything to sit at its right plane in the sequence from foreground to background.
There maybe isn’t enough rigging for an operational vessel, but the photo wasn’t clear, and there is enough to have point and purpose
Now all I have to do (all!!!) is assemble my Heart!