
Tag: design elements
Working on Aethelflaed
You may recall that the planning and designing of Aethelflaed is proving quite a long winded process, with a lot of repetition and rethinking going on.
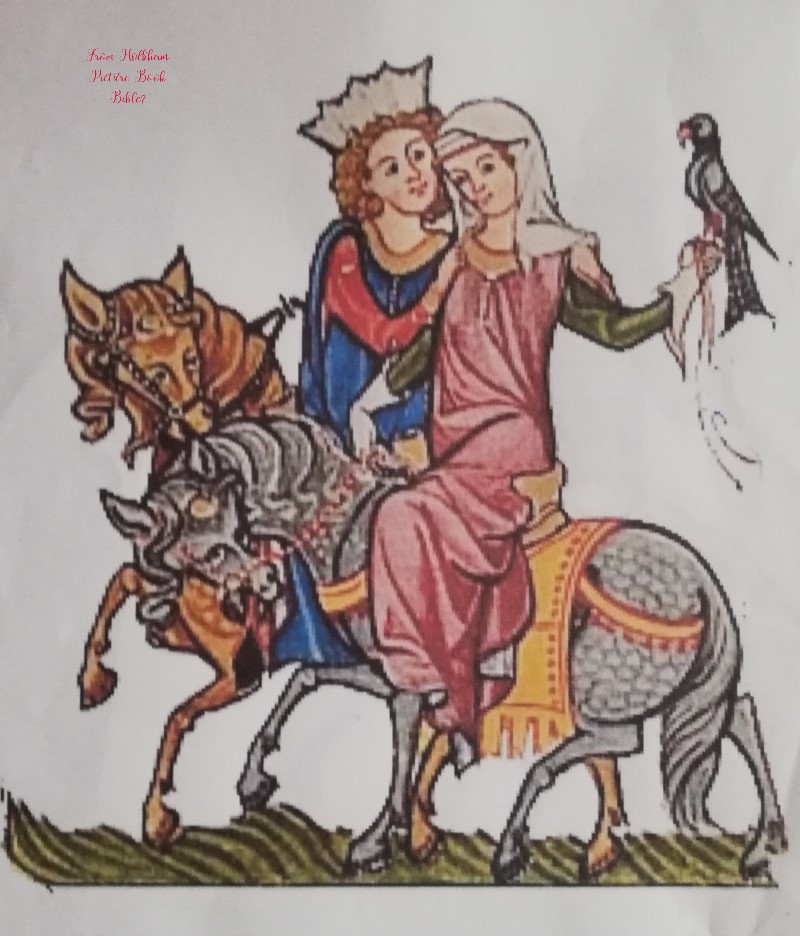
I’ve been looking for medieval women on horseback, because I want Aethelflaed under her own steam, as it were – not lead on a palfrey, but mounted on her own horse, with the reins in her hands.
The best I’ve found so far is this one, which I think was in the Holkham Picture Book Bible.
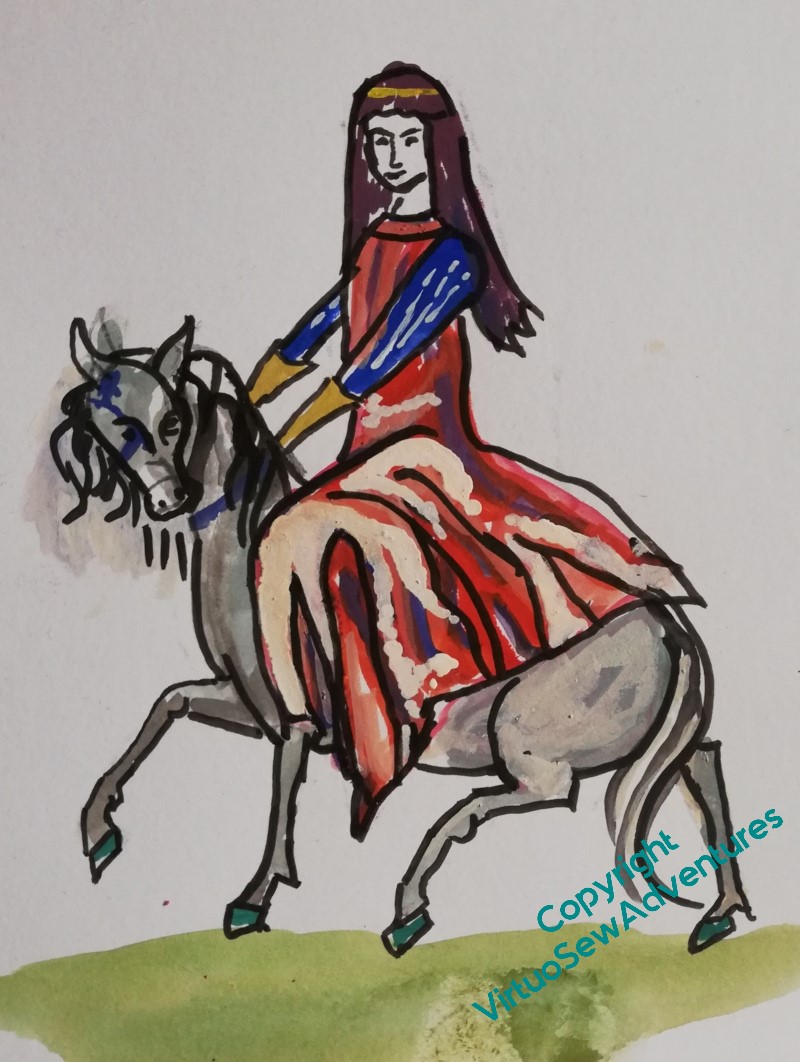
I started with the lady, and began some alterations. I want her horse to have some personality, so I’ve turned the head towards us, and lifted it a little.
I’ve extended the skirts somewhat, and given the rider a veil that flies a little, held in place by a golden fillet.
But the high contrast suggests a silk or brocade, and I want something that suggests a sensible woollen riding dress.
Then I found some Viking and Anglo-Saxon reenactors and talked to them. And goodness, that gave me food for thought. In particular, yes, riding dress was indeed a garment that an Anglo Saxon woman like Aethelflaed might have worn. But Anglo-Saxon dressmaking was not at all like ours.
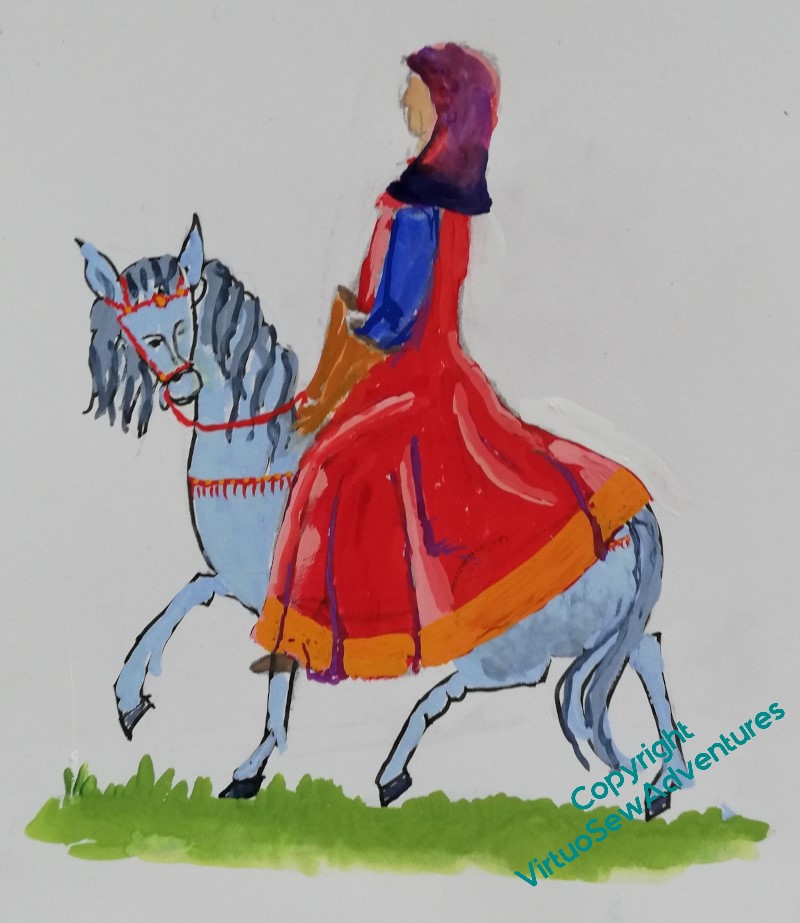
In particular, whereas we tend to have pattern pieces that start with the widest part, and remove fullness by means of darts, pleats, or gathers, Anglo-Saxon dressmaking started with the narrowest width and added fullness by means of gussets and gores. In fact, an Anglo Saxon riding dress would have a full circle’s worth of gores inserted into the side seams, resulting in something roughly like this.
But not quite. I’ve actually been to talk to my reenactor friends, and there are a few bits which don’t quite ring true. I have some photos to work from, so there is more to come…
The Excavation – Further Dilemmas
You may recall I was wrestling somewhat with the large title, still trying to work out what the stitch was. Since I had jumped the gun a little, and already have the Map stretched and stapled to the frame, I can’t look at the back, and I wanted to maintain consistency across the two panels, so I had to find out.
I did a little more rummaging on my blog, and finally found a reference to it!
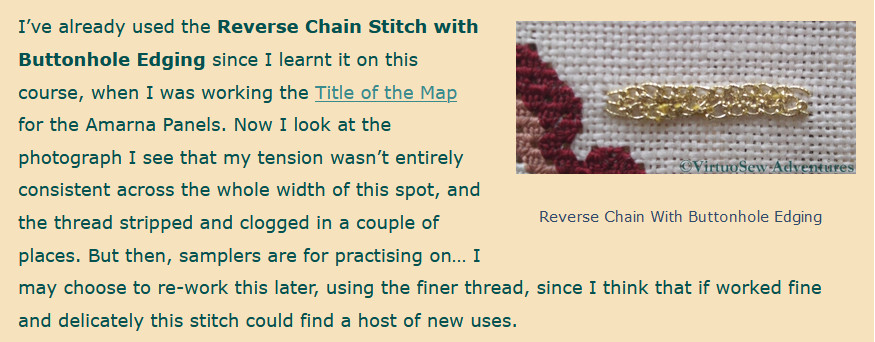
So now I know what to do there, I can move on to my next dilemma..
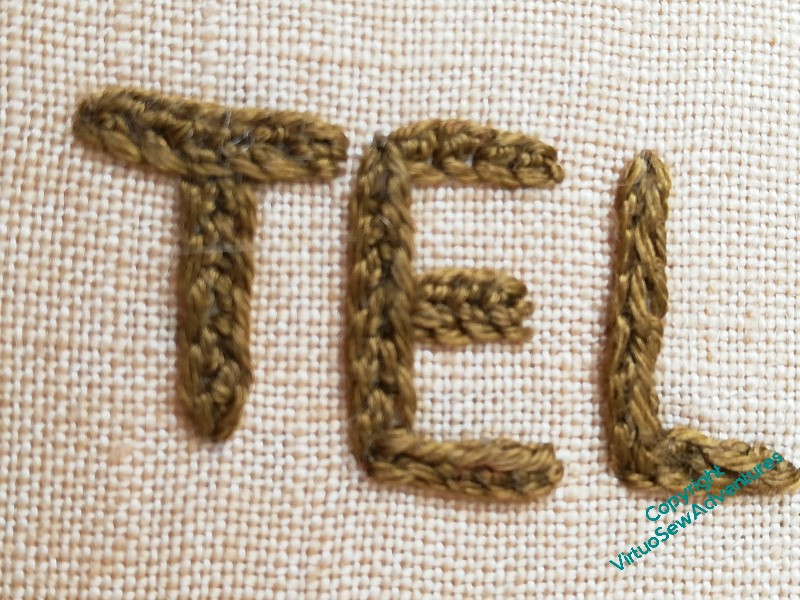
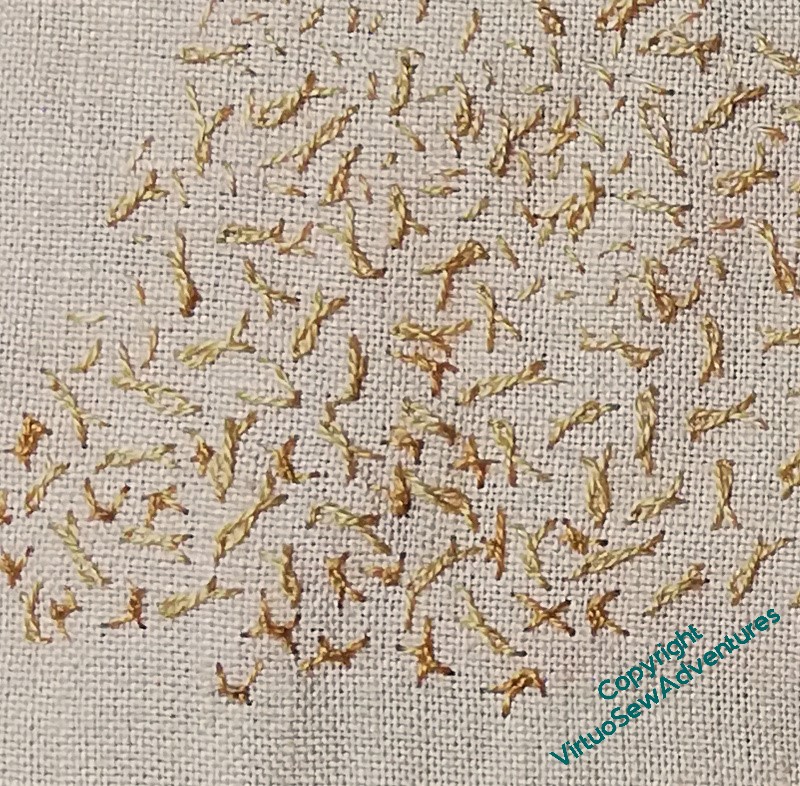
You can see, I think, that the uppermost strand of this section is in Seed Stitch, and the next is Twisted Chain Stitch. All single strand (honestly, what’s happened to me, I used to be all about chunky stitching with six strands in the needle!!) and random as far as I can make them. I felt that the lowest area of this section needed to be more emphatic, and tried a variant on Danish Knotted Cross, followed by single chain, followed by both of those in a slightly thicker thread, and then stood back and looked at them.
Even with my glasses, I was struggling to see any difference.
Now, I find myself wondering, does this matter, or does it not? How emphatic do I need to be, how much do I need to emphasise this mid-ground area?
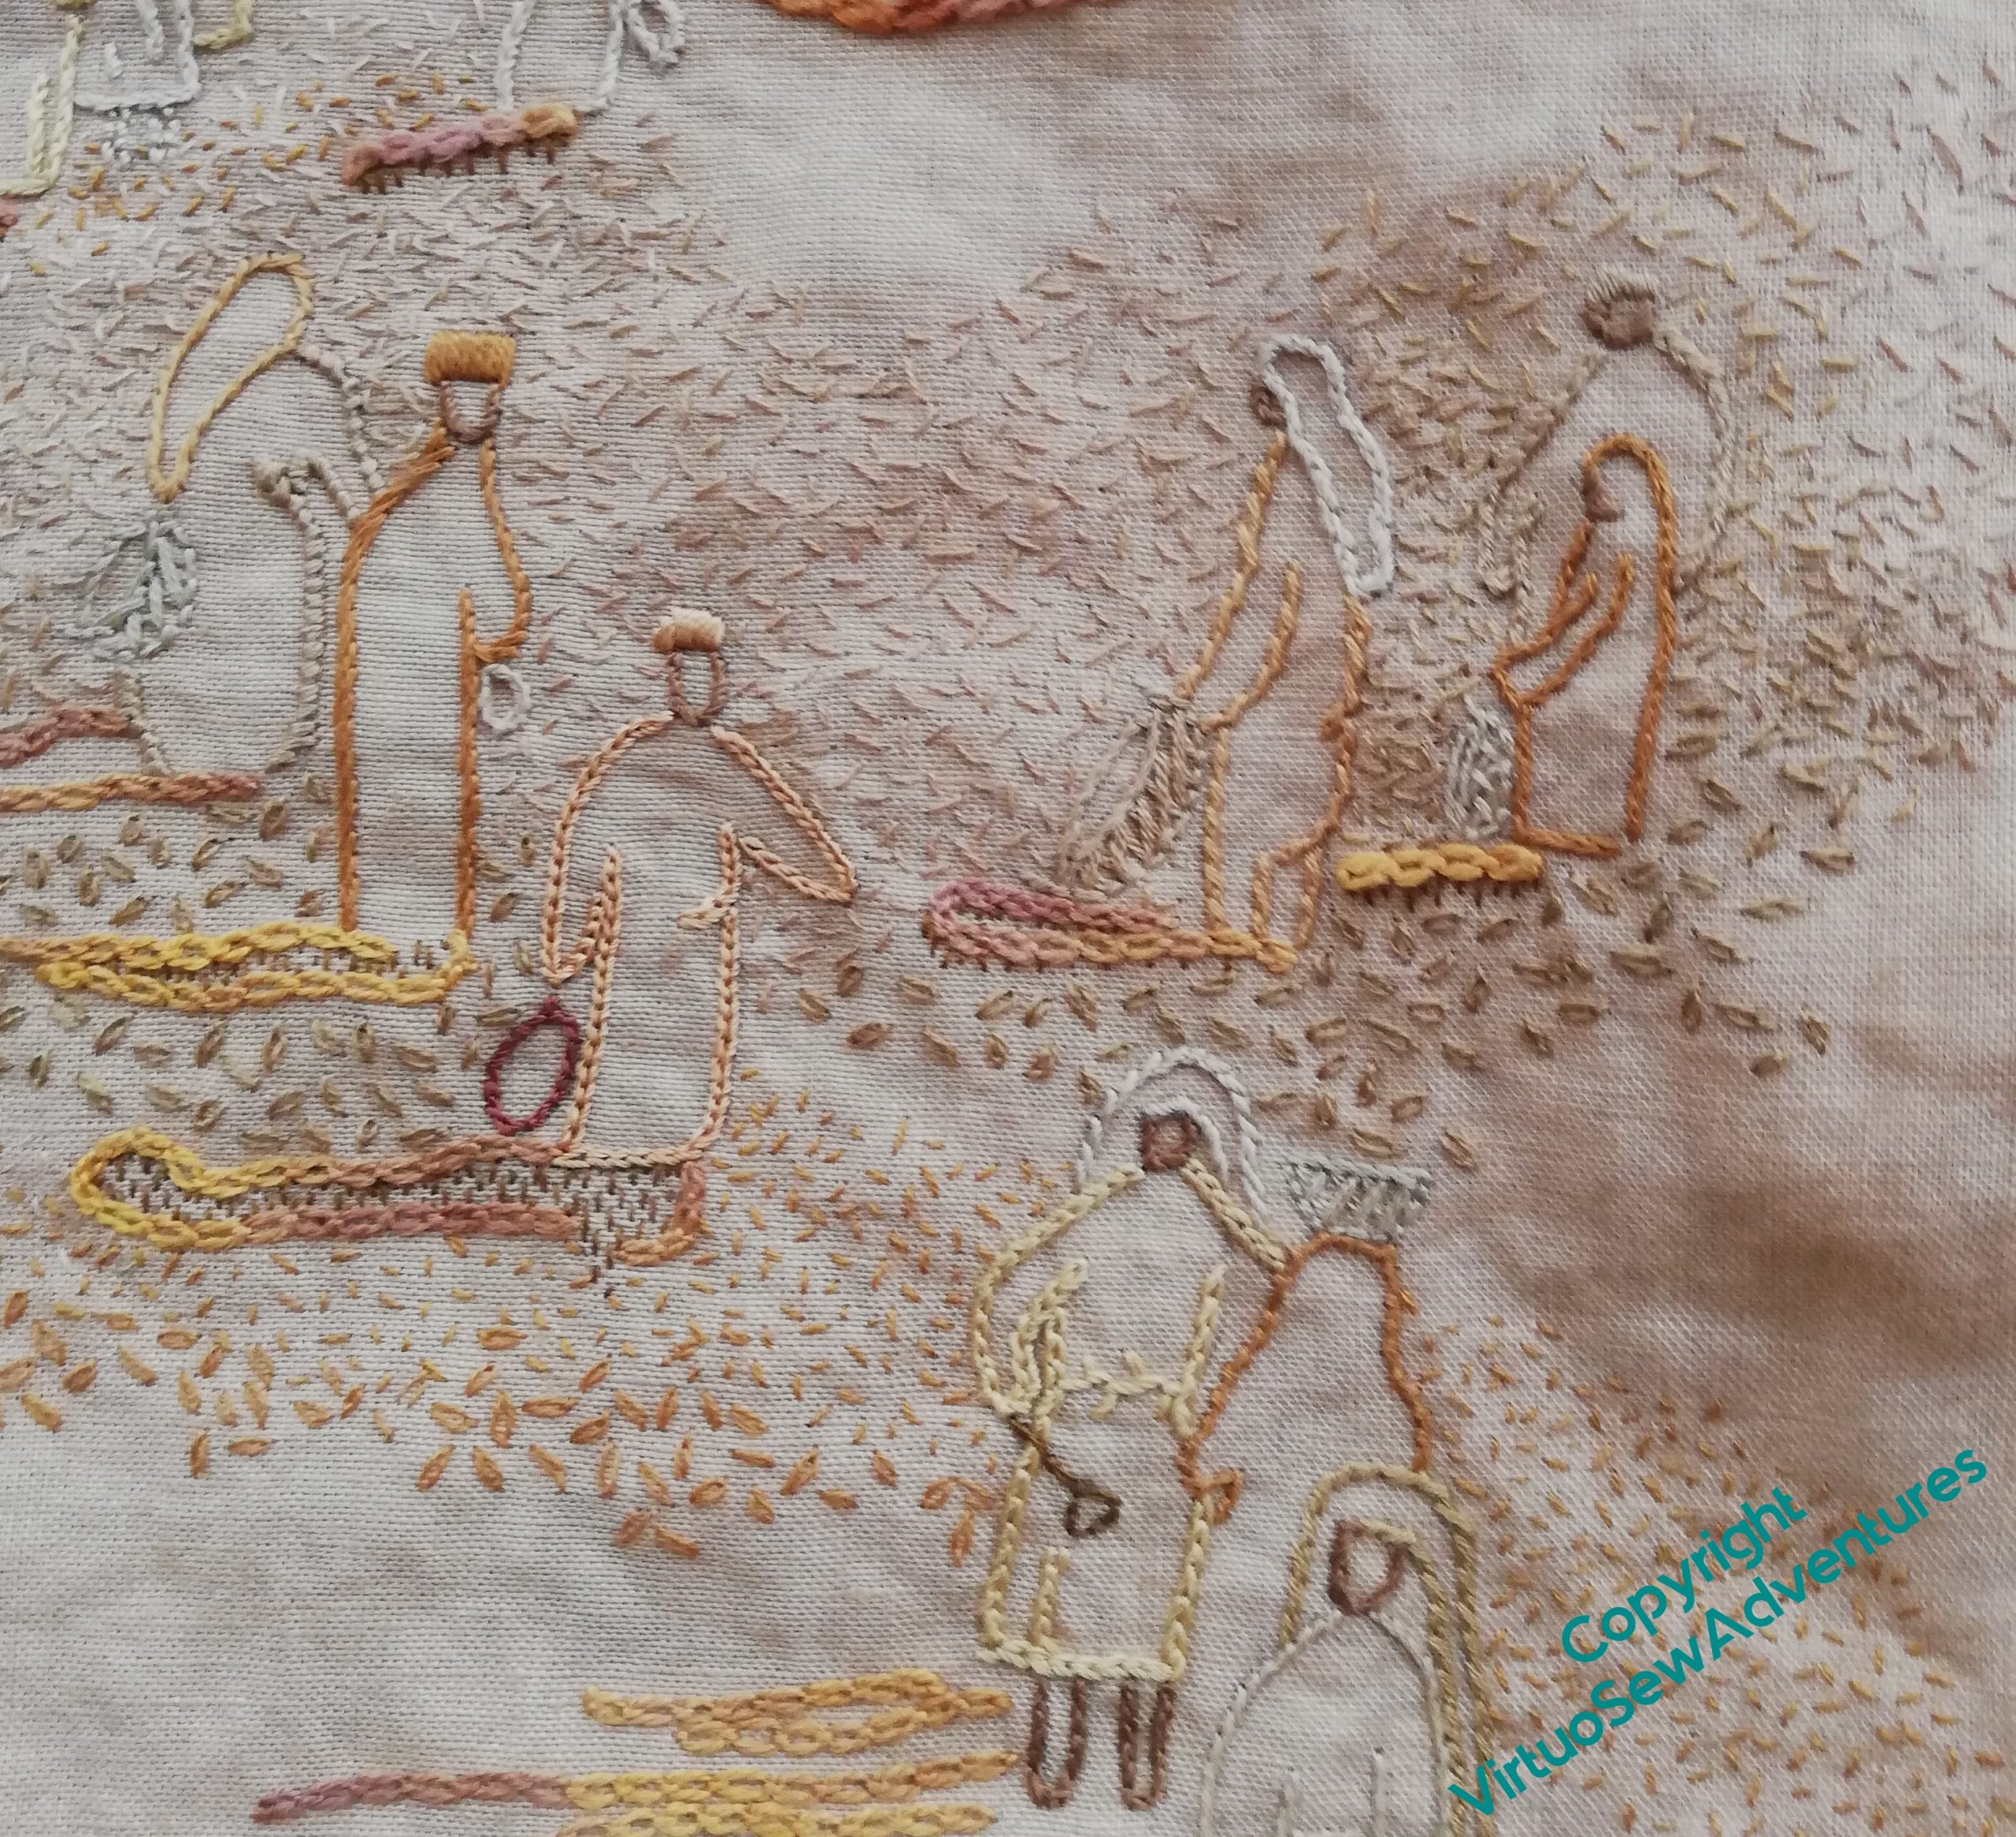
The Excavation – dust in the air
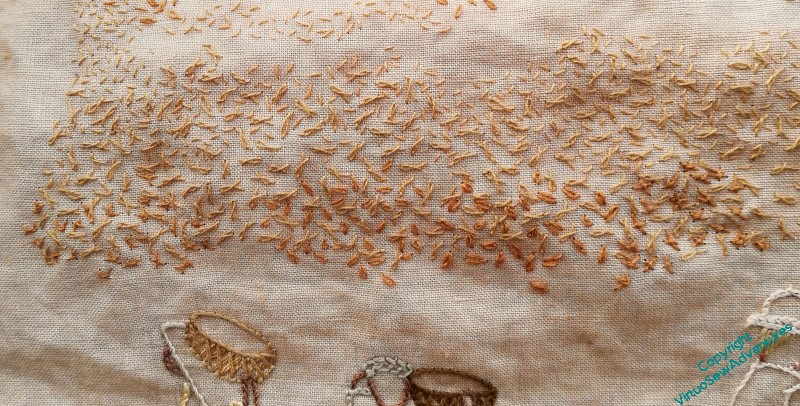
There’s a great deal of stitching still to do on the Excavation. I’ve not tackled the large title because my hoops are in the loft and I’ve not got them down yet, but in any case, adding texture across the piece to help the figures to pop out a little more is taking quite a lot of work. The seed stitches in the distance and around head height help to create the impression of dust in the air – much more effectively, in fact, than I could ever have hoped. Adding the very lightest cream stitches has made quite a difference, in a subtle sort of way.
The difficulties come as I bring the stitching forward, the figures being closer, but the air still dusty. There are relatively few singleton stitches, and many of them are quite square and “manufactured” in appearance, making the dusty, earthy effect harder to produce.
Here you can see that as I’ve moved closer to the viewer, I’ve moved from seed stitch, to single chain stitches, and now to twisted chain stitches. They are well spaced because I’m intending to flow other stitches around them – seed stitches and single chain stitches, to start with.
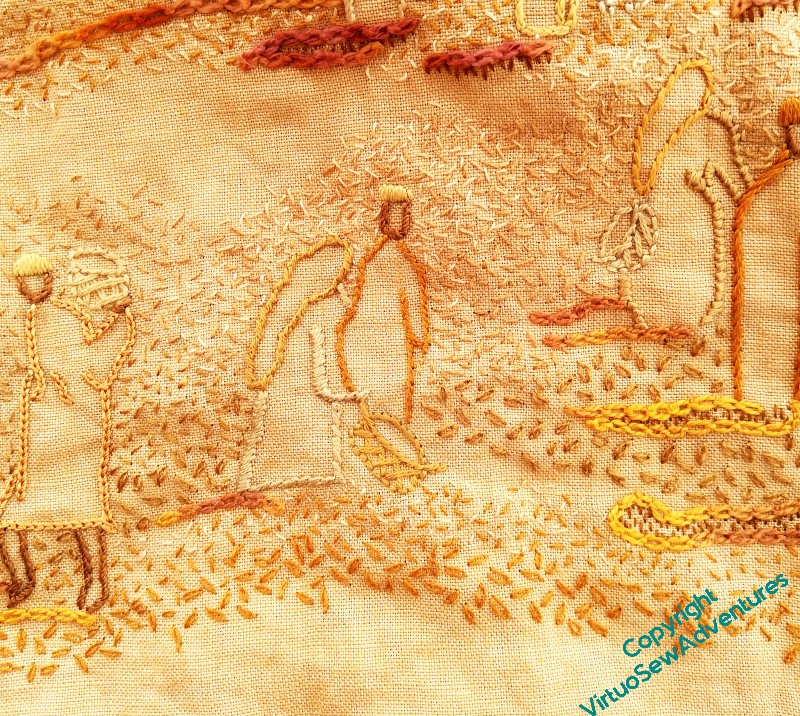
You might just be able to see one of my experiments here, although it must be said, good as phone cameras are these days, this picture is rather pushing beyond the limit.
I’ve added at the bottom of the section, in among the twisted single chain stitches, a variation on Danish Knotted Cross Stitch. In the original version, the cross is worked first, and the knot on top of it. That helps in working a regular shape, but I want something more tangled here, so I work one stitch of the cross, and work the knot as part of the second stitch. I’ve found that as I tighten the stitch, I can move the knot a little, and where I place the end of the last leg helps to make the stitch look more ragged.
Whether I like the result or not, I’m not yet sure!
Beginning The Border
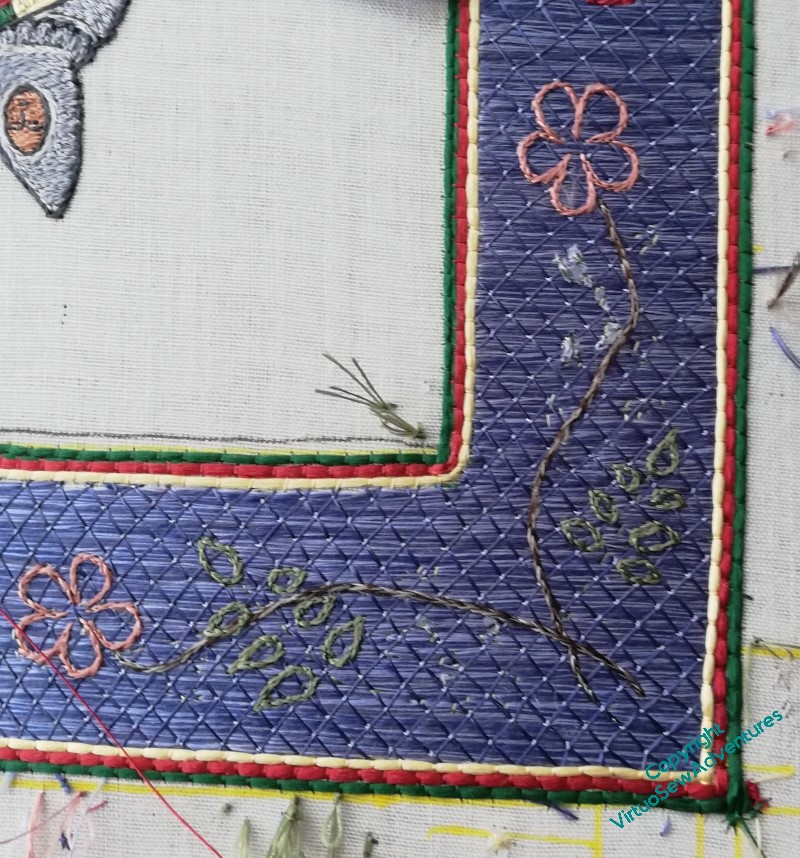
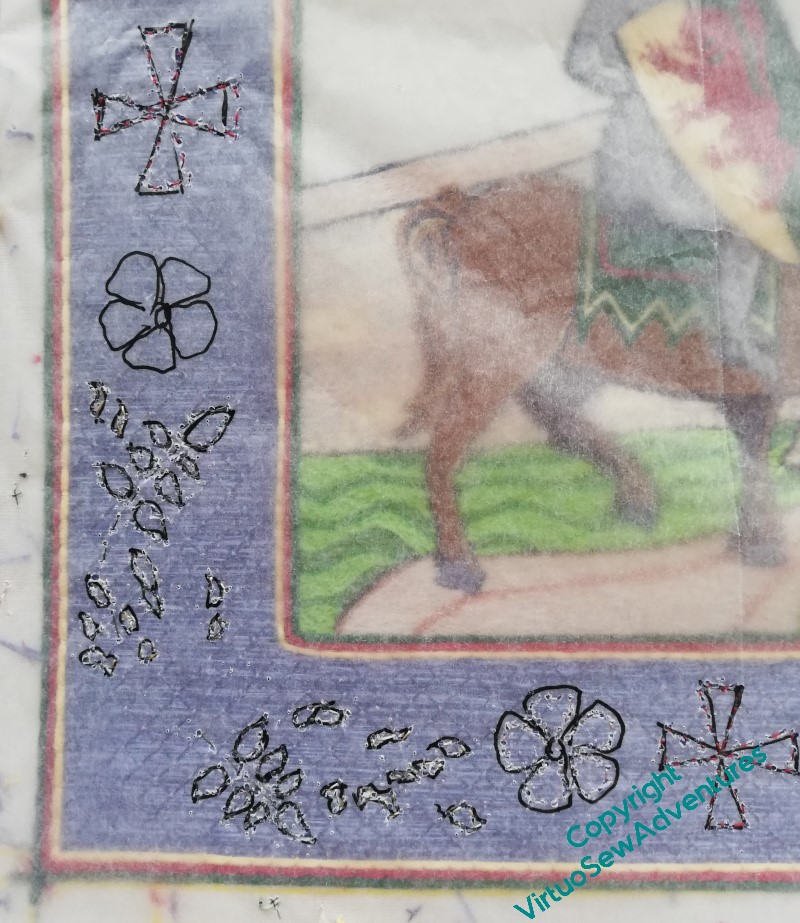
Once I took the tissue paper away, I discovered that in fact my running stitch transfer wasn’t very clear. So I’m going to start by split stitch outlining each element before I fill it in.
You can see in this photo that I still hadn’t quite got all the tissue paper that had the design on it out from under the stitches, and I’m only part of the way through outlining this corner.
I did think I might try to outline everything first, and then I thought about what happens when I have something like that to do, and decided that each corner would be worked to a finish separately!

It is probably at this point that I start to wander from the path of classical Opus Anglicanum. I’m using fishbone stitch for the rose leaves and satin stitch for the broom. But after all, this is a modern work, by a modern embroiderer, not a reconstruction of an existing, or imagined, medieval work.
The wanderings continue with the dog roses – long and short stitch in the petals, over two rows of split stitch outline to help define the edges, and a tiny French knot for the dark centre.
I’m using two differnt dark greens for the rose leaves and the broom, to help the design make sense, and I worked the rose stem in split stitch using two shades of brown. I am not entirely sure about that, so I think the next corner around I will use one, maybe the darker one, and see whether that is an improvement. If it is, bringing this one into line might be a bit hair raising, considering how small all of this is!
The Excavation – more progress
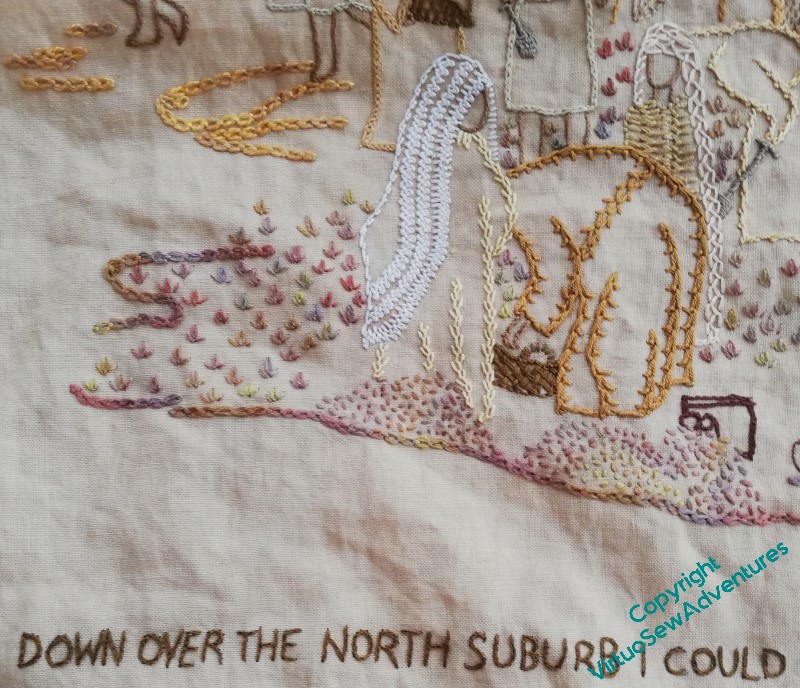
I was clear that the surtitle would be in split stitch, so I got started on that. It’s in a dark, plain colour, to be clear and readable and add weight to the bottom of the design.
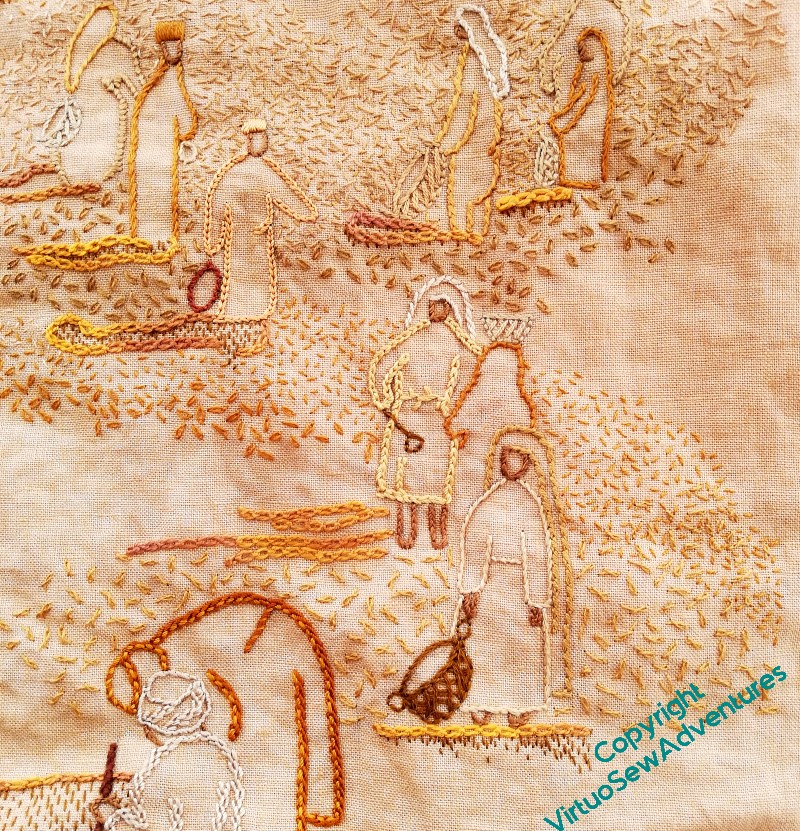
I definitely like the tête de boeuf stitches. They add visual weight, a good variation in colour, and although the colours in the thread are similar, the small seed stitch spoil heaps at the front look completely different.
I may yet find I need to add more stitches at the base, above the text, but of course, by now, you are all accustomed to the way I tend to build up these pieces as the elements occur to me!
The middle ground is, so far, not quite so successful. I am using small sandy coloured seed stitches, and they work at some distances, but not quite so well in others. It certainly doesn’t photograph well at present. I want to make sure that the colours aren’t too dark, because I want it to remain dusty, but developing this section will involve a good few extra layers!
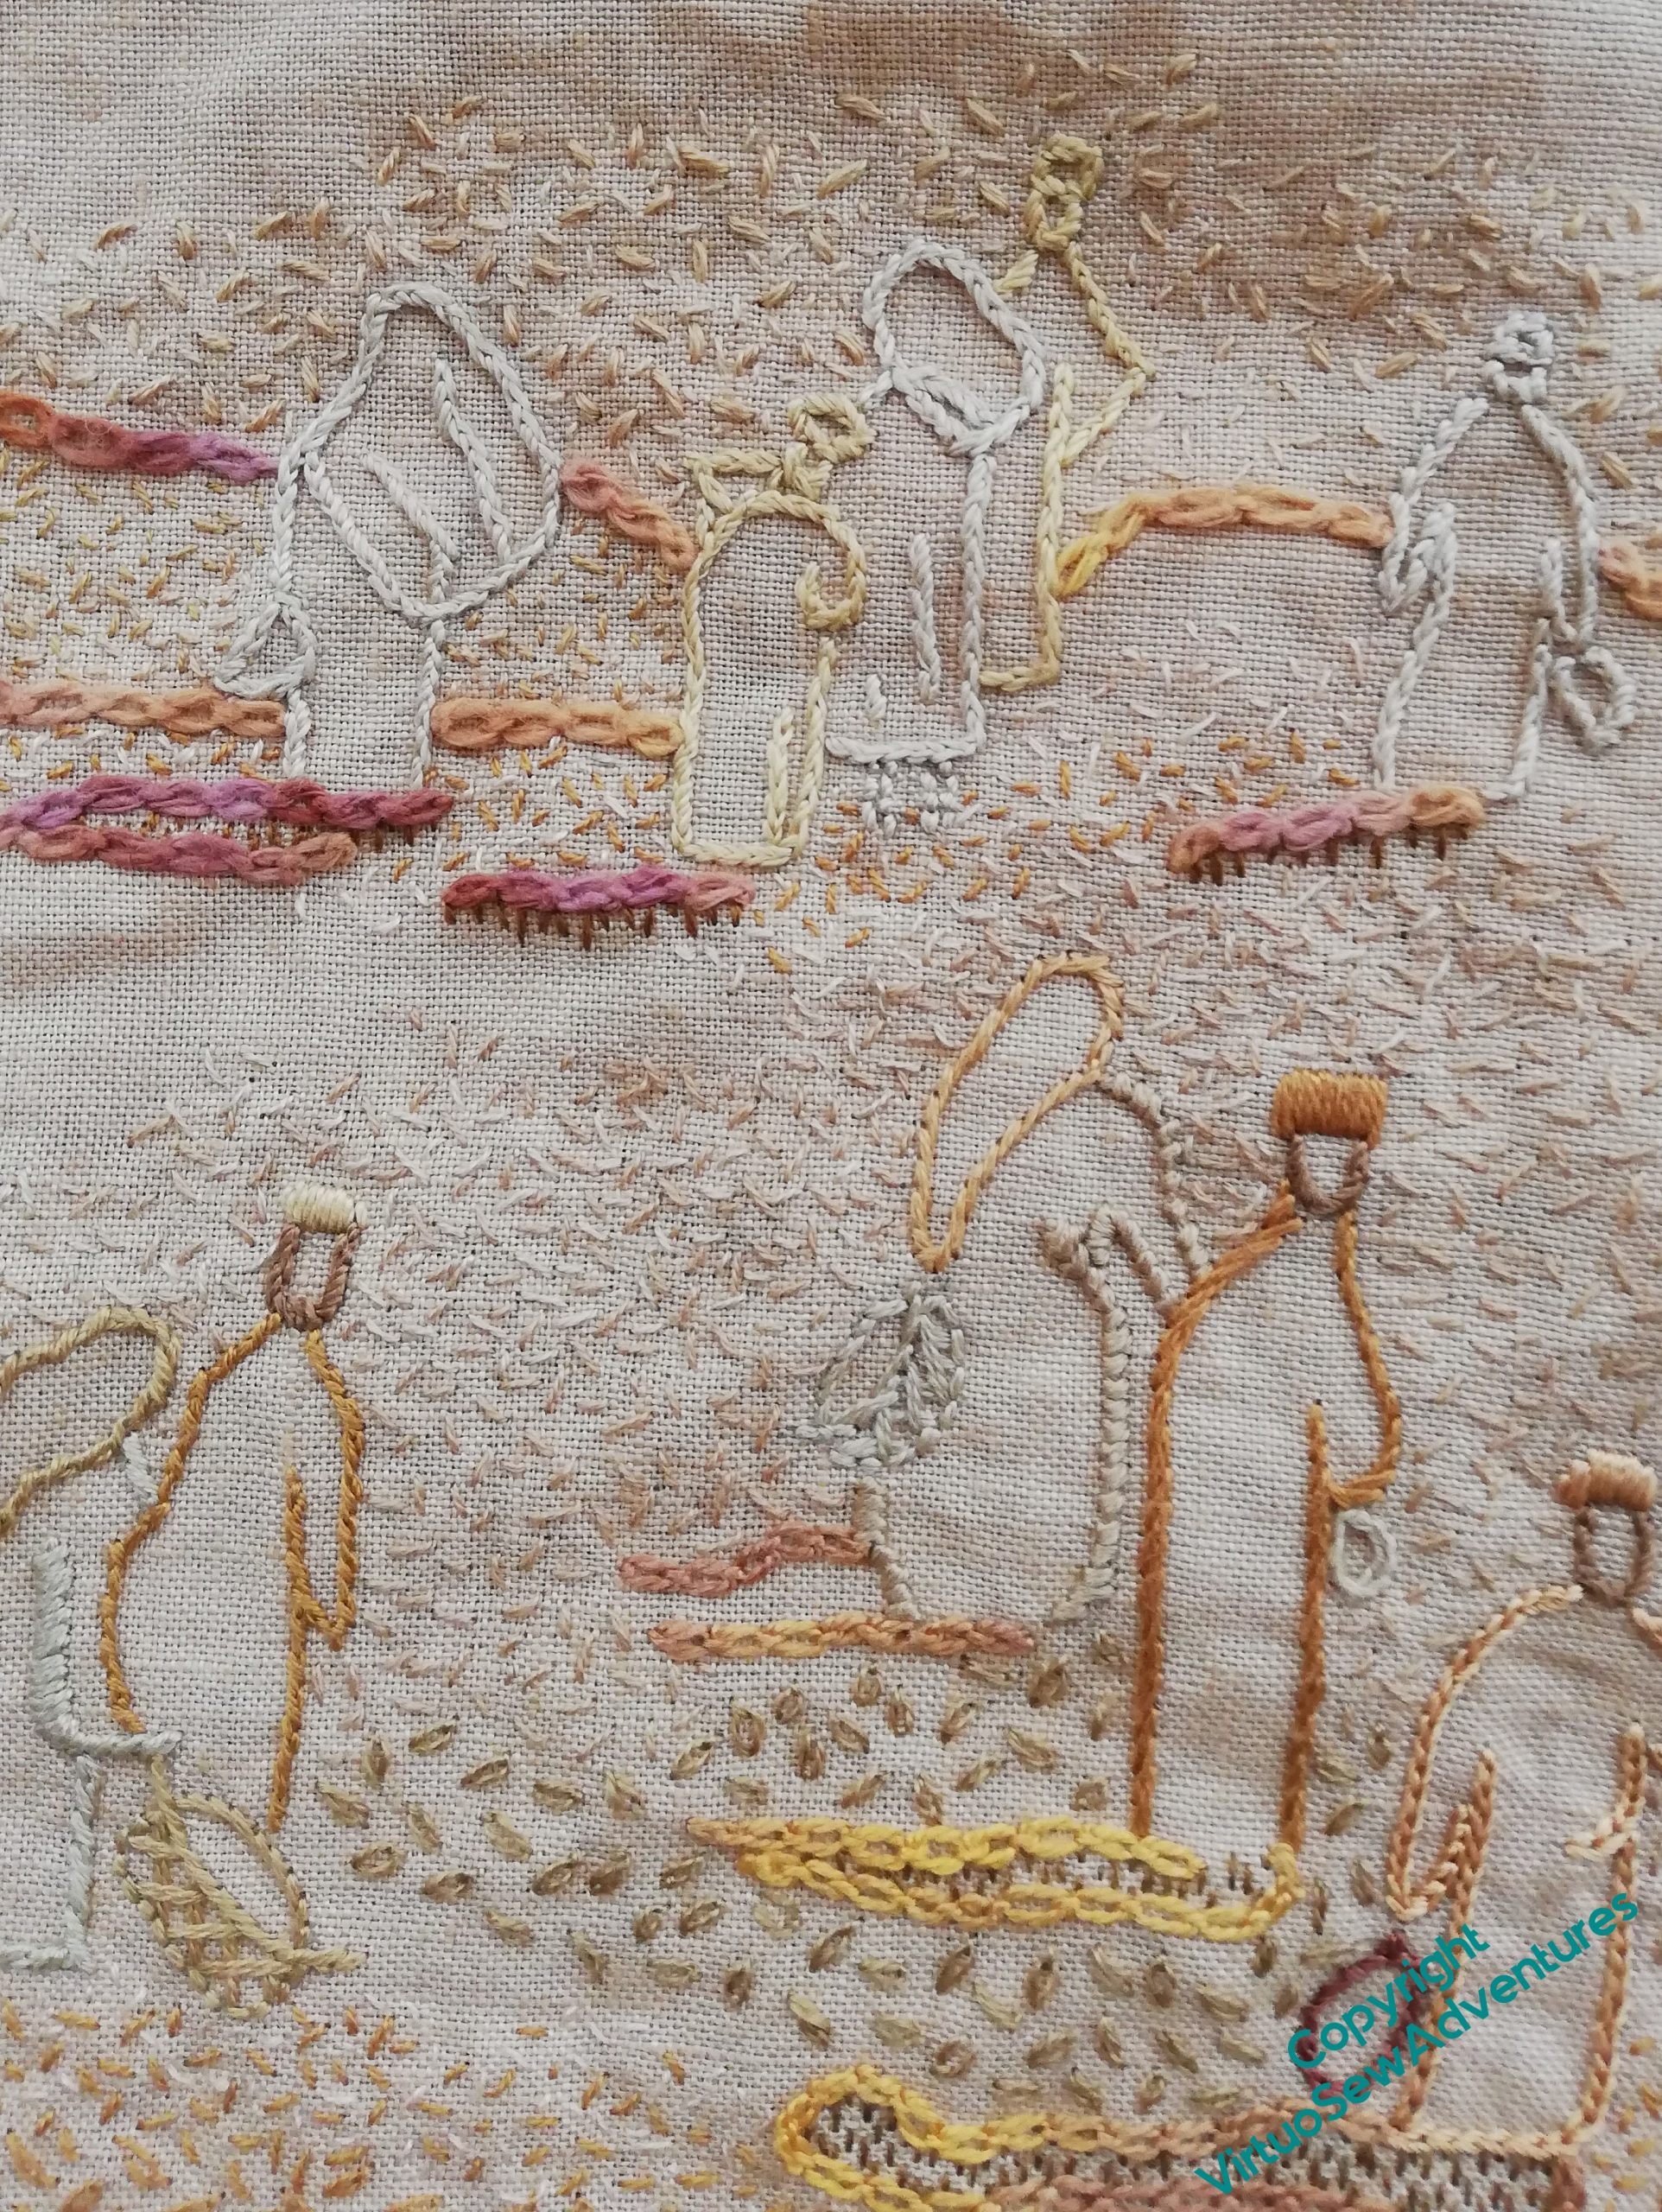
The distant section, I think, has worked. It does all look very dusty, and the distant figures are pushed out of the stitching and don’t vanish into the fabric as much as they did.
Adding the random single chain stitches in the mid ground has also helped. They may need some seed stitches scattered through them the meld the areas together, but I am hoping that each part of this scene will make more and more sense as I continue to work on it.
I haven’t quite worked out which stitch I used for the title on the Map of Amarna. Quaker Stitch? Whipped or Interlaced Reverse Chain Stitch? I even checked the early blog posts, where I read a somewhat elliptical:
For the main title I picked up one of the stitches from the Tudor and Stuart Masterclass – it’s lovely to find myself using a stitch I’ve learnt recently in a project I first started thinking about over fifteen years ago
Me, in 2012
Be warned by me – better recordkeeping reduces frustration!
Border Transfer
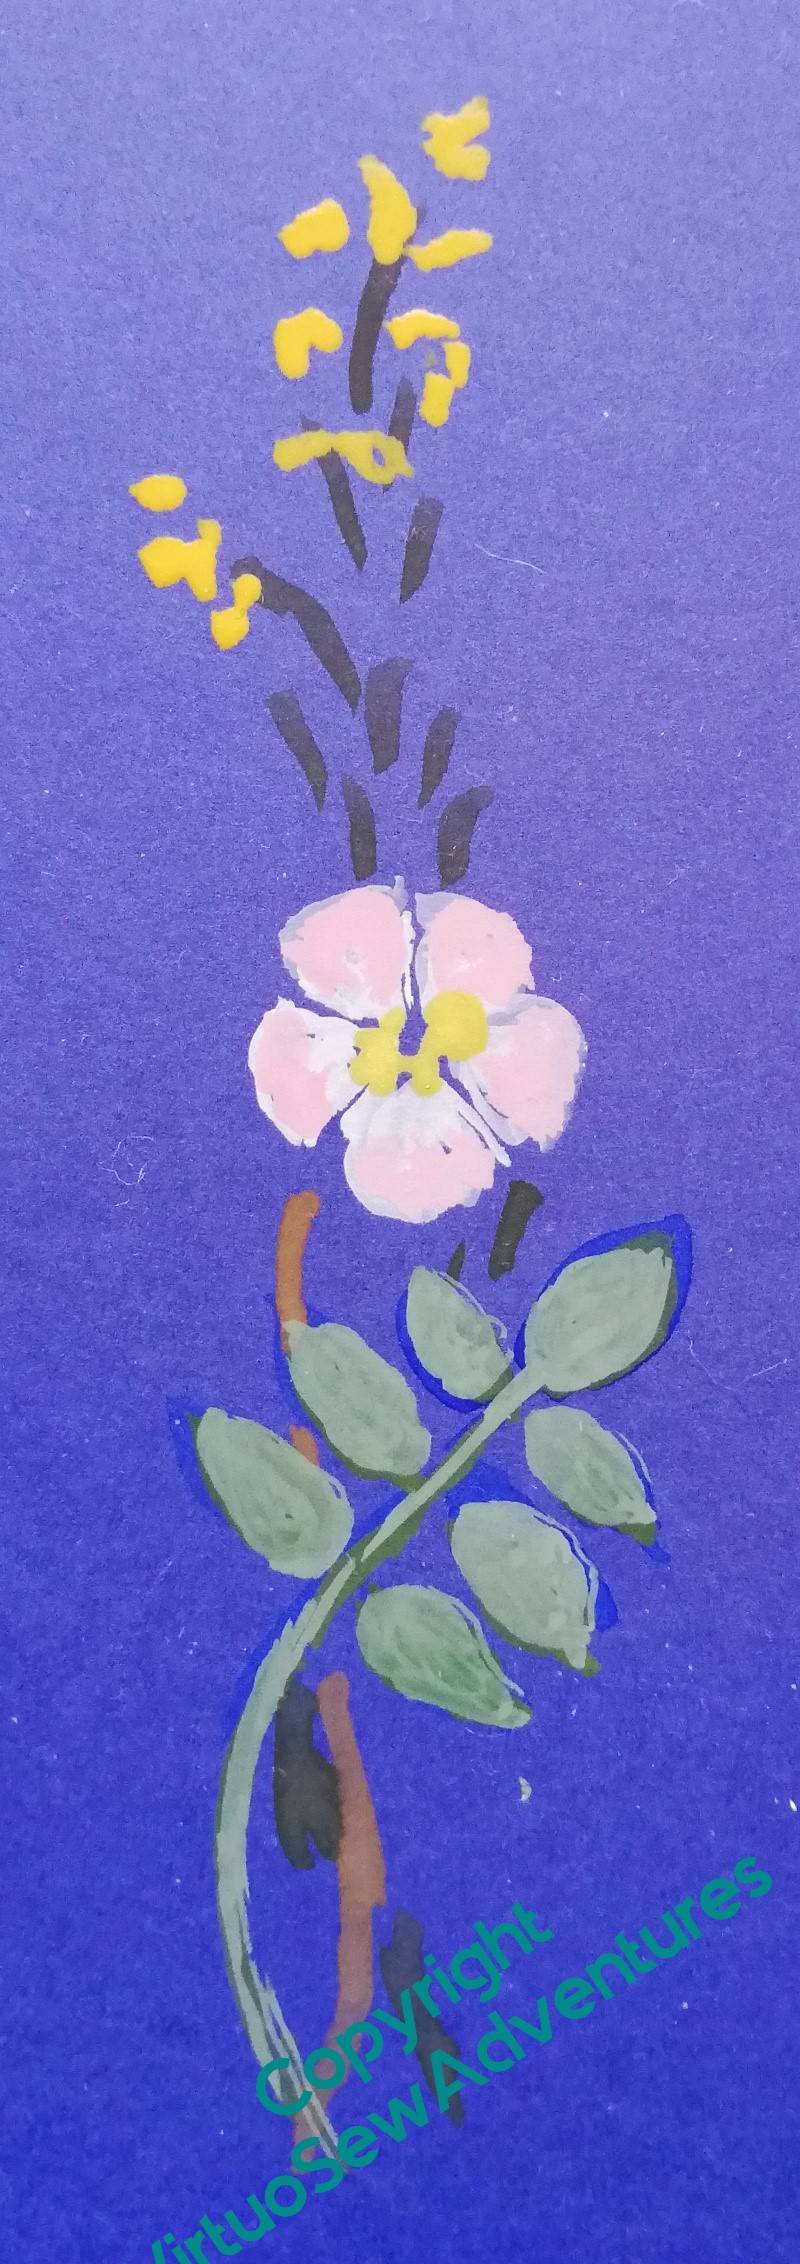
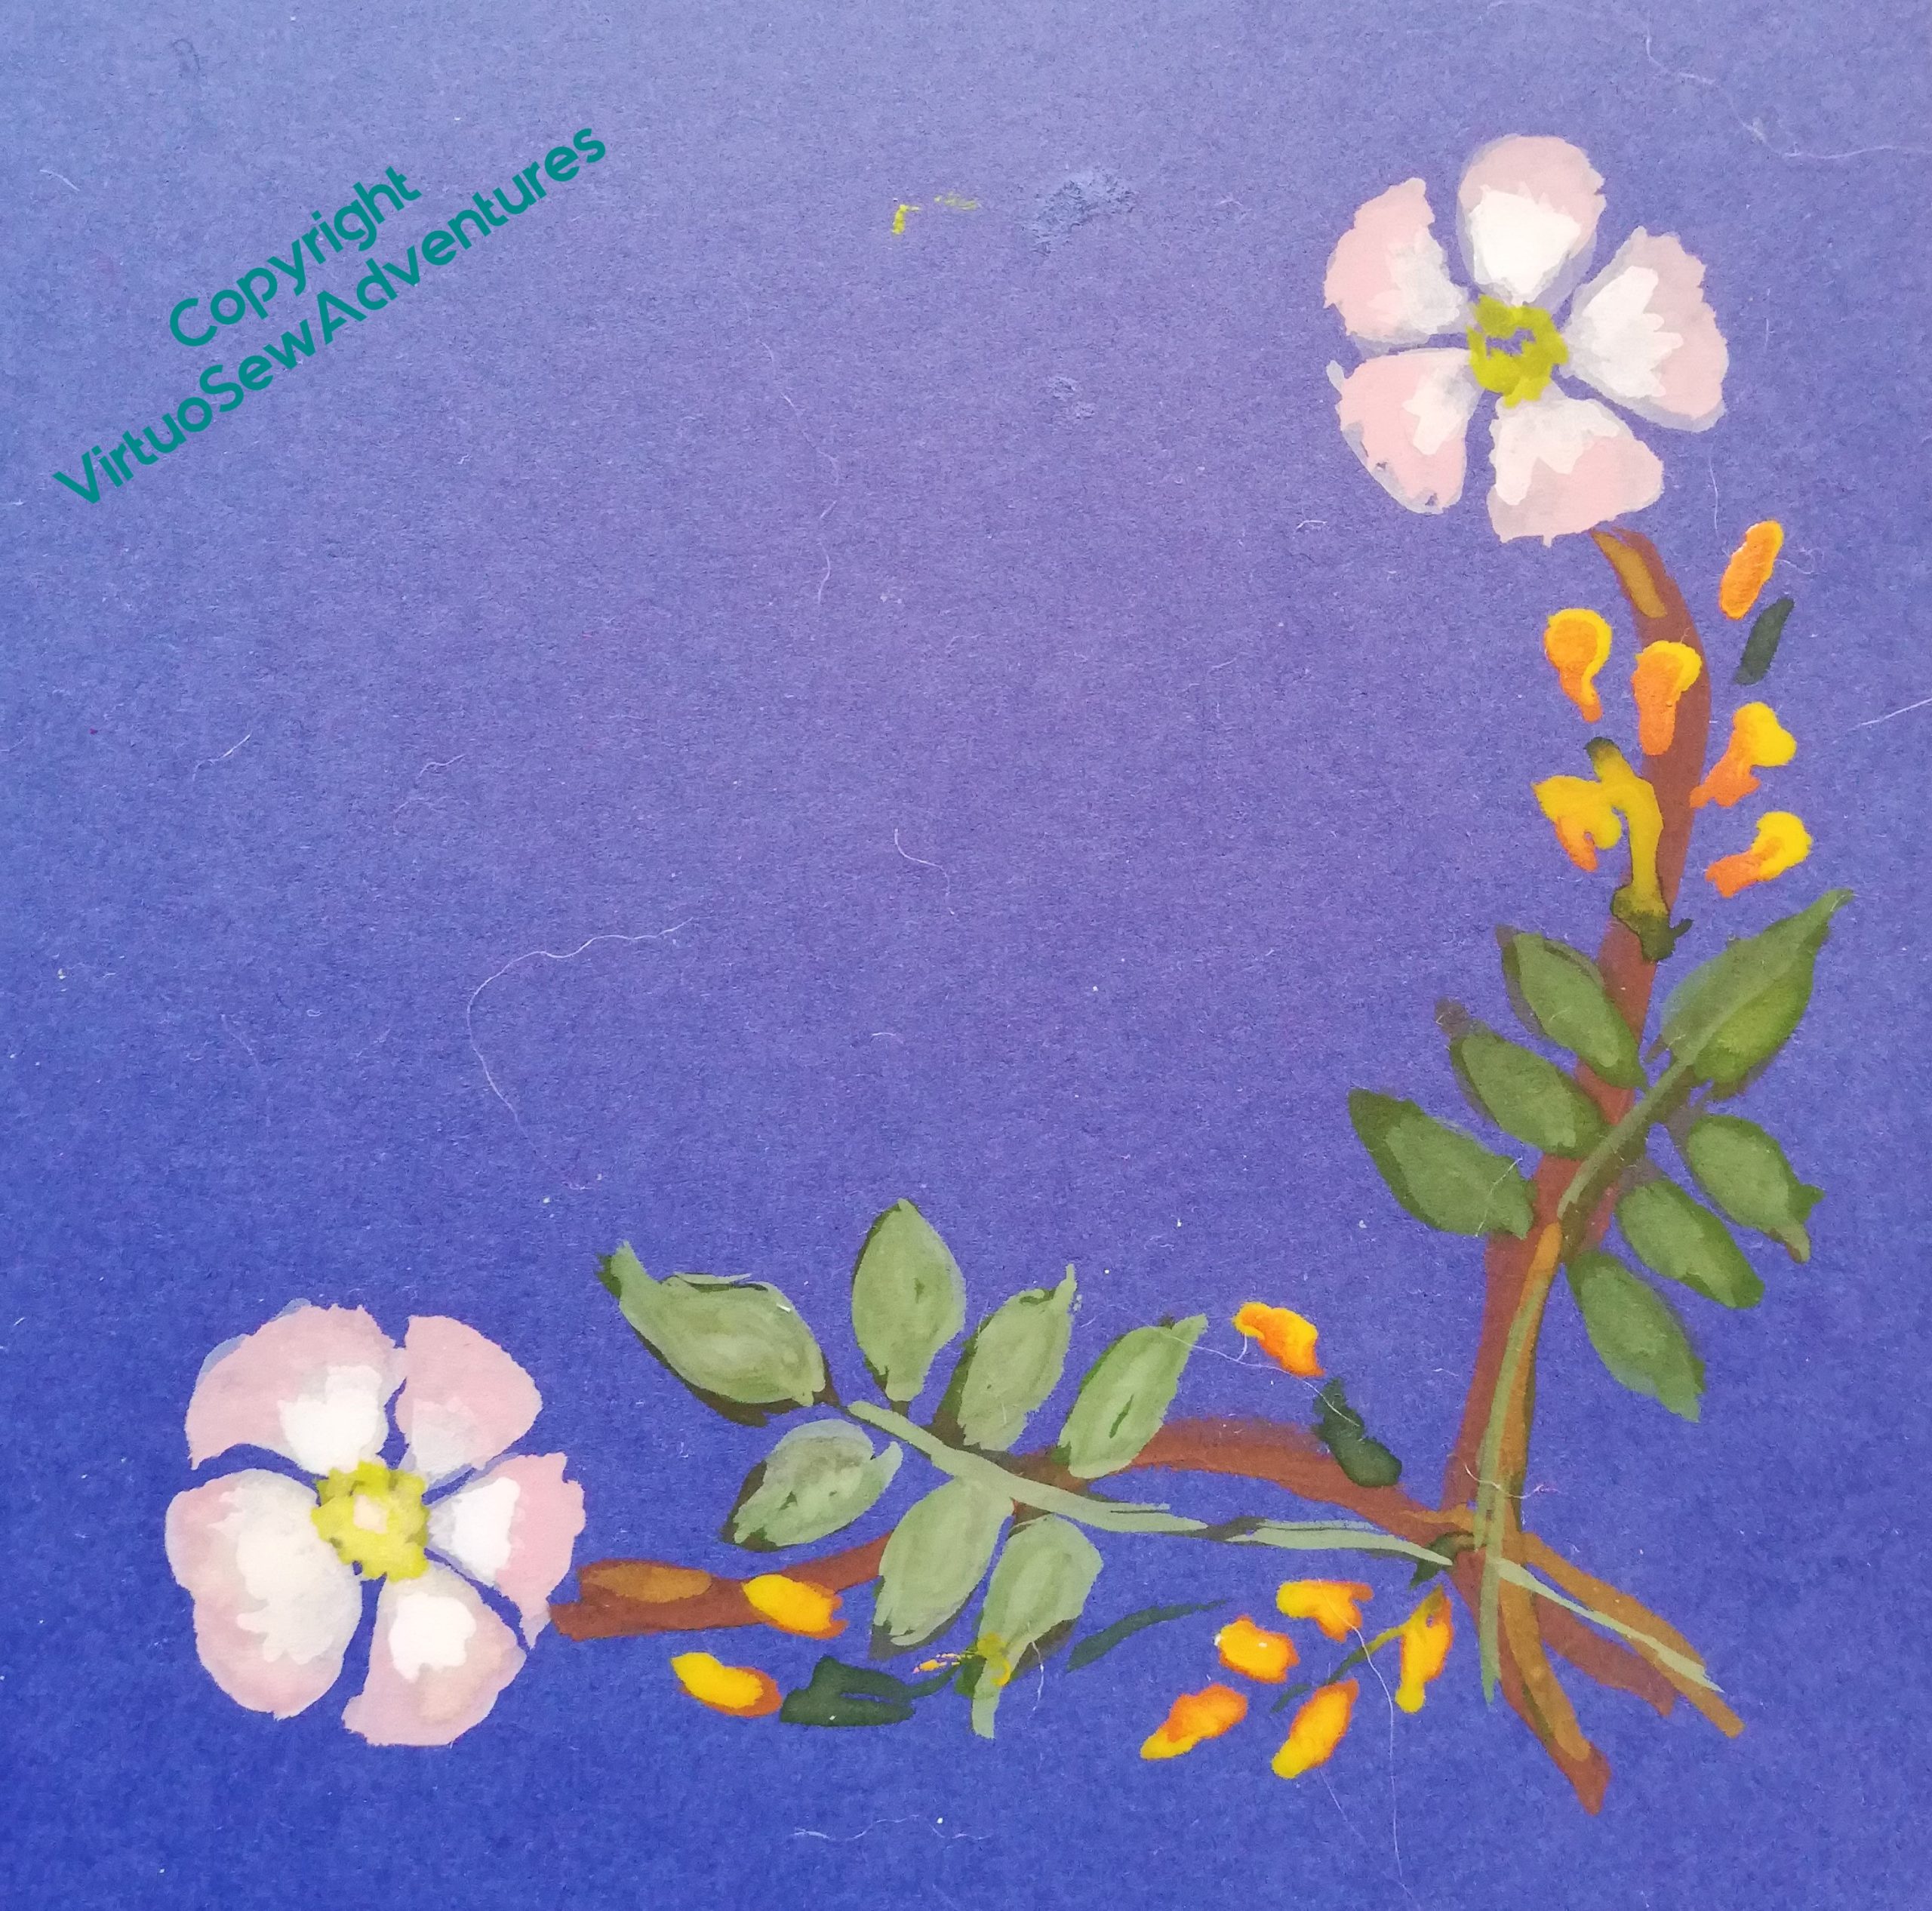
It may not be very obvious in the line drawing, but although the two sides of the corner sprig are very similar, they aren’t quite identical. I wanted to keep a sense of movement and flow, without the chaos of having every little bit different, so in the end I chose to create my corner sprigs based on two slightly different straight sprigs. In this photo you can see that the rose leaves are pointing in different directions, and the broom flowers are arranged differently.
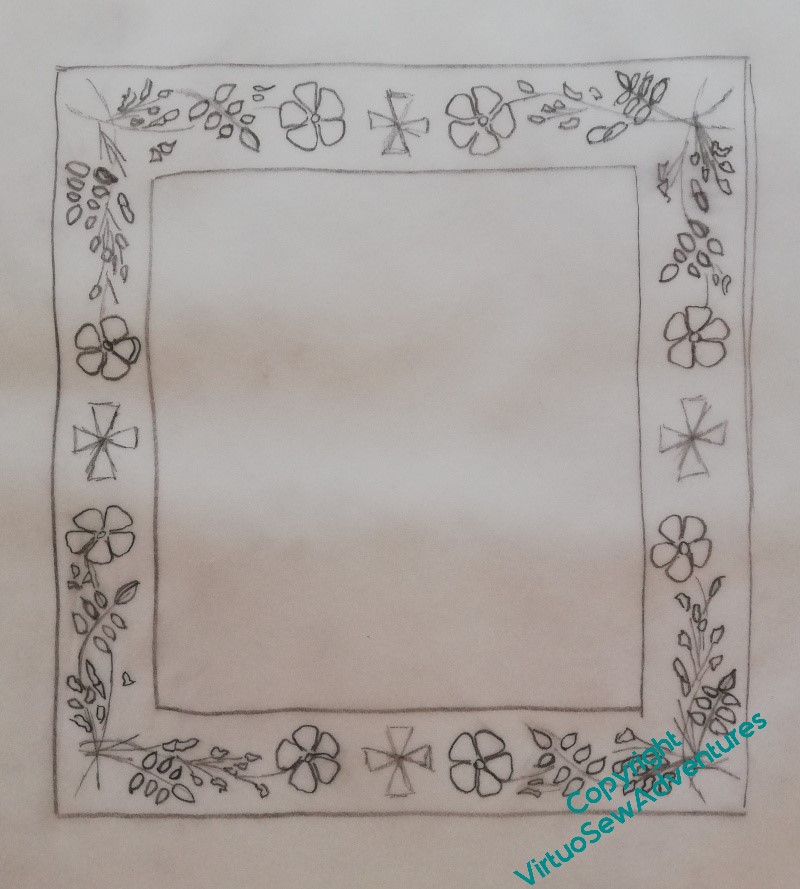
When I did the line drawing, I took my guiding sprig and turned it through ninety degrees for each corner. By doing that, there’s a sense of continuity, whereas I think if I had reflected the design in a mirror line through either the vertical or horizontal crosses, it would have created a rather stop-start effect. I was much impressed, years ago, by a programme about the carver and sculptor Grinling Gibbons, which said that he always aimed for balance rather than symmetry. I like that, it feels more human somehow, so that’s what I try to do too.
Now, however, I have to transfer the design to the border. Clearly that’s not going to be possible using prick and pounce or a drawing method, so I have chosen to create a drawing on tissue paper of the main elements, and running stitch along the design lines. I am hoping that this will be sufficient!
In any case, it allows time for the extra thread I had to order from Devere Yarns to arrive..
Finally, two Announcements:
- The eagle eyed among you may have noticed that the Ko-fi link went away and is now back (plug-ins not playing nicely!). I’m still hoping to put together an exhibition and a book about Dreams of Amarna, and any support, whether financial, moral, or material (suggesting venues, publishers, copy-editors) would be gratefully received!
- You may also noticed the lack of a link to Twitter. I’m mostly on Mastodon now, as @virtuosew@mathstodon.xyz, for reasons that anyone else who’s been on Twitter lately will probably understand very well!
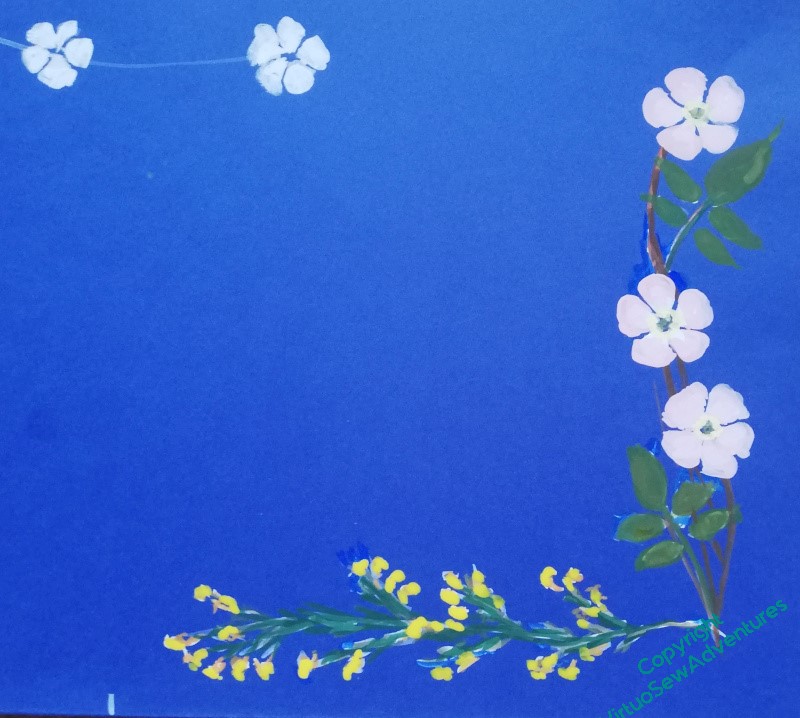
Border Design Finally Nailed!
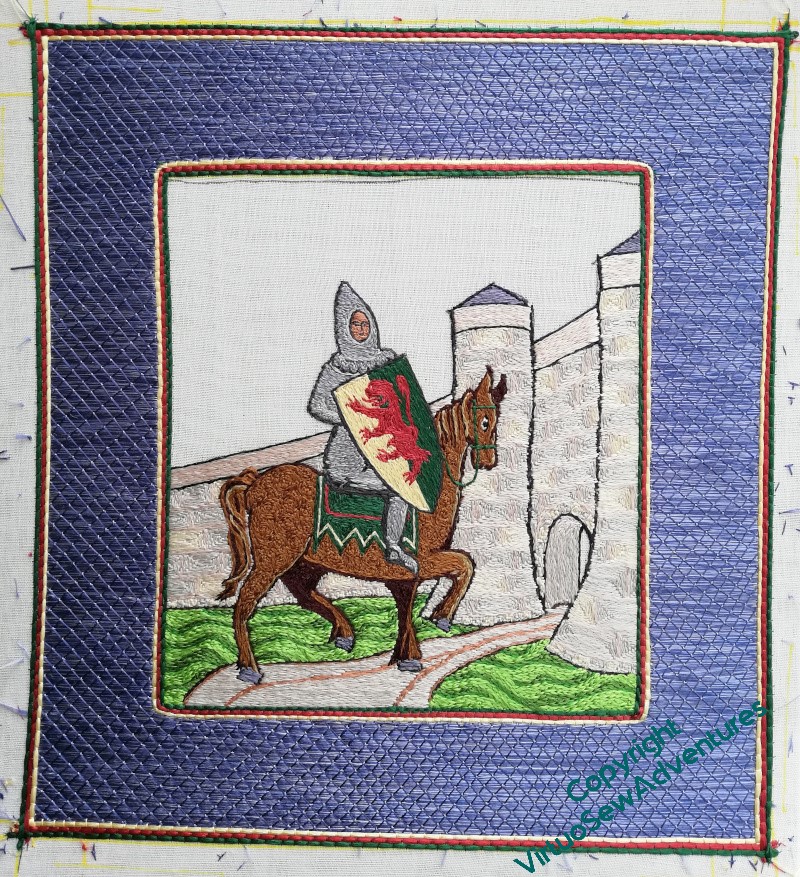
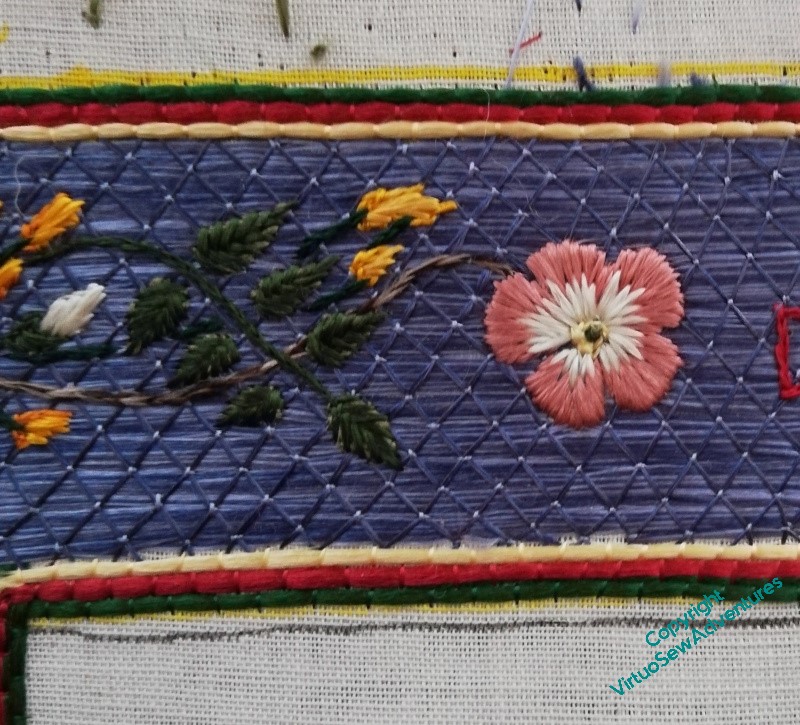
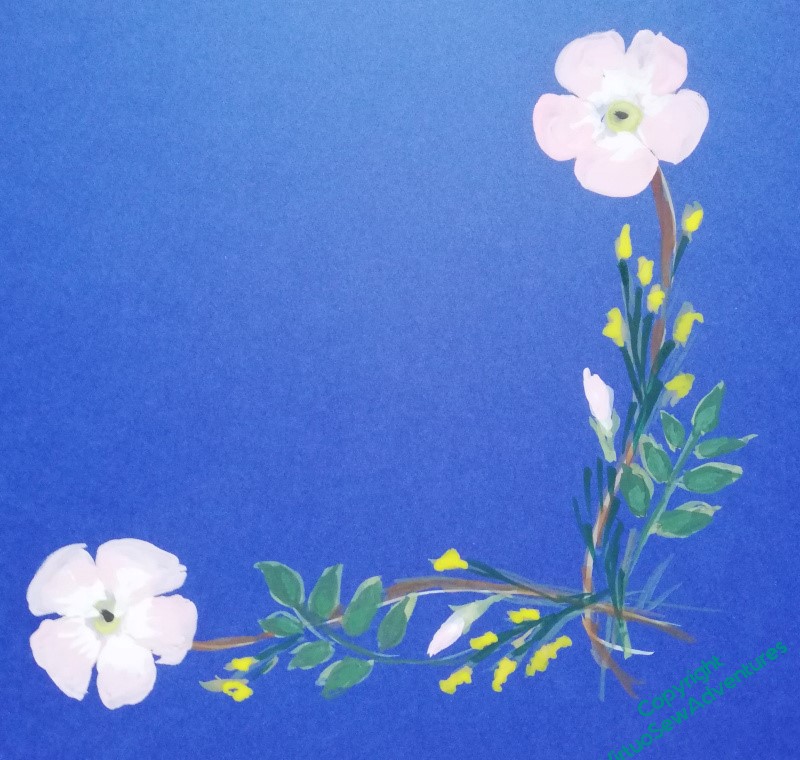
Once I had the border trim in place, I felt I really had to get the details sorted out – but having that trim in place seemed to help. The dark green, red, and yellow on the inside, mirrored by the yellow, red, and dark green on the outside seem to bracket the blue just exactly as I planned, and I began to feel that all that painting and puzzling might have been worthwhile.
So I tried photocopying the full piece to see whether playing with my cut out sprigs on a flat surface I wasn’t worried about snagging might be useful.
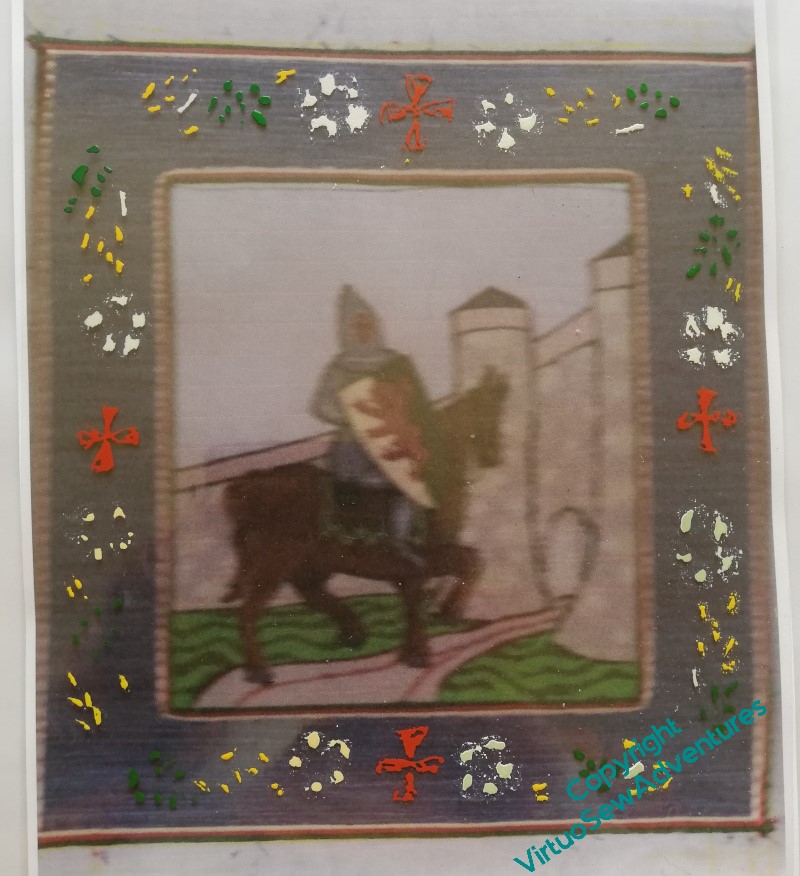
In actual fact, the photocopying wasn’t a great success, but it was close enough that when I overlaid an old acetate and experimented with the border sprig I’d finally, tentatively, settled on, I suddenly became a lot happier. The paint is gouache, and it really doesn’t get along well with the acetate, but I felt that it gave me just enough of the sense of the design that I could be confident it would evoke an illuminated manuscript – which is what I was hoping it would do.
It’s always so pleasing when a plan comes together!
The next stage was to produce a line drawing of the planned design, and use that to transfer the final design to the piece itself.
And this was the point at which all that painting and drawing and redrawing began to show real benefits, because even though the photocopied sprig design I was using as a guide was distinctly muddy, I found myself drawing the lines I needed with a freedom from care I rarely experience with pencil in hand.
Well now, who’d ha’ thunk – more practice does produce better effects!
Still working on that border!
I continue to wrestle with the arrangement of broom and dog roses – my goodness, am I ever glad I’ve been working on planning with paint over the last two years or so! I do some exploration with digital images, but as it often results in a sore arm from mouse and trackpad manipulation, painting is a much better option. This selection of straight sprigs could be assembled into corner decorations, and potentially tweaked in size to fill a side or leave space for the Templar crosses.
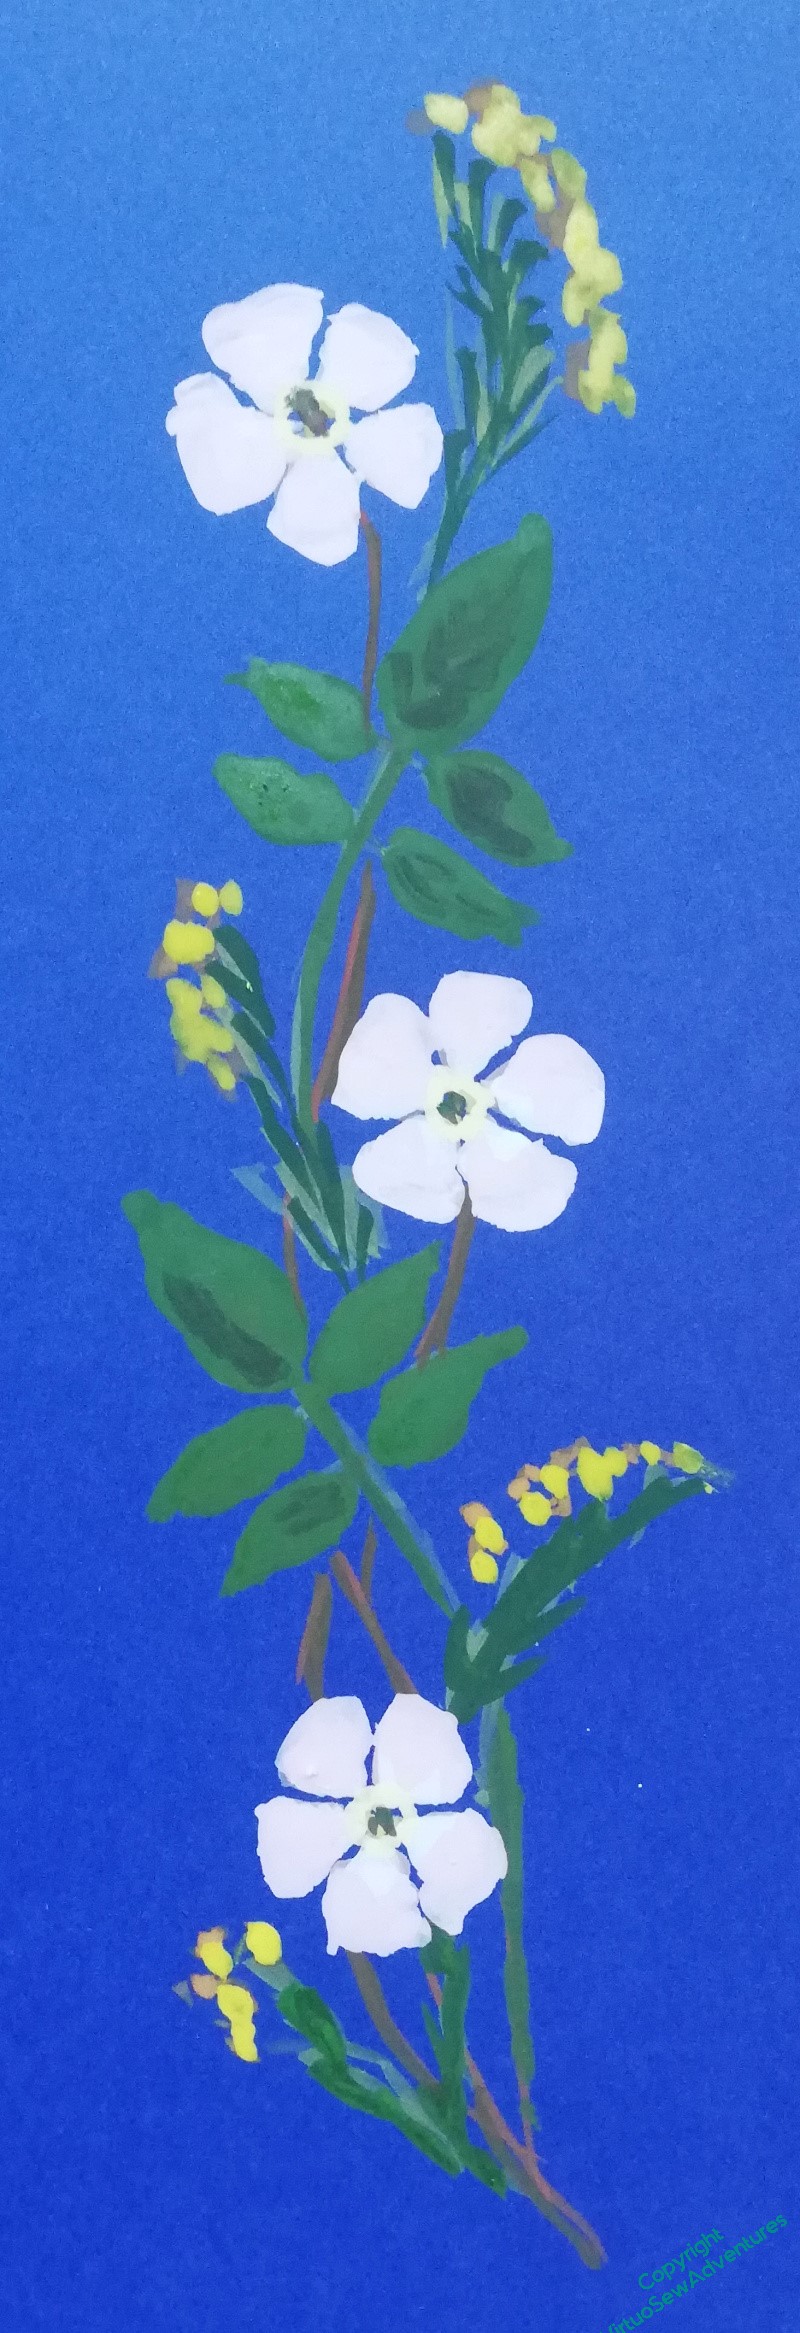
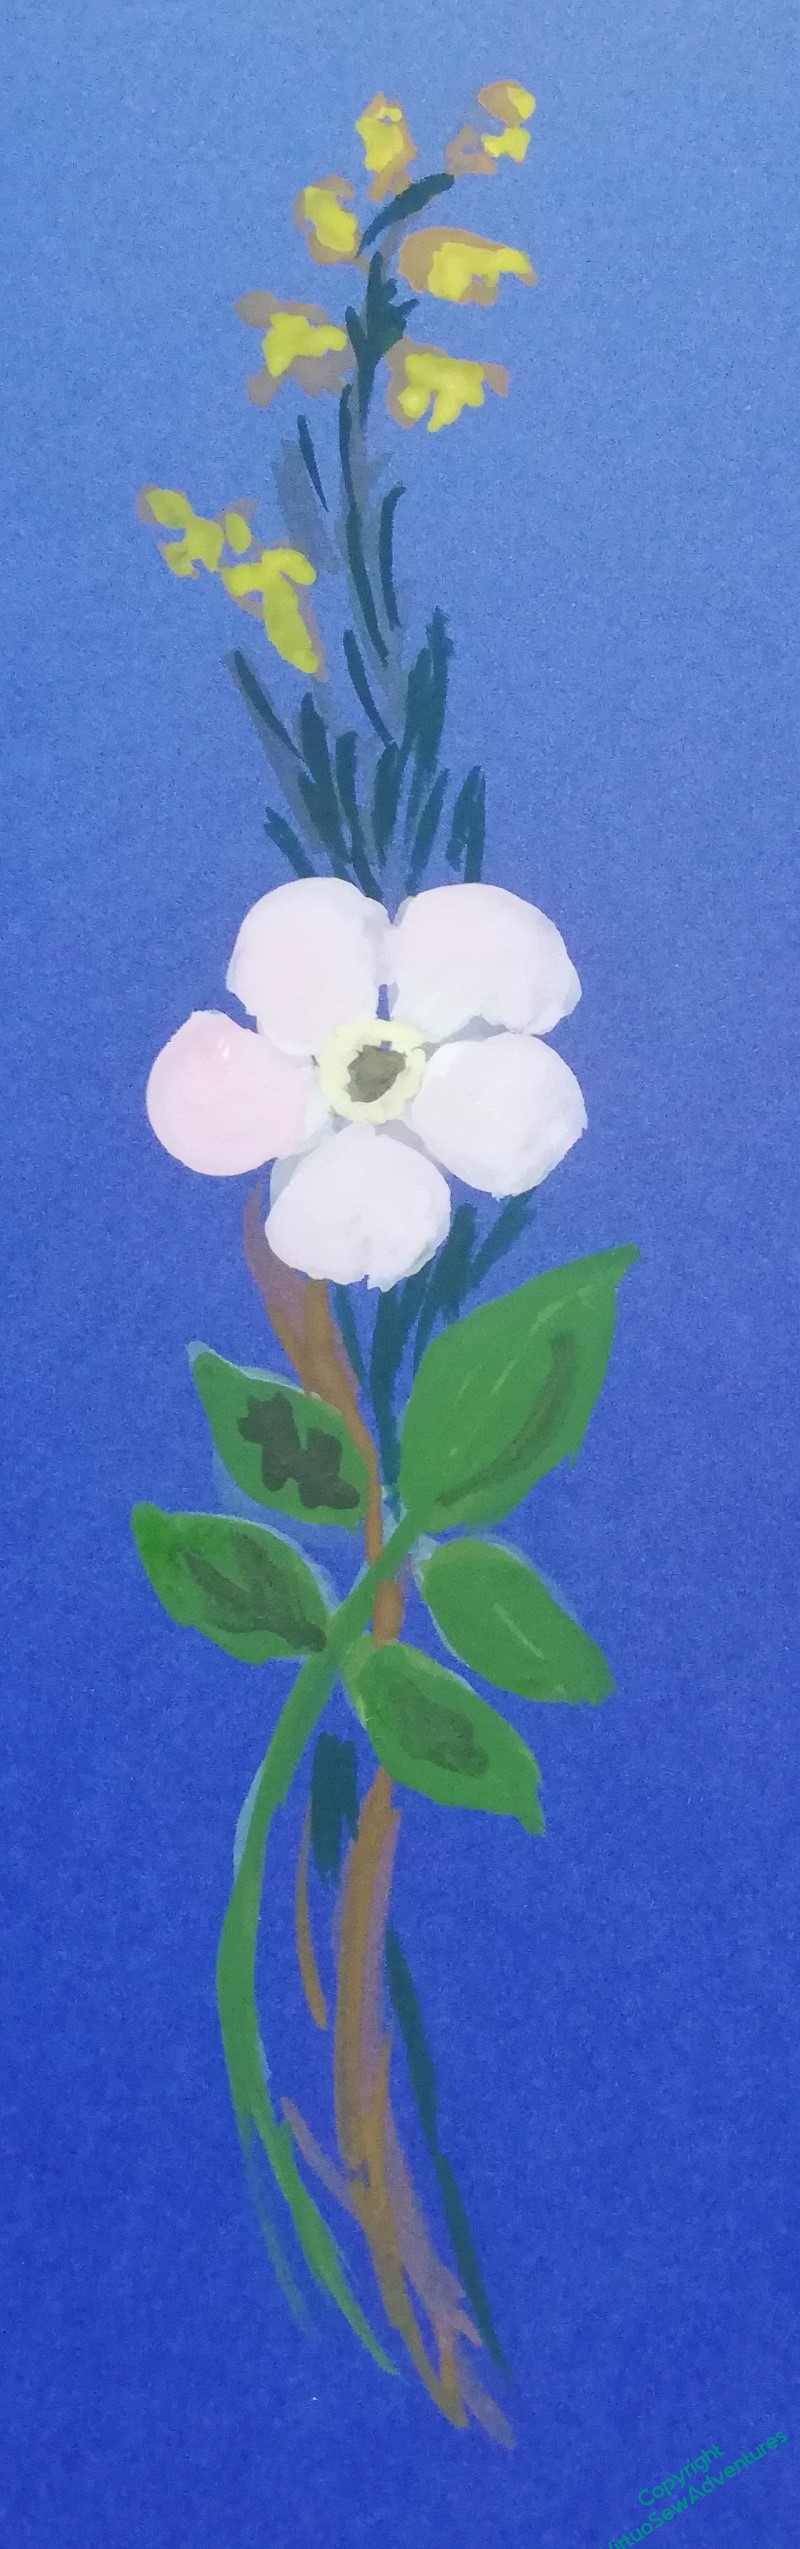
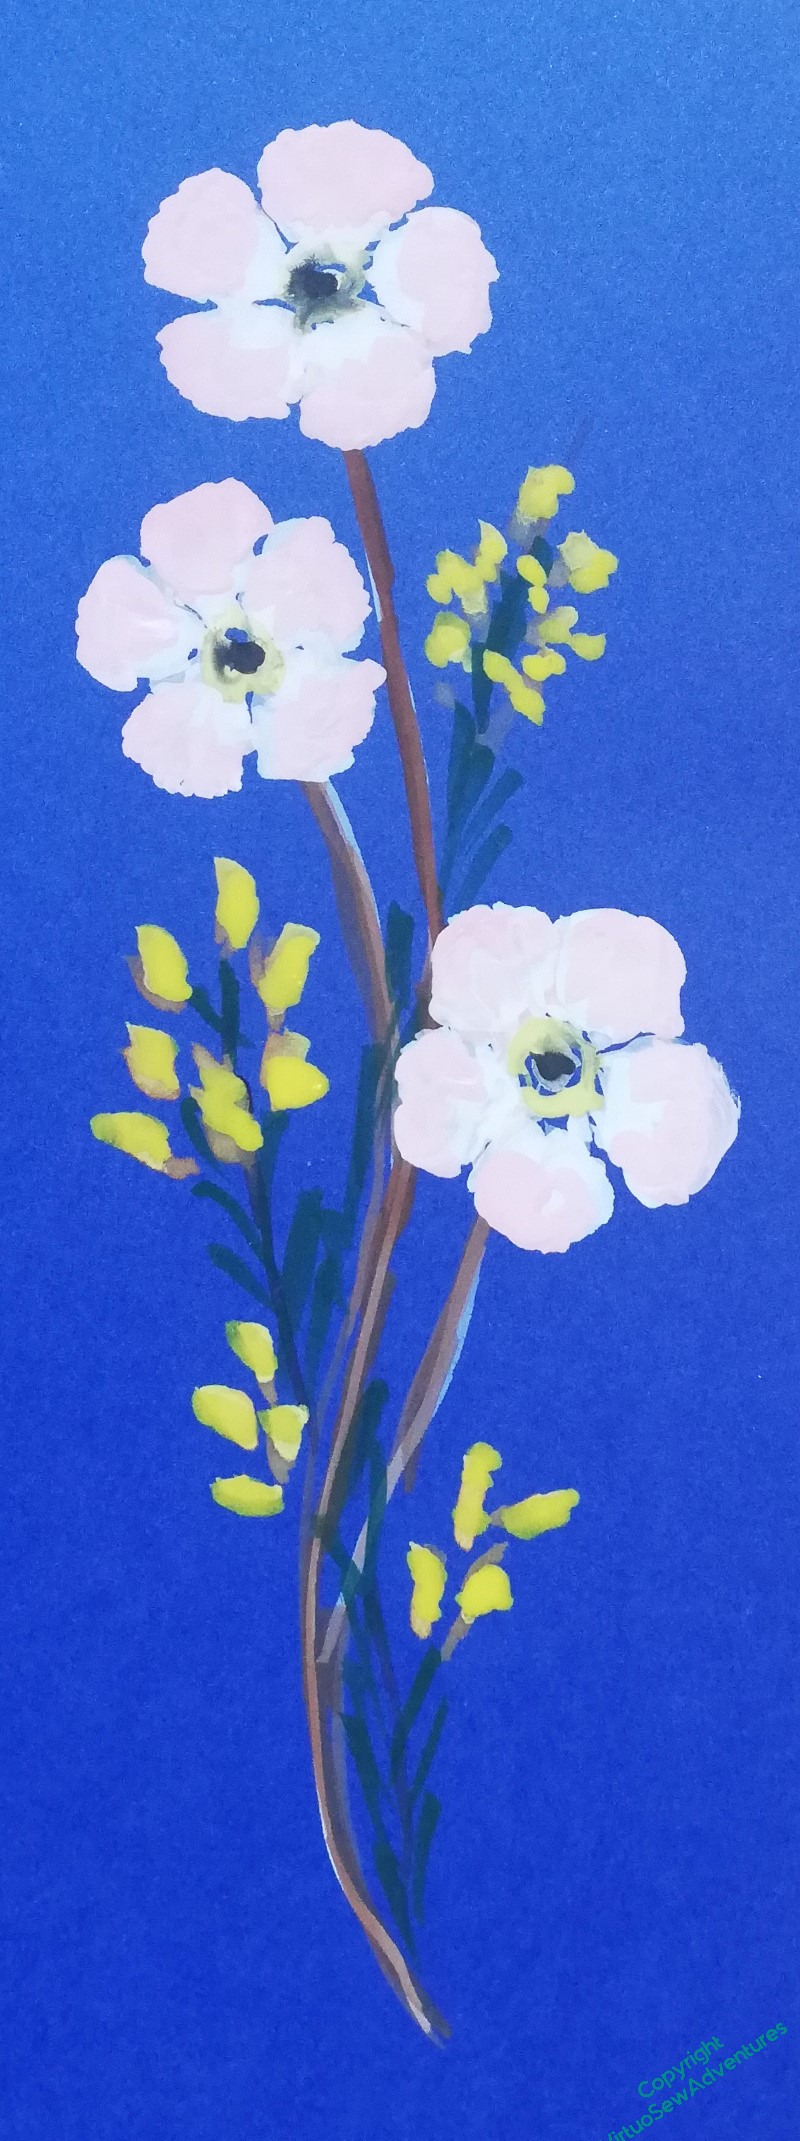
Indeed, I have painted so many straight sprigs and corner designs – so large, to make it easier to paint – that I’ve become quite blind and jaded with them, and can’t decide which I like. I did realise that I needed to put them against William and the chateau de Tancaville, so I photographed them and printed them out. And then told the printer to try something smaller and go again.

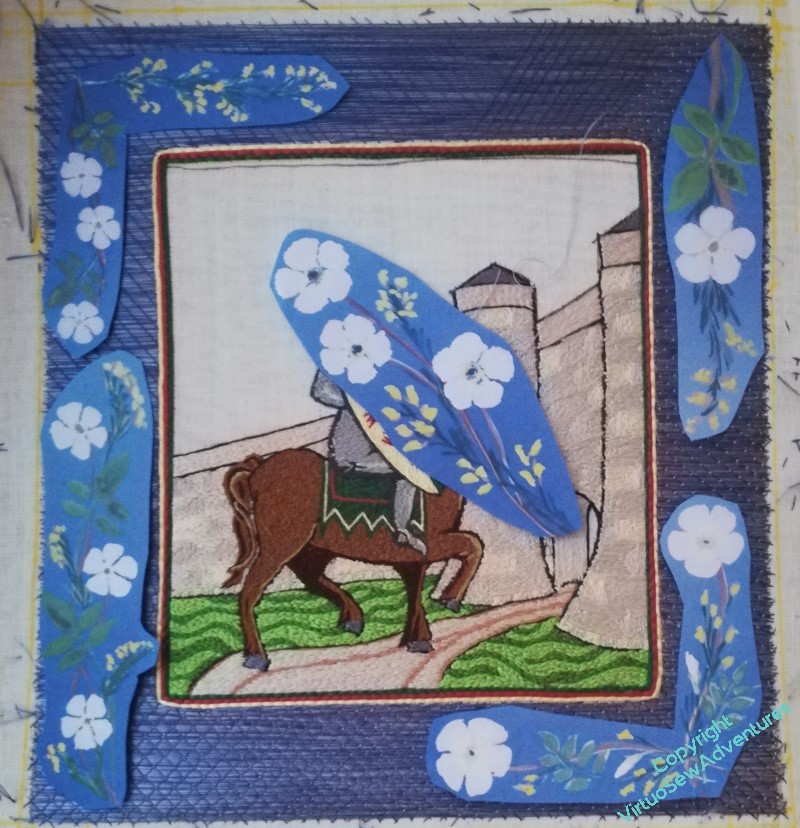
And that showed that those sprigs would have to be, if anything, even smaller than I had anticipated.
This tells me that I will have to be very much more careful about the colours I use, and the number of strands. I can’t afford to produce a border that looks muddy or confused, but equally, it mustn’t fight with William or his underside couched golden sky.
Tricky. Very tricky.
Exhibition – For Worship and Glory II
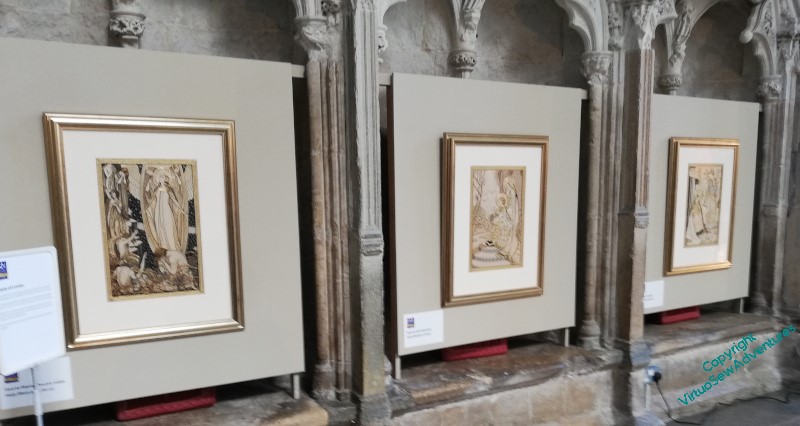
A few weeks ago I went to see the Royal School of Needlework Exhibition “For Worship and Glory”, in its second incarnation, in the Lady Chapel in Ely. The centrepiece of the exhibition was a series of embroideries inspired by the Litany of Loreto, donated to the RSN when Mayfield Convent in Surrey was closed during the 1970s. Since I saw the first version of the exhibition a few years ago, it has been discovered that the designs were created by an Italian graphic designer, Ezio Anichini, at the beginning of the 20th Century.
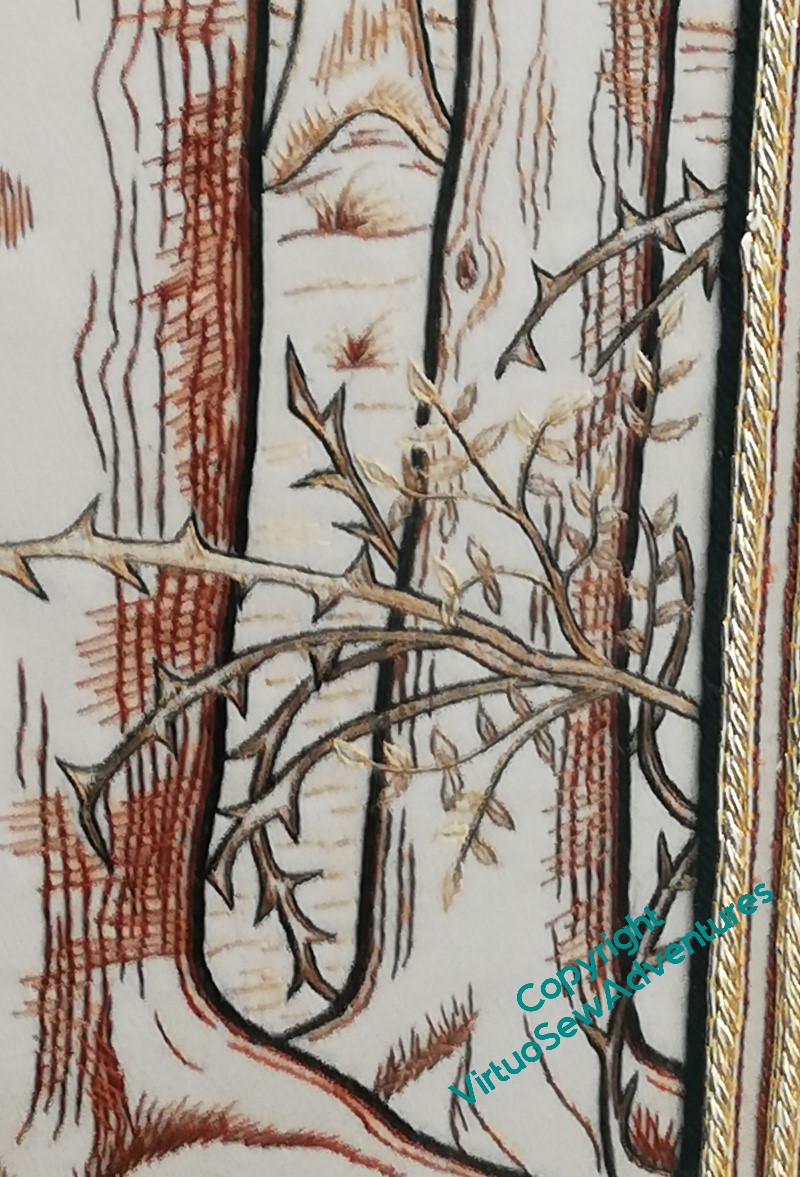
The panels are in a very restricted palette using silk floss and filoselle – browns and golds, some black, and a very tiny amount of blue, and although the stitches are described as “mostly long and short”, with the addition of stem stitch, split stitch and straight stitches, the panels didn’t have the heaviness I associate with long and short stitch. On the contrary, my primary impression was to be astonished and impressed by the manner in which the works were clearly embroideries and yet maintained a kinship with the drawn design. Look at the bark on this picture, the sketchy and textural feel to it, contrasting with the almost naturalistic rendering of the briars.
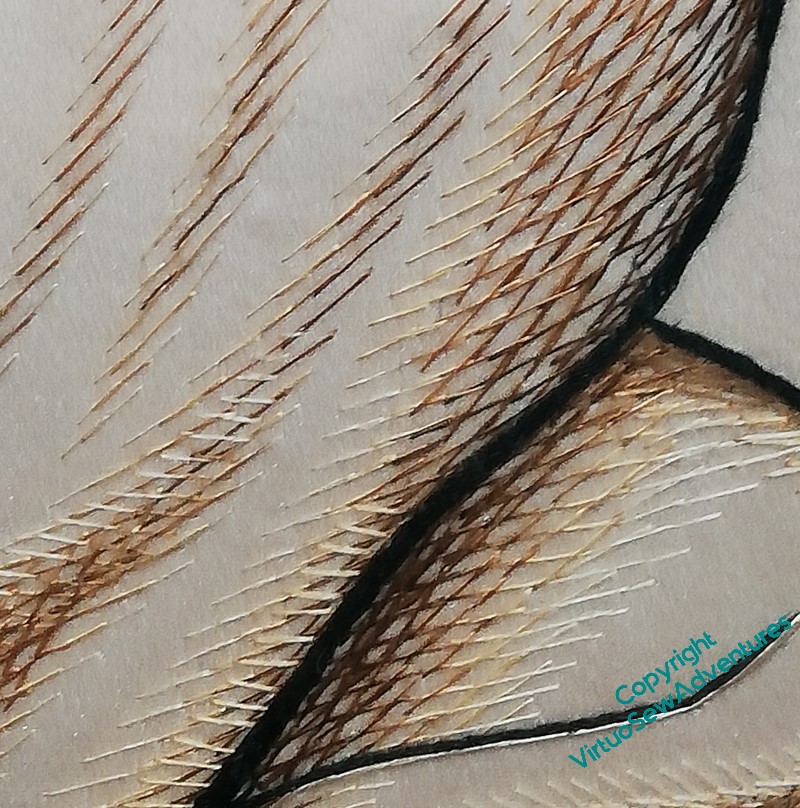
Even more strikingly – and my phone camera, in spite of the wonderful light in Ely’s Lady Chapel, really wasn’t up to the task – look at the rendering of the folds of fabric here. The stitches are just straight stitches, using carefully chosen shades and thicknesses of thread, at carefully judged spacings and angles, and yet the impression of flowing folds in fabric is beautifully realized.
I was very glad I’d thought to take my lorgnettes, because there were so many enchantingly embodied ideas that I wanted to examine!
Ready to Start on William Marshall…
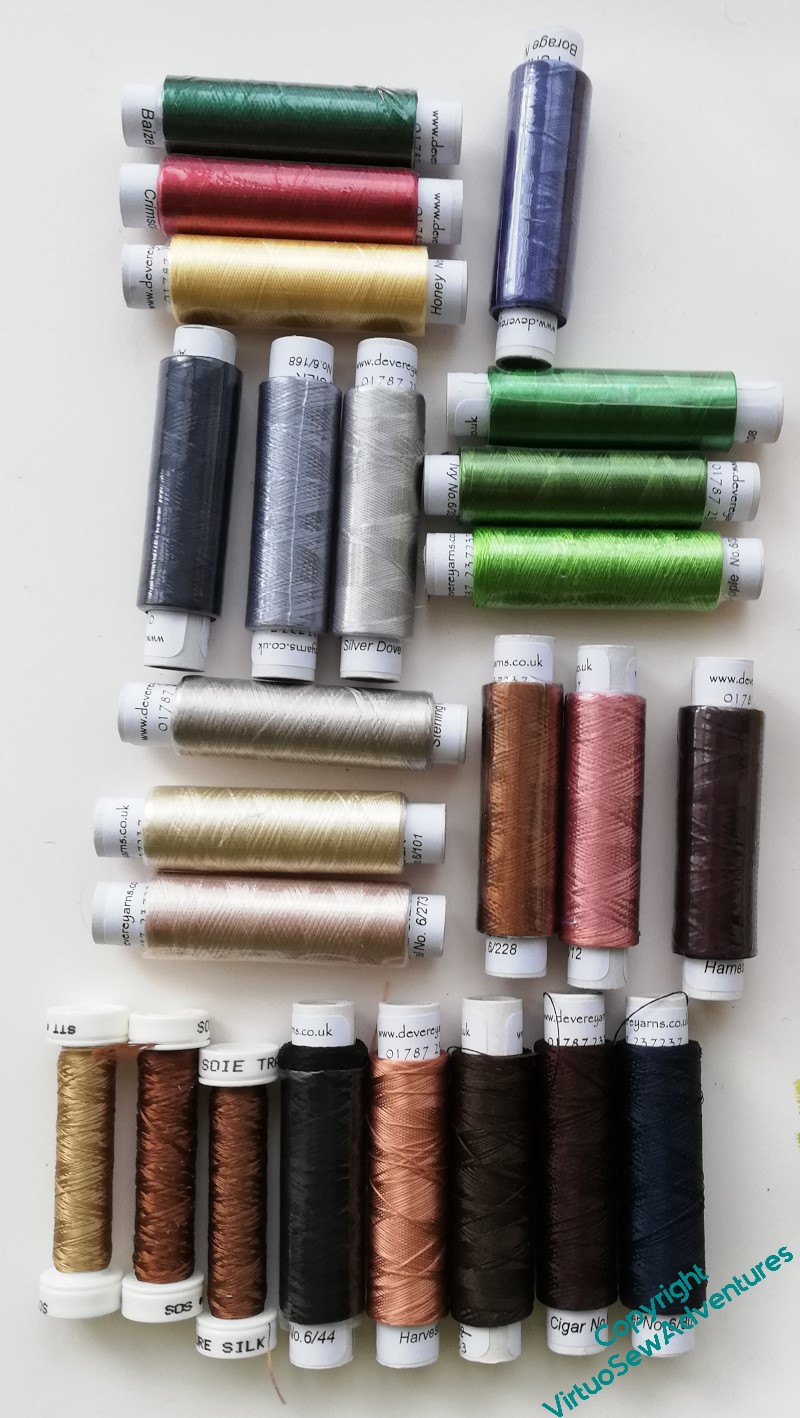
Having spent some time in my stash, deciding that mixing even filament silks might be a bit unpredictable, I finally pulled myself together and placed an order with Devere Yarns. While I waited for them to arrive (it didn’t take long), I went back to Tanya’s book and read the early technique sections again. Homework is always more fun when you’re interested.
I do have some darks left over from the Amarna Family Group, so the outlining is sorted. I’ve got three stone colours, three shades for William’s armour, three greens for grass, three shades for the horse, the three heraldic colours for the shield, and a blue for the slate roofs on the turrets.
The blue is probably also going to be the colour I use for the border.
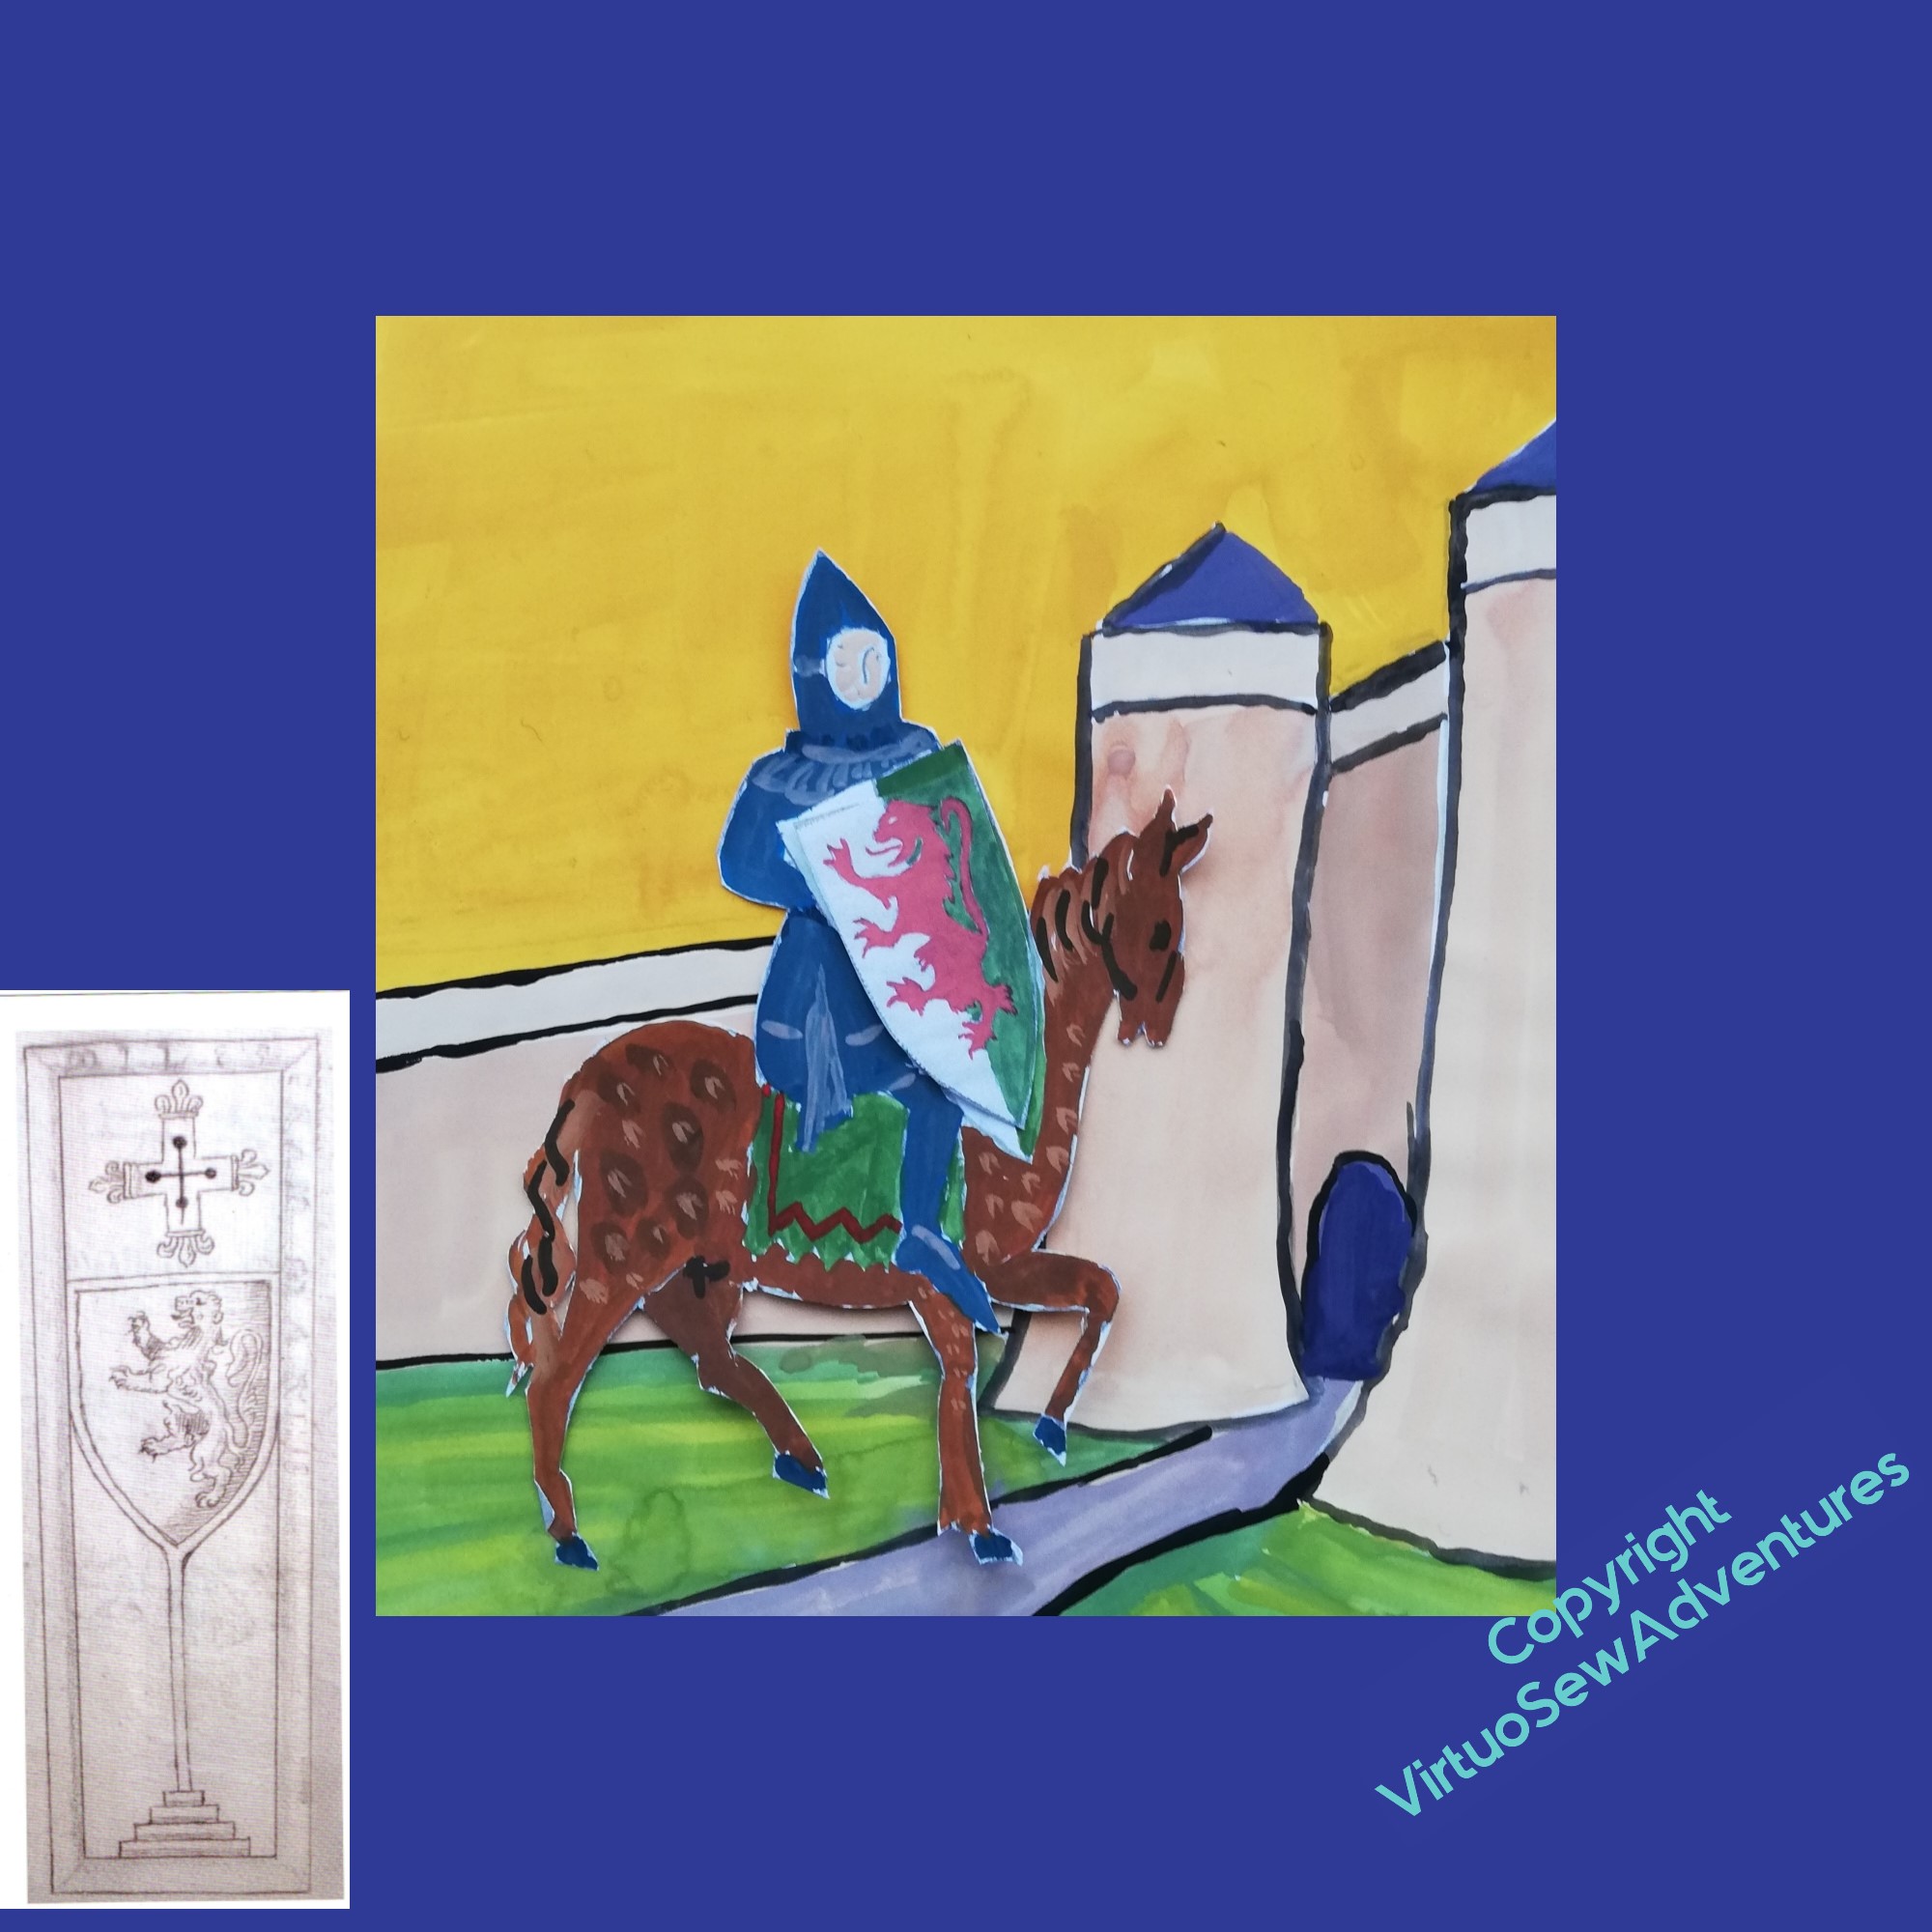
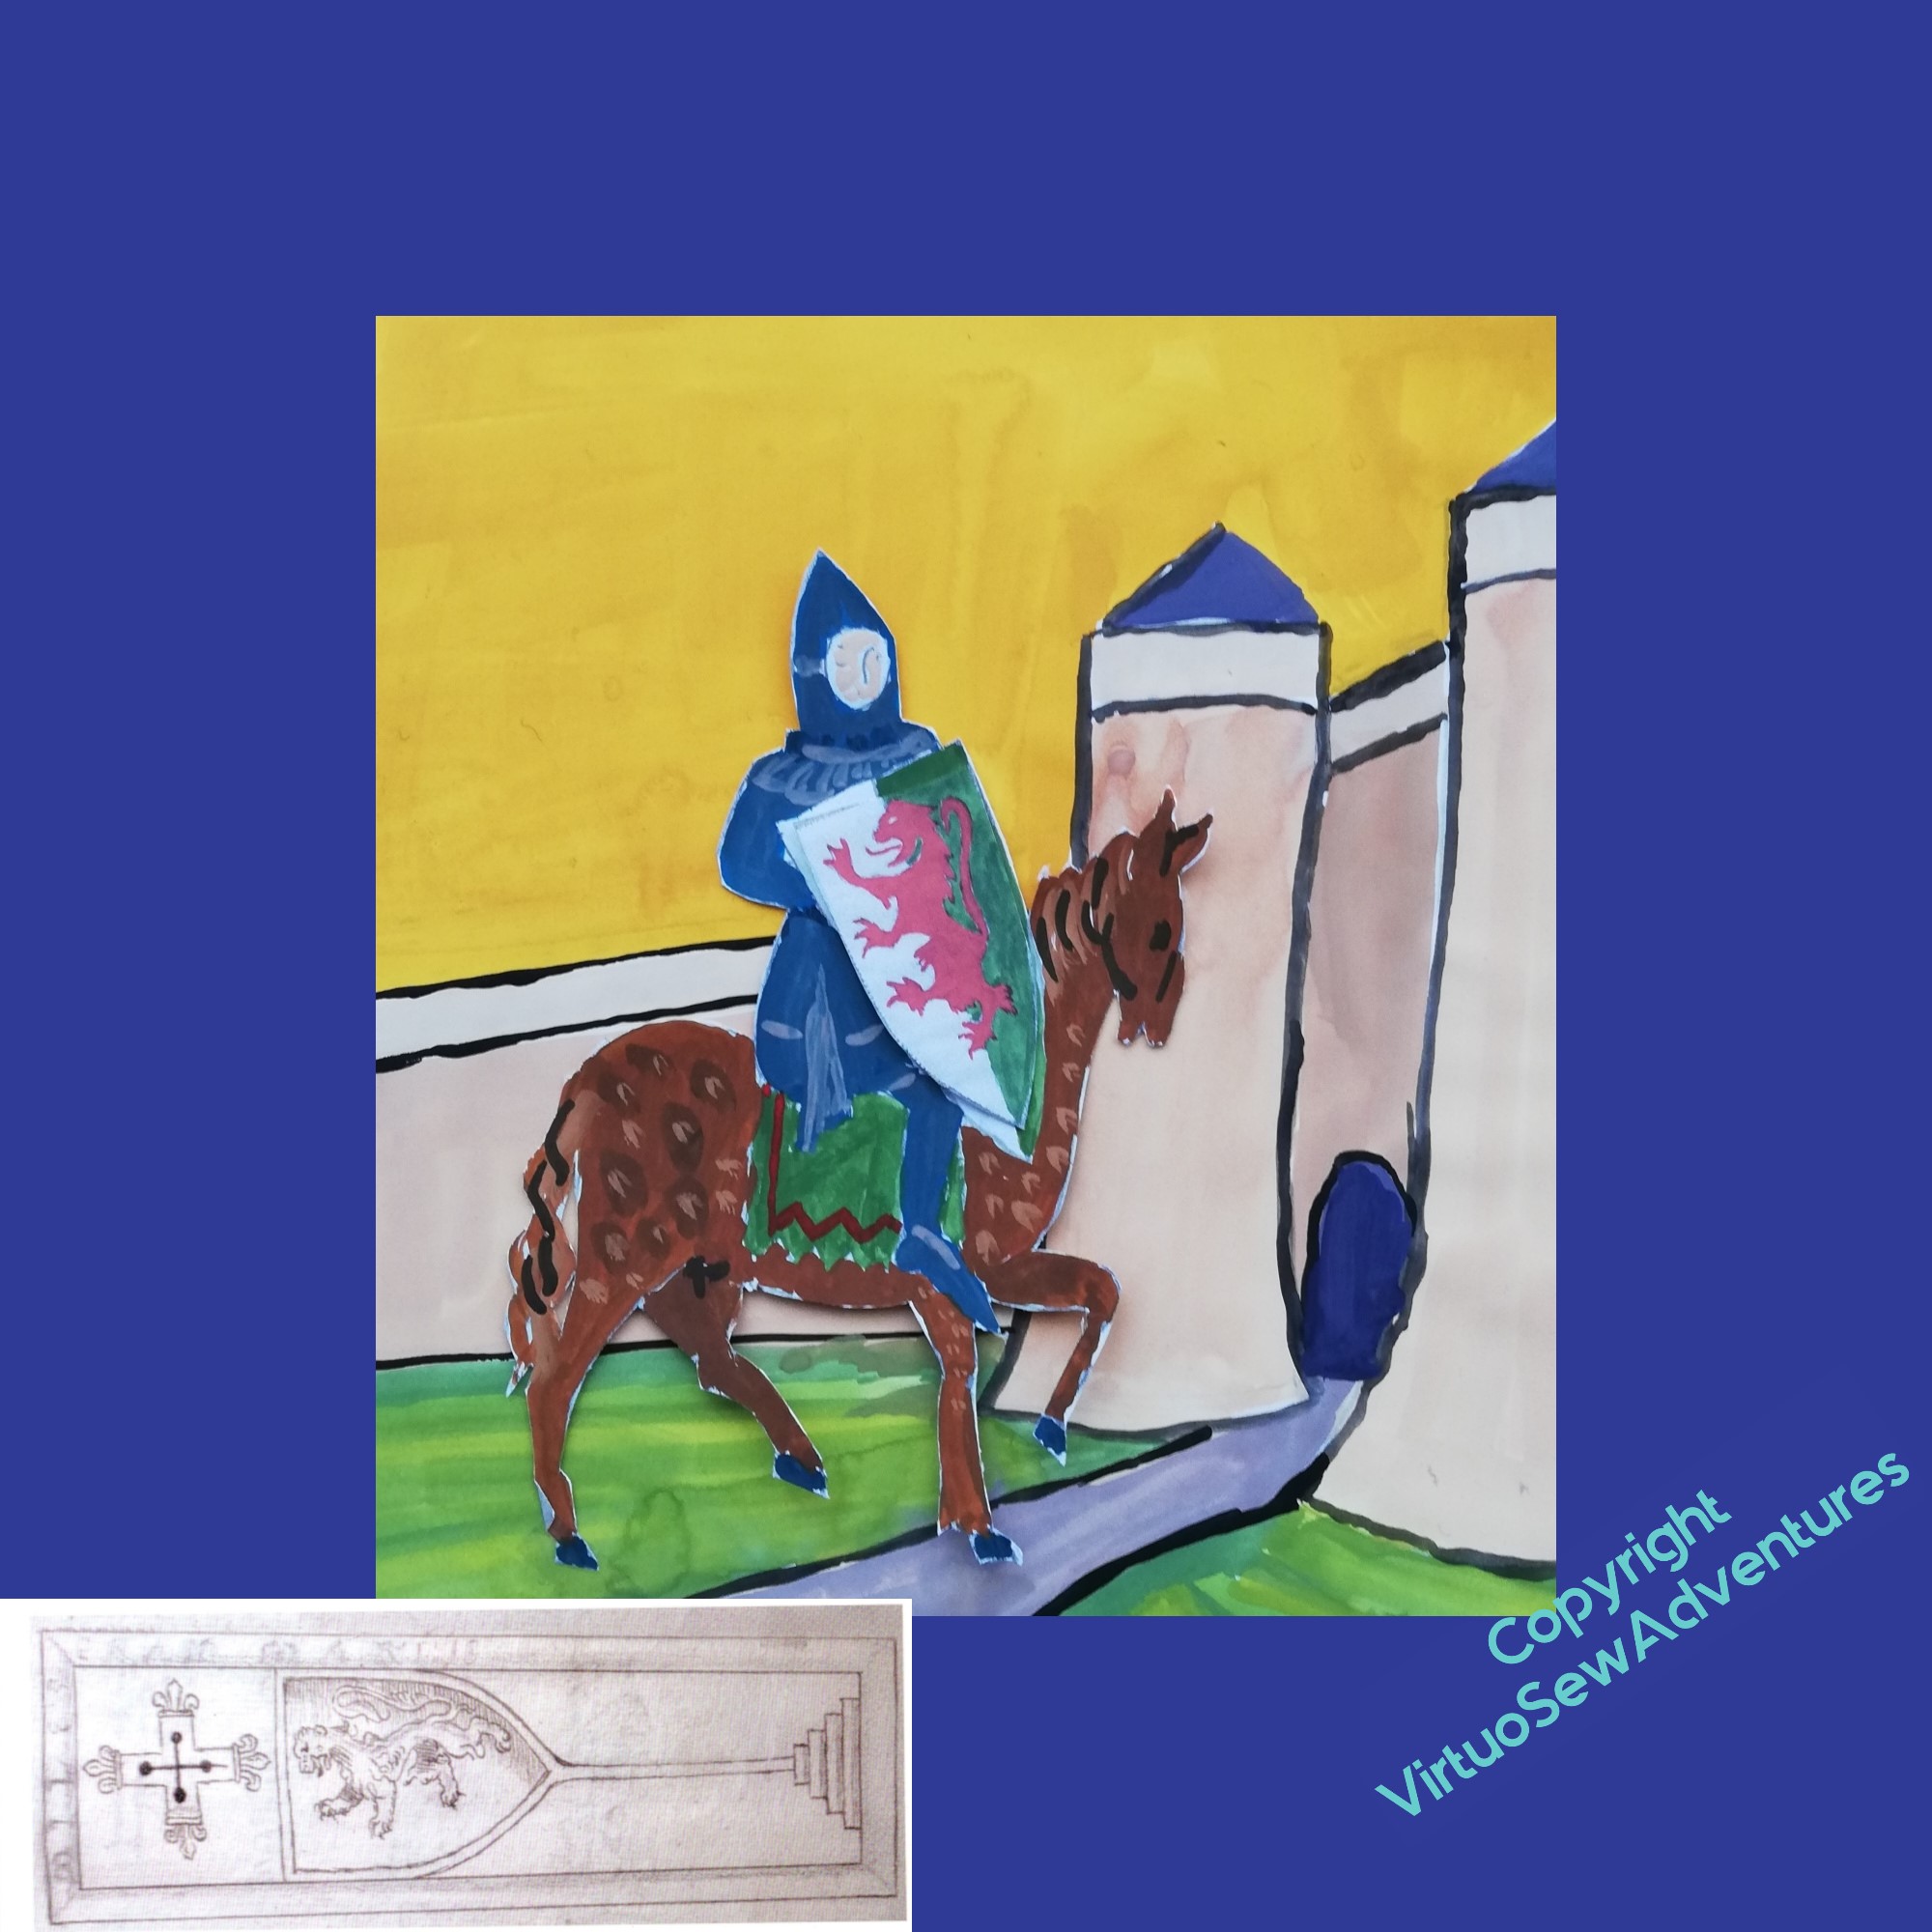
The Victorians remodelled Temple Church, where William is buried, found a strapping six-footer that they believed – based on what we’ve been told of him – to be William, and in due course, reburied him, and everyone else they’d moved, in the garden. So I’m planning a silk border, of blue laid-&-couched work, embellished with roses (for the garden) and common broom (for the Plantagenet kings he served so faithfully).
The grave slab is shown in a leaflet I got when we visited, which is no longer in existence, but is shown in an engraving from the 17th Century, and was thought to be associated with William. The lion looks right, anyway! I’m wondering whether to include that in my design for the border in some way, and if so, in what orientation..