Finnish Embroidery Design
A few weeks ago, my husband the Australian was speaking at a conference in Turku, Finland, and the organisers were kind enough to allow me to go too. We had a marvellous time – the Finns are terrifyingly good linguists, so we had no language problems, and because the conference was about Science and Art, and how they feed off one another and contribute to one another, the conversations were very wide-ranging, full of sparkle and fun.
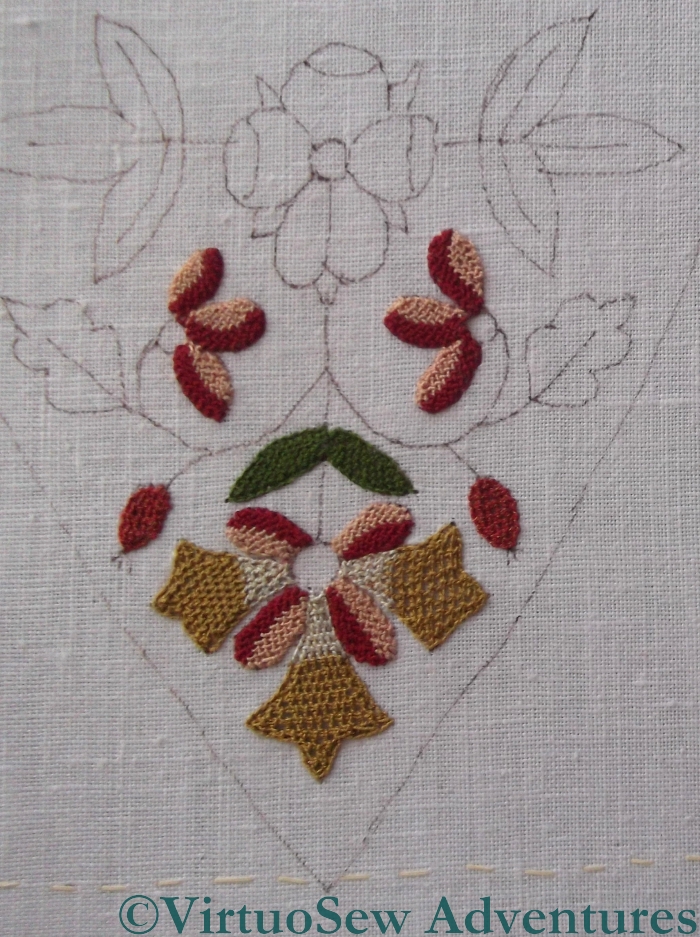
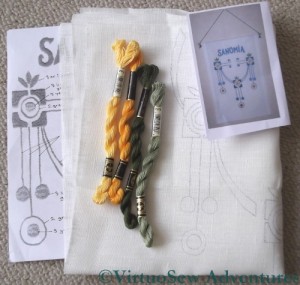
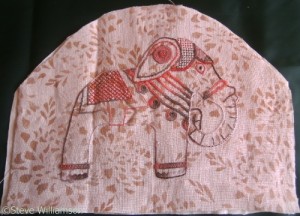
I didn’t have much time for side trips, but I did find an embroidery shop, and asked about local rural Finnish embroidery. I picked a design I liked the look of, and they agreed to prepare a tracing for me and send it on. It seems to be in a combination of stem stitch and Bokhara couching, but when I’ve had a closer look at the stitch diagrams, I will be able to tell you more.
This is what the lady in the shop told me about the design:
You also asked for some information about the pattern, we have a book that tells a brief history of where the pattern was found. Of course, the original designer of the pattern is impossible to trace.
The pattern was originally embroidered on a bag or pouch, that was hanged on the wall, where people put smaller newspapers and magazines into. That’s why the pattern is called ”Sanomia”, it means messages or news in finnish. The word was also embroidered in the bag. We copied the model ourselves to other products, such as runners.
The ”Sanomia”-newspaper bag was found in the Kankaristo house, in country village of Mynämäki.
The bag, that was found there, was sewn by the lady of the house, Helli Kankaristo, born in 1902. The story tells that she was taught to make embroideries by her very skillful teacher at school, and Helli passed her skills also to daughter Inkeri, born in 1928.
Watercolour of Tourieh
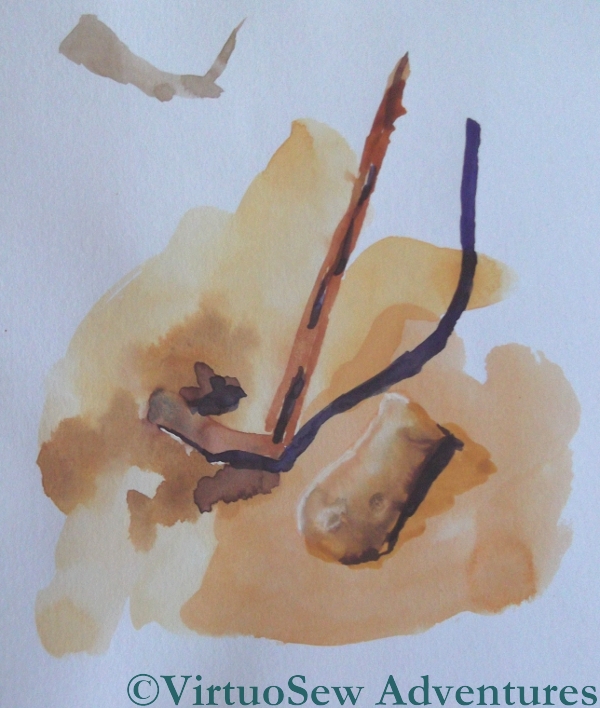
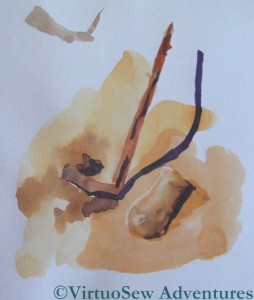
As I am thinking much more seriously about the Dreams of Amarna project these days, I am developing ideas and plans faster than I can stitch them. That’s not a problem; it just means that I need to document my ideas as well, so that I don’t lose them before I get a chance to stitch them. In this case, I’ve included doing the occasional watercolour of some of the possible projects – this is a tourieh (a sort of mattock) with a terracotta pot. The shadow isn’t necessarily in the right place, but at least it shows I’m thinking of the right things!
The Crock of Gold Hoard, as it was called, caused the Expedition considerable anxiety, but in the end contributed the finance for several weeks of work to the next season, so perhaps it was worth it! It consisted of gold and silver ingots in an earthenware crock, guarded over the centuries by a small silver amulet, thought by JDS Pendlebury to be Hittite.
I am thinking of working two references to the Hoard: a small or nué panel of the amulet itself (in fact, you may recall that I’ve already bought the materials for this!), and a panel showing the discovery, which will give me the chance to include some gold and silver chipwork to represent the ingots.
In some ways the Hoard has been easier to research than other incidents, because I discovered a somewhat later article (behind a paywall, so I shan’t link to it) about the Hittite amulet, as well as having access to the photographic archive of the Egypt Exploration Society. There were probably a good many articles in the ordinary press as well – nothing catches a journalist’s attention like gold. That said, I’ve been Googling and discovered that Dr Henri Frankfort, JDS Pendlebury’s predecessor as Director of the Excavation, also found a Crock of Gold.
Continuing my look back over the Map of Amarna now I’ve finished it…
Detail Of Villages And Cultivation
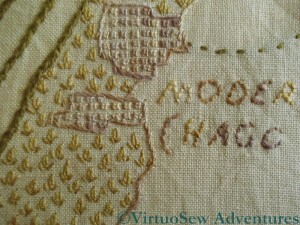
Regular readers will recall that I spent a long time thinking about the stitch I intended to use for the cultivation, and not just that, but selecting the appropriate thread or threads to use for it. In the end I chose tête de boeuf stitch for the cultivation (upside down in relation to the diagram on the page I’ve linked to, making it look more plant-like) , and although you can’t see it in this photo (zoom in on the main photo on the first post on the completed map instead), I used four different fine silk threads to create changes of colour and effect, reminiscent of different crops.
For the modern villages, I used a variegated silk thread, which I used for the text relating to those villages as well, and chose Sorbello stitch, stitched very small, and very regularly spaced. It’s unlikely in the extreme that any rural village, anywhere in the world, would be laid out in a grid pattern, but again the intention is to create a marked textural contrast between the cultivation and the settlement.

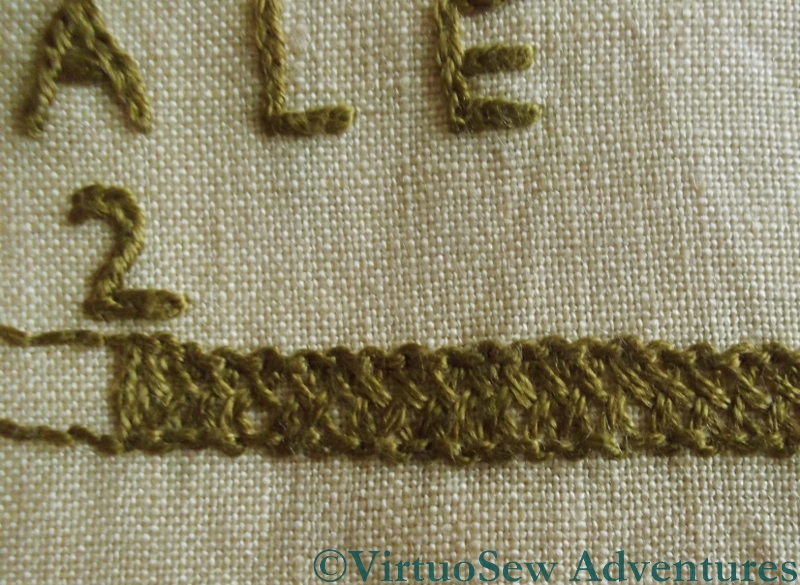
Detail Of Scale
Working the scale for the map gave me some trouble. For the text, again I used split stitch, as I had on the second level title, and eventually I chose to use an interlaced stitch for the dark sections of the scale.
This stitch echoes the reverse herringbone stitch I used for the contour lines. I know that most of the people who see this when I eventually finish it won’t appreciate that sort of detail, but there will be some who will!
Map With Edges
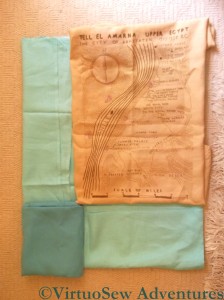
This was the point at which I laid out my finished map on the floor with the other fabrics which I intend to use for the borders, and gave myself a serious fright.
Remember these diagrams in my post in August 2010? These borders are where the “patches”, like the Felucca and the Faience Hippopotamus, will go. Of course this is very approximate – I don’t intend to cut into these fabrics until I’m much more sure of how I’m going to put the pieces together than I am at present – but these borders are about the right proportions, and as it stands they aren’t going to leave much space for the patches.
I may have to edit my patches and fragments very much more ruthlessly than I had intended.
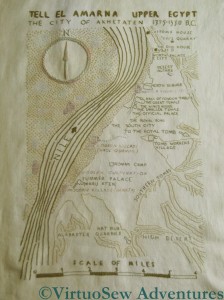
Finished Map of Amarna
At last I have finished the Amarna Map!
This has been a very long road. I started work on this panel – itself intended only as the background of a larger piece – before I started this blog. About four years ago, in fact. I am going to write two posts about this, because while I am looking back over my choices, I am also planning the use to which the panel will be put….

Contour Lines
When I first started on it, it was easy to choose reverse herringbone stitch, or shadowwork for the contour lines. When the piece is pressed and mounted the reverse herringbone will create a slight contour effect. Click on the image and enlarge it and you wll see what I mean.
This is one of the primary concerns of my stitch choice – to create an effect that is reminiscent of the item or object being depicted without attempting to show it in a direct fashion.
The choice of back stitch for the main text was easy too. I wanted a simple line to create the text wiithout drawing undue attention to itself, and back stitch is about as unobtrusive as a stitch can be!
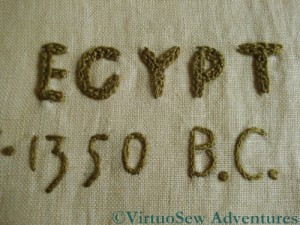
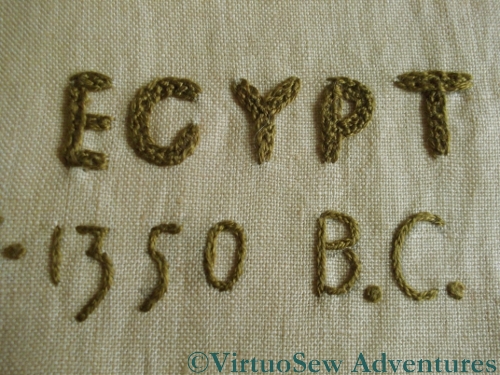
Title Text Detail
When it came to the Main title at the top of the panel, I chose split stitch for the second title, because again, I was looking for a plain stitch, with a little more weight than the back stitch, but not too eye-catching. For the main title I picked up one of the stitches from the Tudor and Stuart Masterclass – it’s lovely to find myself using a stitch I’ve learnt recently in a project I first started thinking about over fifteen years ago, when I first read the book that inspired it, “Nefertiti Lived Here“, by Mary Chubb.

Month Two Done
So, here we are, more progress on the Glittering Nightcap. It still looks spotty, but rather less so, I’m happy to say!
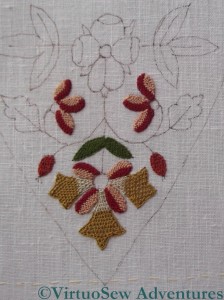
Month Two Detail
Here is a close up to show you what has been added in Month Two in more detail, and you can click on the picture to enlarge it further. The flower is apparently a honeysuckle (botanical realism wasn’t one of the artistic preoccupations of the period!), and is stitched in two shades of Gilt Sylke Twist, in detached buttonhole stitch. All of the pink and red buds are worked in detached trellis stitch in the soie perlee. In both these cases there is nothing complicated about changing colours – it is simply a matter of starting the new colour with a new row of stitches. It does mean that there seem to be ever more threads to finish off at the end of a stitching session, which is when I prefer to do it, because that means that when I sit down to start again everything is clear and tidy, and there is nothing to tangle my next set of stitches.

Stitch Direction
Working the trellis stitch involved some rather uncomfortable contortions in order to work the stitches in the directions described in the instructions. The annotated sketch on the right shows the stitch directions spiralling around the centre of the flower. The whole thing is mounted in a rectangular frame about twenty inches across – sometimes there is a lot of fabric and frame between me and the tiny petal I’m stitching.
That’s the other thing to remember – everything is very small. In a way this is not a problem, because even though the stitches are tiny the shapes do fill fairly quickly. If I have a good light, and a tranquil mind, I can make quite a bit of progress in a single afternoon.
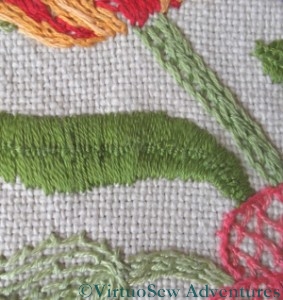
Bokhara Leaf
This long leaf is worked in Bokhara Couching. I find it strange that it did not occur to me at the time that this stitch is as near to satin stitch as makes very little difference! It isn’t particularly neat, in fact it is even rather crammed together, but it serves a purpose, and the stitch is a useful one to know.
I’ve seen diagrams that refer to this as “Roumanian couching” and “Romanian Stitch” , as well as Bokhara couching, which can make life confusing at times.
I’m now using it on the Finnish Embroidery, stitched in pearl cotton – it creates a lovely “basketlike” texture.

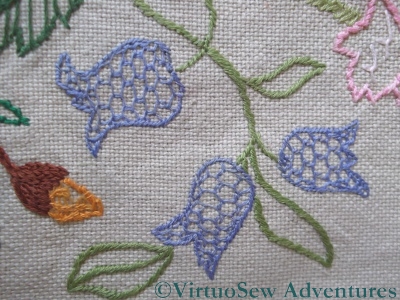
Bluebells
The bluebells are outlined in stem stitch and then filled with Cretan stitch, carefully spaced to create a sort of honeycomb effect. I rather like this, and I’m sad to say that I’ve not used it very much since. It’s good to be reminded of it, and I will try to use it again! The stems are worked in stem stitch, although angled to create a much thicker line than is normal – another effect I rather like, but rarely use.
The golden yellow bud is filled with Ceylon Stitch, which I found myself using in the Goldwork Masterclass, while the calyx is chain stitch again. The Ceylon stitch is the only one which has suffered from the passage of time, but since it was worked in a single strand, that’s scarcely surprising!
I need to learn to pay attention to the instructions.
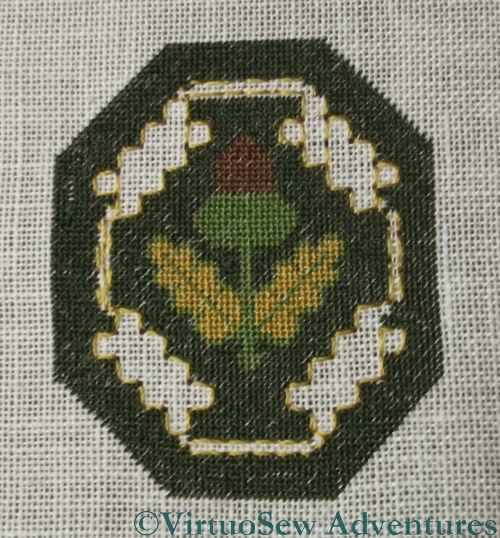
Acorn With Outline

Outline Removed
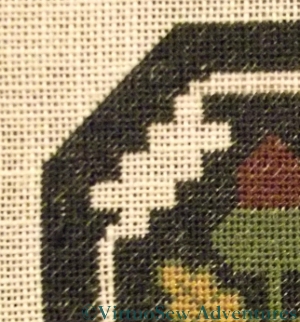
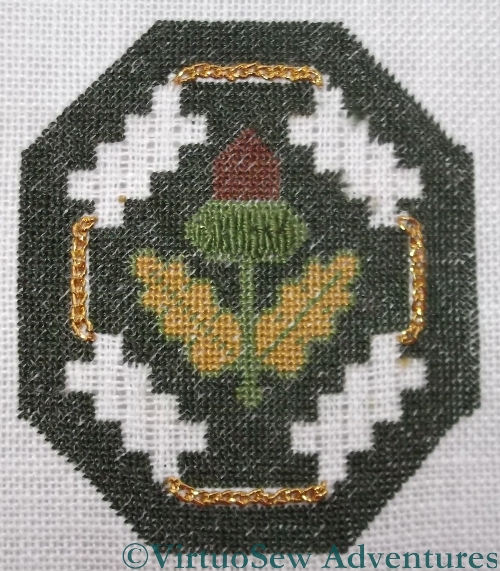
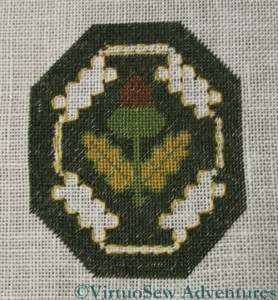
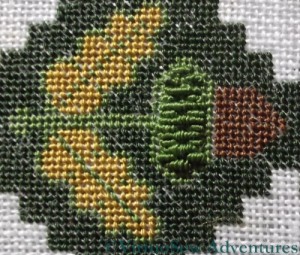
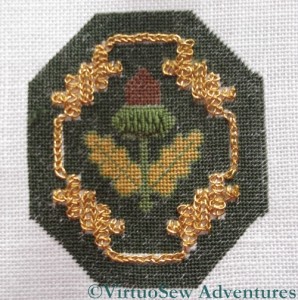
Still, before we get to that – I’ve finished the tent stitch on the Golden Acorn!
Here you see it, first with the outlining for the strapwork still in place, and then in close-up with the outlining removed. That was exciting at times – the gold thread had been caught in a few places by the green.
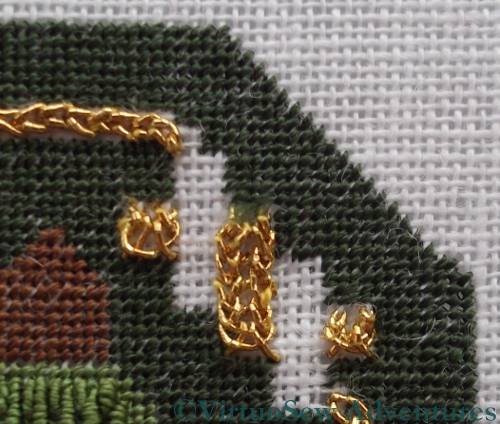
Bullion Knots
Broad Chain Stitch in Place
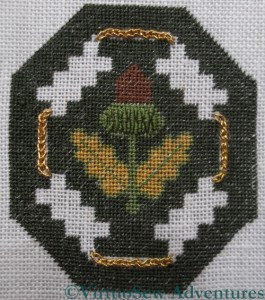
Next, there was a pattern of bullion knots to create an interesting effect on the cup of the acorn. Several different lengths interlock here. I’m not particularly keen on Bullion Knots, but I’m glad I included them – I think they look really good.
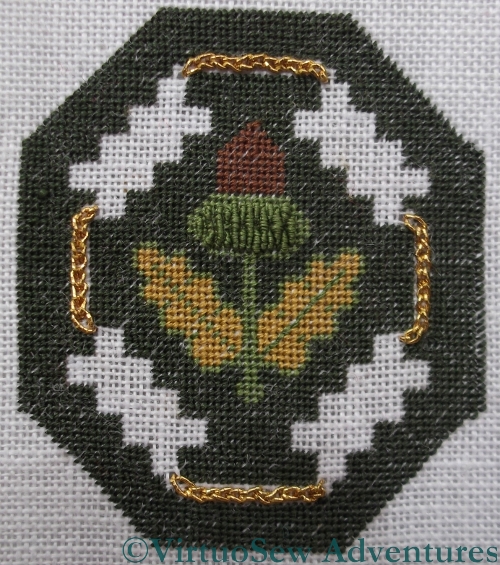
The beginning of the strapwork was a row of Broad Chain Stitch in each of the narrow channels left in the green background.
Ceylon Stitch Straps
Strapwork Looking Clunky
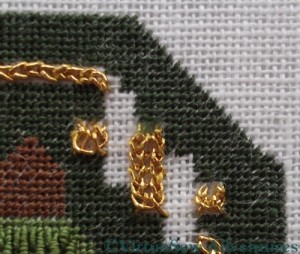
All is still well in the first of these pictures, where I’ve put in the Ceylon Stitch strapwork in gold.
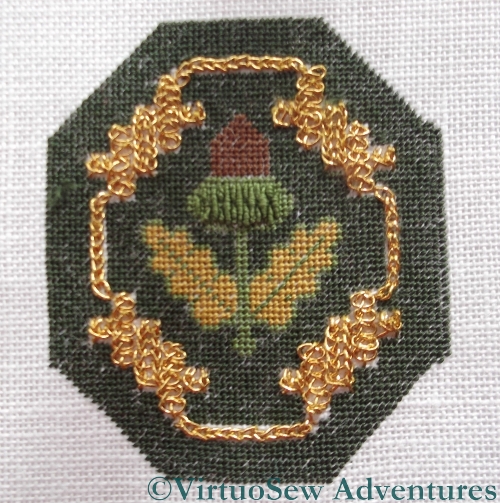
Then, concentrating painfully on my Braid Stitch I went on to add the second lot of straps, and didn’t stop to think until I had finished all four corners. At which point I looked at it and thought it looked rather clunky and that it really didn’t have the delicacy or charm I’ve come to expect from Tricia’s designs.

That’ll Larn Me!
So then (not soon enough!) I went to have a look at the instructions.
The Braid Stitch should be in silver.
Out it all came.
That’ll larn me!
(“Larn” is a dialect word, so what I mean is “That’ll teach me!”)
Glittering Gentleman's Nightcap - Month One
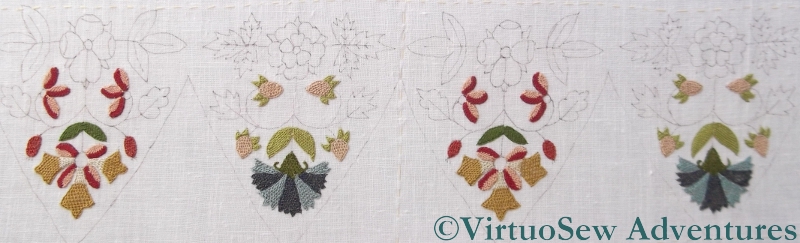
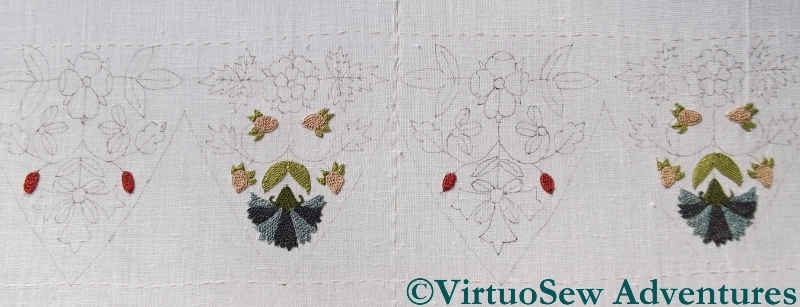
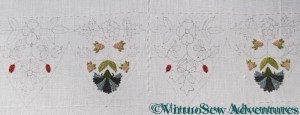
You may recall that I commented in my last post about the Nightcap that it looked very “bitty” because each flower, leaf and bud was going to be done before the stems. This view of the whole piece, with all of Month 1 finished, shows precisely what I mean. If you click on the photo to the left you will be able to see a larger version of it, with the blurred copyright notice unblurred (something strange happened there!).

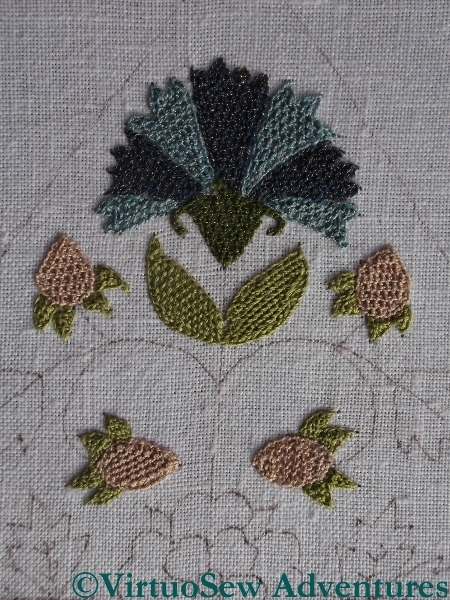
Glittering Gentleman's Nightcap - Month One - Detail
There are two of these flowers worked in two shades of blue, using detached buttonhole stitch in Gilt Silke Twist. Some of it is tricky because I want to change the orientation of the fabric relative to me, which is impossible because it’s framed up as an entire rectangle. Since I really don’t want to crush work already done, I can’t put each element in a hoop, so I’m occasionally having to sit in a rather contorted fashion to to tackle some of the sections.
The leaves and strawberry calyxes are in Soie Perlee, which is a joy to use, supple, smooth and strong. That said, there’s something distinctly odd about the right hand leaf in this detail photograph. It seems almost as though the stitching has pleated or bunched up on itself. One of the possibilities is that I was working this leaf before I bought my Necessaire stand, and somehow I tied myself in knots because I was balancing the frame on the windowsill as well; it might be something to do with the angle of the stitch relative to the stitcher; or I might simply have lost concentration.
Oh, and when I say “All of Month One”, that’s a slight exaggeration. Because of the structure of the Nightcap, there is a band of stitching on the back, which will form a brim or browband. I’m going to do that last, so that I don’t spend too much time changing the orientation of the fabric in the frame. So what I really mean is “All of Month One on the front”…
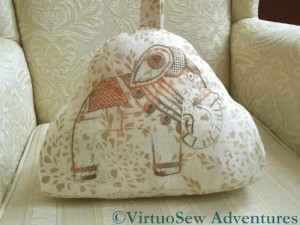
Finished Doorstop
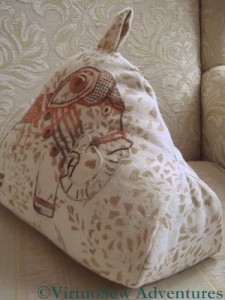
At last – after some months of puzlement, delay and confusion – and with considerable help from my mother, who was, after all the client, and knew what she wanted! – the Elephant Doorstop is finished!
We decided to make the dorstop vaguely teacosy-shaped, with a flat base, so that it wouldn’t fall over, and a loop to pick it up by so that no one is tempted to pick it up by the embroidery and abrade all that painstaking stitchery.
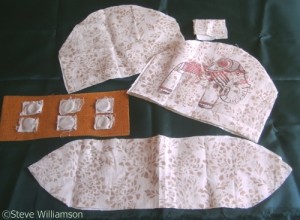
Pieces Laid Out
Once the pieces were cut out, my mother took a picture so you can see what we eventually decided upon. You will notice that there is a piece of buckram to flatten and stiffen the base, and it is being weighted with curtain-weights – small circles of lead held in their own fabric pocket. It’s easy to sew the fabric pocket into a curtain lining, or indeed, onto a piece of bukram, and it is less likely to catch and go astray than if the lead is sewn on like a button or a shisha mirror.
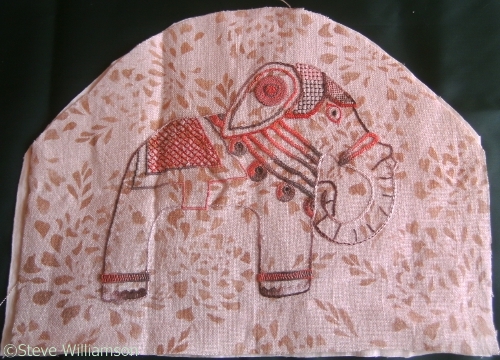
Elephant Finished
I’ve decided to call him “Kala Nag”, after the elephant in Rudyard Kiplings’s story “Toomai of the Elephants”, in “The Jungle Book”. He’s in ceremonial harness, rather than the working harness of the story, but I think he’s a very grand fellow, and I’m really very pleased with how the embroidery turned out. The variegated threads allow him to disappear slightly against the background in places, which makes for a more visually interesting piece than if he’d been stitched in the same tones throughout.
Side View
I propped the finished doorstop up on one of the living room chairs to take some more photos. This one gives you a better idea of the finished three-dimensional article, firmly stuffed with cotton linterfelt and ready to keep doors from swinging. He does a good job, too – those six small pieces of lead are just enough weight to keep him where he belongs.
And when he’s off duty, he sits on a bookshelf, conversing amicably with his older brother, The Elephant of Considerable Charm.
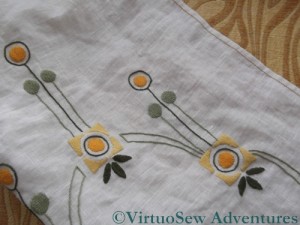
Table Runner Hemmed
At long last… I have finished the Finnish Table Runner!
The embroidery itself is very simple – Bokhara Couching and Stem Stitch, with the darkest leaves worked in nested Fly Stitches. I used two shades each of two colours – a greyish green, and a golden yellow.
The couching stitches of the Bokhara Couching are carefully arranged to create a basketweave effect, and I worked harder than usual to make the stem stitch regular with an even twist to it. Real simplicity is hard work, because the simpler the tools and effects you are using, the better-executed they have to be!
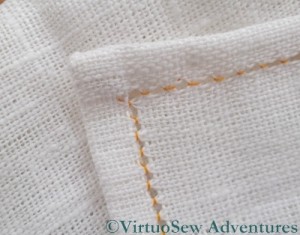
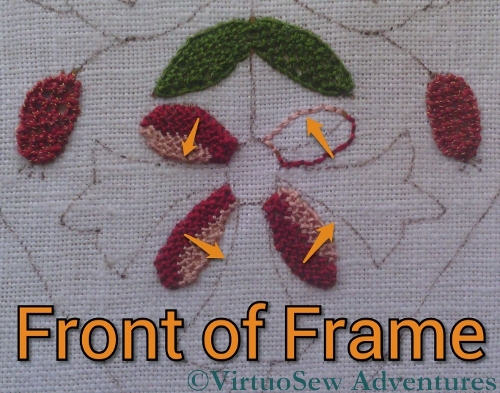
Antique Hemstitch - Corner Front
So I have taken particular care to stitch evenly. This was not entirely straightforward, in fact, as the fabric is a plain weave (one thread over and one thread under in each direction) but is not a square weave (warp and weft threads equally spaced). Since it is also a linen, and the threads are a little slubby, sometimes the effect is exaggerated. This became especially clear when I worked the hems.
Incidentally, I’ve no objections at all to the fabric not being a square weave or to the threads being slubby – these are just factors that sometimes influence how something is worked or the effects that are achievable.
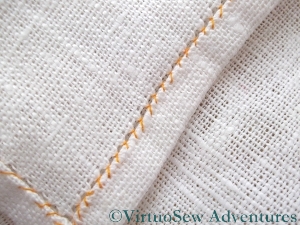
Antique Hemstitch - Corner Back
When I hemmed the piece, I chose to use Antique Hemstitch (at least, that is what it is called in Yvette Stanton’s Right Handed Embroiderer’s Companion). This leaves only a small stitch on the front of the piece. I withdrew a single thread for each hem (the instructions usually suggest at least two, but I wanted a narrow line down the edge and not the dogtooth effect of hemstith on only one side of the withdrawn threads), and then grouped four threads in each stitch. If you look hard at the photos, you will see that in one direction the stitches look longer than the other, although they group four threads in each case.
Since the table runner is about a metre and a half long, and nearly half a metre wide, that’s about four metres of hemming, which for some strange reason I enjoyed enormously, even though I’m really not good with repetition. I used ordinary sewing thread, but decided to use a golden yellow to add a bit of colour along the edges.
When my mother saw it first (half-done), she told be I was being a little show-off, but I think she meant it as a compliment!