
Search Results for: rosette chain
Little Jacket – dealing with a difficulty
Remember this one?
All the stitches came from Edith John, I think. Crested chain edging on the brown petals, and an odd combination of rosette chain and blanket stitch in the yellow-green pearl cotton. The stitch running in a spine down the lower brown petal is called “Wing Stitch”, and looks to me like a cross between fly stitch and twisted chain stitch.
I liked the stitches, but not the effect, and one way and another, I couldn’t work out what to do with them all. So I unpicked it and stitched other things along the way, playing with textures and threads and hoping that inspiration would return…

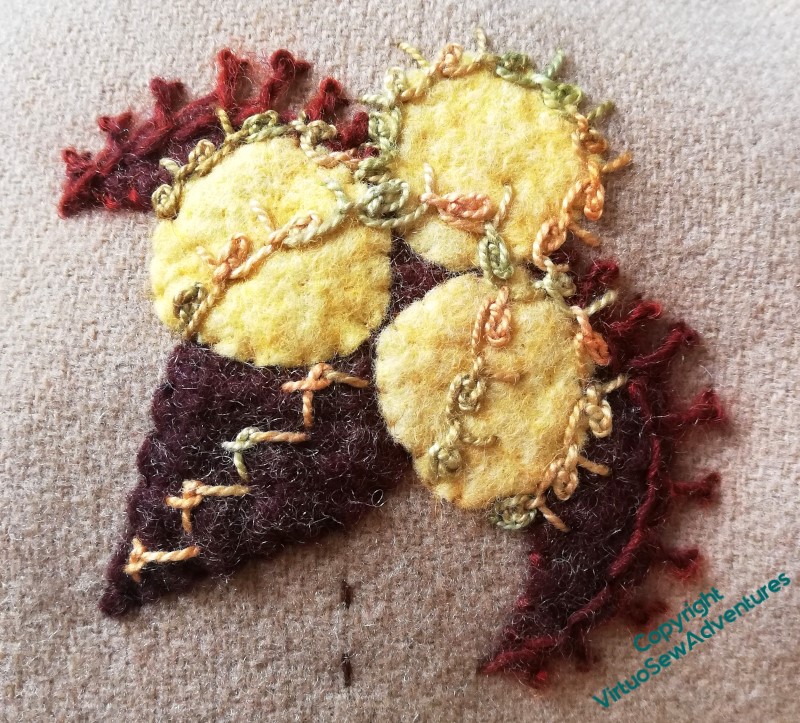
I took out all the pale variegated pearl cotton, and decied that what I need to do was to simplify the shape, and make it less frilly. So I’ve left the crested chain in brown bordering the top petals, but pulled everything else in and calmed it down. Blanket stitch edging the pale circles, and a spiral of twisted chain stitch to pull them together.
It still doesn’t really look like any flower that grew, but I think it makes a better pattern, and a better contribution to the whole thing.
And that is what matters, after all!
And still more on the Little Jacket
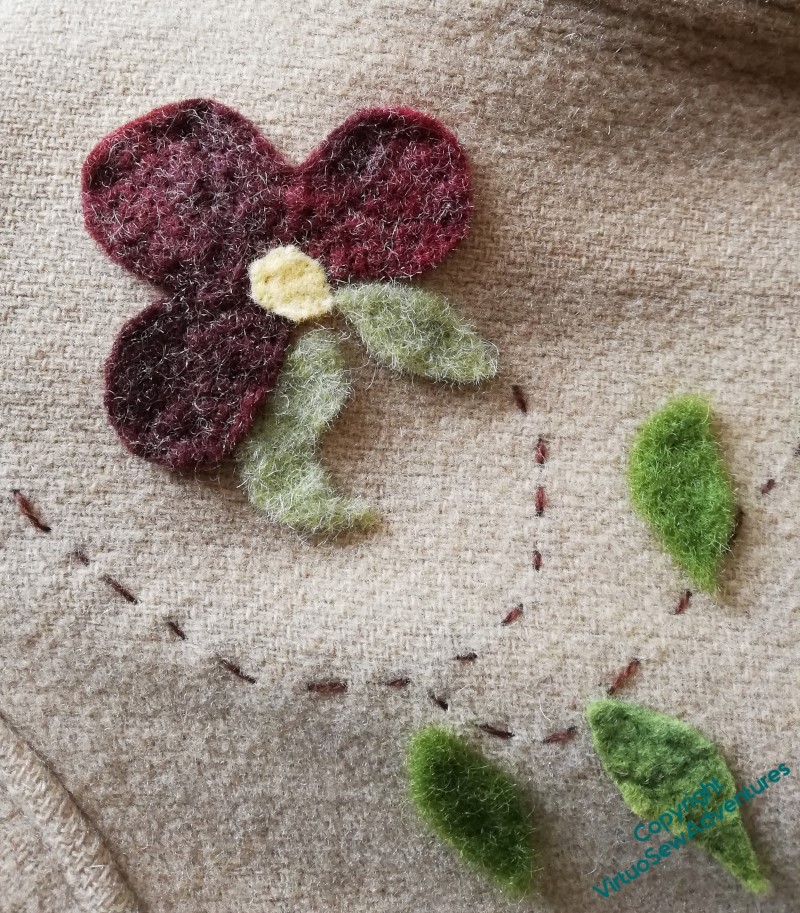
I spent quite some time solemnly Holly Braiding my way all around the jacket, over seams, over itself, even in a couple of cases over the felt. There will also be tendrils in the same yarn, which will pull out the colour variation and reduce the slightly spotty look – which is much less evident in real life, oddly.
The two different stranded silks I used on these leaves help, too, of course. Up and down buttonhole stitch on the top leaf, with the paired uprights worked in a V-shape, and in the lower leaf, closed feather stitch. I do wonder whether a bit more contrast may be needed, but I think that can wait until the whole thing is finished, and I can see what, if anything, wants more help.
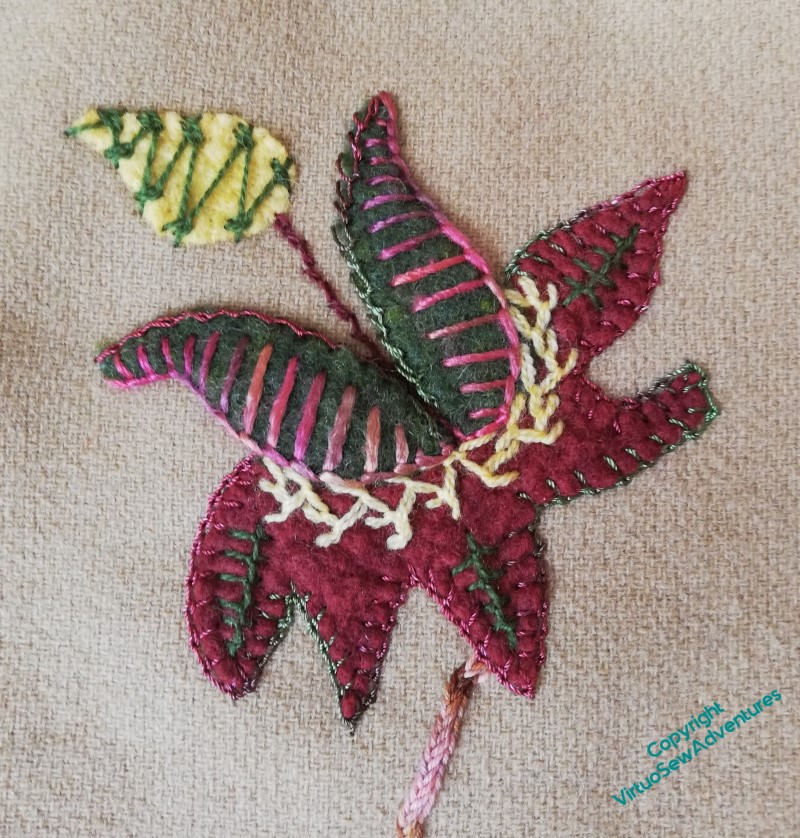
The frilly flower (heaven knows what it was intended to be!) provided a good deal of scope, too. The green stitch over the yellow felt came from Edith John – she calls it Tied Cretan Stitch. The yellow stitching is another one of hers, a pattern of feather stitches, but it doesn’t respond well to the curve and looks so unlike the drawing I now can’t find which it is. The inner edge is tied down with coral stitch in an extremely lively rayon yarn that nearly drove me mad, and I’ve reused one of the variegated yarns from the leaf above to help pull things together.
I’m enjoying myself enormously, but I am not always coming up with something you could call a “textbook example”!
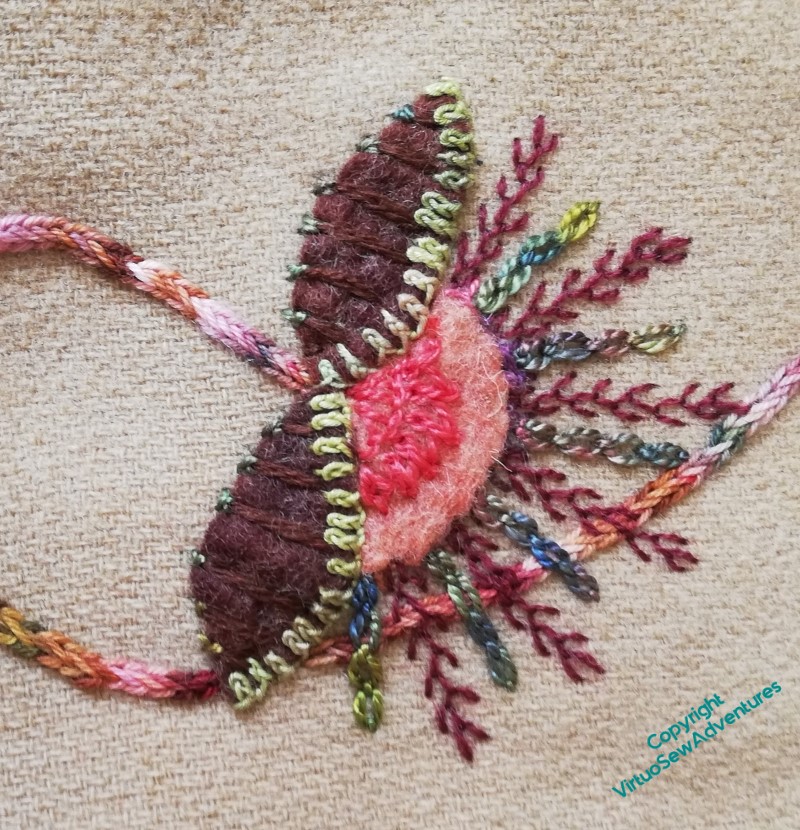
This one shows some of the stitching over stitching that’s been going on as well. I put the stem in first, and then worked the alternating feather stitch and cable chain stitch spikes over the top. I’ve also used rosette chain stitch again. It’s a usefully intricate and intriguing stitch which has some of the practical characteristics of blanket stitch.
More elements on The Little Jacket
I’m using a lot of variagated threads, of course, and leaving stranded threads un-separated. Furthermore, since all washability is clearly lost here, I’m picking thread for colour and texture, rathere than paying attention to the fibre or considering colourfastness. I can, after all, replace the stitching with something else if I need to!
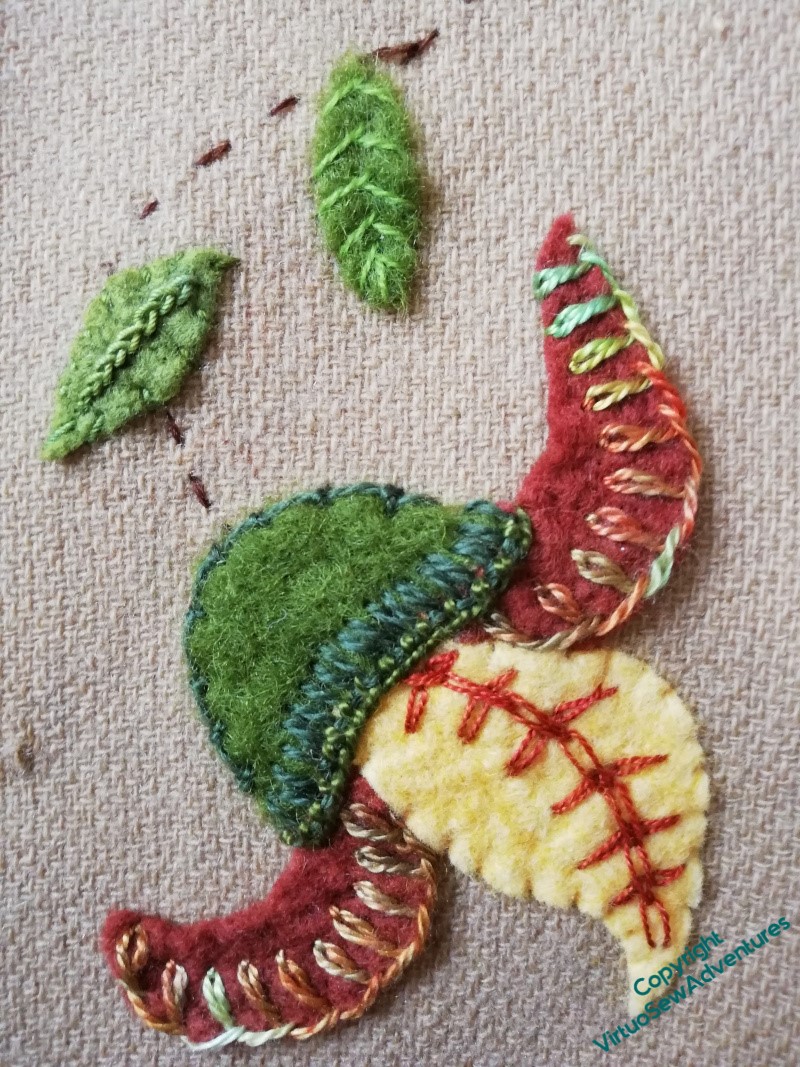
Basque Stitch edges the brown petals here, and triple chain stitch forms the spine of the yellow one. If you click on the picture to enlarge it, you will see that the green calyx is held around the edge with coral stitch and then a blanket stitch which is highlighted with detached buttonhole in a pearl cotton.
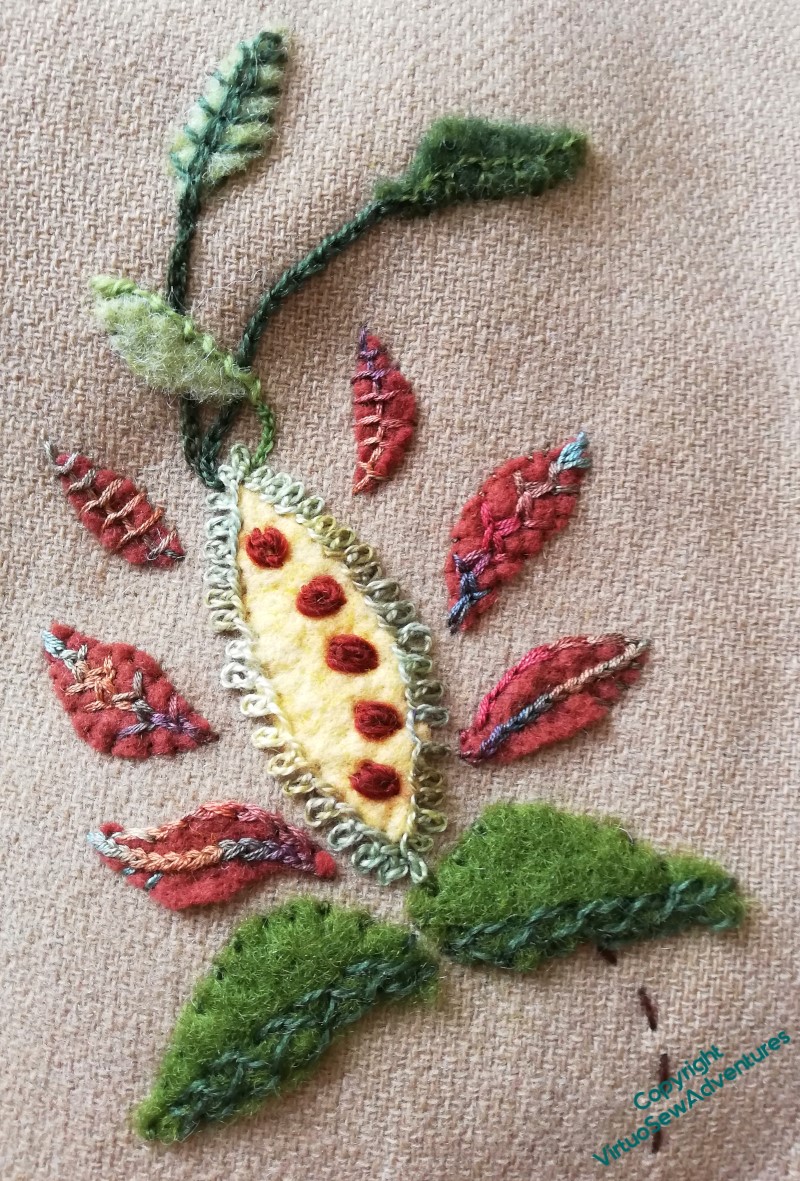
I’m really very pleased with how this element has turned out, although I may choose to lighten the stems on the leaves at the top, once I have everything in place and know what I have to balance of the overall impression.
I’ve looked quickly through the posts for the Coat of Many Flowers, and I was much more definite about stitching all around almost every shape for that, except the small teal leaves. For this one, I seem to be stitching a lot more veins and spines, or edging only one side of a piece. If I become anxious about pieces coming away, I can always add some stitches!
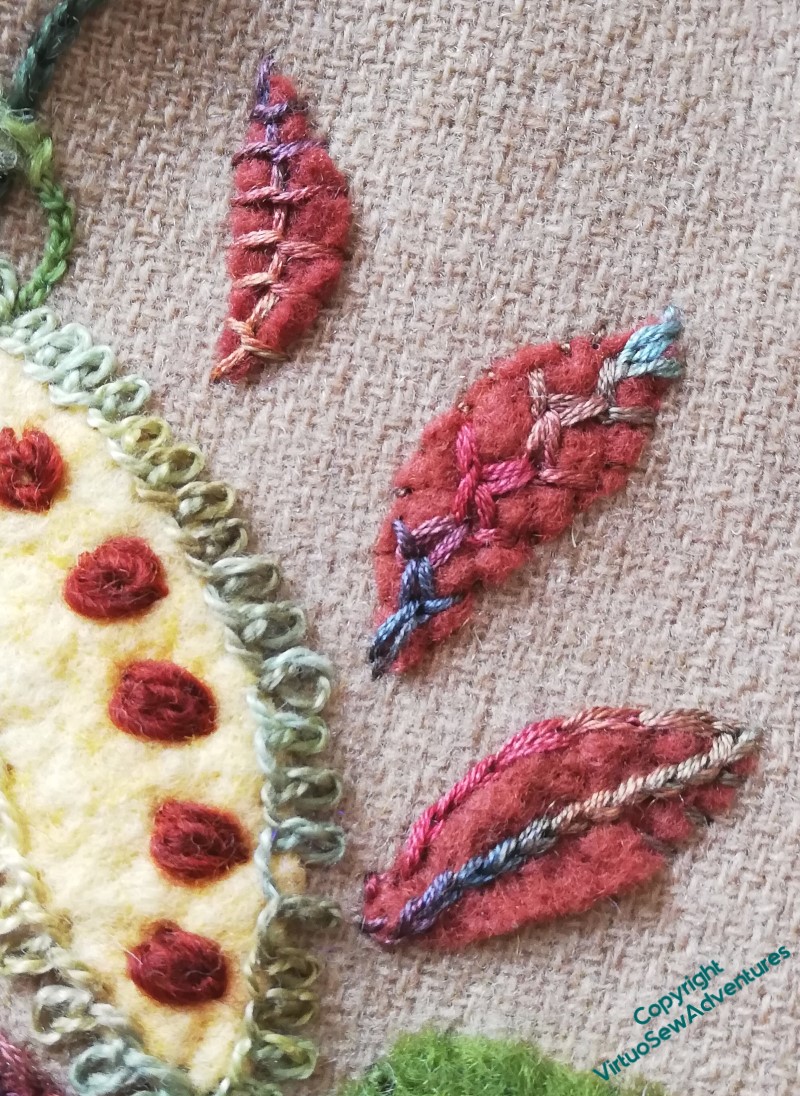
This element was more floral in previous incarnations, but here, I think it has drifted more in the direction of a seedhead. The “seeds” are isolated oyster stitches in sock yarn!
I unified the brown petals by using the same thread to embellish each, but made them more interesting by using different sitches. I’m particularly taken with the feathered zigzag chain on the middle one. The other change, compared with the Coat of Many Flowers, is to have turned some of the edging stitches around: last time, when I used rosette chain stitch, it was more like blanket stitch, with the “vertical” stitches pointing in to the centre of the shape.
And now, Episode 68 of SlowTV Stitchery is live. In which I discuss the alarming adventure of a Watermill Stitchery, remind myself to include the slips when I finally assess the success of Swirl Stitch (not yet, alas), and note that the skill of choosing the order in which to experiment is unheralded and undervalued.
Getting Started on the Little Jacket
The basic technique I’m using for the Little Jacket is the same as I used for the Coat of Many Flowers, so the block colour comes from pieces of felt cut to shape. Most of them are the light and lofty felts I use with my embellisher, but this dark brown is slightly denser and more variable in colour. The variations aren’t as clear in photos as they are in real life, and I have a faint hope that if I wear it enough some of the lighter colours will fade a little more than the dark ones, and pull out the contrast a bit more.

This is the first of the motifs I worked on. A long-legged variation on chain stitch on the central petal is set off by neat paired blanket stitch edgings on the outer petals. I’ve decided that the yellow is to be an accent colour, and I’ve ensured that I have small bits of it it scattered across the whole jacket. In this case I’ve not used contrast colours to stitch it down. I’m not sure about the whipped blanket stitch on the lower half, but I needed something to contrast with the single twisted chain stitches on the uper half, and I don’t think I will continue unhappy with it once the whole jacket is finished.
By contrast, I’m not at all happy with this one, and I don’t know what to do with it.
I like the crested chain edging on the brown petals, and I like the odd combination of rosette chain and blanket stitch in the yellow-green pearl cotton, but not how I’ve placed it or the effect it is creating. The stitch running in a spine down the lower brown petal is called “Wing Stitch” in the book I found it in, and again, I like it, but not what it is doing here.
I can see some unpicking in my future!
However, episode 66 of SlowTV Stitchery is now live, in which we consider the state of progress on Tynemouth Priory and plans for the sea, learn from Granny Weatherwax, and start planning more Watermill Stitcheries.
First Voluntary Project – Third Installment
Heathered Thread
Since I was working with leftover threads from other people’s projects, I was “forced to become inventive” – as Joseph Haydn said in another context!
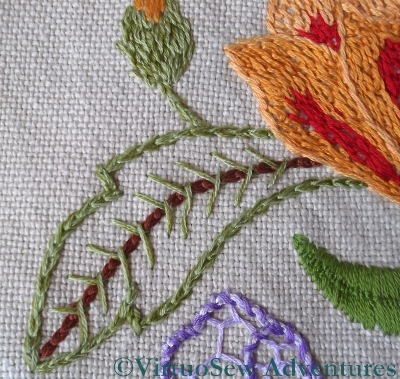
The leaf and bud shown here use Chain Stitch, but I combined single strands of two or three colours in the needle. This is a technique that I don’t necessarily use very often, but it is always one I consider, because heathering is such a good way to create subtle variations in colour and tone. There’s a nice example of this on The Floss Box blog, where the thread for the water is blended in the needle.
The veins are marked in Thorn Stitch, although I’ve just noticed that the central vein is in Chain Stitch!
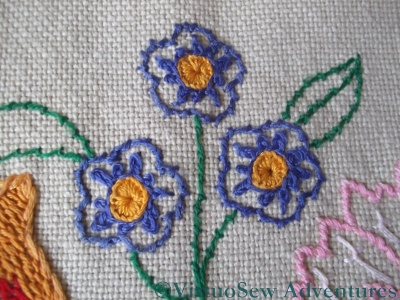
Forget-Me-Nots
The forget-me-knots and attached leaves and stems are almost a sampler all by themselves. The leaves and stems are worked in Coral Stitch, which also outlines the flowers. Inside the flowers, there are tiny circles of Rosette Chain Stitches, worked around a Buttonhole Wheel in golden yellow. Rosette chain looks better worked rather bigger than this – I’ve used it since in several projects – and those who followed my posts on the Goldwork Masterclass will know by now that I have since developed a positive obsession with stitch and fabric scale!
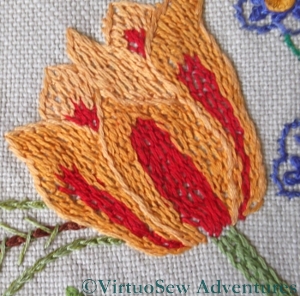
Feather Stitch Tulip
The Tulip is filled with close rows of Feather Stitch in red and golden yellow, outlined with stem stitch. It creates a slightly odd texture that I’m not entirely unhappy with, although it would balance the other flowers better if the filling were not so closely packed, and the colours were rather paler.
The stem is worked in a single row of chain stitch with a row of stem stitch on each side. I was gaining enough of a grip on embroidery by this stage that I made an effort to keep the stitch lengths comparable, which gives a nice regular rhythm to the stem.
Did You But Hear My Lady..?

A Lovely Lady
The Lady in the Garden, again came from a transfer, and was stitched as a companion to the Peacock, and a homage to Grandmama’s Lady. Unlike Grandmama, I made no effort to provide the lady with lovely graduated ruffles – if I am honest, because I really didn’t think I would finish them if I tried! Instead her dress is sprigged with flowers (in Sorbello stitch, which was rather fun!) and only ruffled around the hem.
Because I conceived of the Lady and the Peacock as a pair, I emphasised the flower colours around the lady, and worked some elements of her dress in one of the blues I used for the peacock.
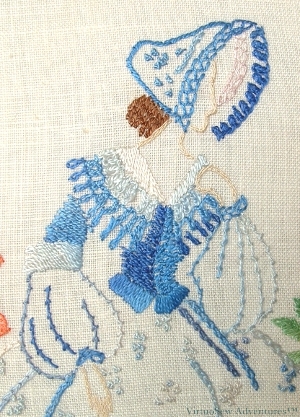
Lady - Close Up
The inside edge of the bonnet is ornamented with Rosette Chain stitch, while the outside is edged with closed feather stitch. This would also have been an ideal opportunity to use bonnet stitch, but I didn’t think of it in time! I also used Rosette Chain Stitch for the ruffles on the the lady’s collar. I like to use a variety of stitches – the trick is not to use so many that the eye becomes bewildered. Using a basic stitch and its variations is one way to maintain some sense of uniformity, as is keeping a small colour palette.
The bodice is in Bokhara Couching, and the sleeves outlined in coral stitch. I’m surprised at how well this works – it should look thorny, and heavy, but somehow manages to evoke an airy gauze sleeve. How does that work?
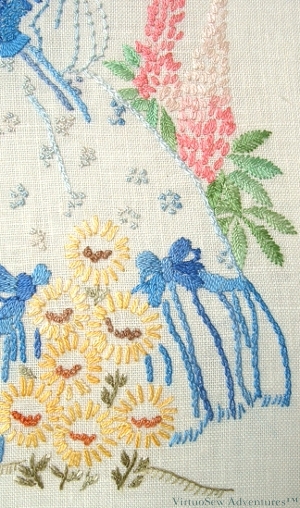
Skirt - Close Up
The bows above the flounce of the skirts are in satin stitch, and the impression of the flounce is given by lines of chain stitch. Almost all the visual weight of the dress is at the bottom, and the airy sprigging on the skirt allows the flowers to take some of the limelight.
Again the stitching is simple – fishbone stitch for the leaves, detached chain stitch and French knots for the flowers, and as almost all the threads were variegated, I got a lot of subtle – and not so subtle! – colour variation “for free” as it were.
I had already worked the Jacobean Fire Screen when I started work on the Peacock and the Lady, and was beginning to feel that I should do some more designing for myself. I will probably still use other designers’ work, because sometimes I want to concentrate on a particular thread or technique (as in the Tudor and Stuart Goldwork Masterclass) rather than the design. Besides, who knows what else I will find in the archives to write about!
The title of this post – for those who are scrabbling around in their memory – is the first line of “Silent Worship“, written by George Frederick Handel as an aria in his opera Tolomeo, but far more popular than anything else in it. Beware if you Google it – the last time I did so the first two links were for ringtones!
The Autumn Leaves Skirt
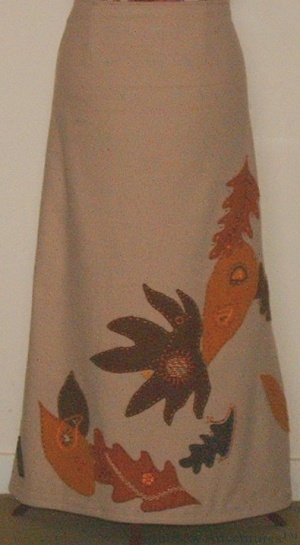
Autumn Leaves Skirt
I made this skirt last winter, and originally needlefelted the leaves onto the fabric. However, after a winter’s wear, and after looking at a good few blogs over the summer, I thought I could do better.
I took some ideas from some of SharonB’s Pintangle posts on seam treatments, fished some additional inspiration from a host of other blogs (wish I’d taken notes, now – I want to find some of them again!) and then proceeded to some adventures in embellishment.
It occurred to me that there was no need to keep within the leaf shapes, or even to add embellishment that resembled leaf characteristics in any way, so paisley shapes, spiders web wheels and trailing lines of feather stitch showed up all over the place.
I started off by sewing around the edges of all the leaf shapes in ordinary running stitch, and originally I had intended to stop there. However, when I did, it looked a little half-hearted, and I’m never that, so Something Had To Be Done!
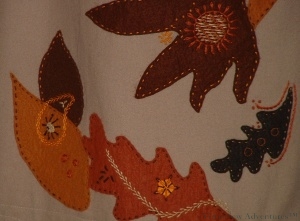
First Skirt Detail
There’s a trail of French knots across the largest leaf, which has a circle of Rosette Chain on it, surrounding a disc of an interlaced filling stitch in three different colours.
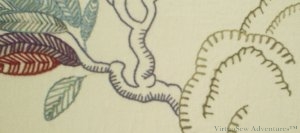
I also realised (about halfway through!) that I didn’t have to keep the embellishment only on the applied fabric, so the skirt fabric acquired stem stitch lines with French knot finials, a spiders web wheel, and more French knots.
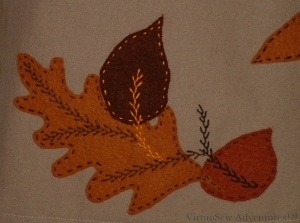
Second Skirt Detail
It is all worked in six strands of stranded cotton, un-separated to maintain a sort of cohesion. I chose colours that were fairly close to the colours of the felt leaf shapes, but working in the opposite direction, as it were, so dark felt was running-stitched in light stranded cotton.
All this on a skirt I originally made purely because I wanted a long winter skirt to cut the draughts in the office!
Stitching the Persian Fantasy – Four
There was so much going on that I consciously reused yarns, colours or stitches across the four panels in order to maintain some semblance of order. In fact as I moved on to each panel I would lay the completed ones side by side on the living room floor and scramble around putting piles of coloured threads on them. It must have looked highly comical, but my parents (I was still living with them when I embroidered these panels) were kind enough not to laugh. Besides, as long as it works…!
Crags worked in Caron Collection "Storm" (I think!)
I chose to use one of the Caron Collection threads for the basic outlines of the closer landscape, using Up and Down Blanket Stitch, my favourite blanket stitch variation. I’ve done a bit of hunting because it’s one of the more obscure variations and finally found it at the bottom of Sharon B’s Stitch Dictionary page on blanket stitch variations. For the further landscape or clouds (I never did quite work out what they were), I used a different colour range but the same stitch.
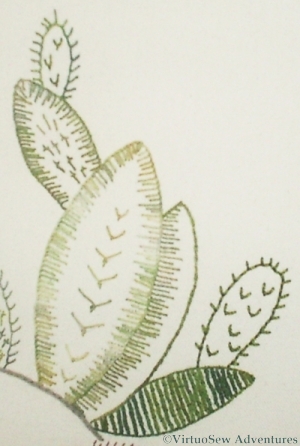
Some of the Cactus Plants
The cacti were worked in a variety of stitches, partly based on the lines of the original transfer, but then extrapolated as the stitches and threads suggested themselves. Although I did use several variegated threads in the flowers and the cacti, most of them are pearl-cotton types, and there is a certain unity provided by the use of the same set of threads wherever those forms appear. There are fly stitches, feather stitches, blanket stitches and sword stitches in this small section. I’ve diagrammed Sword Stitch at the end of this post.
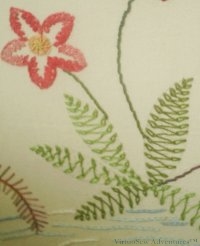
Large flowers with leaves worked in Chained Feather Stitch
The leaves for the largest flowers were worked using chained feather stitch – I had never worked it before and thought it looked fun. I caught down the long connecting stitches with a single strand of cotton, and was delighted to realise that that gave me the effect of a shadowy vein – one of those serendipitous effects that one cannot foresee, but only rejoice in.
The large flowers had centres of Whipped Spiders Web stitch and the outlines were worked in Rosette Chain stitch. The stems were simply a very heavy rayon cord, couched in place. They may well have been the most straightforward element of the entire four panels!

Sword Edging, or Sword Stitch
I couldn’t find a diagram of Sword Stitch on the internet anywhere so I spent a bit of time with a vector drawing package and Barbara Snook’s “Embroidery Stitches”, published by Batsford in 1963. I’ve redrawn the diagrams, changing them slightly where I thought the original used a strange order. When working a row, she seems to recommend working from right to left. The only other advice she gives is that the longest arm should point downwards – clearly that is the blade of the sword.