Lotus Tile Fragmen
I have chosen to work the Lotus Tile Fragment using Japanese Flat Silk, which I bought at last year’s Knitting and Stitching Show in Harrogate, from Midori Matsushima. This is rather an adventure, because I have never used flat silk before, except when I experimented with one of Stef Francis’s overdyed flat silks.
Suddenly, therefore, it rather matters to me whether I produce the effect I’m looking for, which was not the case with the Experimental Seahorse, entertaining and instructive though he was to do!
Last week , Susan of Plays with Needles quoted a Buddhist proverb in her blog – “When the student is ready, the teacher will appear“, and it turned out to be true for me too. Entirely by accident, I discovered that Midori would be teaching an introductory workshop in Japanese Embroidery techniques, not fifteen minutes’ drive away…
Japanese Embroidery Techniques
In two hours, there was only time for the merest scuttle through the techniques – making a twisted thread (we made a four-into-one), learning how to work a Japanese knot, how to stitch with the twisted thread and with the flat, untwisted silk, and finally how to use one of the fine metallic threads. As it happens, the techniques I have ended up using for the Lotus Tile Fragment are (understandably given my background) more Western than Japanese, but although I am intending to use flat silk throughout, it has already occurred to me that I might work an interesting alternate version using Japanese embroidery techniques. I just need Midori to come back and run another short workshop in s0me of the slightly less basic techniques…

First Tudor Rose
My last post about the Glittering Gentleman’s Nightcap was in September, but I’m afraid it has not made much progress over the winter. This is because I only work on it when I have good natural light, and that means sitting in a bay window, which can be very cold indeed!
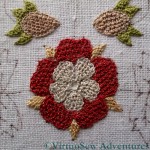
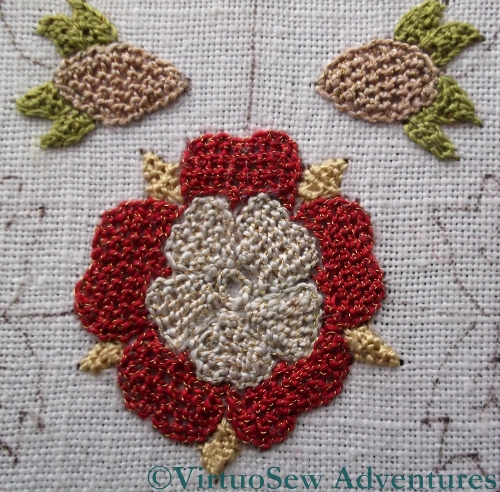
Second Tudor Rose
I managed to get one of the Tudor Roses done and then there was a long, chilly hiatus. Each petal is worked in Gilt Sylke Twist, outlined in reverse chain stitch and filled in with detached buttonhole with return. I think that is the same as “corded Brussels Stitch” in needle-lace, or if it is not, I have yet to work out the difference. The sepals are worked, again in detached buttonhole with return, using straw coloured silk.
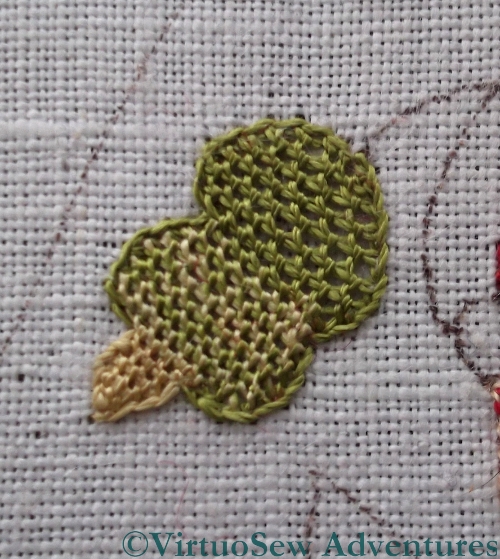
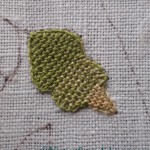
First Blended Leaf
As I mentioned in my previous post, Month Four consisted of the Tudor Roses and a plethora of leaves in a variety of combinations of colours. It was not uncommon for embroiderers of the period to blend colours in the needle, and Tricia suggested that we might choose to do the same. This is not quite as straightforward as one might hope, since of course the Soie Perlee is not intended to be plied and recombined, unlike the stranded cotton I used when I did something similar with Tracy Franklin in Durham.
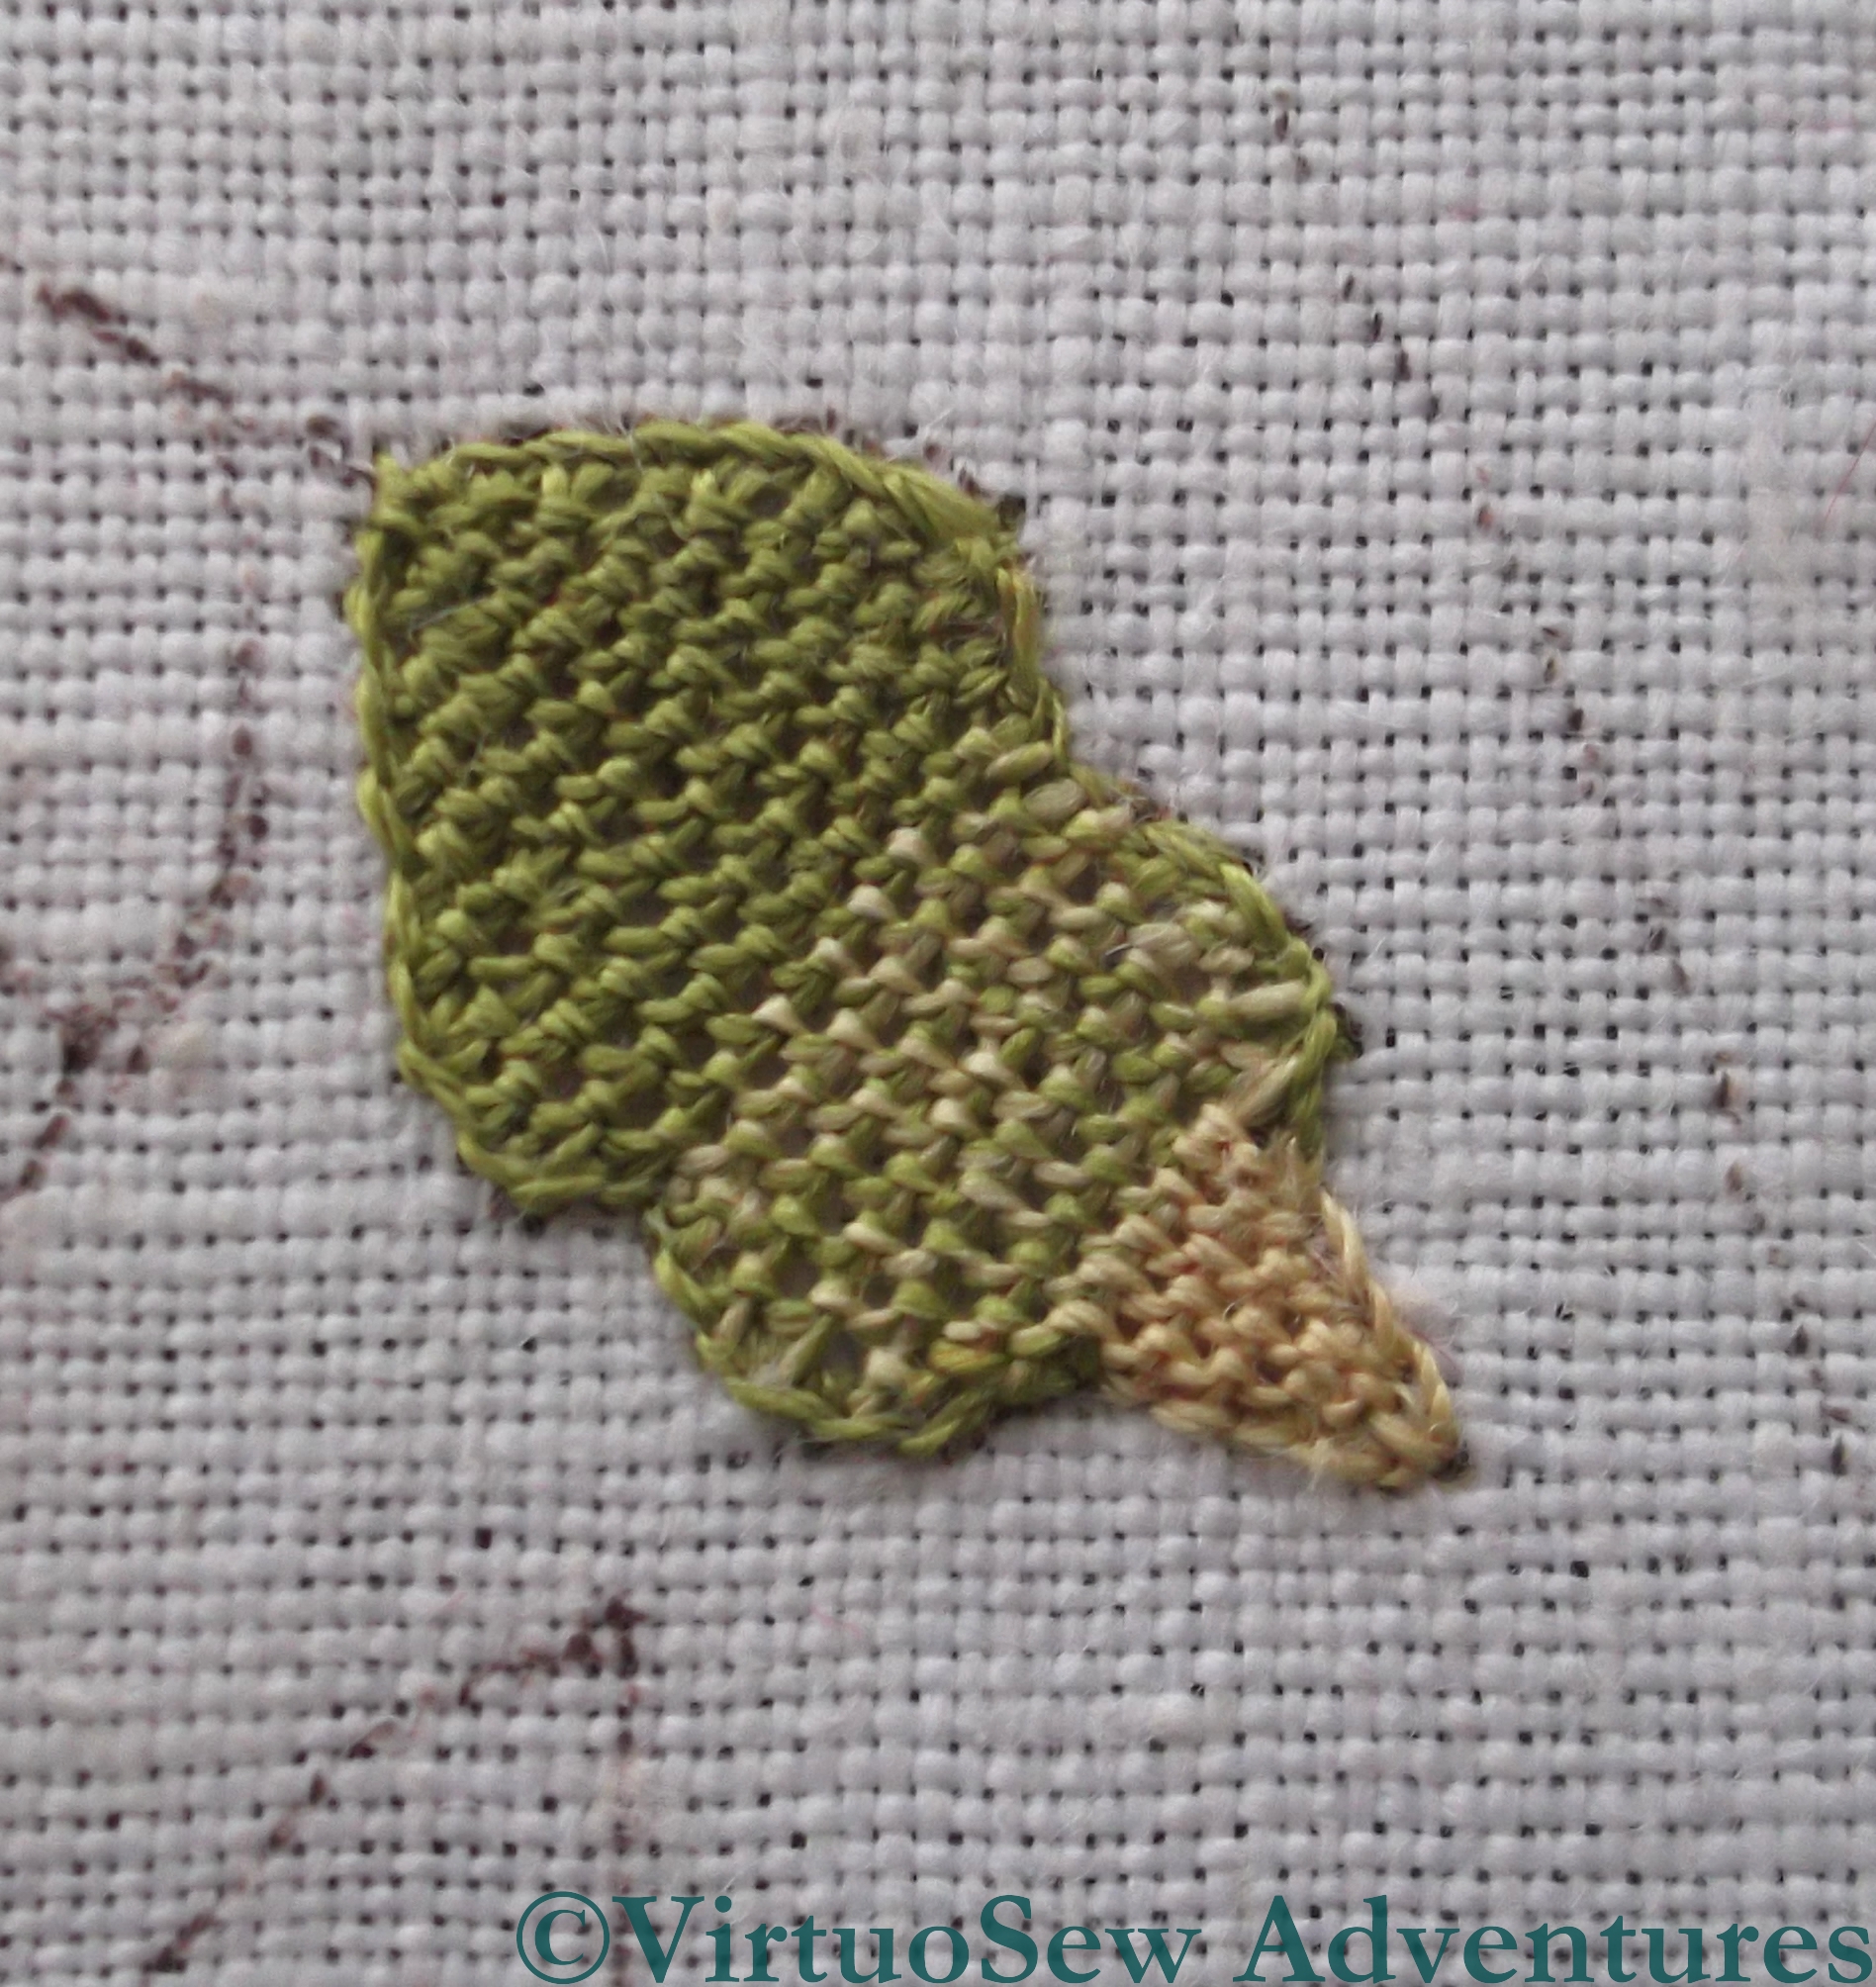
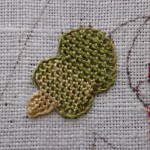
Second Blended Leaf
It produces an interesting effect, and it does allow for a smoother colour change than using the threads in their normal state. What interested me, however, was that without being aware of changing my technique in any way, the coverage of the second leaf was markedly denser than that of the first.
Each leaf took about three-quarters of an hour to work, which tells me that I’ve some considerable time to go before I can get on to the goldwork or turn over to work the brim – there are about 28 more leaves to work!
My current plan for the Dreams of Amarna panels is to overlay the embroidered panels with gauze panels screen printed with the heads of Akhenaten and Nefertiti, and since the panels would be hard to store safely and out of the way while I do the embroidery I have always intended to do the screen printing last of all.

Preparing my screen printing tests
Then, as I mentioned when I was beginning on the Lotus Fragment, I had a Dreadful Thought. What if the gauze killed all the colour in the embroidery? Would it be possible simply to brighten the colours of the embroidery (which would also involve abandoning nearly everything I have done so far) or would I be able to find a suitable fabric? Obviously some early experimentation would be required… Fortunately, “Creative Stitches and Hobbycrafts” happened shortly after my Thought!
I found the stand for Thermofax Screens, and explained what I wanted to do. When I explained that the image I intended to print (in the end) would be of the style of an old-style newspaper print, the lady’s face cleared. Yes, she said, it would certainly be possible to print onto gauze, and when I eventually get to the appropriate stage, it would be possible for them to prepare screens for me based on images I provided. She also said that I should experiment with fabrics, but that synthetic gauzes were likely to prove more transparent than natural fibres. So I bought a starter kit and a screen that had some of the characteristics I expect my final images to have, and got ready to experiment.
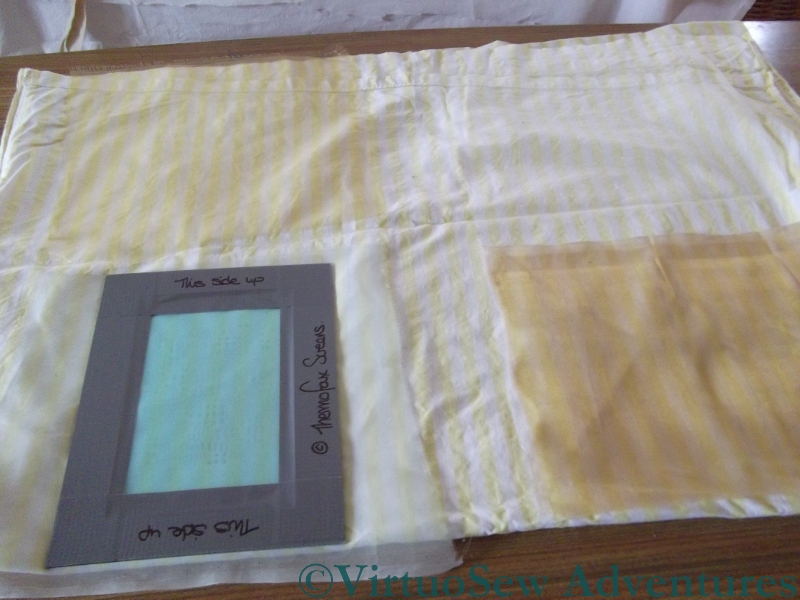
Gazing Through Gauzes
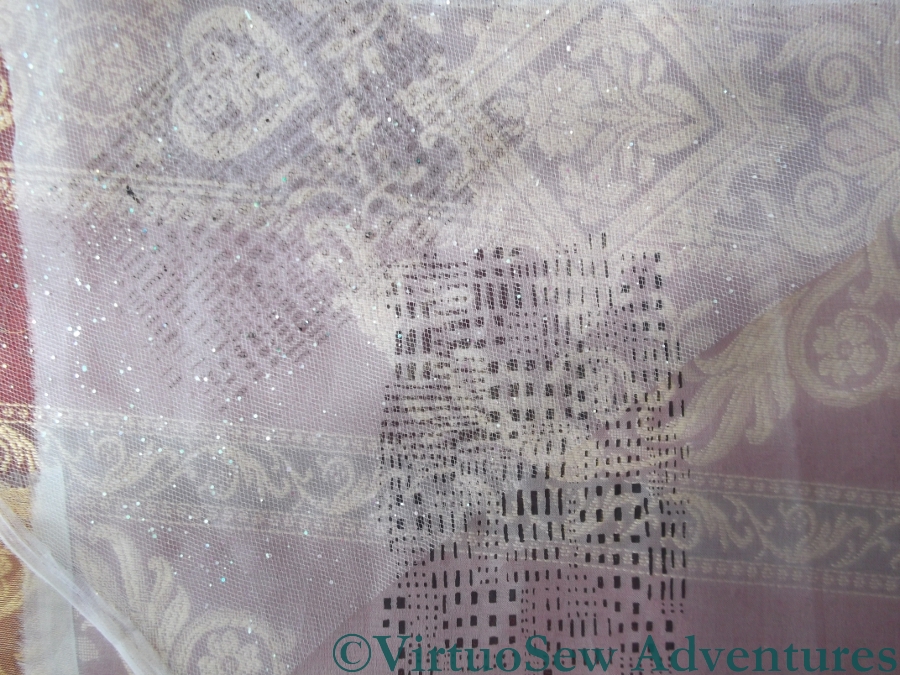
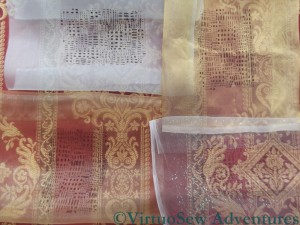
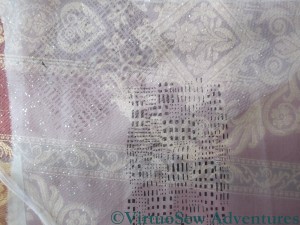
The photo shows, from top left, clockwise: Silk organza, Silk Tissue, Synthetic Diamond Mesh Net, and a Synthetic gauze.
I’ve overlaid them over a strongly patterned upholstery fabric, and it’s clear that the bottom two are going to be better bets. The silk organza all but obliterates the upholstery material, so embroidery is going to stand no chance, and the silk tissue is only slightly more transparent.
Diamond Net and Silk Organza
This photo shows the contrast between the heaviest and lightest of the fabrics I have tested. The silk organza took up most of the ink that passed though the screen, and the design shows up clearly, but it reduces the fabric underneath it almost to a pattern of light and dark, with very little colour. By contrast, the diamond net has to be laid over the organza before the print shows up at all, as you will see if you look at the middle picture at full size.
To be absolutely certain, I will need to set up some of the embroidery as I intend to display it, and then hang the gauzes about an inch in front, but as an early indication, I think this gives me enough to go on that I can feel reassured. There are suitable fabrics for my purposes, and basic single colour printing is no harder than I remember from university.
I can set my worries aside and continue embroidering – just so long as I bear my ultimate plans in mind!
My husband The Australian was at a conference in the Azores last week, and I managed to tag along. It made a lovely change from grey, chilly England, where Spring has been especially tardy this year. It was sunny, most of the time, pleasantly warm rather than cold or too hot, and when the rain did come it came in exhilarating ten-minute bursts that bounced off the pavements and vanished as quickly as it had come. Since the subject of the conference was a little beyond my reach, I spent some time sightseeing, and found a delightful needlework and haberdashery shop, right in the centre of the town, near the harbour. If only embroidery shops were so easy to find in England! Furthermore, it was so busy there was a ticketed queuing system, and four assistants to serve the customers.
My new Azorean Project
My Portuguese is limited to “Please” and “Thank You”, but in the Azores it seems that almost everyone speaks English, so I was able to explain that I am interested in embroidery and was looking for an Azorean or Portuguese project as a souvenir of my visit.
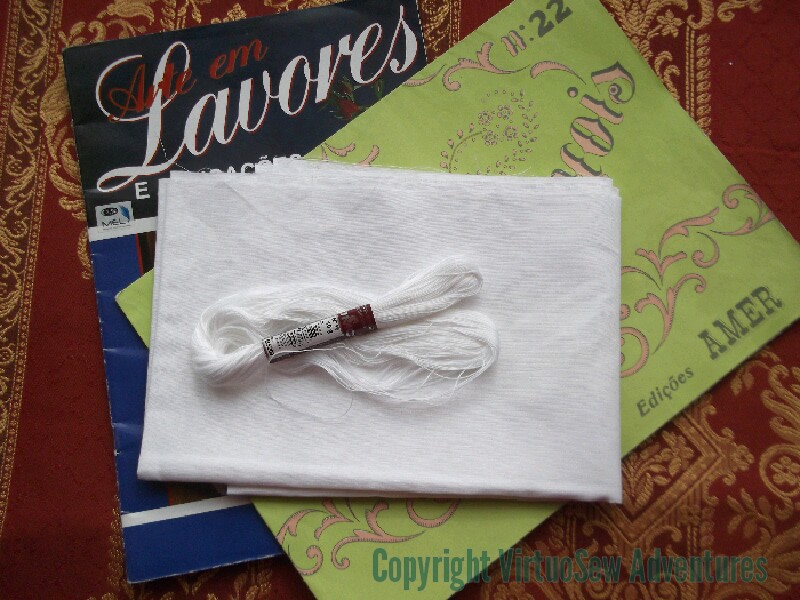
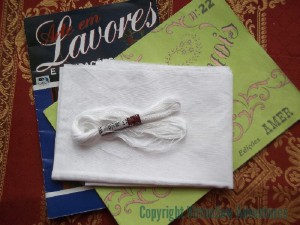
We found some patterns, and some suitable fabric and thread for the cutwork design I had chosen – a lovely crisp, fine cotton and a hank of DMC floche.

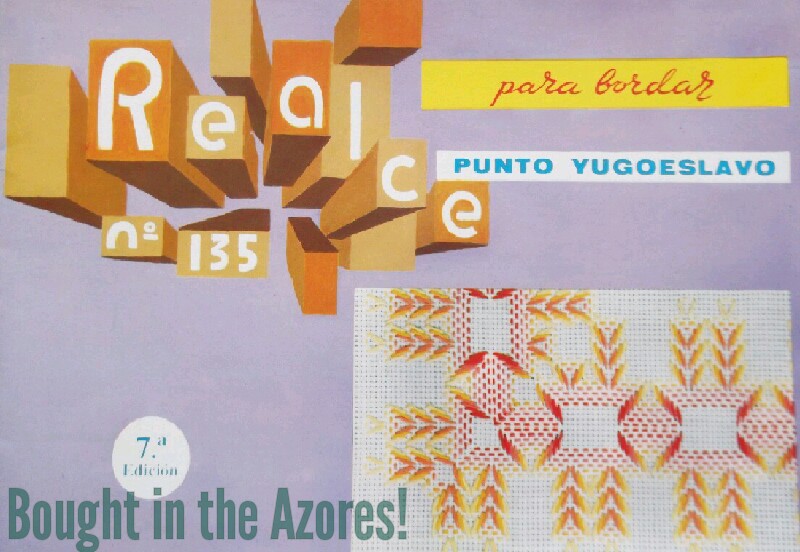
Book on Punta Yugoslavo
Then I found something else, and couldn’t resist it, because the eccentricity of travelling halfway across the Atlantic and then buying a book of patterns from Yugoslavia rather appealed to me!
So, in total, I came back with two pattern booklets for a variety of Portuguese and Azorean embroidery styles, some fabric and thread, and an entirely unrelated booklet about a form of embroidery from Eastern Europe. As if I didn’t have enough to do!
The Sea Edge
Continuing the Saga of the Sea Tractor…
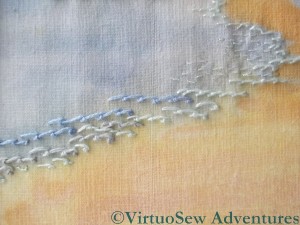
I worked the sea edge in short lengths of scroll stitch in close pastel blues. The idea was to create the sense of the ripples at the edge as a wave settles and flows back down the beach – but only on one side of the sandy bar that leads out to the island. I wanted to create the sense of a prevailing wind that came at an angle so that the waves would be more noticeable on one side than the other.
Cloud, island, and sea suitably depicted, I could leap in and render the Sea Tractor in all its outlandish and spindly glory.
The Sea Tractor
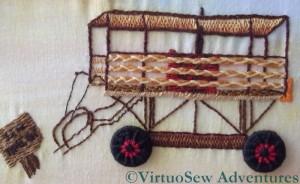
The Sea Tractor was great fun to do. I worked bi-coloured Dorset Buttons for the wheels, to evoke the painted metal hubs – pretty ambitious for my second and third Dorset Buttons ever!
The canopy and the base of the chassis seem to be in Brick Stitch, the main structural elements are either stem stitch or back stitch – the latter in particular for the terrifyingly spindly steps. Notice, by the way, that the steps themselves didn’t actually make it into the embroidered version. I wish I could say that was to emphasie the spindliness – that would be why I would do that now – but I have a strong suspicion that it was really either forgetfulness, or simply not being able to get the angles quite right.
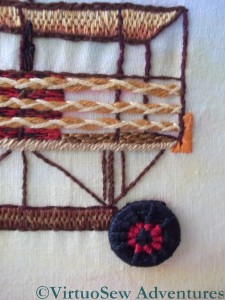
Detail Of Sea Tractor
I used heathered stranded cotton (red and black) for the engine-mounting, and ordinary black for the exhaust pipe that goes up through the roof.
The planks that create the side barriers were a bit of a challenge. In the end I settled on two long stitches in one colour, couched down in herringbone stitch in a lighter colour. I think they make pretty convincing planks, and looking at the detail, I even added the bumper at the back.
I didn’t include the barriers of the back or far side of the sea tractor, but I do recall thinking about that point. Even a painter – even a photo-realist painter – has to edit their image to make sure that it “reads” properly. Often this is a matter of making sure that the colours of things in the background recede sufficiently, but sometimes that isn’t enough. In this case I decided that adding those details would make the Sea Tractor even harder to work out, and discretion would be the better part of valour.
There really wasn’t enough stitching on this piece to qualify for a needlework competition, but I enjoyed working it!
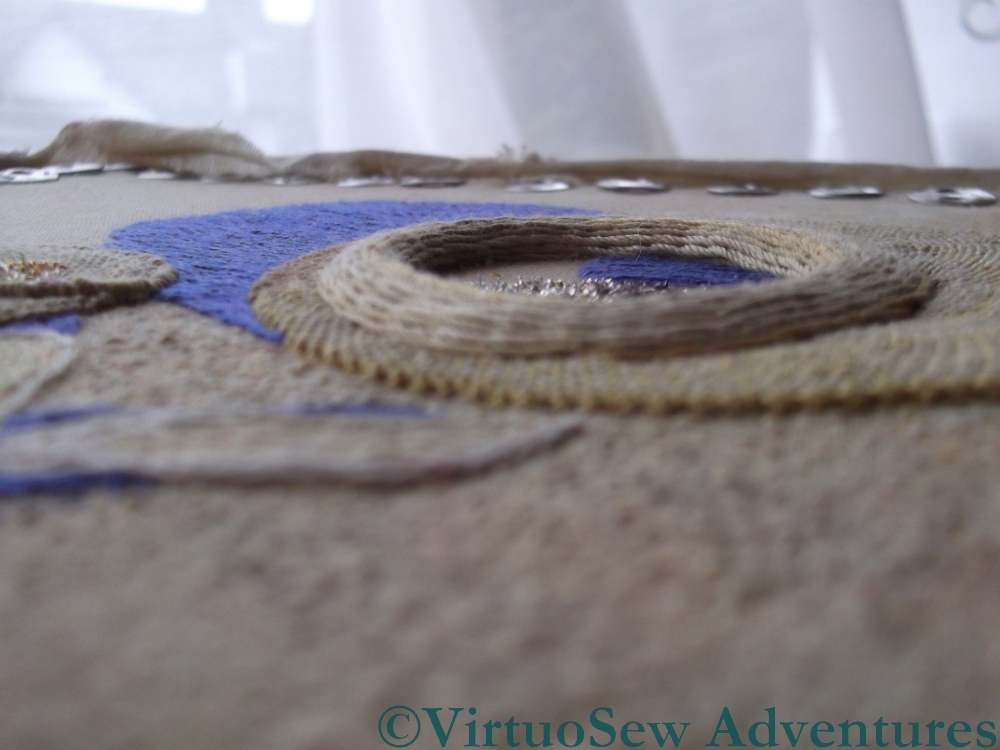
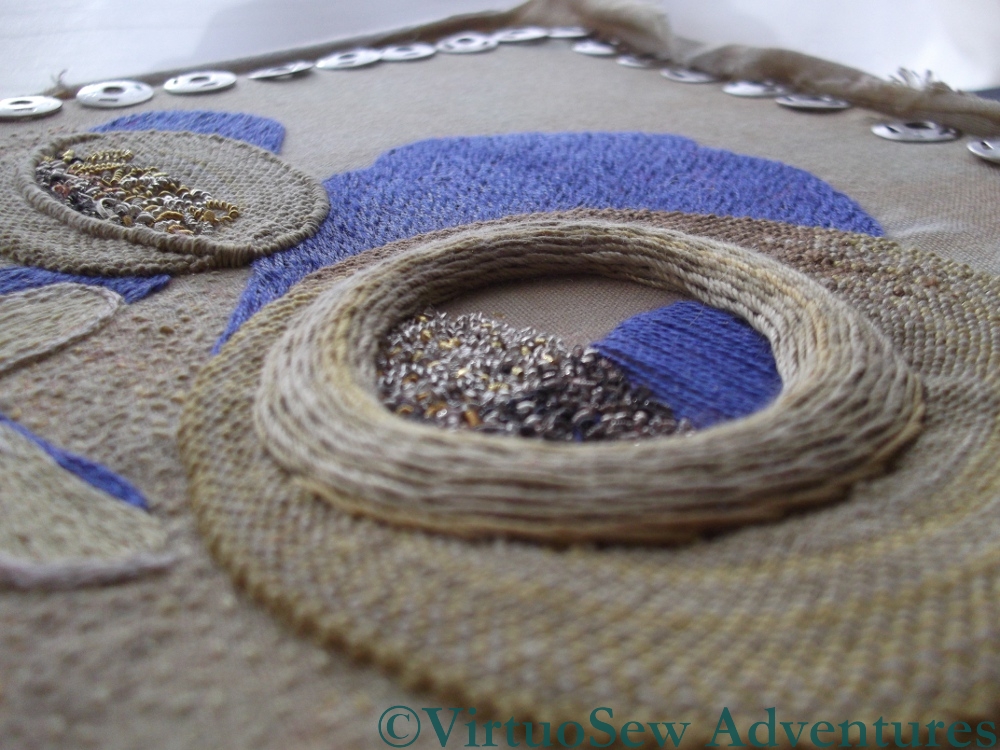
Very few words with this post – Megan asked for some pictures that showed the dimensionality of the various stitches, so here they are!
Looking into the lid

A View into the Crock
I’ve left the pictures larger than usual, so do click on them to have a closer look at the stitches and the purls!

Looking Into the Crock

Side View across the ground
I’ve enjoyed revisiting the Crock and looking at it from new angles. I would have loved a strong side light to pick up the glints, but is has been overcast – a good light for working on the Glittering Nightcap, which I’ve finally got back to, in spite of my breath condensing on the magnifier!

A diagonal view

And again…

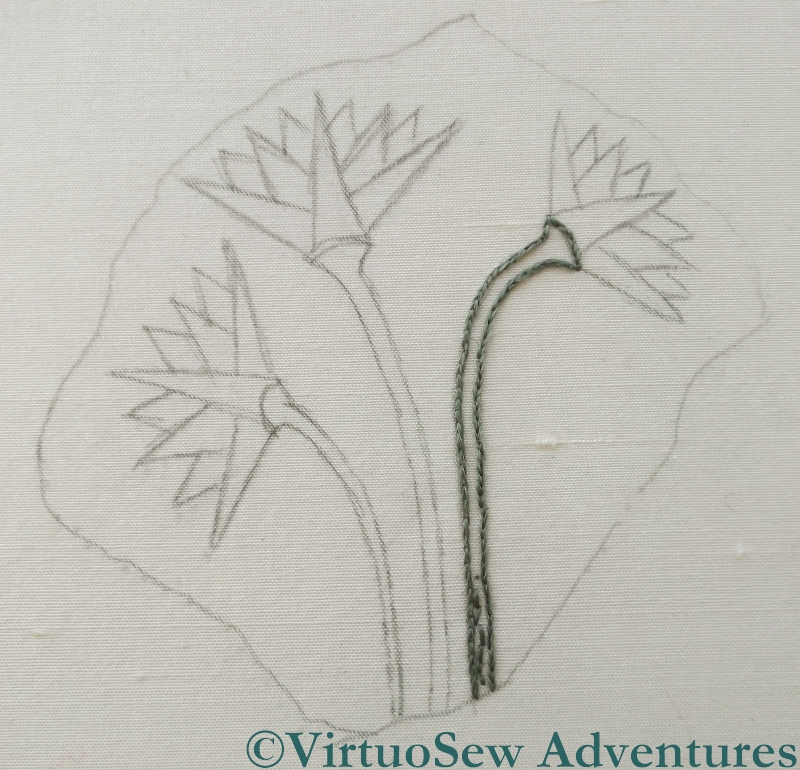
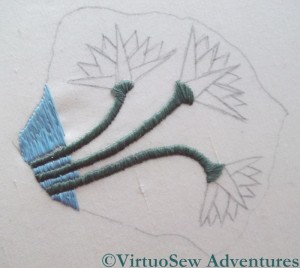
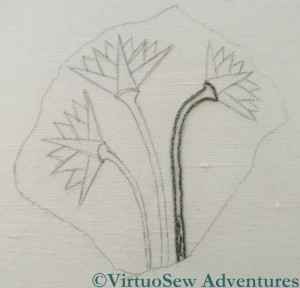
Design Drawn
When I first wrote about the Lotus motif, in September (The Fragment of Tile That Started It All) it was because I wanted to buy materials for it at the Knitting and Stitching Show in Harrogate in November, which I duly did. And now that the Crock of Gold is finished, I can move on to the Lotus Tile Fragment! The colours I bought were soft and slightly greyish, rather than bright and clear, partly because that was all I could find, and partly because I was thinking more of the way Mary Chubb would have first seen the fragment, covered in dust.
However, just when I had got the design drawn out, I had a Dreadful Thought.
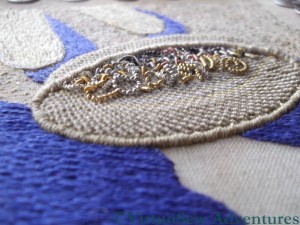
Split Stitch Edging
My intention for the final mounting of the two panels is to print a head of Akhenaten on a piece of gauze and stretch it in front of one of the completed panels, and a head of Nefertiti for the other. Just how fine and gauzy can it be and still create the effect I want of the Heretic Pharaoh and his Queen, brooding over the excavation of their city? How fine and gauzy a fabric can I find that will take a print? And how much brighter do the colours have to be to ensure that the jewel-like panels around the central panels shine like jewels, rather than being killed off by the gauze?
I shall finish this version, since I’ve started it, and I might, perhaps, need to begin learning about screenprinting, and experimenting with fabrics much sooner than I thought. If all the pieces I’ve worked so far need to be re-done in brighter colours, my current estimate will need to be revised outwards…

Materials Laid Out
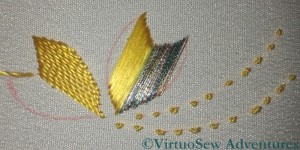
At long last I have finished the embroidery on the Butterfly Pinpad. The embroidery was simple enough – chain stitch, French knots, and satin stitch, worked either with a fine metal thread or pale green silk thread but the fine stitches gave me aching arms during the tennis elbow episode, so everything took longer than I would expect. Then of course I had to get started on finishing it. The reason it took me so long to wind myself up to it was – as some of you may have guessed – that glue was involved!

Tying A Bow
In fact, on this occasion, I cheated – if you can call it cheating when an embroideress uses her needle and thread! I chose to lace the butterfly itself, and the silk backing, onto their card supports, rather than attaching them with glue.
I found the ruched edging almost impossible to keep straight and even – perhaps I simply didn’t make the gathering threads quite even enough. Even squiffy, though, it looks quite luxuriant!
The bows were quite hair-raising to do, as well – tiny, made of very fine silk ribbon, and a little inclined to flop. I tied my fingers in knots, several times, as I made and attached the four of them!

Butterfly PinPad Finished

Another View Of The Pinpad
Now that it’s finished, I’m pretty pleased with it, all the same, although I can’t imagine I’ll ever be able to bring myself to stick pins in it…

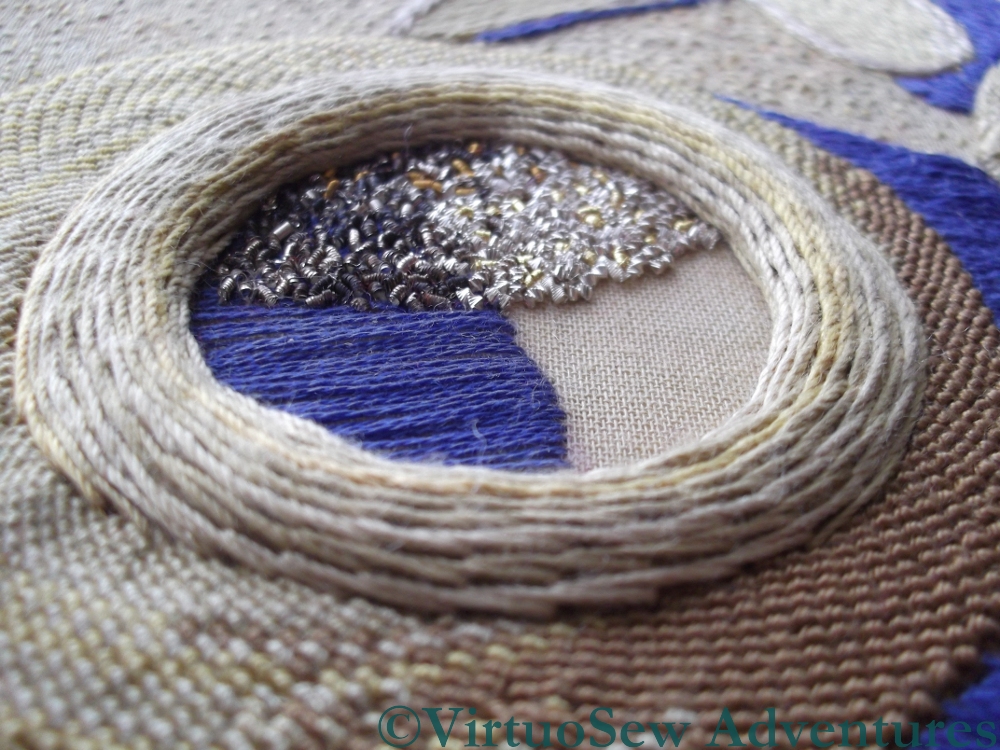
Chipwork Detail
Here is a close up of the finished chipwork on the Crock of Gold Hoard. I’m very pleased with how it has turned out. Especially with a strong side light, there is the right mixture of glint and dullness to suggest old, tarnished metal. I’ve used a mixture of rough purl (both tarnished and untarnished), and check purl, in several shades of silver and gold.
I decided not to use any of the pearl purl, which I used to create the effect of bangles and broken jewellery in the lid. I’ve taken care not to over crowd the chips, because if they started to pile up, it would reduce the illusion of recession that I’m trying to create.
You may recall that last time I posted I had only just spotted the Amulet, set in front of the Crock for the photograph, and I was wondering whether or not to include it in this particular piece. I’m intending to work an or nué version of the Amulet, so even if I fail to include it here, it will still figure in the completed panels.

Crock of Gold Finished

With Kid Amulet
I could simply tell you what I decided, without explanation, but I think that would be unfair.
This first photo shows the piece as I originally intended to finish it. There are the sticks in the foreground, the deep blue shadows of the Egyptian sun, the Crock, its Lid, and the chipwork and curls of the fragments of metal.
I think it looks pretty good, and in fact I’ve decided to leave it like this, without adding the Amulet.
The second photo shows my experiment with adding the Amulet. Since creating the Amulet in stitchery would risk causing damage to the fabric, damage which would be impossible to repair if I dislike the effect, I thought that using silver kid leather would be ideal.
I cut out the Amulet shape – approximately – and laid it on the piece, shifting it around and looking at it in different lights. In some lights, the silver kid drew the eye to such an extent that the rest of the piece might just as well not have been there. In others, it looked like a greyish smudge, killing all the other colours, losing the sunshine and shadow. What it didn’t do, in any light, was create the sense of dialogue between the Amulet and the Crock it had been guarding so faithfully for so many centuries that I was looking for.
I’ve kept the piece of leather I cut out, and may, later, add the padding and stitching to give it form, and keep it to sneak onto the finished work as a challenge for the viewer – Find The Hittite Amulet!
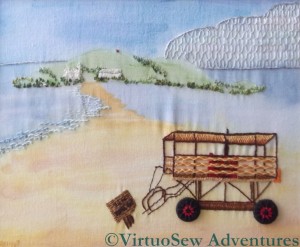
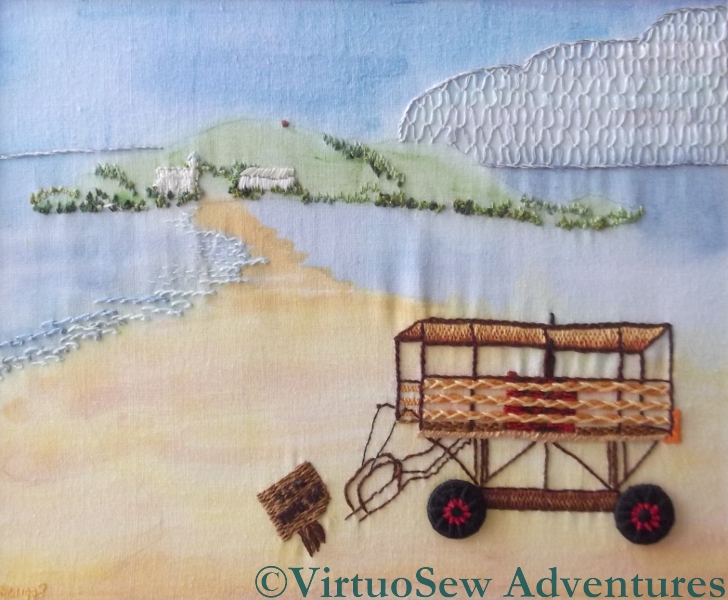
The Sea Tractor At Burgh Island
This piece was intended as an entry in a competition run by “Needlecraft” Magazine about 25 years ago. The brief was to recreate “A Holiday Memory”, and as it happened, that year we had had a great adventure – a ride on the Sea Tractor at Burgh Island in Devon.
“Needlecraft” had also run an article shortly before, describing and teaching Dorset Buttons, and they seemed perfect for the Sea Tractor’s wheels. Since time was short and the complexity of the Sea Tractor likely to be time-consuming, I also experimented with a painted background on my cotton fabric.
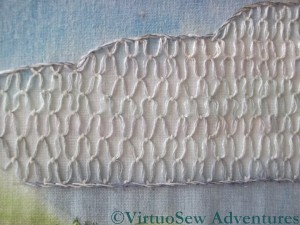
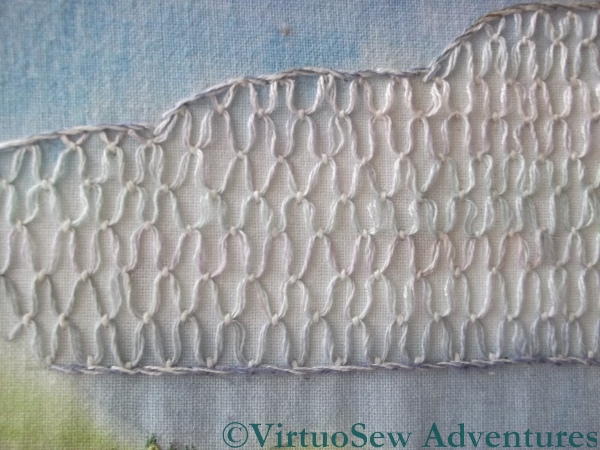
The Cloud Stitch Cloud
In retrospect, the painted background isn’t hugely successful, and it doesn’t have enough stitchery to qualify for high marks in an embroidery competition, but I enjoyed adding those details I did create, and so often in these early pieces, you can see “Rachel-Now” and her ideas prefigured in the stitch choices of “Rachel-Then”.
Looking at it now, I might have done better to work the cloud filling smaller, in white rather than pastels, over a painted base, and without outlining it. Still when you consider that the whole thing was an experiment….!
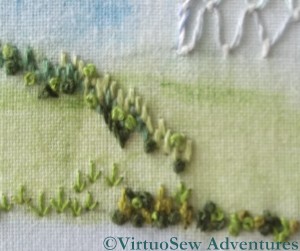
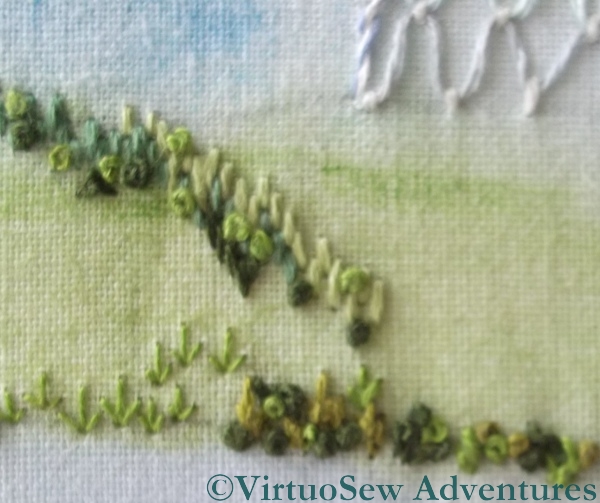
Hillside Stitch Details
The hillside details involved a lot of different stitches in lots of different greens. There are straight stitches, French Knots, chain stitches, and arrowhead stitches (upside down to look like shrubs). Again, if I were to work this now, there would be a great deal more stitchery in it, but I suspect that the combination of lack of time, and a disinclination to work areas of repetitive stitching led me to stop before I should have done.
What I can’t, now, recall, is whether I was pleased with it at the time. I’ve had it propped up in my living room since I rediscovered it, and I’m very tempted to crop it to show just the Sea Tractor itself – which would at least afford me the opportunity to re-block the piece and get rid of the ripples!