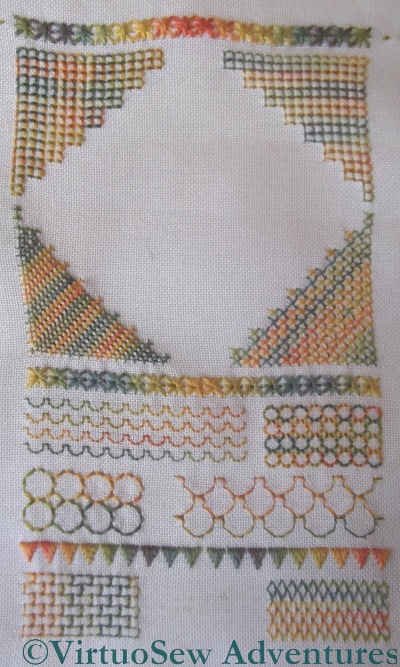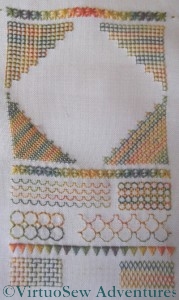
Pulled Thread Sampler
All my regular readers will know that while I’m very keen on experimenting with techniques that are new to me, I’m not so good at finishing what I’ve started.
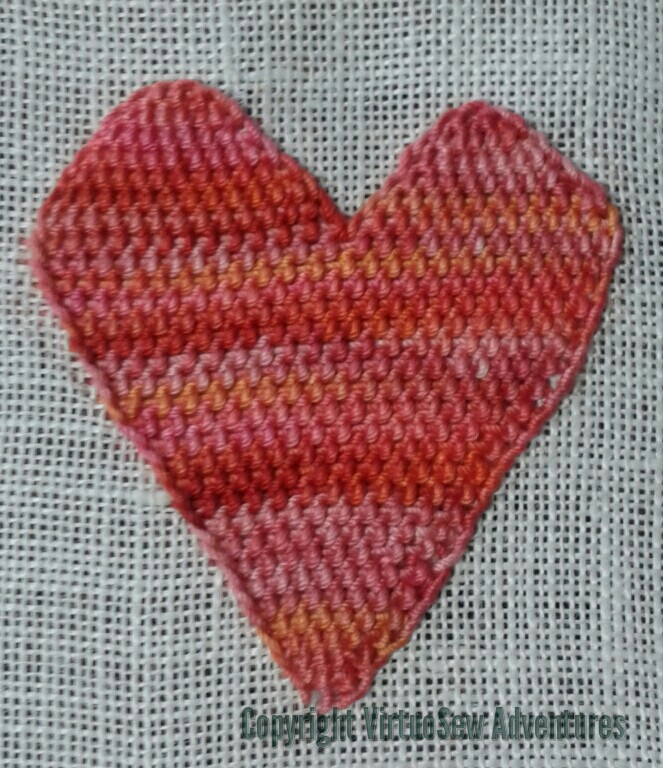
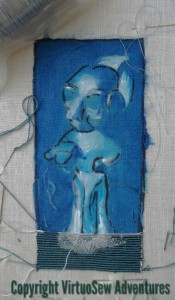
I found this panel when I opened a box in the office that I’ve been ignoring for a while. I can’t even remember how long ago I started it, and you can see that although I worked it on a frame, it’s got somewhat out of shape while it’s been rolled up, because of the varying tension up and down the length of it. There’s less variation across the width, which strikes me as strange since I’m sure I used a roller frame, and didn’t tension the weftwise direction!
The sampler is worked using another pair of Caron Collection threads, the fine Wildflowers, and heavier Watercolours, in a bright orange and green overdye. I love the texture and colours of these threads, and they highlight the stitches beautifully. The fabric itself is Jobelan, which is a regular even-weave fabric, perhaps not quite sufficiently widely-sett for pulled work to show to its best advantage.
Pulled Work Detail 1 – Four Sided Stitch
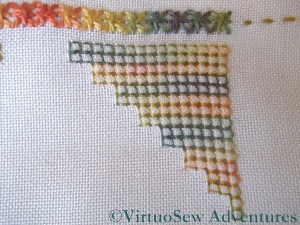
It occurs to me as I look at the photos that pulled work can be done with two different effects in mind – one using the pattern of stitches to create the effect, and the other using a much finer, self-coloured thread, creating the effect with the pattern of holes left by pulling the fabric threads together. Something else to try!
Pulled Work Detail 2 – Four Sided Stitch Again?
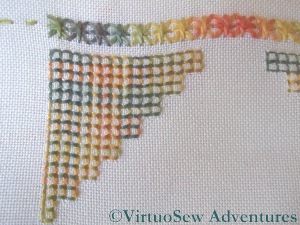
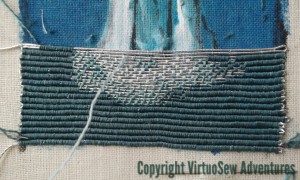
After beginning with a row of Star Stitches in the heavier thread, the first corner of the square panel is in Four Sided Stitch. What puzzles me about this is that the second section seems to be in the same stitch, whereas the two lower corners differ. It seems to me that this was a genuine sampler – I was making it up as I went along!
Progress On The Amulet
Now that I have started on the main design element of the Hittite Amulet, I am entering a familiar and disheartening stage. There is so much more to do, it’s very concentrated work, and at the moment, I’ve not done enough to be confident it will work at all.
In fact there is a good chance that until it is completely finished, I won’t be sure that it is working, which in turn means I need to ignore my doubts and just keep at it!
The fact that I have several needles with different shades of thread in them, all working at once, will explain why I can’t do very much at a time – I need to avoid tangling the threads, and as soon as I start to get tired, the threads tie themselves in such convoluted knots they’d make a macramé expert think twice!
Many Threads In Progress
This close up should give you an idea of what is involved. I decided to allow the coloured silk stitches on the Amulet to be either across the same pair of threads as the background, or across pairs which are off by one. This should allow me to be a little more precise in colour placement. It may or may not matter, but I felt that since this is such a strange piece, I wanted to have as much flexibility as possible.
I have already discovered that in some ways the straight rows are harder than the spiral that I used for Christus Natus Est. As the backing fabric sags, and the stitching became more widely spaced over the Amulet, I found that the rows were no longer straight. I’ve spent several sets of rows geting the rows more or less straight again, which was just a little scary!
First Silver Row
So, with the Hittite Amulet painted on my fabric, stretched, and ready to go, I have now settled down to stitch. I have decided to aim for a more strongly corded effect in the background of this piece than I used for Christus Natus Est, so each row of stitches will be worked over two rows of silver.
This in turn means that I will spend a lot of time wrangling the springy silver thread to make it lie close and straight. Even the first row was a challenge, and as I reach the core of the spool and find the thread that has been wound closely around it, I am expecting the challenge to become even more challenging!
Still, nothing easy was ever worth doing – so they say…

Covered In Silk
This second photo shows the stitching halfway along the third row of background at the base of the piece. You can see the ribbed effect is already building up, and it will create a good strong background. If I get the rest of it right, the Amulet should almost pop out of the surface at me!
I am still trying to decide how to organise my stitching of the Amulet himself, but I plan to allow the silver to show through across the entire design, spacing my silk stitches accordingly. The stitches for the design may cover two silver threads or only one, and I am going to try to space them using the original black and white photo for guidance, to create some sense of the shadows breaking up across the surface.
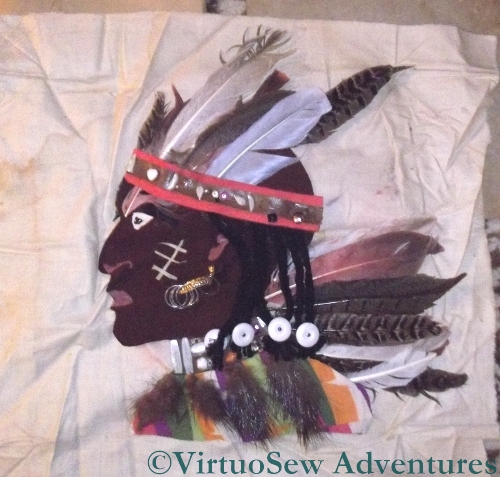
 Grandmama joined the Women’s Institute at some point, and went on many of their craft courses of one sort or another. When I found this collage, I also found one of her notebooks with notes from some of those courses, which I hope will enlighten me about how she approached them. When I get around to transcribing them, that is. It is one of those tasks that always gets put off to a more convenient time!
I’m especially curious about this one. I’d never seen it before – a collage of an Indian’s Head. A fictional one, I imagine. In fact the question I find myself asking about this is “Why?”. Most of it is glued rather than stitched, which I rather imagine would have gone somewhat against the grain with Grandmama. It also has the slightly slapdash feel that my own work has when I’m feeling out-of-sorts about being forced to do something I dislike or consider uninteresting. Maybe the notes will tell me more.
However, I was highly entertained when I realised that the ornaments on the end of the Indian’s braids were trouser buttons from my Grandfather’s Tropical uniform – it’s a good thing he’d retired by then!
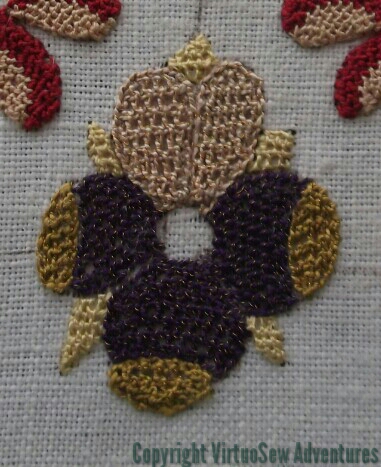
Although I have already commented that I usually regard Online University pieces as tutorial pieces to be worked according to the instructions, I’ve decided to make a few changes on the brim. This will mean I will be able to compare directly some of the working methods I’ve learned about since I began on the Nightcap, so I should learn even more!
 The first change was to use Bordered Corded Brussels Stitch for much of the detached buttonhole stitch. I can’t say that I am finding the Gilt Sylke Twist markedly easier to use now than it was when I started. However, I do find that the Bordered Corded Brussels stitch is easier than working Detached Buttonhole with return into a border of chain stitch, and less prone to breakages of the gilt wire.
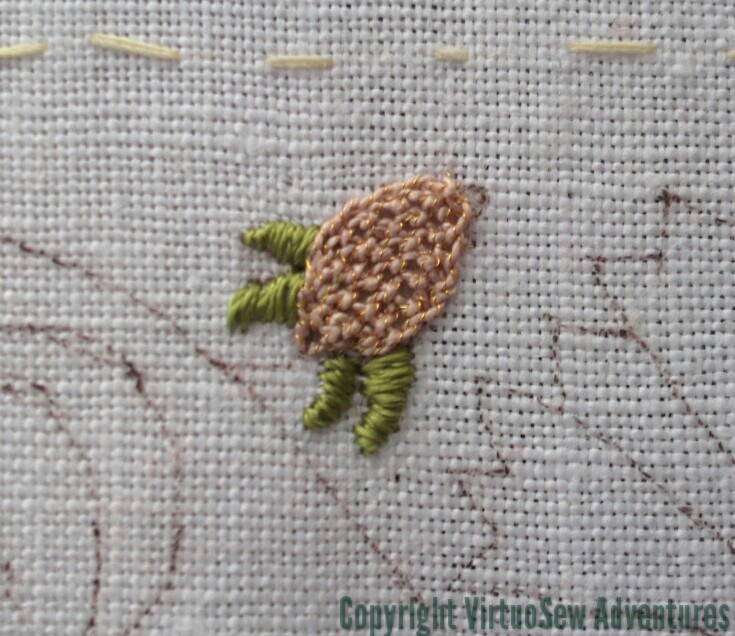
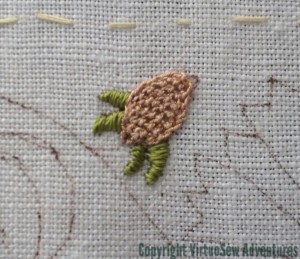
In the case of the strawberries I have also chosen to use satin stitch in place of trellis stitch for the sepals. I’ve padded the satin stitch, to give it a little more life.
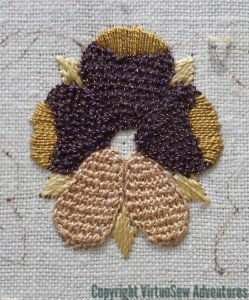
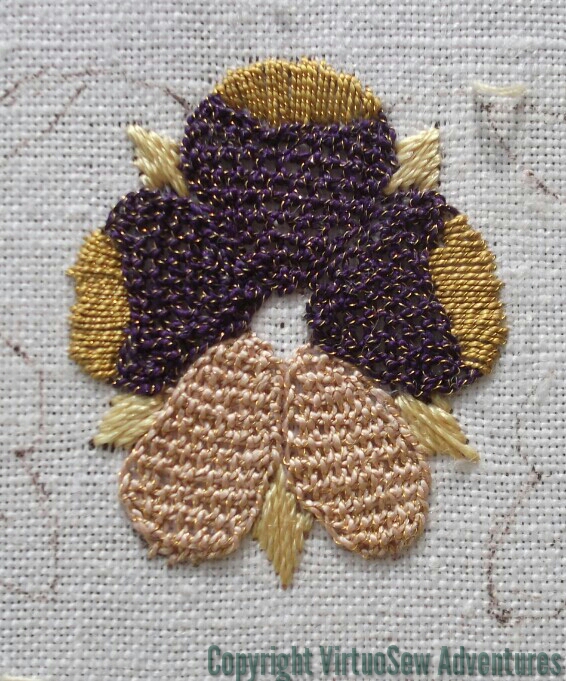
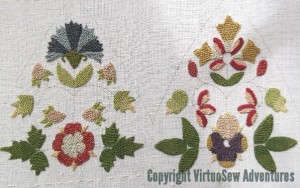
New Version Pansy
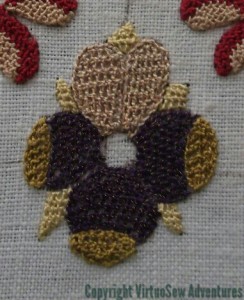
Old Version Pansy
There are changes to the Pansy too. Again, the petals are worked in Bordered Corded Brussels stitch, but the curled edges I worked in satin stitch. The outer edge is padded with a line of back stitch to lift it a little. Possibly not enough, so when I work the second pansy I might choose to pad the edge with chain stitch, or whipped back stitch to see whether it makes a difference.
The straw-coloured sepals are unpadded satin stitch this time, rather than the trellis stitch suggested in the instructions. It’s much less fiddly to do, but I wonder whether these changes rather undermine the style, looking a little too modern, too simple, too plain.
And if there is one thing I have learnt from the exhibition “In Fine Style“, and from its fabulous book, it is that the Tudors believed very much that more is more – more texture, more glitter, more colour, more everything.
Stones Of Venice Panel
Oh dear, that didn’t take very long!
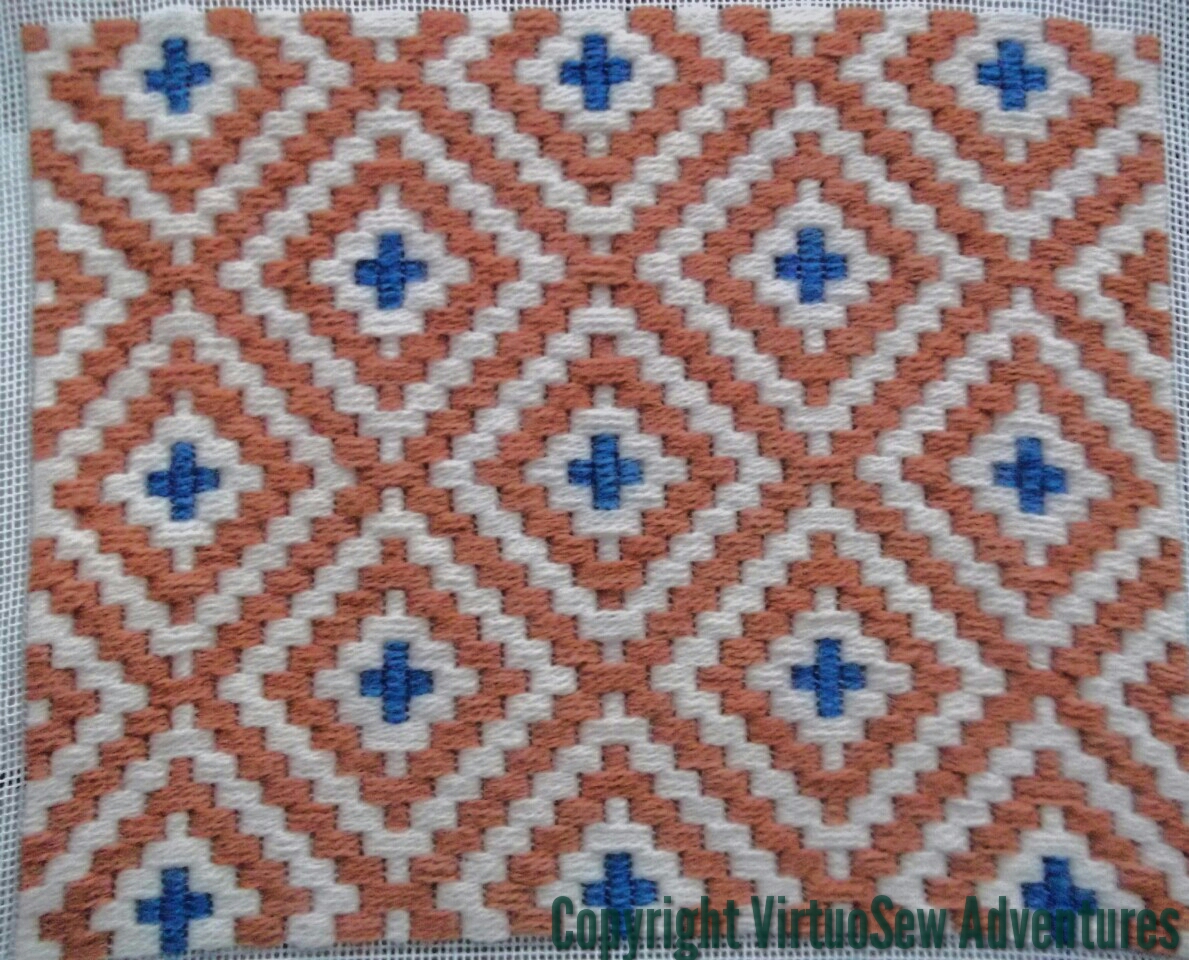
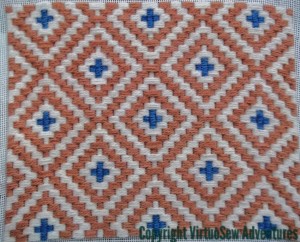
I’ve completed the top part of the footstool cushion using the Bargello pattern “Stones of Venice”. It grew very quickly, and although in the book it was described as an Advanced pattern, I found it fairly straightforward.
Each stitch goes across three, six, or nine threads, the stitches are grouped in threes, and the step between groups of three stitches is three threads. The most time consuming element, I think, was separating my wool and recombining one thread of each shade to create the heathered effect. Some of the other patterns mix up length of stitch, step between stitches, and groupings a great deal more, and must be much harder to keep track of!
However, now I need to stop and think. I need to stitch the vertical sides of the footstool cushion, and since I believe that wrapping the design around the sides will look awkward, I have decided to work each side panel separately. Now I just need a suitably Venetian border design that will work well with “Stones of Venice”.
It needs to be slightly smaller scale, I think, and I also need to allow for the fact that my stash of these colours is almost entirely depleted, and they may need to be supplemented, either by purchase or by using different shades in the borders.
Thoughts, anyone?
Pansy
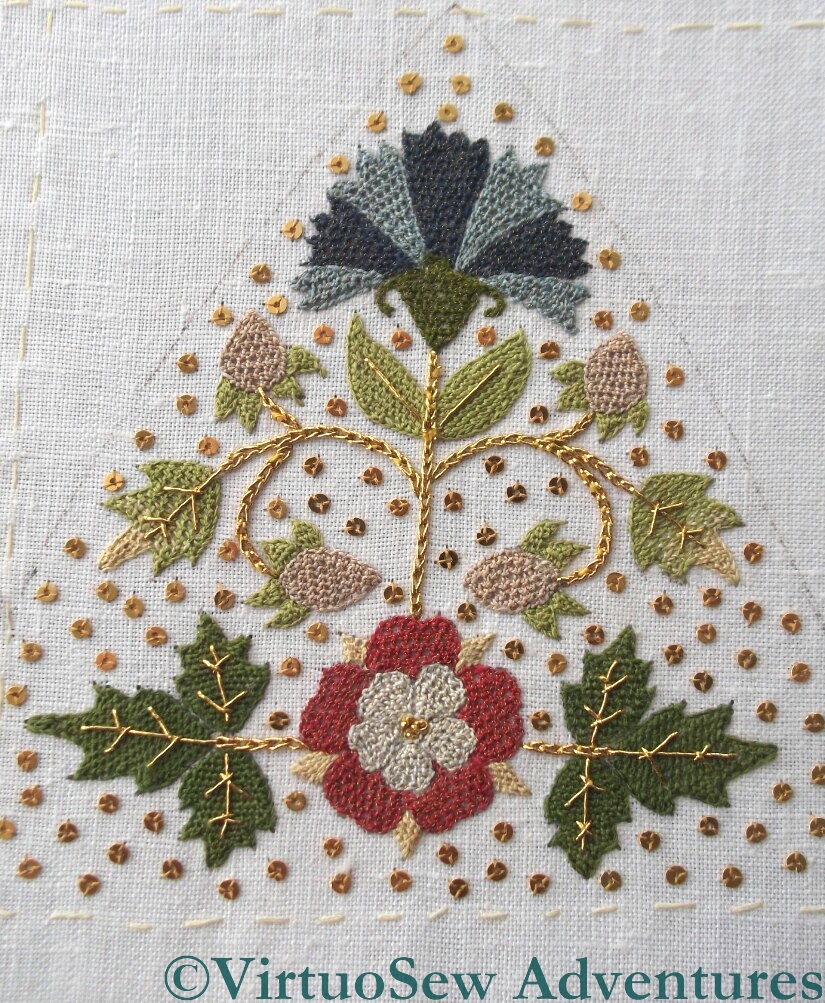
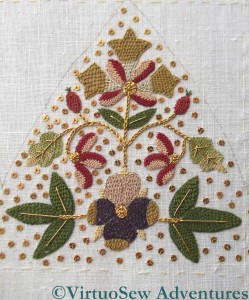
Before I move on to work on the brim, here are close ups of two of the panels of the Nightcap. You will see, when you zoom in, the French Knots at the centre of the rose, contrasted with the Spiders Web stitch at the centre of the pansy.
You can also see that the spangles aren’t evenly spaced – there are some areas more densely spangled than others. I do think I have achieved a reasonably random placement, but humans are pattern-making animals, and it is really extraordinarily difficult to combine relatively even spacings with random placement! However, I am absolutely sure that attempting an even regular spacing would have had me stark mad if I had tried it!

Rose
In ordinary light, the spangles don’t really shine as I am sure they would in the flickering light of a candle. When I have the piece finished and on display somewhere, I will probably have to spend a lot of time getting the lighting right – without using real candles…
Once I had taken the photographs, I tacked a calico cover over the completed crown of the nightcap, back and front, and turned the fabric over in the frame in order to start on the brim. Covering the finished work will stop me catching my threads on it, or knocking spangles off as I work.
I hope…

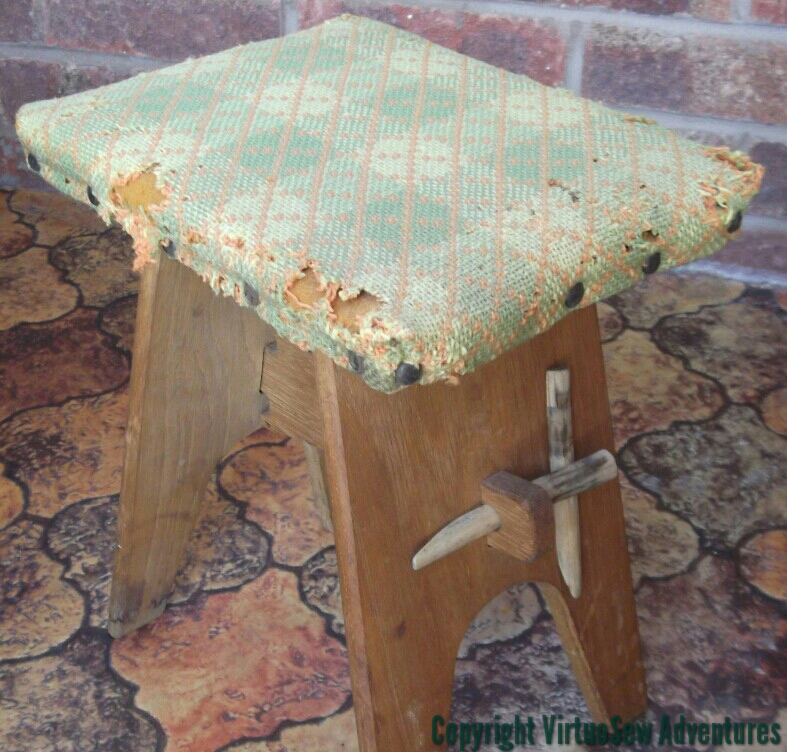
Moth Eaten Footstool
This rather sad specimen of a footstool – covered in now very moth-eaten Welsh tapestry fabric – was a constant part of my childhood. I can’t remember where it lived or what we used it for, but it’s always been somewhere around. When I realised that all my current stitching projects are very detailed and started casting around for something a bit chunkier, I thought that working a new cover for it would do nicely. Furthermore, if I chose threads I already had, it would make a good stash-buster.
Easier said than done. It took the combined efforts of my mother, my father, and myself to find a colour scheme. Even though I have a drawer full of wools, finding enough to meet the needs of the patterns we liked the look of required a great deal of swapping and changing. In the end, however, we picked a Bargello pattern shown in one of the craft books I inherited from my grandmother, “The Book of Creative Crafts”. The book was published in 1978, so the colour choices in the examples are sometimes a little unappealing to modern eyes, and there is also the fact that the top of the footstool is quite small – only 10 inches by 7.5. A couple of patterns that we liked, we felt were on rather too large a scale for the footstool.

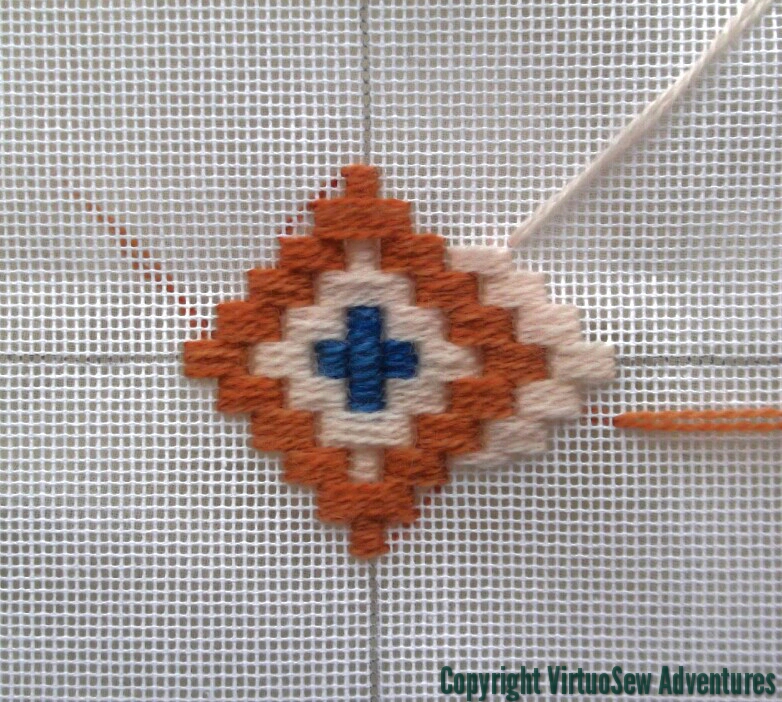
Starting Stones Of Venice
In the end, we chose a pattern called “Stones of Venice”, which is inspired by the brickwork of the Doge’s Palace. One of these days I must go to Venice, and see what I think of their version of it! Only three colours are involved, but as they are heathered, that allows me to extend my bundes of yarn, by using one strand each of two shades of each colour in my needle.
I’m using a roller frame with plastic extending sides which came to me in a bundle of stuff from a lady who was emptying her late mother’s house, and finding it a bit tricky to use. It seems to sag quite easily, and I’m unwilling to tighten the nuts any more in case they break the struts. It is the right size for the project, but other than that it is proving less than straightforward to use. Fortunately I suspect it won’t take long too work this piece!

Complete With Gold Thread
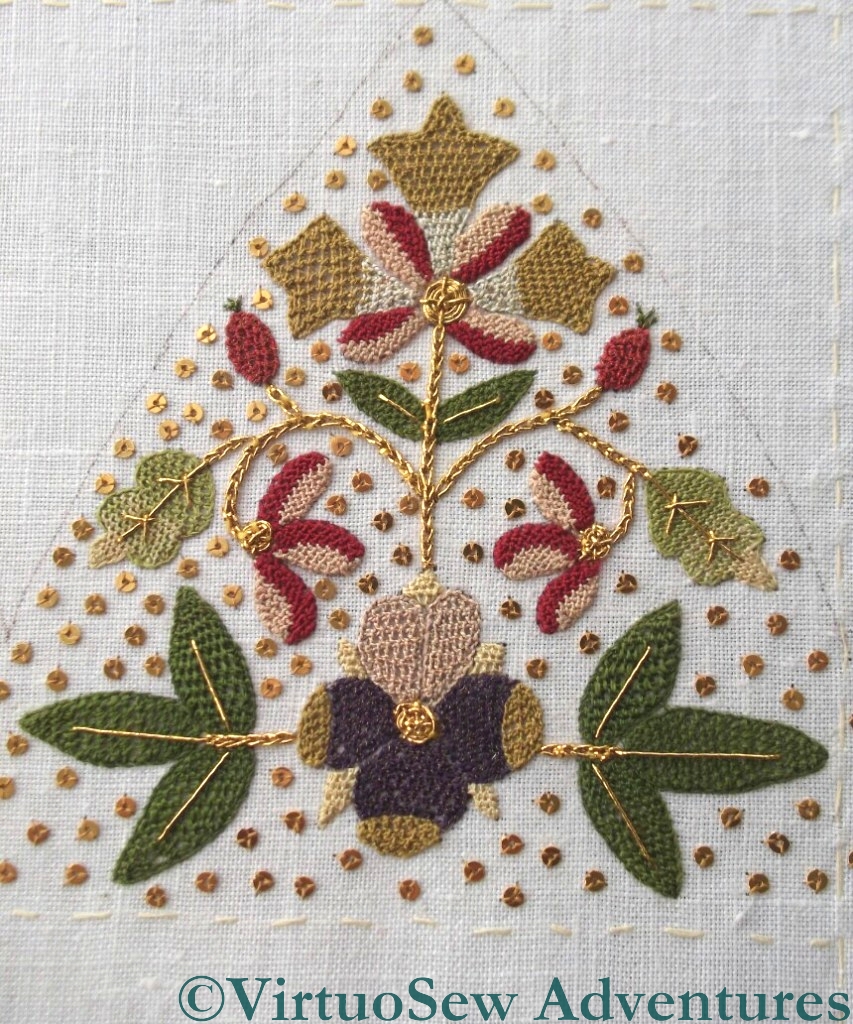
Gosh. Silkwork all done, and metal thread completed too. The experiments with the bordered detached buttonhole stitch with return must have got me a bit fired up, because as well as planning some variations on the brim, I incorporated some changes in the gold metal stitching on the crown. The two roses have a cluster of French Knots at their centres, instead of Eight-Spoked Spiders Web Stitches, and I quite deliberately have not used exactly the same run of lines for each variation.
I have to say that although I commented that my visit to “In Fine Style” showed me that I had not stitched my Detached Buttonhole Stitch with Return closely enough, I would hate to have to sink a metal thread through anything more closely stitched. I was on tenterhooks lest I damage the silk, or the metal thread, or create some sort of obvious flaw in the stitching.

Spangled
The next stage was to add the spangles, since I want everything on this side finished before I turn the fabric over to start on the brim. Tricia says in the instructions that in the light of the experience they had with the Plimoth Jacket, she feels that they should have used more spangles, rather than fewer, and with that in mind she was much more generous with the provision of spangles than she would otherwise have been. I divided my packet of spangles roughly into six (one for each quadrant of the crown and two for the brim), and Spangled away enthusiastically.
Silkwork On Cap Done
I’ve now finished the silk work on the main sections of the Glittering Gentleman’s Nightcap. The next stage is to work the metal thread embroidery, because I want everything on this side of the fabric done before I take it off the frame, turn it over and work on the brim. In the end, I found that the last few bits went quite quickly, perhaps because I had a whole day when I did nothing else and found the stitching speeding up. It’s taken me a while to realise it, but I now think that Detached Buttonhole Stitch With Return is one of those stitches which requires “flow”, which in turn doesn’t happen if you sit down with only time to do one leaf before doing something else!
Up until now, I have tended to regard the Online University projects I have done as a sort of salutary discipline, and worked them exactly according to the instructions (something I rarely do, even when I have instructions!), but during my last visit to a stitching show, I spent some time on Jacqui Carey‘s stand, talking to her, and acquiring her books about Elizabethan Stitches and Sweet Bags. One of the stitches she found, and “reverse-engineered” is effectively the “Detached Buttonhole stitch with Return” which forms so much of the stitchery on this piece, but it incorporates a border within the method of stitching. So I thought maybe on the brim I could used this bordered stitch instead of the standard stitch.
Unsuccessful Trial
In another departure from my usual procedure I decided to practise the stitch first, and it’s really just as well.
Perhaps because Jaqui is primarily a braid maker and not an embroiderer, it took me some time to adapt my way of thinking to make sense of her diagrams. She also shows the stitch as worked upwards, whereas I have worked downwards with this sort of stitch all my life – or at least ever since my first attempt, when I worked the Needlelace Embellished Blouse.

Second Trial Much Better
The fact that version one was worked on felt didn’t help, either, since the needle kept snagging it, and the felt sagged under the weight of the stitching.
So version two was worked on linen, using a mercerised cotton instead of pearl cotton. This time I think I have got to grips with the stitching and the way to create the border. The linen survived much better, but the mercerised thread kept trying to tie itself in knots!
Furthermore, try as I might to work the stitch as diagrammed – upwards and away from me – I kept turning the frame and working it sideways or downwards instead.
I probably will choose to use the stitch for at least some of the areas on the brim, but it will be interesting to see how I cope when I simply can’t turn the frame around!